

Microsoft Store apps on Windows 10 and Windows 11 are installed in a special, protected folder to ensure system stability and security. While these files are normally hidden and inaccessible, advanced users may need to view them for troubleshooting, managing files, or understanding an application’s structure.
This guide will show you how to safely access the WindowsApps folder.
This tutorial provides several methods, starting with the safest and easiest. We will first show you how to access a single app’s folder using Task Manager, which is recommended for most users.
We will then cover the more advanced process of taking full ownership of the main WindowsApps folder, the critical procedure to restore its permissions, and a read-only method using PowerShell.
Before you begin, it is crucial to understand that modifying the WindowsApps folder is risky, especially with the full ownership method. Incorrectly changing, moving, or deleting files can cause your apps to fail, break the Microsoft Store, and even destabilize Windows.
For any method beyond simple viewing, you must have an account with administrator privileges.
Access a Specific App Folder Safely Using Task Manager
Difficulty: Beginner | Time Estimate: 2-3 minutes
This is the safest and fastest method if you only need to access the installation folder for a specific application that is currently running. It does not require changing any system-wide permissions and is highly recommended for targeted access, such as inspecting configuration files or assets.
-
Launch the Target Application
Start the Microsoft Store app whose folder you want to access. For this method to work, the application’s process must be running and visible in Task Manager, like the Calculator app.

-
Open Task Manager
Open Task Manager by right-clicking the Start button and selecting it from the menu. For keyboard users, a helpful shortcut is pressing Ctrl + Shift + Esc. Ensure you are on the Processes tab.

-
Locate the Application Process
In the list of processes, find the application you launched. You may need to expand the main process by clicking the arrow next to its name to see all related sub-processes.

-
Open the File Location
Right-click on the main process for the application and select Open file location from the context menu. As a success validation, a File Explorer window should immediately open to the exact installation directory for that specific app, which will be a subfolder inside the main WindowsApps folder.


Gain Full Access to the WindowsApps Folder Using File Explorer
Difficulty: Intermediate | Time Estimate: 10-15 minutes
This method provides full read and write access to the entire WindowsApps folder by changing its ownership from the system to your user account. You might prefer this method if you need to see all installed apps at once or access files for an app that cannot be run.
This is an advanced action, so proceed with caution and ensure you complete Method 3 afterwards to re-secure your system.
-
Open File Explorer Options
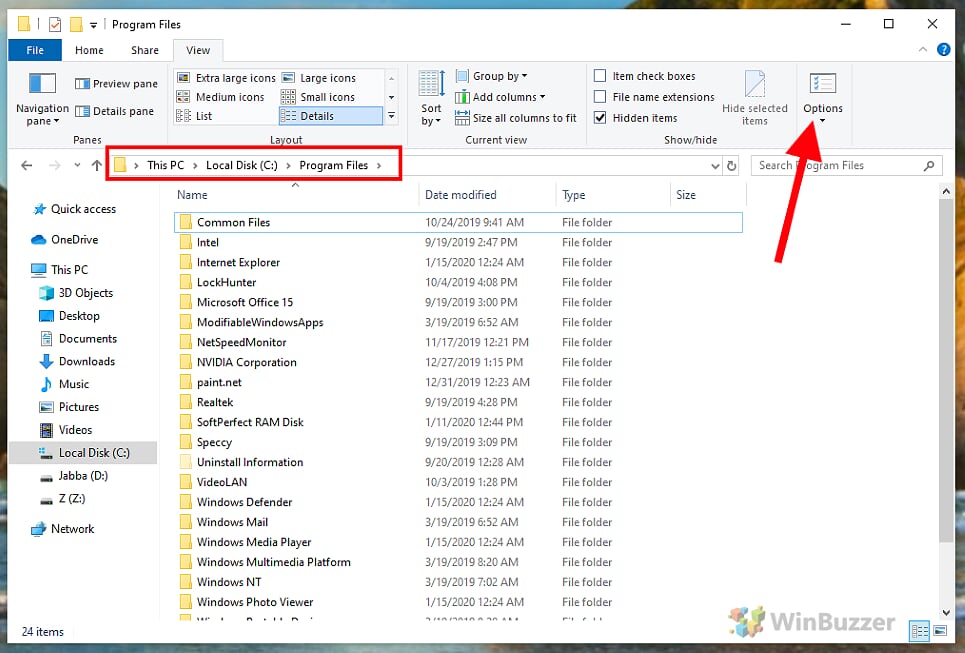
First, open File Explorer by pressing Win + E. Navigate to your system drive, typically C:\Program Files. In Windows 11, click the “… (See more)” button in the toolbar and select Options. In Windows 10, click the View tab in the ribbon and then click the Options icon. You should see the ‘Folder Options’ window appear.

-
Enable Hidden Files and Folders
In the Folder Options window, switch to the View tab. In the Advanced settings list, find the Hidden files and folders section and select the radio button for Show hidden files, folders, and drives. Click Apply and then OK. You should now see the ‘WindowsApps’ folder appear as a semi-transparent folder.

-
Open WindowsApps Folder Properties
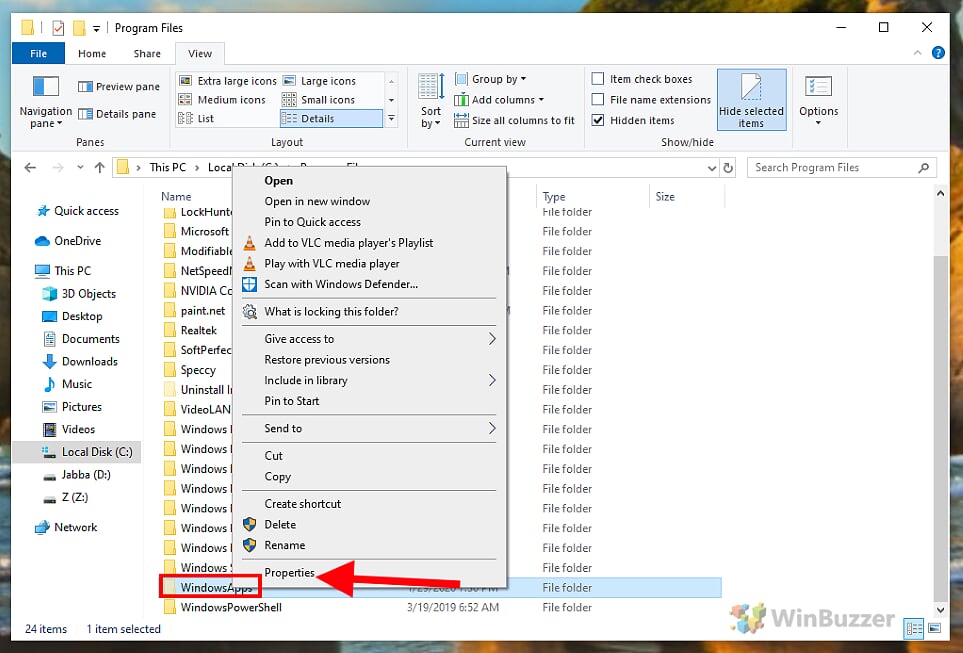
Locate the WindowsApps folder. Right-click on it and select Properties from the context menu. If you try to open the folder directly, you will receive an ‘Access is denied’ error. Do not worry, this is expected. The ‘WindowsApps Properties’ window will open.

-
Access Advanced Security Settings
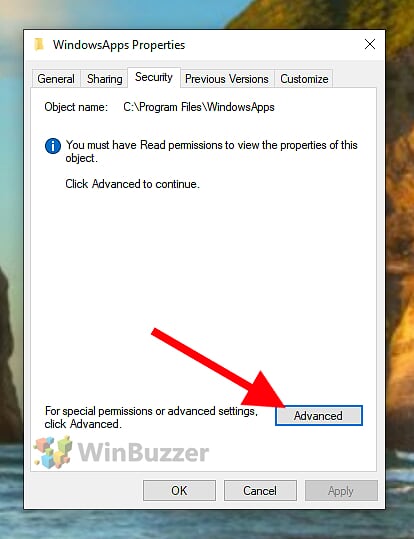
In the Properties window, navigate to the Security tab and click the Advanced button near the bottom. This action opens the ‘Advanced Security Settings for WindowsApps’ window. If the button is greyed out, you are not using an administrator account.

-
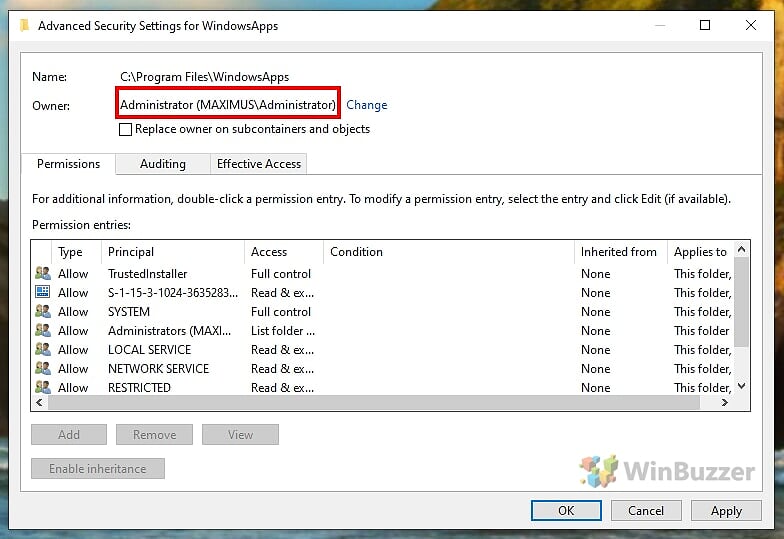
Change the Folder Owner
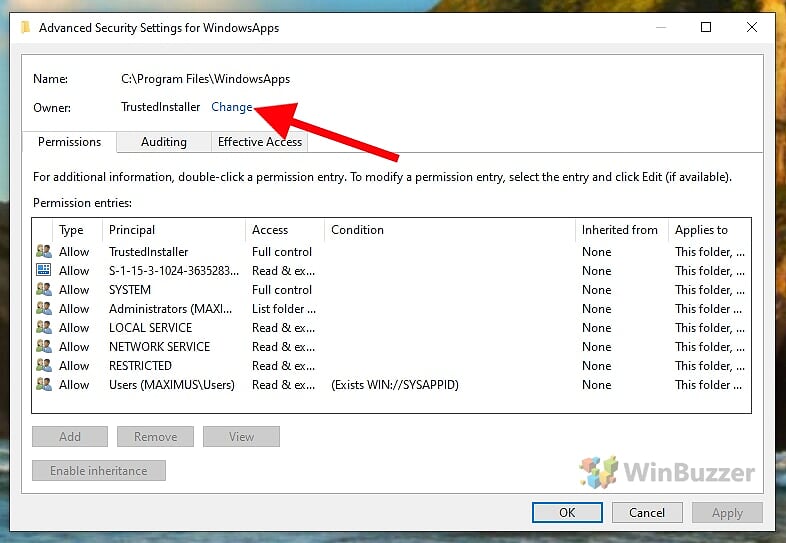
At the top of the Advanced Security Settings window, you will see the current owner listed as TrustedInstaller. Click the blue Change link next to it. A new window titled ‘Select User or Group’ will open. You may need to approve a User Account Control (UAC) prompt.

-
Enter Your User Account Name
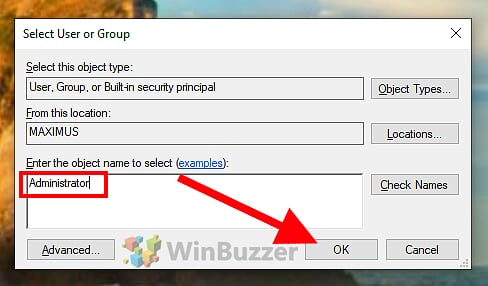
In the ‘Select User or Group’ dialog, type your Windows username into the text box labeled Enter the object name to select. If you use a Microsoft account, this is typically your email address. Click the Check Names button to verify, then click OK. If your name is not found, click ‘Advanced’, then ‘Find Now’ to select your account from a list.

-
Apply New Ownership
Back in the Advanced Security Settings, check the box for Replace owner on subcontainers and objects. This is a critical step; without it, you only get access to the main folder, not the files inside. Click Apply. This step may take a few moments, so be patient while Windows applies the new permissions. Click OK on all open properties windows when done.

-
Grant Full Control Permissions (If Needed)
In most cases, taking ownership is enough. However, if you still get an ‘Access Denied’ error, return to the folder’s Properties > Security tab. Click Edit, select your username from the list, and check the box for Full control under the ‘Allow’ column. Click OK.
-
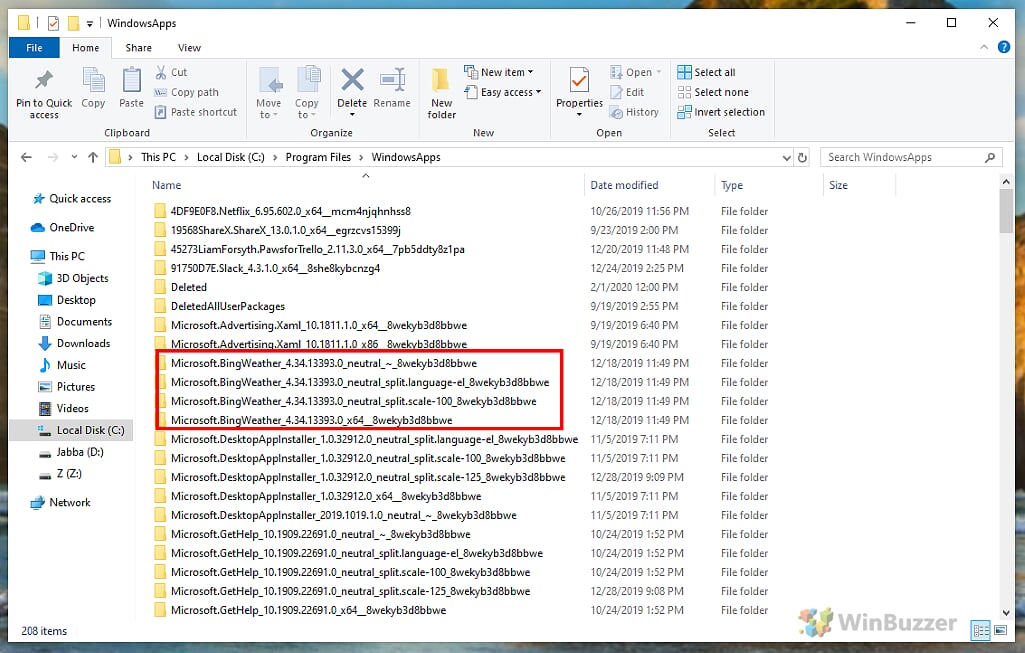
Access the WindowsApps Folder
You can now return to C:\Program Files in File Explorer and double-click the WindowsApps folder. The folder should open successfully, showing numerous subfolders for each installed Microsoft Store application. You now have full access.


Restore Default Permissions and Re-secure the WindowsApps Folder
Difficulty: Intermediate | Time Estimate: 5-7 minutes
After you have finished using Method 2, you must restore ownership to TrustedInstaller. Skipping this step can cause problems with app updates and system security. This procedure is mandatory for maintaining a healthy Windows installation.
-
Re-open Advanced Security Settings
Follow the first few steps from the previous method. Right-click the WindowsApps folder, select Properties, go to the Security tab, and click Advanced. This will open the ‘Advanced Security Settings’ window again.
-
Change the Owner Back
Next to your username in the Owner field, click the blue Change link. The ‘Select User or Group’ dialog box will appear, allowing you to assign a new owner.
-
Enter the TrustedInstaller Principal Name
In the text box, type NT SERVICE\TrustedInstaller exactly as shown. This is the official name for the TrustedInstaller system account. Click Check Names to validate it, then click OK. The owner field should now show ‘TrustedInstaller’.
-
Apply the Restored Ownership
Finally, check the box for Replace owner on subcontainers and objects and click Apply. Windows will re-apply the original permissions. Once complete, the folder is secure again. For best results, consider rebooting your PC to ensure all system services recognize the change.
View WindowsApps Folder Contents Safely Using PowerShell (Read-Only)
Difficulty: Advanced | Time Estimate: 3-5 minutes
If you only need to see a list of the files and folders inside WindowsApps without modifying anything, PowerShell provides a safe, read-only alternative. This method does not require any permission changes and is therefore much less risky.
-
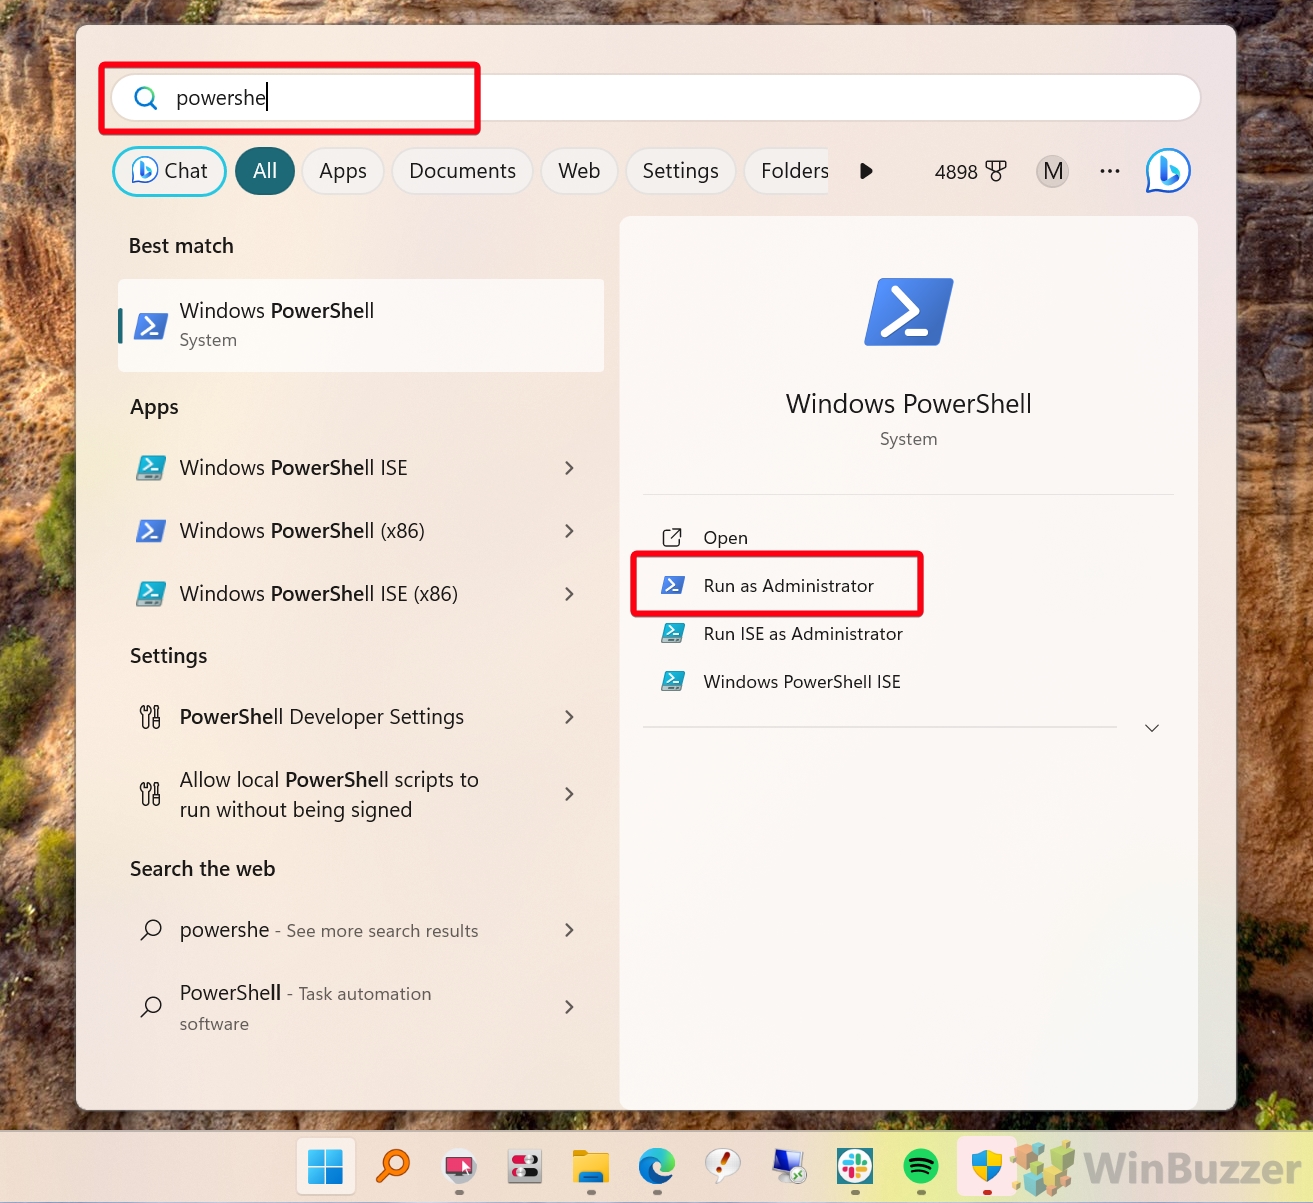
Open PowerShell as Administrator
Click the Start button, type PowerShell, right-click on Windows PowerShell in the search results, and select Run as administrator. A blue PowerShell terminal window will open with administrator privileges.

-
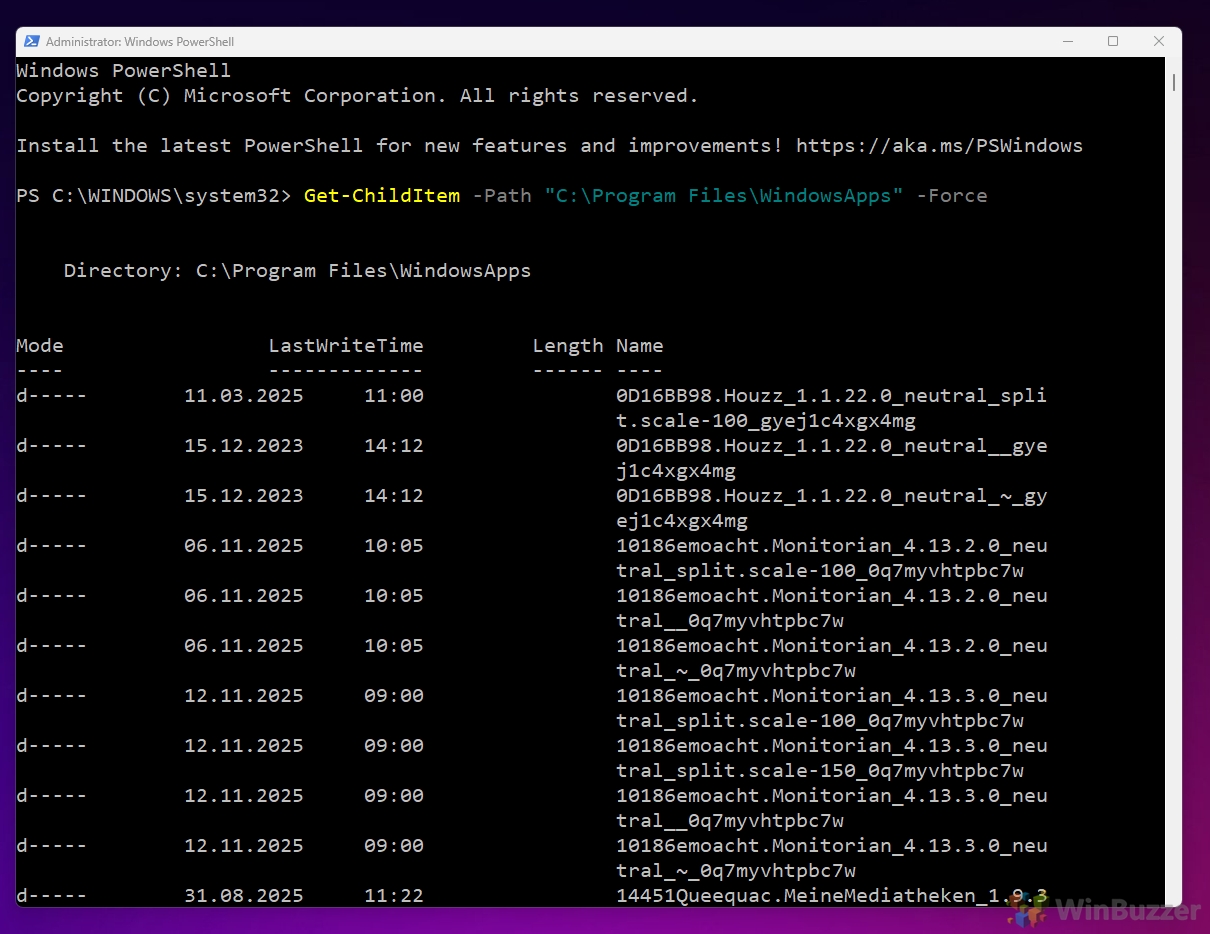
Run the Directory Listing Command
In the PowerShell terminal, copy and paste the following command and press Enter:
Get-ChildItem -Path "C:\Program Files\WindowsApps" -Force. The-Forceparameter is necessary to include hidden items in the results. You will see a complete list of the folder’s contents.
-
Identify the Exact App Package
To find the exact folder for a specific app, run the following command in the same PowerShell window and press Enter:
Get-AppxPackage *partOfAppName* | Format-List Name, PackageFullName, InstallLocationGet-AppxPackage *partOfAppName* | Select Name, PackageFullName, InstallLocationReplace
partOfAppNamewith a recognizable part of your app’s name, for example*calculator*,*photos*, or*spotify*. PowerShell will return the app’s internal package name along with its InstallLocation, which points to the exact folder inside WindowsApps.
-
Match the Package to Its WindowsApps Folder
In the output, look at the PackageFullName and InstallLocation values. The folder name shown in PackageFullName will match one of the entries you saw earlier when listing C:\Program Files\WindowsApps, and InstallLocation gives you the full path. For example:
InstallLocation : C:\Program Files\WindowsApps\Microsoft.WindowsCalculator_11.2410.0.0_x64__8wekyb3d8bbweThis means the exact folder for that app is Microsoft.WindowsCalculator_11.2410.0.0_x64__8wekyb3d8bbwe inside the WindowsApps directory.
-
Open App Folder in File Explorer
You can copy/paste the app folder path into the address bar in File Explorer to open it there.


FAQ – Frequently Asked Questions About Accessing WindowsApps
What happens if I forget to restore ownership to TrustedInstaller?
Failing to restore ownership can prevent the Microsoft Store from installing, updating, or uninstalling apps. It may also interfere with Windows Update and compromise system security by leaving a critical system folder under user control.
Is the process different between Windows 10 and Windows 11?
The core process of changing permissions in the security tabs is identical. The only minor difference is how you open ‘Folder Options’ in File Explorer. In Windows 11, it’s under the ‘…’ menu, while in Windows 10, it’s in the ‘View’ tab of the ribbon, as noted in the tutorial.
Can I use this method to modify game files for mods?
While technically possible, it is highly risky. Modifying game files from the Microsoft Store can corrupt the game, prevent it from updating, or even trigger anti-cheat software, potentially leading to a ban. Always back up files before modifying and understand the risks involved.
What if ‘Check Names’ can’t find ‘NT SERVICE\TrustedInstaller’?
This almost always means there is a typo. The name must be entered exactly as NT SERVICE\TrustedInstaller with a backslash. Ensure your computer’s location is set to ‘This computer’ in the ‘Select User or Group’ dialog if you are still having issues.
Why does applying new permissions take so long?
The WindowsApps folder contains thousands of files and subfolders for all your installed apps. When you change ownership, Windows has to apply that new permission to every single item, which can take several minutes depending on your disk speed and the number of apps installed.
I messed up the permissions. Is there a way to reset them?
Yes, but it can be complex. The safest option is to use a System Restore point from before you made the changes. For advanced users, the command-line tool icacls can reset permissions, for example: icacls "C:\Program Files\WindowsApps" /reset /t /c /q.
Can I move the WindowsApps folder to another drive to save space?
You should not move the folder manually. Instead, go to Settings > System > Storage > Change where new content is saved. From there, you can direct new apps to be installed on a different drive. You can also move individual apps via Settings > Apps.
Is there a way to find a specific app’s folder without browsing all of them?
Yes, the Task Manager method is the best way. Alternatively, the folder names usually contain the app’s name and publisher. You can use the search bar in File Explorer or the PowerShell method with a filter, like Get-ChildItem -Path "C:\Program Files\WindowsApps" -Filter *Spotify* -Force.
Will taking ownership of the WindowsApps folder affect my PC’s performance?
The act of taking ownership itself does not impact performance. However, if you modify or delete files inside, it can lead to application errors and system processes trying to access missing files, which could degrade performance or cause crashes.
Can I use this method to backup and restore Microsoft Store apps?
No, this is not a reliable backup method. UWP apps have dependencies and registry entries that are not contained within the WindowsApps folder alone. Simply copying the folder will not result in a working app on another system or a clean installation.
Why can’t I delete certain app folders even after taking ownership?
Some apps are considered core components of Windows (like the Microsoft Store itself or system apps like the calculator). Windows actively protects these files, and even with ownership, you may be blocked from deleting them to prevent system damage.
Does this process work for the WindowsApps folder on a secondary drive?
Yes. If you have installed apps on another drive (e.g., D:), a `WindowsApps` folder will exist there. The process to take ownership is identical; just substitute the correct drive letter and path in the instructions.
Are there any third-party tools that make this easier?
While some third-party file managers or permission utilities claim to simplify this, using them can be risky as you don’t have full control over the changes they make. The manual method described here is the safest because you are in complete control and can verify each step.
What is the difference between the WindowsApps folder and the AppData Packages folder?
The `C:\Program Files\WindowsApps` folder contains the core installation files for an application. The folder at `C:\Users\YourUser\AppData\Local\Packages` contains user-specific data, settings, and cache for those apps. The AppData folder is generally accessible without changing system permissions.
Why is the ‘Change’ owner link greyed out even though I’m an administrator?
This can happen in a corporate environment where security policies are managed by a system administrator, preventing local admins from changing permissions on certain folders. It can also be caused by third-party security software. In this case, you may not be able to proceed.
Related: How to Clear and Reset the Microsoft Store Cache
The Microsoft Store in Windows 11 and Windows 10 offers a convenient place to grab and automatically update apps, but it also tends to go wrong. If your store is throwing up “Store cache may be damaged” errors in the troubleshooter, you’ll need to perform a Microsoft Store reset or clear the Microsoft Store cache to resume. In our other guide we show you how to reset and clear the Microsoft Store cache using two different methods.


