

With the Windows 10 Fall Creators Update, Microsoft’s OS has added feature called Power Throttling, a way to increase the battery life of laptops by slowing down background processes.
What is Power Throttling in Windows 10?
Microsoft Power Throttling can net up to 11% more battery savings per charge with little negative impact. To do so, it leverages modern CPU throttling features to ensure that the OS is spending the lowest amount of power possible on background tasks. The idea is that the application will still get its work done, but with a smaller footprint.
However, it’s worth noting that Power Throttling is only available on Intel 6th gen and higher processors. Those with older or Ryzen processors won’t be able to make use of or disable this feature and should look elsewhere for power savings or performance gains.
With that said, we’re going to show those of you with a modern Intel processor how to monitor Windows 10 Power Throttling and turn it off/on for individual applications or the entire system.
How to Monitor Windows 10 Power Throttling with Task Manager
If you’re unsure which apps Windows 10 is throttling in the background, you can use Task Manager to get a list.
- Open Task Manager
Press “Start” and type “task manager”. Click the first entry.
- Open the “Details” tab and select columns
In Task Manager, click the “Details” tab heading, then right-click any of the column headings and choose “Select columns”.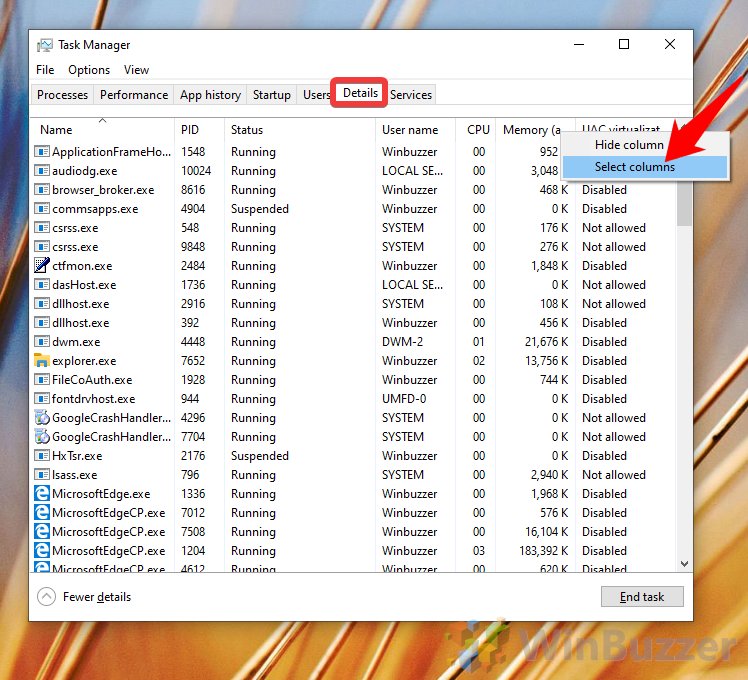
- Enable the Windows 10 Power Throttling heading
In the “Select columns” window, look for “Power throttling”, tick it, and click “OK”.
- Check to see if CPU throttling is enabled or disabled for your service
Look for your application service in the right-hand column, then check to see if Power Throttling is enabled or disabled. To check if the feature is working, you can open the app to minimize/maximize it to check if the status changes.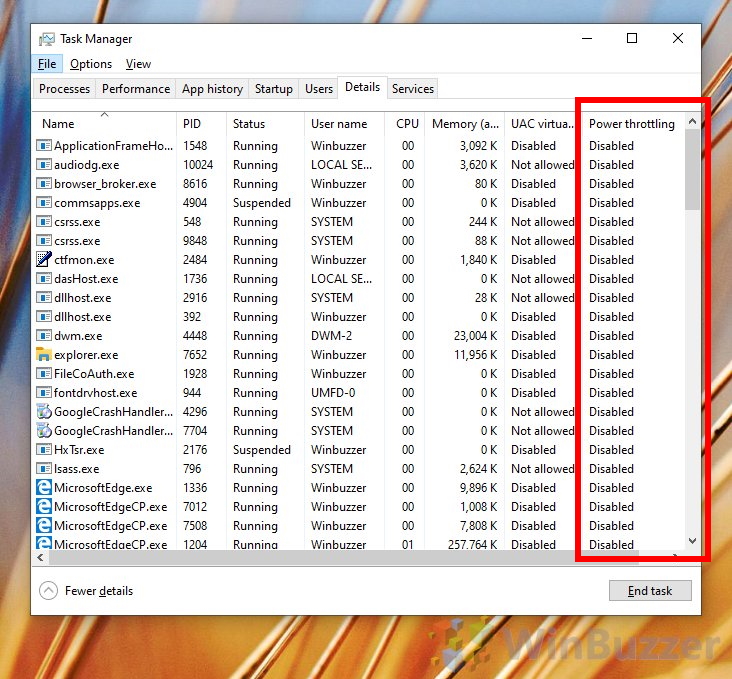
How to Disable Power Throttling in Windows 10
There are times when you’re on battery power but don’t want Windows to CPU throttle you, such as when you’re doing multiple performance-intensive tasks at once. You can disable power management in Windows 10 completely by the Power settings on the taskbar.
- Disable power throttling via the Taskbar
Click the battery icon on your taskbar, then drag the slider all the way to the right to “Best performance”. This mode will disable power throttling on your device. You can also set it to “Better performance” for less intense CPU throttling for background tasks.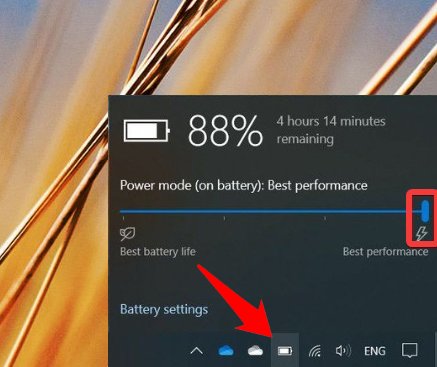
How to Disable Windows 10 Power Throttling via Group Policy
Alternatively, those with Windows 10 Pro or higher can use a group policy to disable power throttling for all users.
- Open the Group Policy Editor
Press the “Start” button and search for “gpedt.msc”, clicking the first result under “best match”.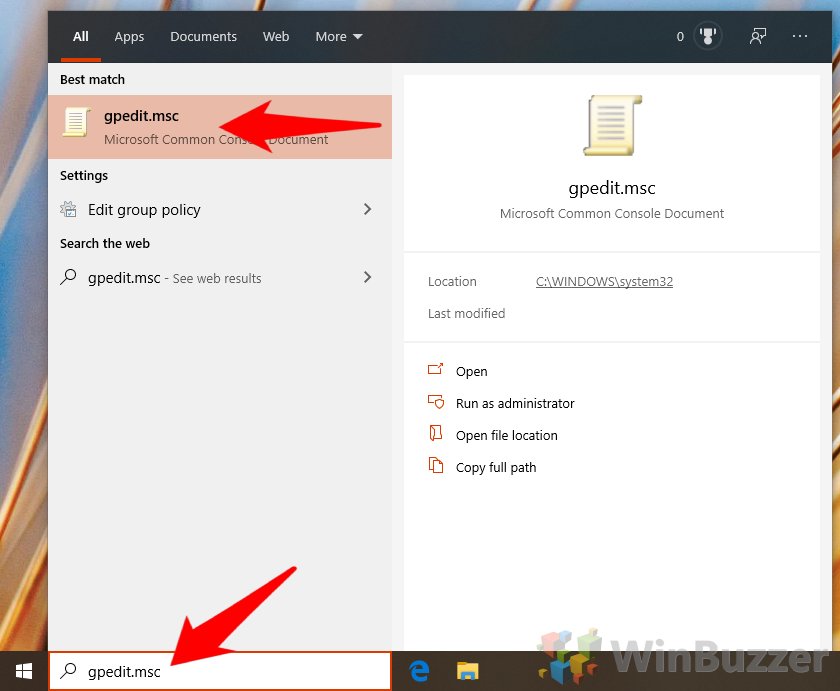
- Navigate to Power Throttling settings
In the left sidebar, use the folders to navigate toComputer Configuration > Administrative Templates > System > Power Management > Power Throttling Settings. In the main pane, double-click “Turn off Power Throttling” to open the policy edit menu.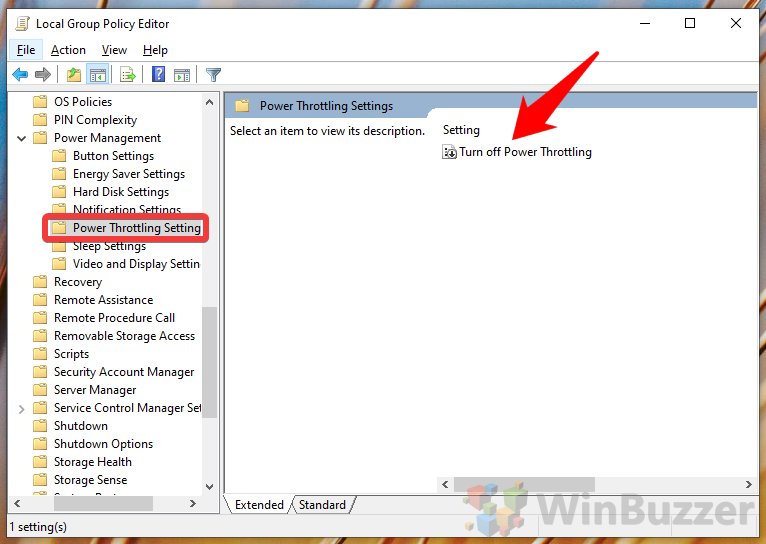
- Turn off Power Throttling/CPU throttling
In the Policy properties window, set “Turn off Power Throttling” to “Enabled” to turn it off, “Disabled” to enable it all the time, and “Not Configured” to have it follow the system settings.
How to Disable Windows 10 Power Throttling with Registry Editor
If you’re on Windows 10 you won’t have access to the Group Policy Editor, but you can edit the Windows registry to have the same effect. First, though, make sure you read our safe registry editing guide.
- Open Regedit and navigate to the Power key
Press “Start” and type “regedit”, clicking the first result to open it. You can find the key underHKEY_LOCAL_MACHINE\SYSTEM\CurrentControlSet\Control\Power. Once there, right-click any empty space in the main pane and select “New > Key”. Name it Power Throttling and press “OK”.
- Edit the Laptop Throttling Registry key
Double-click “PowerThrottlingOff” to edit the DWORD, then set the “Value data” to “1” to turn off the CPU throttling, “0” to turn it on, and delete the DWORD to follow the system defaults.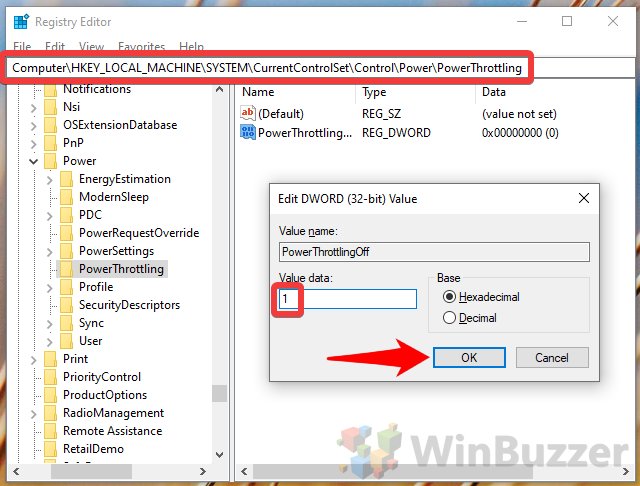
How to Turn Power Throttling On or Off for Specific Apps via Windows Settings
If it’s just the case of a specific app that’s being targeted by laptop throttling, you can modify its settings via the regular Windows settings UI.
- Open Windows Settings
Press the “Start” button, then click the settings cog in the bottom left, above the power icon.
- Click “System”
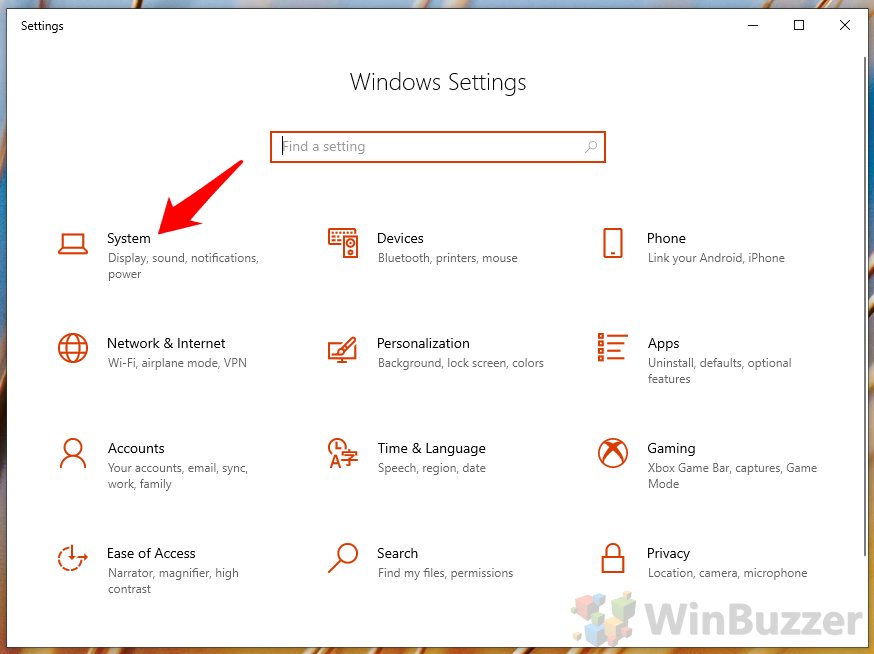
- Open the “Battery” side heading and click “See which apps are affecting your battery life”

- Tick or untick “Let Windows decide when this app can run in the background”
Windows will return a list of apps, sorted by the amount of battery life they consumed in the past 24 hours. You can untick “Let Windows decide when this app can run in the background”, “Reduce the work the app can do when it’s in the background”, and optionally “Allow the app to run background tasks”.
Just bear in mind that this is likely to have a toll on your battery life, so only do this if you’re experiencing significant issues.


