Rearranging columns in Excel is a common task that can significantly improve the readability and functionality of your spreadsheet. Whether you’re incorporating new data or optimizing the layout for better analysis, knowing how to efficiently move or swap columns is essential. This tutorial will guide you through four effective methods to rearrange columns in Excel, ensuring your data is organized exactly how you need it.
How to Move a Column in Excel with the SHIFT Key
Moving a column in Excel using the SHIFT key is a straightforward process that allows you to reposition a column without overwriting any existing data. This method is particularly useful for quick adjustments.
-
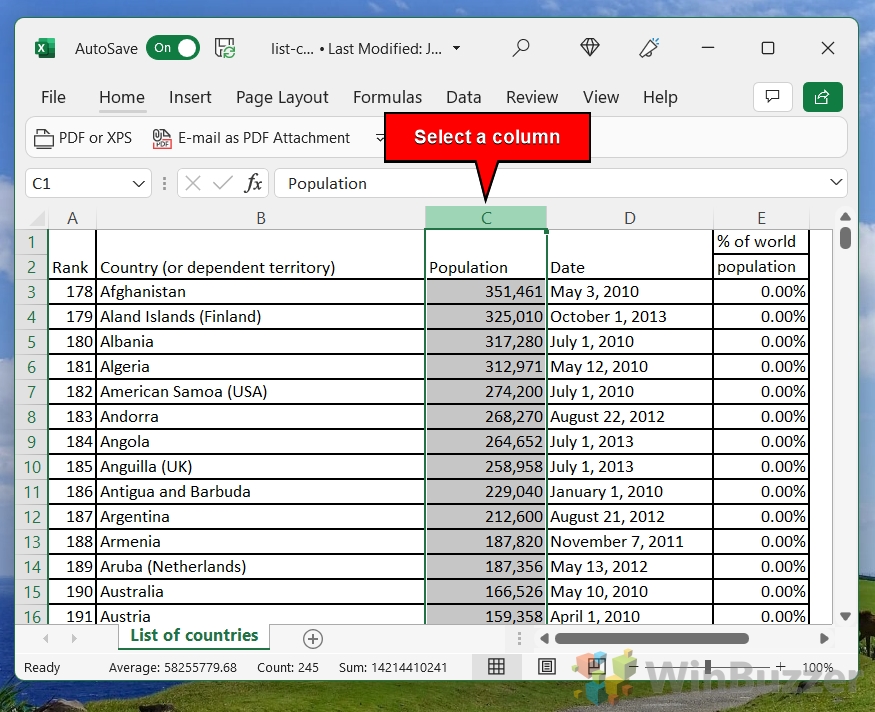
Select Your Column
Click on the letter of the column you wish to move. This action highlights the entire column, preparing it for relocation.

-
Press and Hold SHIFT
While pointing your cursor over the border of a selected cell, press and hold the SHIFT key. Then, drag the column to its new position. A green line will appear, indicating where the column will be placed upon release.

-
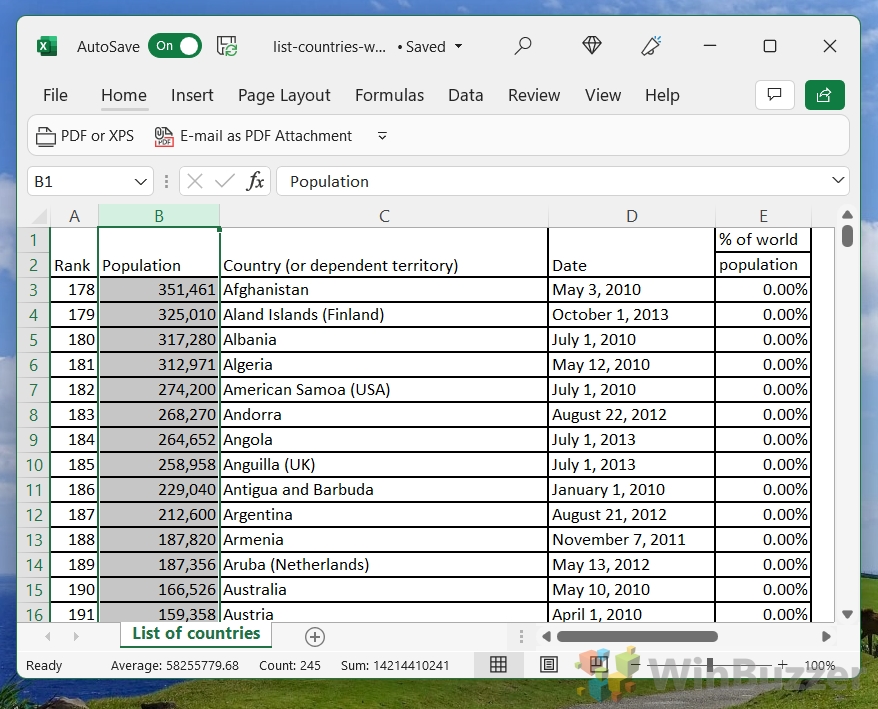
Release to Reposition
Upon releasing the mouse button, Excel will automatically move your column to the location marked by the green line, seamlessly integrating it into its new position.

How to Move Multiple Columns without Overwriting Data
When you need to move several columns at once, it’s crucial to do so in a way that preserves the integrity of your data. This method is ideal for reorganizing large sections of your spreadsheet efficiently.
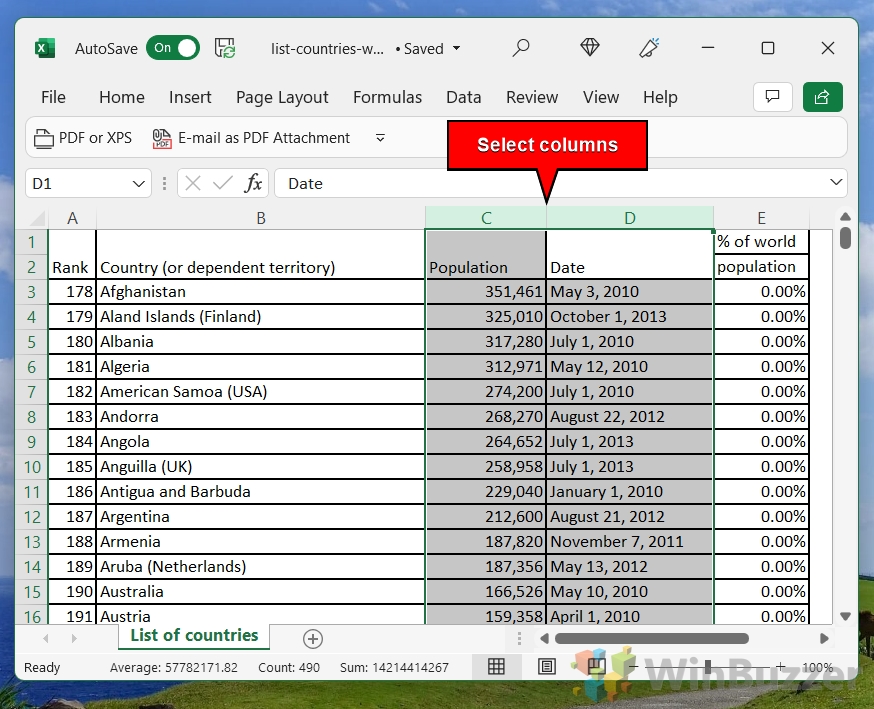
- Select the Columns
To move multiple columns, click and drag over their headers. Ensure the columns are adjacent to each other; if not, use the previous method to position them accordingly.

- Hold SHIFT and Drag
With the SHIFT key held down, click and drag the border of one of the selected columns. A green line will guide you to the new location, showing where the columns will be inserted. The adjacent columns will shift accordingly to accommodate the move.
Again, the green line indicates where your columns will move to. The columns next to them will automatically shift across to make room.

How to Swap Columns in Excel with Cut and Paste
Swapping columns in Excel can also be achieved with the cut-and-paste functionality. This method is perfect for exchanging the positions of two columns without disrupting the layout of your spreadsheet.
-
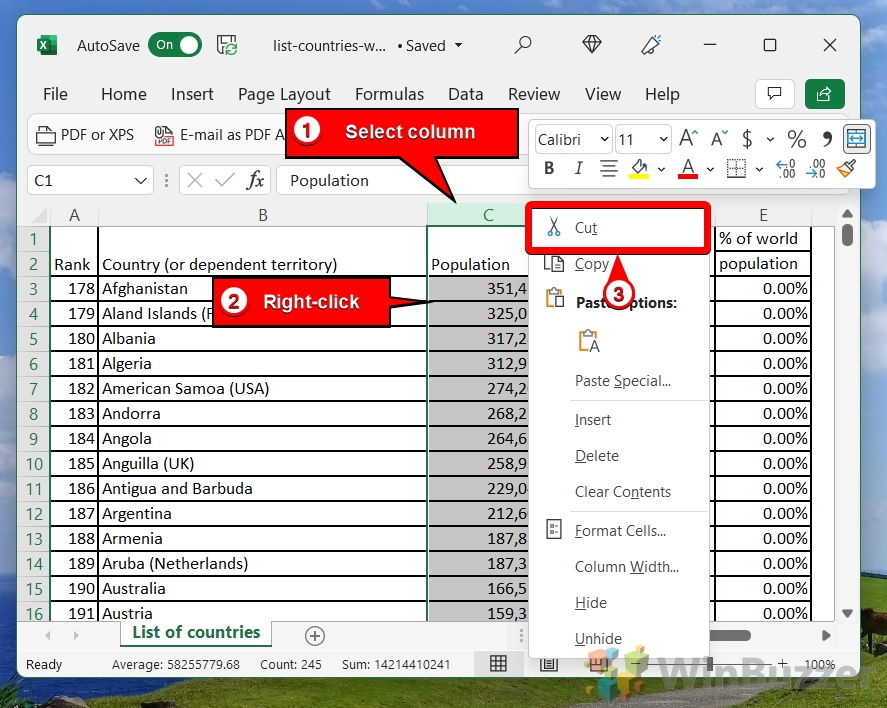
Cut the Column
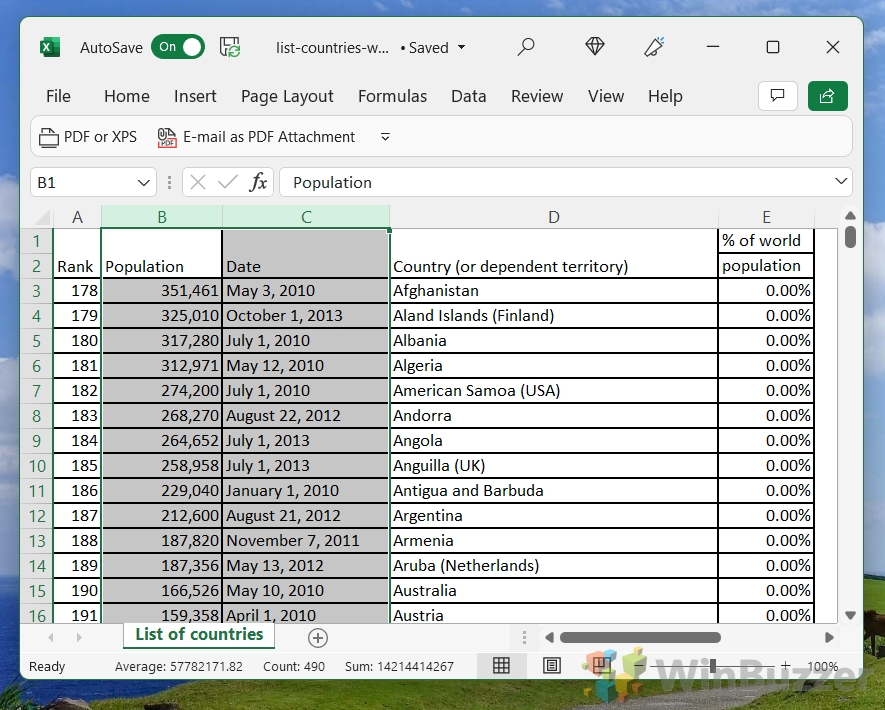
Select the column you wish to move by clicking its letter, then press “Ctrl + X” to cut it or use the right-click context menu and select “Cut“.

-
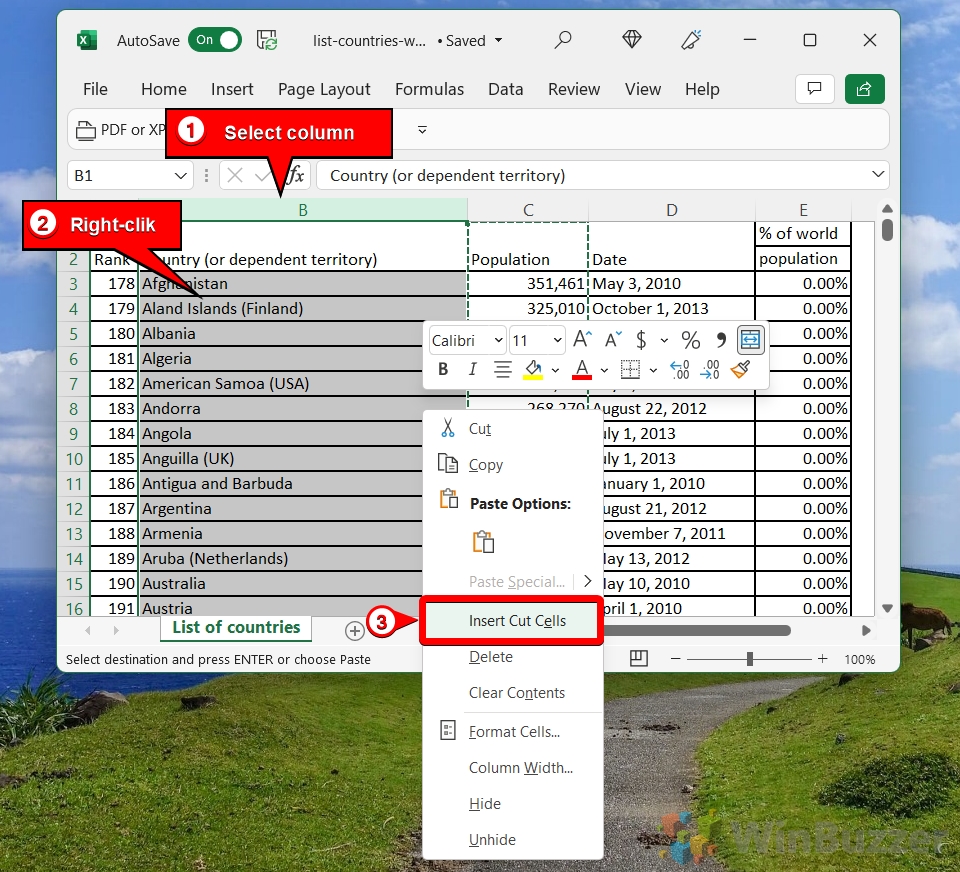
Insert Cut Cells
Click on the header of the column where you wish to place the cut column. Right-click and select “Insert Cut Cells“. This action will move the cut column to the selected location and shift the existing column to the right, effectively swapping their positions.

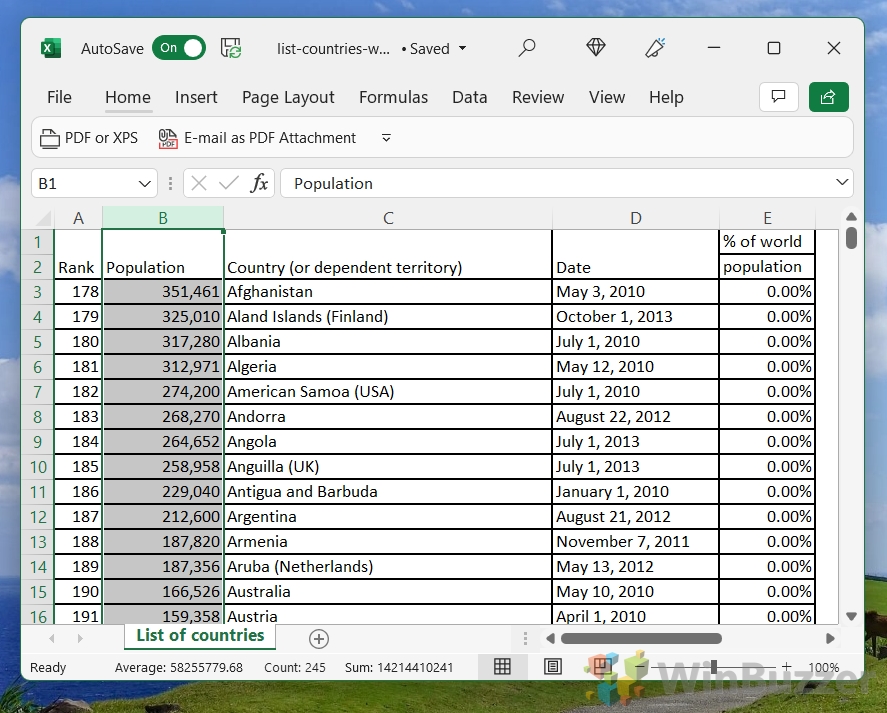
- Your cut data will be moved to your selected column
The data you previously selected will be moved one space to the right, so this is a great way to swap columns in Excel if they’re next to each other.

How to Rearrange Columns in Excel with the Sort Feature
For complex rearrangements involving multiple columns, utilizing Excel’s sort feature is another highly effective way to rearrange columns. This method allows you to reorder columns based on specified criteria, ideal for large-scale reorganizations.
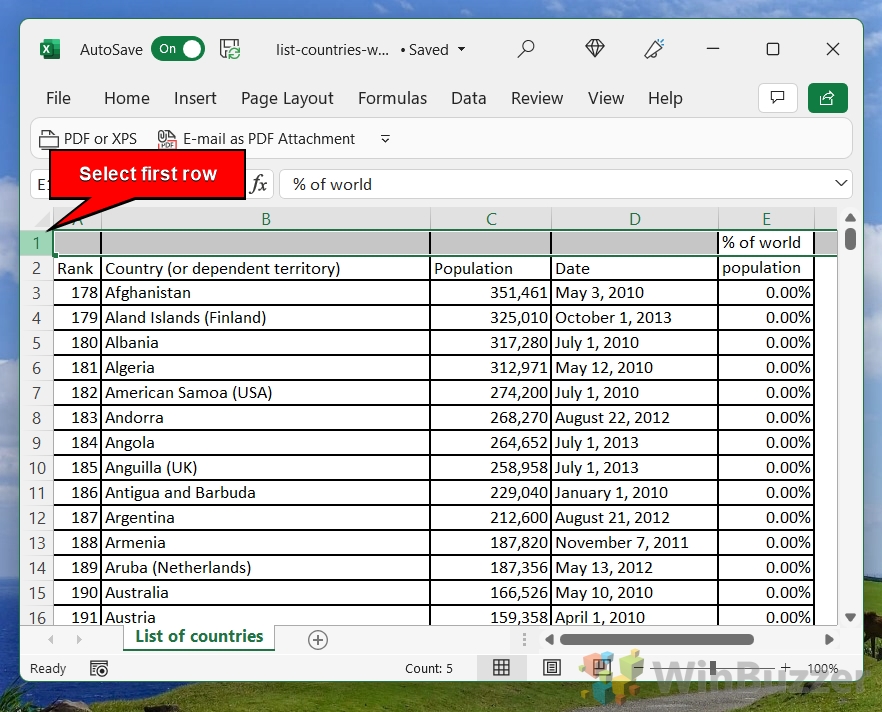
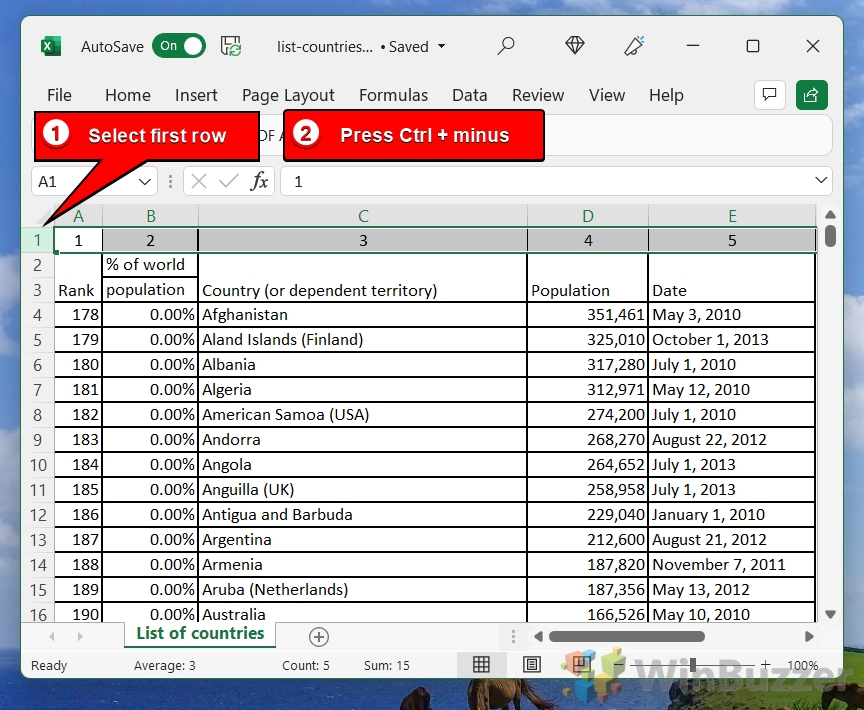
- Select the first row
-
Insert a Helper Row
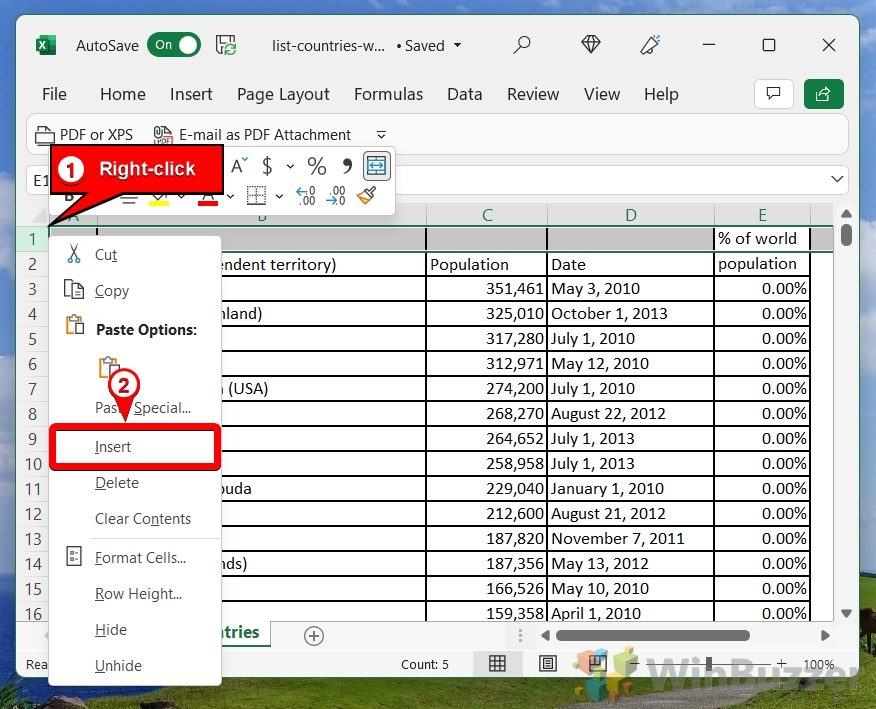
Click the number of the first row to select it. Right-click and choose “Insert” to add a new row at the top of your spreadsheet.

-
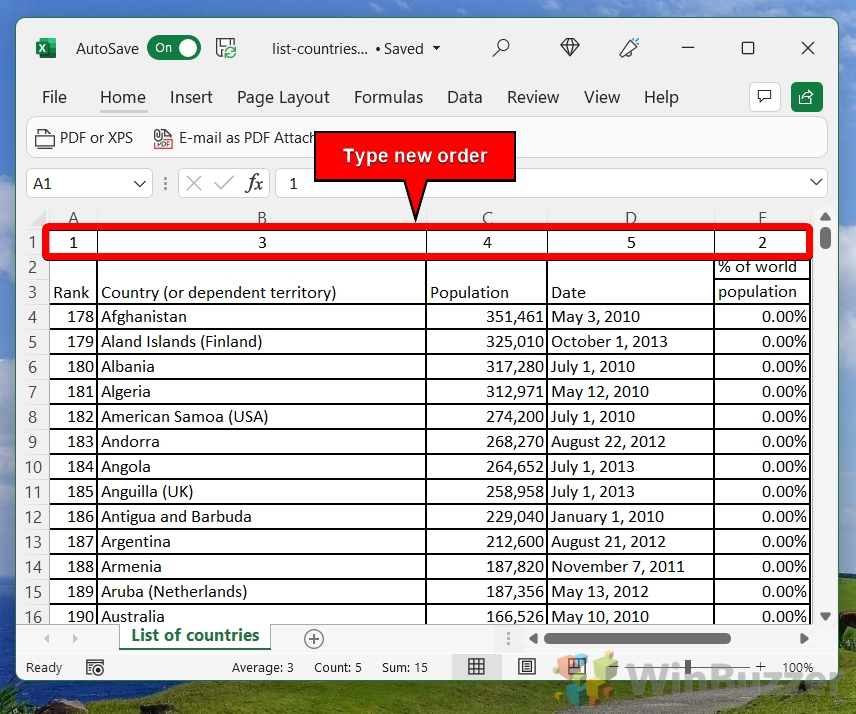
Assign Order Numbers
In the new row, enter numbers corresponding to the desired order of your columns. For example, label the column you want first as “1“, the second as “2“, and so forth.

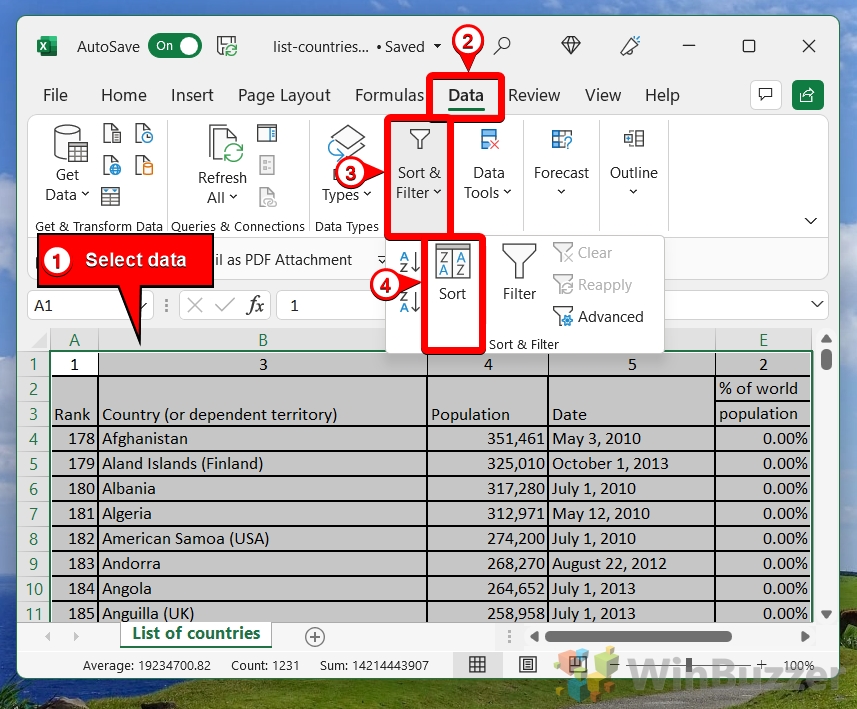
- Open the “Sort & Filter” Feature
Select your entire sheet, then navigate to “Sort & Filter > Sort” in the Data tab.
-
Define the Sort Options
Click “Options…“, select “Sort left to right“, and press “OK“.

-
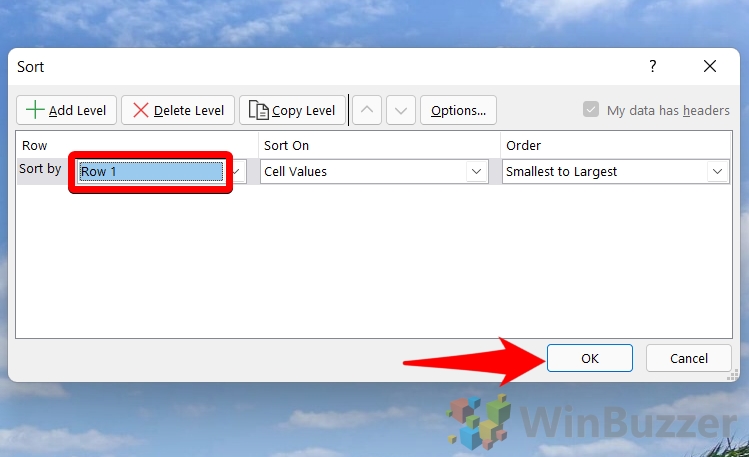
Set Sorting Order and Apply
Choose “Row 1” as your “Sort by” criteria, then click “OK” to reorder the columns.

- Remove Helper Row
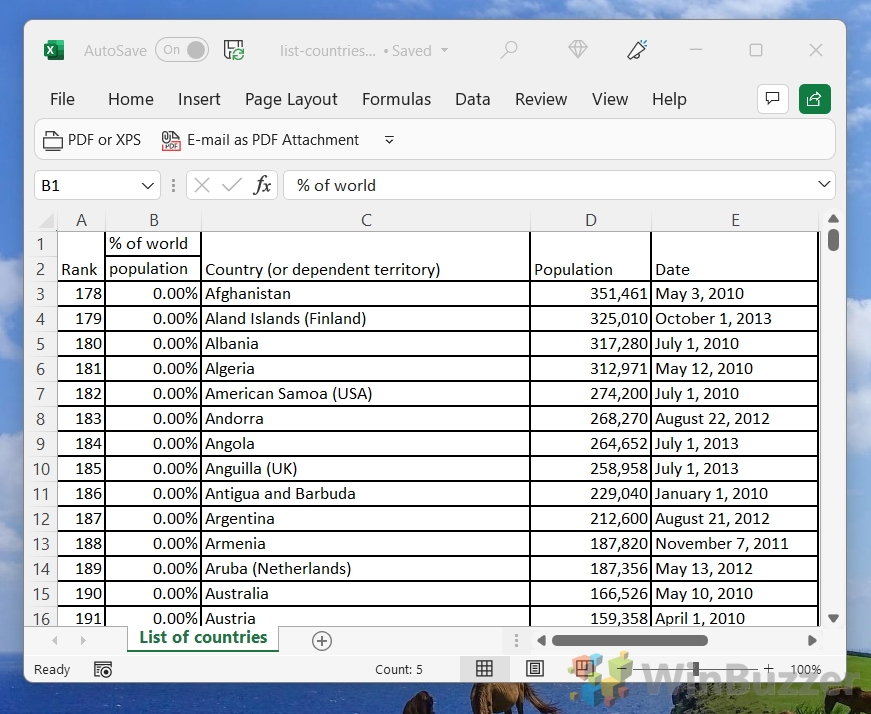
Select the first row and press “Ctrl + minus (-)” to remove it. If you think you’ll need to change the order again in the future, you can hide the cells instead, by right-clicking and selecting “Hide“.
- Enjoy your fully sorted spreadsheet
FAQ – Frequently Asked Questions About Excel Column Operations
How do I automatically rearrange columns in Excel?
To automatically rearrange columns based on certain criteria or a predefined order, use the Sort feature. First, add a new row above your data and enter sequential numbers representing the desired order for your columns. Highlight the whole table, navigate to the Data tab, click on “Sort“, choose “Options“, select “Sort left to right“, and choose the row with your sequence numbers as the basis for sorting. This method rearranges your columns without needing to move them manually one by one.
What is the formula for transpose?
To flip data from rows to columns or vice versa, you can use the TRANSPOSE formula. Select a blank area where you want the transposed data to appear, type =TRANSPOSE(the range of cells you want to transpose), then press Enter. In newer versions of Excel, press Enter directly. In older versions, you must press Ctrl+Shift+Enter to activate the array formula. This method is ideal for reorienting data efficiently without manually copying and pasting information.
Can you flip data in Excel?
Yes, flipping data horizontally or vertically in Excel can be accomplished using a couple of methods. For horizontal flipping (reversing the order of columns), you can manually cut and paste columns or use a formula approach to reverse the order. Vertically flipping data (reversing the order of rows) typically requires a manual approach or the use of a helper column with a descending count which you then sort. For converting columns into rows, or vice versa, the “Transpose” function under “Paste Special” is the most straightforward method.
How do I rearrange columns alphabetically in Excel?
To rearrange columns alphabetically, select the range of columns you want to sort (including the header row if you have one), go to the Data tab, and click on the “Sort A to Z” button for ascending order or “Sort Z to A” for descending order. If your columns have headers, Excel will usually prompt you to confirm whether your selection includes headers. Choose accordingly to ensure the sort operation recognizes and maintains your column headers.
How do I reorder columns in Google Sheets?
Reordering columns in Google Sheets can be done by clicking and dragging column headers to your desired location. For more precise moves, select the column by clicking on its header, cut it using Ctrl+X (or Cmd+X on a Mac), right-click the column where you want it moved, and select “Insert cut cells”. This effectively moves the selected column to the target position while preserving your data integrity.
Extra: How to Wrap Text in Excel (Automatically and Manually)
Knowing how to wrap text in Excel is important so that your spreadsheet doesn’t get any wider than it needs to be. The wrap text function in Excel lets you break text into multiple lines, therefore increasing the length of your cell. In our other guide, we show you how to wrap text in Excel, using both Excel line breaks and its automatic word wrap functionality.
Extra: How to Alphabetize Data in Excel Columns or Rows
One of the most common types of sorting in Excel is alphabetical sorting. Whether it’s a list of names, businesses, or mail addresses, sorting helps to organize and keep track of what you’re doing. In our other guide, we are showing you how to alphabetize in Excel for both rows and columns.
Last Updated on March 21, 2024 5:09 pm CET by Markus Kasanmascheff
