

Understanding how to effectively wrap text in Excel is crucial for maintaining the readability and organization of your spreadsheets. The wrap text function in Excel lets you break text into multiple lines, therefore increasing the length of your cell. This guide will walk you through the steps to use Excel’s text wrapping feature, ensuring your data is presented neatly.
There are two ways to word wrap in Excel: you can format your cell so it wraps automatically when the edge of the cell is reached, or you can use a manual line break to split it at your choosing.
How to Wrap Text in Excel Automatically
This method allows you to quickly adapt cell sizes to accommodate varying lengths of text, enhancing the visibility of your content without manual adjustments.
- Select the Desired Column
Identify the column containing the text you wish to wrap. Place your cursor on the column header to highlight it. If you just want your text to fit inside your column without wrapping, double-click the right border of the column header.
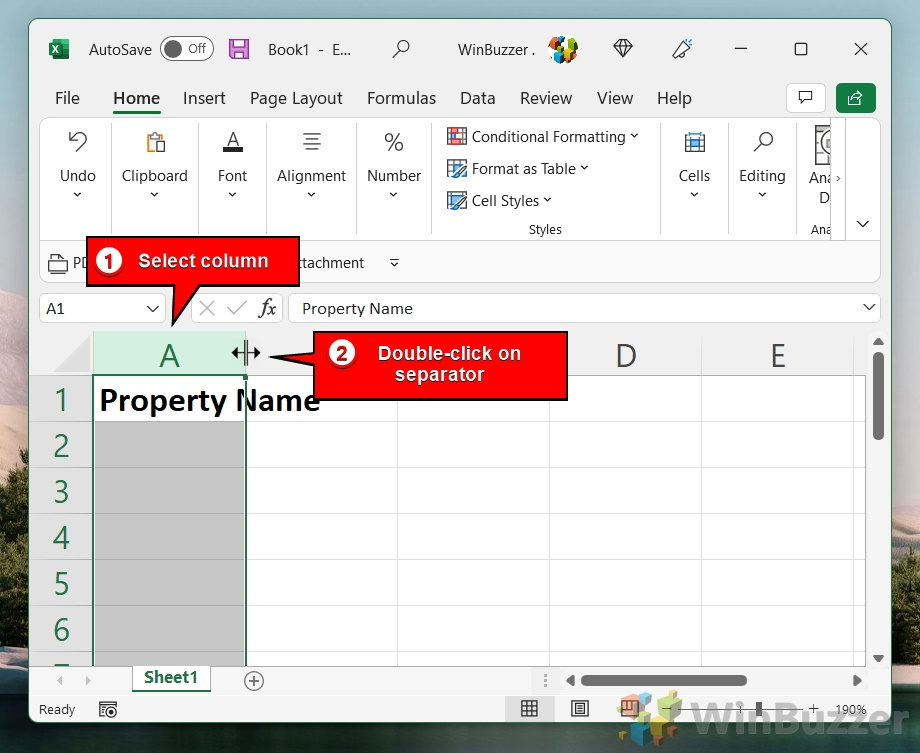
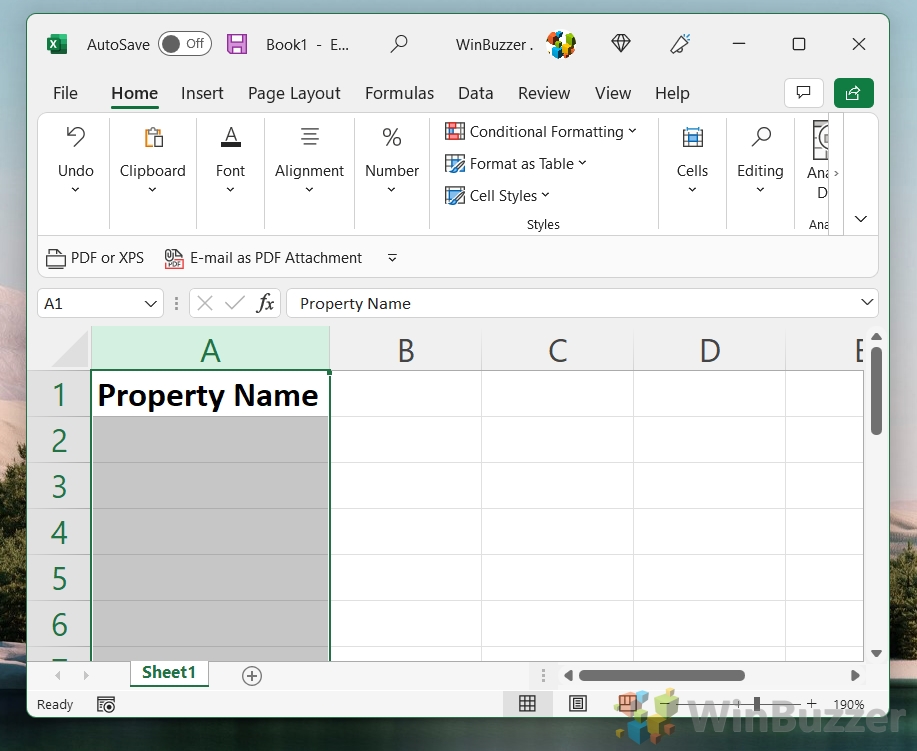
- Check Adjusted Column Width
This automatically adjusts the column’s width.
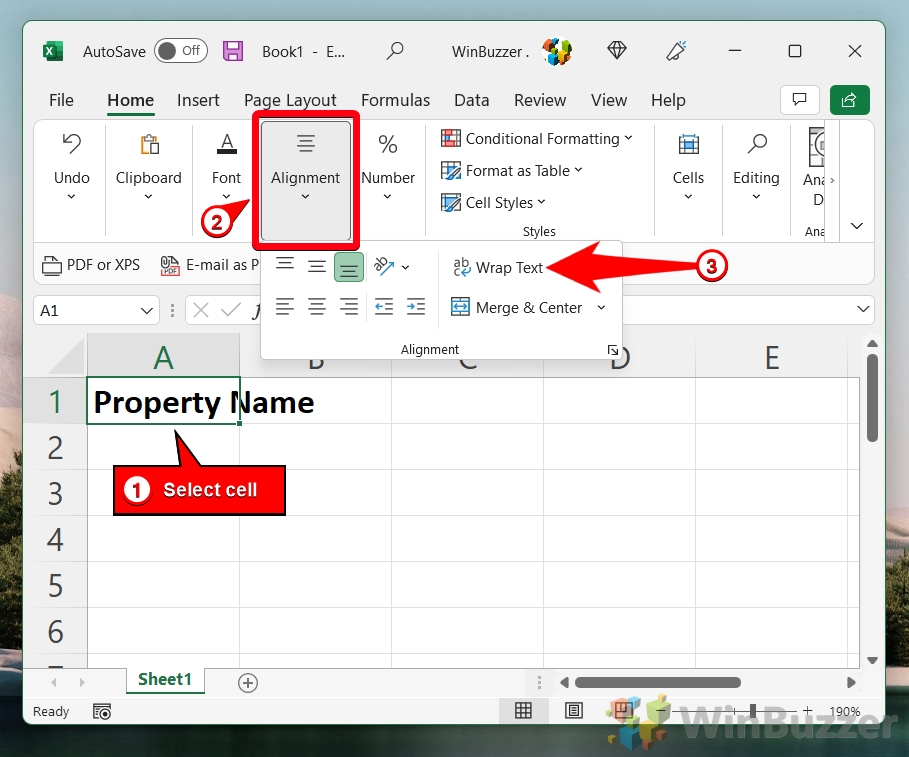
- Activate Wrap Text
Navigate to the “Home” tab, locate the “Alignment” group, and click the “Wrap Text” button. This applies text wrapping to the selected cells.
- Modify the Wrap Location
Click and drag the right border of the column header to manually set the column width, controlling where the text wraps.

- Adjust Row Height
Double-click the bottom border of the row header. Excel will automatically adjust the row height to fit the wrapped text snugly.

- The cell height will automatically adjust to fit the text

- Changing Text Alignment
By default, wrapped text is aligned to the bottom of its cell. If you don’t want it this way, select the cell, then click the “Top Align” button in the “Alignment” group under “Home“.

- This aligns the text to the top of the cell

How to Word Wrap in Excel with a Manual Line Break
Manually inserting line breaks in Excel gives you precise control over where your text splits, ideal for custom formatting within cells. By adding an Excel line break, you’re able to choose exactly where your text will split and save yourself a lot of fiddling around afterward.
- Add Manual Line Break
Double-click inside the cell where you want to insert a line break. Place your cursor at the desired point of separation. Press “Alt + Enter” on your keyboard to insert a manual line break at the cursor’s position.

- Repeat if needed
Excel will split your text on to two lines at wherever the cursor was placed. Repeat as needed for additional line breaks.

FAQ – Frequently Asked Questions About Fitting and Wrapping Cells in Excel
1. Why does wrap text not work on merged cells?
To ensure wrap text works on merged cells, first confirm that the cells are indeed merged. Next, select the merged cell(s) and enable the “Wrap Text” option by clicking on it under the “Home” tab in the Alignment group. Remember, if the row height or column width is manually set to a specific size, it might prevent the text from wrapping effectively. Adjust the size as needed to accommodate the text.
2. How do I make Excel Cells expand to fit text automatically vertically?
To make cells automatically expand vertically to fit wrapped text, ensure that the “Wrap Text” feature is enabled for these cells. Excel will typically adjust the row height automatically when text wraps. However, if this doesn’t happen, you can manually adjust the row height by positioning your cursor on the bottom line of the row header until it turns into a double arrow, then double-clicking.
3. Why is AutoFit not working in Excel?
AutoFit may not work due to several reasons such as manual adjustments to row heights or column widths, merged cells, or specific formatting applied to cells. To use AutoFit, ensure that there are no manual sizes set for the rows and columns you’re trying to adjust. For columns, double-click the right side of the column header; for rows, double-click the bottom of the row header.
4. How do I change text wrap settings?
Text wrap settings in Excel can be adjusted by first enabling the feature for selected cells via the “Wrap Text” button under the “Home” tab in the Alignment group. To further manage how text wraps within a cell, you may need to adjust the column width or row height manually. Additionally, inserting manual line breaks using “Alt + Enter” within a cell can also help control text wrapping more precisely.
5. How do I automatically adjust columns to fit text?
To automatically adjust columns to fit the text without wrapping, you can use the AutoFit feature. Simply hover your cursor over the right edge of the column header until it turns into a double arrow, then double-click. This action will resize the column to fit the longest piece of text within the column. For adjustments in several columns at once, select the columns and double-click any selected column’s right border.
6. How do I make all cells wrap text in sheets?
This question seems to pertain to Google Sheets rather than Excel. In Google Sheets, select the cells where you want text to wrap, then go to the “Format” menu, choose “Text wrapping“, and select “Wrap“. This will apply text wrapping to all selected cells, adjusting cell heights as needed to fit the text.
7. How to prevent text from overflowing sheets without wrapping?
To prevent text from overflowing in cells without applying text wrapping, you can adjust the column width to fit the longest piece of text. Another approach, especially useful in Google Sheets, is to use the “Clip” option under the “Format” menu followed by “Text wrapping“. This will prevent text from spilling over into adjacent cells but not adjust the cell size or display the text on multiple lines.
8. What is the difference between wrapping text and merging cells?
Wrapping text in Excel allows you to display long text segments across multiple lines within the same cell, which may increase the cell’s height. Merging cells combines two or more adjacent cells into one larger cell, which can be used for aesthetic purposes or to create headings over multiple columns or rows. While text wrapping focuses on content presentation within individual cells, merging is about cell structure modification.
9. What automatically wraps text to the next line as it reaches the end of the cell?
In Excel, the “Wrap Text” feature is responsible for automatically wrapping text to the next line once it reaches the end of the cell. This feature can be activated by selecting the cell(s) and clicking the “Wrap Text” button under the “Home” tab. The cell will dynamically adjust its height to accommodate the wrapped text.
10. Why can’t I wrap text?
If you’re unable to wrap text in Excel, it could be due to incorrect selection of cells, or the “Wrap Text” function might not be enabled. Always ensure you have correctly selected the cell or range of cells you want to apply text wrapping to, then click the “Wrap Text” button under the “Home” tab. If the button seems unresponsive, check if your spreadsheet is protected or shared, as these conditions might restrict formatting changes.
11. Why does wrap text not work in Excel sometimes?
The wrap text feature may not work if there are conflicting formatting settings, if the cells are part of a merged range with specific restrictions, or if the spreadsheet view mode does not support formatting features (e.g., Page Layout or Print Preview). To troubleshoot, ensure you’re in Normal view, check for any conflicting formatting, and verify that the wrap text option is properly enabled for the selected cells.
12. How do I wrap text without affecting other columns?
Wrapping text in one column will not automatically affect other columns. To wrap text in a specific column without changing the layout of others, select the column or cells where you want the text to wrap, then click the “Wrap Text” button. This will only alter the row height to accommodate wrapped text in that specific column.
13. What are the different options available in AutoFit?
In Excel, the AutoFit feature offers two main options: “AutoFit Column Width” and “AutoFit Row Height“. These options automatically adjust the column width and row height to match the content size. You can access these by selecting columns or rows, right-clicking, and choosing “AutoFit Column Width” or “AutoFit Row Height” from the context menu.
14. Can you set a default text wrapping for all new Excel sheets?
Excel does not have a native feature to set default text wrapping settings for all new worksheets within a workbook. Text wrapping must be applied manually or through a template that has predefined settings. You could create a template with text wrapping enabled on specific cells or columns and use this template for new worksheets.
15. How do I keep all text in one cell without it overflowing?
To keep all text within a single cell in Excel, you can use the “Wrap Text” feature to ensure text occupies multiple lines within the cell. Additionally, you can manually adjust the cell size or insert manual line breaks using “Alt + Enter” at specific points in the text to control overflow. Always ensure the column width is sufficient to display the text confined to the cell without spilling into adjacent cells.
Extra: How to Combine Text Cells in Excel with the Concatenate Formula
If you’ve spent much time in Excel, you’ll know the pain that comes with creating a large spreadsheet, only to realize it needs adjusting. Thankfully, though, this doesn’t always need to be time-consuming. If you’re wondering how to combine two cells in Excel, you can use the concatenate command to do so without data loss. In our other guide, we show you how to use the concatenate formula in Excel, including how to combine cells in Excel with it and add spaces between words.

Extra: How to Lock Cells in Excel to Protect Them from Editing
Throwing a lot of work into a shared Excel sheet can be rewarding, which is why it’s even more soul-crushing to wake up one day to find it destroyed. Unfortunately, whether by accident or malice, formula and numerical cells often end up edited beyond repair and headers somehow come back in Comic Sans. We’re going to show you how to lock cells in Excel so that you can stop a single keypress from ruining your day. In our other guide, we show you how to protect a worksheet in Excel, as well as how to lock specific cells and formulas in Excel from editing or formatting.


