
Excel is an incredibly handy tool for organizing a mailing list, but it’s not so great when it comes to actually printing the labels. Typing out all of the information you have already entered would be time-consuming – but thankfully you can have your cake and eat it too. Today we’ll be showing you how to make and print address labels from Excel with a little help from Microsoft Word and the mail merge feature.
Printing Labels From Excel is Easy
Though Excel’s built-in functionality isn’t great for label making, the beauty of the Microsoft Office suite is its cross-compatibility. If you have both applications installed, you can quickly and automatically import the data from your Excel spreadsheet into Word and have it displayed in an organized manner for printing.
It’s worth noting two things before we start. Firstly, though the tutorial will focus on address labels, it can be modified to work with any label. Secondly, you will have to set your columns up properly in Excel to make this as seamless as possible. We’ll discuss this in the first step:
How to Prepare Your Mailing List in Excel to Print Labels With Mail Merge
Before diving into the Mail Merge process, your Excel spreadsheet needs to be properly prepared. This involves organizing your data with clear, concise column headers and ensuring each row contains accurate data for each label.
- Set Up Column Headers
Ensure your Excel sheet has clear, descriptive column headers corresponding to label fields (e.g., First Name, Last Name, Address). This aids in accurately mapping data in Word.
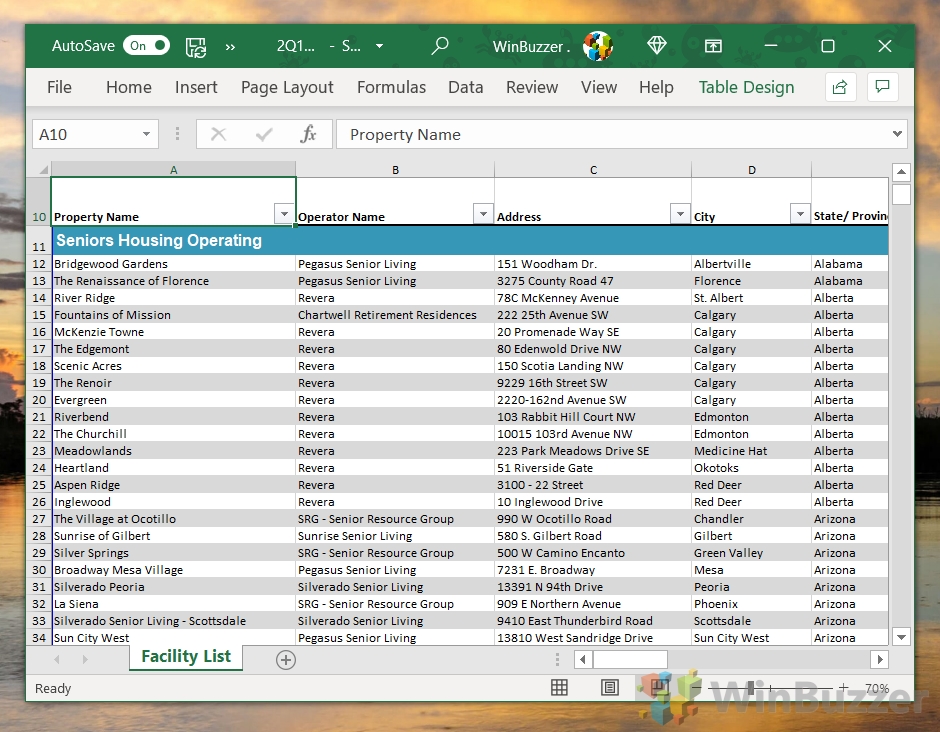
For example, in our example, we’ll be using the fields property name, operator name, address, city, state, zip code, and country. If you’re using your labels for a mailing list, you may want to include heading labels like first name, last name, and title.
Tip: Use consistent naming conventions and avoid special characters in headers to prevent merge errors.

-
Organize Your Data
Each row should represent one label’s information, ensuring no blank rows or columns disrupt the data set.
Best Practice: Regularly check and clean your data for duplicates, incomplete entries, or errors to maintain accuracy.
- Format Data Properly
Pay special attention to data types, especially for fields like Zip Code or Phone Number. Ensure they are formatted correctly (e.g., ‘Text’ format for Zip Codes to preserve leading zeros).
Tip: Use Excel’s data validation feature to maintain data integrity.
- Save Your Excel File Once your data is organized and checked, save the Excel file. It’s recommended to keep this file accessible for future label printing tasks.
How to Mail Merge Labels from Excel to Word
- Select ‘Start Mail Merge’ > ‘Labels’
Open the “Mailings” tab of the Word ribbon and select “Start Mail Merge > Labels…”. The mail merge feature will allow you to easily create labels and import data to them from a spreadsheet application.

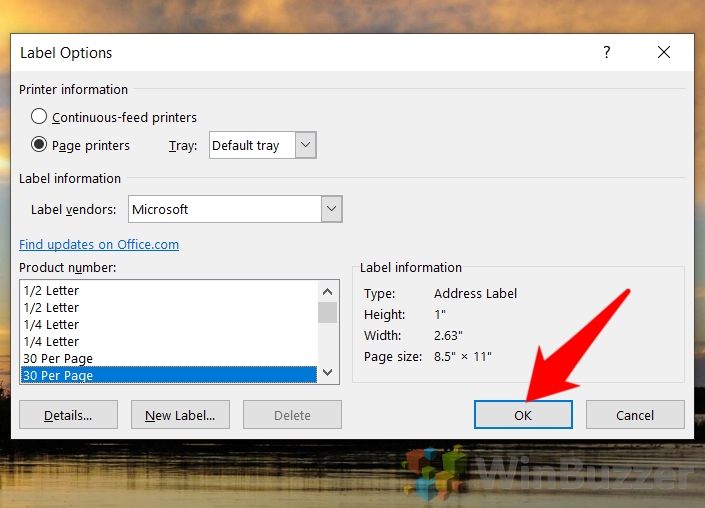
- Select your label options and press “OK”

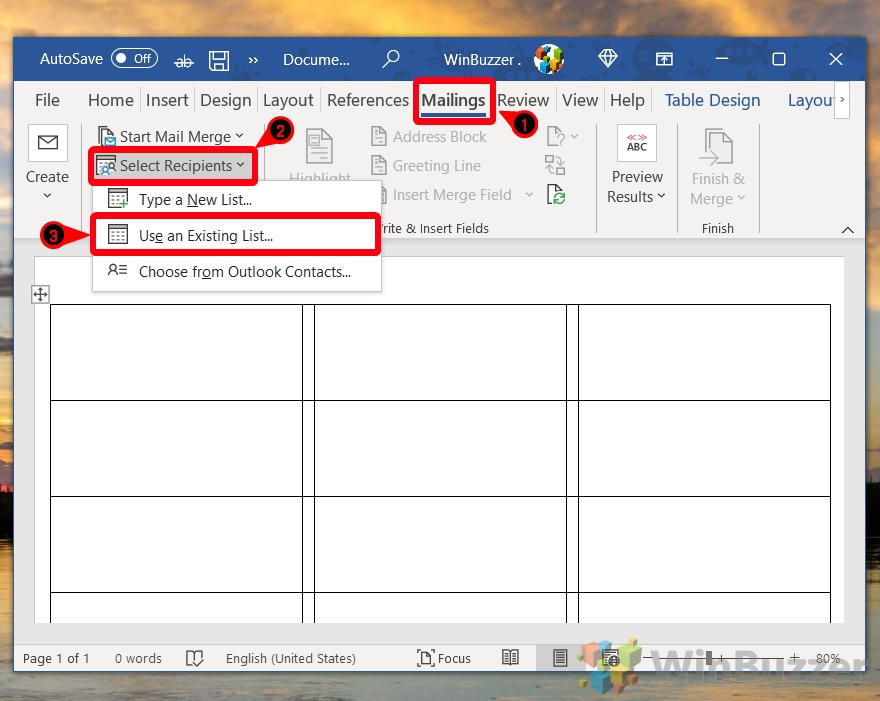
- Select Recipients
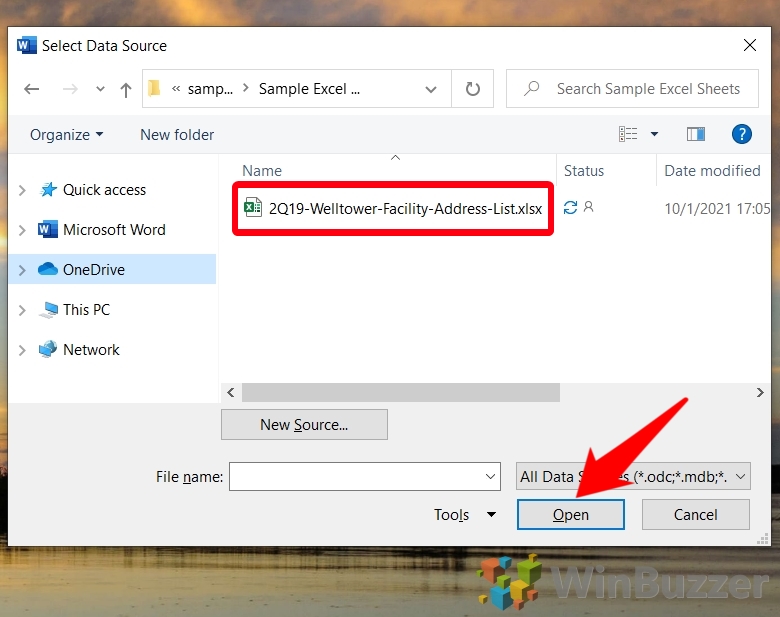
Press “Mailings > Select Recipients > Use an Existing List…”

- Browse to your mailing list file, select it, and press “Open”

- Select your sheet name, tick “First row of data contains column headers” and press “OK”

- Insert Address Block
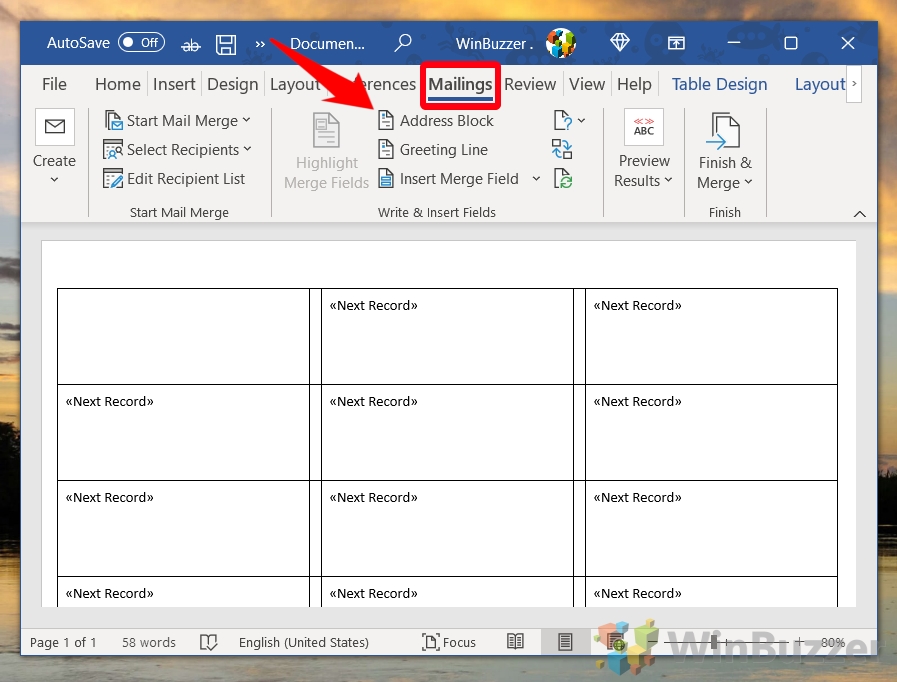
Open the “Mailings” tab in your Word ribbon and click “Address Block”.

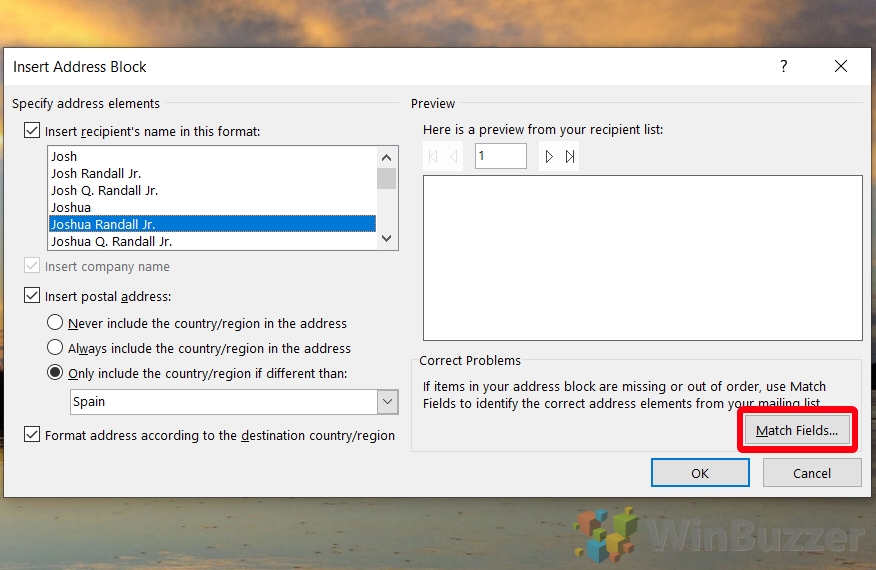
- Press “Match Fields…” in the “Insert Address Block” window

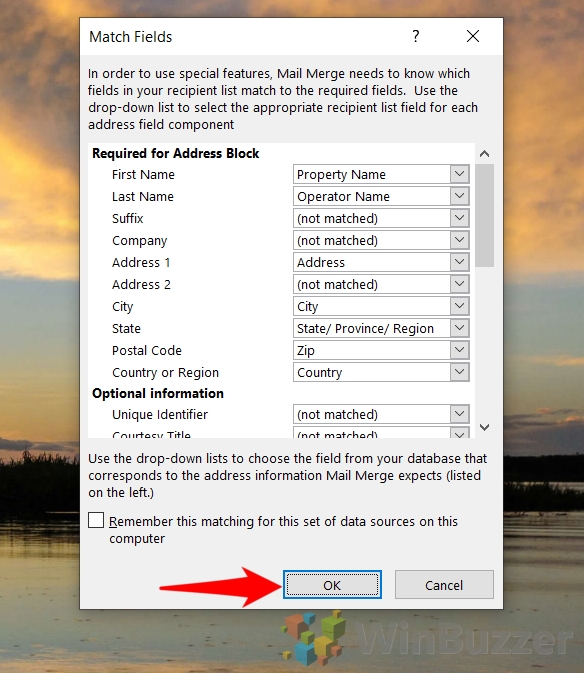
- In the “Required for Address Block” section, match the fields to your column names
If they don’t line up exactly, that’s fine. In our case, for example, “Property Name” and “Operator Name” take the place of first and last name. Press “OK” when you’re done.

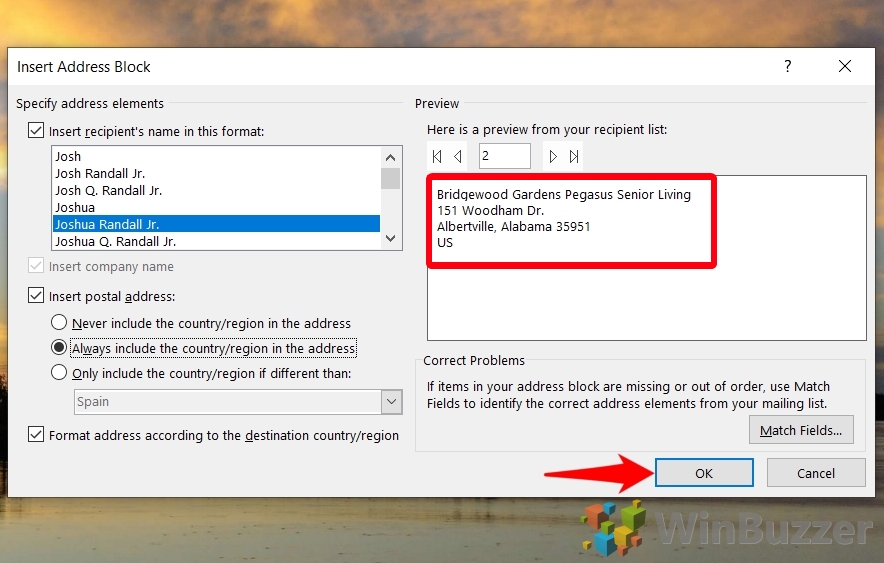
- Check the preview in the “Insert Address Block” window and check the preview
If you’re happy with it, press “OK”. Otherwise, you may need to modify your fields again.

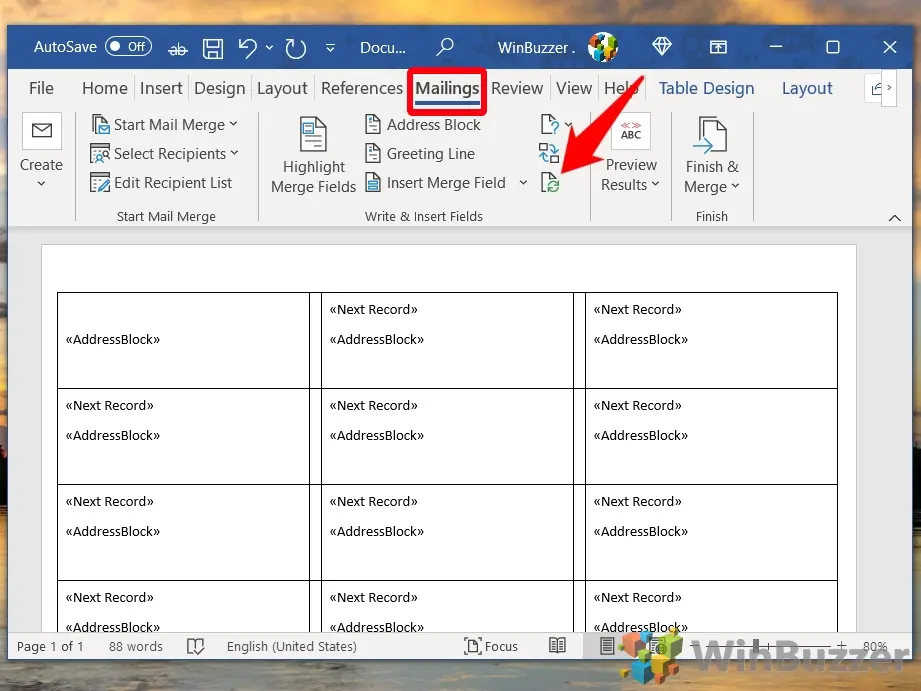
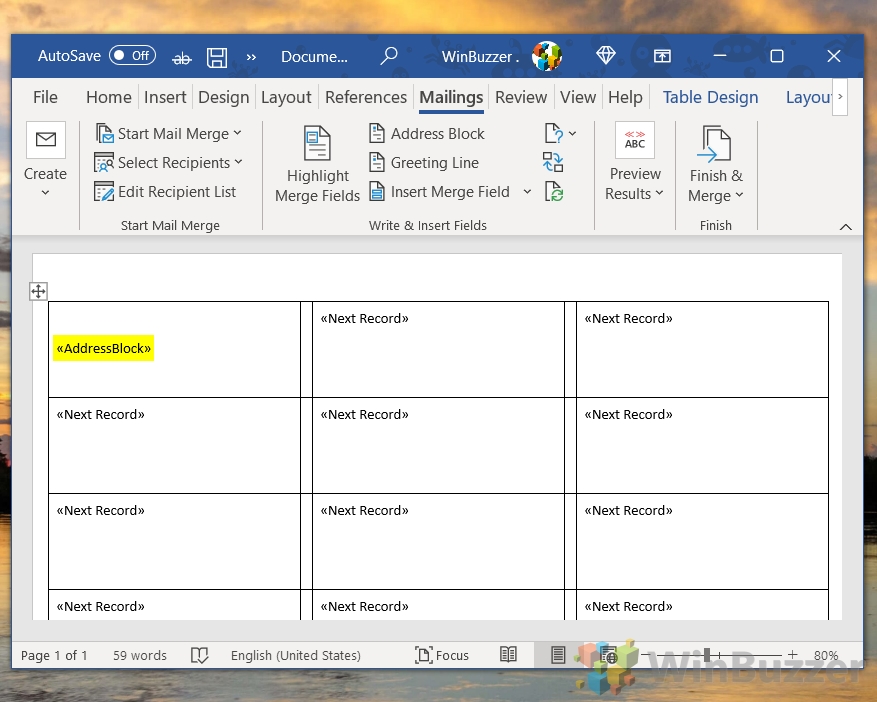
- Check whether “AddressBlock” appears in your first label

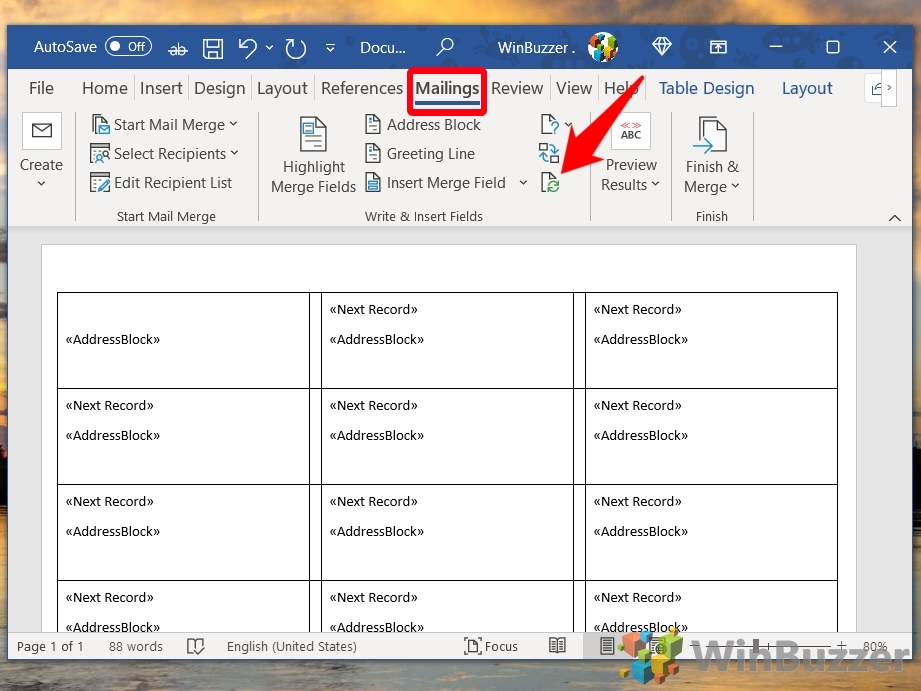
- If it does, open the “Mailings” tab again and press the green “Update labels” button
“AddressBlock” will now appear in all of your labels.
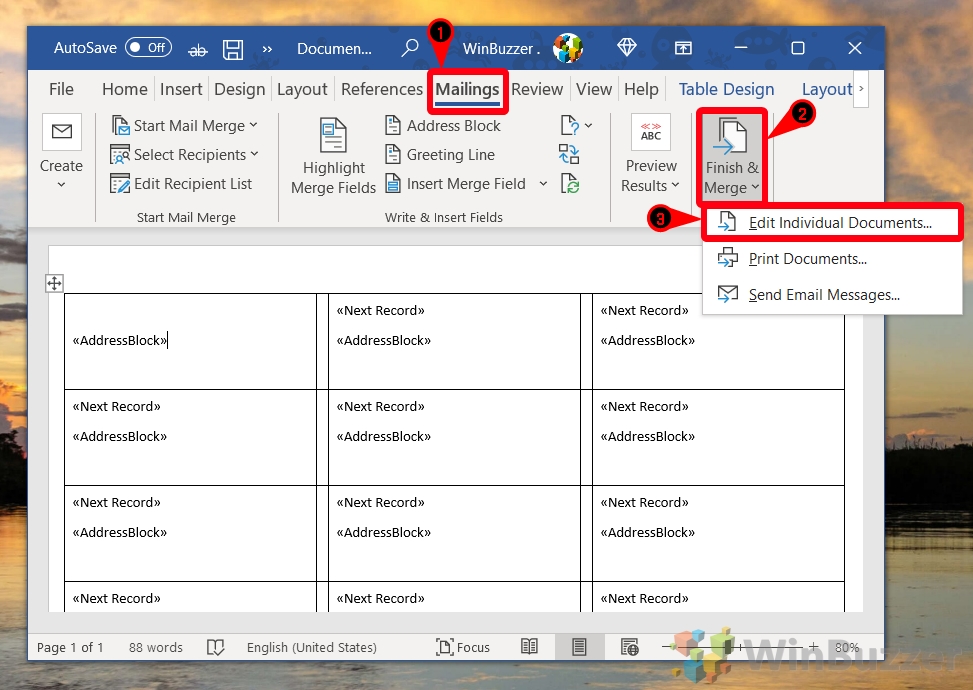
- Perform your final mail merge
Open the “Mailings” tab again and click on “Finish & Merge”, then “Edit Individual Documents…”.

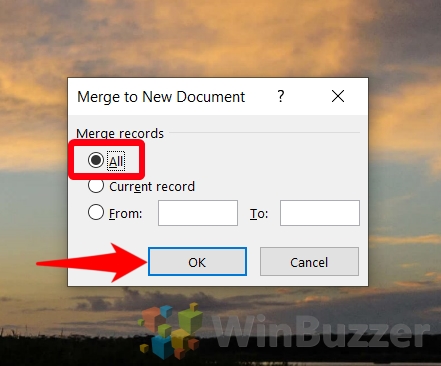
- Tick “All” in the “Merge to New Document” window and press “OK”

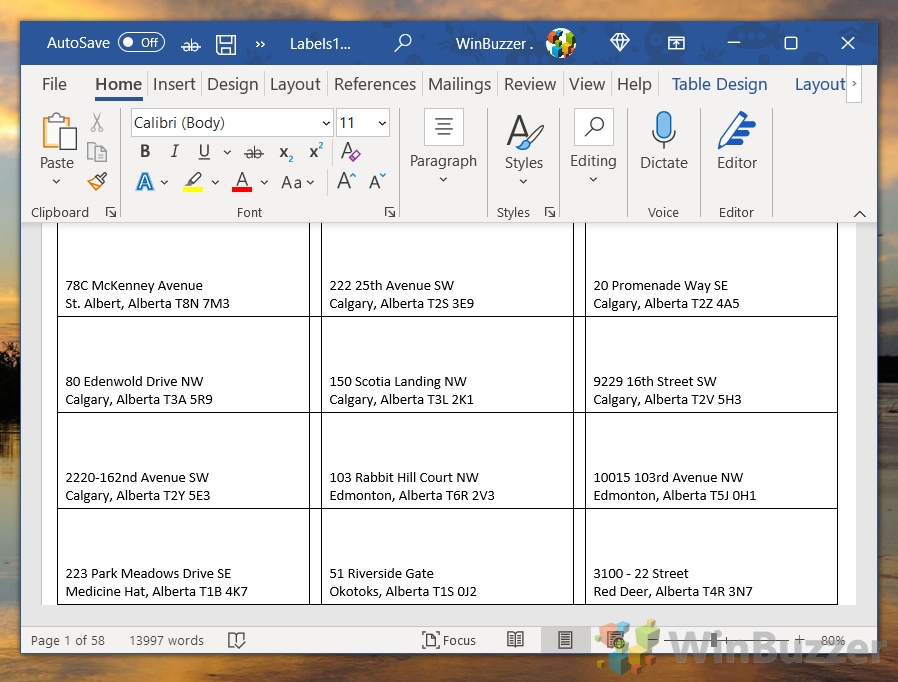
- Print your address labels
With all of your addresses imported, you can finally print your labels and send off your mail. Remember to save the document in case you need to reprint any of them.
Before printing on your actual label sheets, print a test page on standard paper to check the alignment and formatting. Adjust as needed.


FAQ – Frequently Asked Questions About
Can I automate the Mail Merge process for repeated label printing tasks?
Absolutely, by leveraging Word’s Step by Step Mail Merge Wizard, you can not only automate but also simplify the process for future tasks. After completing the Mail Merge setup, save your document as a Word template. This strategy allows for the reuse of the setup with different or updated Excel files for subsequent label printing tasks, thus streamlining your workflow and saving you a substantial amount of time. Remember, the template retains your label layout, field alignment, and preferences, requiring only the selection of a new or updated Excel file to refresh the data for new label batches.
How do I merge data from multiple Excel columns into one label field?
To merge data from multiple columns in Excel into a single field in your labels, you can utilize the “Insert Merge Field” option in Word during the Mail Merge setup. First, manually insert placeholders for the data you wish to merge into one field on your label. Then, by concatenating these fields (using the “&” symbol or through the “Match Fields…” dialogue), you can customize and structure your address layout or any field to include multiple data points from your Excel sheet. For example, creating a full name from separate first and last name columns or combining street address and apartment number. This flexibility allows for personalized and precise control over the information on your labels.
How do I troubleshoot printer alignment issues when printing labels?
Printer alignment issues can often be the most frustrating part of printing labels. To troubleshoot, make sure you have accurately chosen the label size that matches your physical label sheets within Word’s Mail Merge setup. Additionally, it’s prudent to adjust Word’s page setup margins and your printer’s alignment settings as needed. Always print a test page on a regular piece of paper first. After the test print, compare the alignment by laying the test page over the label sheet and holding them both up to a light source. This will show if the printed addresses align correctly with the label sections. If misalignments occur, go back and make necessary adjustments in your document or printer settings. This trial and error process helps ensure perfect alignment before using your actual label sheets, thus avoiding wastage.
Is it possible to use Google Docs for Mail Merge tasks?
While Google Docs does not offer a built-in feature for Mail Merge as Microsoft Word does, there are third-party add-ons available that can enable similar functionality. One such add-on is “Yet Another Mail Merge”, which integrates with Google Sheets and Google Docs to perform Mail Merge operations. This approach requires setting up your mailing list in Google Sheets, similar to how you would in Excel. Then, using the add-on, you can link your Google Docs template to the Sheets data and create personalized documents or labels. This method provides a viable alternative for users who prefer to work within the Google ecosystem or do not have access to Microsoft Office products.
How do I handle Excel entries with special characters during a Mail Merge?
Handling Excel entries with special characters during a Mail Merge requires attention to detail to ensure data integrity. Before importing your Excel file into Word for the Mail Merge, review your data for special characters that might conflict with Word’s formatting or cause errors. Use Word’s “Find and Replace” feature after importing your data to correct any discrepancies resulting from special characters. Additionally, it’s essential to avoid using complex or non-standard characters in column headers as they might not be recognized correctly during the merging process. This proactive approach ensures a smoother Mail Merge process and prevents potential data mishandling.
What are some eco-friendly practices for printing address labels?
Adopting eco-friendly practices for printing address labels not only benefits the environment but can also help reduce office supply costs. Consider using recycled or sustainably sourced label sheets to minimize the environmental impact. When printing drafts or performing alignment checks, print on reused paper or the back of non-sensitive documents to reduce waste. Selecting a printer’s draft or eco-mode for test prints can save ink. Where feasible, digitize mailings to eliminate the need for physical labels altogether. Additionally, research and opt for environmentally friendly ink and toner options compatible with your printer. These practices collectively contribute to more sustainable office operations.
How can I secure my mailing list data when printing labels?
Securing your mailing list data is of paramount importance, especially when handling sensitive or personal information. Ensure your Excel and Word files are stored in a secure, password-protected directory on your computer or network. Consider using file encryption for an additional layer of security. Implement strong, unique passwords, and enable two-factor authentication if your files are stored in a cloud-based service. Regularly update your cybersecurity software to protect against malware and unauthorized access. Limit access rights to the files to only those individuals who need them for their tasks, and make sure to educate them on the importance of data privacy and security protocols.
What strategies exist for managing large mailing lists in Excel?
Managing large mailing lists in Excel efficiently requires utilizing the software’s advanced features. Employ sorting and filtering tools to organize data based on specific criteria, making it easier to handle and visualize. Implement data validation rules to ensure that all entries adhere to a specified format, reducing the likelihood of errors or duplicates. Utilize conditional formatting to highlight important information or anomalies within the list. Pivot tables can be particularly useful for summarizing and analyzing large datasets, offering insights that can help with segmentation or targeted mailings. Lastly, keeping your list segmented by categories (e.g., geographical location, customer type) can facilitate more targeted and effective communication strategies.
How do I track version history for my mailing list in Excel?
Tracking version history for your mailing list in Excel is crucial for maintaining data integrity, especially when multiple individuals update the file over time. If using Microsoft 365’s Excel Online, the version history is automatically maintained and can be accessed under the “File” menu, enabling you to see who made changes and when. For desktop versions, a manual approach of saving incremental versions with dated filenames can be effective. Alternatively, consider using cloud storage solutions like OneDrive, Google Drive, or Dropbox, which offer built-in version history tracking and backup capabilities. This allows for the recovery of previous versions in case of accidental deletions or undesired changes.
Are custom label sizes supported in the Mail Merge process?
The Mail Merge feature in Word does support custom label sizes, granting the flexibility needed for unique label printing projects. When setting up your labels in Word’s “Labels” options, you can select “New Label…” to input the specific dimensions of your label sheets. This includes width, height, page margins, and spacing between labels, ensuring that the printed content aligns perfectly with your custom label stock. It’s crucial to measure your labels accurately and enter these dimensions correctly to avoid printing alignment issues. This feature is particularly beneficial for creating labels for special projects that require sizes not covered by standard templates.
Can I print different addresses on a single sheet of labels?
Indeed, the core functionality of the Mail Merge process is designed to facilitate the printing of different addresses or data entries on a single sheet of labels. Each row in your Excel spreadsheet should correspond to a unique label on the sheet. When you link your Excel file during the Mail Merge setup in Word and insert the address block or specific fields, Word dynamically pulls this information from the Excel file, placing each entry onto individual labels within your document. This process ensures a streamlined approach to creating personalized labels for mailings, invitations, or any project requiring unique entries per label.
How do I adjust text size and font in Mail Merge labels?
Customizing the text size and font in Mail Merge labels is straightforward and follows the same principles as editing any text in Word. Once you have inserted your address block or specific merge fields into the label document, simply highlight the text you wish to customize. You can then use Word’s home toolbar to adjust the font, size, color, and other properties to fit your design preferences. It’s important to note that these changes will apply to all labels if you’ve updated all labels through the “Update Labels” button. Consider the label size and the amount of text to ensure readability and a professional appearance for your labels.
Can I include images or logos in Mail Merge labels?
Incorporating images or logos into your Mail Merge labels is a great way to add a professional touch or brand identity. After setting up your label document in Word, insert your image or logo in the desired location on one of the labels. You can resize and position the image as needed. Once satisfied, select the layout option that enables the text (address or other information) to wrap around or overlay the image if desired. Then, use the “Update Labels” button to replicate the layout with the image across all labels. This process ensures that each label printed will include the consistent placement of your image or logo alongside the personalized text.
How can I ensure accurate zip code formatting from Excel to Word?
Ensuring accurate formatting for zip codes, especially when they begin with leading zeros, is crucial for the correctness of your mailing labels. In Excel, before performing your Mail Merge, format the cells containing zip codes as ‘Text.’ This preserves any leading zeros or specific formatting. To do this, right-click on the column header, choose “Format Cells“, and then select “Text” under the Number tab. When you proceed with your Mail Merge in Word, the zip codes will import exactly as they appear in Excel, maintaining the integrity of your mailing addresses. This step is particularly important for ensuring that your mail reaches its intended destination without delay.
What’s the best way to test the final print layout before printing on label sheets?
To avoid wasting label sheets on incorrect layouts, the best practice is to conduct a thorough test print onto regular paper. First, ensure your document is correctly set up in Word with the accurate label size and layout. Print a test page using the same print settings that you will use for your final labels. After printing, take this test page and place it on top of your label sheet. Hold both against a light source to see if the printed addresses align properly with the individual labels on the sheet. This visual check allows you to adjust the layout or printer settings as needed. Repeat the test as necessary until you achieve perfect alignment, ensuring a professional outcome for your actual label printing.
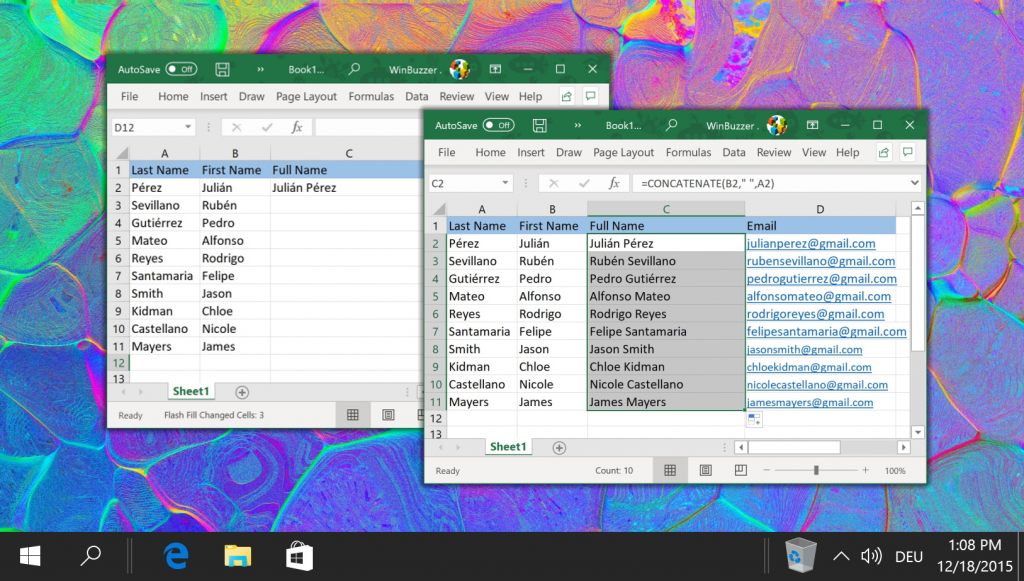
Related: How to Combine Text Cells in Excel
If you’ve spent much time in Excel, you’ll know the pain that comes with creating a large spreadsheet, only to realize it needs adjusting. Thankfully, though, this doesn’t always need to be time-consuming. You can use the concatenate command to combine text cells in Excel without data loss.
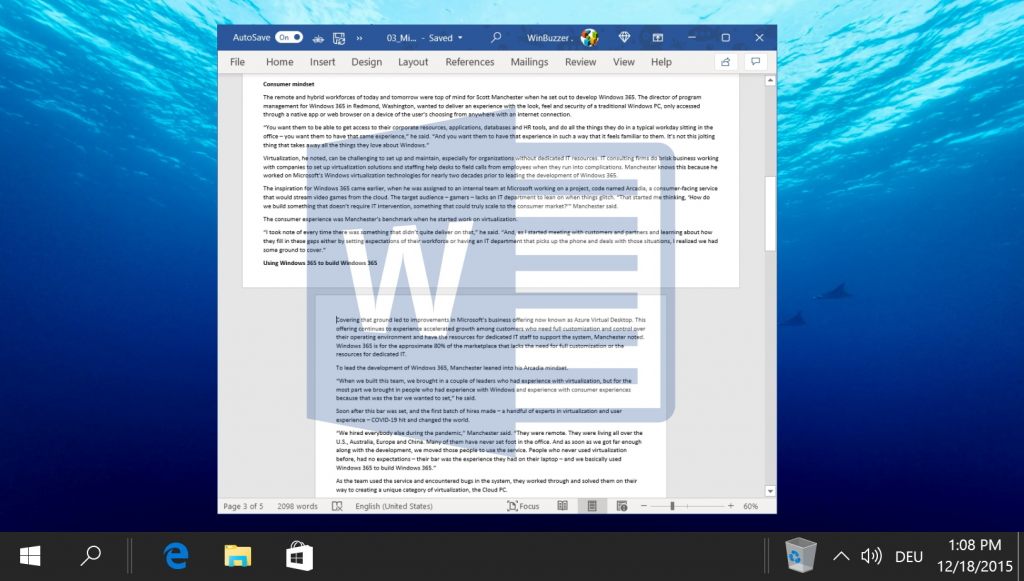
Related: How to Make a Page Landscape in Word
Most of the time when you create a Word document, you want it in either landscape or portrait. Sometimes, though, you want a single page landscape – to display an image for example. Doing so, however, isn’t as easy as you might expect. As a result, we’re going to show you how to make one page landscape in Word using a couple of tricks.
Last Updated on March 31, 2024 3:17 pm CEST by Markus Kasanmascheff


