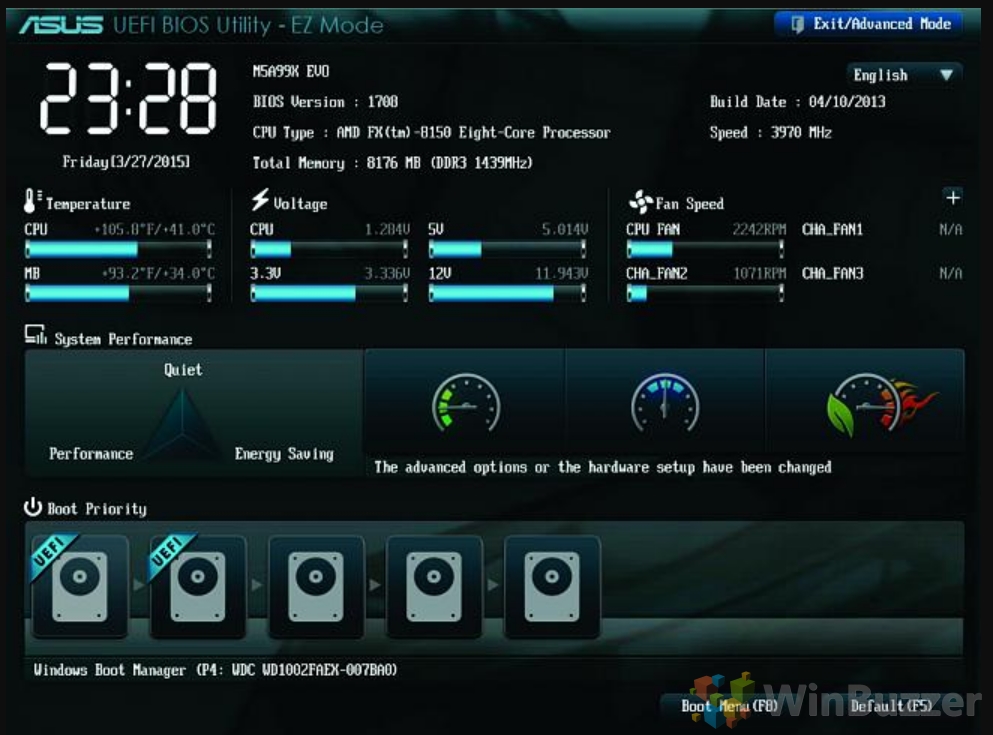
Being able to access UEFI / BIOS on your Windows machine is essential if you want to change certain firmware and hardware settings. Unfortunately, however, as BIOS / UEFI are pre-boot environments, you can't access them from your regular OS interface. Not to worry, though – today we're going to show you how to enter UEFI / BIOS on Windows 11 and Windows 10.
UEFI vs BIOS: What’s the difference?
You may have noticed that we're using the terms UEFI and BIOS almost interchangeably in this guide. So, is there any real difference between the two? The answer is yes.
UEFI and BIOS are two of the most popular motherboard firmware interfaces. They act as translators between an operating system and its hardware, initializing components and allowing users to change certain settings.
The main difference between BIOS and UEFI is their age. UEFI is a more modern solution, supporting faster boot times, better security, and larger hard drives. Unlike UEFI, BIOS can only support hard drives of up to 2.1 TB and must run in a 16-bit processor mode. Additionally, it does not support cursors and a modern graphical interface.
There are also differences between how each functions. BIOS, for example, stores its bootloader data in the MBR format on the first sector of the HDD. This can be more easily corrupted than UEFI, which uses the GUID Partition Table (GPT) and built-in redundancy checks.
As a result of all of these advantages, basically any PC or laptop you buy today will be using UEFI instead of BIOS. However, it is still referred to as “BIOS” by some manufacturers to avoid confusion, and many people use “BIOS” to refer to any pre-boot interface. As a result, we'll be using both in this guide.
With that important distinction out of the way, here's how to enter BIOS / UEFI in Windows 11 and Windows 10.
How to Enter UEFI on Windows 11 via System Recovery
While there may be a key you can press to access BIOS, this varies between OEMs. It could be Del, F1, F2, F10, F12, or even Esc. On top of this, modern PCs boot so quickly that it can be difficult to find and press the key in time.
As a result, we'll be showing you how to get to BIOS on Windows 11 using the Settings interface instead. To do this we'll make use of Windows' Advanced Startup Options:
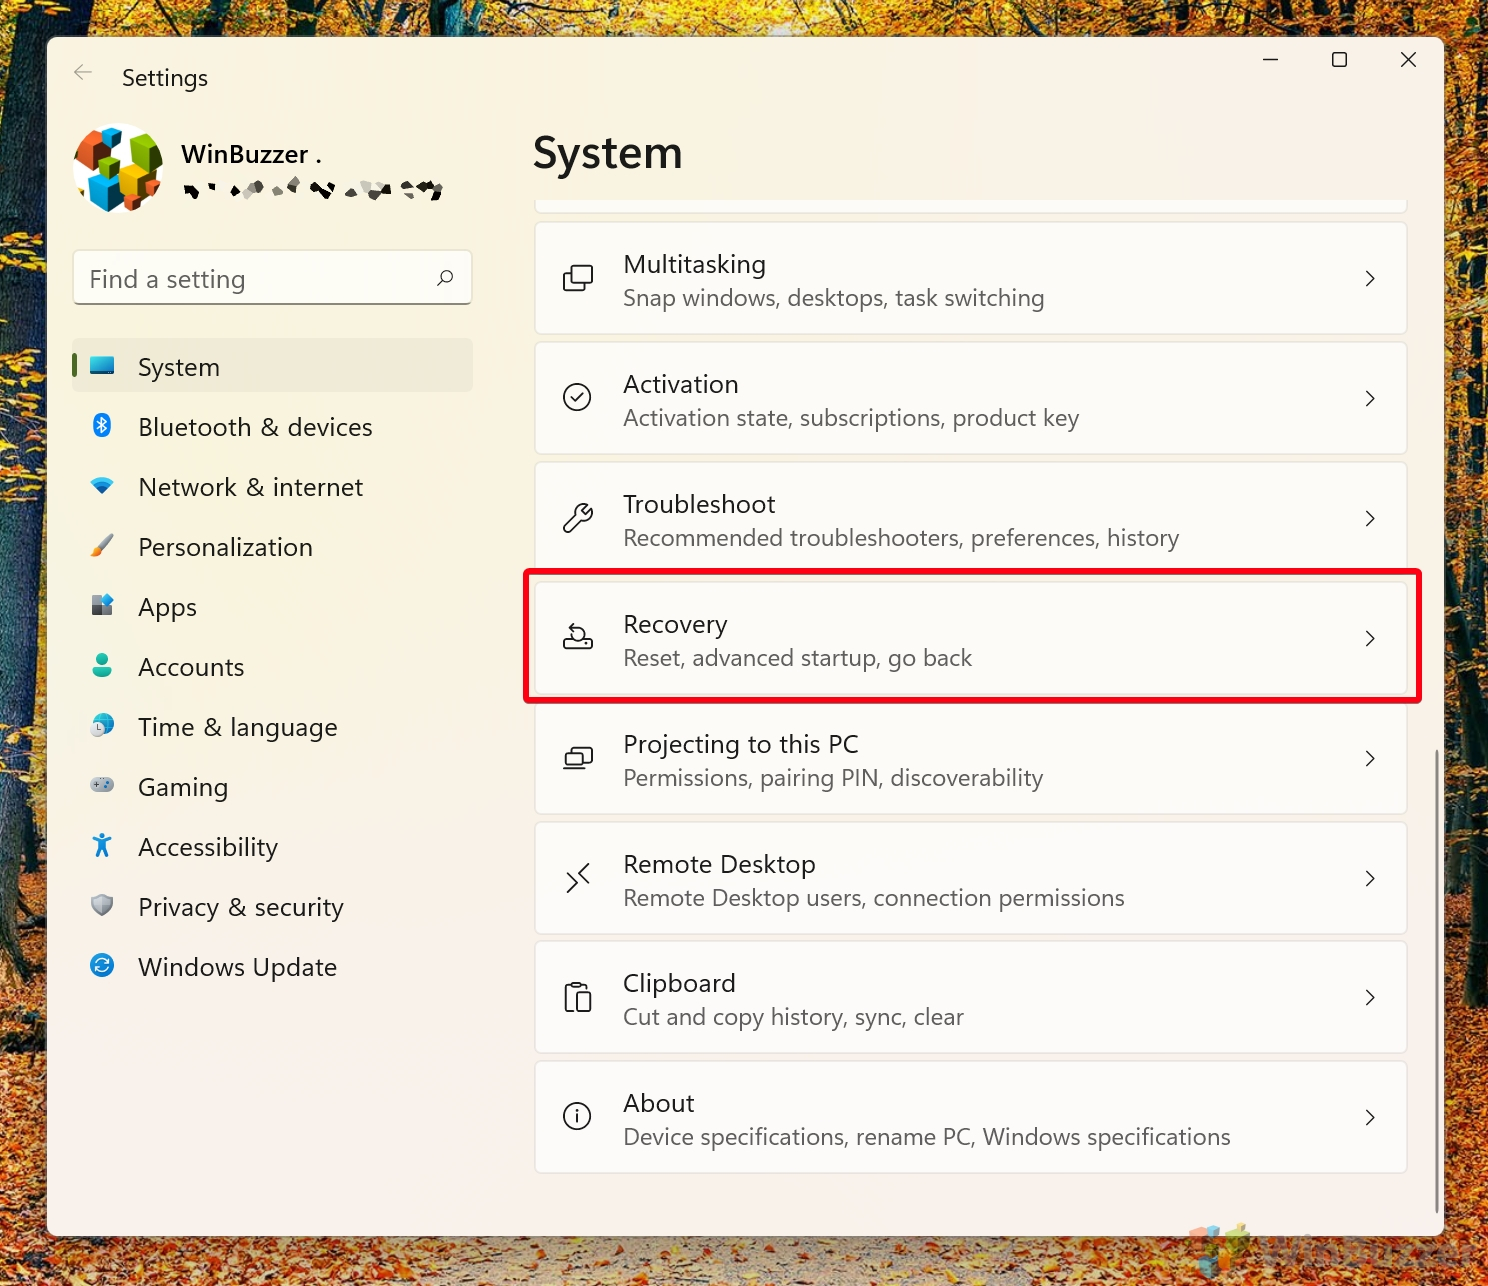
- Open Settings and click the “Recovery” heading
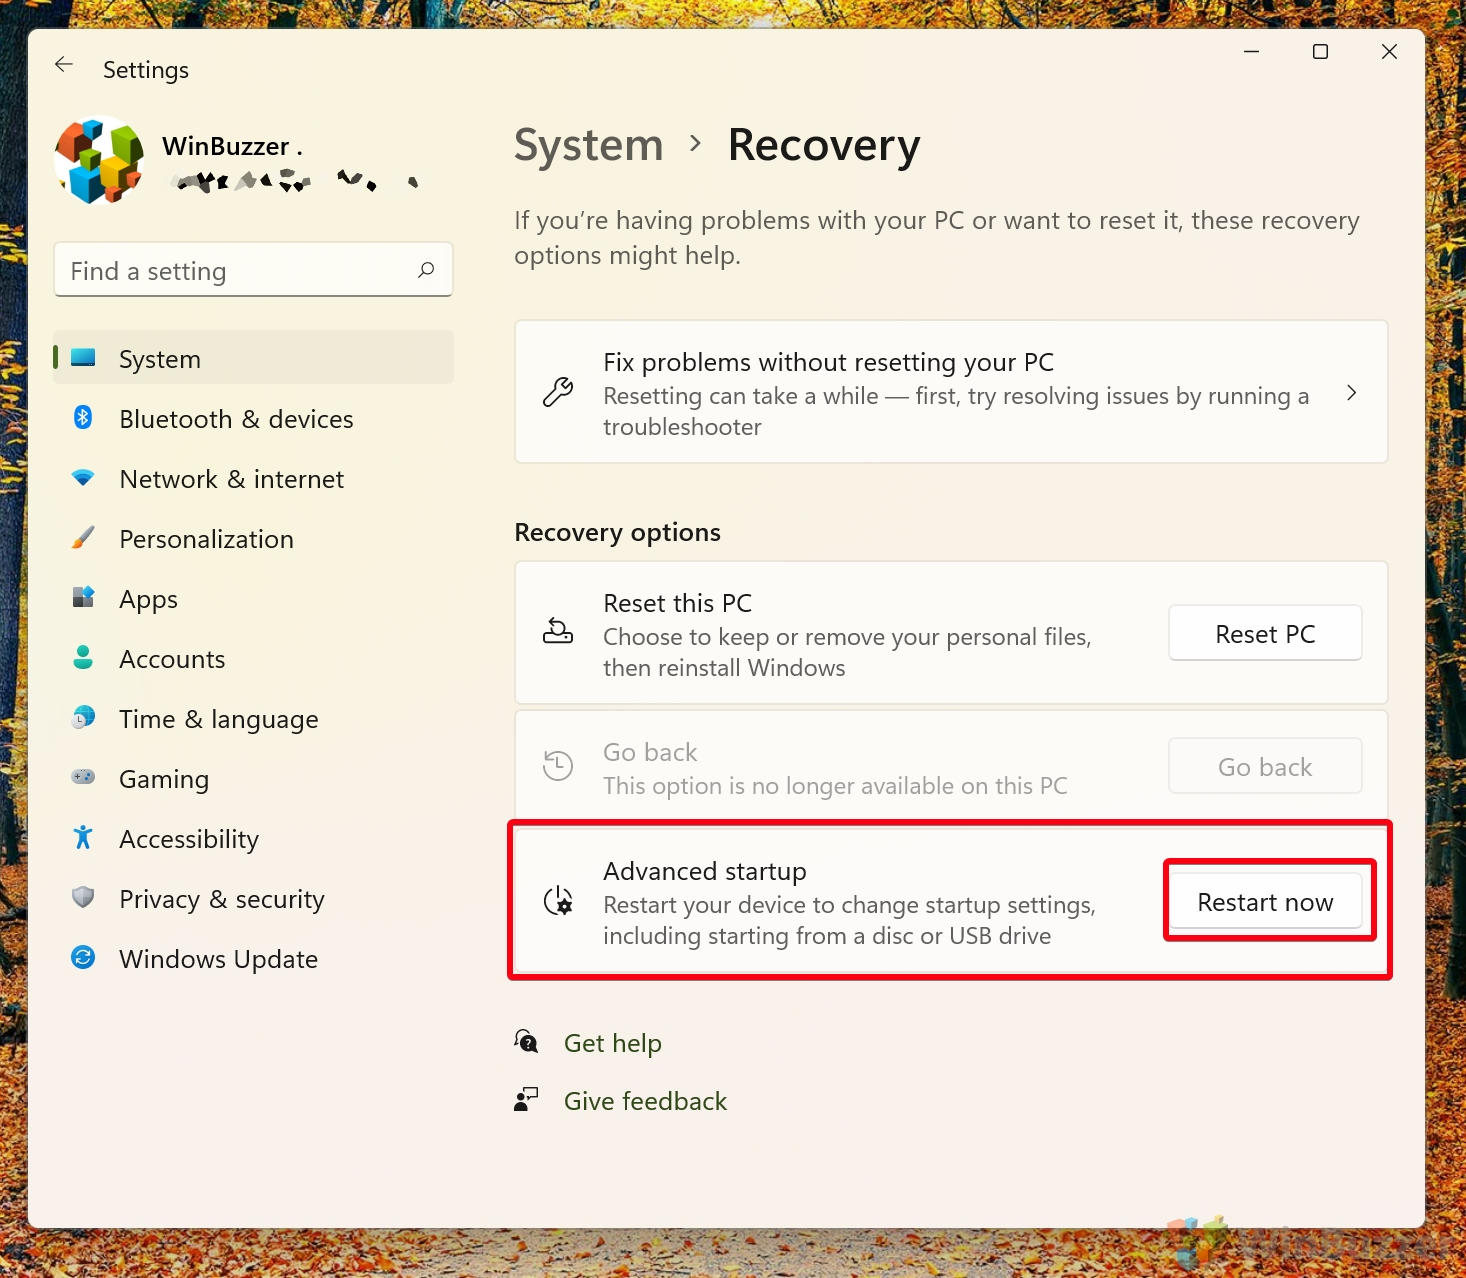
- In the “Advanced startup” section, press “Restart now”
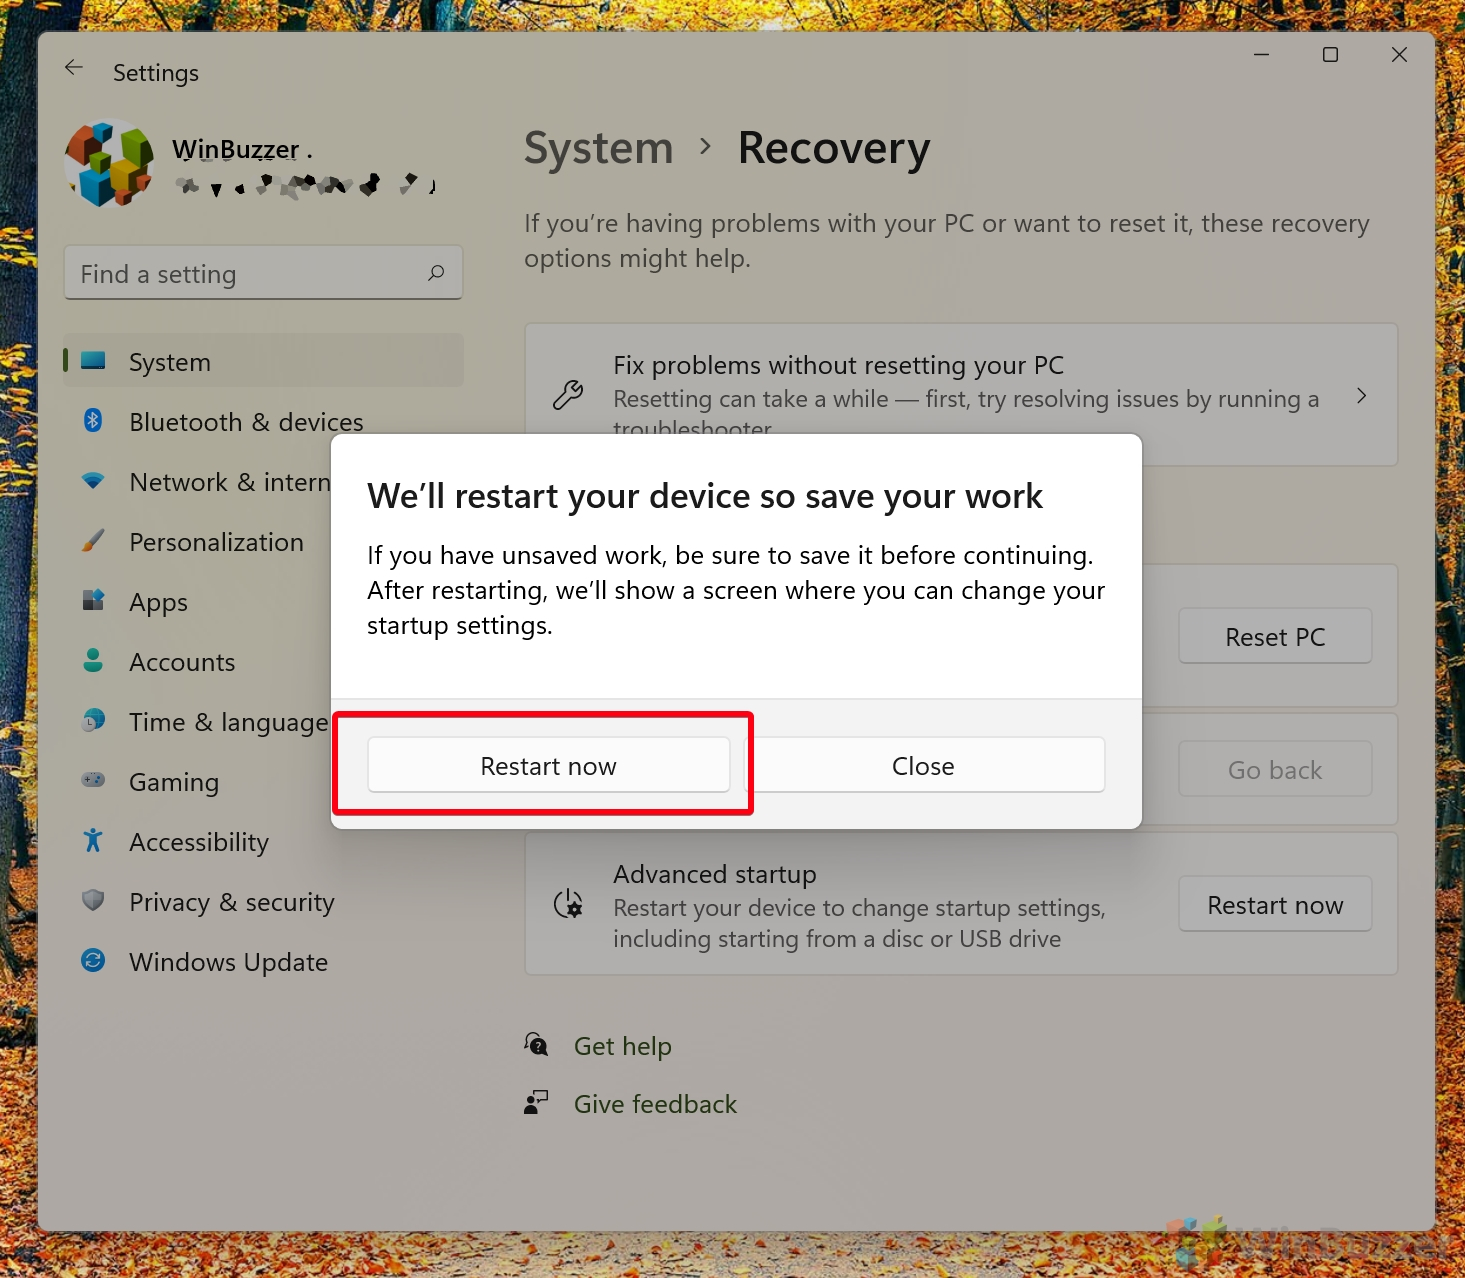
- Click “Restart now”
As prompted, you should save any open documents before you do so. - Wait for your PC to start
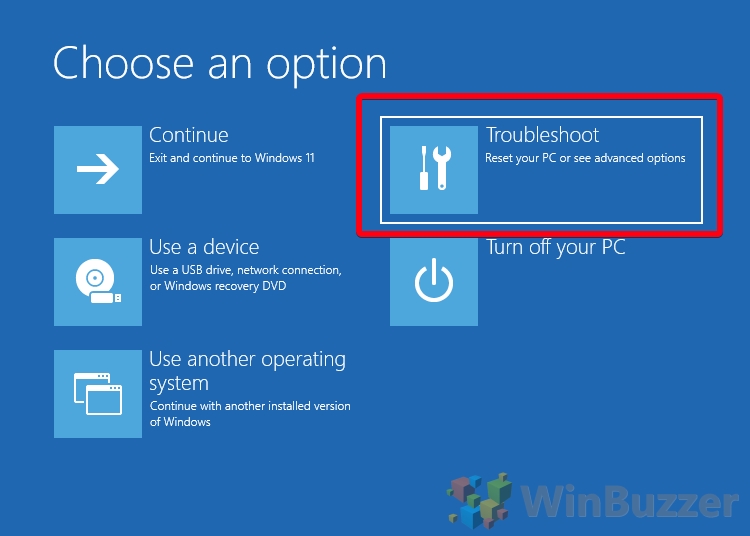
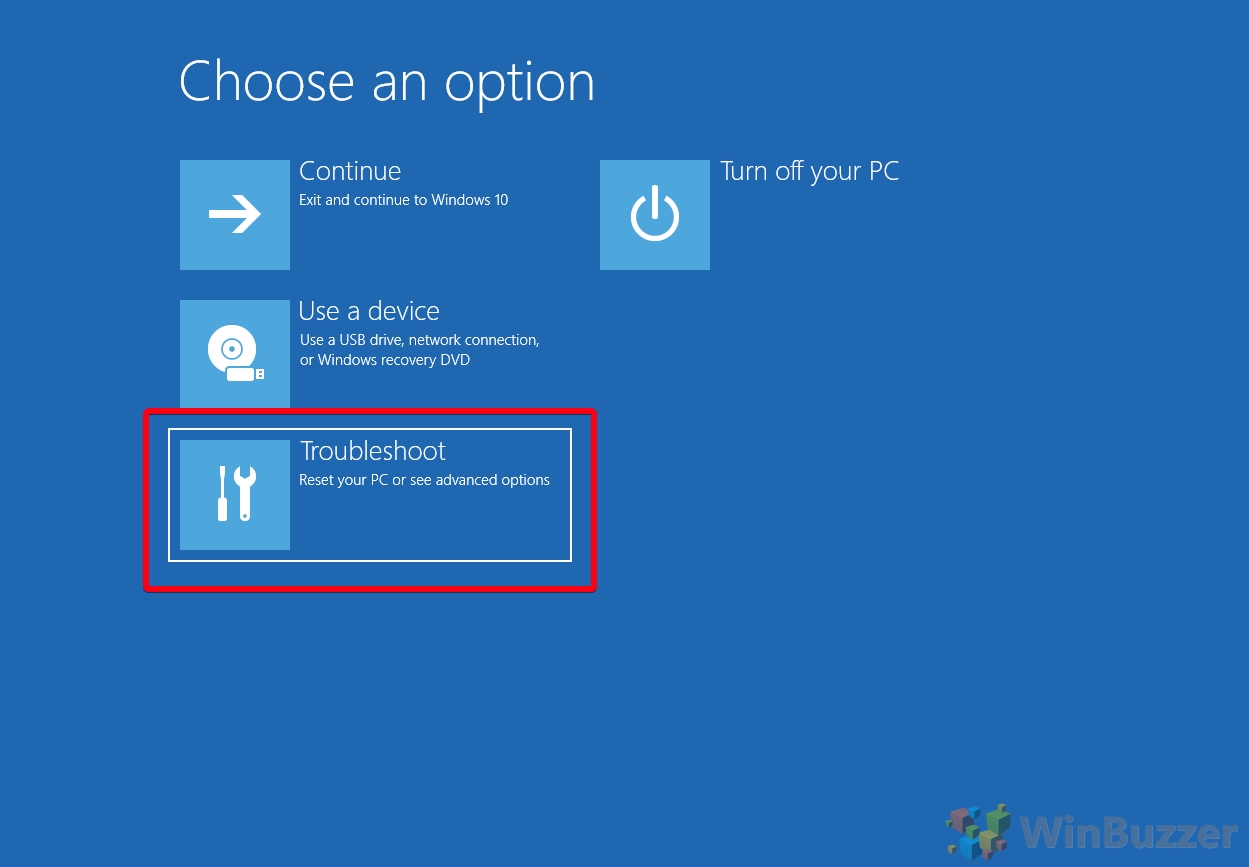
- Press “Troubleshoot” on the “Choose an option” screen
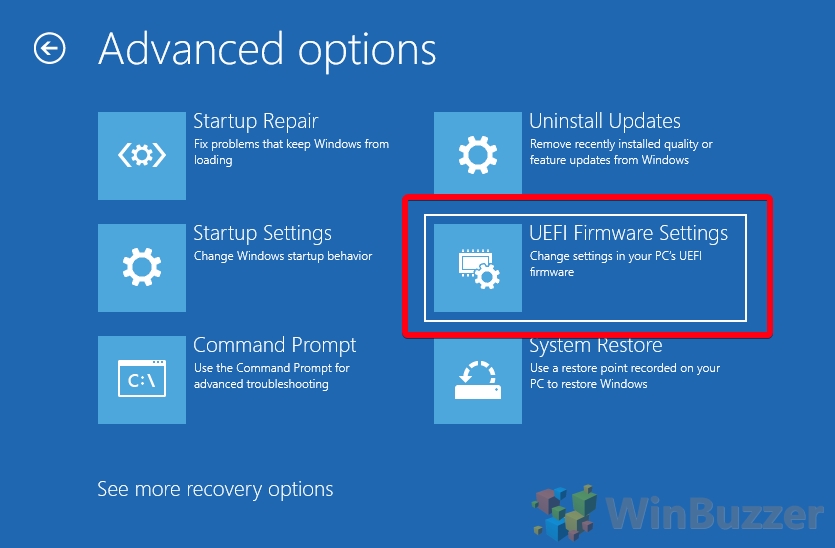
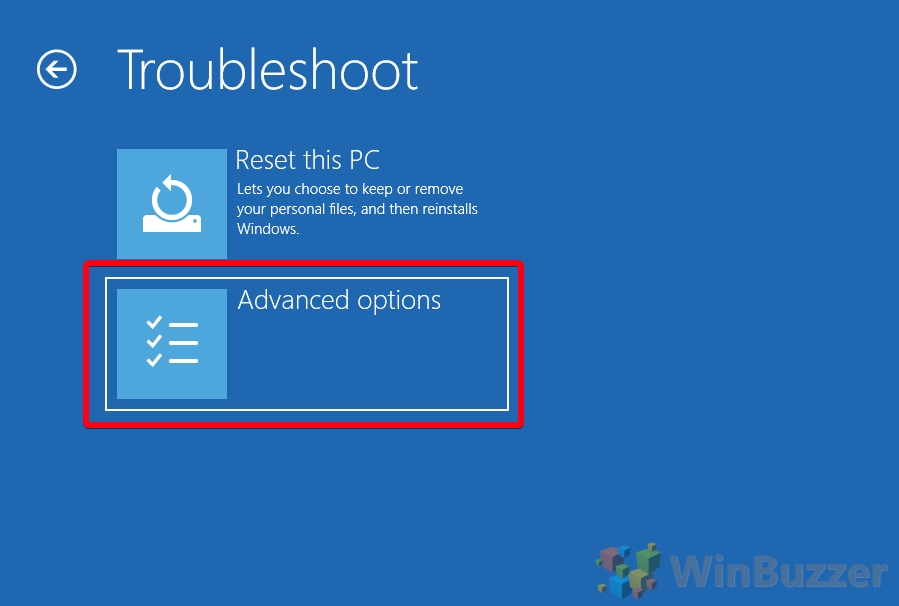
- Click “Advanced options”
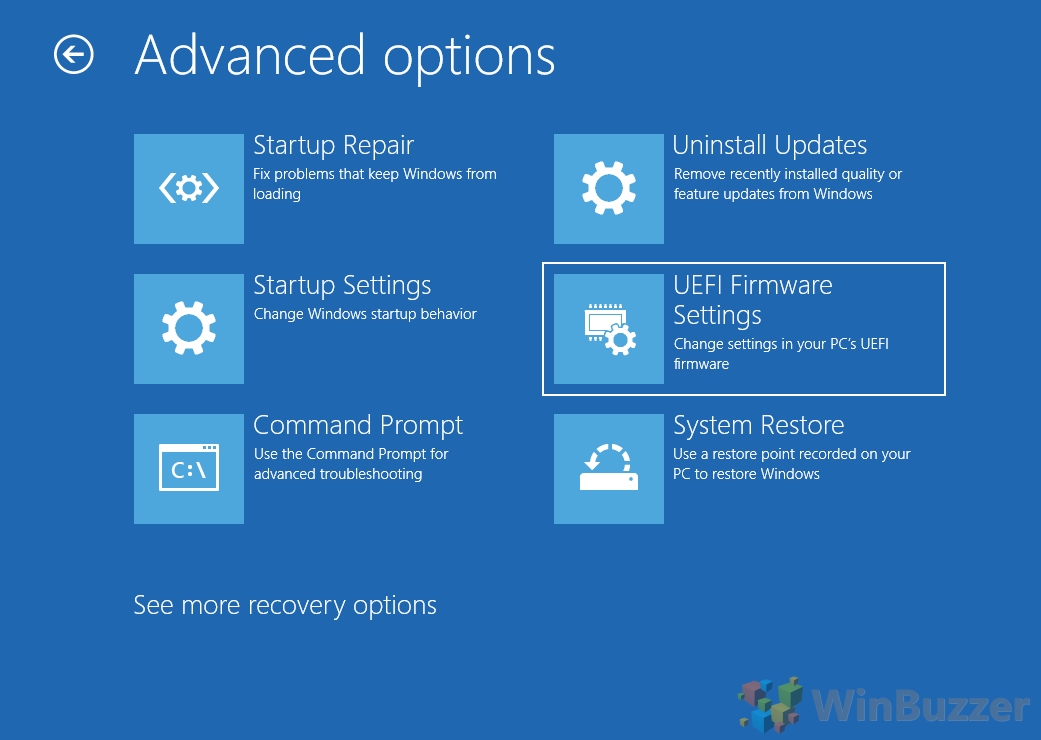
- Press “UEFI Firmware Settings”
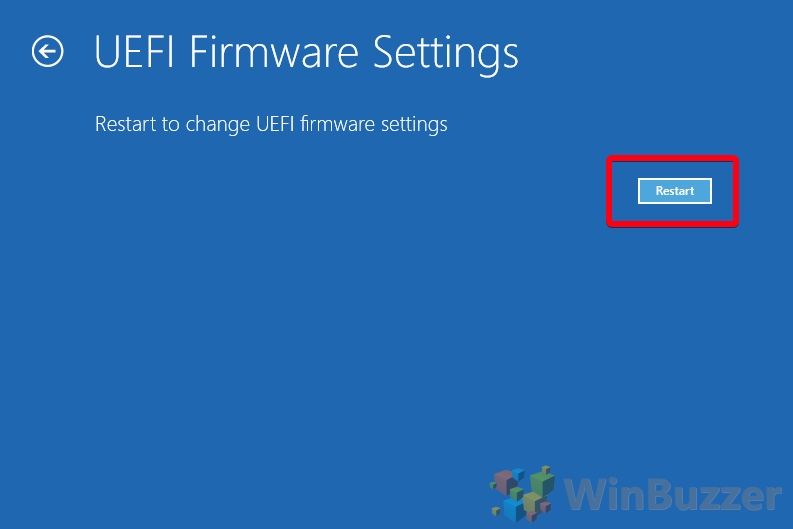
- Click “Restart”
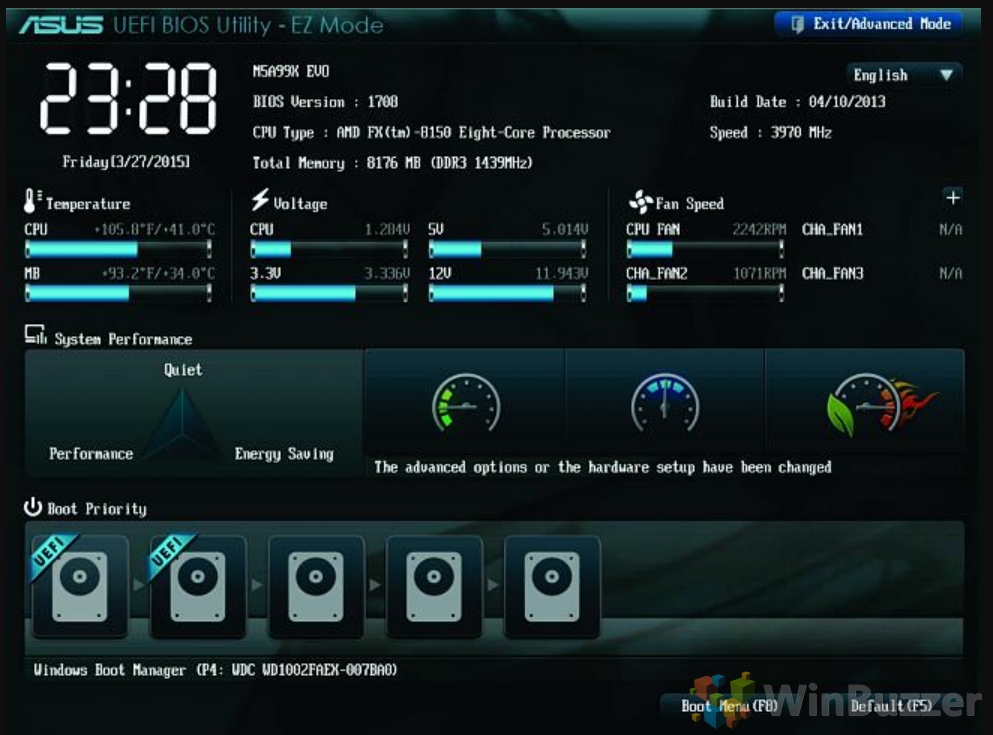
- Make your BIOS / UEFI changes as necessary
Upon restart, your PC will exit Advanced Startup Options and boot as it normally does.
How to Boot into UEFI on Windows 10 via Update & Security
Similarly to Windows 11, you can try one of the many BIOS keys as your computer boots, but it's easier to just skip all that and get there via your Settings interface. This is how to get to BIOS in Windows 10:
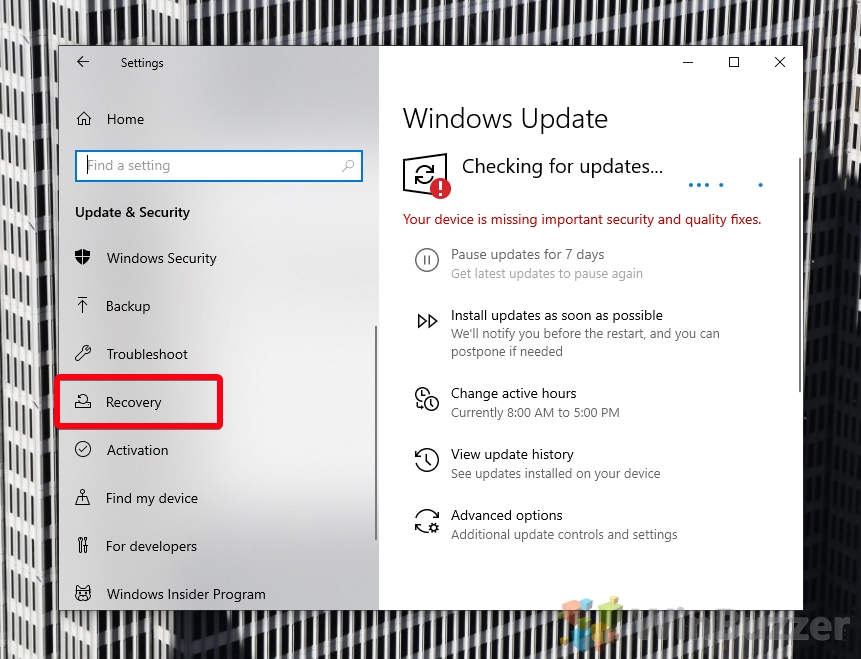
- Open Settings and click on “Update & Security”
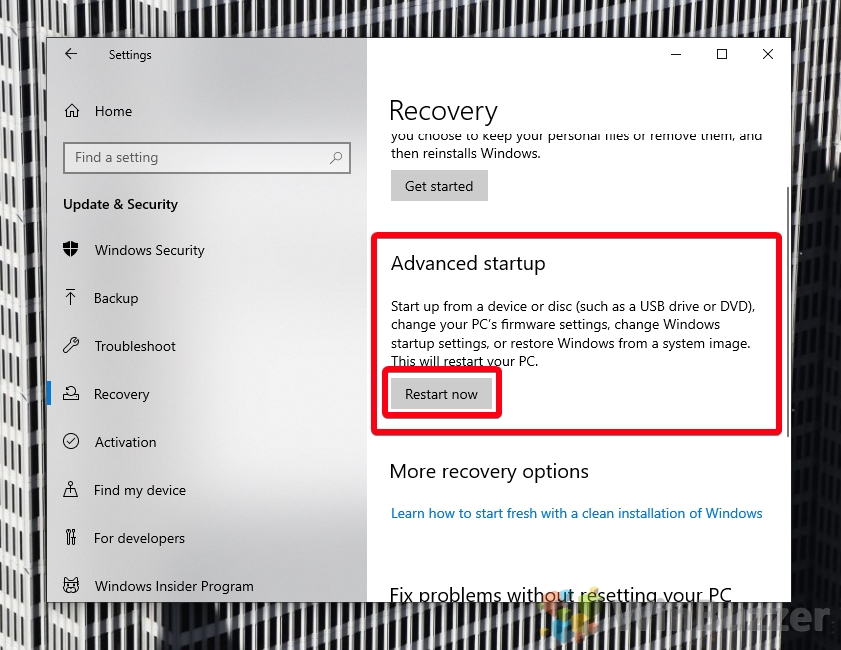
- Select “Recovery” in the sidebar and click “Advanced options”
- Look for the “Advanced startup” heading and click “Restart now”
- Wait for your PC to restart
- Press “Troubleshoot” on the “Choose an option” screen
- Click on “Advanced options”
- Select UEFI Firmware Settings
Your PC will automatically reboot into UEFI / BIOS. - Make any modifications to your UEFI / BIOS and save them
Upon restart, your PC will exit Advanced Startup Options and boot as it normally does.
How to Boot to Advanced Startup Options on Windows 10
Entering Windows 10 boot options gives you access to various tools that aren't commonly available. From it, you can access command prompt, enter safe mode, perform a system restore, and uninstall updates. In our other guide, we show you all possible ways to boot into Advanced Startup Options, using settings, the shutdown menu, a recovery drive, an USB or DVD and the “Choose an Operating System” screen.

Extra: How to Boot to Safe Mode in Windows
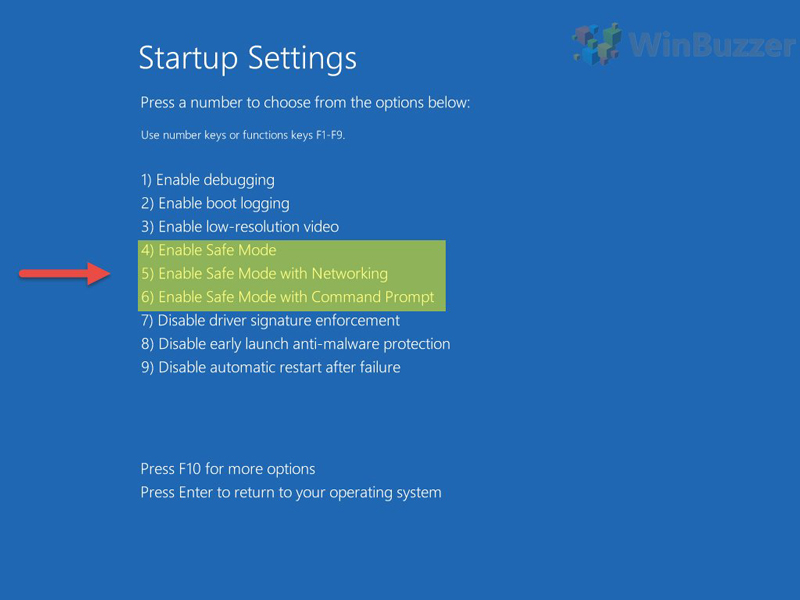
While you're fiddling around with your Advanced Startup Options, you may want to learn how to enter Safe Mode in Windows 10 and Windows 11. This useful mode can help solve issues if your PC won't boot normally. Once you're done, be sure to follow our guide on how to get out of Safe Mode.
Extra: How to Disable Windows 11 or Windows 10 Fast Startup
If you'd really rather just hit a button on startup to enter BIOS / UEFI in Windows, you should consider following our guide on how to disable fast startup in your Control Panel. This will give you a bit more time without seriously slowing down the boot process.

UEFI BIOS FAQ – Frequently Asked Questions
What is UEFI BIOS?
UEFI BIOS is a modern firmware interface for computers, enhancing hardware initialization and system settings management.
Why is UEFI preferred over traditional BIOS?
UEFI offers faster boot times, better security, support for larger hard drives, and a user-friendly interface.
How do I know if my computer uses UEFI or BIOS?
Check system information in the BIOS/UEFI settings or use system information tools within your OS.
Can UEFI and BIOS coexist on the same system?
No, a system typically uses either UEFI or BIOS, but not both.
How do I update UEFI BIOS firmware?
Download the latest firmware from your motherboard manufacturer's website and follow their update instructions.
What is Secure Boot in UEFI?
Secure Boot is a UEFI feature ensuring only trusted software loads during startup, enhancing security.
Can UEFI improve system performance?
UEFI's efficient design can lead to faster boot and load times.
What is the GPT partition style in UEFI?
GPT (GUID Partition Table) is a partitioning scheme used by UEFI supporting larger hard drives and more partitions than MBR.
How does UEFI affect hardware compatibility?
UEFI may require firmware updates for older hardware to ensure compatibility.
What is the difference between UEFI boot mode and Legacy boot mode?
UEFI boot mode uses the UEFI firmware's boot manager, while Legacy boot mode uses BIOS methods.
Can I switch from Legacy BIOS to UEFI?
Yes, but it often involves changing the partitioning of your hard drive and reinstalling your OS.
Is UEFI more secure than traditional BIOS?
Yes, UEFI offers enhanced security due to features like Secure Boot.
What are the common errors during UEFI booting?
Errors can include boot device not found, security violations, or incompatible file systems.
Can I use UEFI with a virtual machine?
Yes, many modern virtualization platforms support UEFI.
What file systems does UEFI support for boot drives?
UEFI commonly supports FAT32 for boot partitions.


