

Your network profiles in Windows are automatically created when you connect, taking either the SSID of the hotspot or a generic “Network” as their name. However, though few know it, you can use a couple of tools in Windows 10 to change the network name to something more descriptive.
This network profile name will show in the Network and Sharing Center section of the Control Panel. Aside from a neat customization, this can be quite useful for identification, particularly if you have multiple Ethernet connections. Rather than “Network 1” or “Network 2” you can give them descriptive names.
How to change WiFi name or ethernet network name
There are a couple of ways to change network name in Windows 10, but all of them may not be available to you. If you're on Windows 10 home, you'll have to make use of the registry editor to modify the network setting. Windows 10 Pro and above users can instead use the Local Security Policy Editor, which is more user-friendly.
Not to worry though, we'll walk you through both methods. Whichever you choose, you'll be able to change WiFi name or Ethernet name in just a few minutes. Lets' get started:
How to Change Network Policy Name in Windows 10 via the Registry Editor
If you're on Windows 10 Home, the best route to change network name in Windows 10 is the Registry editor. However, you should always be careful when editing the registry and make a backup. You can also read up on best practices and terminology.
With that said, we'll walk you through exactly what you need to modify so there can be no mistakes:
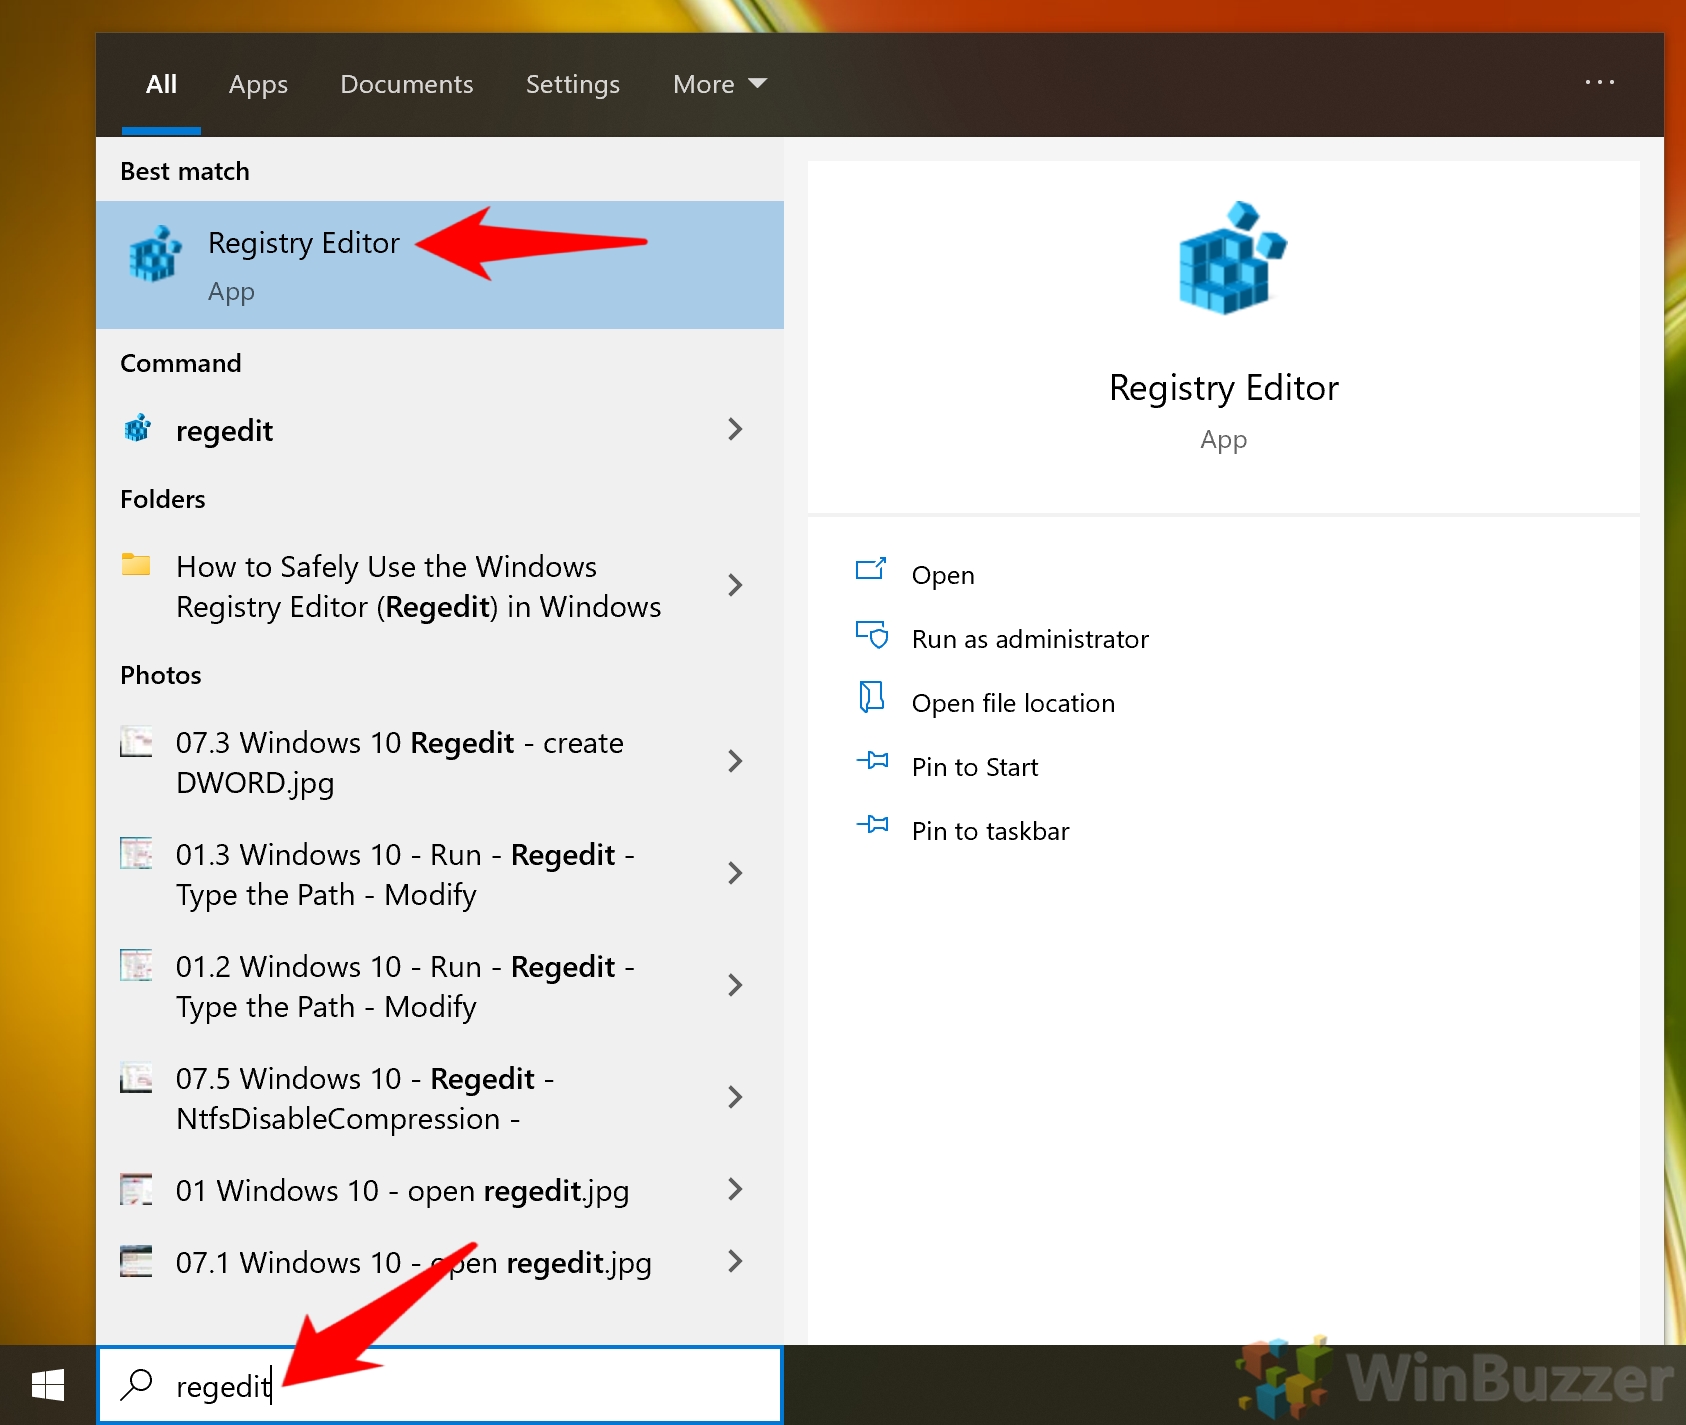
- Open the Registry Editor
Press Start and then type “regedit”. Click the top result.
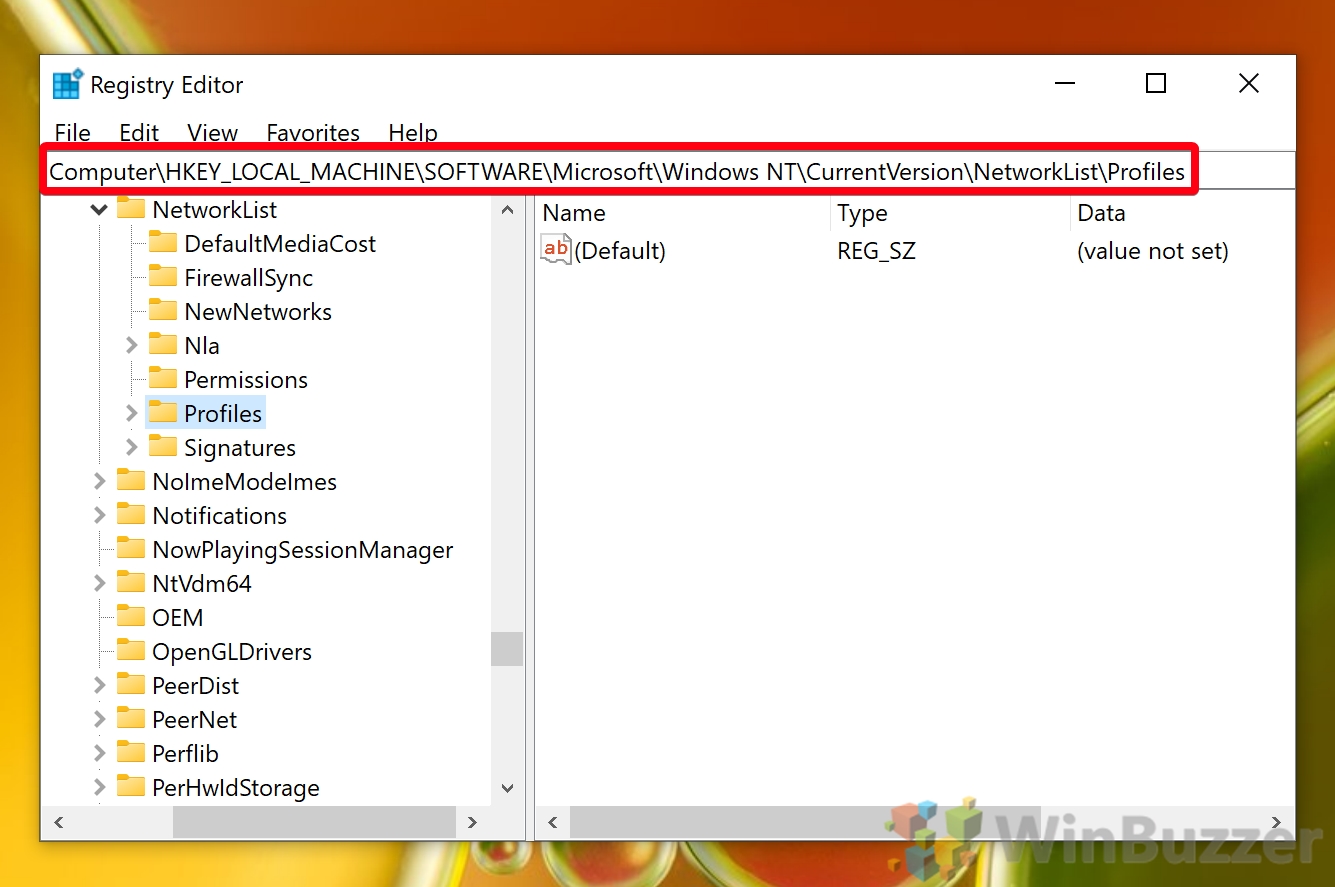
- Navigate to the network profiles key
In your regedit address bar, paste the following:
Computer\HKEY_LOCAL_MACHINE\SOFTWARE\Microsoft\Windows NT\CurrentVersion\NetworkList\Profiles
You can also navigate here manually using the folder structure on the left-hand side.
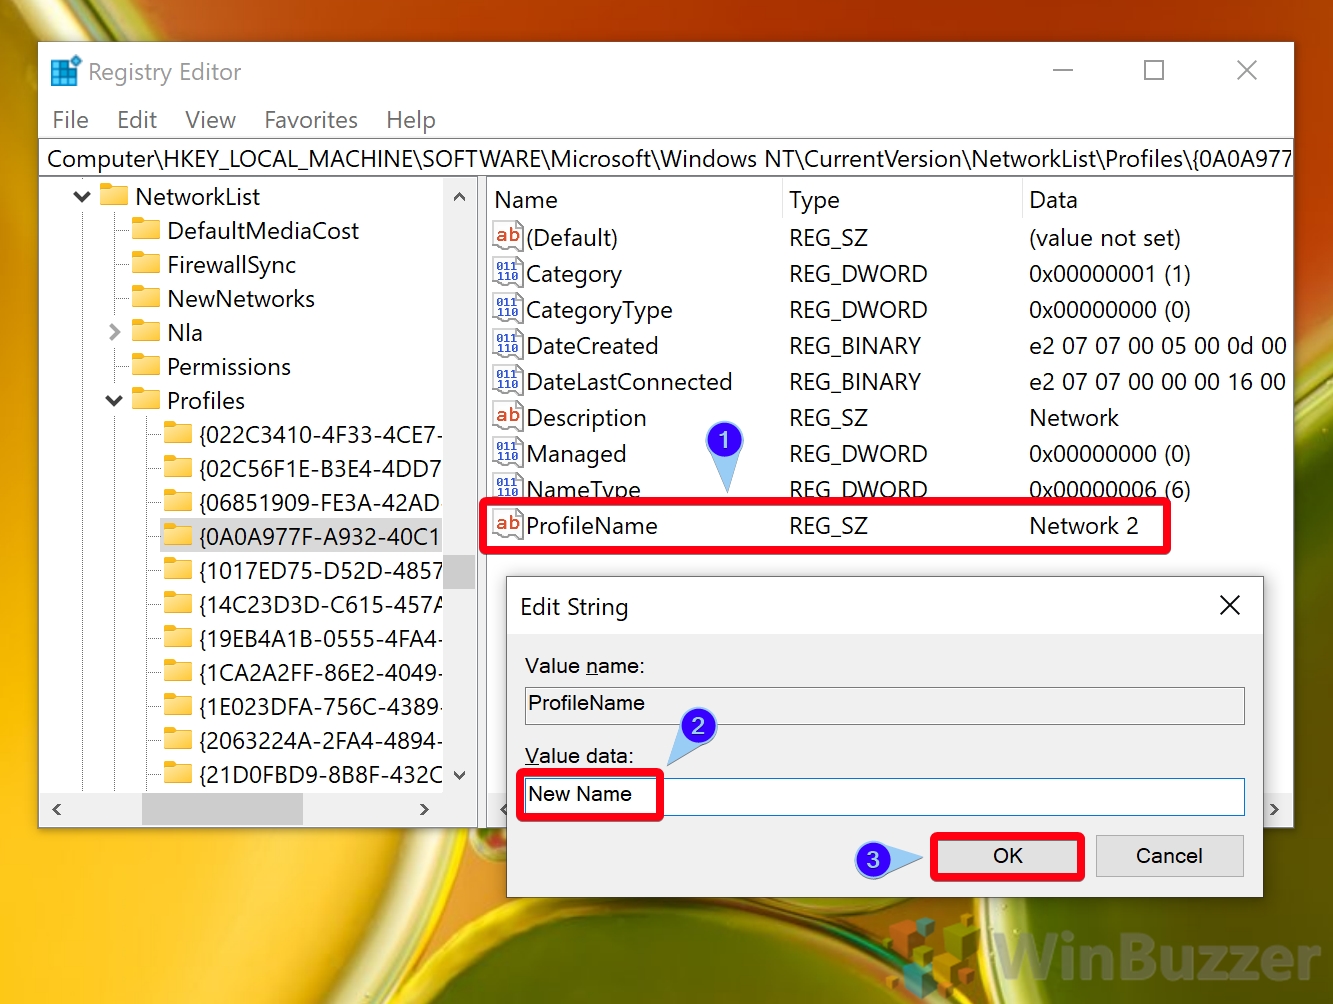
- Find your active network
Search for the Windows 10 network profile you want to change by clicking on the different folders in the left-hand navigation pane. Look in the “Data” column of the “ProfileName” entry in each key until you find the current name.

- Modify the value data of the ProfileName entry
Once you've found the correct network, double-click the ProfileName entry. Write your new name in the “Value data” field and press “OK” to change the network name in the Windows 10 Control Panel.
Open your Network and Sharing Center to view the changes.
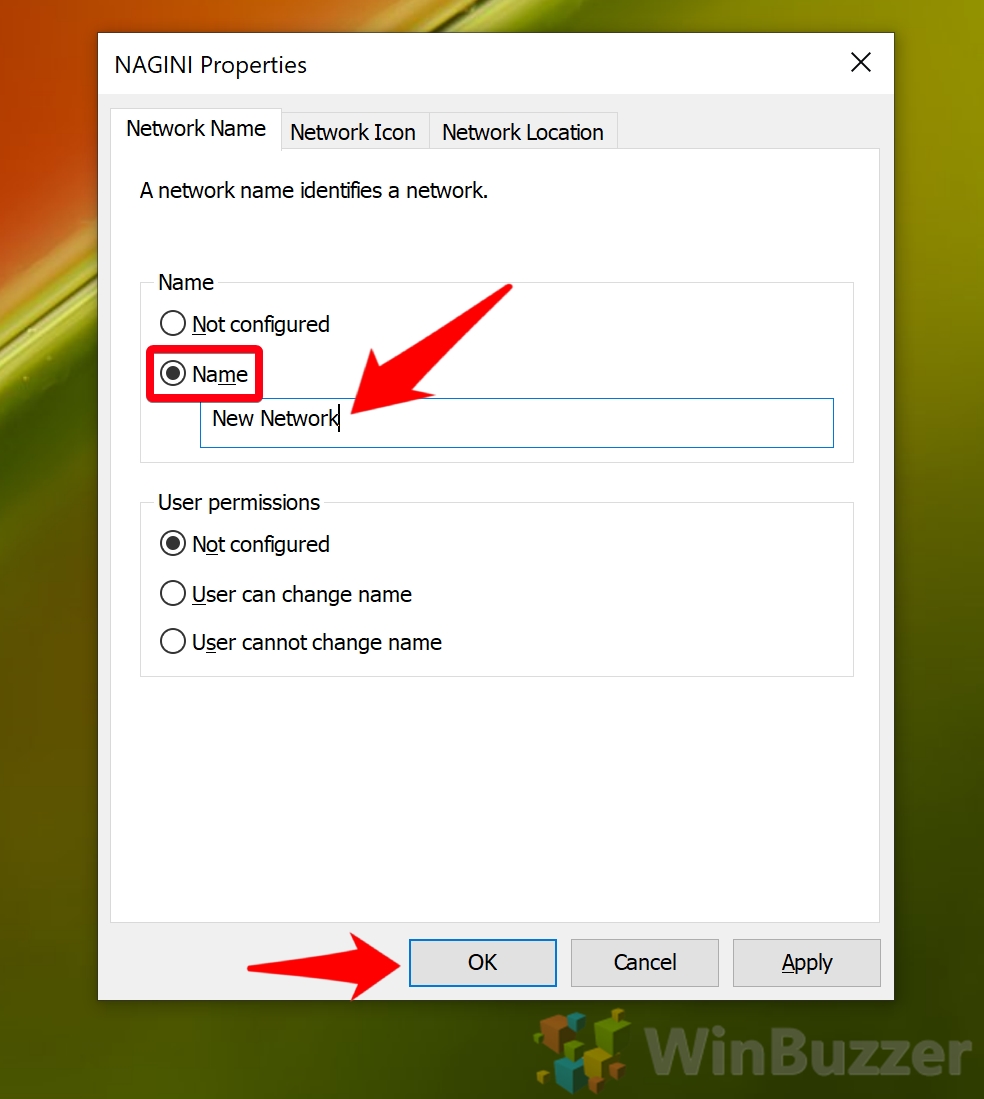
How to Change Network Name in Windows 10 via the Local Security Policy Editor
If you're a Windows 10 Pro or Enterprise user, the easiest way to modify network profiles in Windows 10 is the Local Security Policy editor. This tool will afford us a nice simple UI with little room for error.
- Open the Local Security Policy app
Press Start and type “Local Security Policy”. Click the top result.

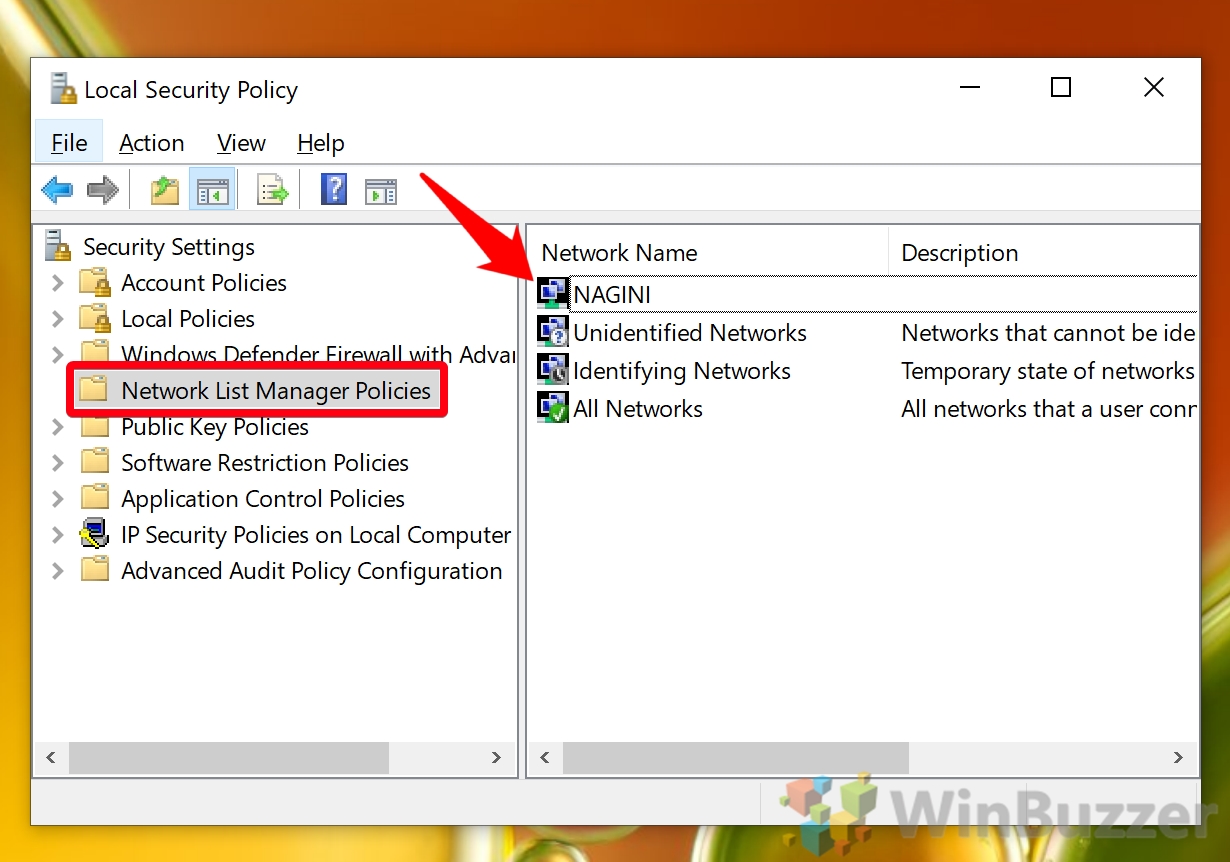
- Open the “Network List Manager Policies” folder and double-click your network name
- Change the WiFi name or Ethernet name
Select “Name” from the radial menu, then type your new network name in the field below. Press “OK” to apply the change.
If you change your mind in the future, you can set this policy to “Not configured” instead. That way, it'll follow the default Windows 10 network setting.
That closes this quick Windows 10 network profiles tutorial. If you're interested, you can also check out our guides on how to forget or block a WiFi network.
Last Updated on February 14, 2022 7:44 pm CET by Markus Kasanmascheff


