HomeWinBuzzer TipsWindows 10: How to Forget a WiFi Network / Delete Wireless Network...

Windows 10: How to Forget a WiFi Network / Delete Wireless Network Profiles

We show you how to forget a Wi-Fi network in Windows 10 to stop automatic connect and resolve configuration issues.

-

After years of hefting a laptop around, you inevitably build up a menagerie of Wi-Fi networks. For the most part, they'll sit on your PC, hardly used, but at times a change in configuration can make it difficult to connect to a network your computer already remembers. At this point, it can be beneficial to forget a Wi-Fi network and delete its network profile.

We're going to show you exactly how to do that, but first a word of warning. When you forget a Wi-Fi network, Windows will also remove its password any configuration changes you've made. As a result, you'll struggle to get back in if you aren't sure of the credentials. Make sure you have them to hand before making any changes.

It's worth noting that you can also use this technique to stop Windows 10 from connecting to a network automatically. This can be especially useful if your ‘connect automatically' option keeps resetting itself.

How to Forget a Wi-Fi Network Via Windows 10 Settings

  1. Open Windows Settings


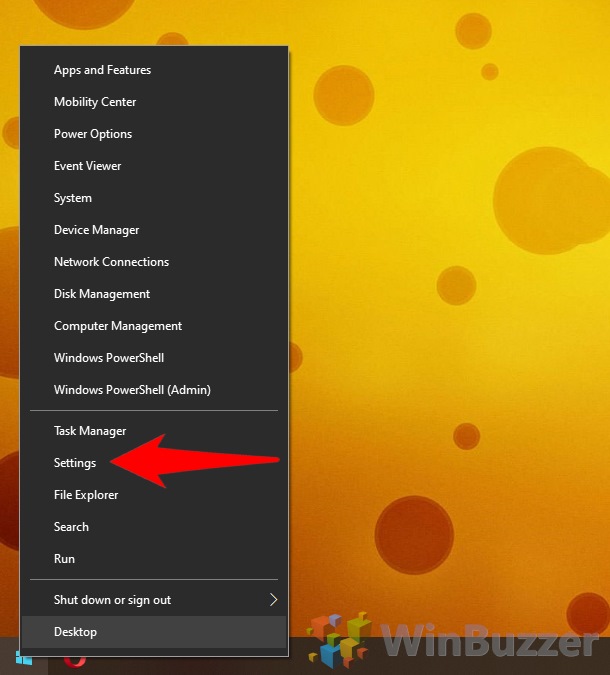
    Press “Windows + X”, followed by “Settings”.

    Windows 10 - open Settings

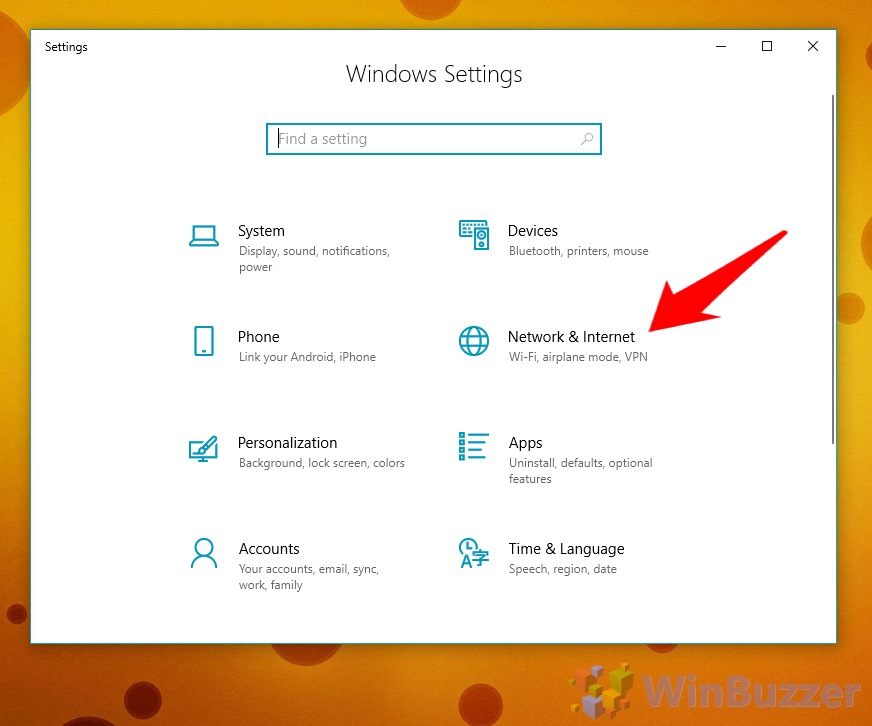
  2. Open Network & Internet Settings


    Windows 10 - Settings – Network and Internet

  3. Manage networks


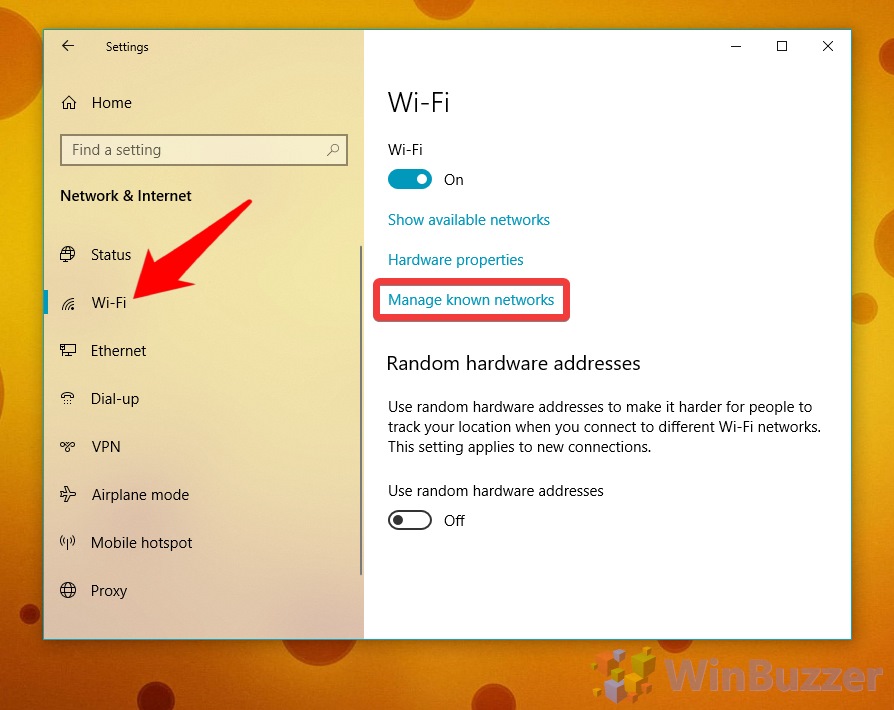
    Under the “Wi-Fi” subheading in the left sidebar, click “Manage known networks”.

    Windows 10 - Settings - Network and Internet

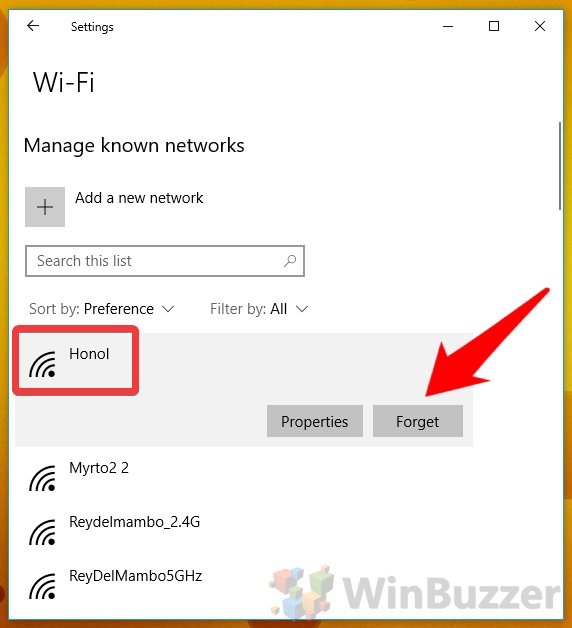
  4. Forget the Wi-Fi network


    Click on the Wi-Fi network you'd like to remove and then click “Forget”.

    Windows 10 - Settings - Network and Internet - WIFI (1)

Forget a Network via the Taskbar

Alternatively, you can forget a network straight from the taskbar.

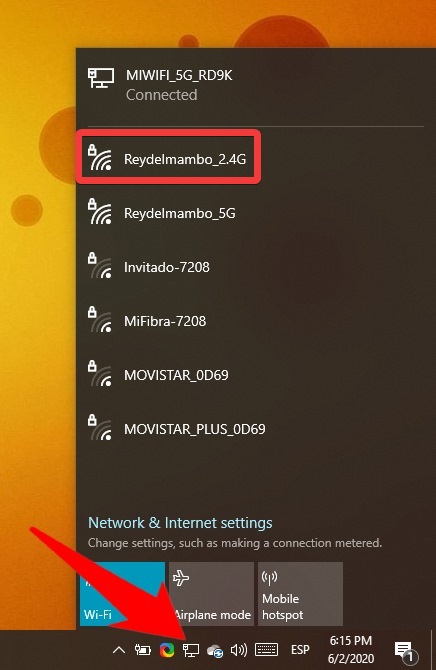
  1. Click on the network


    Click the Wi-Fi or ethernet icon on your taskbar to bring up the connections flyout and then click on the name of the network you'd like to remove.

    Windows 10 - Taskbar - Network Connections

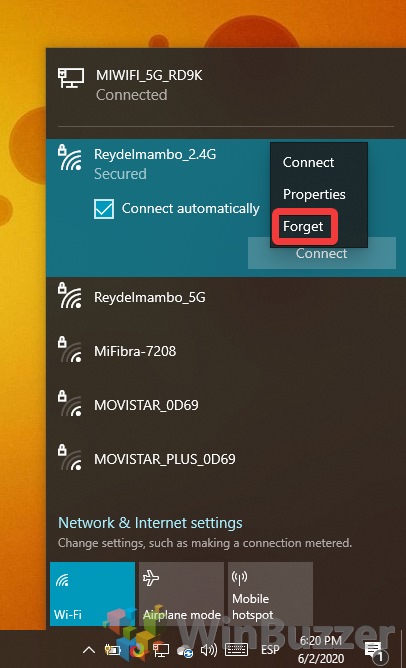
  2. Forget the network


    Right-click on the selected network and choose “Forget”.

    Windows 10 - Taskbar - Network Connections - Forget

How to Delete a Wireless Profile with Command Prompt

Some may find it easier to delete a wireless network profile via the Windows 10 command line.

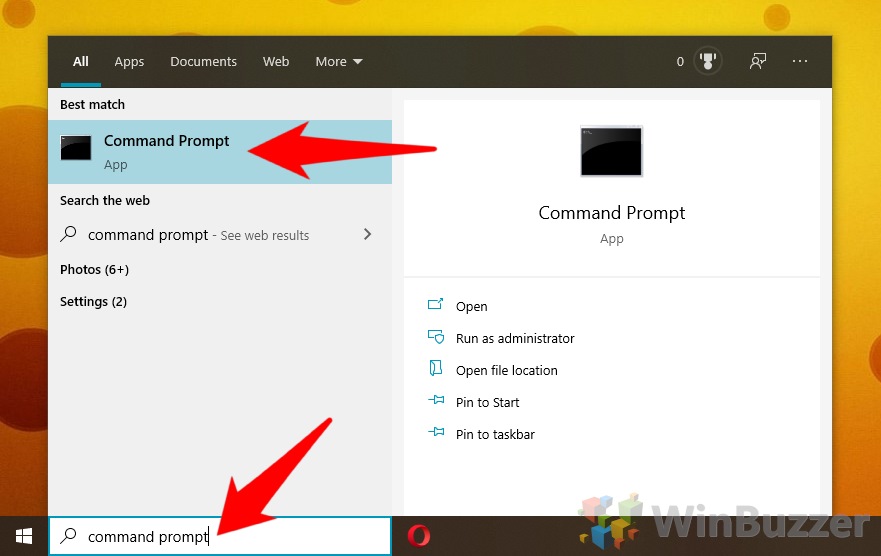
  1. Open


    Press start and search for “Command Prompt”. Click the first ‘best match' entry.

    Windows 10 - Open Command Prompt

  2. List the network profiles


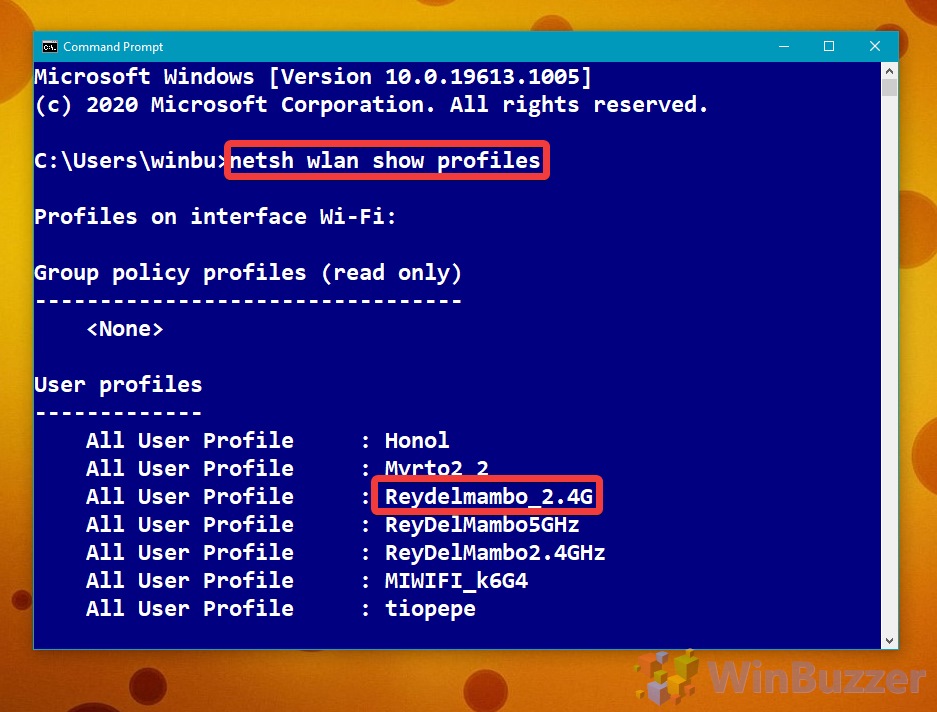
    Type netsh wlan show profiles and press “Enter” to show a list of network profiles. Identify the one you want to delete.

    Windows 10 - Command Promt - netsh wlan show profiles

  3. Delete the Windows 10 network profile


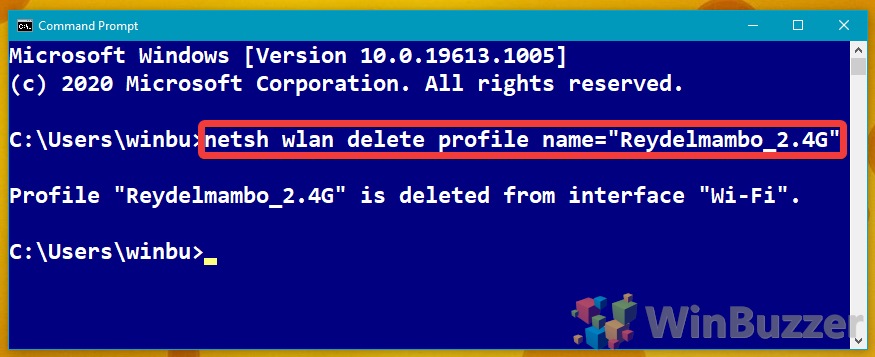
    To delete the profile, enter:
    netsh wlan delete profile name="YOURWIFINETWORK_HERE"

    Command Prompt will now inform you that it successfully deleted the Wi-Fi profile.

    Windows 10 - Command Promt - netsh wlan delete profile

Ryan Maskell
Ryan Maskellhttps://ryanmaskell.co.uk
Ryan has had a passion for gaming and technology since early childhood. Fusing the skills from his Creative Writing and Publishing degree with profound technical knowledge, he enjoys covering news about Microsoft. As an avid writer, he is also working on his debut novel.

Recent News

0 0 votes
Article Rating
Subscribe
Notify of
guest
0 Comments
Newest
Oldest Most Voted
Inline Feedbacks
View all comments
0
Would love your thoughts, please comment.x
()
x
Table of Contents:
Mastodon