Driver Signature Enforcement in Windows 10 protects you from parties who may try to infect you with malware through a fake driver. It checks the integrity of the code and that it is signed by Microsoft before proceeding with any installation.
Generally, it's good practice to check the integrity of every driver. If it's coming from a trusted manufacturer, it should have gone through the process to get it certified by Microsoft.
However, there are some cases where you might want to disable driver signature enforcement in Windows 10. For example, you may be trying to install beta or unsupported drivers from your manufacturer. One instance I have personally encountered is installing a driver to increase a monitor's FreeSync range outside of its factory settings.
If you fully trust the driver you're about to install, there are two ways we recommend you turn off driver signature enforcement. One involves the use of startup settings and the other Windows 10 test mode.
You'll find the instructions for both methods below. We'll also briefly mention how you can turn Windows 10 test mode off and enable driver signature enforcement once you're done.
How to Disable Driver Signature Enforcement on Windows 10 via Startup Settings
The most user-friendly way to disable driver signature enforcement in Windows 10 through Startup settings. This is a slow process, especially if you're installing multiple drivers, but leaves little room for error.
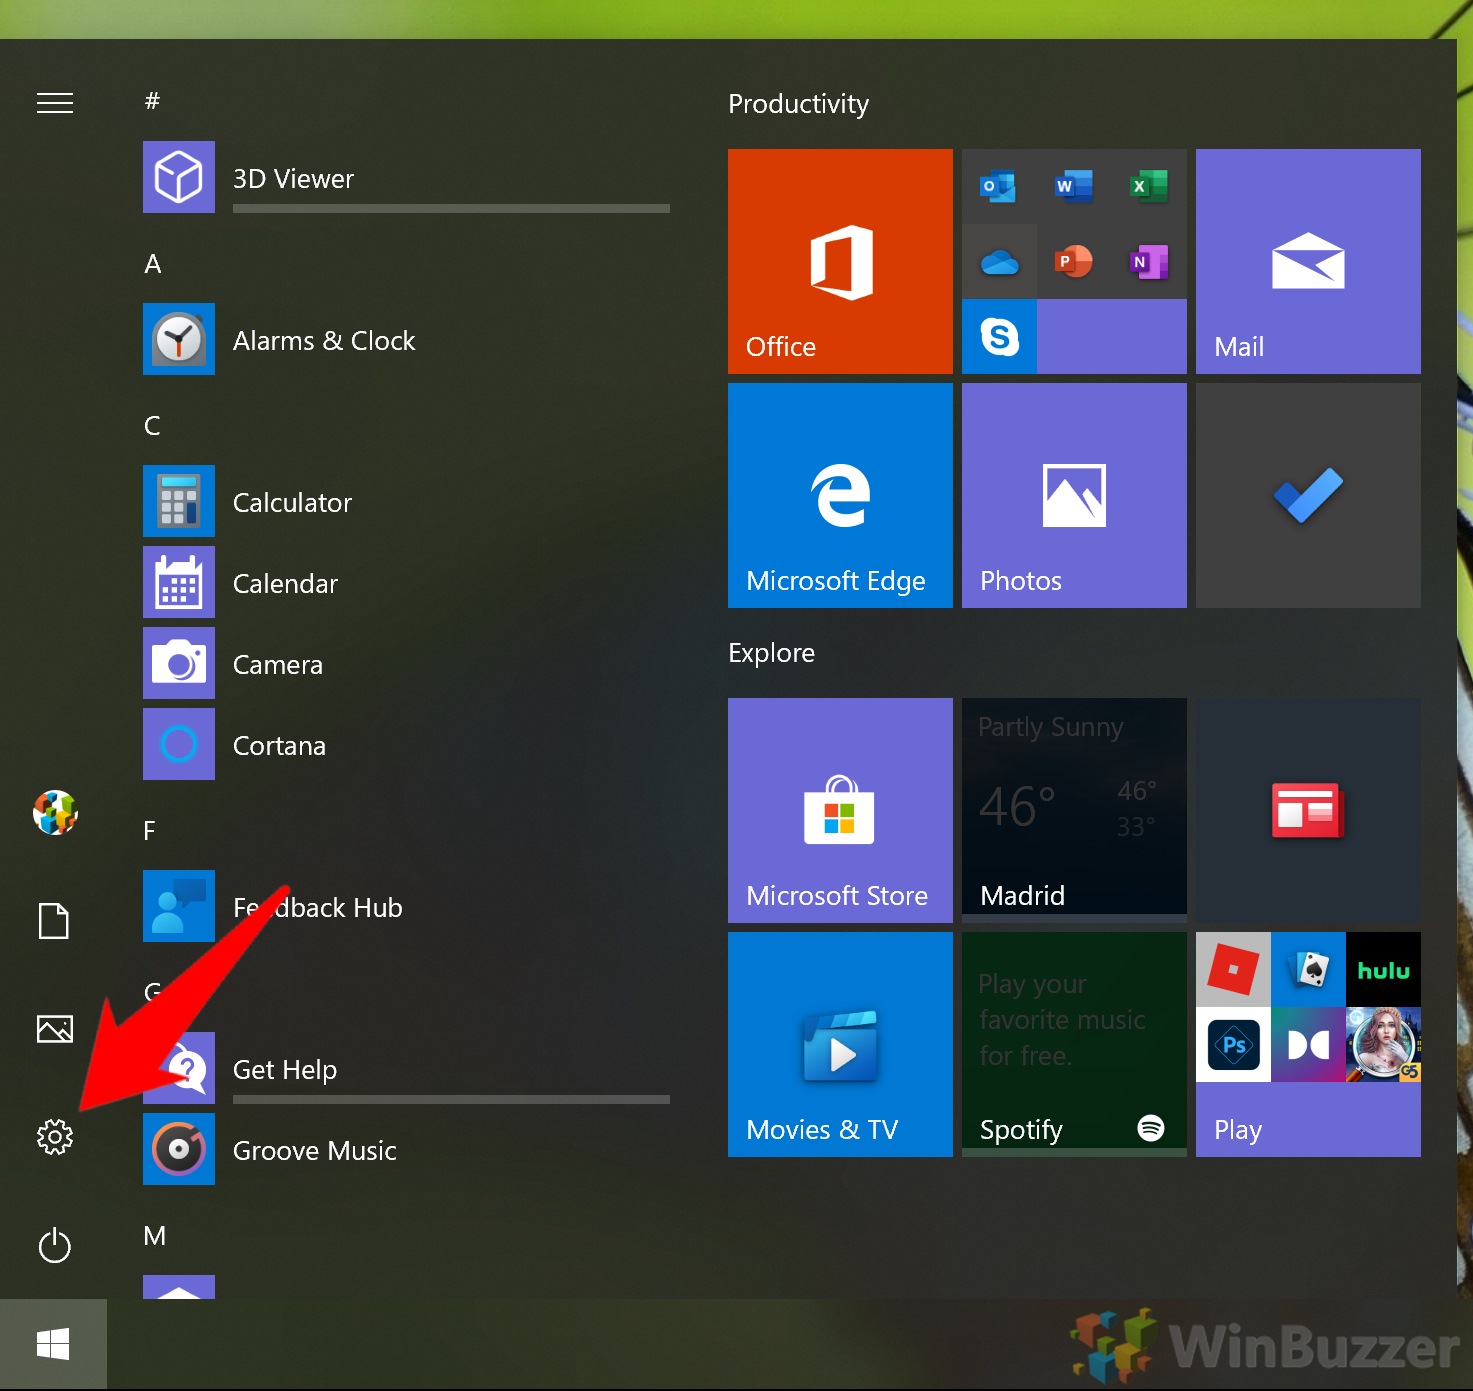
- Open Settings
Press Start and then click the settings cog above the power button. Alternatively, simply press Windows + I on your keyboard.
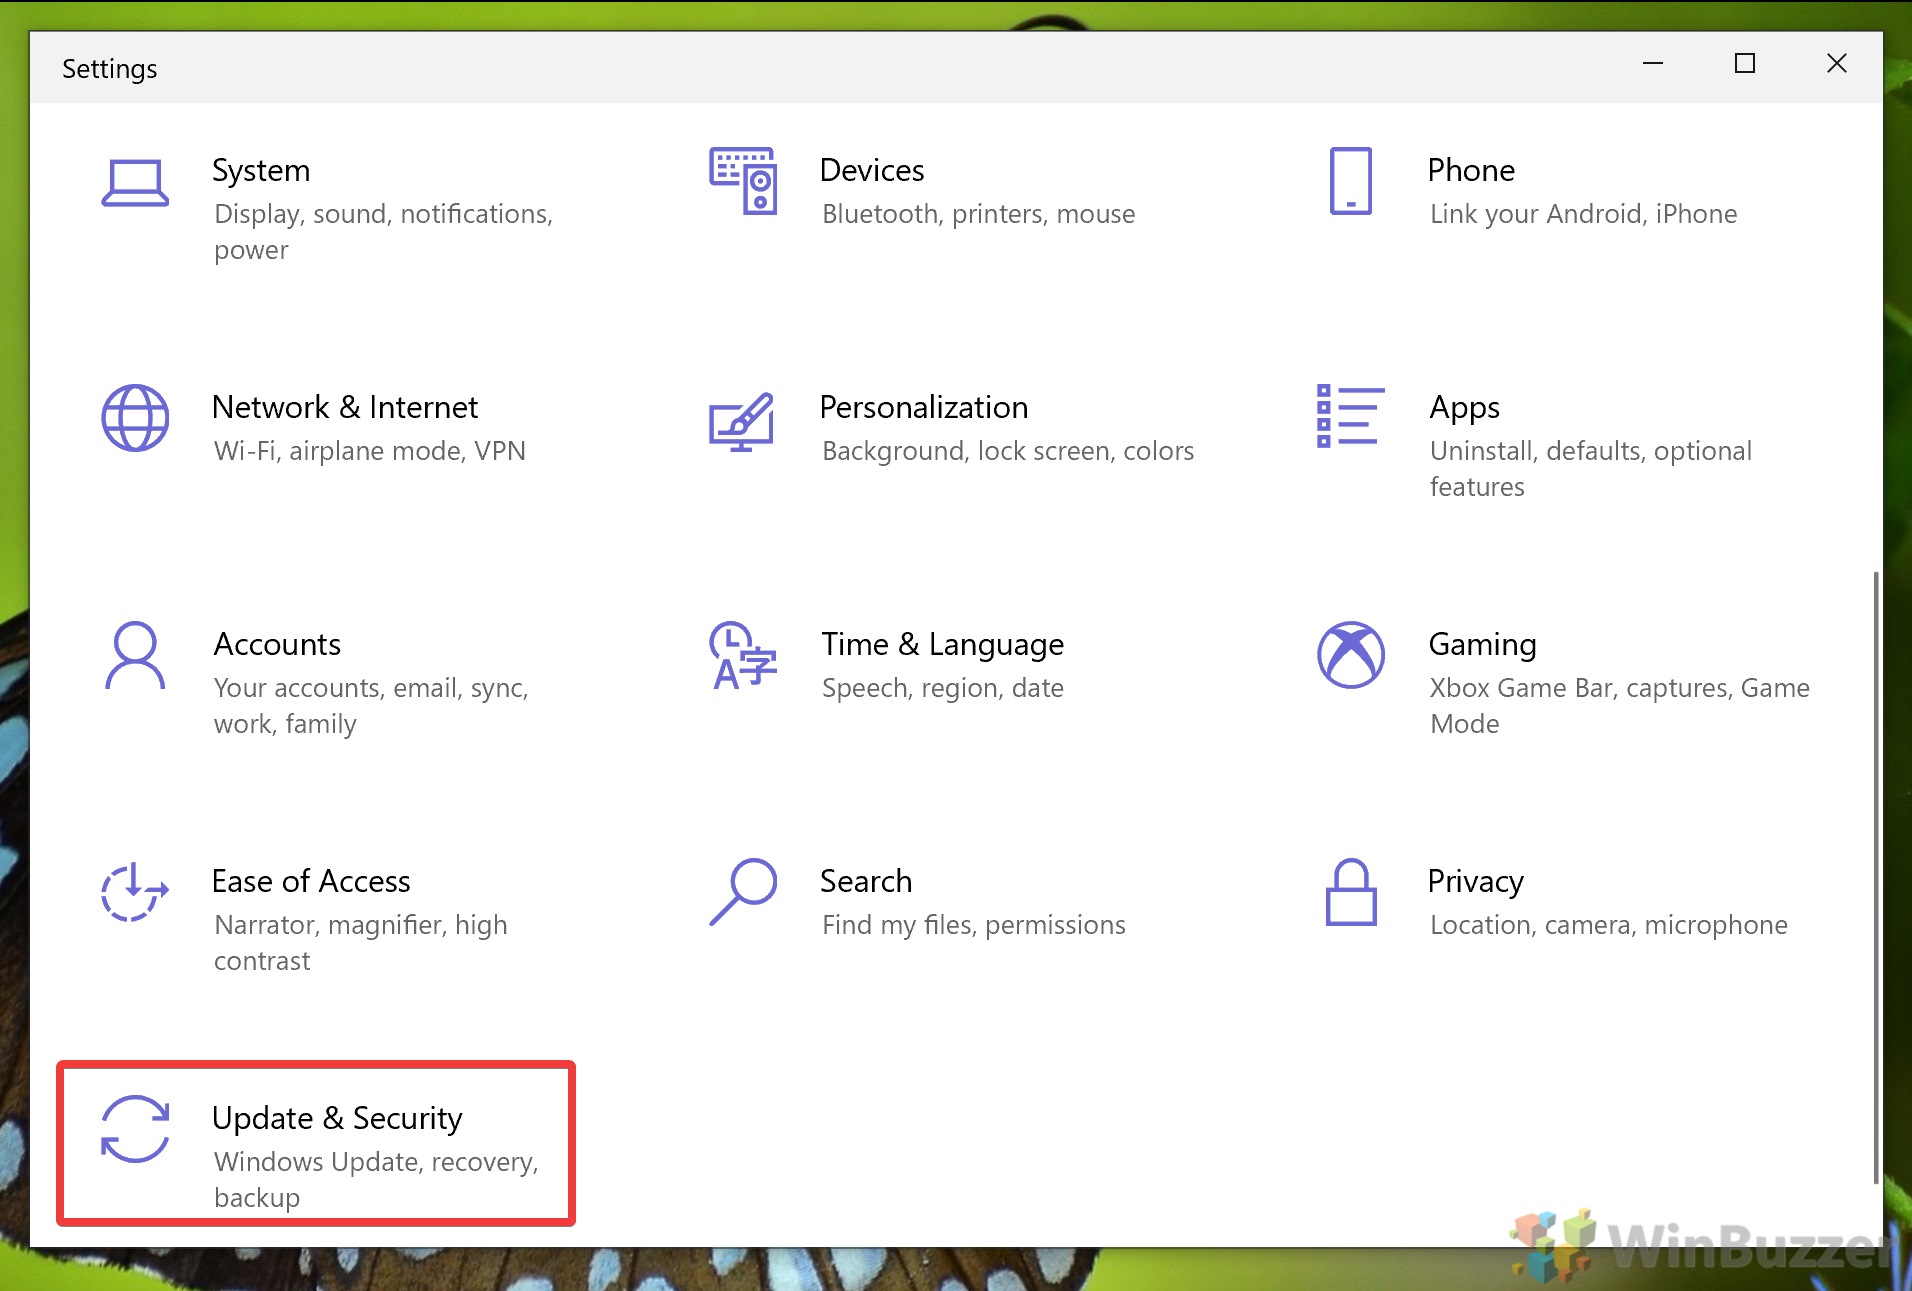
- Click ‘Update & Security'
- Step title
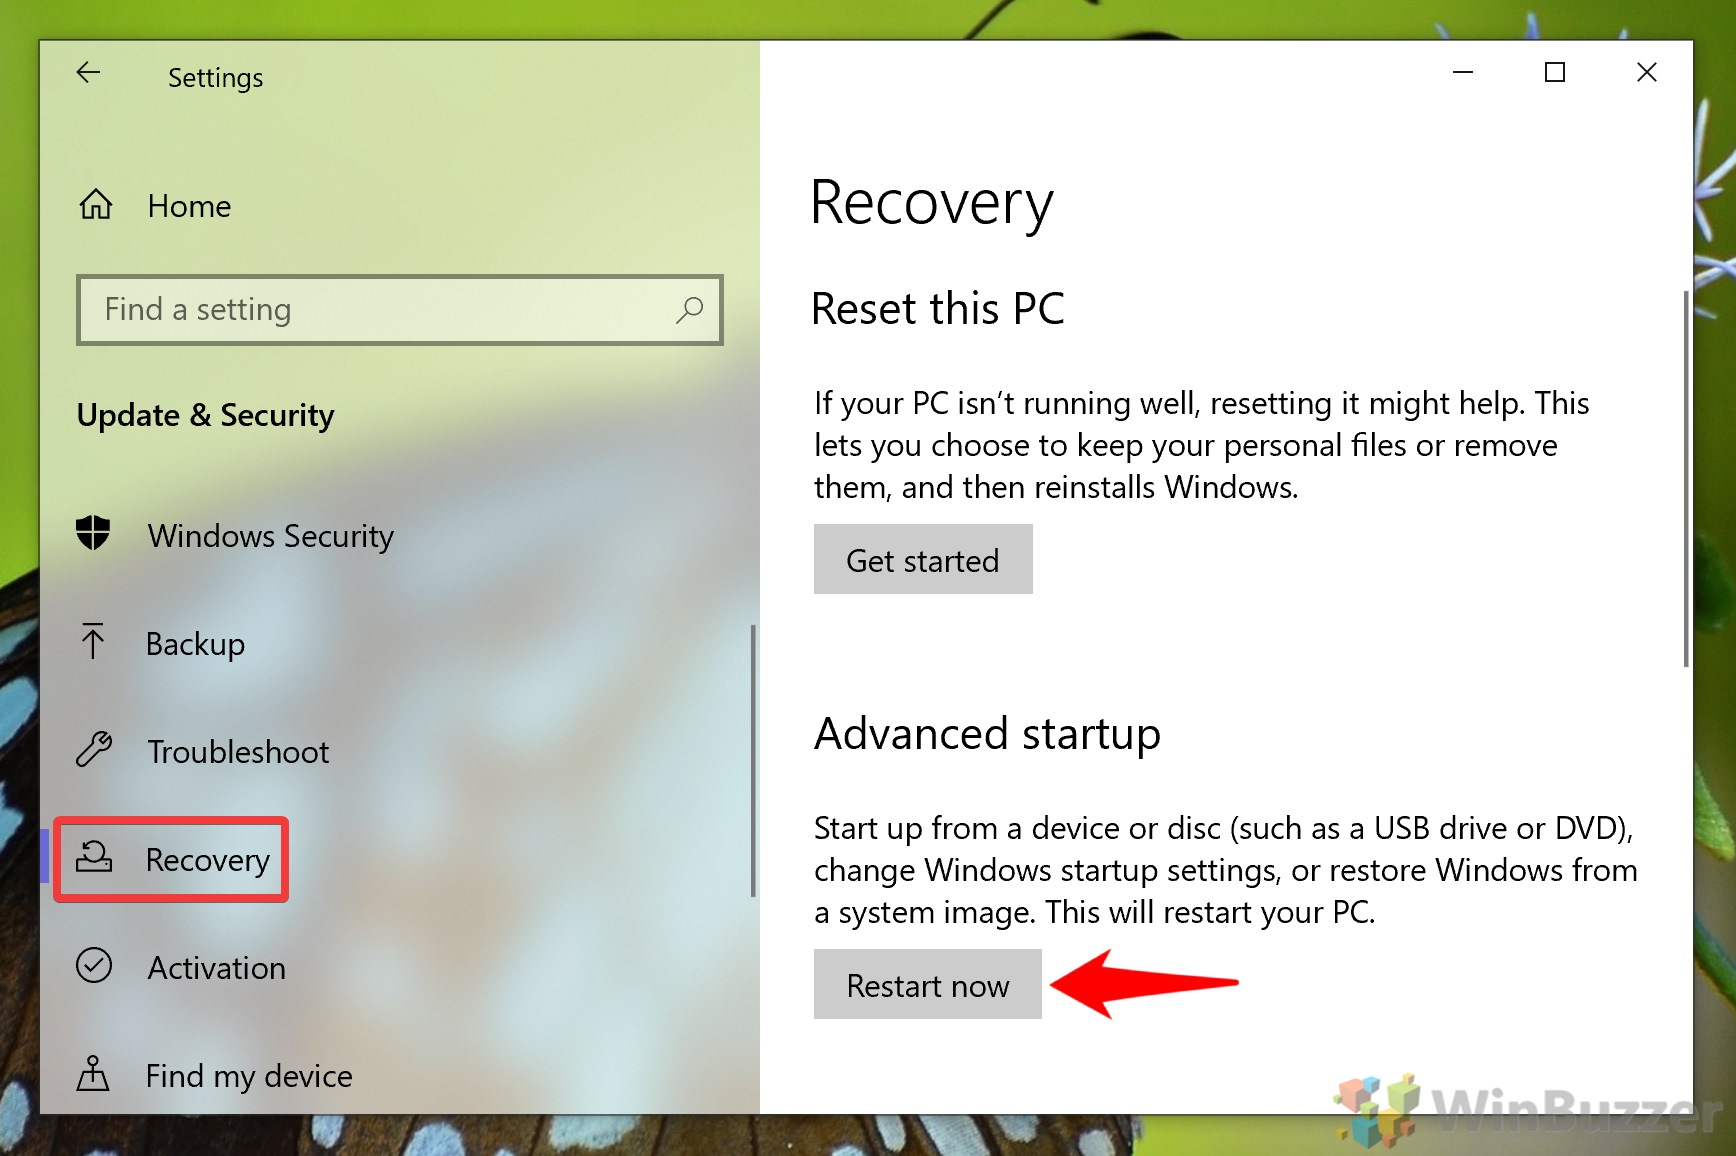
In the sidebar, click “Recovery”, then scroll down in the main pane until you see “Advanced Startup”. You'll see a button that says “Restart now”. Save whatever you're doing on your PC and then click it.
If this method does not work for you, try one of the methods outlined in our full advanced startup guide.
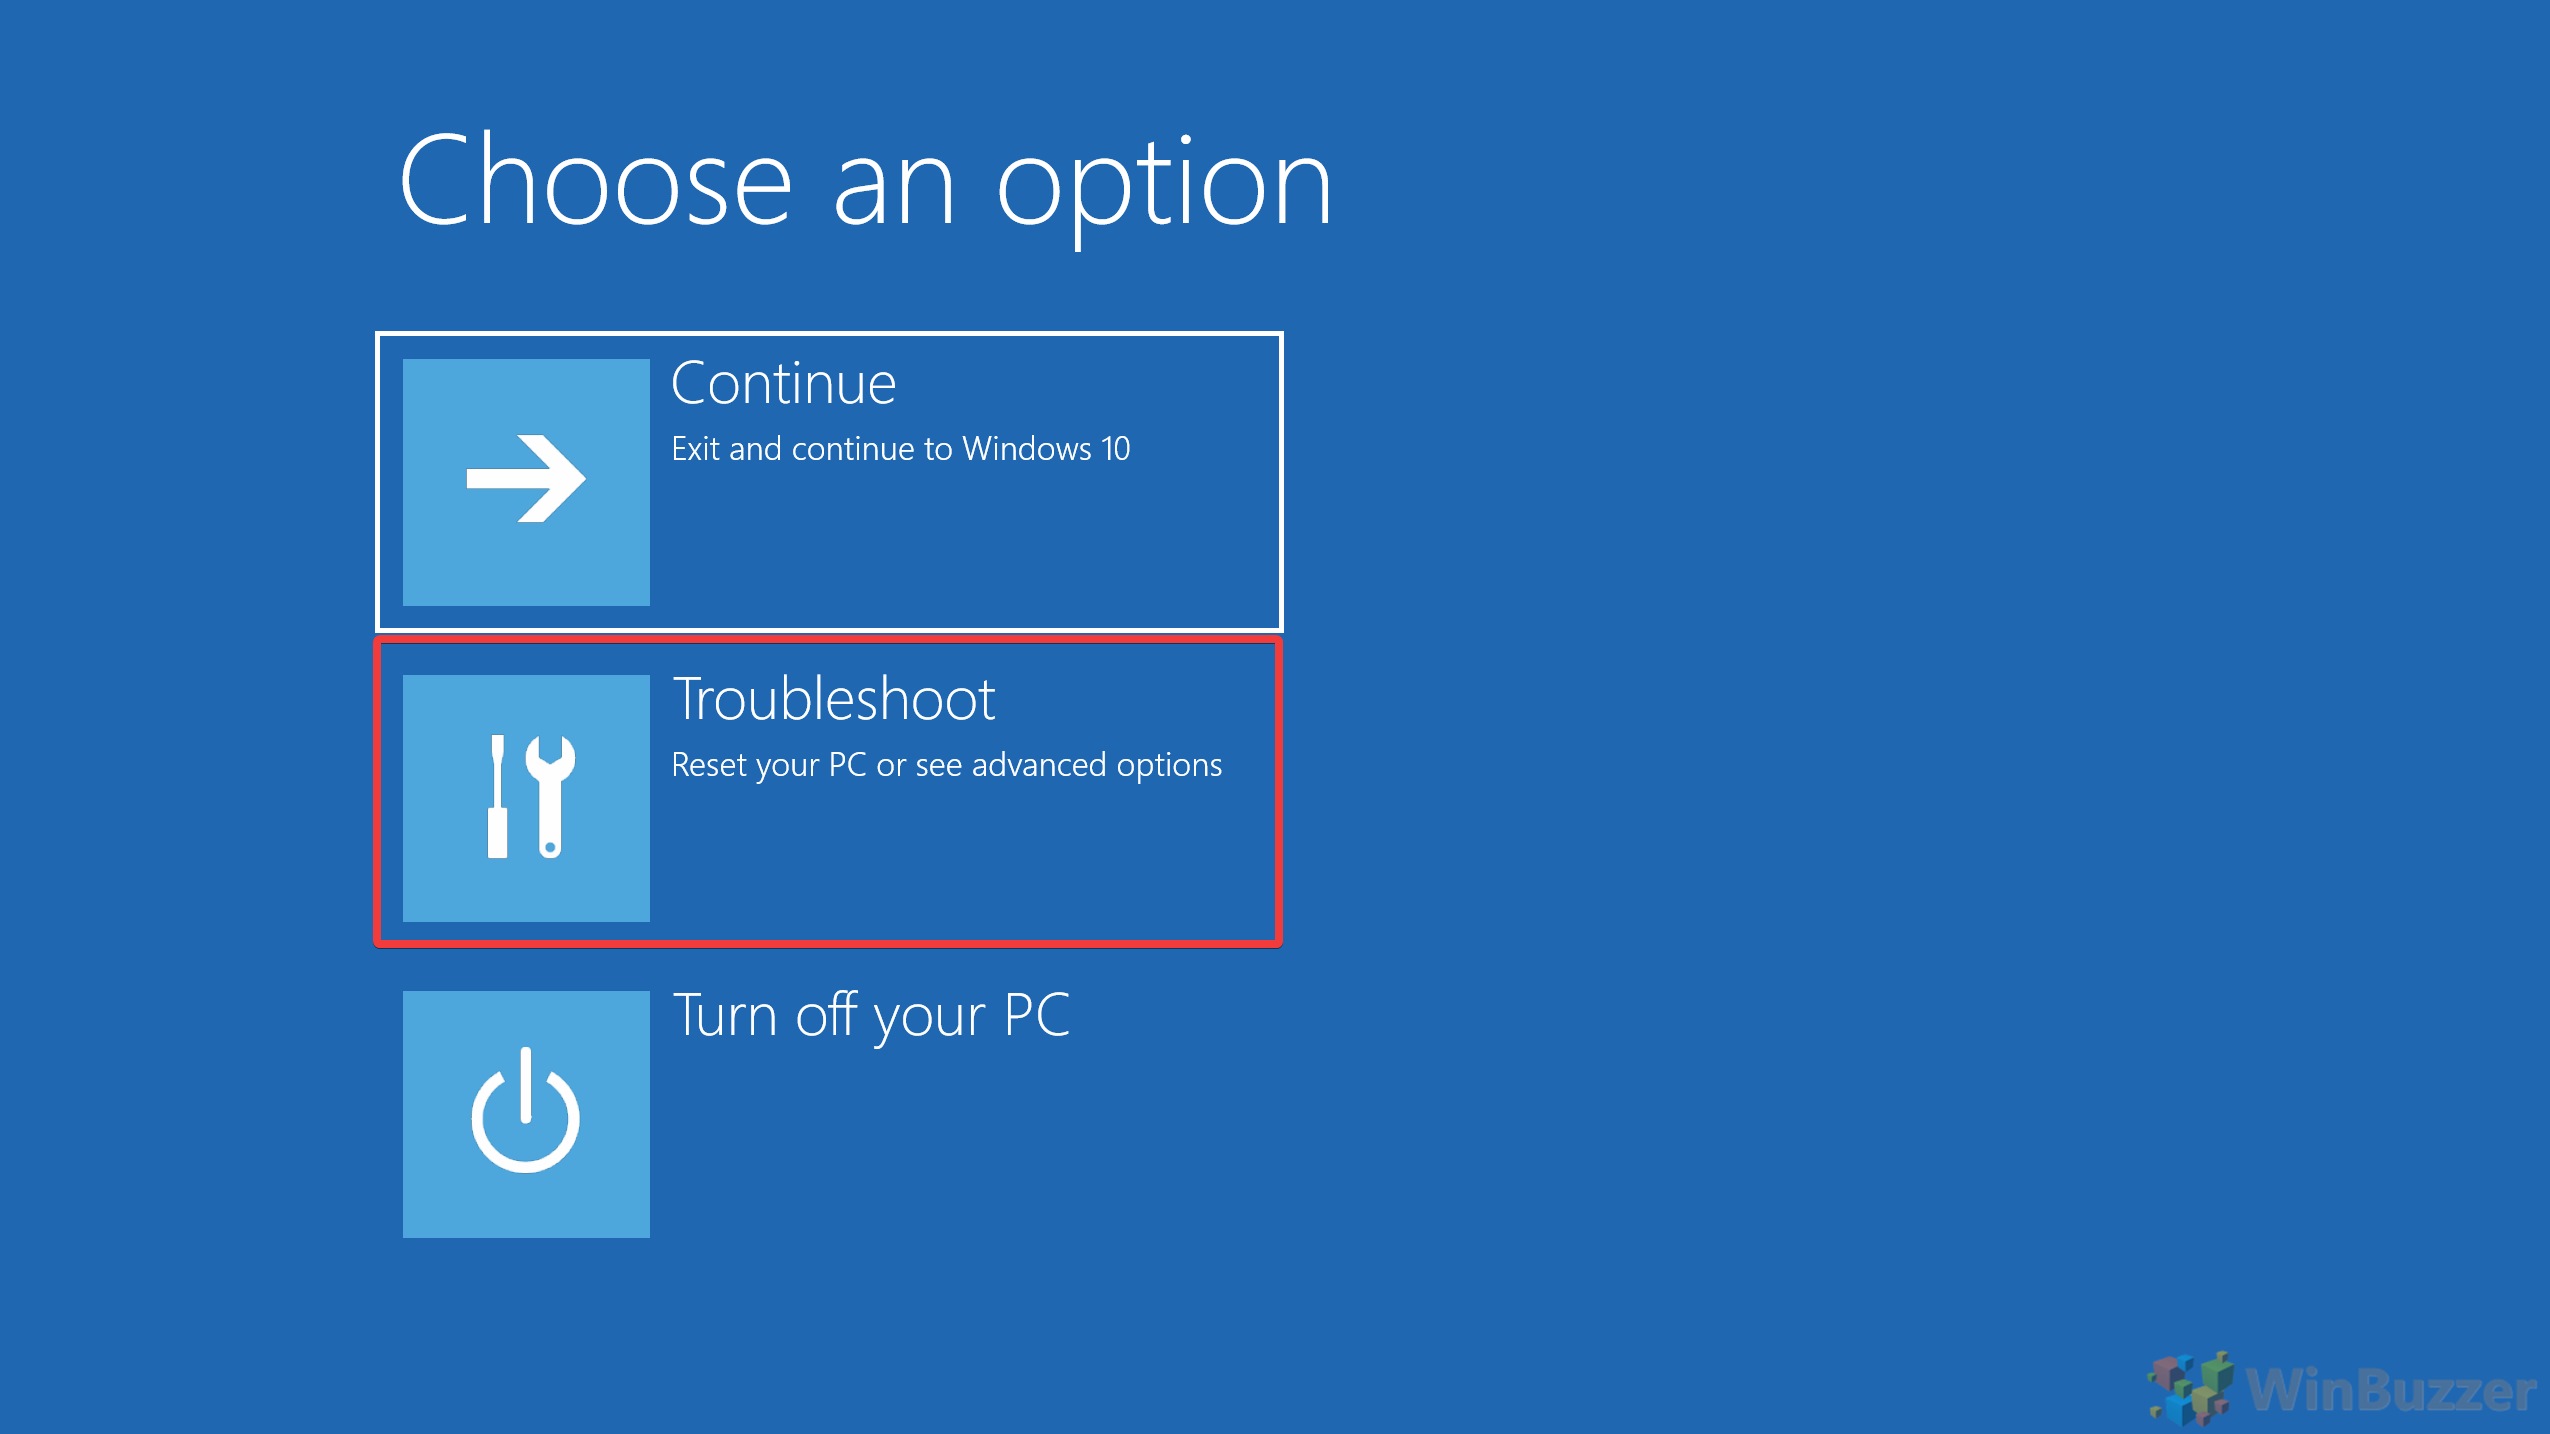
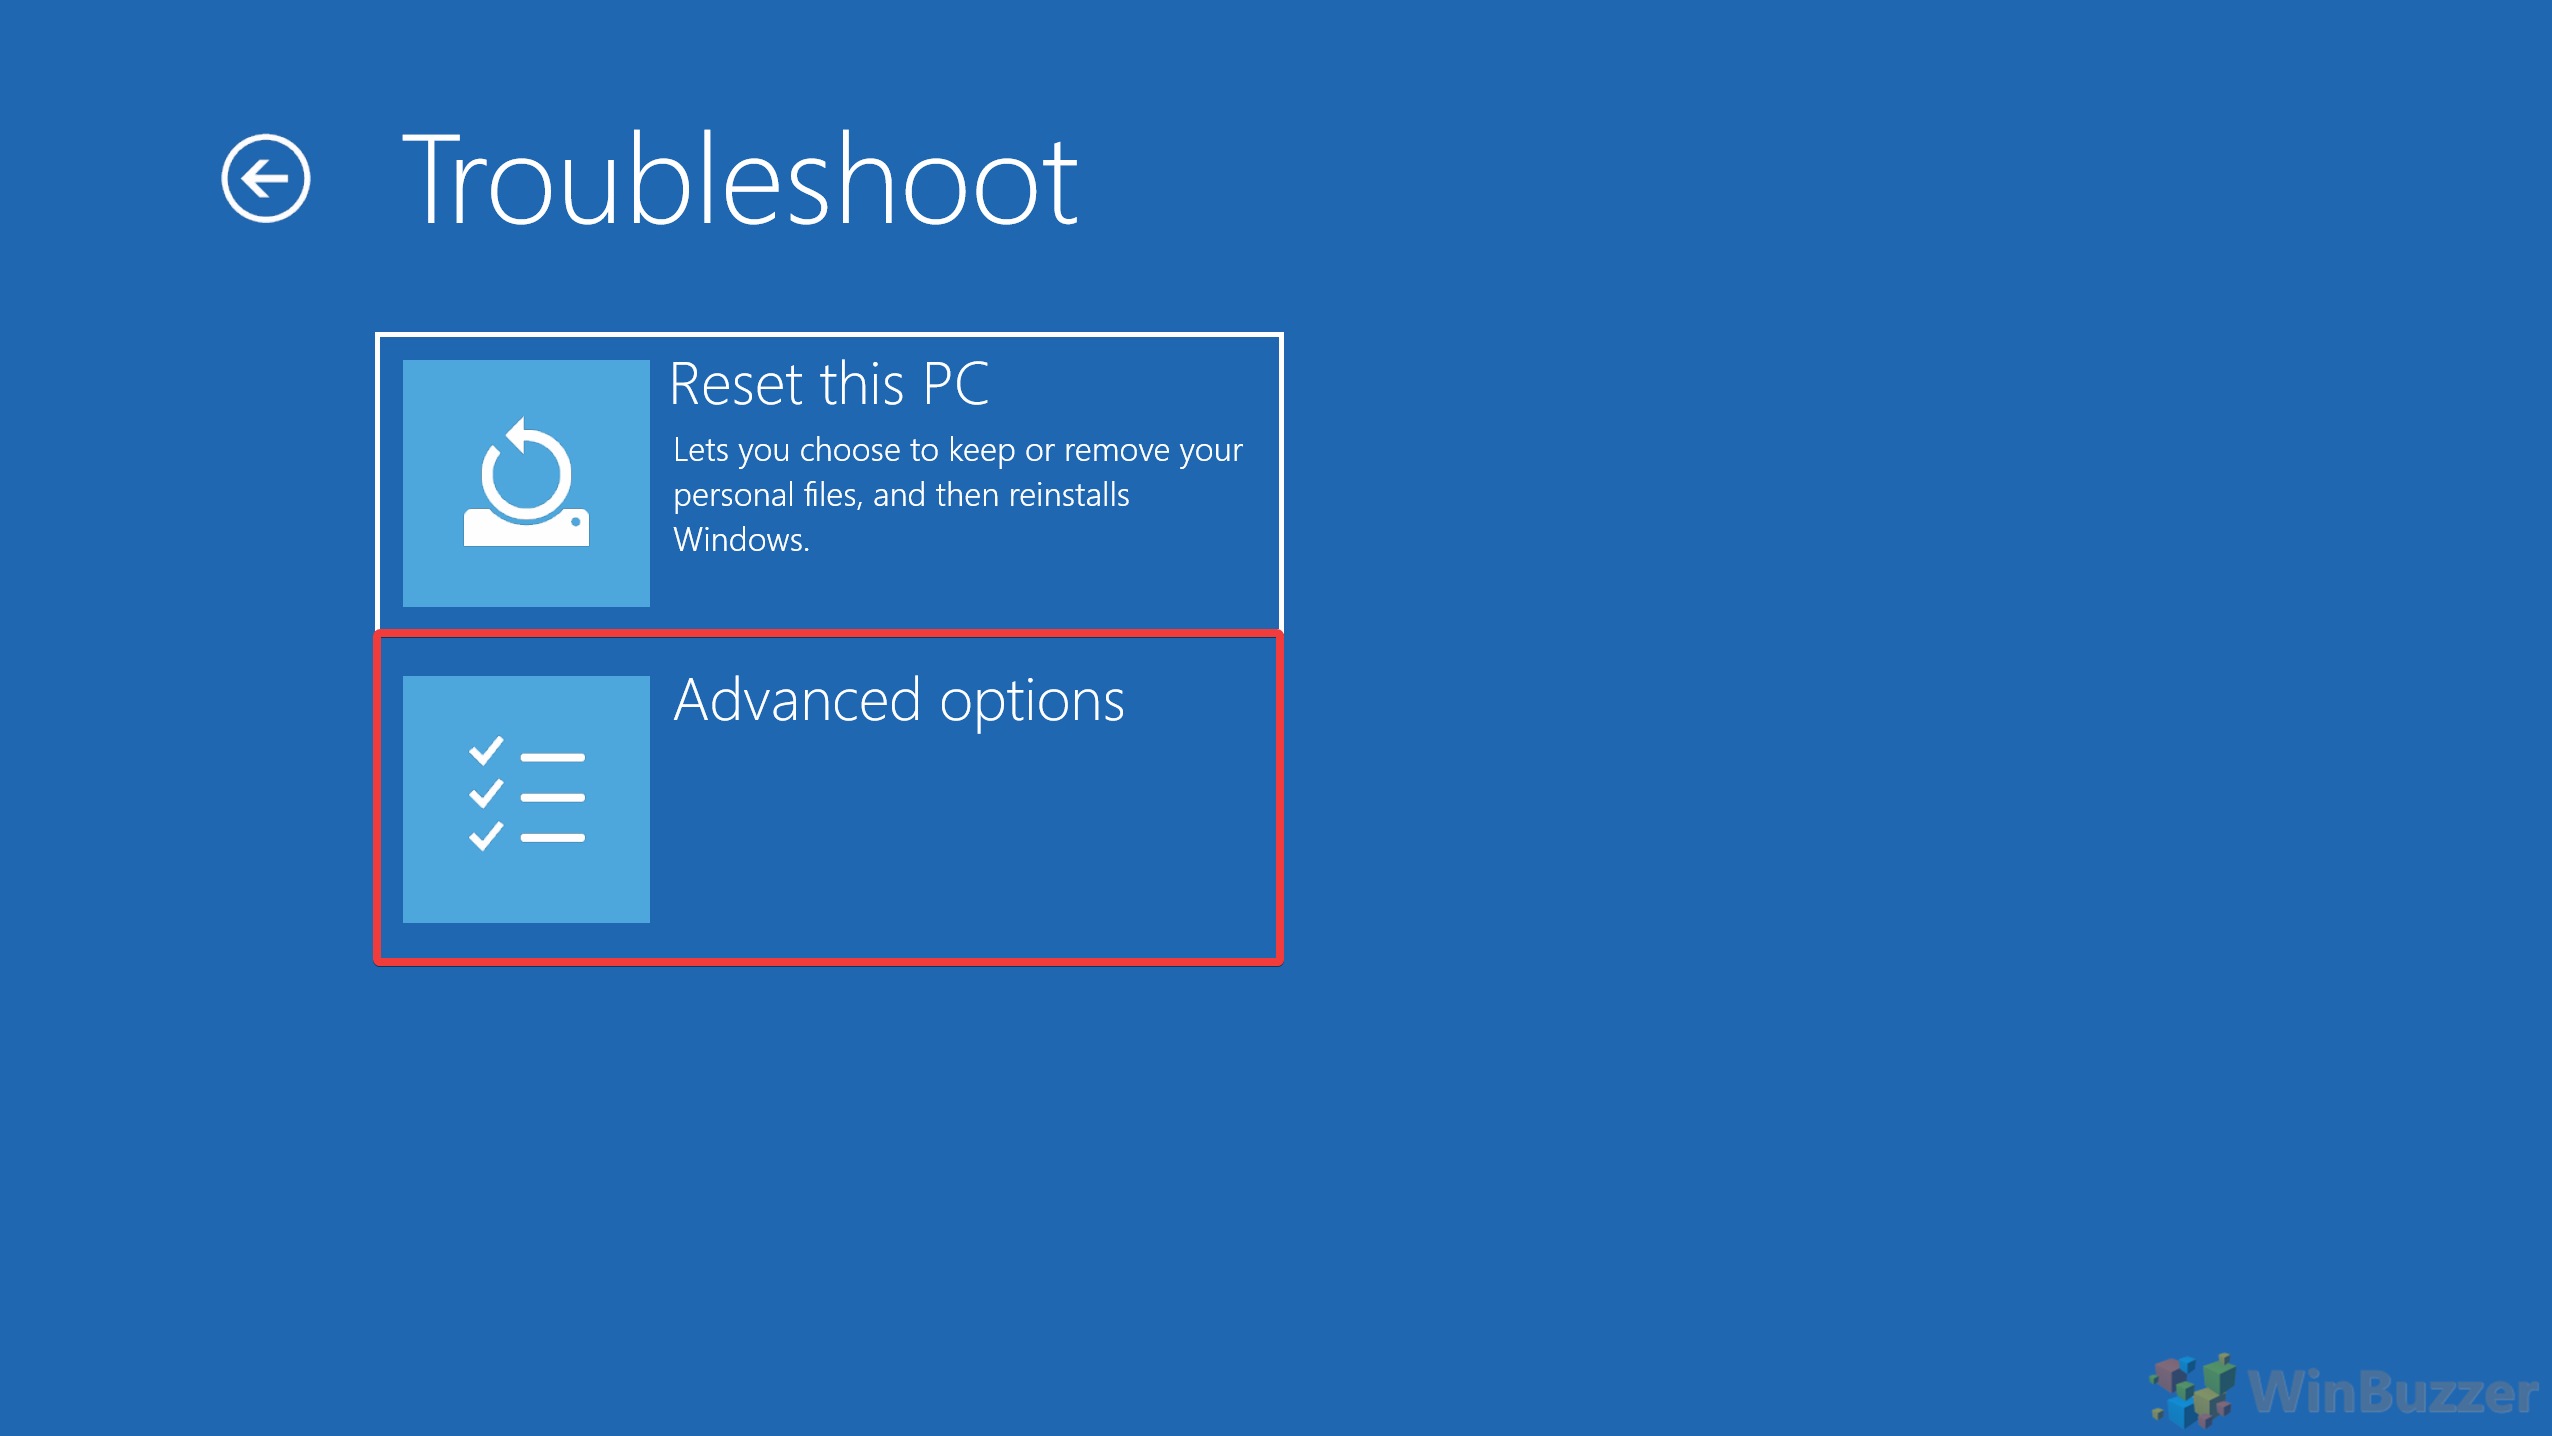
- Click ‘Troubleshoot'
- Click ‘Advanced options'
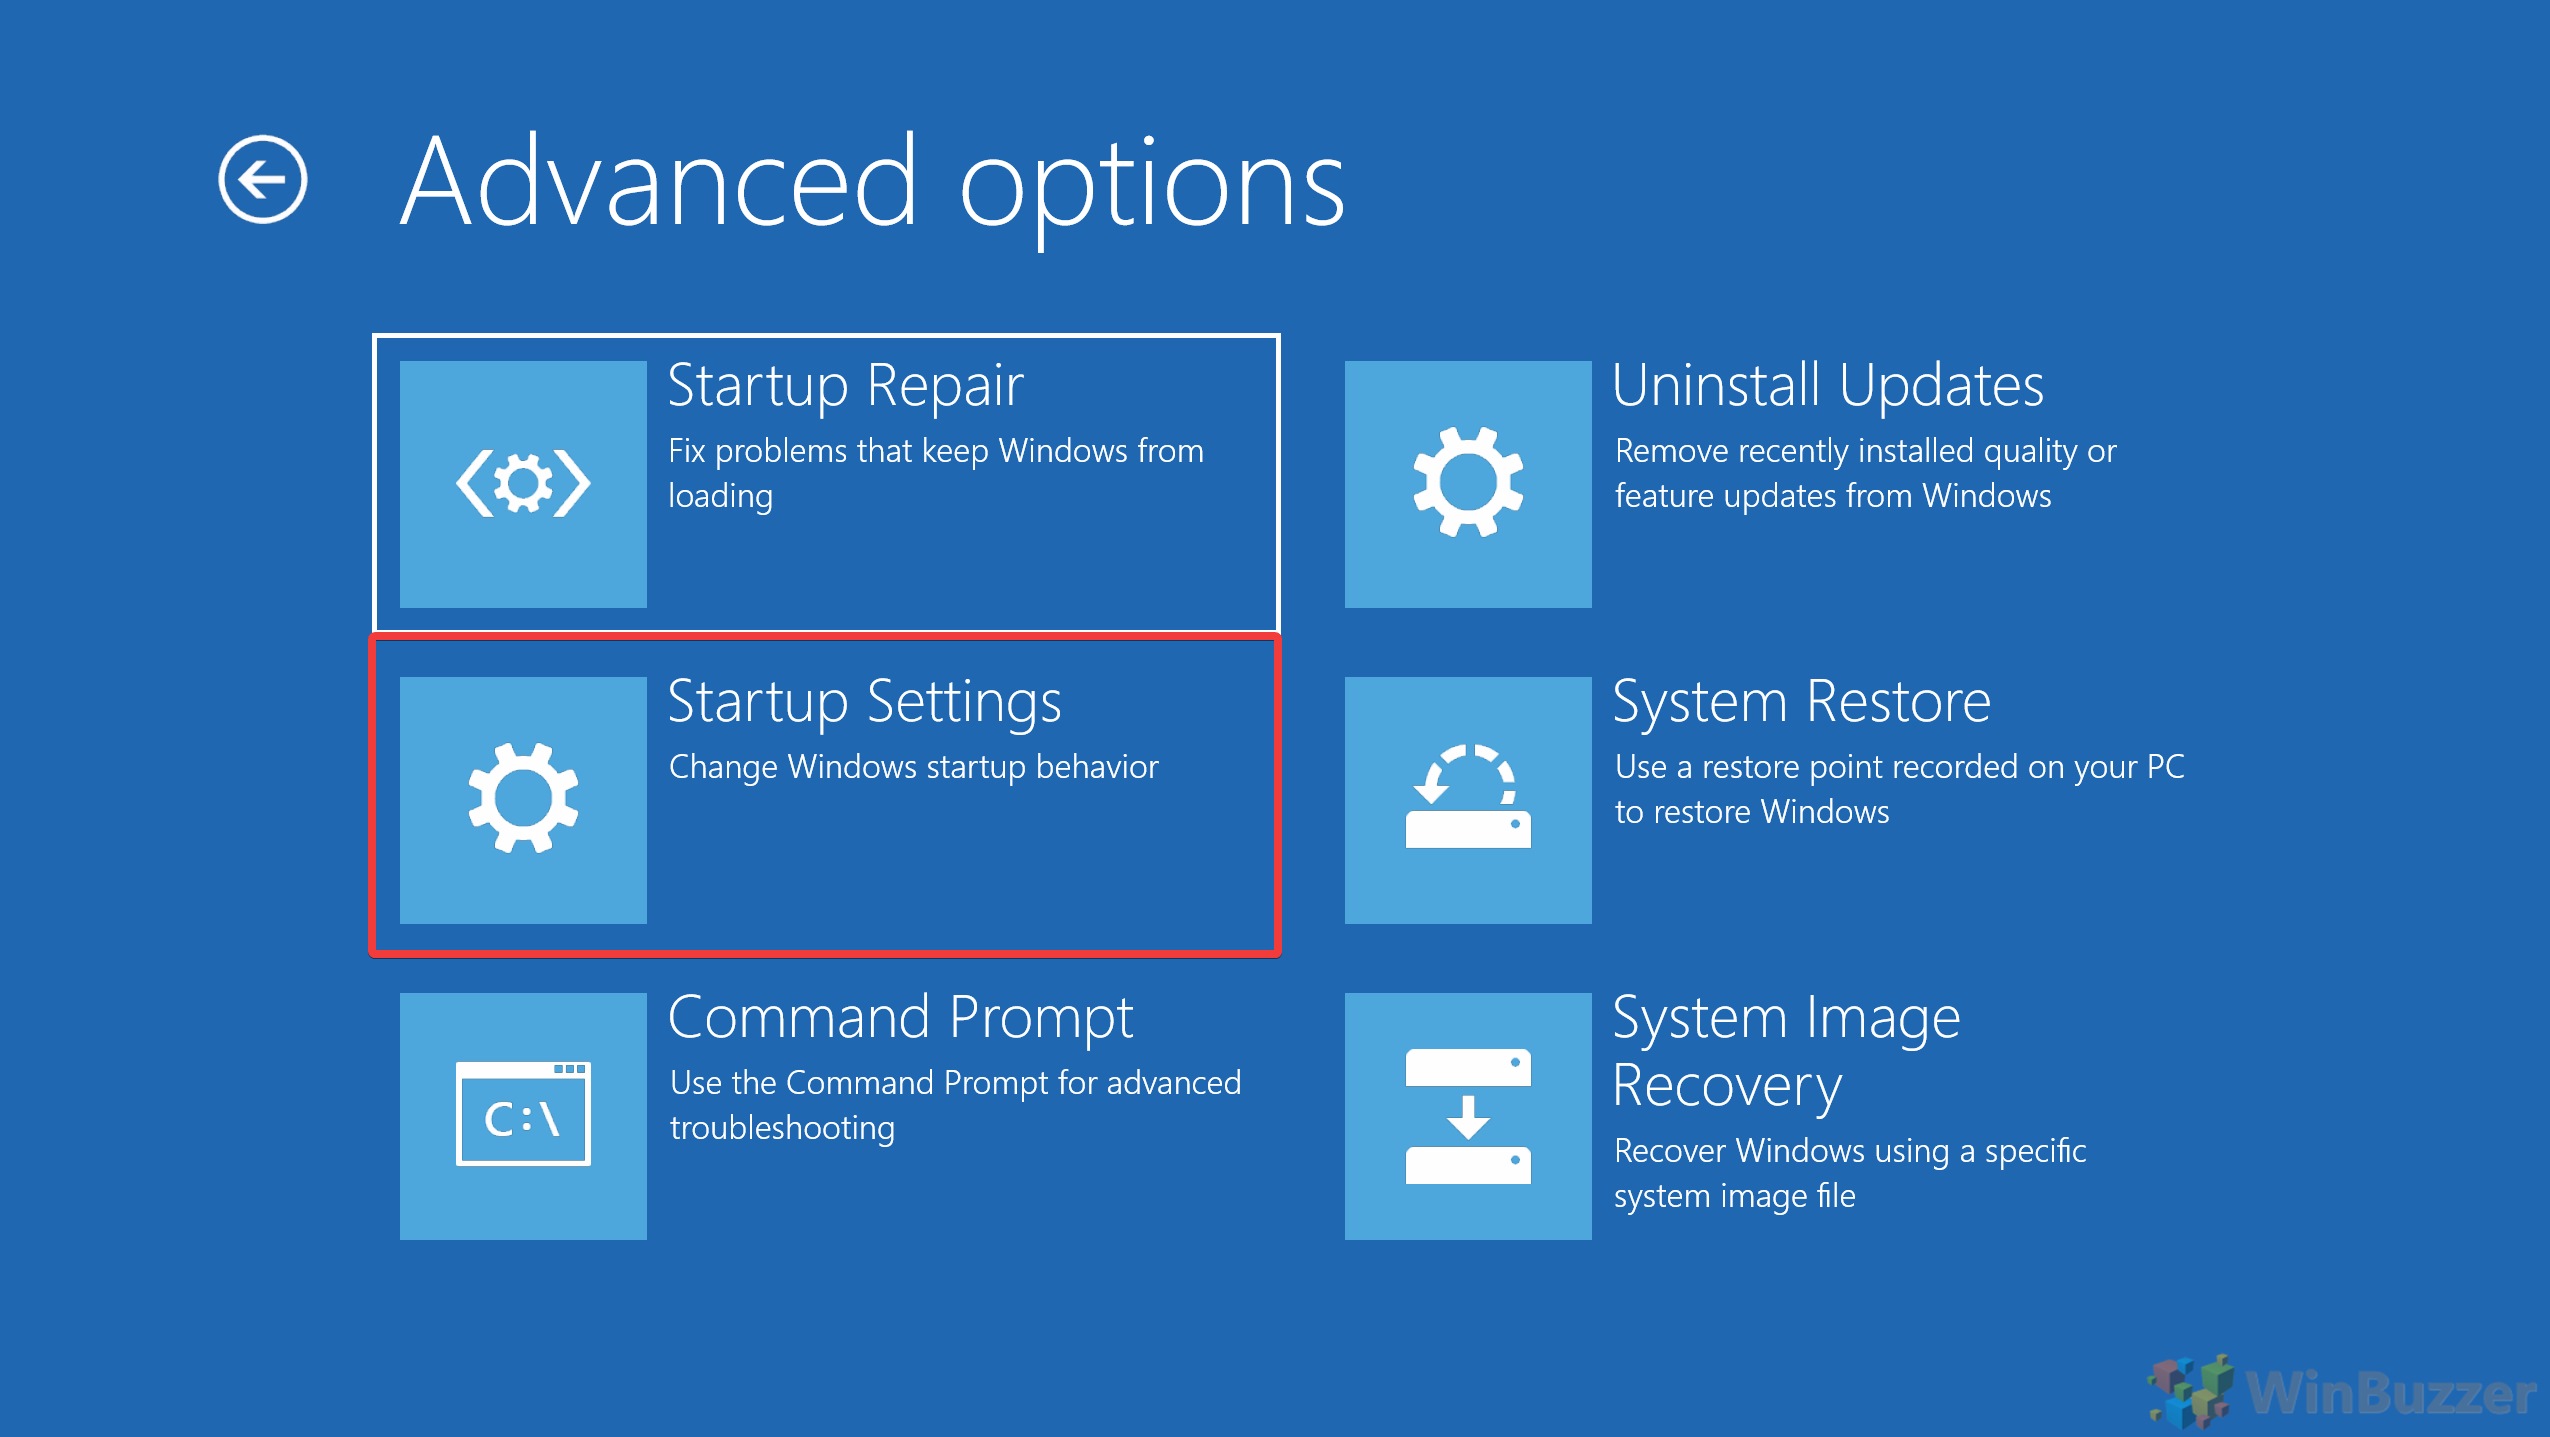
- Click ‘Startup Settings'
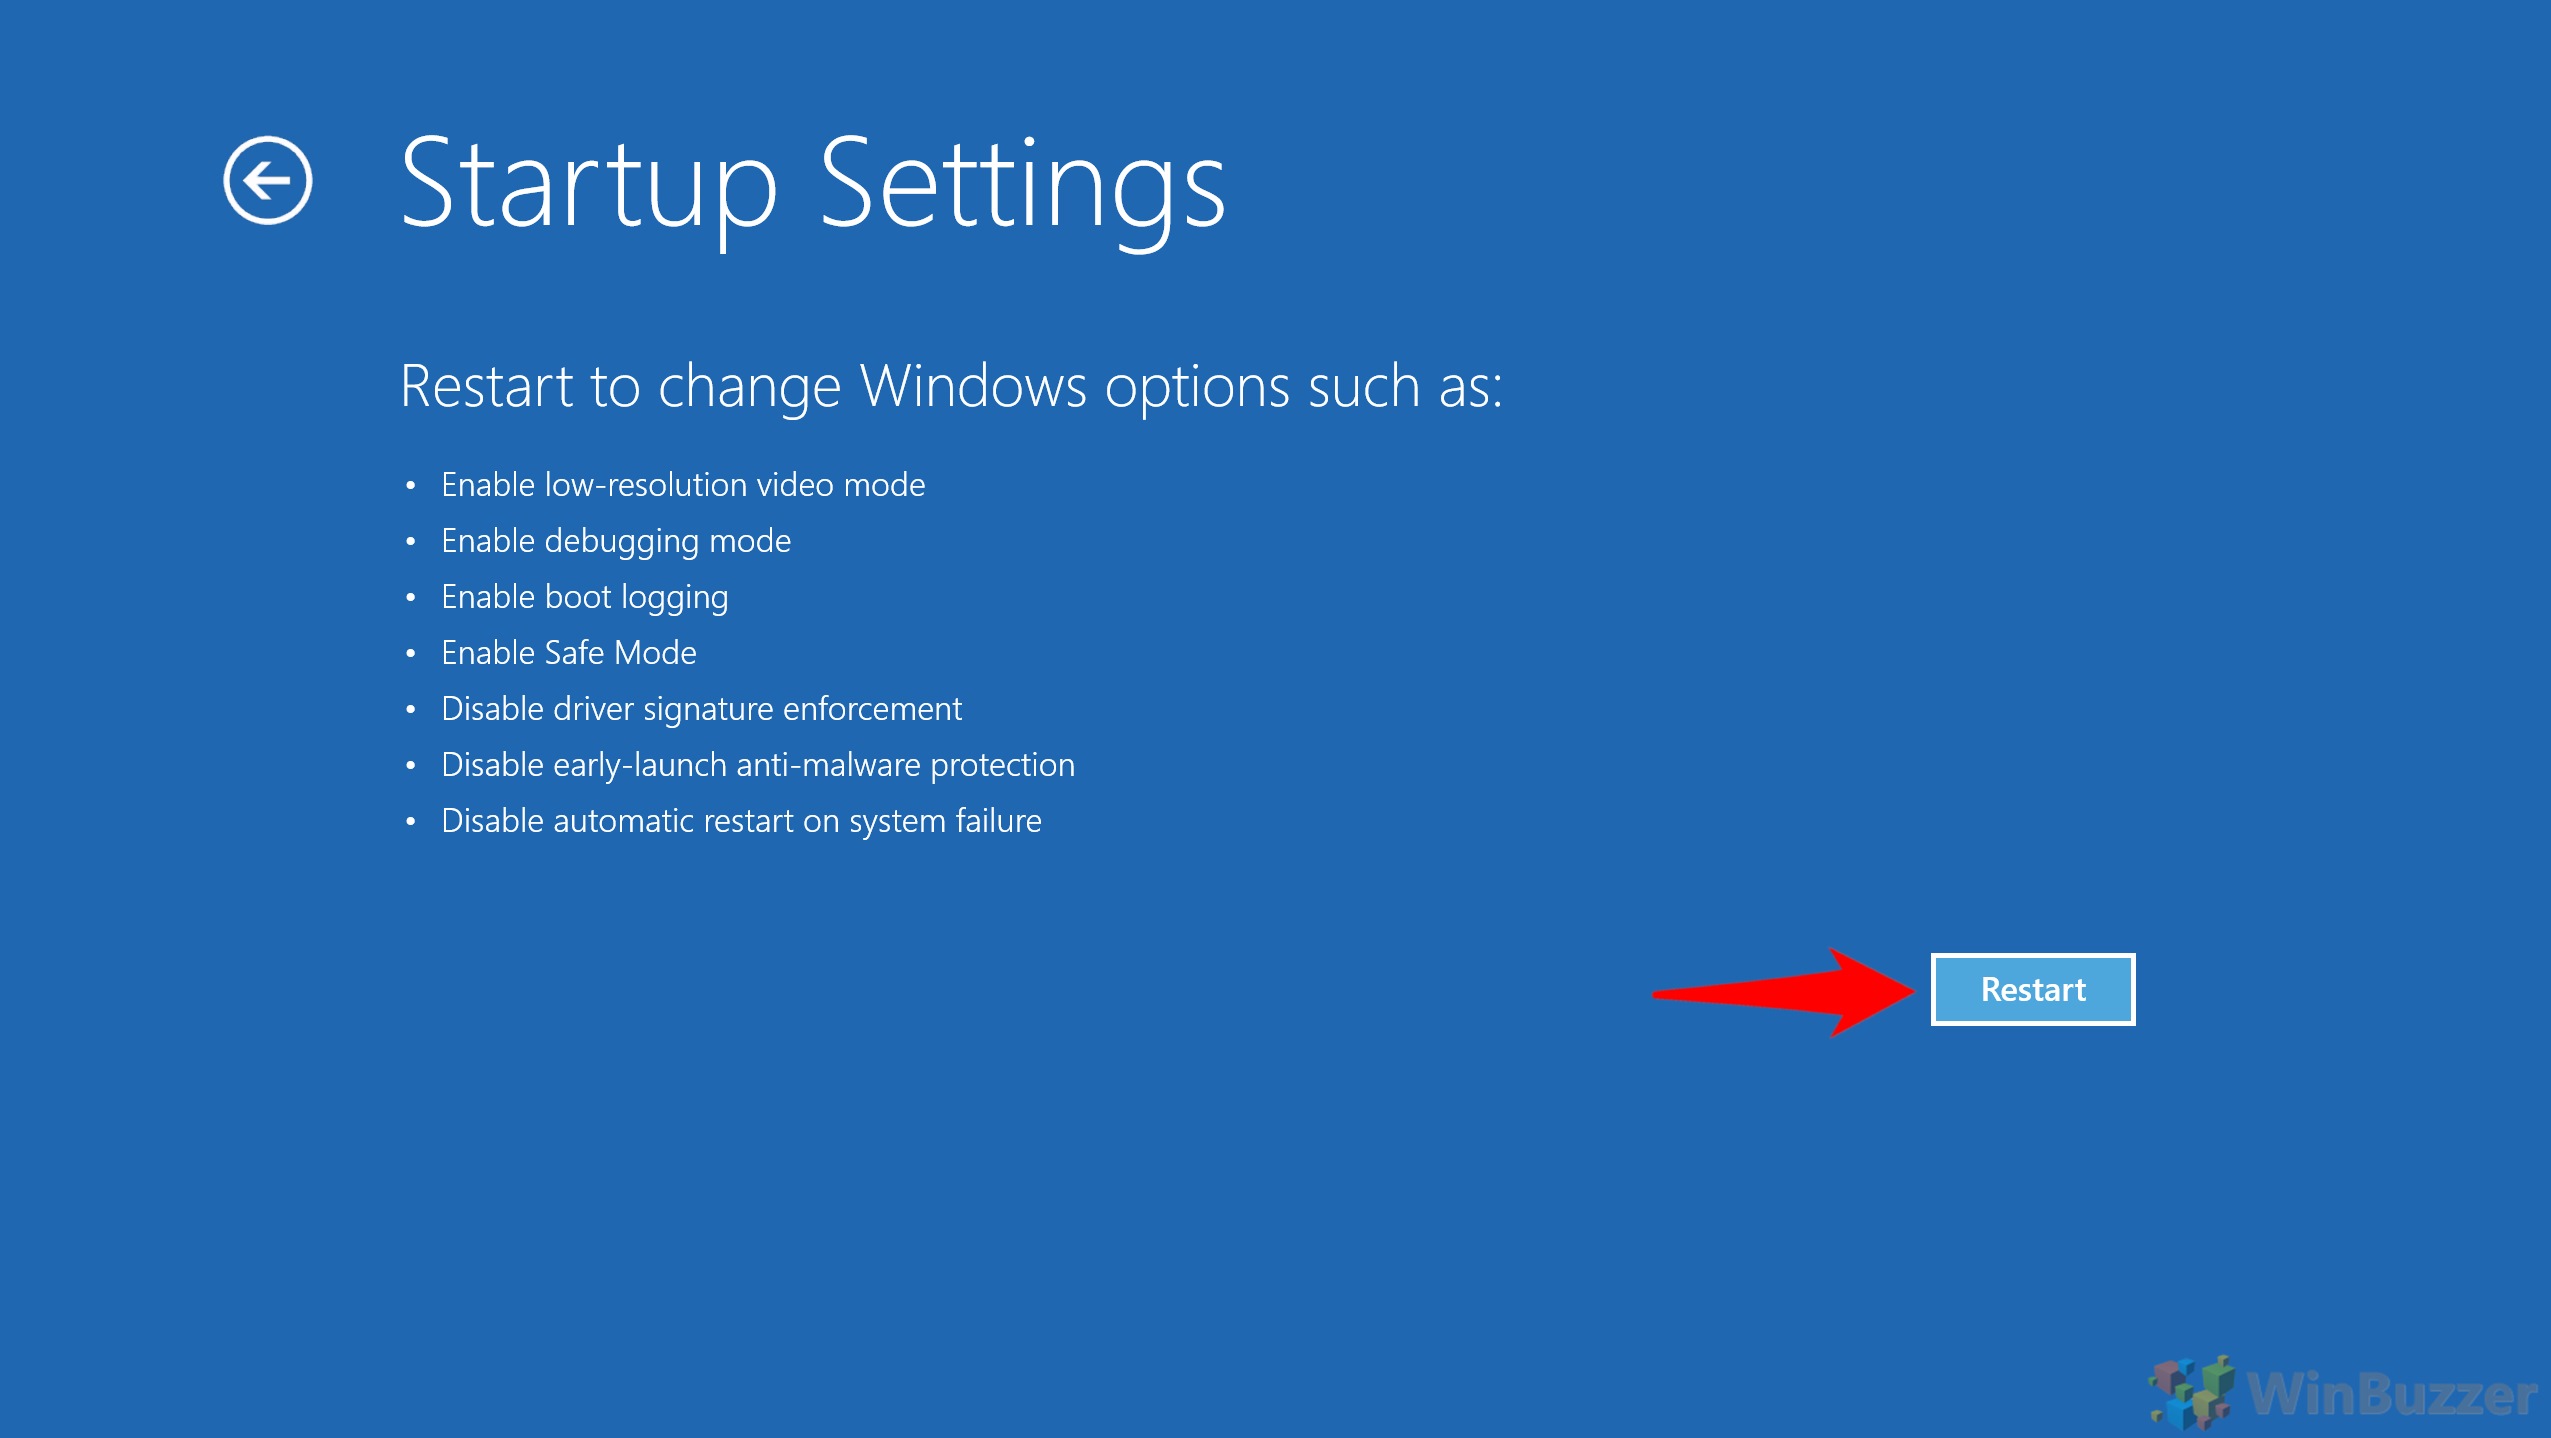
- Press ‘Restart'
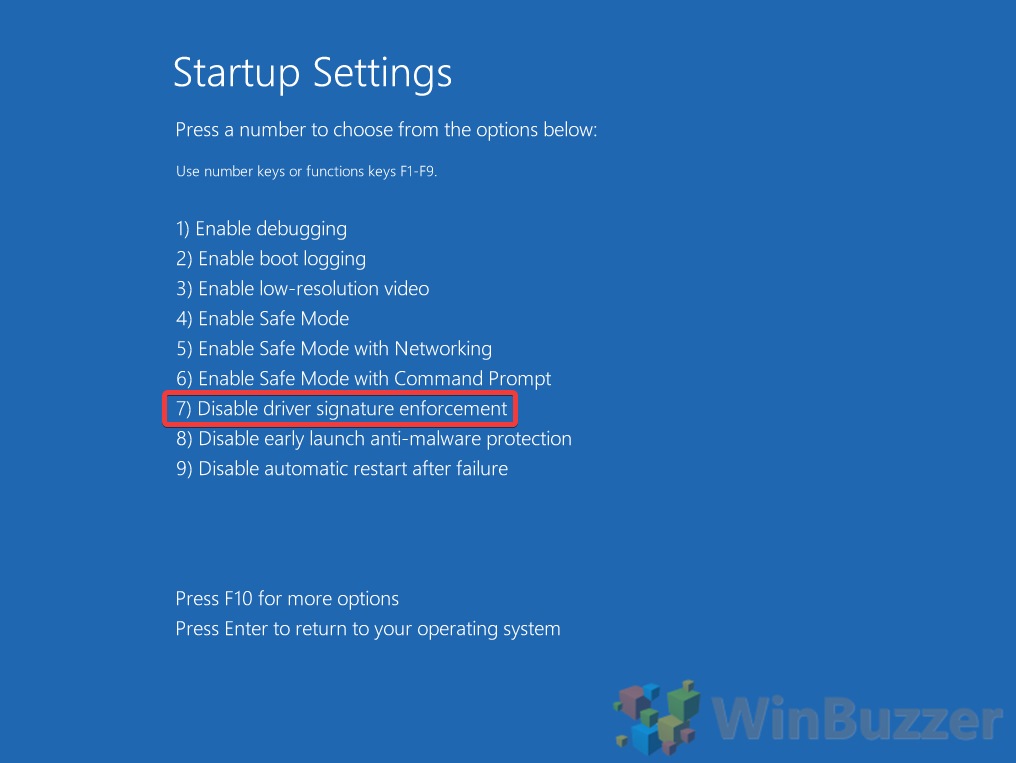
- Disable driver signature enforcement in Windows 10 startup settings
To do so, look for the relevant number on your startup settings screen and press the number or function keys on your PC to select it. In our case, it was the number 7. This is usually the case, but you should double-check in case Microsoft has added additional startup options since we made this guide.
Windows will soon boot into a desktop that looks quite normal but has driver signature enforcement enabled. You can then install your unsigned driver as you would normally without interruption.
To enable driver signature enforcement again, all you need to do is restart your PC. It will automatically turn it back on.
How to Disable Driver Signature Enforcement Using Windows 10 Test Mode
The faster method to turn off driver signature is through the command prompt and the test mode in Windows 10. However, there are a few caveats that come with this method.
Firstly, you will have to enable driver signature enforcement again manually when you're done. Secondly, you may run into problems with Secure Boot, in which case you're better off just following the method above.
Here's how you can do it:
- Open Command Prompt
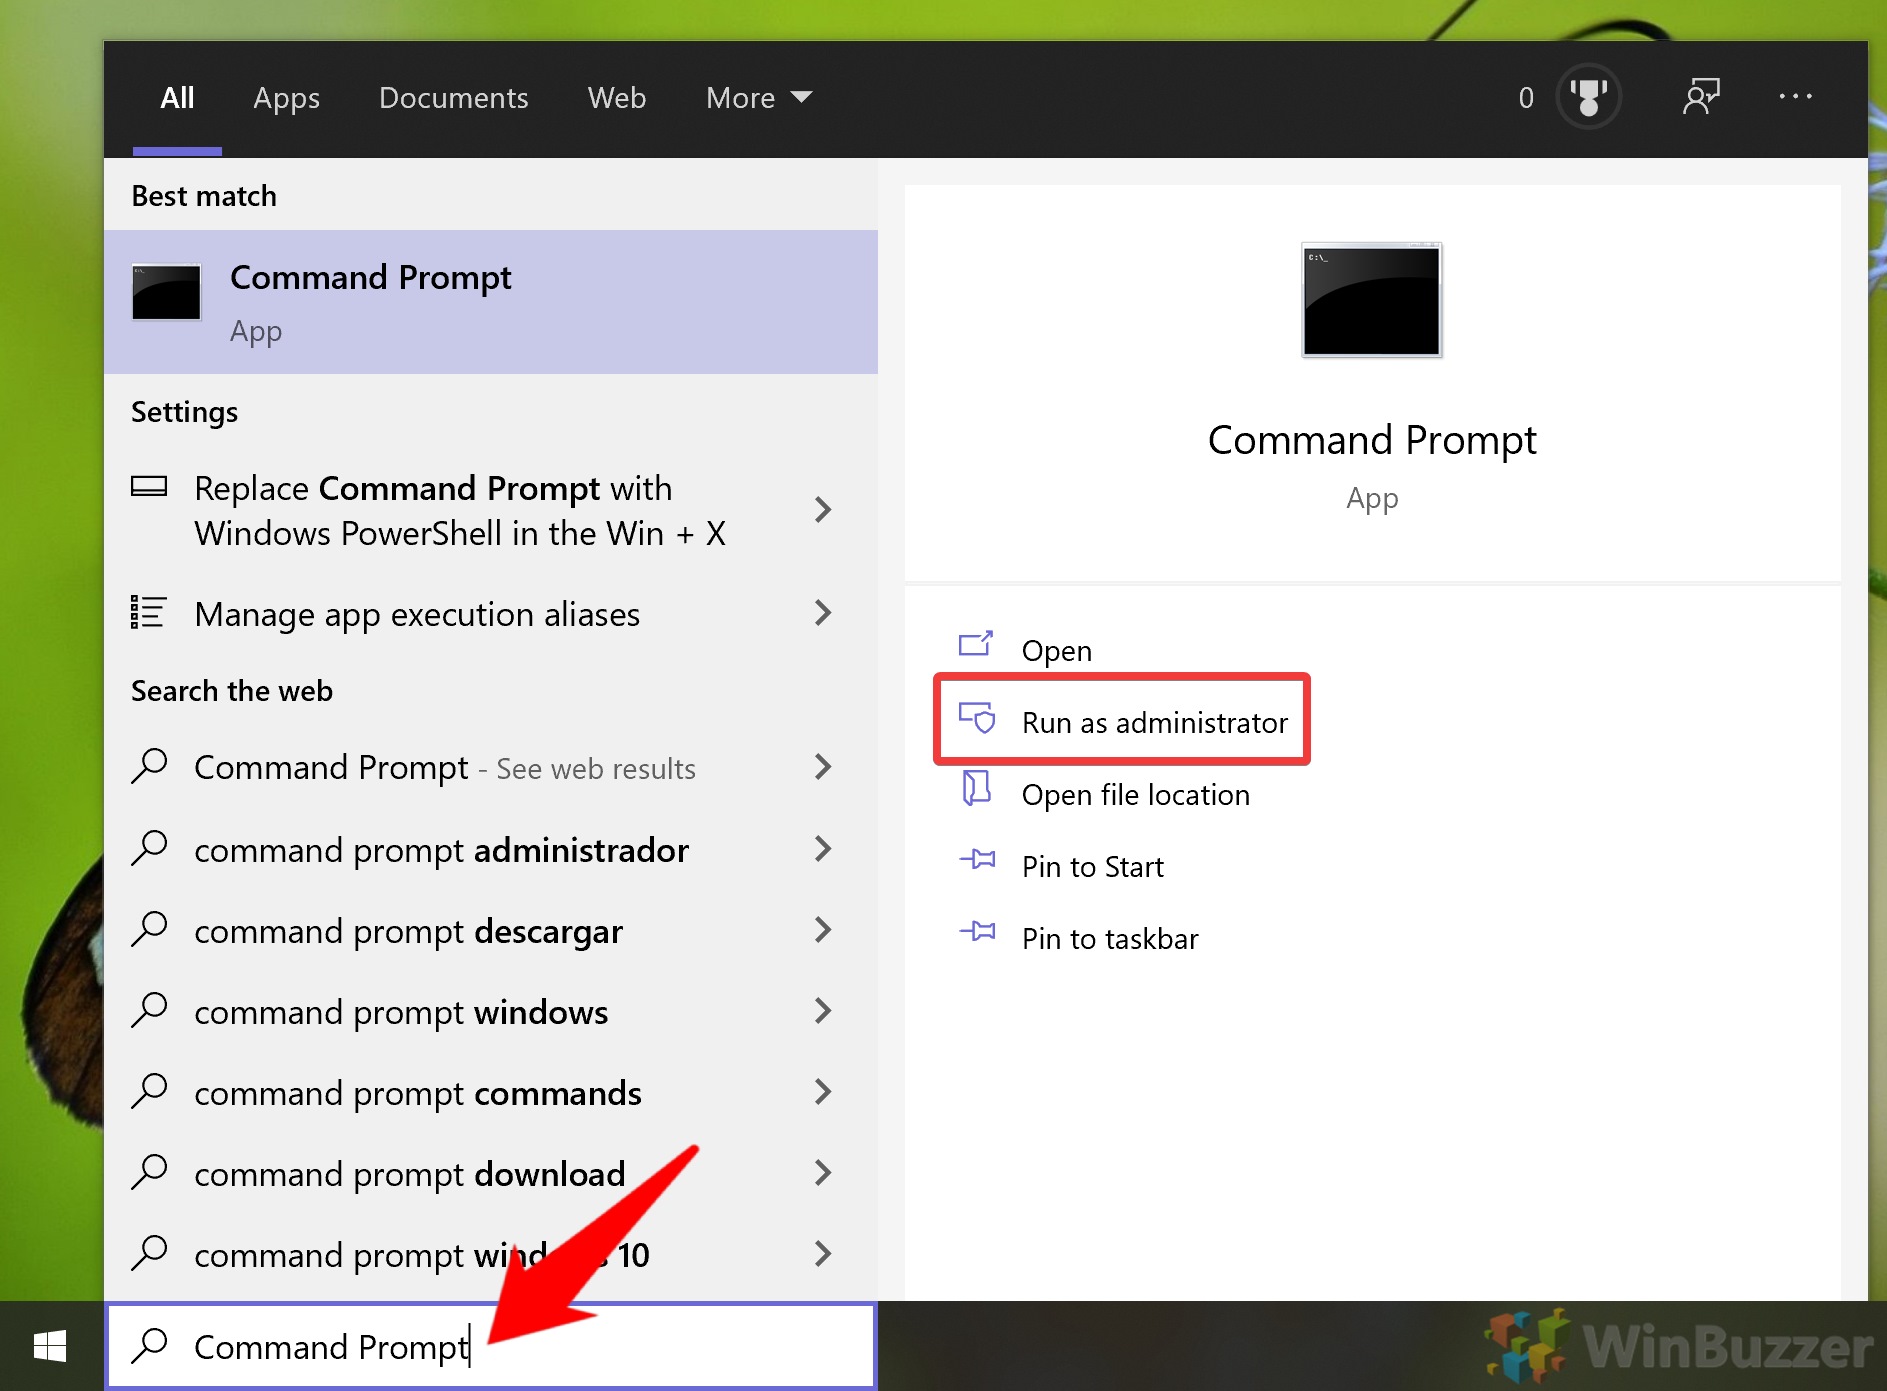
Press Start and type “Command Prompt”. With the top result selected, press “Run as administrator” on the right-hand side.
- Enable test mode for Windows 10
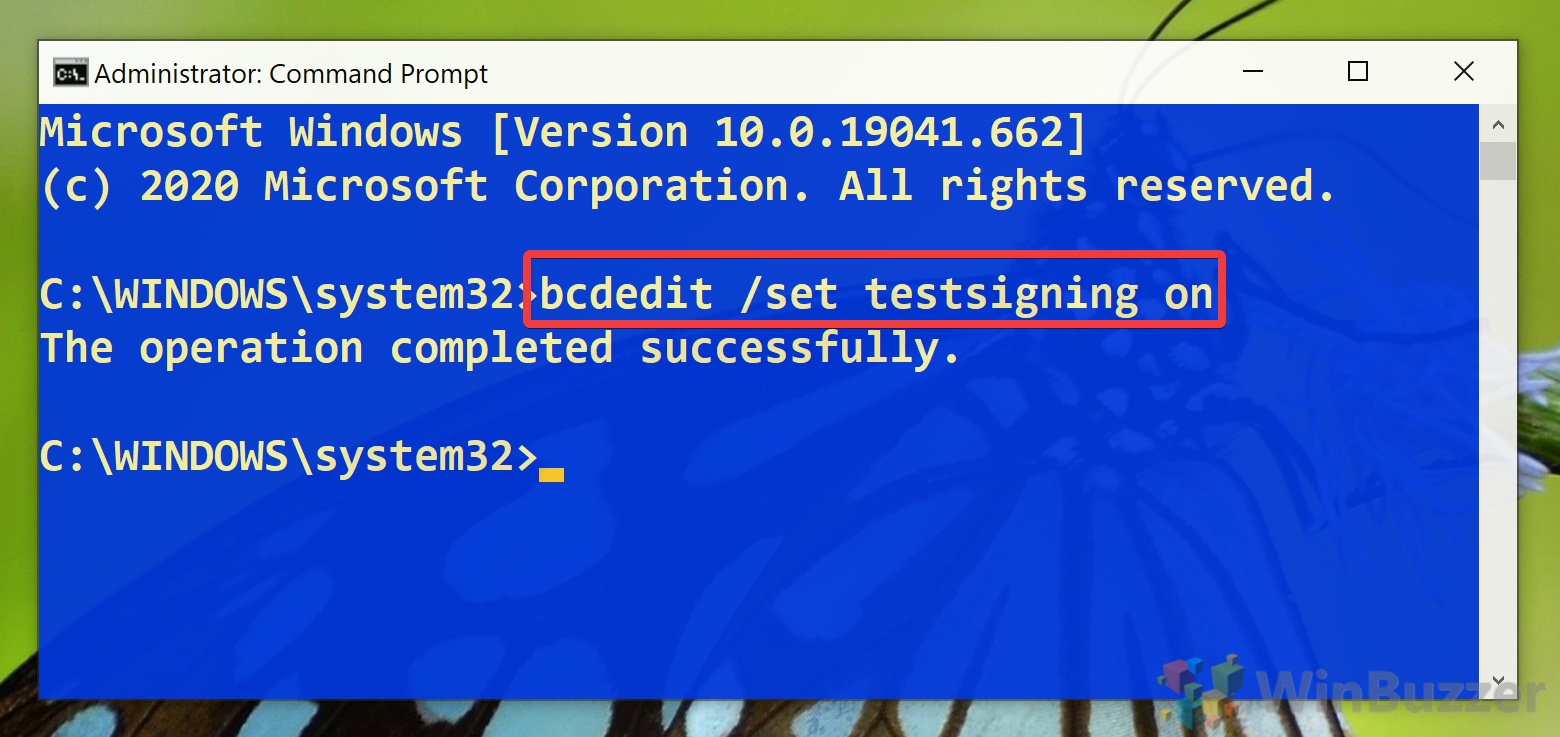
In your Command Prompt window, run the following command to enable Windows 10 test mode:bcdedit /set testsigning on
Now simply restart your computer and install any unsigned drivers you require.
It's important to note that even after you restart your computer again, driver signature enforcement will be turned off. This is a security risk, so you should turn Windows 10 test mode off when you're done with the following command:bcdedit /set testsigning off
Reboot your device for the changes to take.
With that, your unsigned drivers should be installed and driver signature checking re-enabled. If your new driver keeps getting overwritten, you may need to disable automatic driver installation. Also considering learning how to back up your drivers so you won't need to search for them again if needed.

