Windows 10’s driver support isn’t as long-lasting as many of us would like. Quite often, you’ll perform an update or reinstall only to find that a hardware device that was previously supported no longer works. When the driver is out of support, the OS won’t download it automatically. As such, it’s becoming increasingly important to perform a Windows 10 driver backup to avoid downloads from sketchy third-party sites. Thankfully, the process is relatively pain-free.
What is a Device Driver?
Drivers are groups of files or a program that controls a physical or virtual device attached to the computer. It essentially tells hardware how it should run on an operating system, and is vital for functioning.
Windows 10 has two types of drivers: generic and non-generic. Generic drivers are ones provided by Microsoft that provide basic functionality. For some devices, such as most monitors, generic drivers are all you need, but using them for hardware like a graphics card will result in significantly worse performance and potential compatibility issues.
If you find Windows is using generic drivers for a device that previously had specialized one, or that a driver is broken after an update, a restore could be your best option. We’re going to show you how to restore and backup your device drivers in Windows 10 so you have a fallback. As an added bonus, a Windows 10 driver backup will get you back on track faster if you have to reinstall your OS.
How to Backup Device Drivers in Windows 10 via Command Prompt
If you’re comfortable with command-line use, cmd is one of the fastest methods to export drivers in Windows 10.
- Open Command Prompt
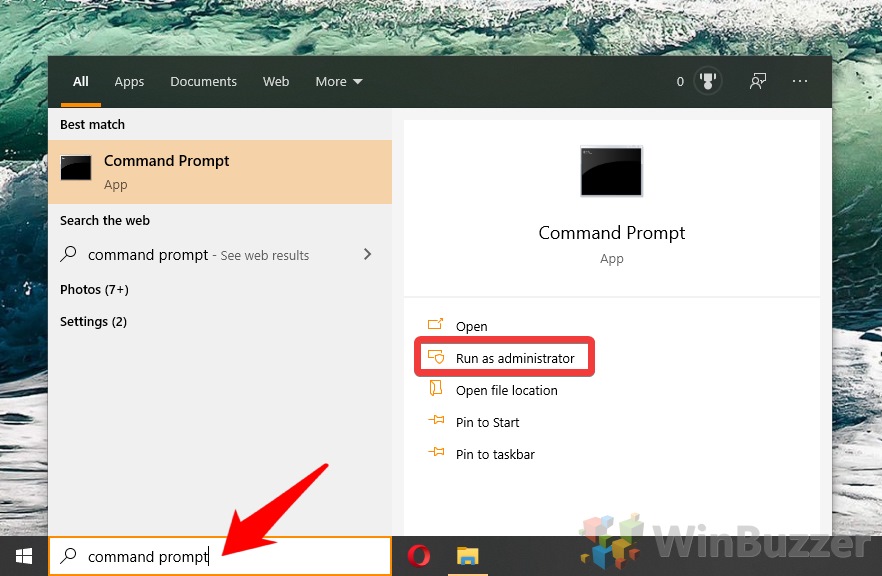
Press the Windows key and search for “Command Prompt”. Select the first result under ‘Best match’.
- Export your drivers
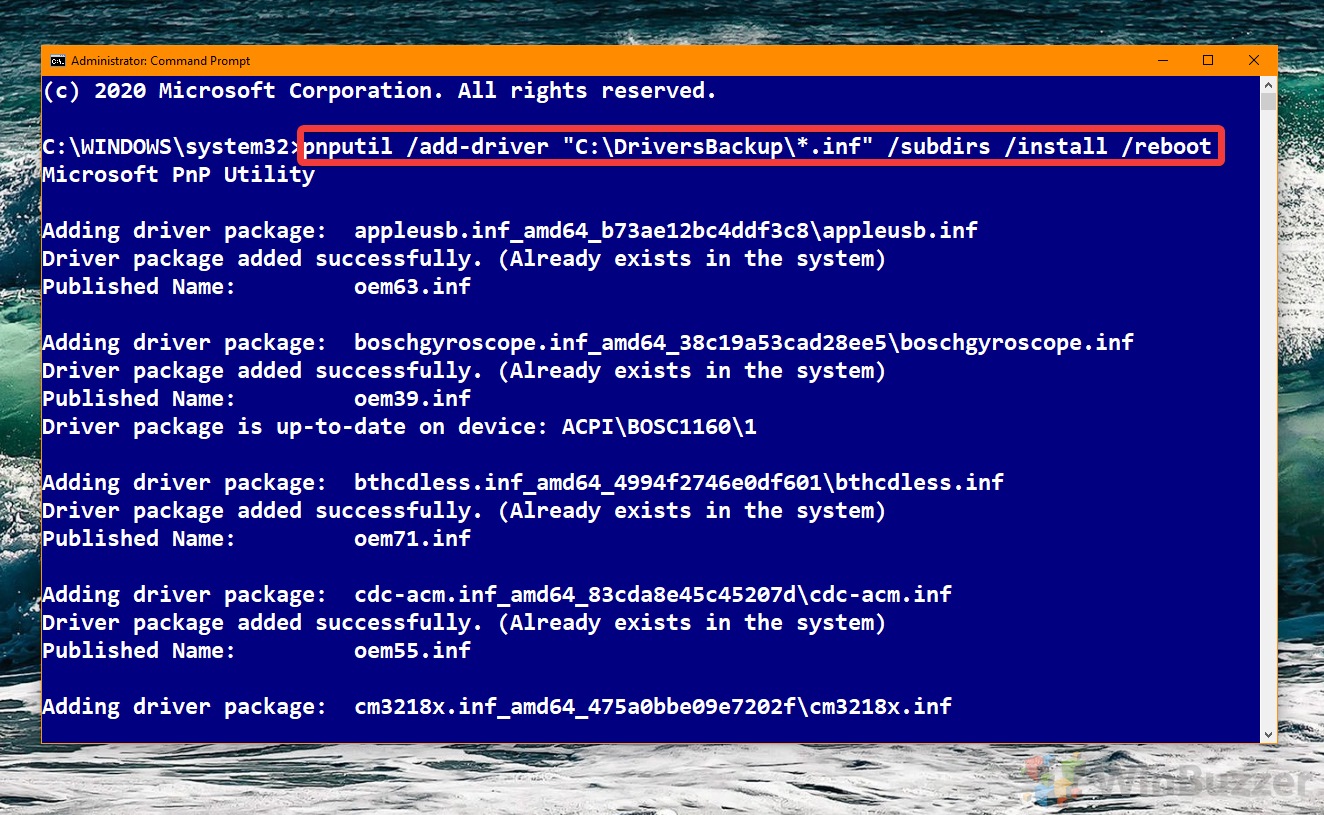
In Command Prompt, enterdism /online /export-driver /destination:"C:\DriversBackup".
- Check your Windows 10 driver backup folder
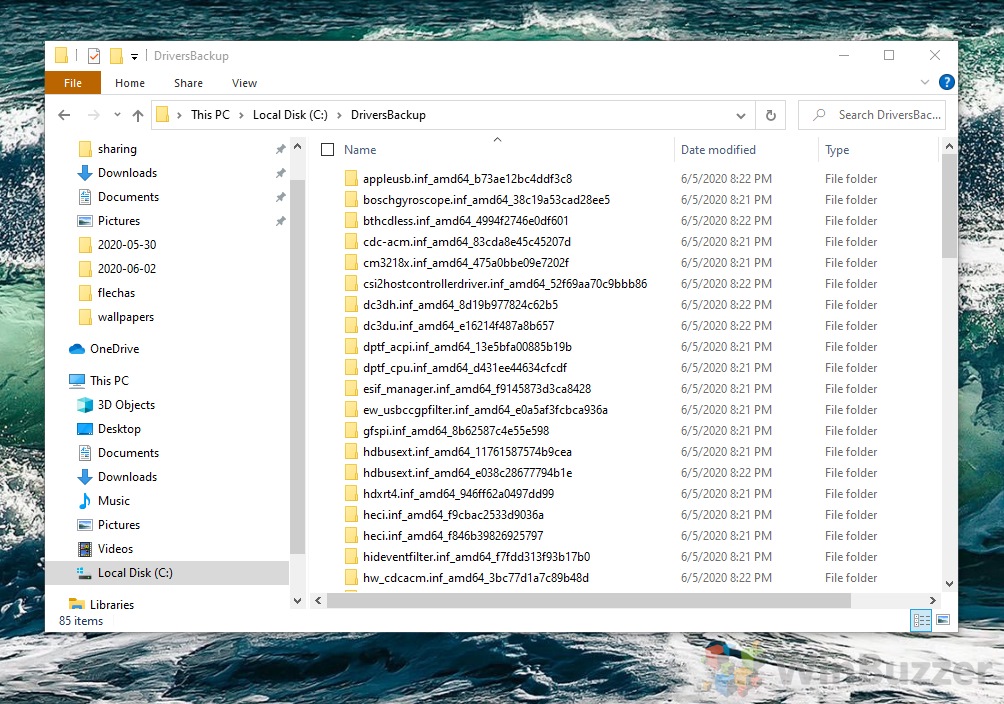
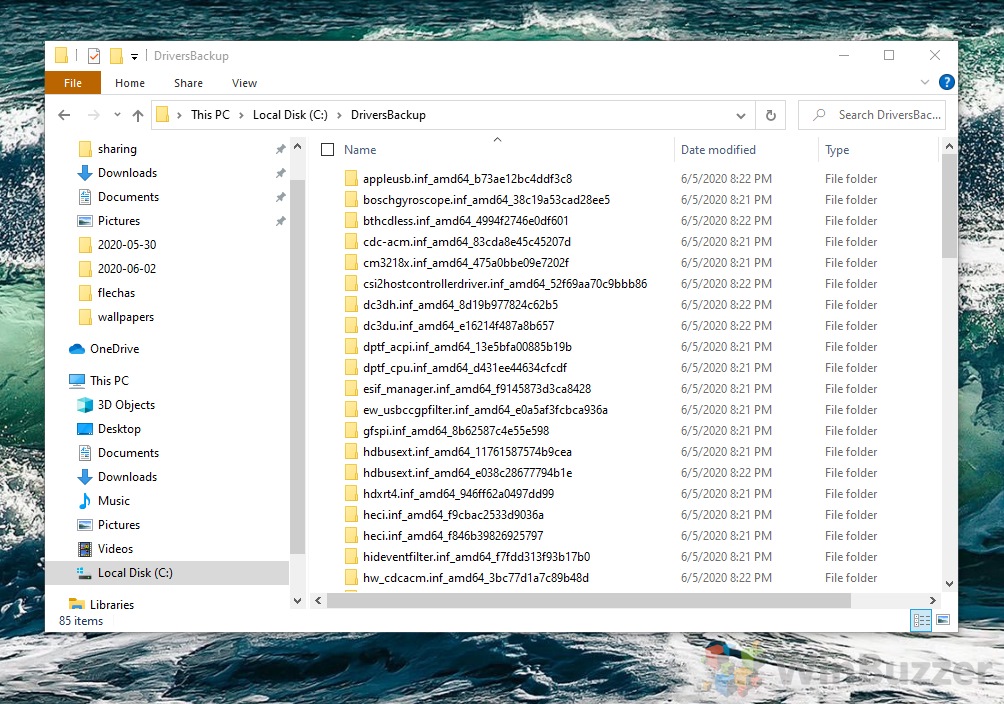
Open File Explorer and navigate toC:\DriversBackupto confirm that everything worked as expected. At this point, you may want to copy these files to an external drive or upload them to a cloud service for safekeeping.
How to Backup Drivers in Windows 10 via PowerShell
- Open PowerShell
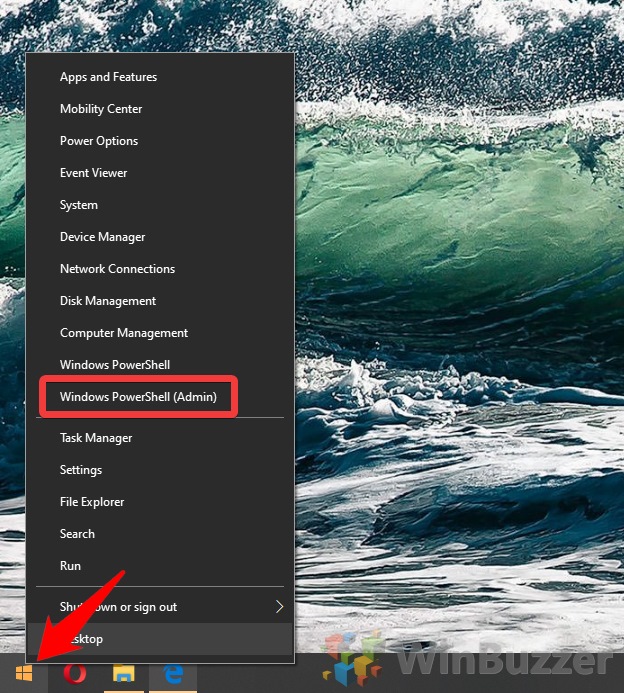
Press “Windows + X” and click on “Windows Powershell (Admin)”.
- Export device drivers
The command to export Windows 10 device drivers in PowerShell is:Export-WindowsDriver -Online -Destination "C:\DriversBackup".
You can change the destination to whatever works for you.

- Check for the files
Open Windows Explorer and navigate to the folder you specified next to the -Backup argument. Make sure your drivers are there and transfer them to another drive or cloud storage if necessary.
How to Restore a Driver in Windows 10 with Device Manager
Restoring device drivers its most user-friendly with Windows 10’s driver management tool, Device Manager.
- Open Device Manager
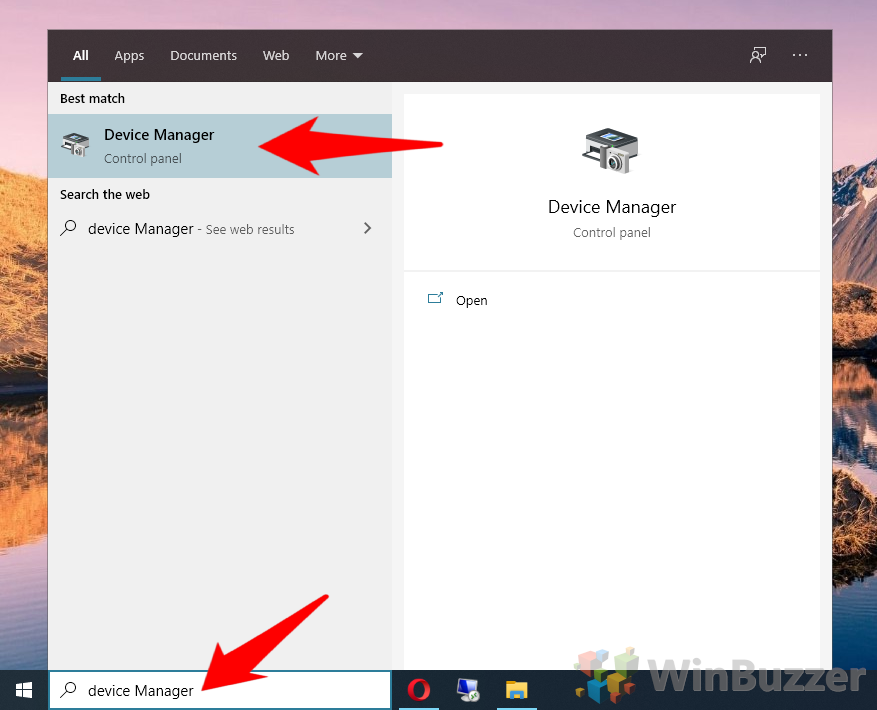
Press Start and type “Device Manager”. Click the first result under ‘Bet match’.
- Find the device you want to restore
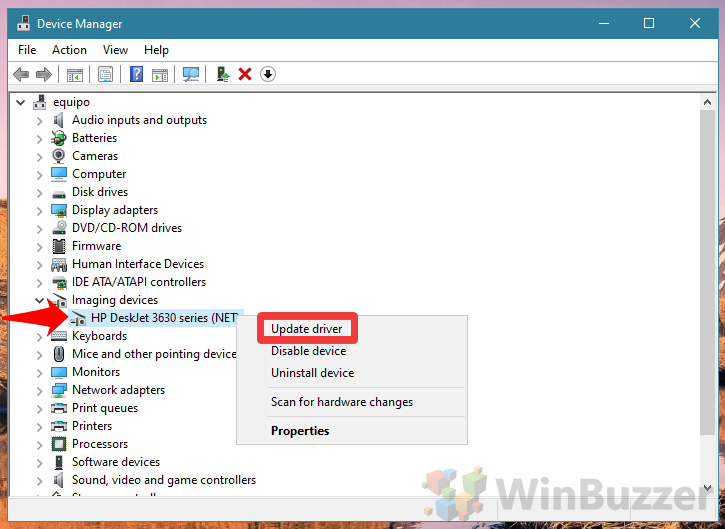
In the list of devices, find the ones you’d like to restore and click on it. In our case, a scanner driver.
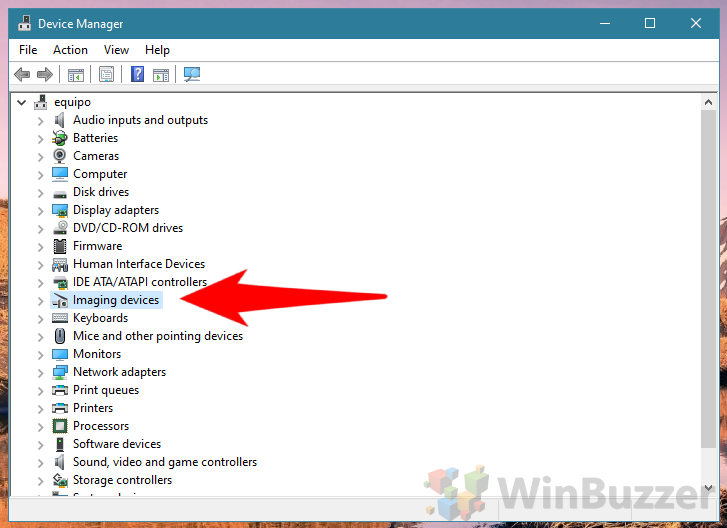
- Open the driver update menu
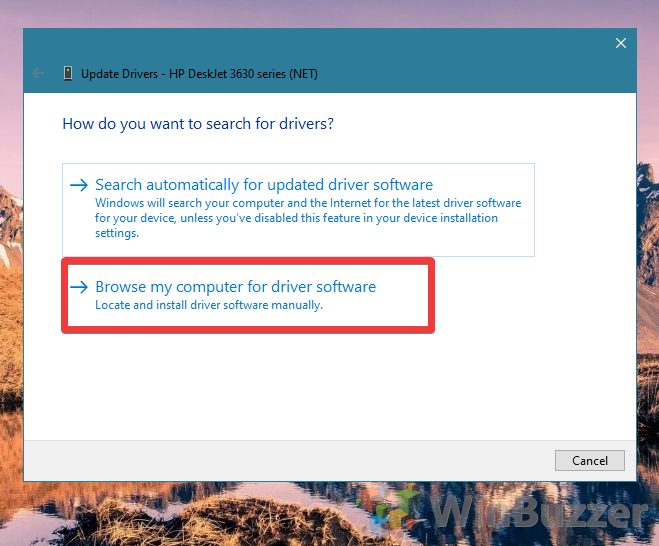
- Browse for local files
On the next screen, click “Browse my computer for driver software”.
- Select your backup folder
Tick “Include subfolder” and click “Browse…”. Click on your “DriversBackup” folder and press “OK”, then “Next”.

- Complete the Windows 10 driver restore process
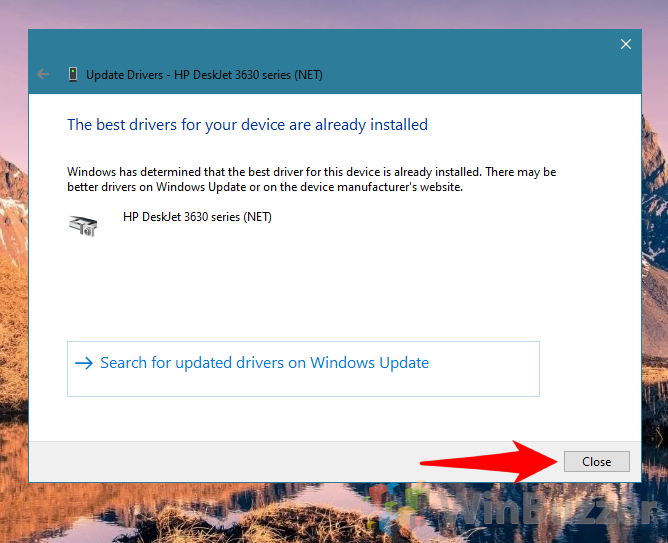
Wait for the device drivers to install, make sure the driver name is correct, and press “Close”.
