

Most of us are used to the classic qwerty or azerty layout on our keyboards, but that doesn’t mean they’re perfect. Default keyboard layouts are meant to apply to a broad range of people, not cater to individual needs. As a result, you may be wondering how to remap keys in Windows 11 and Windows 10 to suit your preferences.
PowerToys: A Great Key Remapper From Microsoft
For this purpose, we’ll be using a Microsoft-published tool called PowerToys. PowerToys is an application-suite designed to help you get more out of your PC, and that includes the ability to remap your keyboard.
If you don’t have PowerToys already, you can download it from the official PowerToys GitHub page. Follow the installer’s instructions and you’ll be good to go.
How to Remap your Keyboard in Windows 11 with PowerToys
PowerToys is a suite of utilities designed to allow power users to streamline their Windows experience for greater productivity. Among its various tools, the Keyboard Manager utility stands out for its ability to remap keys and shortcuts easily. Opting for PowerToys means benefiting from a Microsoft-supported tool that’s not only reliable but also regularly updated with security enhancements and new features.
- Open PowerToys
Press Start, type “PowerToys”, then click the top result to launch the application.

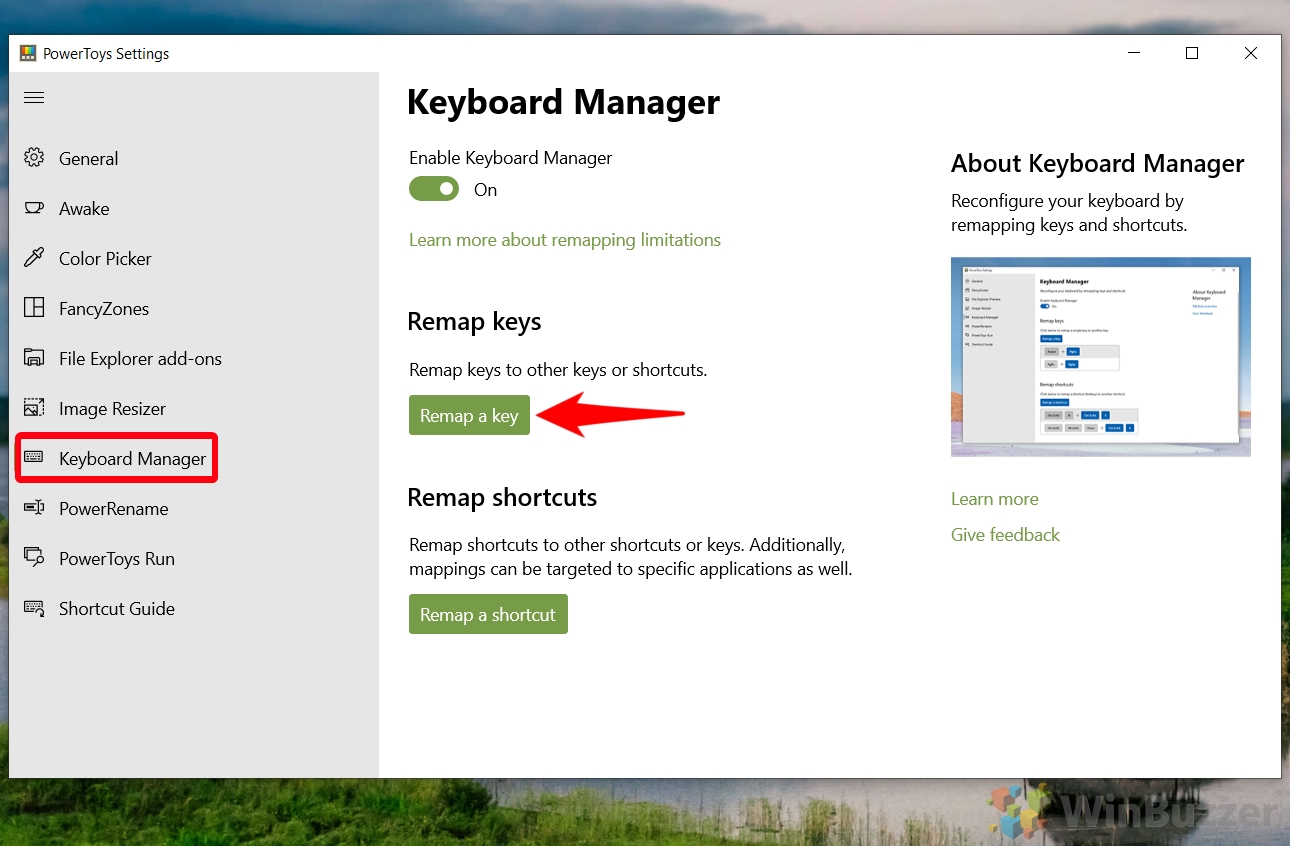
- Open “Keyboard Manager”
Navigate to the “Keyboard Manager” section and initiate the key remapping process by clicking on “Remap a key”.

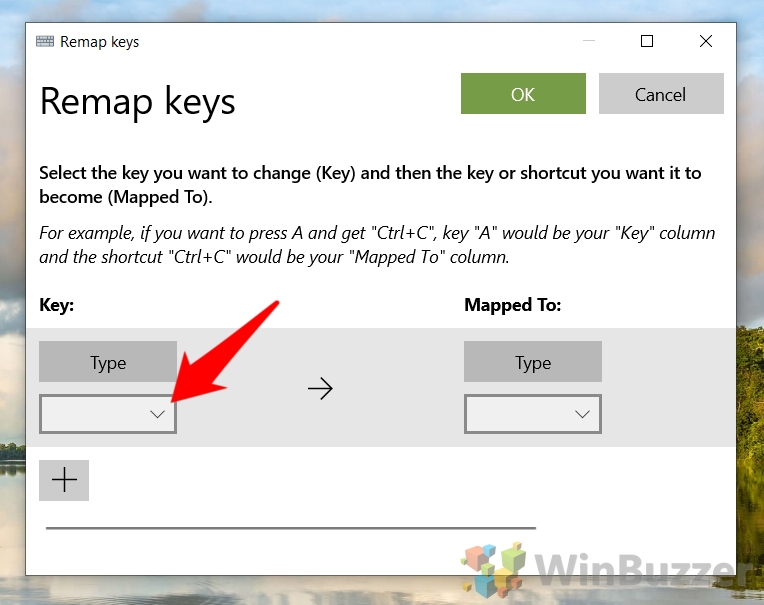
- Create a New Key Remap
Click the “+” button to add a new key mapping to your configuration.

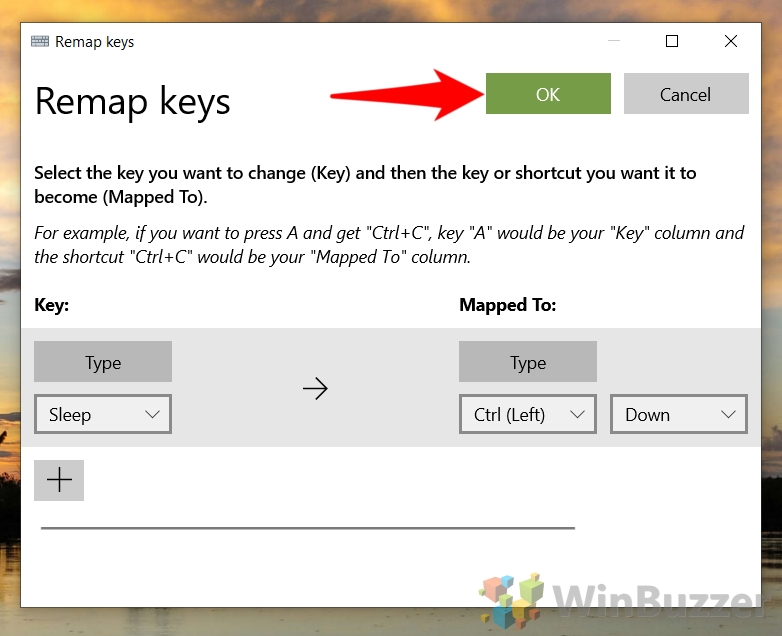
- Select the Key You Want to Remap
Select the key you wish to change and then the key or shortcut you want it to become (Mapped To).
For example, if you want to press A and get “Ctrl+C”, key “Æ would be your “Key” column and the shortcut “Ctrl+C” would be your “Mapped To” column.

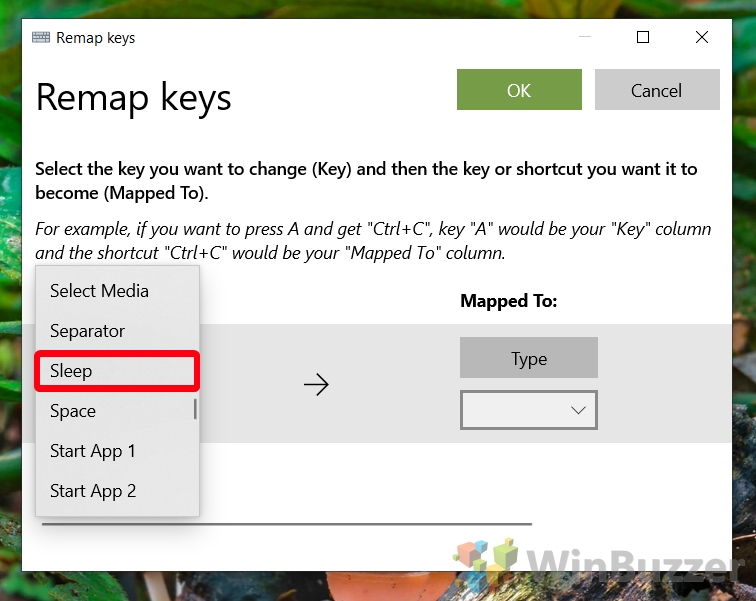
- Select the key from the list or press the “Type” button and type the key
In addition to the standard key names you can also select VK codes from “VK 1” up to “VK 252”, as explained in a comment from contributor arjunbalgovind on GitHub:
“We show VK for any virtual key code which doesn’t point to a unicode character using the ToUnicodeEx API, or if it doesn’t have a special key name (as per the Virtual key codes docs). The reason for keeping all the key codes is for flexibility for users (some users have mentioned use cases where they map a key to a unused key code and in turn can use it for a specific function in an application which accepts only 1 key), and because the list of “valid” key codes can vary between input languages. For the mouse buttons the name was not added because they wouldn’t work (the keyboard hook won’t catch events for those codes, but GetAsyncKeyState would still show the state as per the mouse click). It might be better to use hex/both, it wasn’t something we thought about when we added it in since it was there primarily for compatibility between languages.”

- Press the dropdown in the “Mapped To:” column

- Select the key you want to remap it to
After selecting the original key, choose the new key or action you want it to perform.

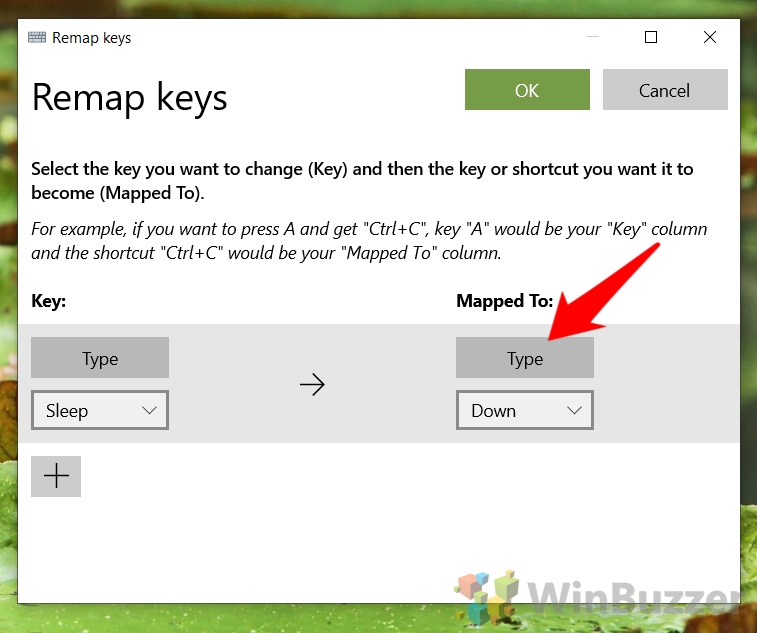
- Or: Use “Type”
Use the “Type” option for direct key input if your desired key isn’t listed.

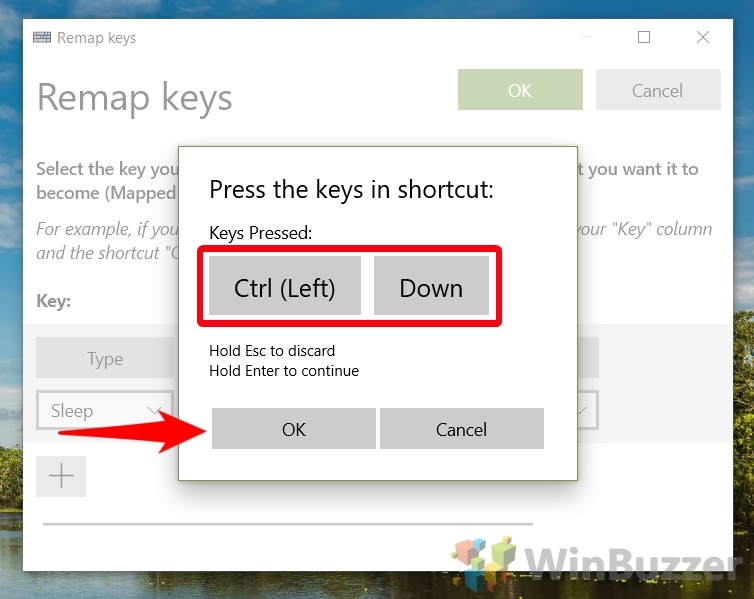
- Press the key or keyboard shortcut to remap to
Confirm your selection by pressing “OK” once the desired key or shortcut appears in the “Keys Pressed” window.

- Apply the changes
Finalize your key remapping by clicking “OK“.

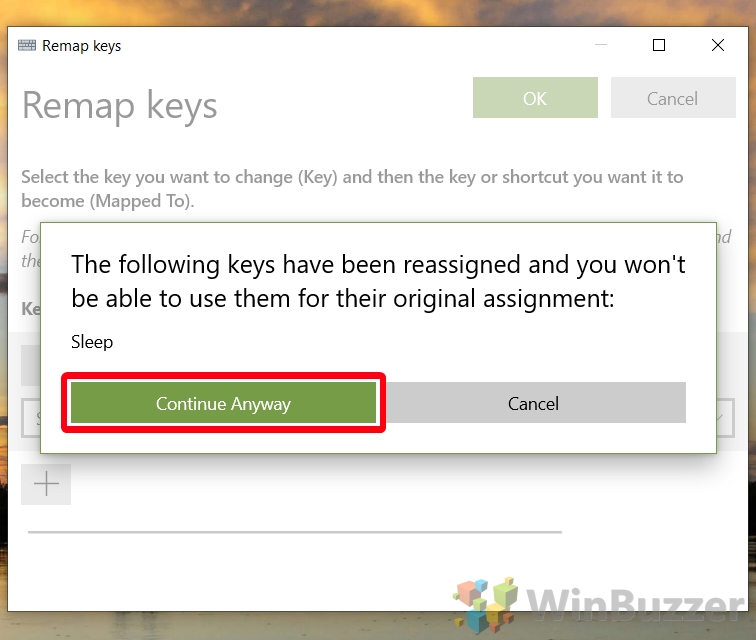
- Confirm with “Continue Anyway”
You can now try out your new keyboard remapping and use it wherever you like.


The Best Freeware Tools to Move and Remap Keys
If you’d prefer not to install a general-purpose tool like PowerToys, there are several third-party tools to choose from. Popular choices include:
SharpKeys
SharpKeys is a simple and easy-to-use tool that has been around for a while. Its interface is nothing fancy but is perhaps more efficient because of it. Once you’re done making the changes, SharpKeys lets you easily write them to the registry and then reboot to get started.
Key Remapper
Key Remapper is one of the more popular and well-reviewed key remappers for Windows 10. Though you do have to pay for its full version, you can grab a restricted version for free here. The best thing about Key Remapper is its ability to additionally remap mouse buttons. You can therefore add keyboard keys to your mouse for very easy access.
KeyTweak
KeyTweak is a good alternative if you’re looking for a key remapper with a more visual interface. Rather than lists, it displays a virtual keyboard and allows you to click each button on it to remap them. You can also save different sets of mappings to separate profiles so that you can easily switch between them.
Key Mapper
Key Mapper stands out for its flexible interface. Everything works through a drag and drop interface that allows you easily reassign, disable, and activate keys. However, you can also use methods such as double-clicking keys on the keyboard or manually creating a new mapping. Importantly for international or dvorak users, Key Mapper also supports several alternate keyboard layouts.
RemapKeyboard
If you’re looking for something small and lightweight, RemapKeyboard does the job. It comes in at just 79KB and consists of simple, three-column list interface that is very easy to navigate. It requires a registry entry to change the keys, so you’ll need to log in and out for the changes to take effect.
FAQ – Frequently Asked Questions About Key Remapping with PowerToys
Can I remap keyboard shortcuts in addition to individual keys using PowerToys?
Absolutely. The Keyboard Manager component of PowerToys allows you not only to remap single keys but also to customize keyboard shortcuts. This includes creating new shortcuts or altering existing ones to better suit your workflow and productivity needs. It’s a versatile feature that extends your customization capabilities well beyond simple key remapping.
Is it possible to remap mouse buttons using PowerToys?
Currently, PowerToys does not support the remapping of mouse buttons directly. For users looking to customize their mouse button actions, alternative third-party software will be necessary. There are numerous tools available that offer mouse button customization, including the ability to set up complex actions and gestures.
Can I export my PowerToys keyboard remappings to another computer?
While PowerToys does not offer a built-in feature for exporting and importing keyboard remapping profiles directly through the GUI, you can manually transfer the necessary configuration files. These files are typically located in the PowerToys settings folder within your user profile directory. Copying these to the corresponding location on another computer with PowerToys installed will replicate your key remapping setup.
How do alternative key remapping tools compare to PowerToys in terms of features?
Alternative key remapping tools vary widely in their approach and features. For instance, SharpKeys offers a straightforward, no-frills interface for directly writing remaps to the Windows registry, making it less flexible but very simple to use. Key Remapper, on the other hand, includes the ability to remap both keyboard keys and mouse buttons, providing a wider range of customization than PowerToys’ current keyboard-only focus. Other tools might offer unique user interfaces, such as drag-and-drop mapping, or support for creating conditional remappings based on the application in focus.
Can I use PowerToys to remap keys on external keyboards?
Yes, PowerToys supports key remapping for both built-in laptop keyboards and external keyboards. This means that any remapping you apply through PowerToys will affect the selected keys regardless of whether they’re on an internal or USB/Bluetooth-connected external keyboard. It’s important to note, however, that remappings are global and not device-specific; the same remappings apply to all keyboards connected to the system.
Does remapping keys with PowerToys affect performance or security?
Key remapping with PowerToys is designed to be both secure and efficient, having a negligible impact on system performance and no known security vulnerabilities as long as you download PowerToys from the official Microsoft GitHub repository. Microsoft actively develops and supports PowerToys, ensuring it adheres to modern security standards.
How can I contribute to the development of PowerToys or suggest new key remapping features?
Microsoft welcomes community contributions to PowerToys. If you’re interested in suggesting new features, reporting bugs, or even contributing code, the best place to start is the PowerToys GitHub repository. There, you can open an issue to suggest a new feature or report a problem, or you can fork the repository to work on your own code improvements. The project’s README and contributing guidelines provide a wealth of information on how to get started.
Can I set key remappings in PowerToys to be application-specific?
As of the current version, PowerToys does not support the ability to create application-specific key remappings. All key and shortcut remappings applied via the Keyboard Manager are global, affecting all applications. For specialized remapping needs—including application-specific configurations—users may need to look into more advanced scripting or software solutions.
Is PowerToys compatible with Windows versions older than Windows 10?
PowerToys is specifically designed for Windows 10 and later, leveraging modern Windows features and APIs for its functionality. As such, it is not compatible with or supported on older versions of Windows, such as Windows 8.1 or Windows 7. Users on these older platforms would need to explore alternative tools or upgrade their operating system to use PowerToys.
How does PowerToys manage remapping of special keys like function or media controls?
PowerToys’ Keyboard Manager supports remapping a wide array of keys, including function keys and many special keys like media controls. This allows users to customize their keyboards extensively, tailoring functionality like volume control or track skipping to keys of their choosing. Keep in mind that while most keys are remappable, there may be some special keys or hardware-specific keys that cannot be remapped due to their direct handling by the system or hardware-level firmware.
What steps should I take if I encounter a conflict during key remapping in PowerToys?
When you encounter a conflict during key remapping with PowerToys—such as overlapping shortcuts or remapped keys affecting crucial system functions—PowerToys will alert you through its interface. You can opt to proceed with the remapping, knowing the conflict, or revise your remappings to avoid the issue. For optimal results, it’s advisable to carefully plan your remappings to minimize conflicts, particularly for commonly used shortcuts and keys.
Are there communities or forums where I can share or learn about PowerToys remapping setups?
Yes, there are several communities and forums where PowerToys users share tips, remapping setups, and troubleshoot issues together. The PowerToys GitHub repository is a central hub for technical discussions and feature requests. Additionally, forums like Reddit’s r/PowerToys and Microsoft’s own community forums serve as platforms for broader discussions, user tips, and shared configurations.
Do I need administrative privileges to use PowerToys for key remapping?
Running PowerToys and accessing its key remapping feature requires administrative privileges primarily during installation or when updating PowerToys. This ensures that PowerToys can interact securely with system-level settings and apply remappings effectively. Once installed, key remapping doesn’t require additional permissions for daily use.
Will my PowerToys key remappings persist through system reboots?
Yes, any key remappings or shortcut customizations you apply using PowerToys’ Keyboard Manager are permanent changes that persist through system reboots. This ensures that your custom keyboard configurations remain consistent across all your computing sessions, eliminating the need to reapply settings after a reboot.
Can I revert to the original key settings easily in PowerToys if I change my mind?
Reverting to the original key settings in PowerToys is straightforward. Within the Keyboard Manager, you can remove individual key mappings or reset all custom remappings to default with just a few clicks. This flexibility allows you to experiment with different configurations and easily undo changes if they don’t meet your needs.
Extra: How to Disable the Windows Key in Windows 11
The Windows key on your keyboard can be a useful shortcut for accessing various features and functions of Windows 11. However, it can also be a source of annoyance or frustration for some users, especially when gaming or working on important tasks. In our other guide we show you how to disable the Windows key and provide some hints what you can do if the Windows key is not working.
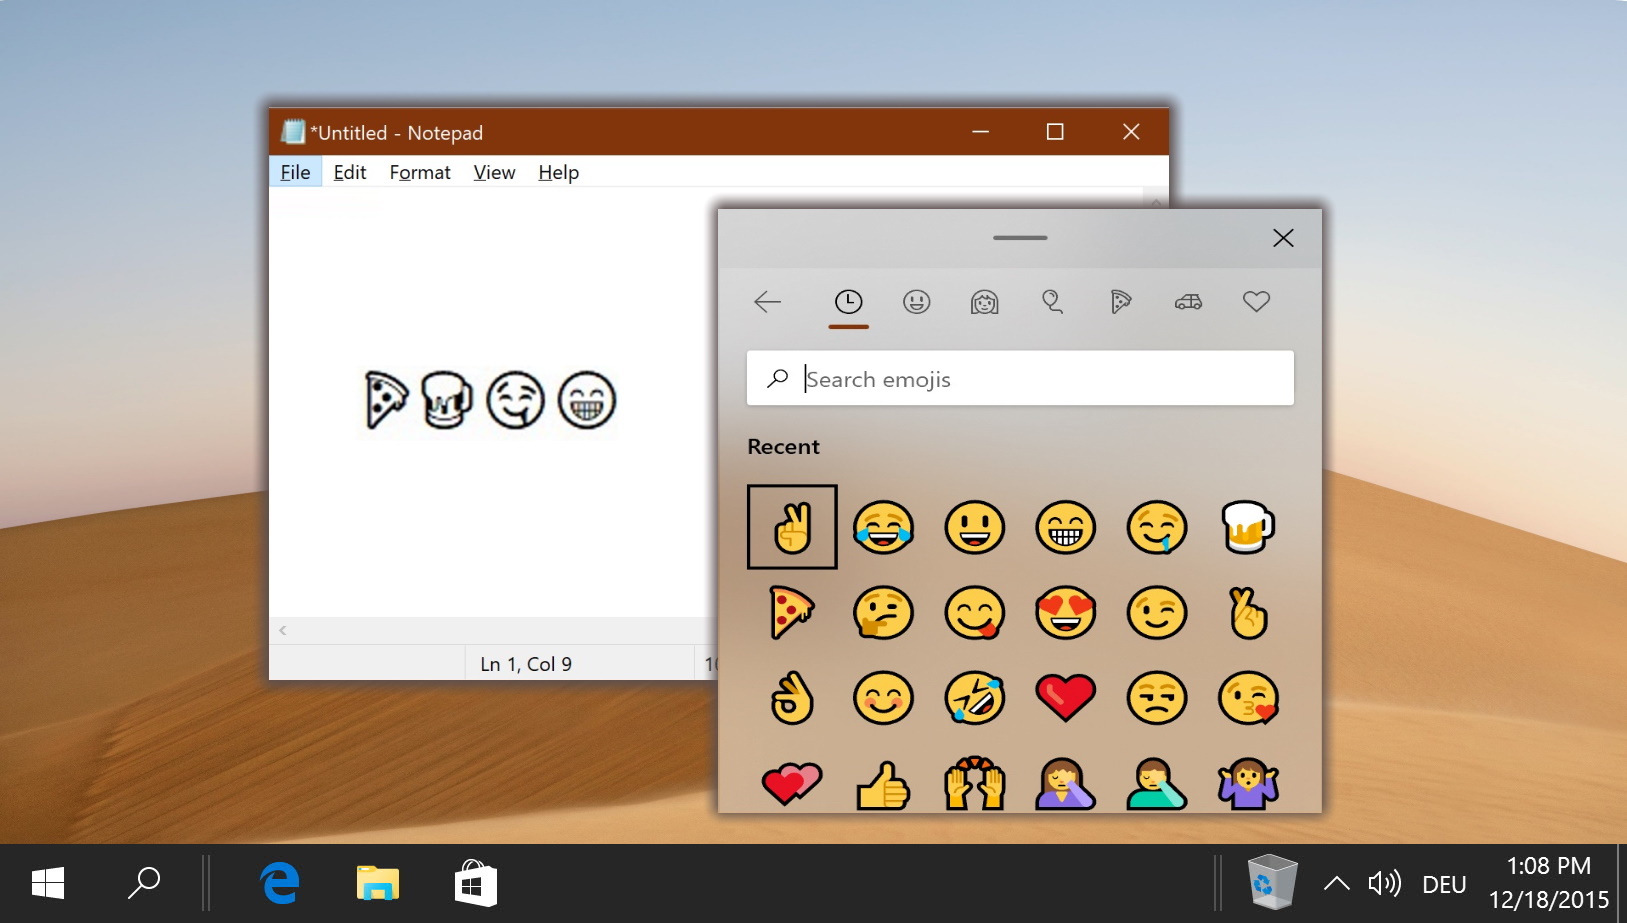
Related: How to Make Emoji, Kamoji, and GIFs on Your Keyboard
Inserting emoji on a mobile phone is a piece of cake – you already use a software keyboard, which can be updated as often as is needed. Inserting emoji on a computer is a little more complex, however. Our hardware keyboards aren’t designed to accommodate emojis, and many apps don’t have their own emoji, kaomoji, or GIF interfaces. In our other guide, we show you how to make emojis, Kaomoji, symbols, and GIFs on Windows using a hardware or touch keyboard.
Related: How to Enable or Disable the Touchpad on Windows 11
The touchpad, also known as a trackpad, is a pivotal element in laptop design, offering a touch-sensitive interface to control the cursor with finger swipes and gestures. Users often find the need to disable the touchpad, especially when it hinders their workflow, such as accidental cursor movements while typing. In our other guide we show you how to enable or disable the touchpad on Windows 11 using various methods.


