While Google Chrome has supported a custom blend of notifications for many years, in version 68 it gained support for native notifications in Windows 10. With them, you can receive Chrome notifications directly to your Windows 10 notification center.
This has a few advantages over the traditional notifications method. For one, Chrome native notifications stick around in your action center if you aren't at the PC when they ping. They'll also respect your global Windows 10 notification settings, which means respecting your focus assist settings to prevent them at certain times of the day.
Unfortunately, though, some find that native notifications aren't enabled on their browser by default, while others prefer Chrome's own notifications as they let you block sites more quickly.
As result, we're going to be showing you how to enable native notifications for Chrome, but also how to turn them off if you wish. We'll then show you how to manage them using Windows 10 settings. This should only take a few minutes, so let's get started:
How to Turn off or Enable Chrome Native Notifications in Windows 10
Though it's an important feature, you won't find the option to disable Chrome native notifications in Windows 10 in its usual settings menu. Instead, it's hidden away in the Chrome flags, which is also where you'll go to enable them.
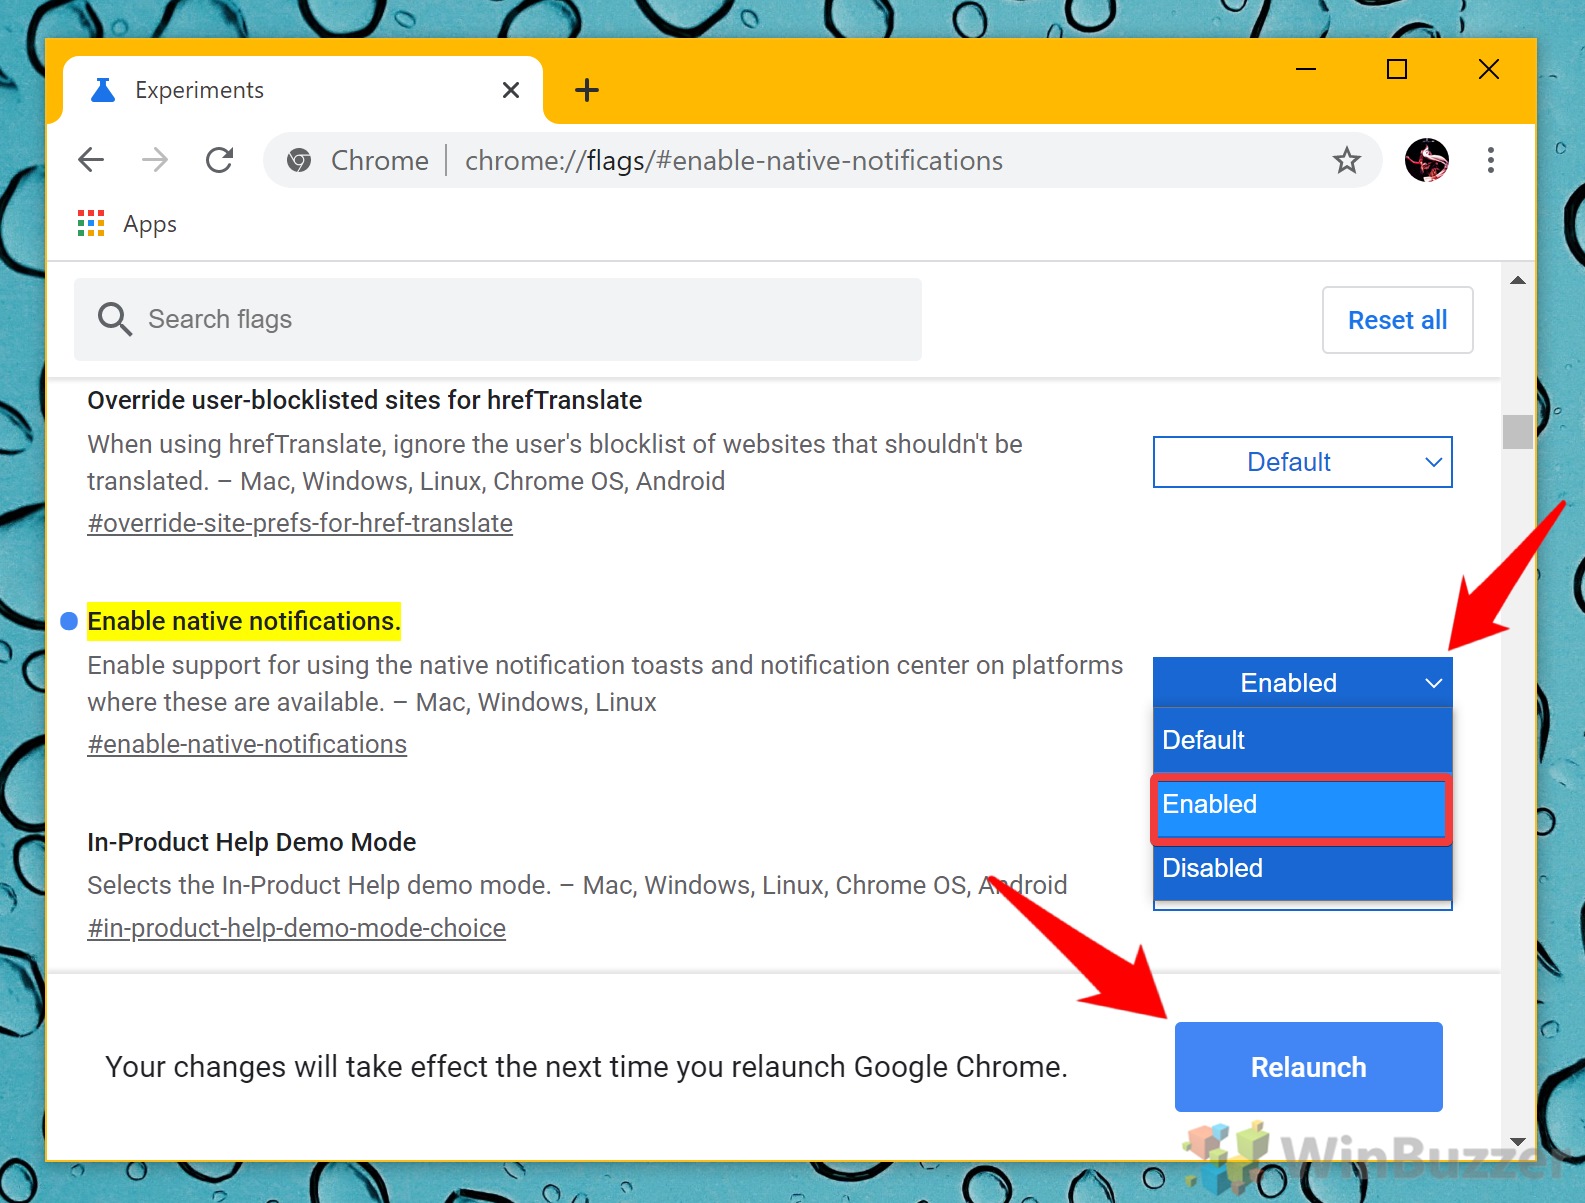
To start, paste chrome://flags/#enable-native-notifications in your browser bar and hit Enter.
- Enable or Disable native notifications in Chrome flags
Click it and change it to “Disabled” to turn off Chrome notifications for Windows 10, or “Enabled” if you'd like to force them on.
The above URL should take you straight to the “Enable native notification” flag in your Chrome settings, where it'll be highlighted. Your dropdown on the right-hand side is likely on “Default”.
Once you're done, press “Relaunch” so your settings apply.
How to Manage Native Chrome Notifications
If you just enabled native notifications in Chrome, there are a few adjustments you can now make to suit your preferences. Before you start, you may want to open this test notification page so you can test the changes as you go along.
- Open settings
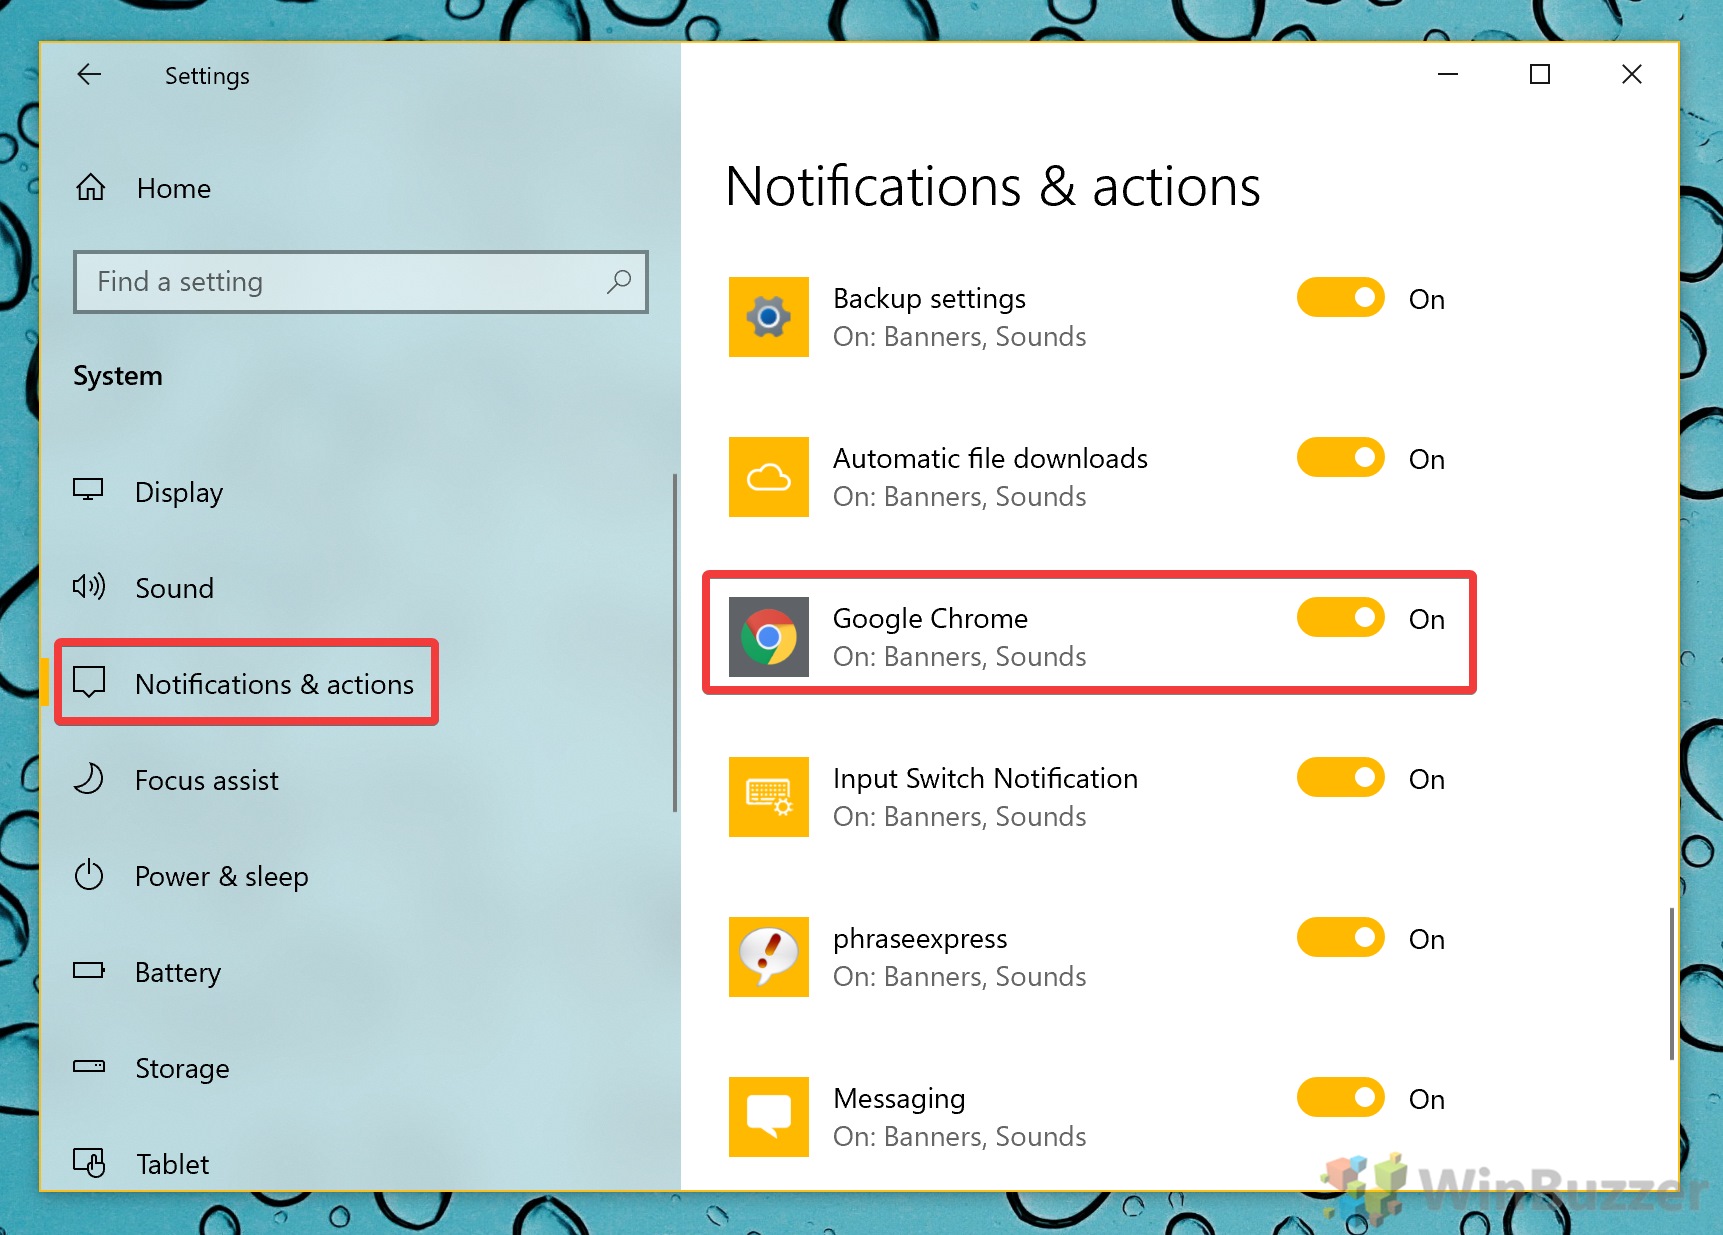
Press the Start button, then click the settings cog in the bottom-right, above your power button. You can also press Windows + I if you want to be a bit faster.
- Click ‘System'
- Open Google Chrome's native notification settings
In the sidebar, click on “Notifications & actions”, then in the main pane press “Google Chrome“.
- Modify your Windows 10 Chrome notifications settings
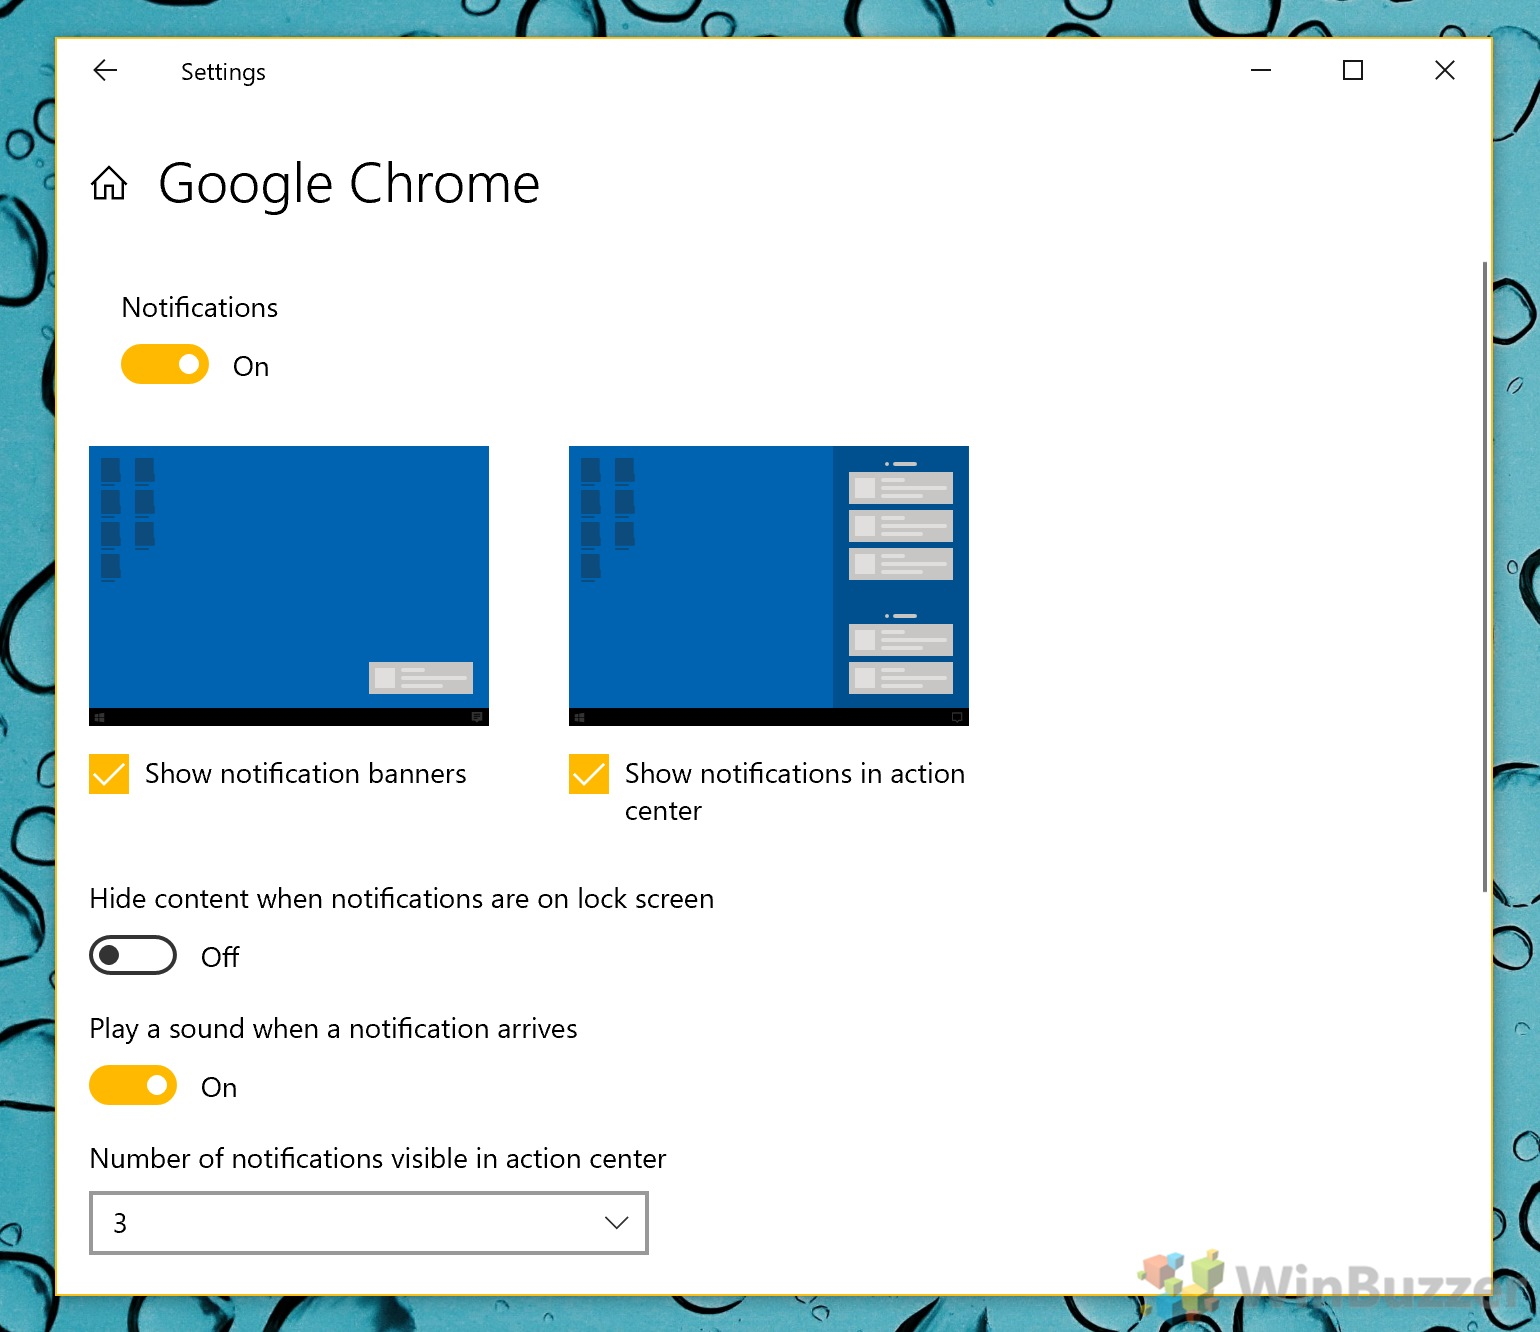
Firstly, you can use this as a method to turn off Chrome notifications in Windows 10 by hitting the toggle at the very top. You can also choose whether to show pop-up banners and if you want to enable the Chrome notification center in your Windows 10 panel.
You'll be presented with various options to customize how Google Chrome notifications display on Windows 10.
Finally, you can disable their text on the lock screen to hide sensitive information, choose whether to play a sound when a notification arrives, and set the max number of notifications in the Windows 10 notification center.
These settings will automatically apply from the moment you change from the moment you toggle them – no restarts required.
If you found this tutorial about native Chrome notifications useful, you may be interested in learning how to disable its autoplay videos or import and export its bookmarks.


