If you want a new account name in Windows 10 you can either create an additional user account or change the username of your exisiting account.
Here we show you how to change an account name in Windows 10, which requires different procedures for local accounts that are only present on your drive and linked Microsoft accounts.
There are different reasons why you might want to change a username in Windows 10. Maybe your real name has changed and you need to reflect this change in Windows 10 as well. Or you have been using a nickname and want to do a username change to your real name. You may also want to change the name of the built-in administrator account for security reasons.
Here are all the different methods on how to change a Windows user account name.
How To Change your Windows 10 Account Name for Linked Microsoft Accounts
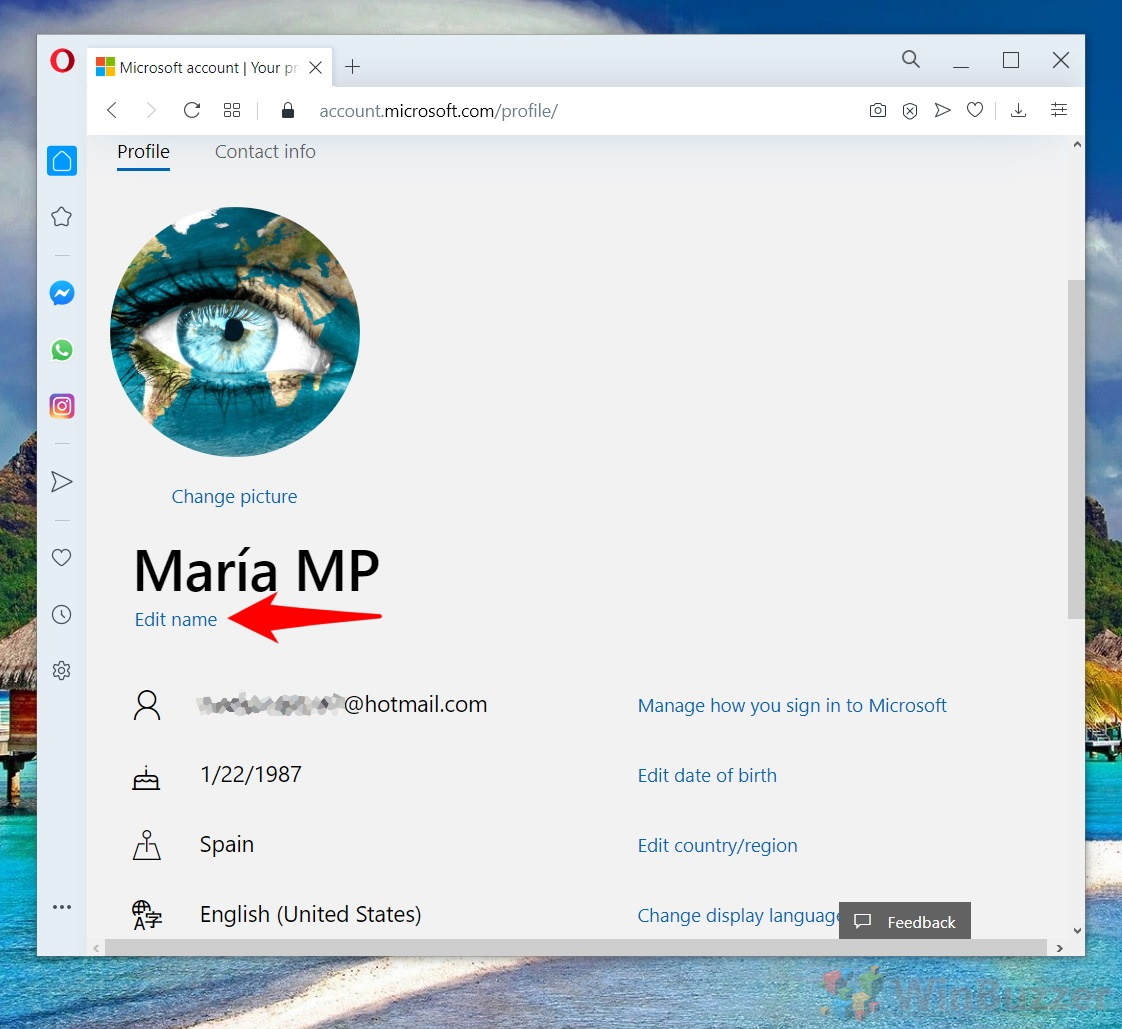
To change the Windows 10 username of a linked Microsoft account you need to access account options in a webbrowser. After changing your user name there, the effect will be reflected in Windows 10 and other linked products such as Xbox, Skype etc..
- Open your Microsoft account in the web-browser
Head to account.microsoft.com/account and click on “Your info”.

- Click on “Edit name”

- Select a new account name and click “Save”

- Check if the username change has been applied correctly
Your new account name will be changed also on Windows 10 after logging in the next time after Windows 10 synced with your account information in the cloud.

How To Change the Account Name of a Local Account via Control Panel
Local account names can be changed easily via the control panel for normal users and for administrator accounts.
- Open “Control Panel”

- Switch to “Small icons” view or search for “User Accounts”

- Open Windows 10 “User Accounts”

- Select “Manage another account”

- Klick on the user account name you want to change

- Select “Change the account name”

- Choose a new Windows username
Write in “New account name” and click “Change Name”.

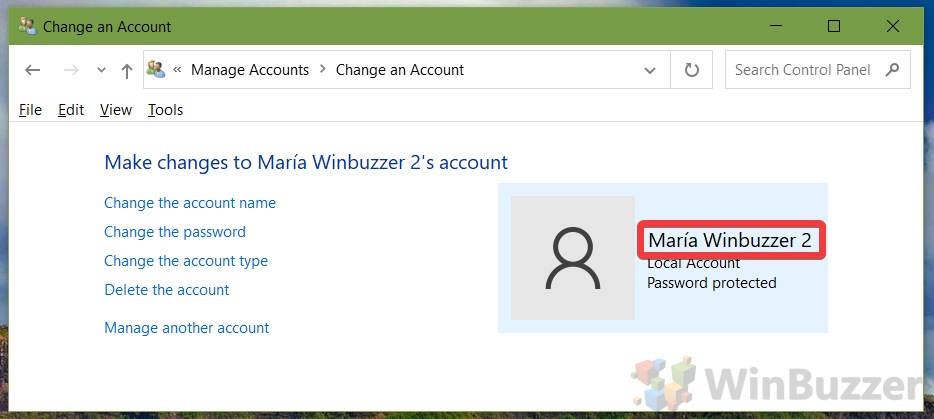
- Check if your changed account name is correct

How To Change a Local Account Name via Local Users and Groups
Changing a Windows user name via Local Users and Groups is only available in the Windows 10 Pro, Enterprise, and Education editions.
- Run the “usrmgr.msc”-command
Open the run-dialog via the hotkey “Windows + R” and launch the command “usrmgr.msc”.

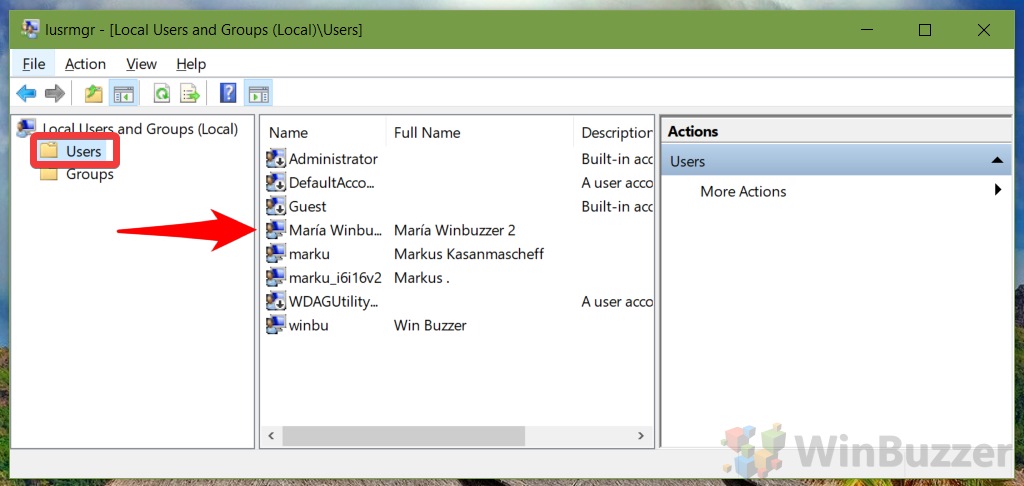
- Select the Windows 10 user name you want to change
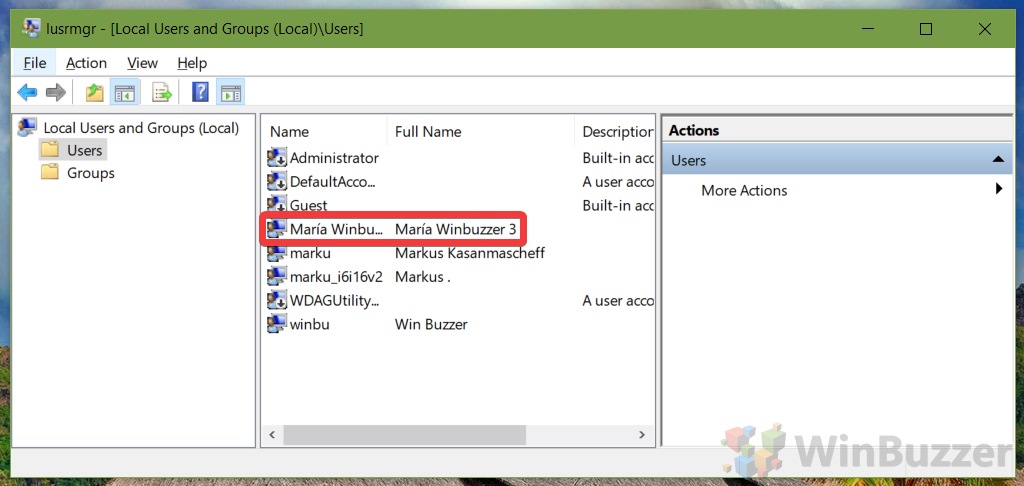
Click on “Users” on the left side and double click the account name you want to change.

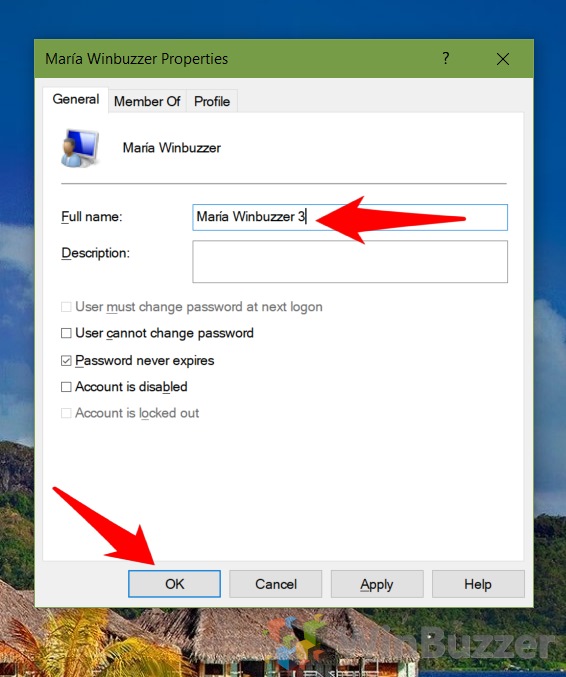
- Add the new account name you want to use and click “OK”

- Check the list if the username has been changed successfully

How To Change the Name of a Local Account via the Advanced User Accounts Control Panel (Netplwiz.exe)
The Advanced User Accounts control panel “Netplwiz” lets you perform various user management tasks such as changing the account name of a local user, assigning users to groups, manage passwords and set some security features.
- Run the “netplwiz”-command
Open the run-dialog via the hotkey “Windows + R” and launch the command “netplwiz“.

- Select password-based logon and username
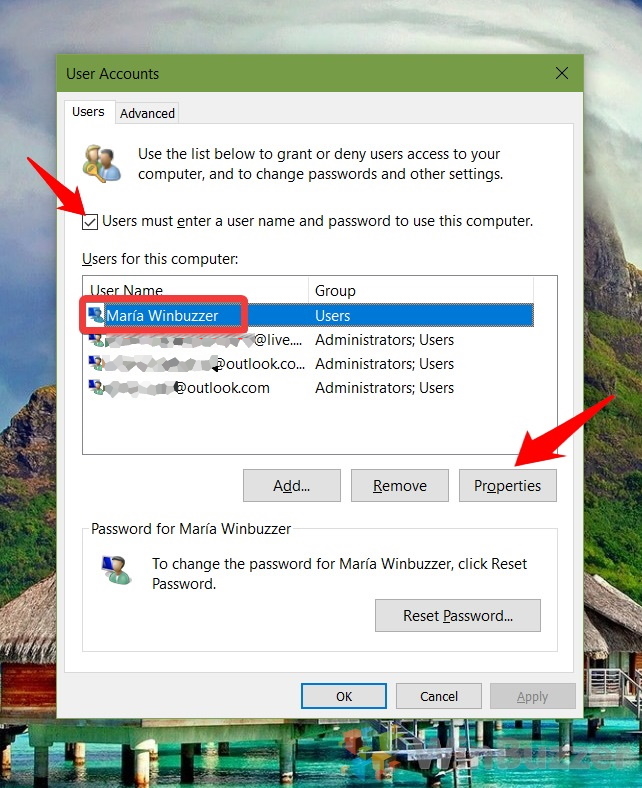
Check “Users must enter a user name and password to use this computer”, select the local account you want to change the name of, and click/tap on “Properties”.

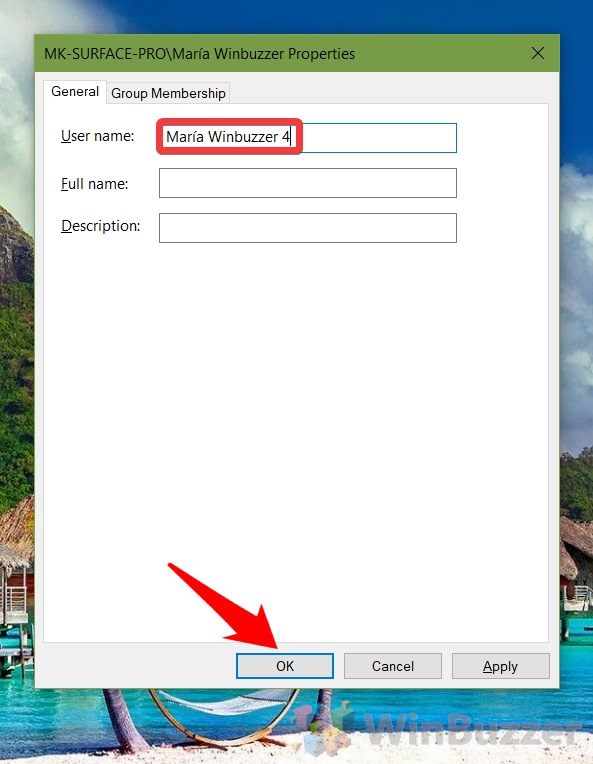
- Put the new account name at “User name” and click “OK”.

How To Change the Name of a Local Account via Command Prompt
Changing a Windows 10 user name for a local account is also possible via the command prompt.
- Open an elevated command prompt
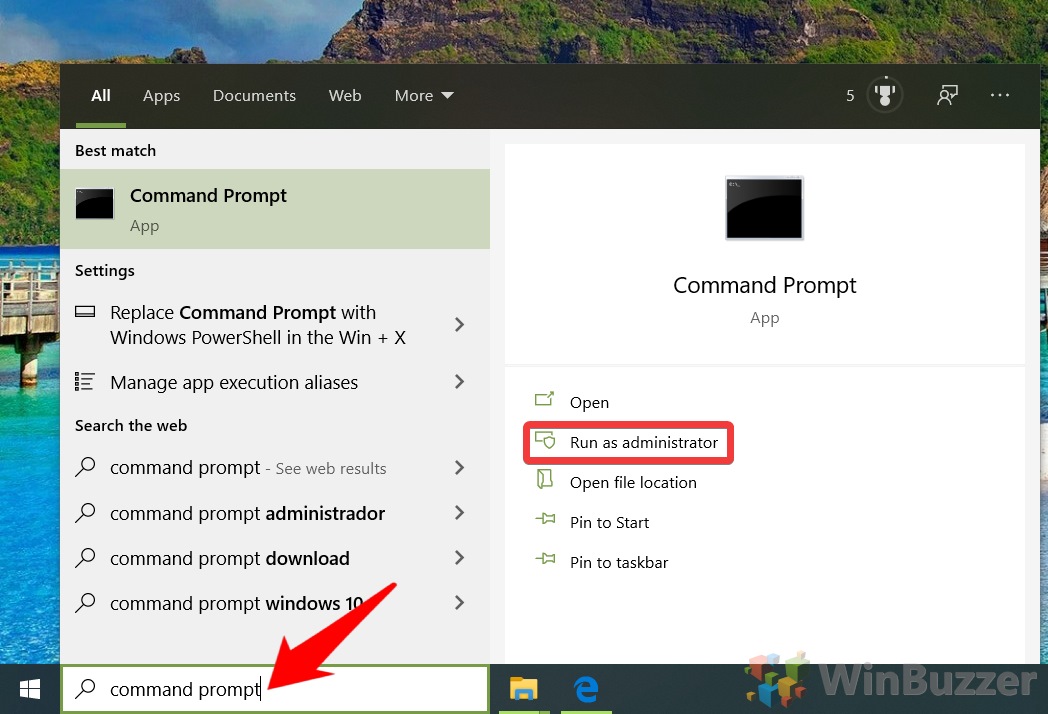
Search for “CMD” or “Command Prompt” using Windows 10 search and click on “Run as administrator”.

- List existing Windows 10 user names
Run the following command to list all user account names and note the one you want to change.wmic useraccount get fullname, name

- Set a new account name with
Run the following command to change the account name replacing “Current User Name” and “New Account Name” accordingly:wmic useraccount where name="Current User Name" rename "New Account Name"

How To Change the Name of a Local Account in PowerShell
As an alternative to the CMD-method, you can also change a Windows 10 user name with PowerShell.
- Open an elevated PowerShell
Right-click the Start-button and select “Windows PowerShell (Admin)”.

- List existing Windows 10 user names
Run the commandGet-LocalUserto list all existing Windows 10 user accounts and note the username you want to change.

- Rename username of local account
Run the following command to change the account name replacing “Current User Name” and “New Account Name” accordingly:Rename-LocalUser -Name "Current Name" -NewName "New Name"

How To Change the Name of the Built-in Administrator account via Local Security Policy
This option is only available in the Windows 10 Pro and Enterprise editions.
- Open Windows 10 Local Security Policy
Search for “secpol.msc” using Windows 10 search and click on the result.

- Open the “Rename administrator account” policy
Navigate to “Local Policies – Security Options” and open “Accounts: Rename administrator account” via double-click.

- Change the Windows 10 administrator name
Change “Administrator” to any other account name you want to use for the built-in hidden Windows 10 admin account.

How to Enable the Hidden Admin-Account, Delete User Accounts and Disable Fast User Switching
Please also check our tutorials on how to enable the hidden admin-account and about the various available methods to delete user accounts in Windows 10. You might also be interested in how to enable or disable Fast User Switching.
Last Updated on August 20, 2021 10:46 am CEST by Markus Kasanmascheff


