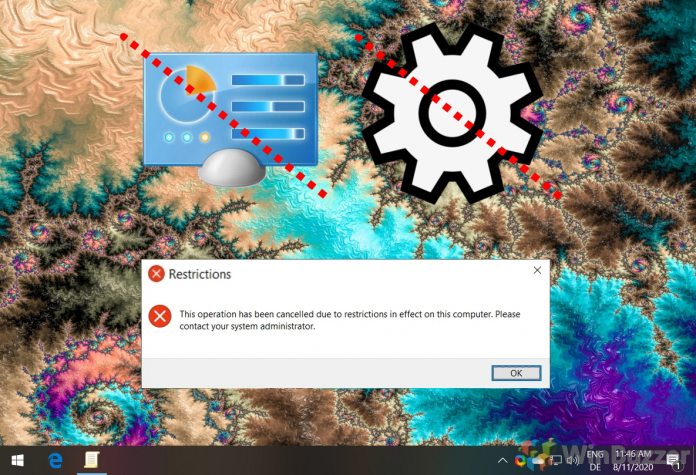
Over the past few years, Microsoft has been slowly copying options from the legacy Control Panel in Windows 10 to its new Settings app. These days, almost everything you need can be found there, though there are a few select items that can only be adjusted via the old interface.
As a result, admins who are trying to restrict the ability of their users to cause problems with their operating system have to disable both. As such, Microsoft bundles the toggle for both together, letting users disable or enable settings and the control panel in Windows 10 in one fell swoop.
This tutorial will show you how to disable and enable settings or the control panel in Windows 10 for specific users. It can also be used globally restrict access to settings changes for non-trusted users on your system. As you’d expect, you’ll need to be logged in as an administrator to make these changes.
How to Disable or Enable Settings and the Control Panel in Windows 10 via Group Policy
Windows 10 Pro and Enterprise users can disable the control panel via GPO and can do the same for settings. Those in Windows 10 Home should edit the registry instead.
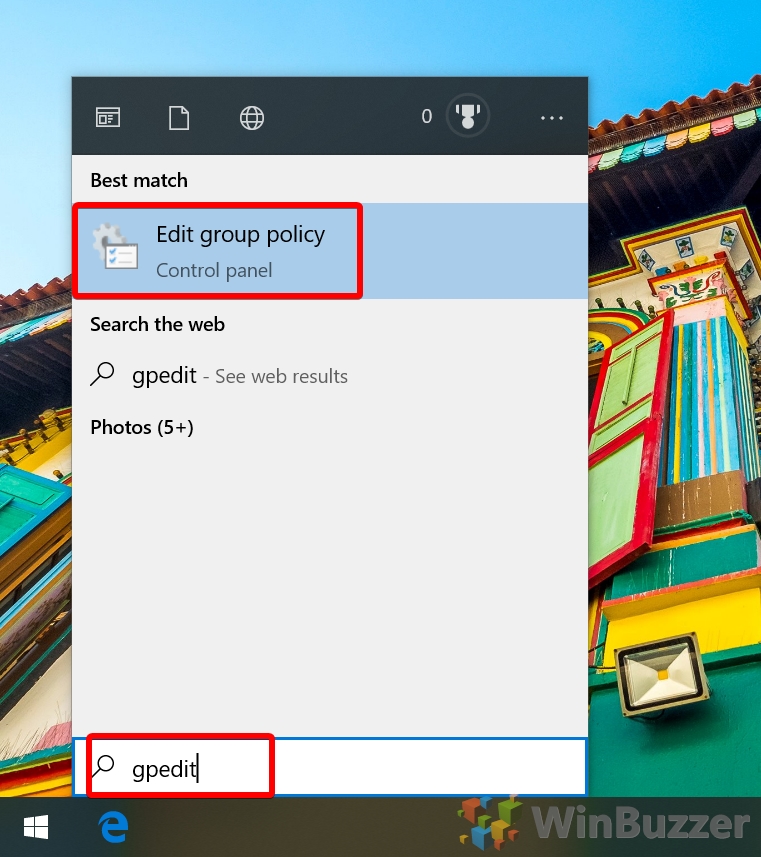
- Open the Group Policy Editor
Press “Windows” and search for “gpedit”, clicking the top result.
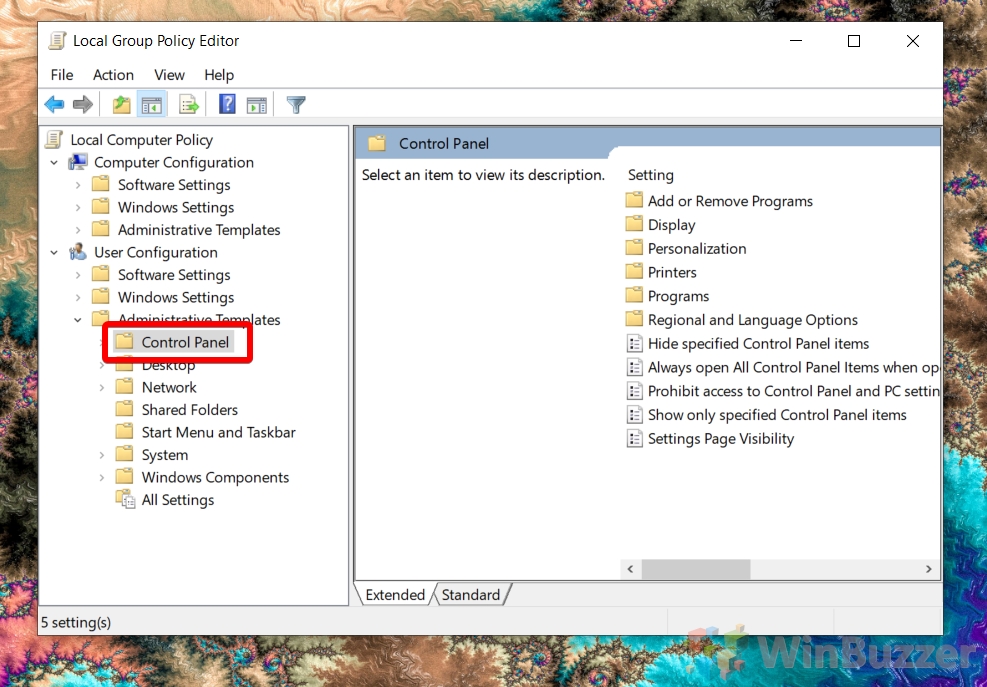
- Navigate to the Control Panel section
You can find it under “Local Computer Policy > User Configuration > Control Panel”.
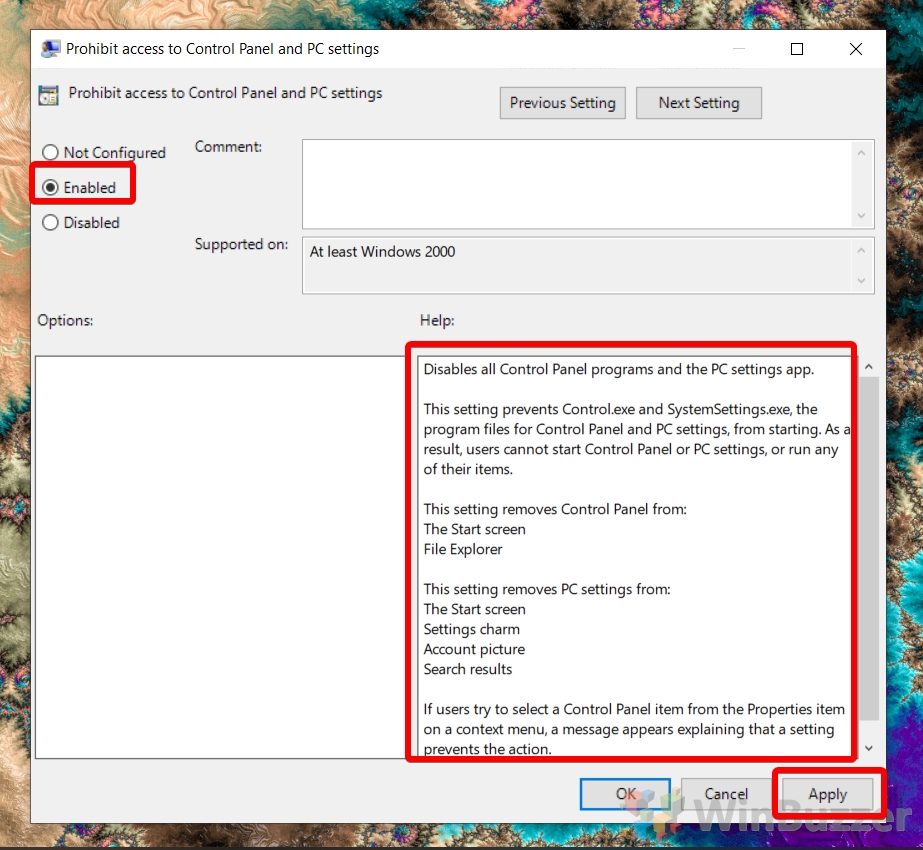
- Double-click “Prohibit access to Control Panel and PC settings”
- Disable control panel via GPO or enable it
In the policy editing Window, read the help information to be sure you want to go ahead with the change, then sitch to to “Enabled” to disable control in Windows 10, or “Disabled” to enable it. “Not Configured” will follow the system settings/defaults.
How to Disable or Enable Settings and the Control Panel for the Current User via Regedit
If you’re a Windows 10 Home user you can disable or enable the Windows 10 control panel, either for the current user or all users, via the Registry Editor.
- Open the Registry Editor
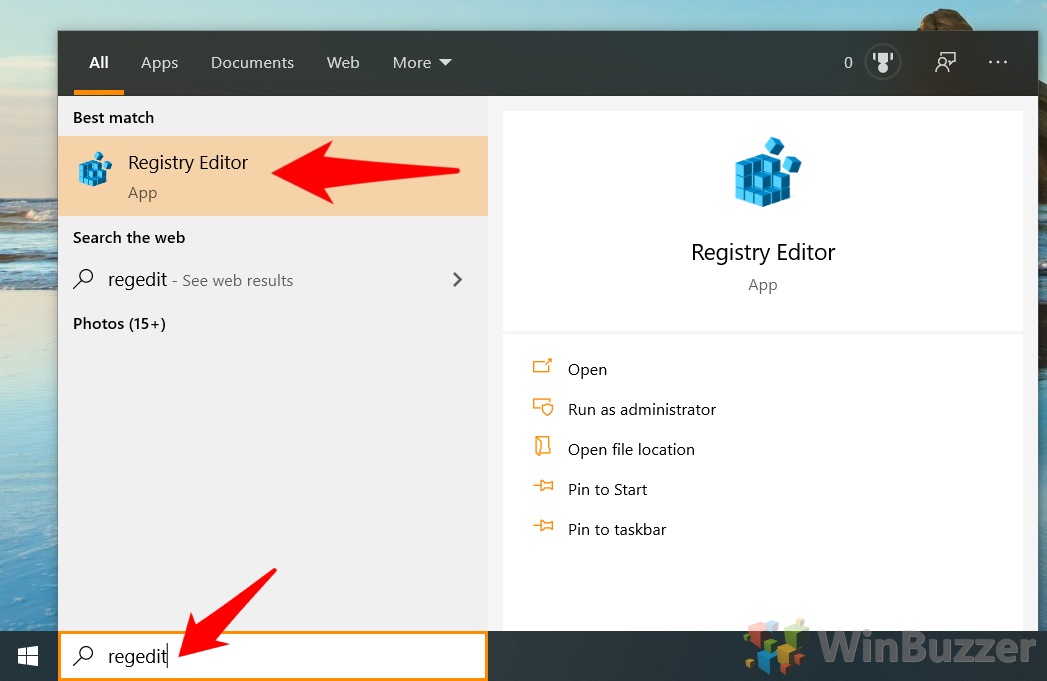
Press “Windows” and type “Registry Editor”, then click the top result.
- Navigate to the Explorer Registry Key for the current user
In the registry editor, paste the following into your address bar:
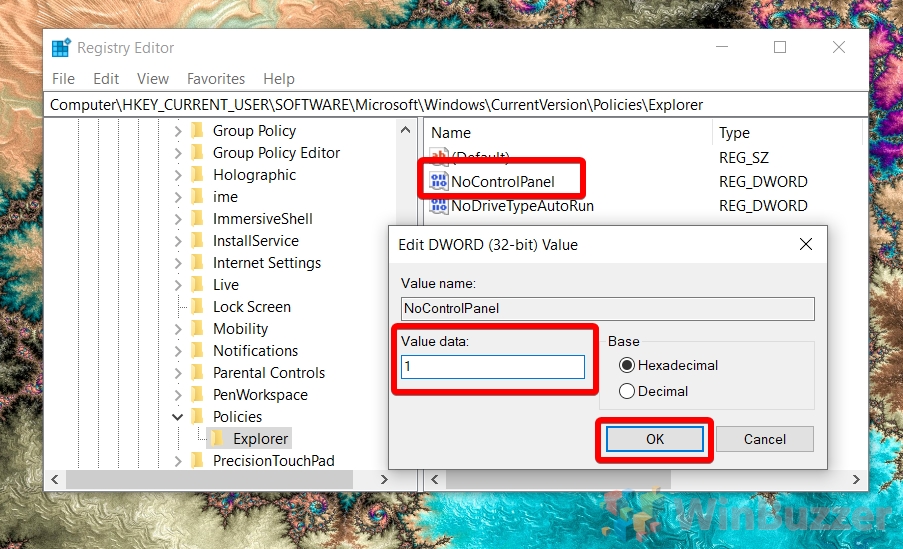
Computer\HKEY_CURRENT_USER\Software\Microsoft\Windows\CurrentVersion\Policies\Explorer - Disable or Enable settings and the control panel for the current user
In the “Edit DWORD” interface, change the “Value data” to 1 to disable Windows 10 settings and the control panel or 0 to enable it. Press “OK” when you’re done.
How to Disable or Enable Settings and the Control Panel for All Users via Regedit
If you want to disable the Control Panel and Settings for all users on the system, you can also do so via the registry editor. Combine this method and the one above and you can keep them on for the admin, but off for everyone else.
- Open the Registry Editor
Press “Windows”, type “regedit”, and click the top result.
- Navigate to the Explorer registry key for the local machine
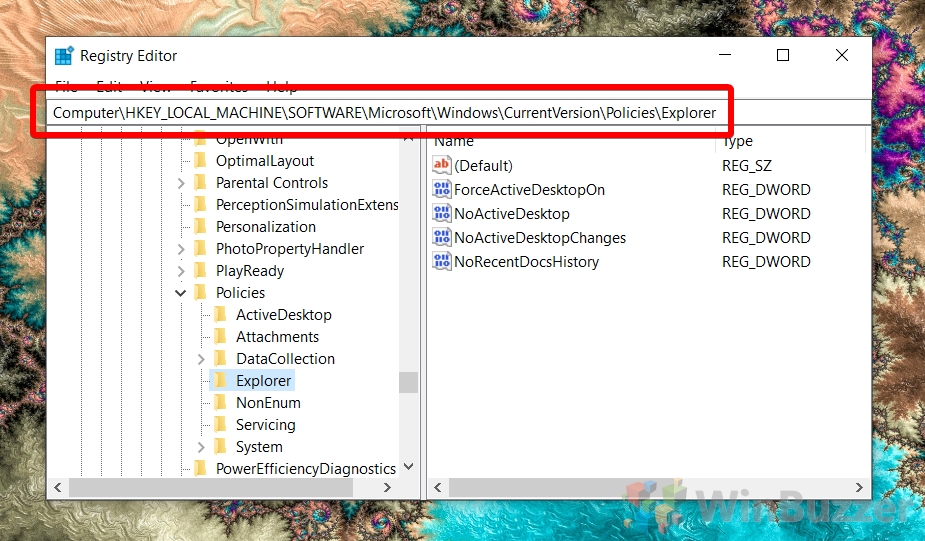
In your Registry Editor search bar, paste:
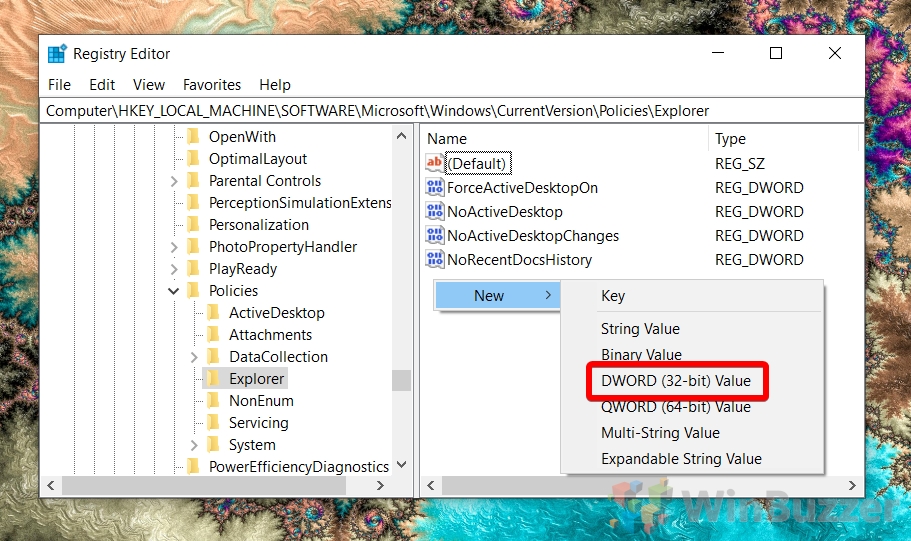
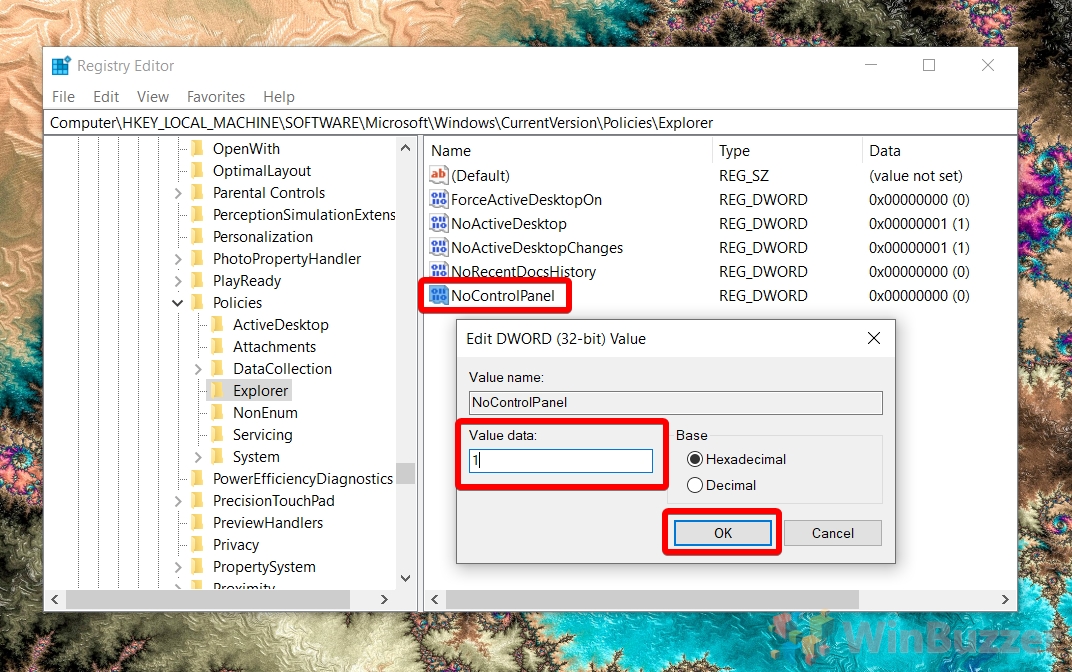
Computer\HKEY_LOCAL_MACHINE\SOFTWARE\Microsoft\Windows\CurrentVersion\Policies\Explorer - Create a new registry key
Right-click the empty space and choose “New > DWORD (32-bit)”.
- Name the DWORD “NoControlPanel”
- Disable or Enable settings and the control panel for the current user
Double-click the entry. In the “Edit DWORD” interface, change the “Value data” to 1 to disable Windows 10 settings and the control panel or 0 to enable it. Press “OK” when you’re done.
If you found this guide useful, you may also want to check out our tutorials on blocking the Microsoft Store and Enabling/Disabling the Action Center.
