
Screen recording is becoming an increasingly useful gaming tool for content creation, streaming, tutorials, and sharing. Not any screen recorder will do as gamers value the ability to make high-quality clips. Features such as audio capture, recording at 60fps, and 4K support are basic demands. Amongst the myriad of excellent screen recorders, EaseUS RecExperts is worth checking out.
I have been using EaseUS RecExperts as my go-to gaming screen recorder recently. During that time, I found it to be a solid suite of tools that make recording short clips or whole sessions easy. Whether you're a gamer, broadcaster, YouTuber, or business, you too may benefit from this software.
To help you get started, the following tutorial walks you through each step of recording a game clip, from setting up to saving and sharing.
What is EaseUS RecExperts?
Before jumping into the tutorial, let's take a broader look at the EaseUS RecExperts software. At its core, the suite focuses on providing a simple way to record gaming or any other type of visual or audio content from a PC screen. Audio, screen, or webcam can be recorded simultaneously or individually.
The app separates its recording abilities into sections. So, you get the standard screen recording, audio recording, game recording, webcam recording, and content platform recording. This latter option allows you to record directly from a website (Netflix, Disney+, YouTube, etc.). Each option is available on the left icon panel:
![]()
Furthermore, with EaseUS RecExperts, it is easy to customize what you want to record. Users can select a region or the entire screen. In terms of editing, EaseUS RecExperts is not the most complete software. Even so, post-recording options are decent, including the ability to label, annotate, crop, and more.
Use EaseUS RecExperts to Record Gaming on Windows 11/10
For this tutorial, I will focus specifically on the game recording section of EaseUS RecExperts. (Note, you can switch to other sections and easily record screen, audio, websites, or webcam with similar controls):
Step 1: Click the controller icon on the left panel to select the game recording tool:
![]()
Step 2: Access the game you are playing
EaseUS RecExperts makes this easy by allowing you to select a game via the select game dropdown menu found under the controller icon. The game you want to record will need to be running already:

Step 3: Select the game you want to record
Before the menu opens, you will need to confirm you are an administrator on the PC you're using. Once you confirm, EaseUS RecExperts displays all open windows/processes (browsers, documents, etc.).

Step 4: Select the game window and click “OK” to select the game file:

Step 5: Click the big red “REC” button to start recording:

Managing Your Screen Recording with EaseUS RecExperts
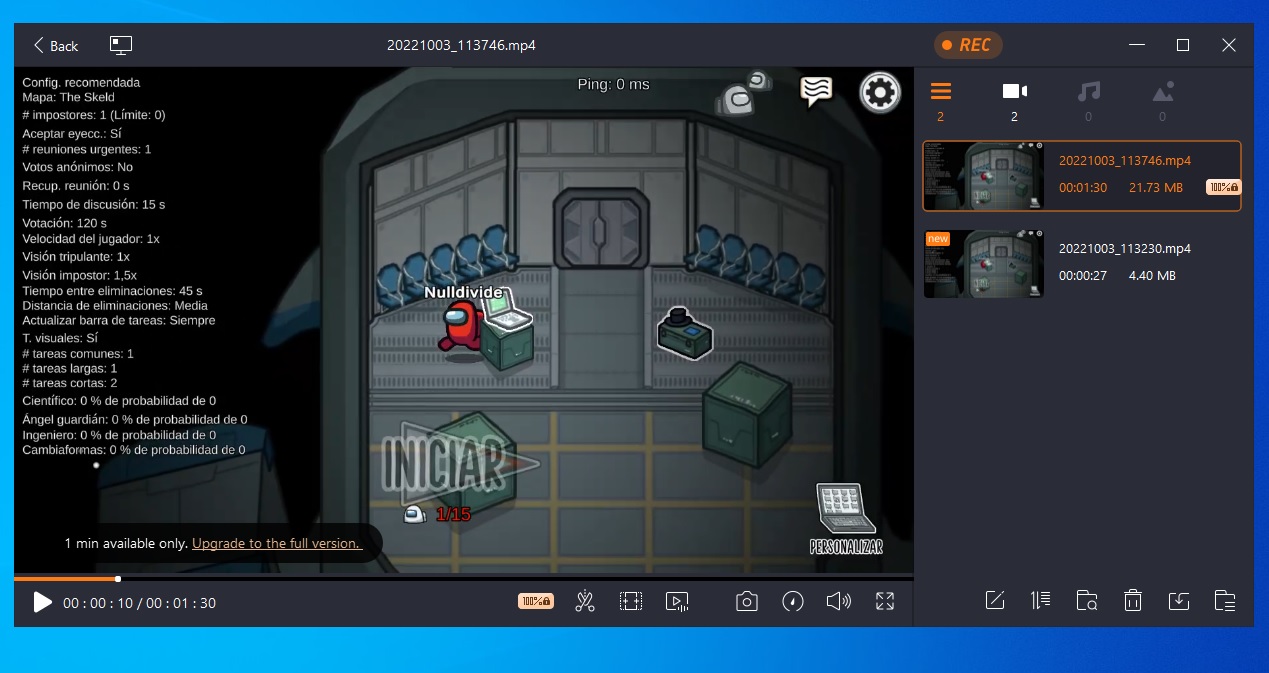
Step 1: Record your screen and then manage the recording
EaseUS RecExperts now records a clip for as long as you want. Screen controls allow you pause/play or stop the recording. Closing the game will also end the recording. Once the screen recording is stopped, the app presents a new window showing the recording file:

Step 2: Select the gameplay recording you want to manage/edit
When you select one of the gameplay recordings in the EaseUS RecExperts library, the clip will open and start playing in the left pane:
Step 3: Select editing options if you want to make changes to the recording.
EaseUS RecExperts has a selection of basic editing tools at the bottom of the gameplay clip. Here you can choose to Trim, add Opening/Closing titles, Extract Audio, Screenshot, and Change Playback Speed:

Step 4: Save your gameplay recording.
Finally, you can save your recording to your local storage by selecting the import icon on the bottom right menu. Also in this section are files to open previous recordings, file management, rename your files, and delete options:


