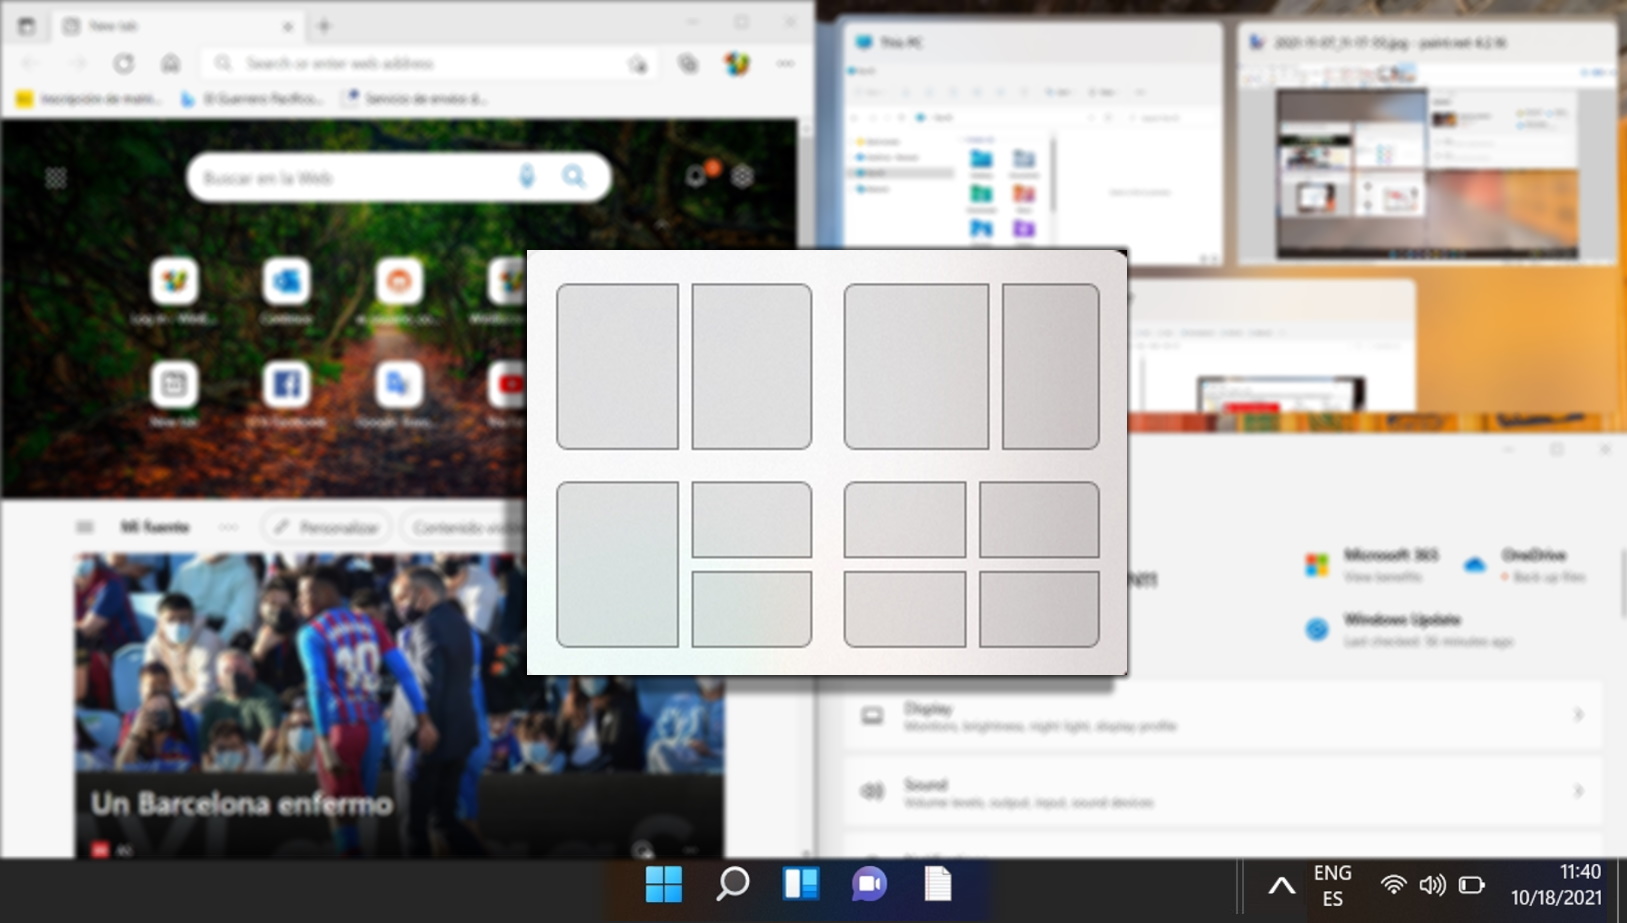
In Windows 11, Microsoft has made the Windows snap feature more obvious and robust. Windows 11 snap layouts let you easily snap a window to a specific area by hovering on the maximize button and clicking where the window wants to go. If you’re a power user, however, this feature may be more of a nuisance than an aid. In this guide we will show you how to disable Windows snap layouts on the maximize button.
Why to Disable the Windows 11 Snap Layout Feature?
You might want to disable the Snap Layout feature as you can get all the functionality of snap layouts via a few simple hotkeys. To snap your windows to the most common positions, all you really need to do is press the Windows key and the direction you want to snap your window. Press left, and you’ll snap the window to the left of your screen. Press down after that, and it’ll place it in the corner. On top of this, you have tools like PowerToys, which let you create entirely custom zones to snap your windows to.
Once you start using these shortcuts or tools, it only makes sense to deactivate the snap selector. It can get in the way if you hover over the maximize button for too long and can be an annoyance if you accidentally click on a layout while doing so.
Bear in mind that the tutorial today will focus primarily on how to disable the Windows 11 snap layouts button. You’ll still be able to snap your Windows through other means, such as dragging it to the side of your screen. If you want to disable the functionality entirely, though, you can check the section toward the bottom of the tutorial.
How to Disable Snap Layouts on the Maximize Button in Windows 11
This method is straightforward and is recommended for users who prefer not to modify the Windows Registry. It involves a few simple steps within the Windows Settings app to enhance your user experience.
- Open Settings
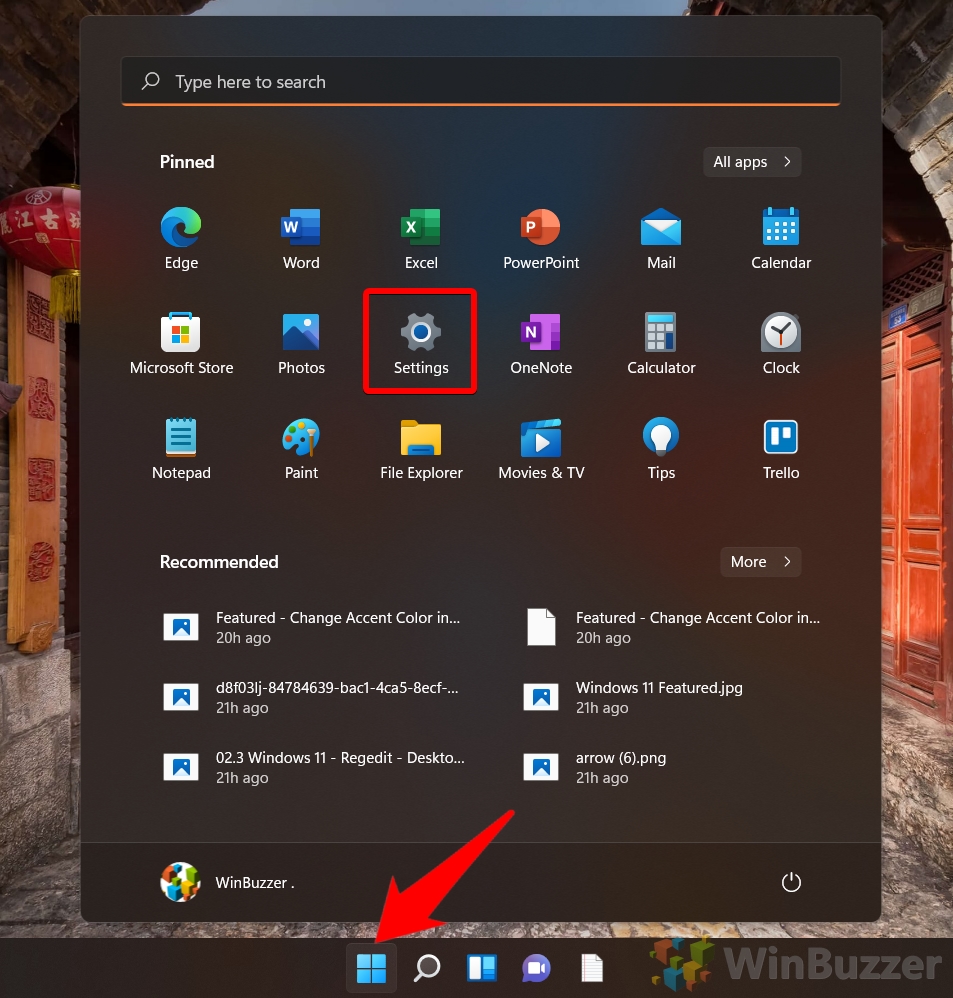
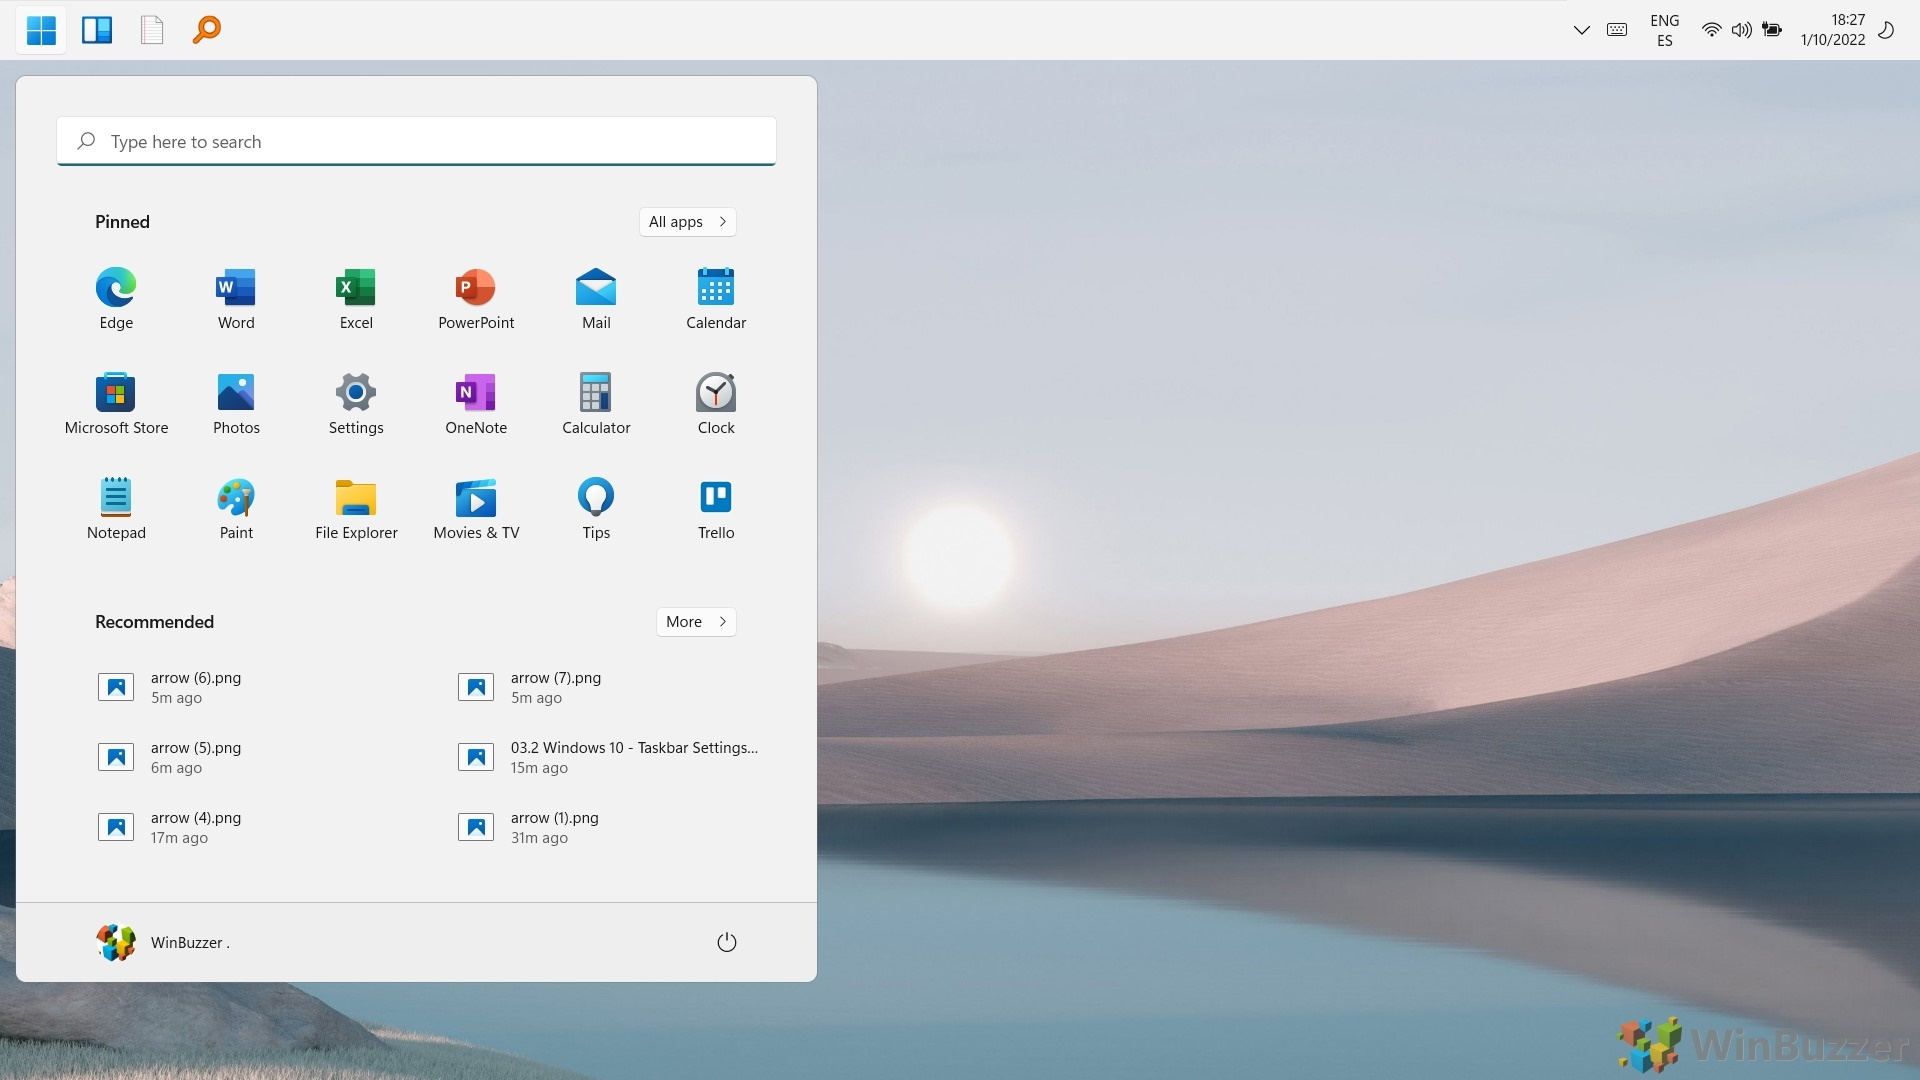
Press the “Start” button and click on the “Settings” icon in your Start menu. Alternatively, you can press “Windows + I” on your keyboard to open the Settings app directly.

- Navigate to Multitasking Settings
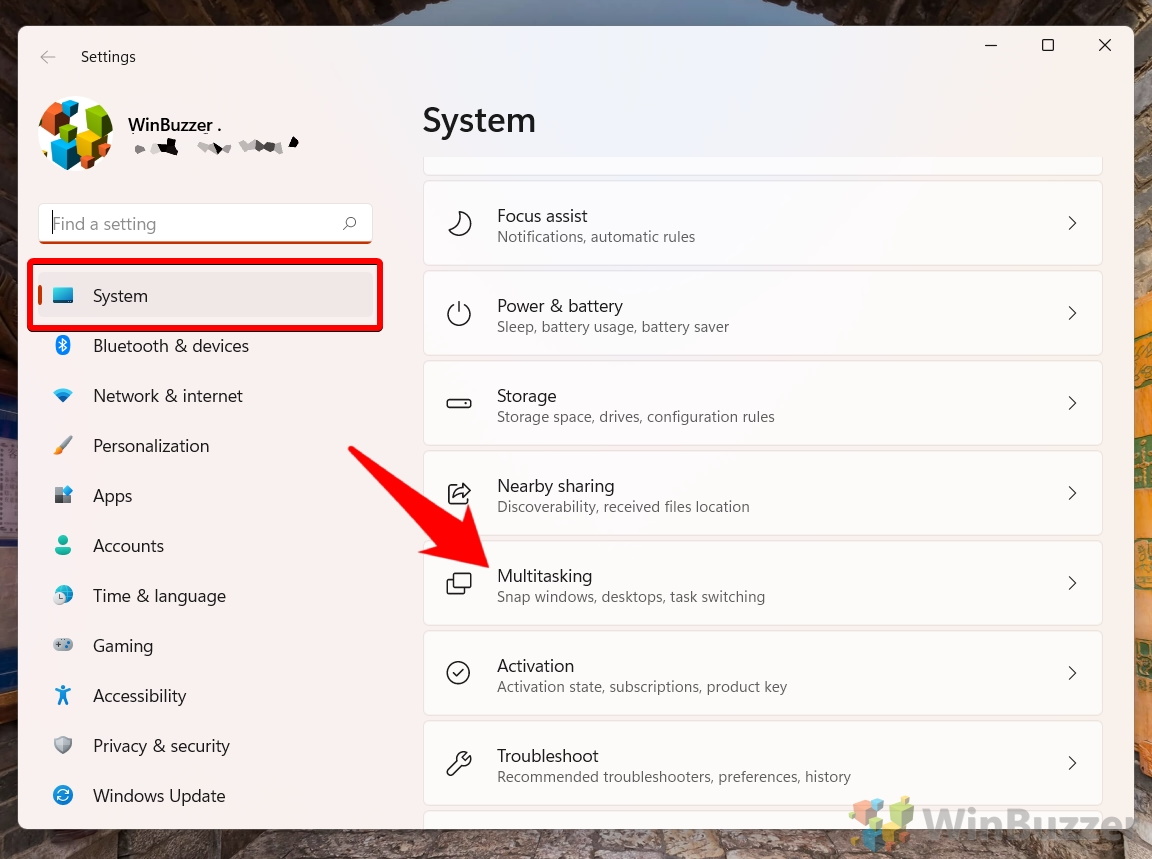
Click on “System” in the sidebar and then select “Multitasking” in the main pane. This section allows you to adjust how windows snap and how you can work with multiple windows efficiently.

- Disable Snap Layouts
Look for the option that says “Show snap layouts when I hover over a window’s maximize button” and uncheck it. By doing this, you deactivate the snap layouts feature from appearing when you hover over the maximize button, streamlining your window management experience.


How to Deactivate the Snap Selector in Windows 11 via the Registry Editor
If you are seeking a more permanent solution that remains effective across system updates, modifying the Windows Registry is a viable option. This method is more technical and requires careful execution.
- Open the Registry Editor
Press the “Search” icon on your taskbar, type “Regedit,” and click on the top result to open the Registry Editor. This tool allows you to modify the underlying settings of your Windows operating system.

- Navigate to the Advanced Explorer Key and Create a New DWORD
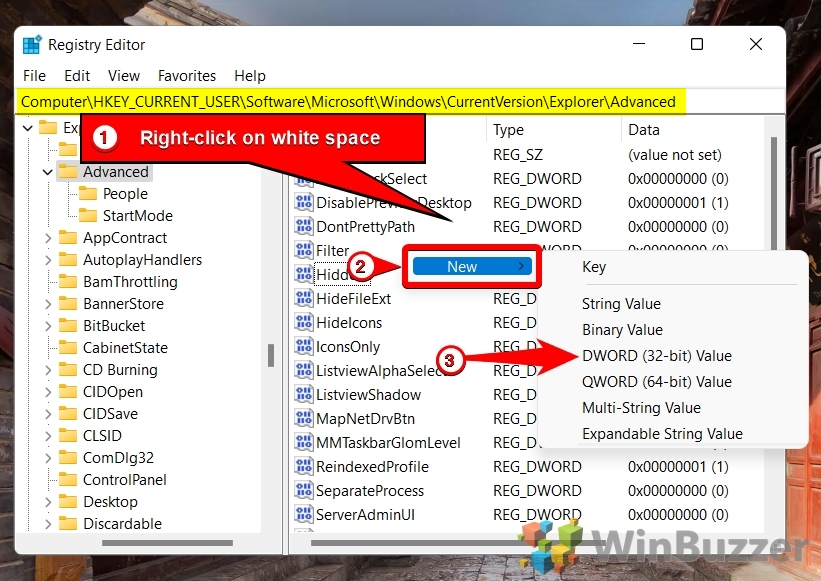
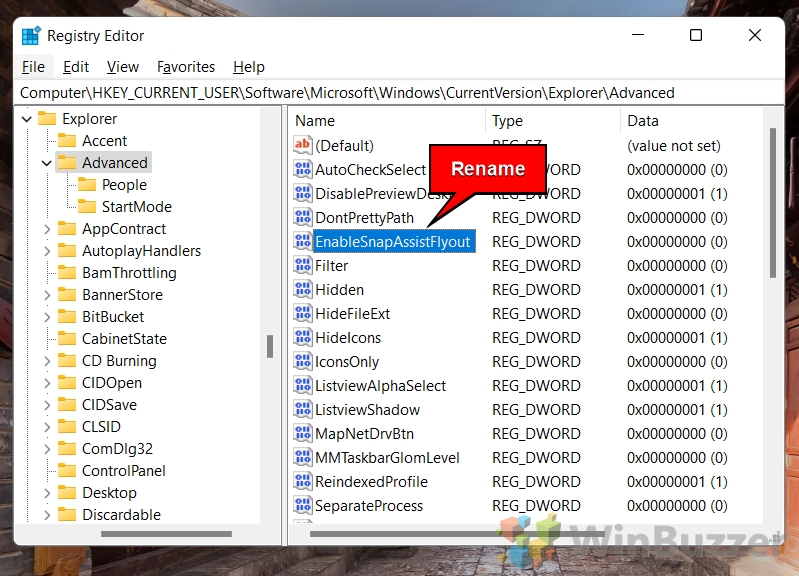
In the Registry Editor, navigate to the following key:
Computer\HKEY_CURRENT_USER\Software\Microsoft\Windows\CurrentVersion\Explorer\Advanced
This is where you can find settings related to Windows Explorer’s behavior.Once you’re there, right-click on white space in the main pane and select “New > DWORD (32-bit) Value”.

- Name your DWORD “EnableSnapAssistFlyout”
It’s important that it’s named exactly as above, including the capitals but without the quotation marks.

- Set the DWORD Value
Double-click on the newly created “EnableSnapAssistFlyout” DWORD, set its value to “0,” and click “OK.” This disables the snap assist flyout feature, providing a cleaner user experience.


How to Deactivate the Snap Selector in Windows 11 using a .REG File
Using our REG file, you can apply the change from the previous method with just a few clicks.
- Turn on or off the Windows 11 snap layouts pop-up via a .reg file
If you prefer not to manually edit the Registry Editor, you can download our pre-made .reg files to adjust the settings with minimal effort. Start by downloading the zip file from this link: “Enable Or Disable Windows 11 Snap Layouts On Hover“. After downloading, right-click on the zip file and choose “Extract All…” from the menu.

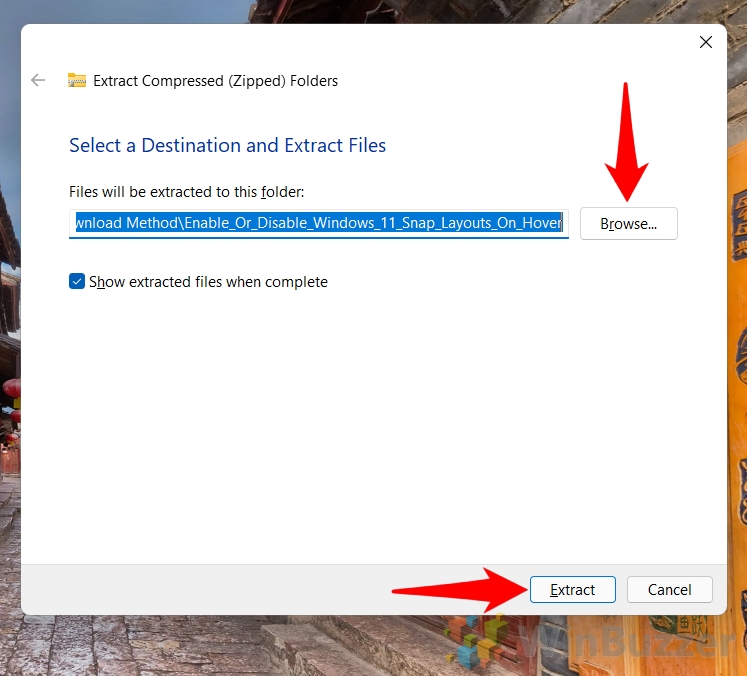
- Browse to where you want it extracted and press “Extract”
Select the desired location to extract the files to, and then click the “Extract” button to proceed.
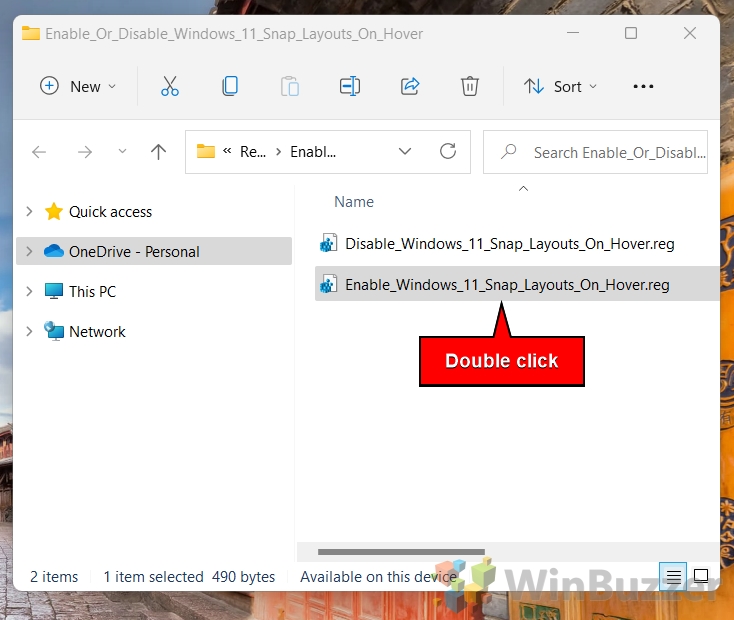
- Open the extracted folder and double-click the relevant .reg file
In the extracted contents, locate and double-click “Disable_Windows_11_Snap_Layouts_On_Hover.reg” to turn off Windows 11 snap layouts on hover. Conversely, to re-enable the feature, double-click “Enable_Windows_11_Snap_Layouts_On_Hover.reg“.
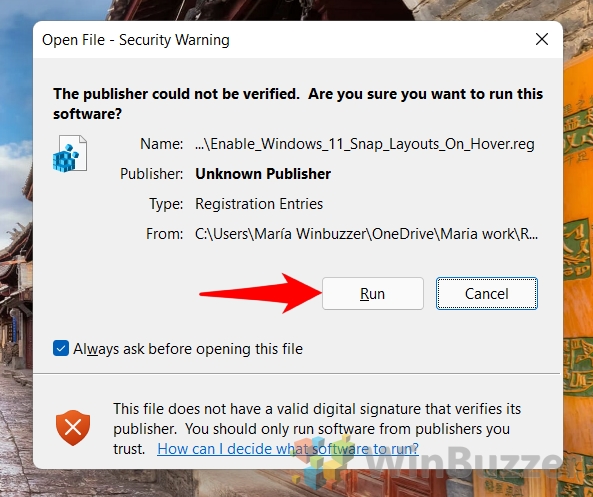
- Press “Run” on the Security Warning
Upon attempting to run the .reg file, a security prompt may appear. Click the “Run” button to proceed.
- Click “Yes” on the Registry Editor prompt
You’ll be asked to confirm the changes to your registry. Click “Yes” to approve and proceed with the modifications.

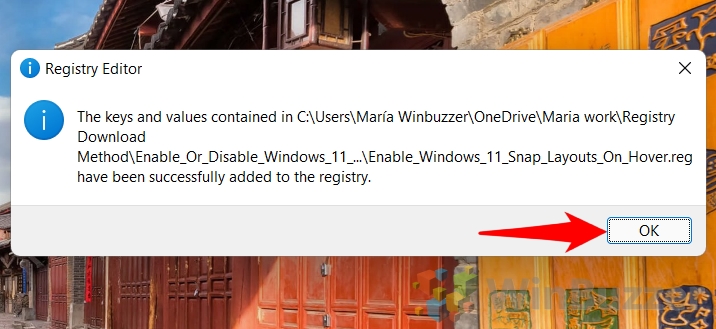
- Press “OK” to apply the changes
After approving the changes, you may need to sign out and back in or restart your PC to see the effects. Clicking “OK” will finalize the configuration.
How to Disable Windows Snapping in Windows 11 Entirely
The snap windows feature, also known as snap assist, can either be a great aid or a great annoyance. As the setting comes enabled by default, today we’re going to show you how to disable Window snapping in Windows 11. The main reason you’d want to do this is if you already use a third-party solution for Window snapping that has more options or conflicts with the default Windows behavior. PowerToys, for example, lets you set custom window layouts for all of your apps. In our other guide, we show you how to disable window snapping in Windows (Snap Assist) using Settings, the Control Panel, and a registry entry.
FAQ – Frequently Asked Questions About Windows Snap and Snap Layouts
How can I quickly access the Windows Registry Editor?
To open the Registry Editor, press Windows + R to open the Run dialog, type “regedit,” and press Enter or click OK. This method is quick and straightforward, allowing you to start editing the Registry immediately. Ensure you have administrative permissions, as making changes to the Registry requires elevated privileges.
Is it necessary to back up the Windows Registry, and how can I do it?
Backing up the Windows Registry is crucial before making any changes to prevent potential system issues. To back it up, open the Registry Editor, go to “File” > “Export,” select “All” under Export range, choose a memorable location and give your backup file a name, then click “Save.” This .reg file can be used to restore the Registry to its previous state if needed.
Can modifying the Registry cause errors in my system?
Yes, incorrect modifications to the Registry can lead to system malfunctions or even prevent Windows from starting properly. It’s important to follow reliable instructions carefully and to make changes only if you understand their impact. Always back up the Registry and create a System Restore point before proceeding.
How can I reverse the changes made in the Registry if I encounter errors?
To reverse changes, you can either run the backup .reg file created before making changes or manually revert the values to their original state using the Registry Editor. If you cannot access your system due to a Registry error, you may need to boot into Safe Mode or use System Restore to revert to an earlier state.
Are there any tools to automate Registry edits for less experienced users?
Use .reg files for automatic Registry edits. These files contain specific instructions to add, remove, or modify Registry entries and can be executed with a double-click. Review the contents by opening the .reg file with Notepad to understand the changes it will make. Ensure the .reg file originates from a reputable source to avoid adverse effects on your system.
What precautions should I take when using .reg files from the internet?
Exercise caution with .reg files from the internet. First, verify the source’s credibility and check user reviews or feedback. Before applying the file, open it with a text editor like Notepad to review the changes it will make, ensuring they are safe and relevant to your needs. Lastly, always have a recent backup of your Registry.
Can changes made through the Settings app be overridden by system updates?
Yes, significant updates to Windows 11 can sometimes reset certain settings to their defaults, including those related to snap layouts and multitasking. After updating, it’s wise to check your custom settings to ensure they remain as you set them, reapplying any that were reverted.
How do I ensure the maximum benefit from disabling snap layouts on my workflow?
To maximize benefits, familiarize yourself with keyboard shortcuts for window management, such as Windows + Arrow Keys for snapping windows aside or corner. Consider utilizing virtual desktops for better workspace organization, and adjust other multitasking settings in Windows to fit your workflow preferences. Removing unnecessary distractions and optimizing your setup can significantly enhance productivity.
Will changing snap layout settings affect all user accounts on my PC?
Changes made through the Windows Settings app apply only to the user account currently logged in. For settings changes to impact all users, each account needs to adjust settings individually or use administrative tools to apply changes globally, such as Group Policy Editor in Windows 11 Pro and Enterprise editions.
Can I disable snap layouts for specific applications instead of globally?
Windows 11 does not offer a built-in feature to disable snap layouts for individual applications. However, some third-party window management tools provide more granular control over how applications behave on your desktop, including managing snap behavior on a per-application basis.
What alternative productivity features should I consider using in Windows 11?
Beyond managing snap layouts, consider using virtual desktops for organizing applications by task or project, which can significantly improve your workflow. The Focus Assist feature minimizes distractions by blocking notifications when you need to concentrate. Furthermore, exploring Task View and customizable keyboard shortcuts can enhance your efficiency in navigating and managing applications.
How can I manage window arrangements without using snap layouts?
Without using snap layouts, manage your windows using keyboard shortcuts, which enable quick window placement and sizing. “Windows + Arrow Keys” for snapping windows to sides or corners without hovering is highly effective. Additionally, manually adjusting window sizes and positions by dragging with the mouse allows for custom arrangements on your desktop.
Can disabling snap layouts improve system performance?
Disabling snap layouts alone is unlikely to significantly impact system performance for most users. However, turning off unnecessary features can contribute to a cleaner interface and might slightly reduce computational overhead on low-specification computers, potentially making the system feel more responsive.
Is there a way to customize the behavior of snap layouts instead of disabling them?
Yes, Windows 11 offers customization options for snap layouts in the Settings app under System > Multitasking. Here, you can adjust settings such as how windows snap and arrange themselves, enabling or disabling features to tailor the behavior to your liking, creating a balance between productivity and personal workflow preferences.
How do I restore default window management settings after customizing them?
To restore default settings, navigate to Settings > System > Multitasking in Windows 11. Look for a reset option to revert changes made in this section. If unavailable, manually re-enable or adjust each option to match the default configuration as needed. Remember, a system restore can also revert settings to a previous state but at the cost of losing recent changes and installations.
Related: How to Move the Taskbar in Windows 11 and Windows 10
With the advent of Windows 11, Microsoft introduced a centered taskbar and Start menu, aiming to align with modern design trends and user behaviors. However, not all users have embraced this change. If you’re among those who want to experiment with different taskbar positions for a more personalized setup, Windows offers the flexibility to move the taskbar to suit your preferences. In our other guide, we show you how to move the Windows taskbar to other places.
Related: How to Disable “Show More Options” in Windows 11 to See the Full Context Menu
The “Show More Options” line in the Windows 11 context menu is a departure from the traditional, instantly accessible full menu that users have become accustomed to in previous versions of Windows. While visually appealing, this change can disrupt the workflow by adding an extra step to access commonly used functions. In our other guide, we show you how to restore the classic context menu in Windows 11, removing the need to click “Show More Options”.

Related: How to Pin a Website, Folder, Drive, or Files to the Taskbar in Windows 11
The taskbar is an essential part of how you use your Windows PC, but it often goes underutilized. In our other guide, we are showing you how to pin a website, folder, drive, or file to the taskbar in Windows 11.