

When you create a document with Google Docs, it defaults to a 1.15-spaced, 11pt Calibri to try to appeal to the widest range of people. The first thing many people do is change this manually each time. In this guide, we show you how to change the Google Docs default font, font size, and line spacing so you don’t have to.
The Google Docs default font is called the “default style”, and though it isn’t especially intuitive, you can change it. If you tend to double-space in Google Docs, you can make sure new documents start with that setting. If you want your Google Docs default font to be a serif one, you can change that too.
How to Change Default Font, Font Size, and Line Spacing in Google Docs
Before you can modify the default font and formatting in Google Docs, you need to change some existing text to your liking. Create a new document and type anything, then follow the steps below:
Changing the Default Font Style in Google Docs
Adjusting the default font style can add a personal or professional touch to your documents, ensuring consistency across your work.
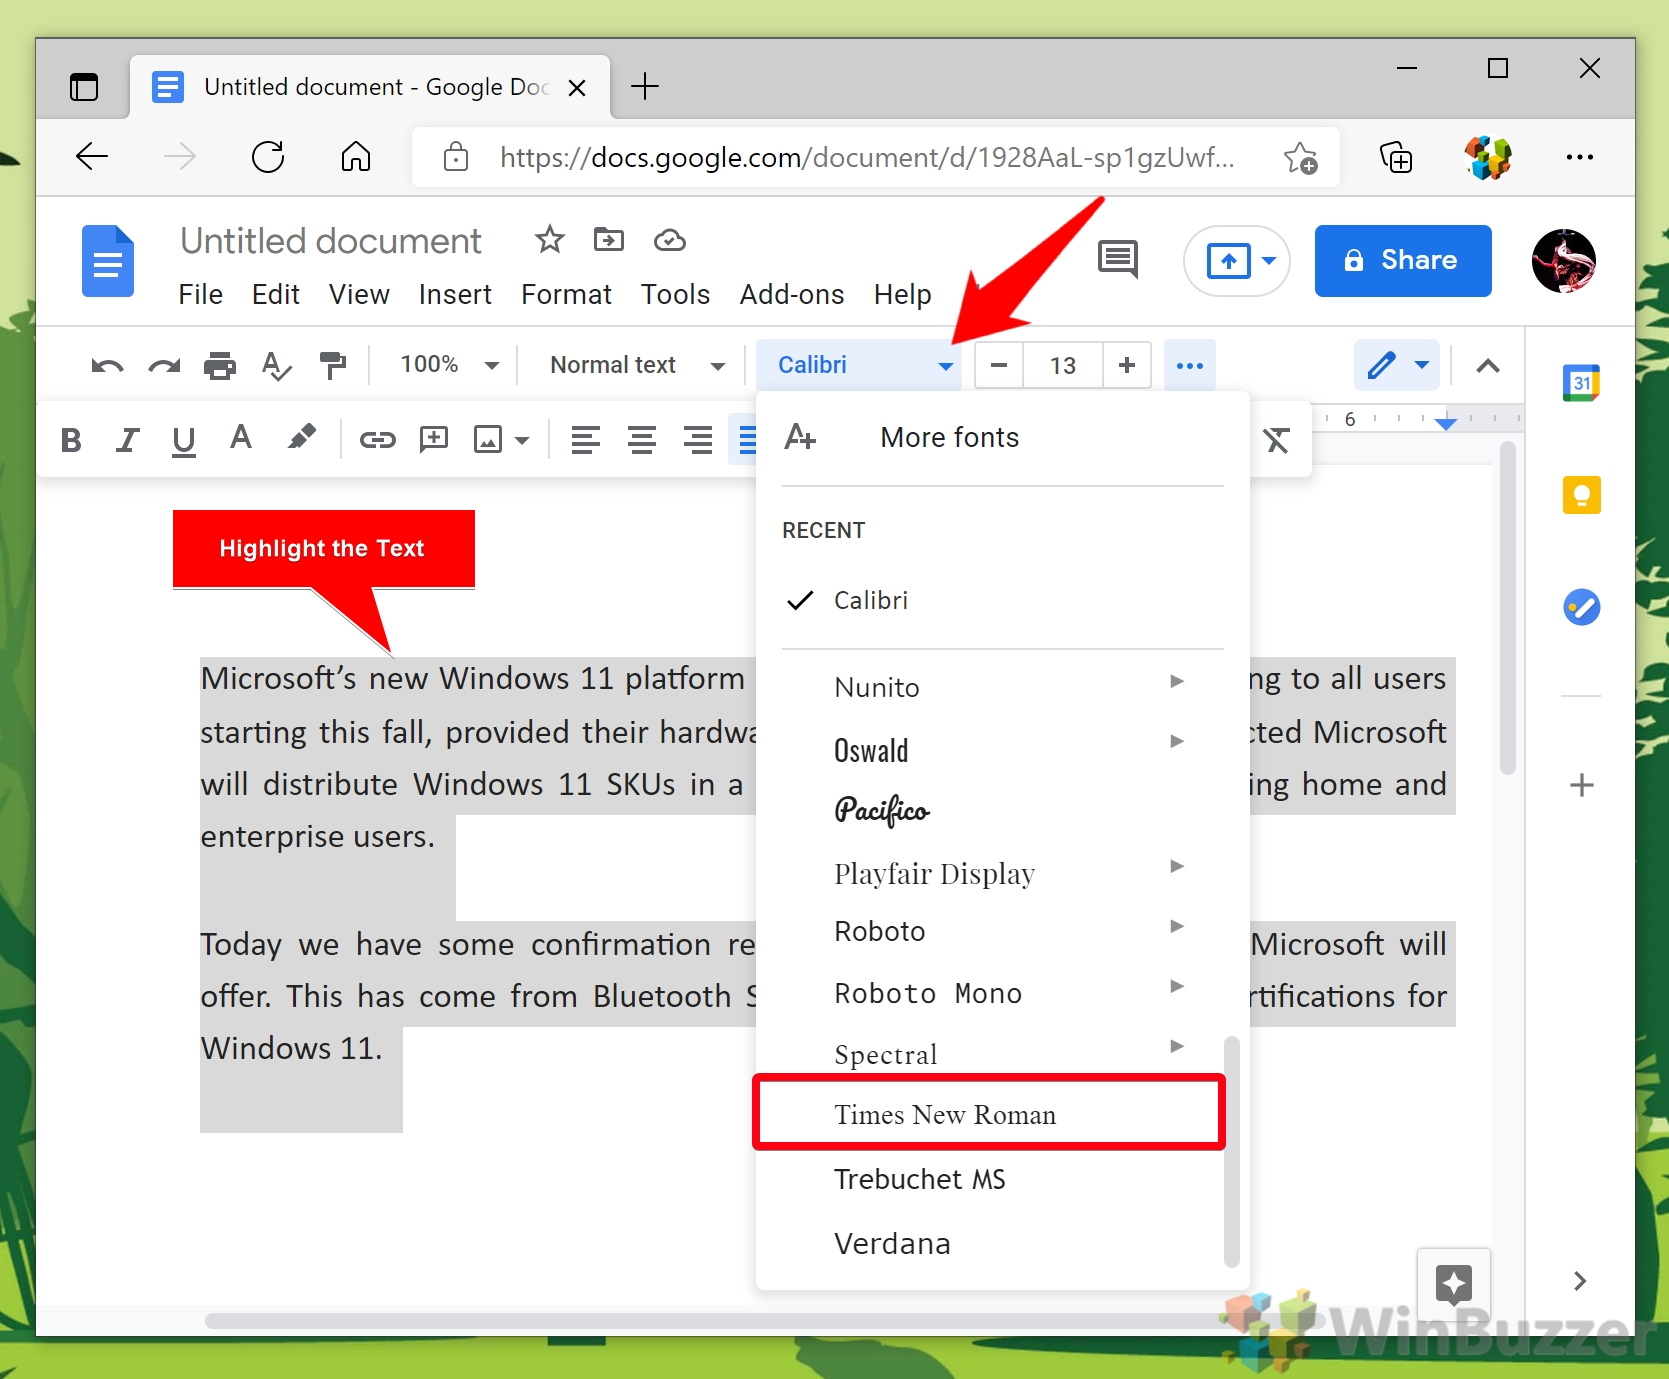
- Select Text and Open Font Style Dropdown
Highlight the text, then navigate to the font style dropdown menu, currently set to “Calibri“, to explore the available fonts. - Choose Your Preferred Font
From the dropdown, select a font that suits the purpose of your document or your personal preference. This will be set as the new default font for future documents.
Adjusting the Default Font Size in Google Docs
Modifying the default font size can make your document more accessible and easier to read for your audience.
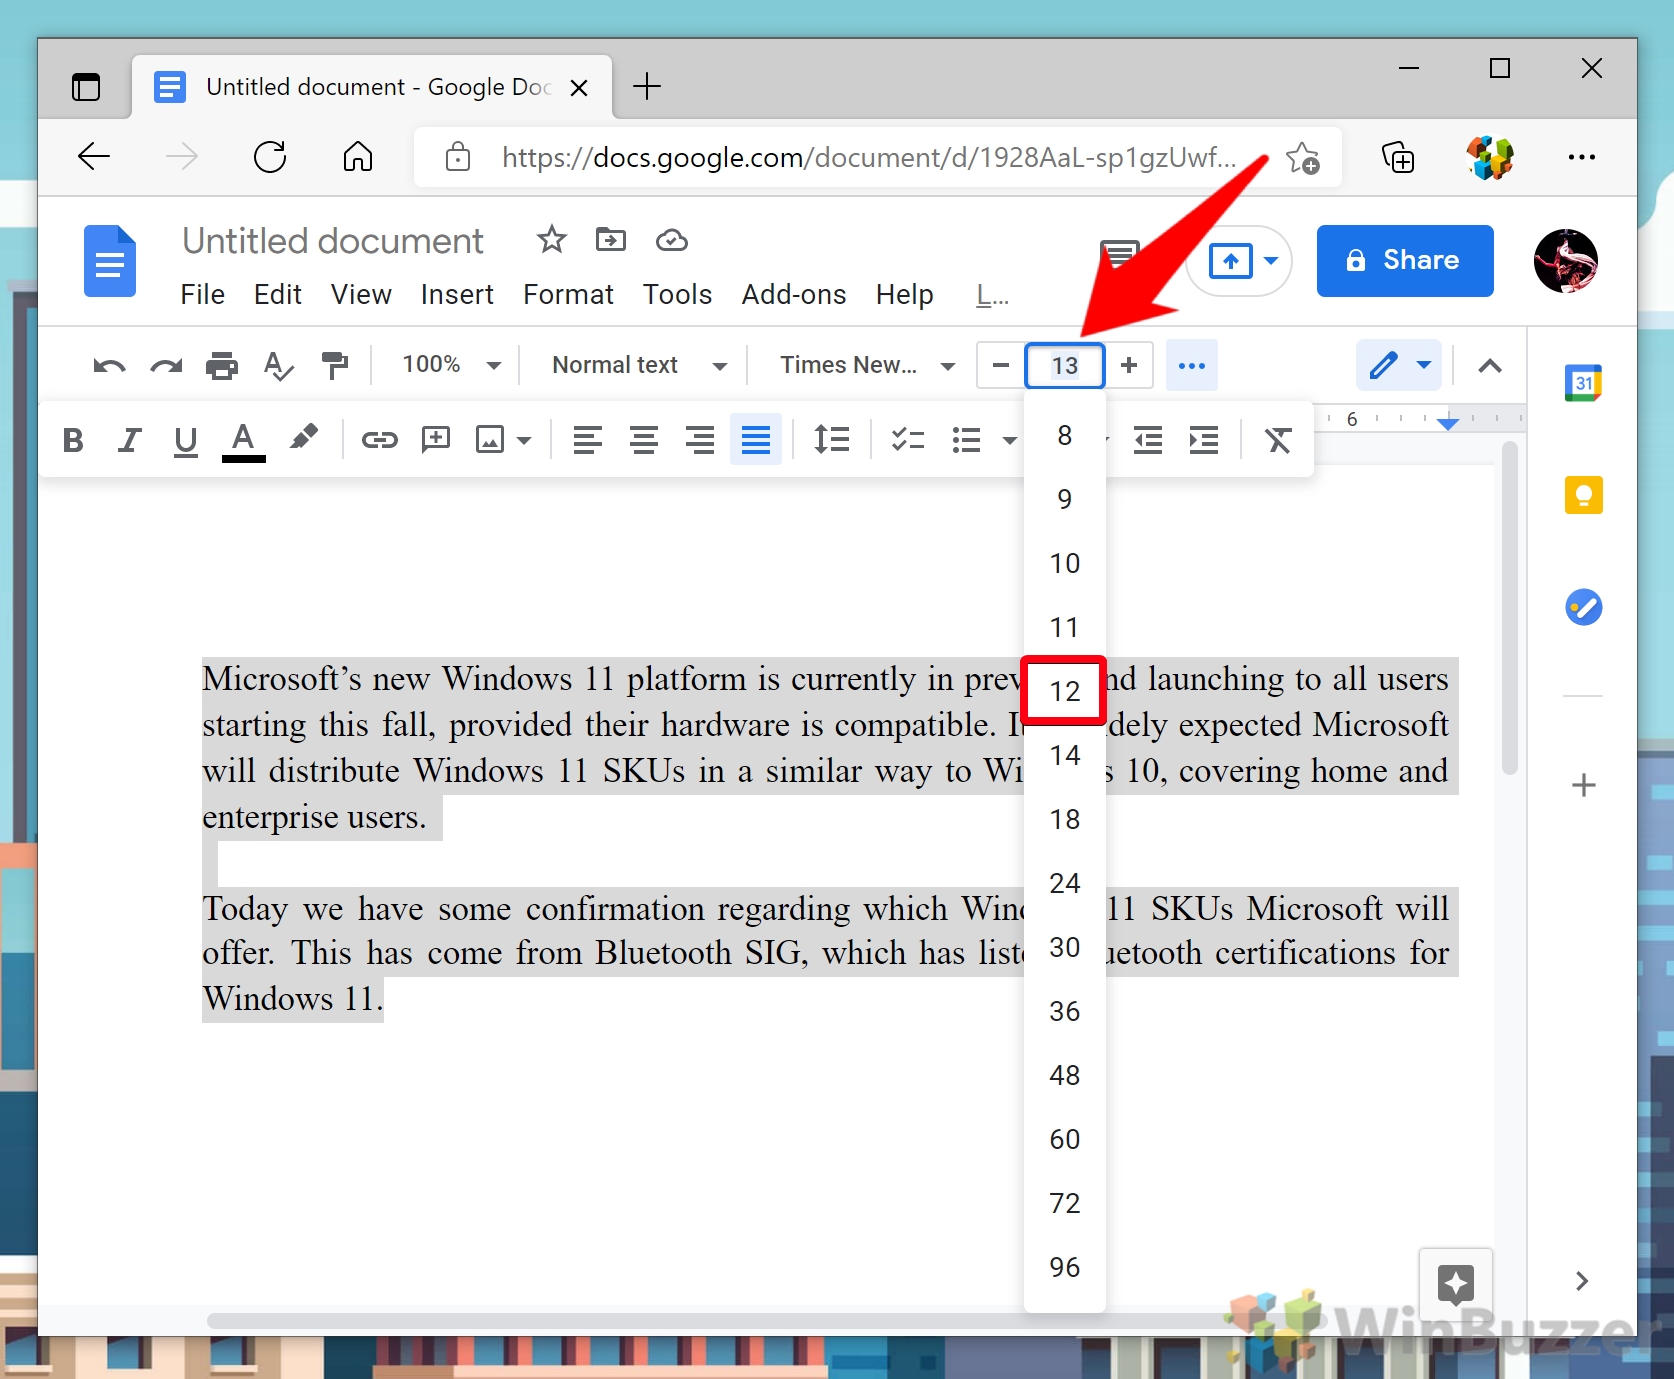
- Highlight Text and Open Font Size Dropdown
With your text highlighted, click on the font size indicator, usually set to “11“, next to the font style dropdown to view and select from different size options. - Select a New Font Size
Choose a font size that better fits your document’s needs from the dropdown menu. This size will become the new default for all standard text.
Modifying Default Line Spacing in Google Docs
Adjusting the default line spacing can enhance the readability and appearance of your document, making it more professional or easier to annotate.
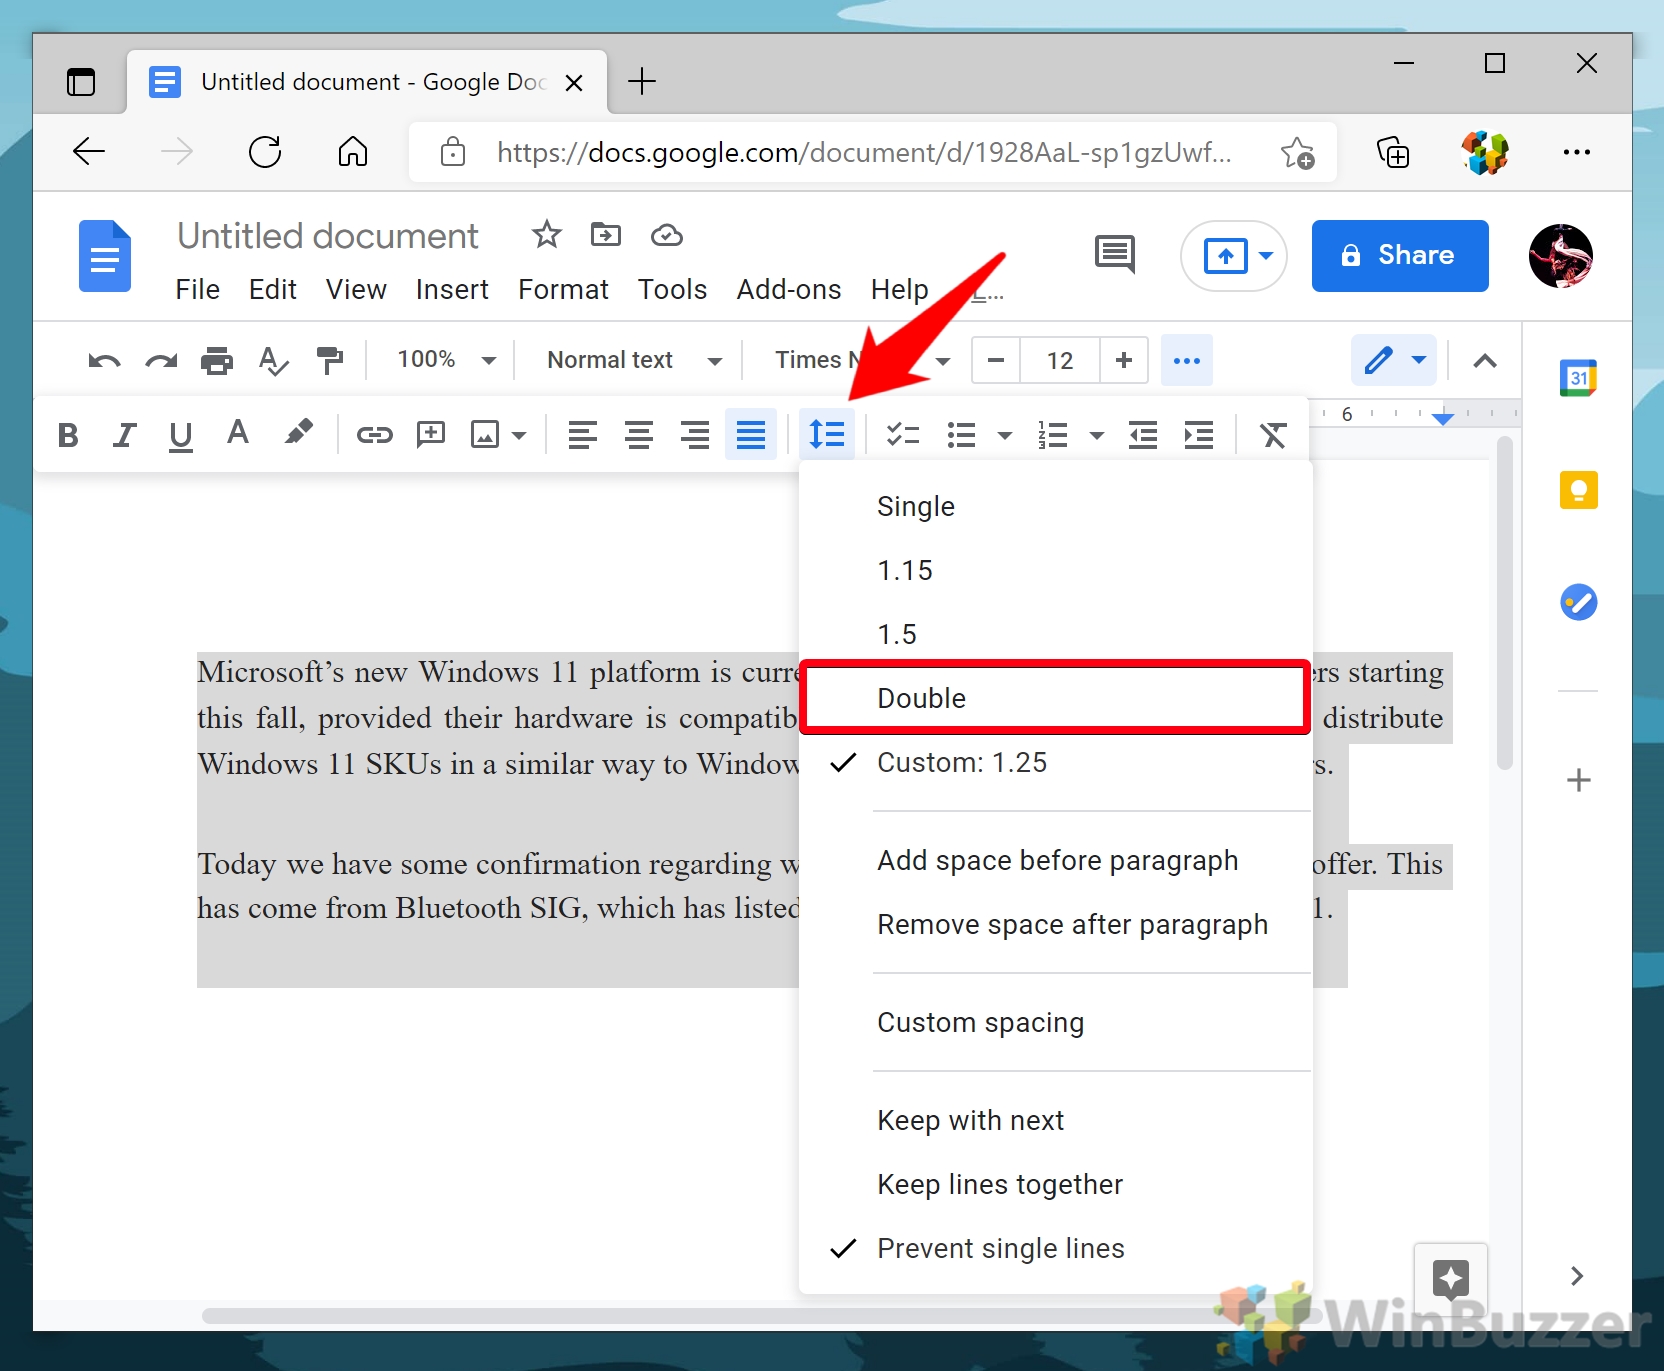
- Access Line Spacing Options
Click on the line spacing icon in the toolbar, represented by a double-sided arrow with three lines, to open the line spacing menu. - Choose Your Desired Line Spacing
From the menu, select a line spacing option that suits your document’s needs, such as Double for academic papers or Single for more compact documents.
Updating the “Normal Text” Stylein Google Docs
Ensuring your “Normal text” style matches your new settings is crucial for maintaining consistency throughout your document.
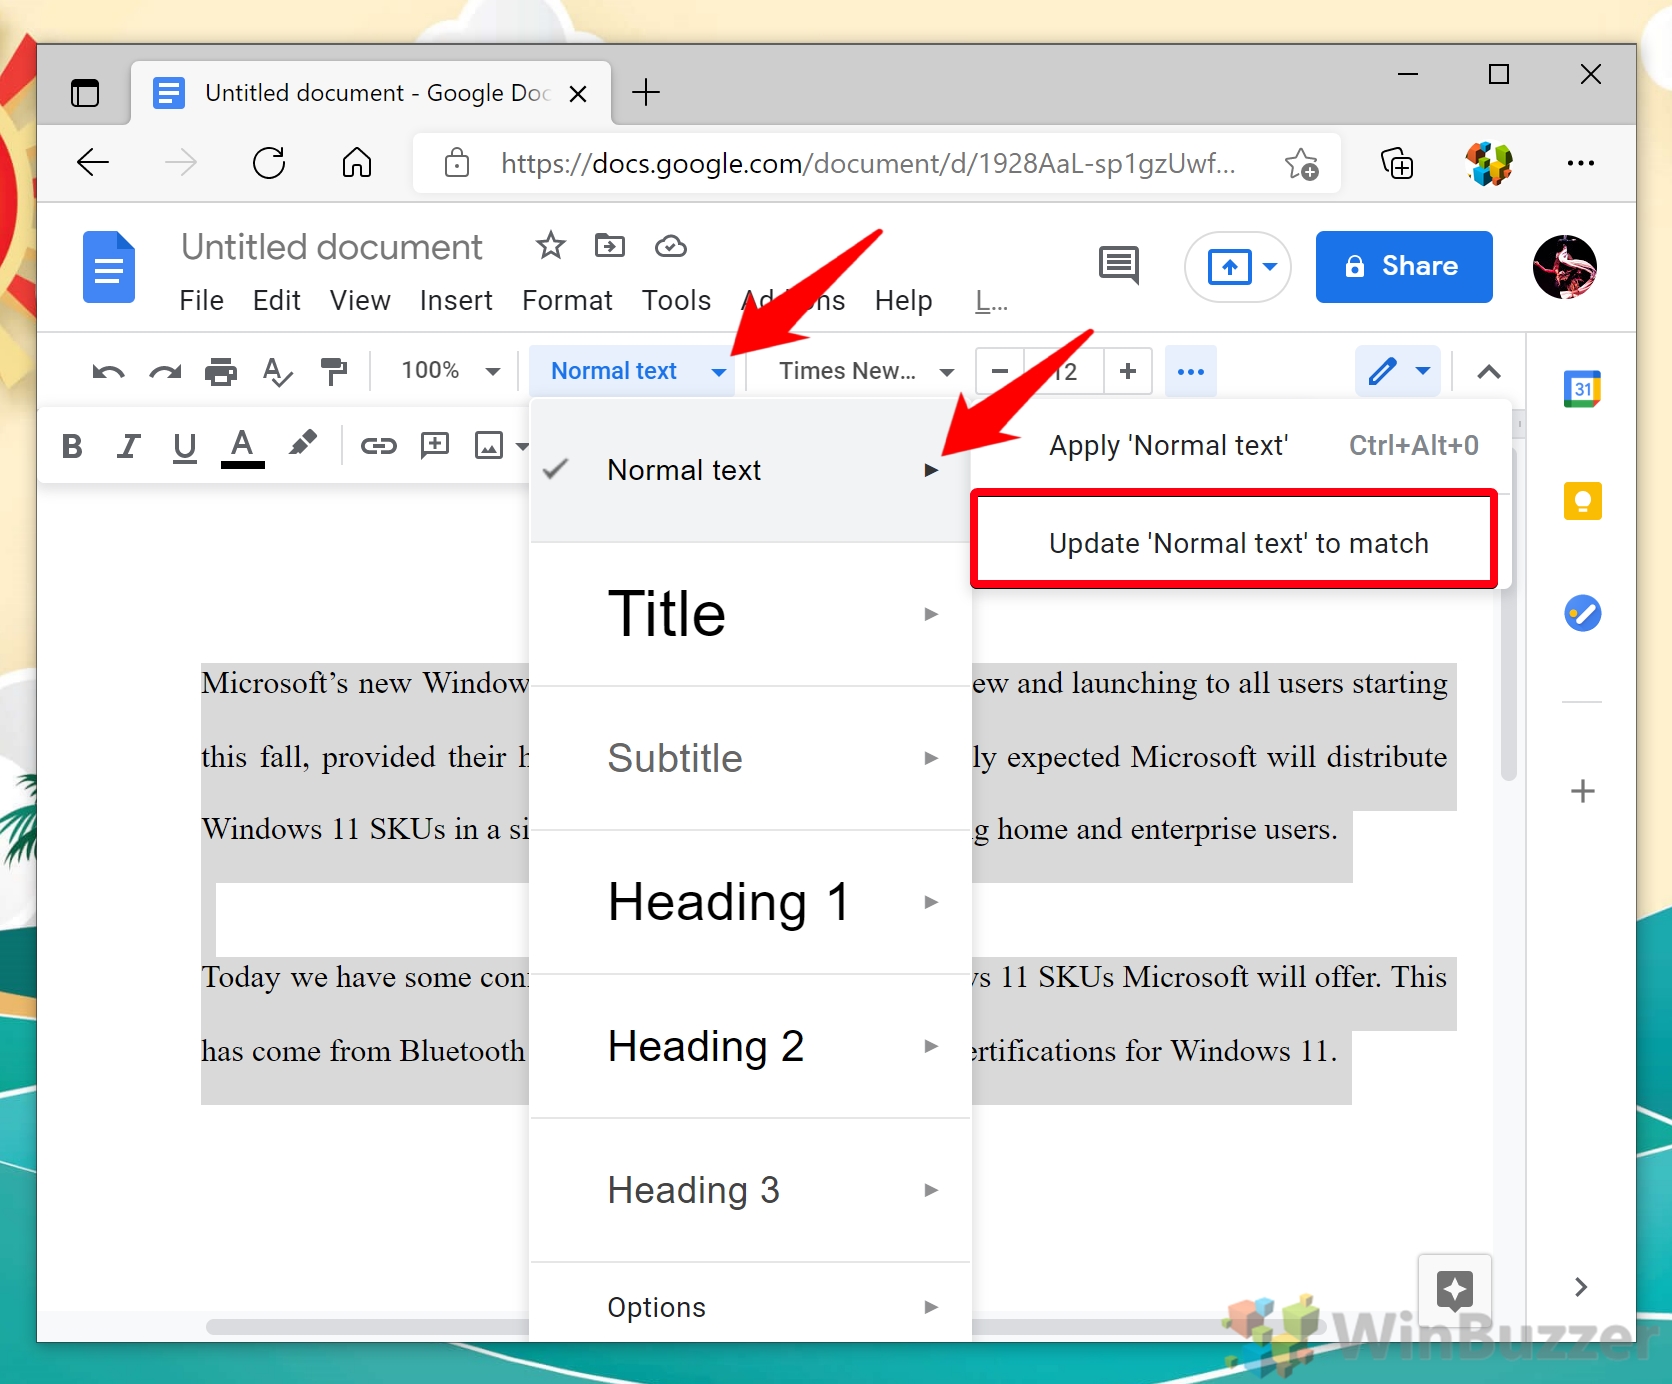
- Match “Normal Text” to Your Selection
After adjusting your font, size, and spacing, highlight the text again, right-click, and select “Update ‘Normal text‘ to match”. This updates the default style for body text. - Apply Changes to Headings and Subtitles
Add headings and subtitles to your document, adjust their appearance as desired, and update their styles to ensure all text elements are consistent.
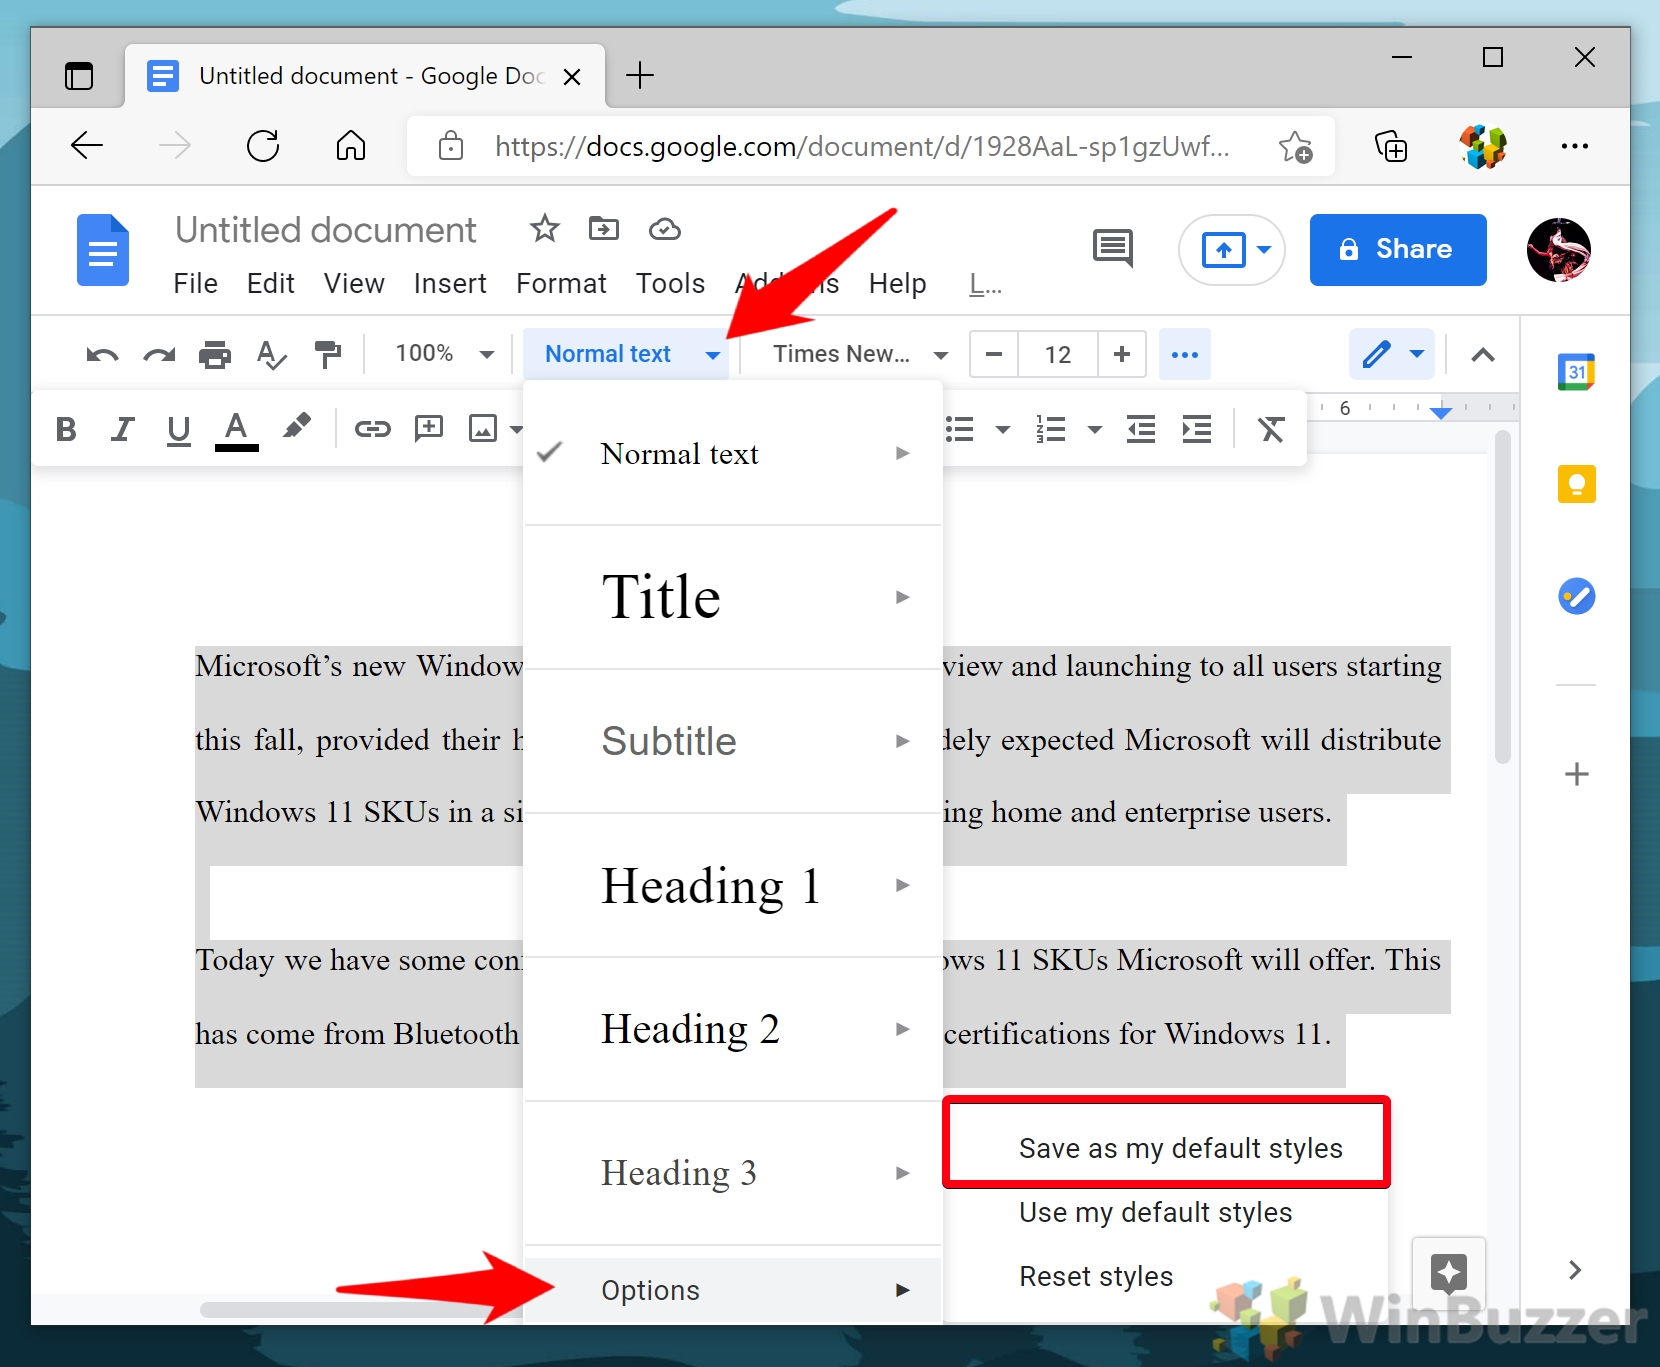
Saving Your Default Styles in Google Docs for Future Use
Google Docs allows you to save your custom settings as the new default, simplifying the document creation process for future projects.
- Save as a default style
To finalize your customizations, click on “Options” in the toolbar, then select “Save my default styles“. This action saves your new settings as the default for all new documents.
FAQ – Frequently Asked Questions About Document Settings in Google Docs
Can I apply customized settings to existing documents?
To apply your customized settings to an existing document, open the document, select the entire text (Ctrl+A for Windows, Cmd+A for Mac), and manually apply your preferred font style, size, and line spacing. Finally, to make these the default styles for future text, right-click on a paragraph, choose “Styles” from the dropdown menu, then “Update ‘Normal text’ to match” for font and size, and apply your preferred line spacing from the toolbar’s spacing options.
Is it possible to have multiple default styles for different types of documents in Google Docs?
Google Docs does not natively support multiple sets of default styles within the same account. A workaround is to create separate documents as templates with your desired styles for different purposes. Remember to open and make a copy of the relevant template before starting a new document to maintain your varying default styles.
How can I ensure that my customized font settings are maintained when exporting Google Docs to other formats?
When exporting a Google Doc to another format (e.g., PDF, Word), ensure that the application you’re importing into supports the customized fonts and formatting used. If a font isn’t supported, consider converting the text to images or embedding fonts into PDFs if the format allows, though the latter cannot be done directly through Google Docs. Additionally, check the export settings on Google Docs and the import settings on the target application to ensure compatibility.
Can I use my custom font that is not available in Google Docs?
While you cannot directly upload custom fonts to Google Docs, you can expand your font selections by clicking on “More fonts” at the bottom of the Fonts dropdown menu. This action opens the ‘Fonts’ dialog where you can browse or search Google’s extensive font library, potentially finding a suitable alternative to your custom font. For fonts not available in Google’s library, consider using a different application that supports font uploading for your document creation and then importing it into Google Docs if necessary.
How do I save my customized text styles for headings and subtitles beyond the normal text?
After adjusting the font style, size, color, and line spacing for a heading or subtitle, highlight the text of that heading or subtitle, right-click, and select “Update ‘Heading 1’ to match” for heading 1, for example. Repeat this process for each heading style or subtitle you’ve customized. This will ensure that whenever you apply a particular heading or subtitle style within your document, it will automatically have your customized settings.
What is the best line spacing for readability according to conventional standards?
The optimal line spacing for readability typically ranges from 1.5 to 2.0, as it improves text legibility and eases the reading process, especially for longer documents. Academic and professional documents often require double spacing (2.0) to accommodate comments and revisions. It’s important to consider your audience and the document’s purpose when choosing line spacing, as more dense documents might benefit from slightly tighter spacing to conserve space.
Is it possible to create a template in Google Docs with my custom settings?
Yes, after adjusting a Google Docs document to your preferred settings and styles, including fonts, sizes, and spacings, you can save it as a template for future use. Go to “File” > “Make a copy” to create a new document that retains all your customizations, which you can then rename and designate as your template. Although Google Docs does not have a specific ‘Save as template’ feature, this method effectively serves the same purpose. You can also store these template documents in a dedicated folder in Google Drive for easy access.
How does adjusting default settings impact the document’s accessibility?
Adjusting the default settings like font size, type, and line spacing can significantly enhance a document’s accessibility. Larger fonts (above 12pt) and wider line spacing (1.5 or 2.0) are easier for individuals with vision impairments to read. Use simple, legible fonts and ensure sufficient contrast between text and background colors. These adjustments aid in making documents more user-friendly for people with disabilities, aligning with best practices for digital accessibility.
Can I lock the formatting so others cannot change my set defaults in a shared document?
Google Docs does not currently offer a feature to lock formatting within a document. As a collaborative platform, it allows all users with editing permissions to change formatting as needed. A workaround is to communicate clearly with your collaborators about the importance of maintaining certain formatting standards. Alternatively, you could restrict their permissions to either “viewing” or “commenting” if preserving formatting is crucial.
How do I change the default font color in Google Docs?
To change the default font color, select the text, then click on the text color icon (a letter ‘A’ icon with a color bar beneath it) in the toolbar. Choose your desired color from the palette. To make this your default font color for future text, right-click on the text, go to “Styles”, then “Update ‘Normal text’ to match”. Note that while this sets a precedent for the document, Google Docs does not save this color change as a default for new documents.
Can line spacing be set to less than single space in Google Docs?
Yes, to set the line spacing to less than single space, highlight the text for which you want to adjust the spacing, click on the line spacing icon in the toolbar, and select “Custom spacing”. Here, you can enter a value less than 1.0 (e.g., 0.75) to achieve tighter line spacing. This feature allows for more flexible document formatting, though it’s less commonly used for conventional documents intended for readability and accessibility.
How do I ensure my custom defaults are applied when collaborating on a document?
While your custom default styles apply automatically to new documents you create, shared documents rely on the original creator’s settings. If you’re the document owner, apply your preferences as defaults. When collaborating, communicate and agree upon formatting preferences, then manually apply those settings within the document. Remember, collaborative editing may lead to changes in formatting, underscoring the importance of clear communication.
Why does Google Docs revert to the original defaults when I log in from a different device?
Your Google Docs settings, including default styles, should be consistent across devices as long as you’re logged into the same Google account. If you’re experiencing inconsistencies, ensure that you’re signed into the correct account and check if any browser or device-specific settings might override your preferences. Google Docs’ default styles are account-bound rather than device-specific, so this issue is often attributable to account mix-ups or syncing delays.
Will changing the default font affect the document’s loading time?
Changing the default font in a Google Docs document generally has a negligible impact on the document’s loading time. Google Docs is designed to handle a variety of fonts efficiently. However, excessively large documents or those with numerous special fonts, images, or embedded content might load more slowly, regardless of the default font used. Ensuring a stable internet connection and keeping documents reasonably streamlined can help optimize performance.
How do I reset to the original default settings in Google Docs after customizing them?
To revert to the original default settings in Google Docs, you must manually adjust each of the settings (font style, size, and line spacing) back to their original states (Calibri, 11pt, and 1.15 line spacing for instance). After making these adjustments, highlight the text with these settings, right-click, and choose “Update ‘Normal text’ to match” from the Styles menu for font and size. There is no one-click option to revert all settings to their defaults, so this process needs to be done for each element you’ve customized.
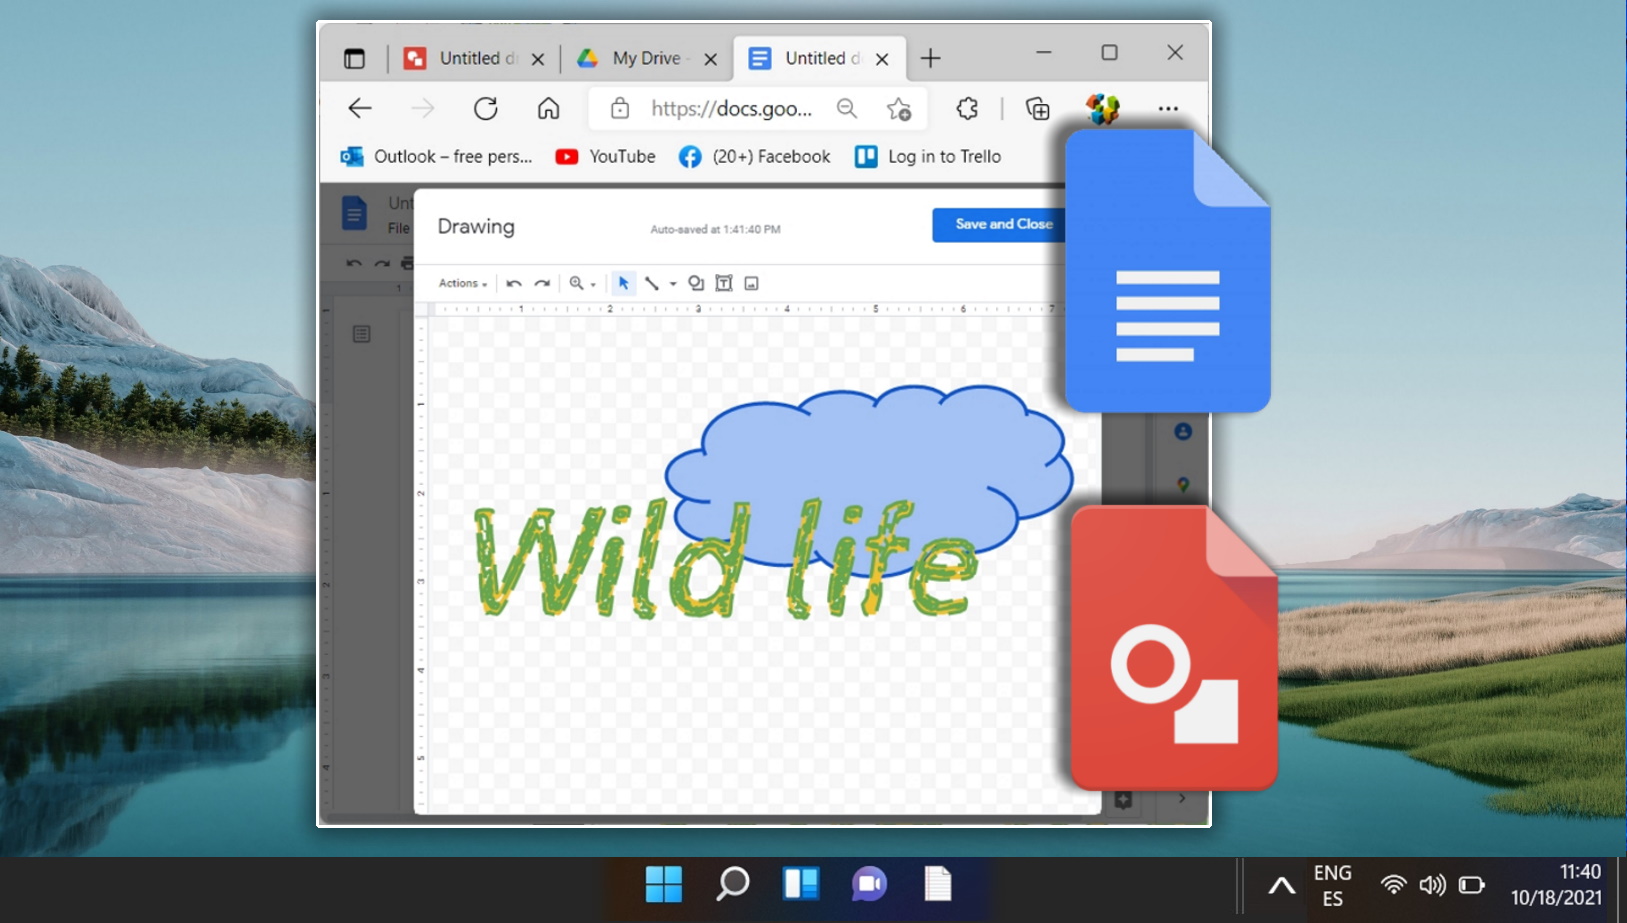
Related: How to Draw on Google Docs
Google Docs isn’t just for typing up documents; it’s also equipped with features that allow you to unleash your creativity through drawing. Whether you’re looking to add a personal touch to your documents or need to create detailed diagrams. In our other guide, we show you how to draw on Google Docs using both its in-built tool and the separate Google Drawing service.
Related: How to Add a Table of Contents in Google Docs and Update It for Changes
Adding a table of contents to your Google Docs is important once they reach dozens of pages. While many overlook this feature in favor of the document outline, it’s a useful tool to tell readers what’s in the document and help them navigate it. In our other guide, we show you how to create a table of contents in Google Docs via the use of heading styles, and then update it to reflect any changes you make in the editing process.
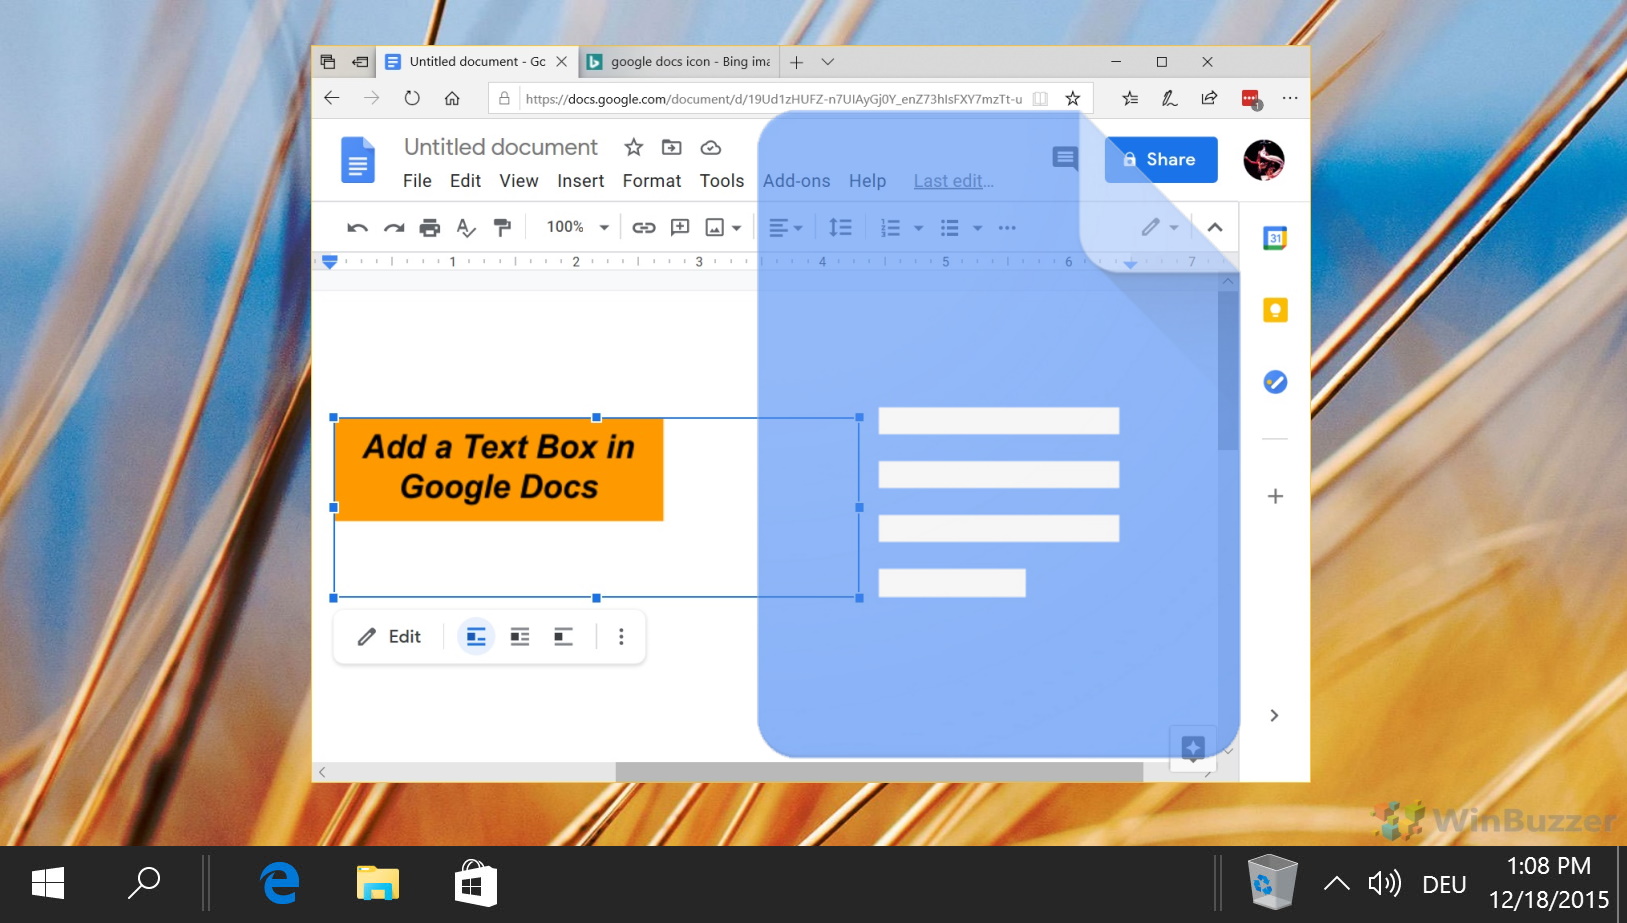
Related: How to Insert a Text Box in Google Docs or Sheets
The process to insert a text box in Google Docs isn’t as intuitive. For whatever reason, Google has hidden the feature behind an entirely different menu that is rarely frequented. In our other guide, we show you how to insert a text box in Google Docs or Google Sheets, while disclosing a small trick to put a text box over an image.
Related: How to Add a Border in Google Docs
While Google Docs doesn’t have quite as much functionality as Microsoft Word, the free online tool has a surprising amount of flexibility. For example, though it has no specific border too, it’s entirely possible to create page borders in Google Docs. In our other guide, we show you how to add a page border in Google Docs using several unofficial but highly customizable methods.


