

If you’re a former Microsoft Word user, you’re probably quite familiar with text boxes. However, the process to insert a text box in Google Docs isn’t as intuitive. For whatever reason, Google has hidden the feature behind an entirely different menu that is rarely frequented.
Not to fear, though – if you’re scratching your head wondering where the hell the text box is in Google Docs, the answer is the drawing tool menu. It’s a bit of an inconvenient workflow, but the advantage lies in the ability to easily combine multiple types of media.
Before we show you how to insert a text box, it’s worth quickly covering what you can and can’t do with them. Specifically, you should be aware that you can’t place a text box over other text, nor can Google Docs add a text box over an existing image in your document. You can, however, add the image to your drawing and combine it with your text box to get around this.
With that said, let’s jump into the main tutorial. The content below is designed for Google Docs users, but if you’re wondering how to insert a text box in Google Sheets, the process is identical, so feel free to follow along anyway.
How to Insert a Text Box in Google Docs or Google Sheets
This tutorial will guide you through the steps of inserting, formatting, and editing text boxes in Google Docs or Google Sheets using the drawing tool. Master the art of combining text and images to enhance your document’s layout and visual appeal.
- Create a new drawing
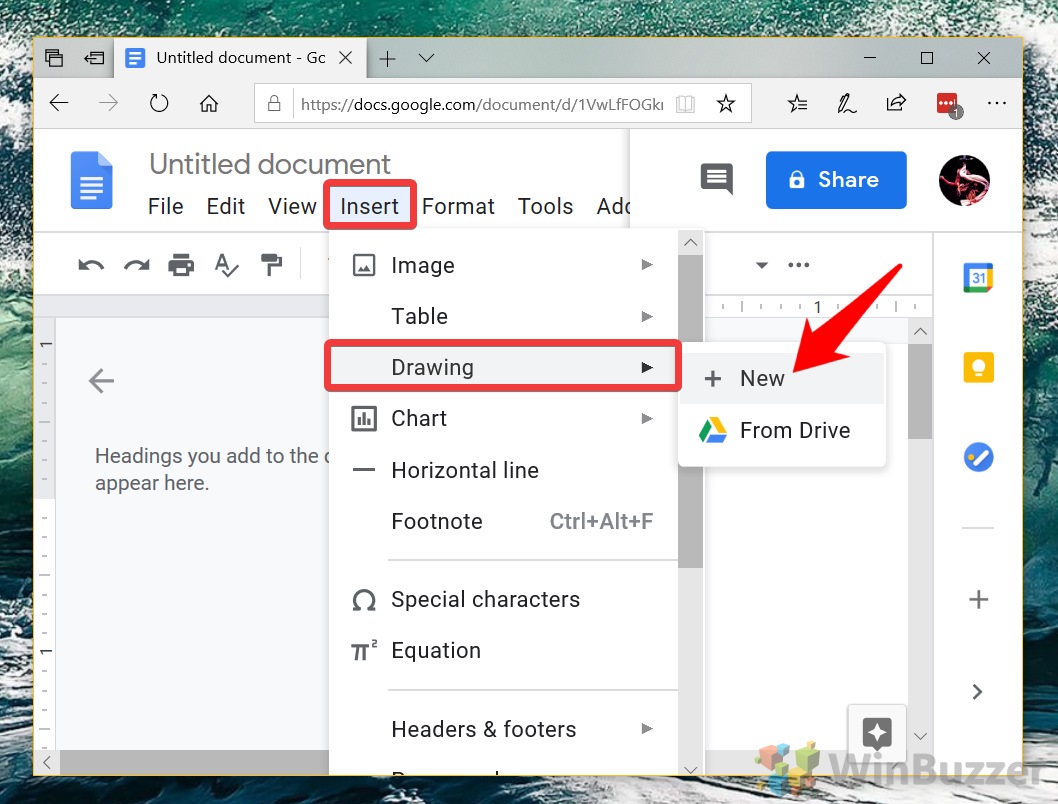
With your Google Doc open, navigate to “Insert” in the main toolbar. Select “Drawing > + New” to open a new drawing canvas. This canvas is your workspace for creating text boxes.
- Create a Google text box
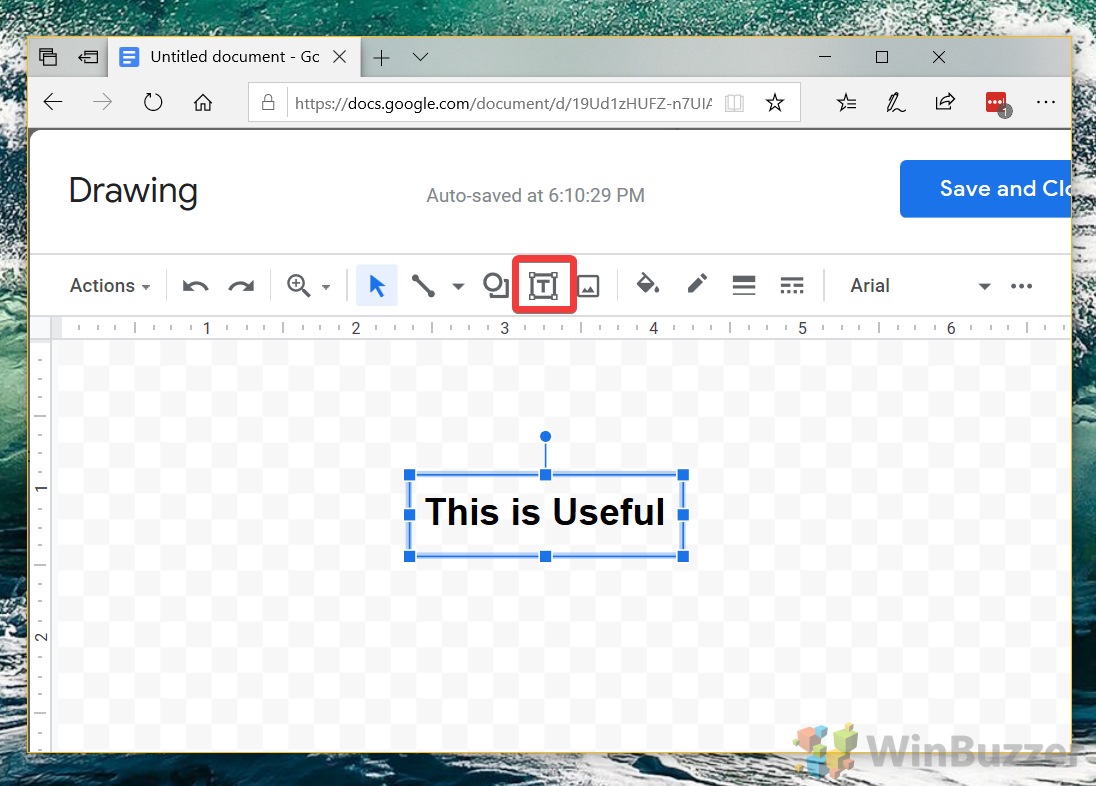
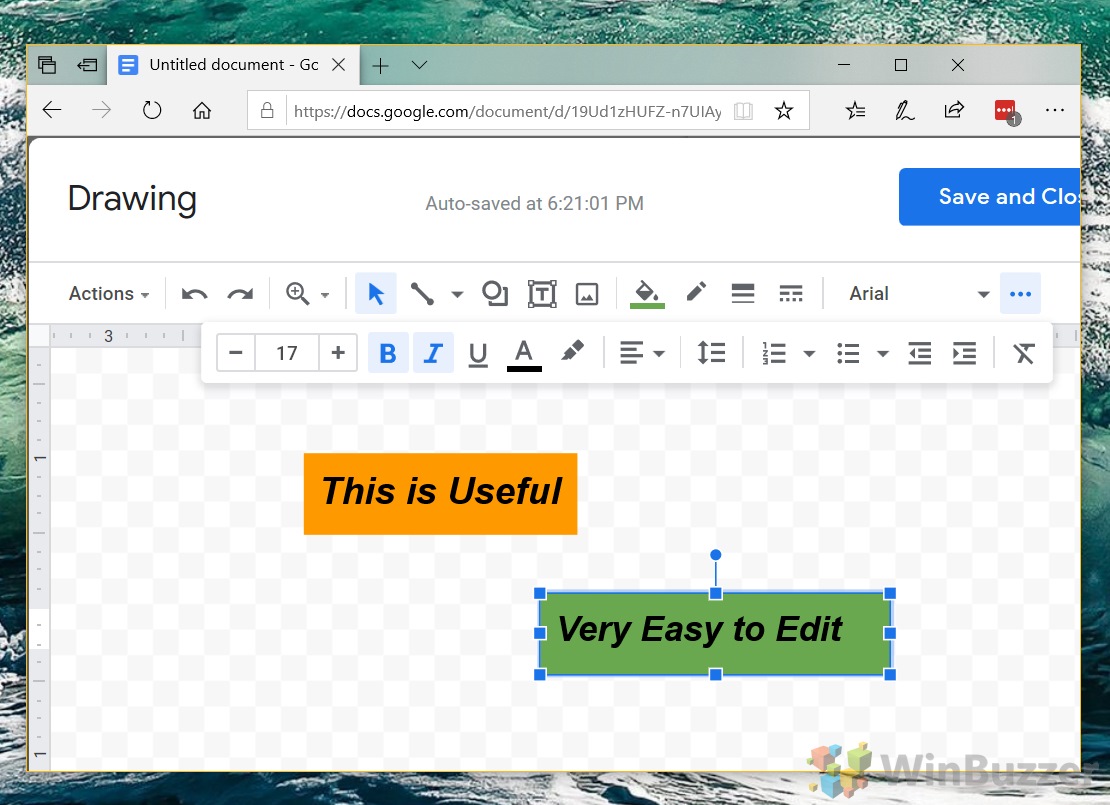
In the drawing tool, click the text box icon (a T inside a square). A blank rectangle will appear for you to type your text in.
- Format your Google Docs text box
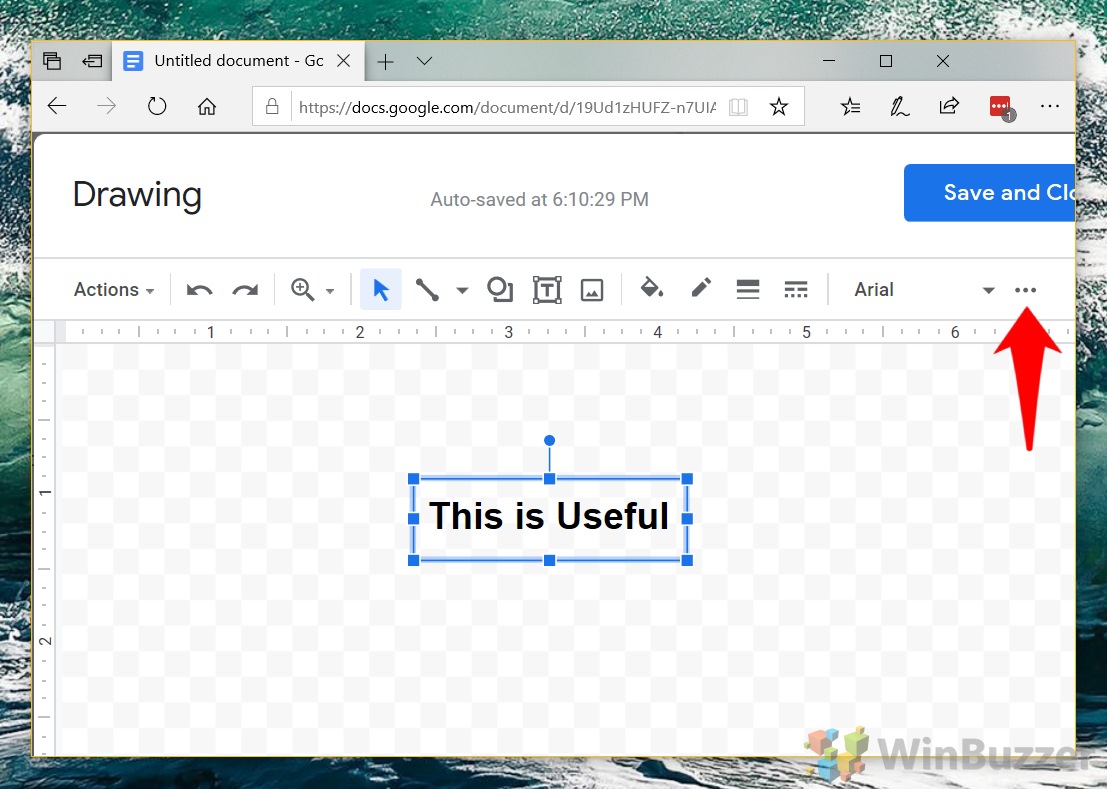
Unfortunately, formatting your text box isn’t much more intuitive than creating it in the first place. To access formatting options, look for the three dots in the top-right corner of the drawing tool. Here, you can adjust the text box’s font style, size, color, and more. You can also change the background of the box by pressing the paint bucket bottom back on the main toolbar.
- Add the text box to your document
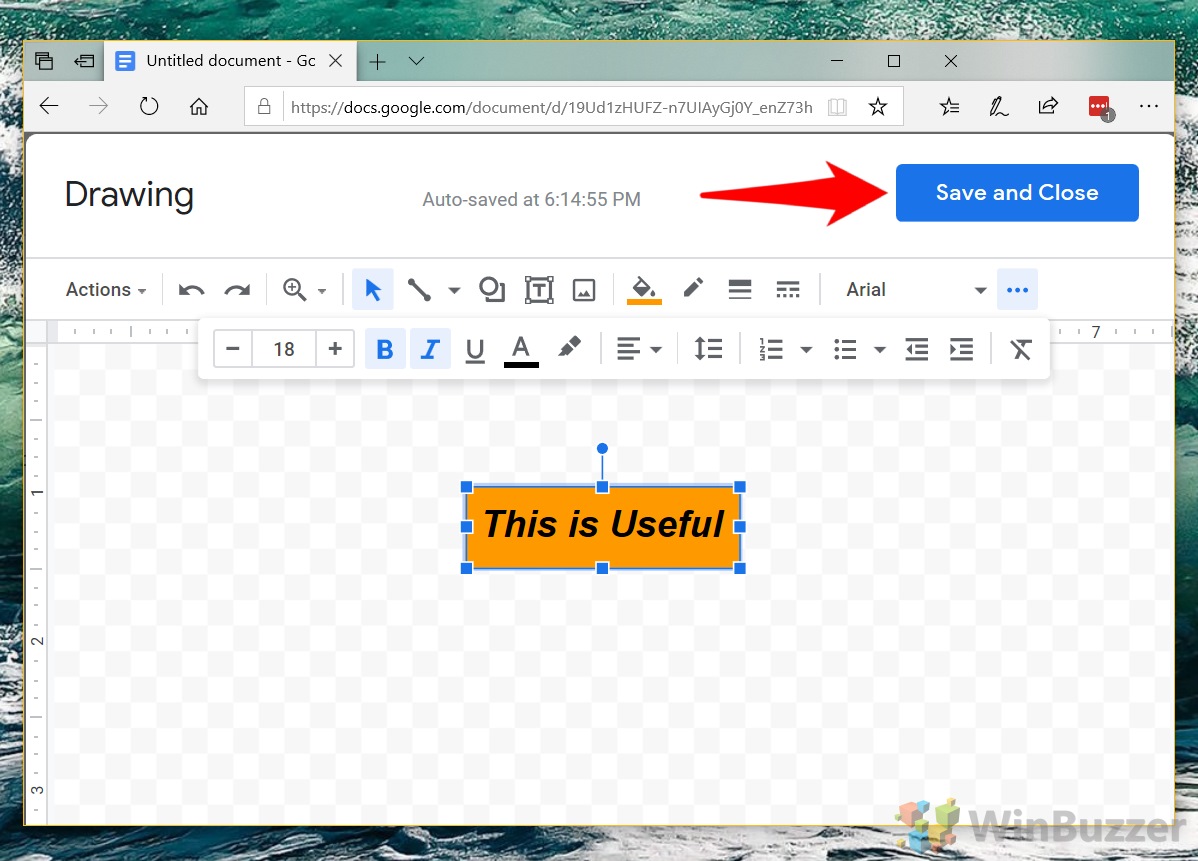
Click “Save and Close” to add the text box to your Google Doc. You can then move and position it as needed.
- Edit the Google Docs text box if needed
To edit your text box, click it in your document and press the “Edit” button. For layering text boxes over images, insert an image, then create a text box and right-click the image to select “Send to back”.
FAQ – Frequently Asked Questions About Text Boxes in Google Docs and Google Sheets
Can I lock a text box in place in Google Docs?
While Google Docs does not provide a direct feature to lock text boxes or any drawn elements in place, to prevent accidental movement or editing, one strategy is to be cautious while editing around these elements. Alternatively, after finalizing your document, converting it into a PDF format can ensure that all elements, including text boxes, stay fixed in their places.
Is it possible to link text within a text box to another document or website?
Yes, you indeed can link text within a text box to external websites or other Google documents. After typing your text inside the text box using the drawing tool, highlight the portion of the text you wish to link, click on the link icon (which looks like a chain link), and enter the URL or search for the Google document you want to link to. This feature is particularly useful for creating clickable elements within graphic components.
Can I copy a text box from one Google Doc to another?
Absolutely, to copy a text box from one Google Doc to another, first ensure that the text box is saved and visible in your original document. Then, simply select it, copy it using the Ctrl+C (or Command+C on Mac) shortcut, navigate to your target document, and paste with Ctrl+V (or Command+V). This method retains the formatting and contents of your text box across different documents.
Can text boxes in Google Docs have different border styles or colors?
In the Google Docs drawing tool, which is used for creating text boxes, you have the option to customize your text box with different border styles and colors. By selecting your text box and locating the line color (for changing border color) and line weight (for adjusting border thickness) options, you can easily stylize your text box. While more intricate border styles like dashed or dotted lines are limited, adjusting the color and thickness provides a degree of customization.
How can I make a text box background transparent?
For achieving a transparent background in your text box, after creating it in the drawing tool, click on the paint bucket icon which represents the fill color option. In the menu that appears, select the transparent option, often represented by a checkered pattern. This action removes the background color, making the text box background see-through while still maintaining the text visibility.
Is it possible to group multiple text boxes together?
Google Docs allows users to group multiple elements, including text boxes, within the drawing tool for easier manipulation as a single object. By holding down the Shift key while clicking each object you wish to group, then right-clicking and selecting “Group” from the context menu, you can move and resize these elements collectively. This feature simplifies managing layered elements or creating complex graphics arrangements.
Can I add a drop shadow to a text box in Google Docs?
While directly adding a drop shadow to a text box in Google Docs isn’t supported within the drawing tool itself, there is a workaround. To achieve a shadow effect, you could duplicate the text box, change its color to a darker shade (representing the shadow), slightly offset it behind the original text box, and then lower its opacity if the drawing tool permits. Alternatively, using an external graphics design software to create and then import the text box with the shadow effect might be more efficient for a polished look.
How to adjust line spacing within a text box?
Adjusting line spacing within a text box created in Google Docs’ drawing tool is straightforward. Once you’ve added your text, select it, and then look for the line spacing button on the toolbar—it might resemble lines with up/down arrows next to them. Here, you can select your desired spacing option, adjusting how tightly or loosely your text lines are spaced, enhancing the readability and aesthetics of your content.
Is it possible to set a specific width and height for a text box?
Google Docs does not offer a direct input method for setting precise dimensions for a text box by entering numerical values. The size adjustment is predominantly visual and manual—by clicking and dragging the edges or corners of a text box. For precise dimensions, a potential workaround involves using the gridlines or ruler in the drawing tool as a reference to manually adjust the text box size as accurately as possible.
Can I insert a hyperlink inside a text box?
Indeed, inserting a hyperlink within a text box in Google Docs is possible and functions similarly to linking text outside of a text box. Simply select the desired text, click the link icon (could be represented by a chain icon), and either paste the URL you wish to link to or search for a Google document. This capability is valuable for directing readers to specific web resources directly from your text box content.
How do I align text within the text box?
Text alignment within a text box in Google Docs can be changed by selecting the text and using the alignment icons found in the drawing tool’s toolbar. These icons typically include options for left, center, right, and justified alignment. Clicking one of these will reposition your text accordingly within the text box, allowing for varied visual layouts and emphasizing different parts of your content.
Can I save a template of my text box to reuse in other documents?
Google Docs does not provide a built-in feature to save individual text boxes as reusable templates. However, creating a document that serves as a repository for various text box styles and designs you’ve created allows you to copy these text boxes from this document to others. This manual method acts as a makeshift template system, enabling quick access to your preferred styles and formats.
How do I ensure that my text box stays on top of an image when the document is viewed on different devices?
To ensure a text box remains layered on top of an image across various devices, make ample use of the “Send to back” or “Bring to front” layering options within the drawing tool when arranging your elements. Properly layering and grouping your elements, as needed, can aid in maintaining the desired layout integrity, offering a consistent viewing experience no matter the device.
Can text within the text box be formatted to include tables?
The drawing tool in Google Docs, used for creating text boxes, does not support adding tables directly within the text box. If you need to combine text and tables in your layout, consider inserting tables separately in the Google Docs interface, outside of the drawing tool. The drawing tool is better suited for integrating text with images or creating standalone graphical elements.
Are there keyboard shortcuts to quickly create a text box in Google Docs?
Direct keyboard shortcuts for creating a text box in Google Docs do not exist. Users need to access the drawing tool manually via the “Insert” menu, then select “Drawing” followed by “+ New.” Despite this, familiarizing yourself with the drawing tool can streamline the process, and over time, this might become a quick task as you become more accustomed to the workflow within Google Docs.
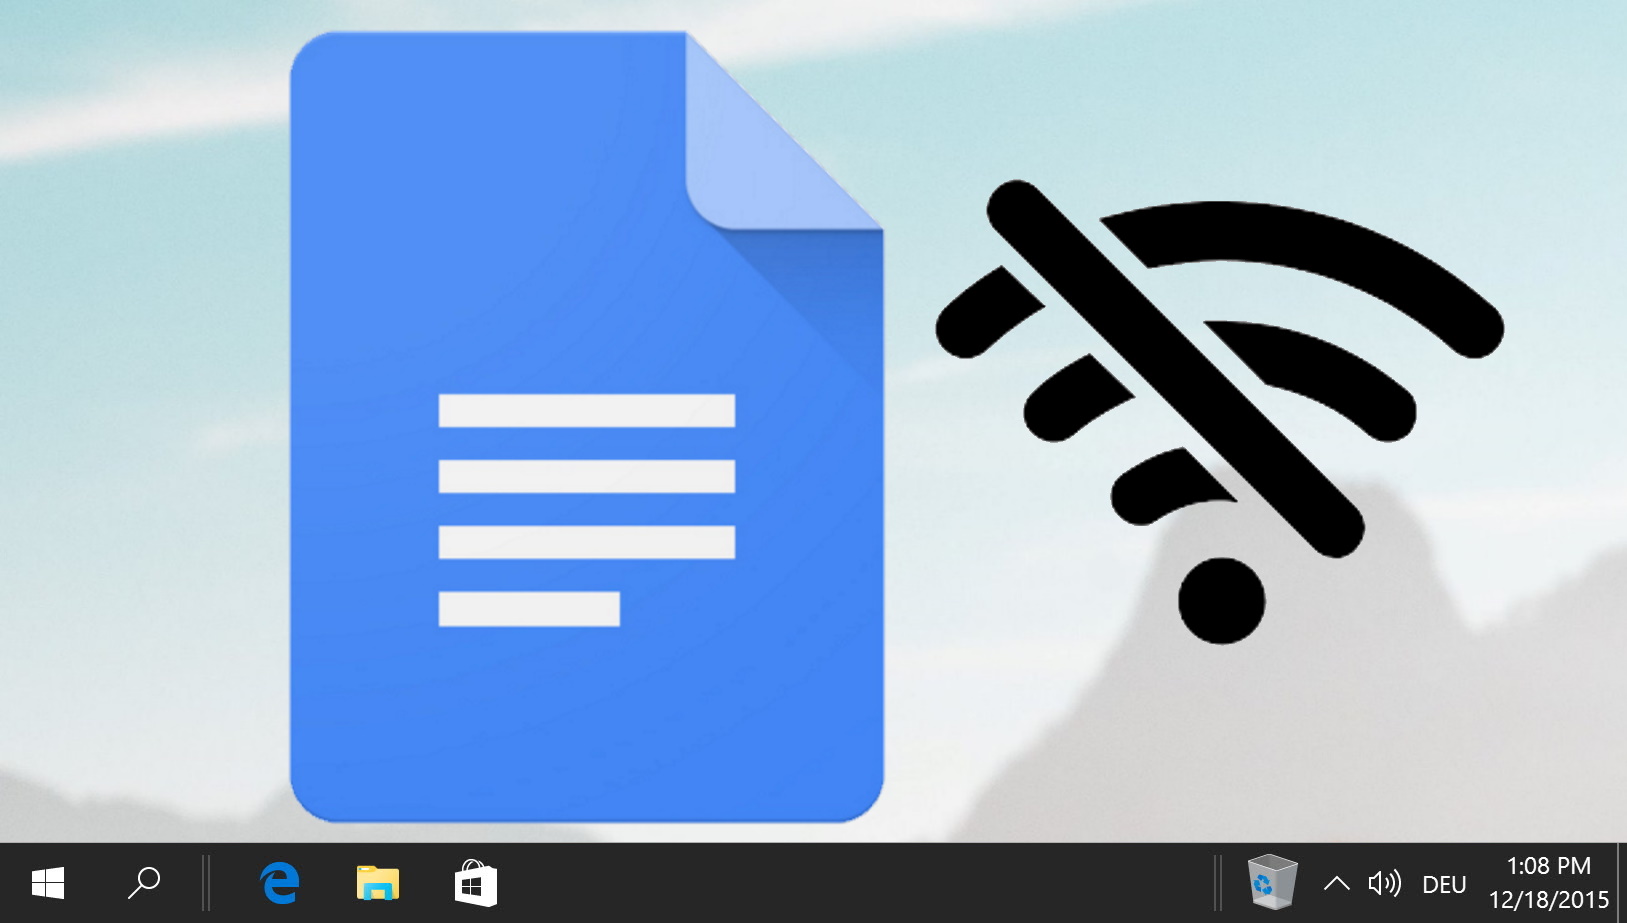
Related: How to Use Google Docs Offline on Windows, Mac, or Linux
Microsoft Word is naturally our word processor of choice. However, that doesn’t stop us from acknowledging that Google Docs is a strong, free alternative. The only real thing holding it back is that it requires an internet connection to use. Or, at least, it used to. Today we’re going to show you how to use Google Docs offline so that you can stay productive on the move. In our other guide, we show you how to use Google Docs offline to edit Documents when you’re away from a Wi-Fi network.
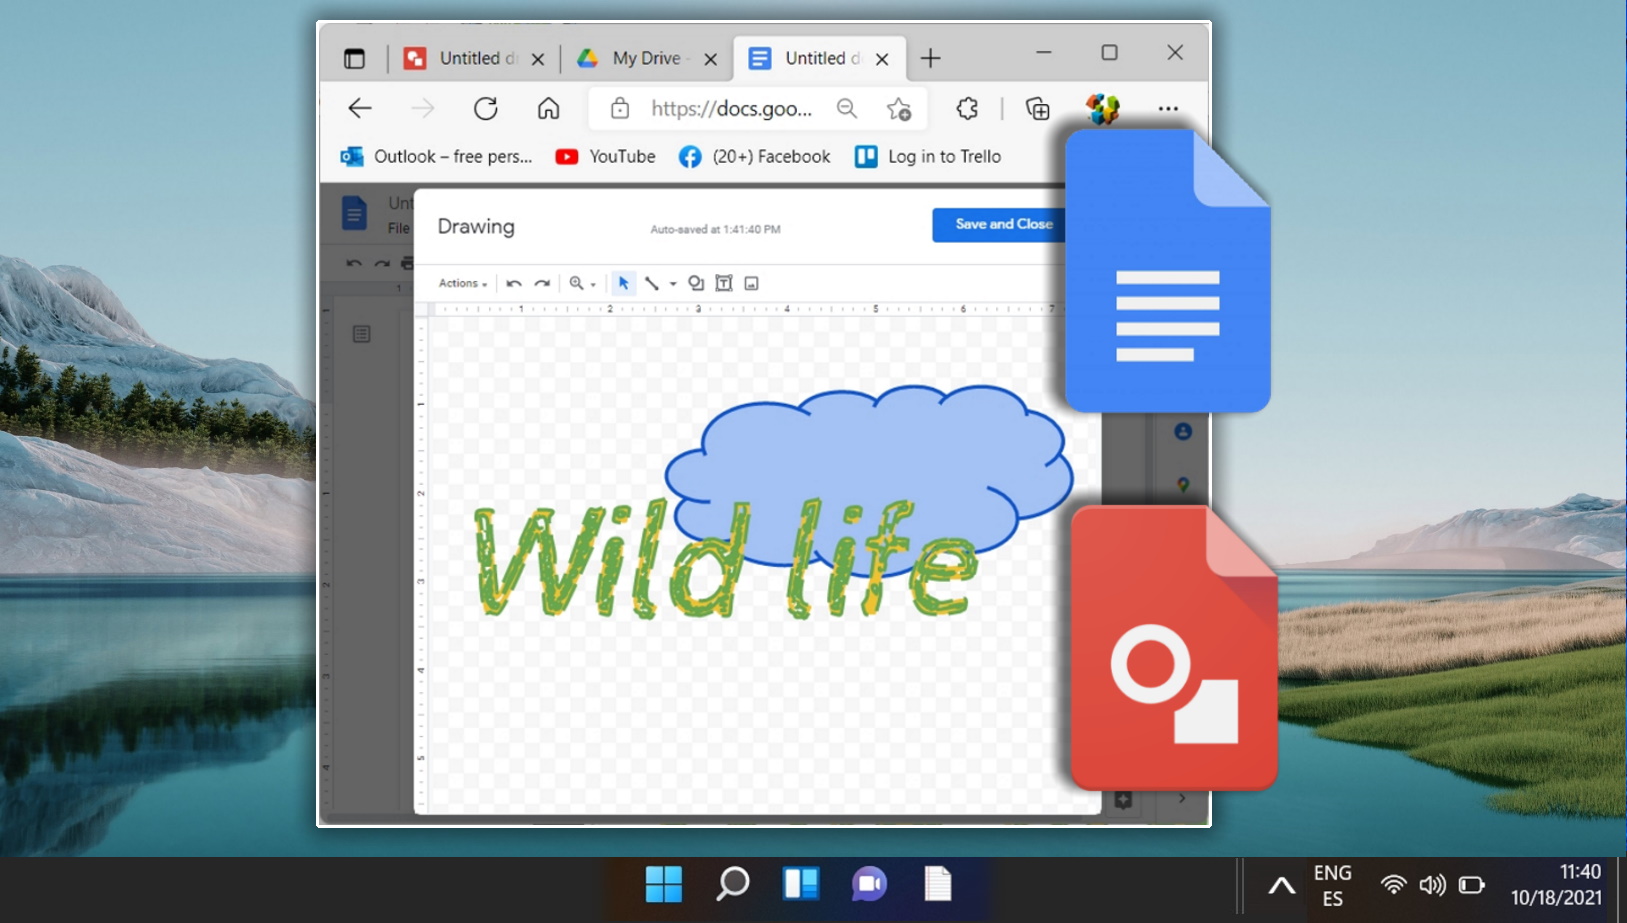
Related: How to Draw on Google Docs
Google Docs isn’t just for typing up documents; it’s also equipped with features that allow you to unleash your creativity through drawing. Whether you’re looking to add a personal touch to your documents or need to create detailed diagrams. In our other guide, we show you how to draw on Google Docs using both its in-built tool and the separate Google Drawing service.
Related: How to Make a Graph in Google Sheets
Google Sheets offers a robust suite of tools to convert your data into meaningful graphs. Whether you’re looking to create a simple line chart or a more intricate pie chart, Google Sheets has got you covered. The platform’s intuitive interface ensures that even those new to data visualization can craft compelling graphs with ease. Our other tutorial will guide you through the nuances of creating and customizing graphs in Google Sheets.


