

Whether it’s the TV or your PC, having to constantly adjust your volume is incredibly frustrating. On Windows 10, you may have noticed that there’s a lot of variability between the volume of different videos, applications, and games. That’s where an audio normalizer comes in, known in Windows 10 as loudness equalization.
What is audio normalization?
Audio normalization looks to maintain a consistent audio volume regardless of volume differences between media or within a single piece of media. It boosts quieter sounds to match the loudest so you can set your volume to a set point without ear fatigue.
Windows 10 loudness equalization does this very effectively most of the time. However, you may notice some differences in the media you consume, especially when gaming. Some games, movies, and music use audio normalization to give you a better sense of space and depth while listening.
As a result, audio normalization isn’t for everyone. Audiophiles may notice a difference in quality, so it’s worth trying out for yourself. If it’s not a good fit, you can try the section part of this tutorial, which will show you how to increase volume on Windows 10 for each application using the volume mixer.
Let’s get started:
How to Normalize Volume with Windows 10 Loudness Equalization
Before we start, it’s worth noting that while most setups have this option, some may not – it depends on your sound driver. Aside from Googling your specific sound setup, which may be difficult, the only way to find out is a manual check.
Here’s how you can check if you have an audio normalization setting and enable it if so:
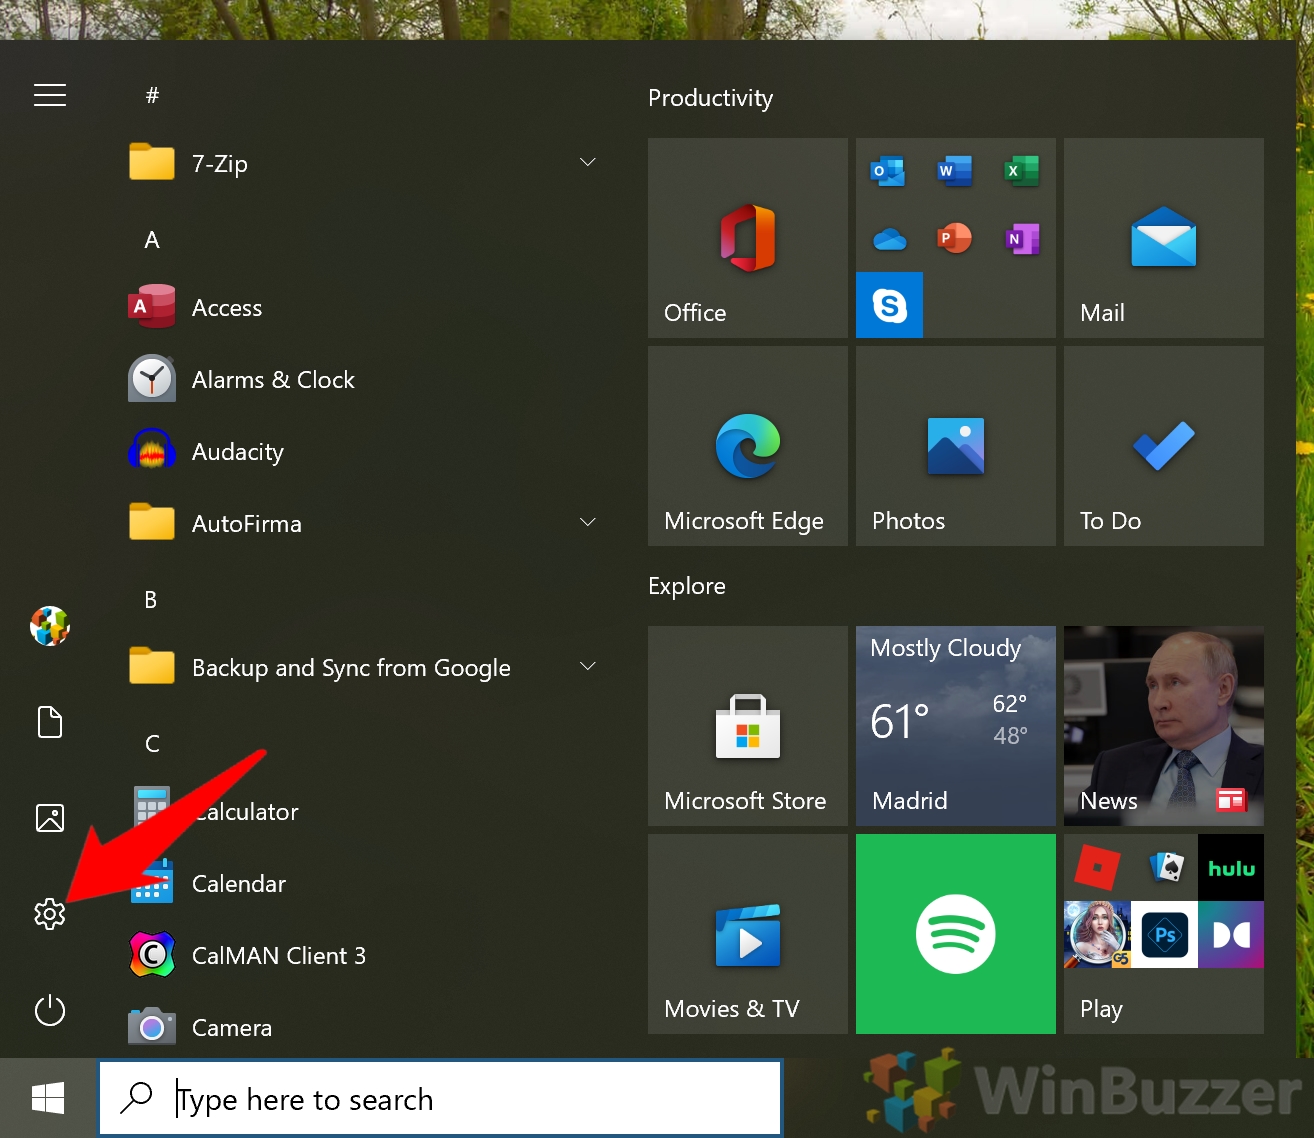
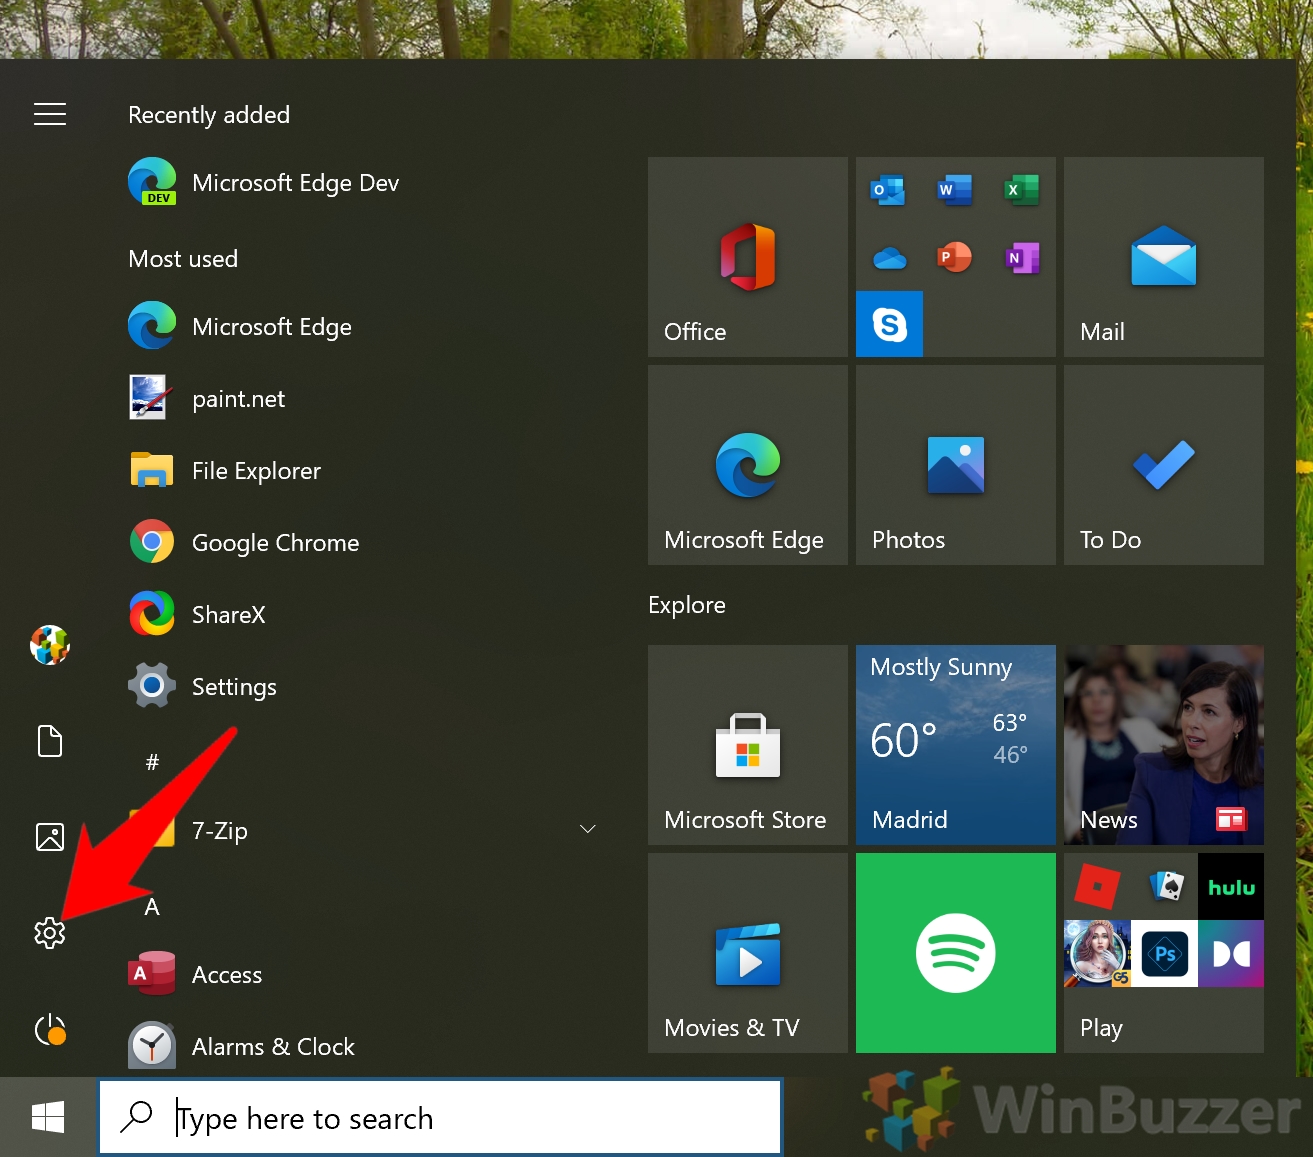
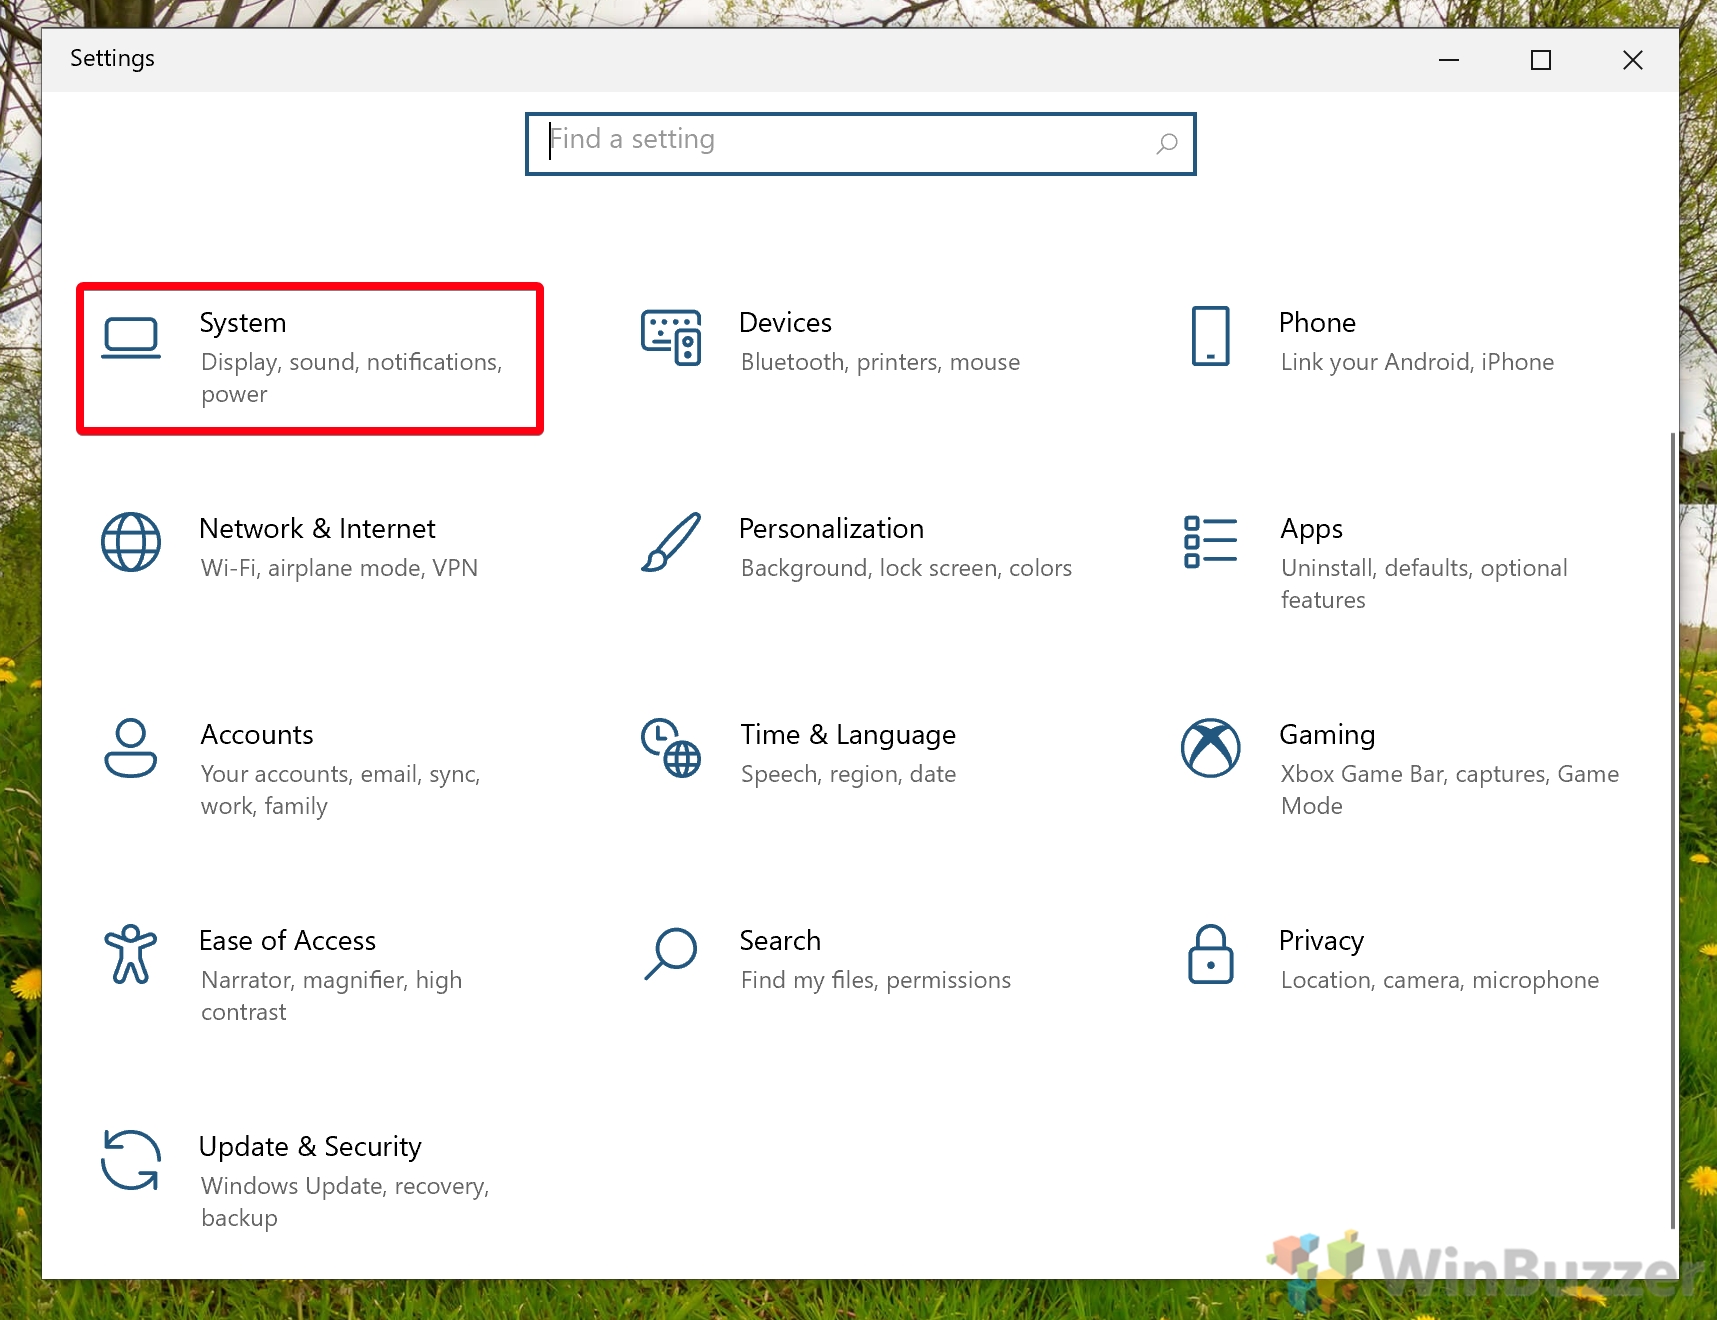
- Open Settings
Press Start, then click the settings cog above the power button. Alternatively, press Windows + I.
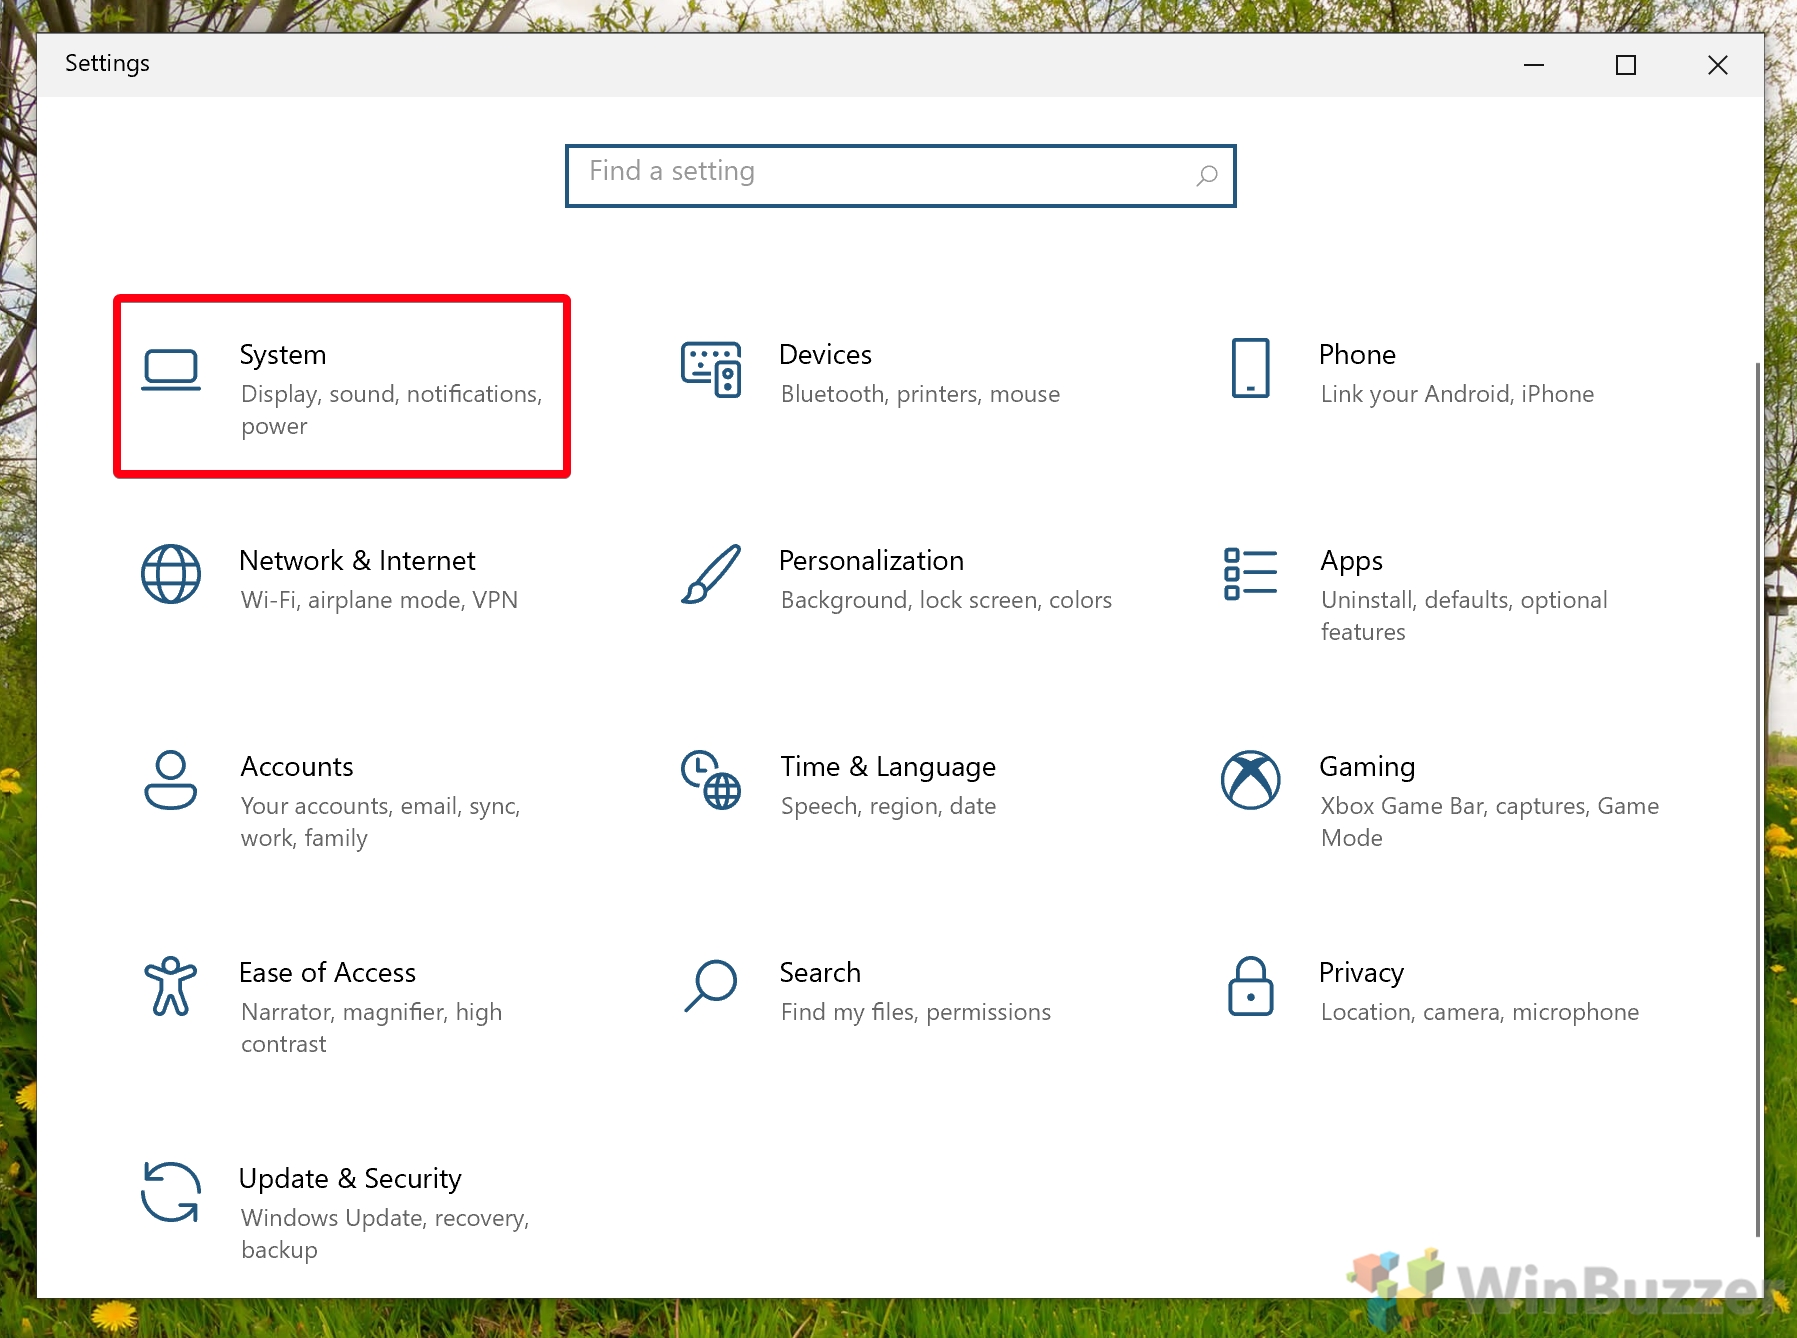
- Click “System”
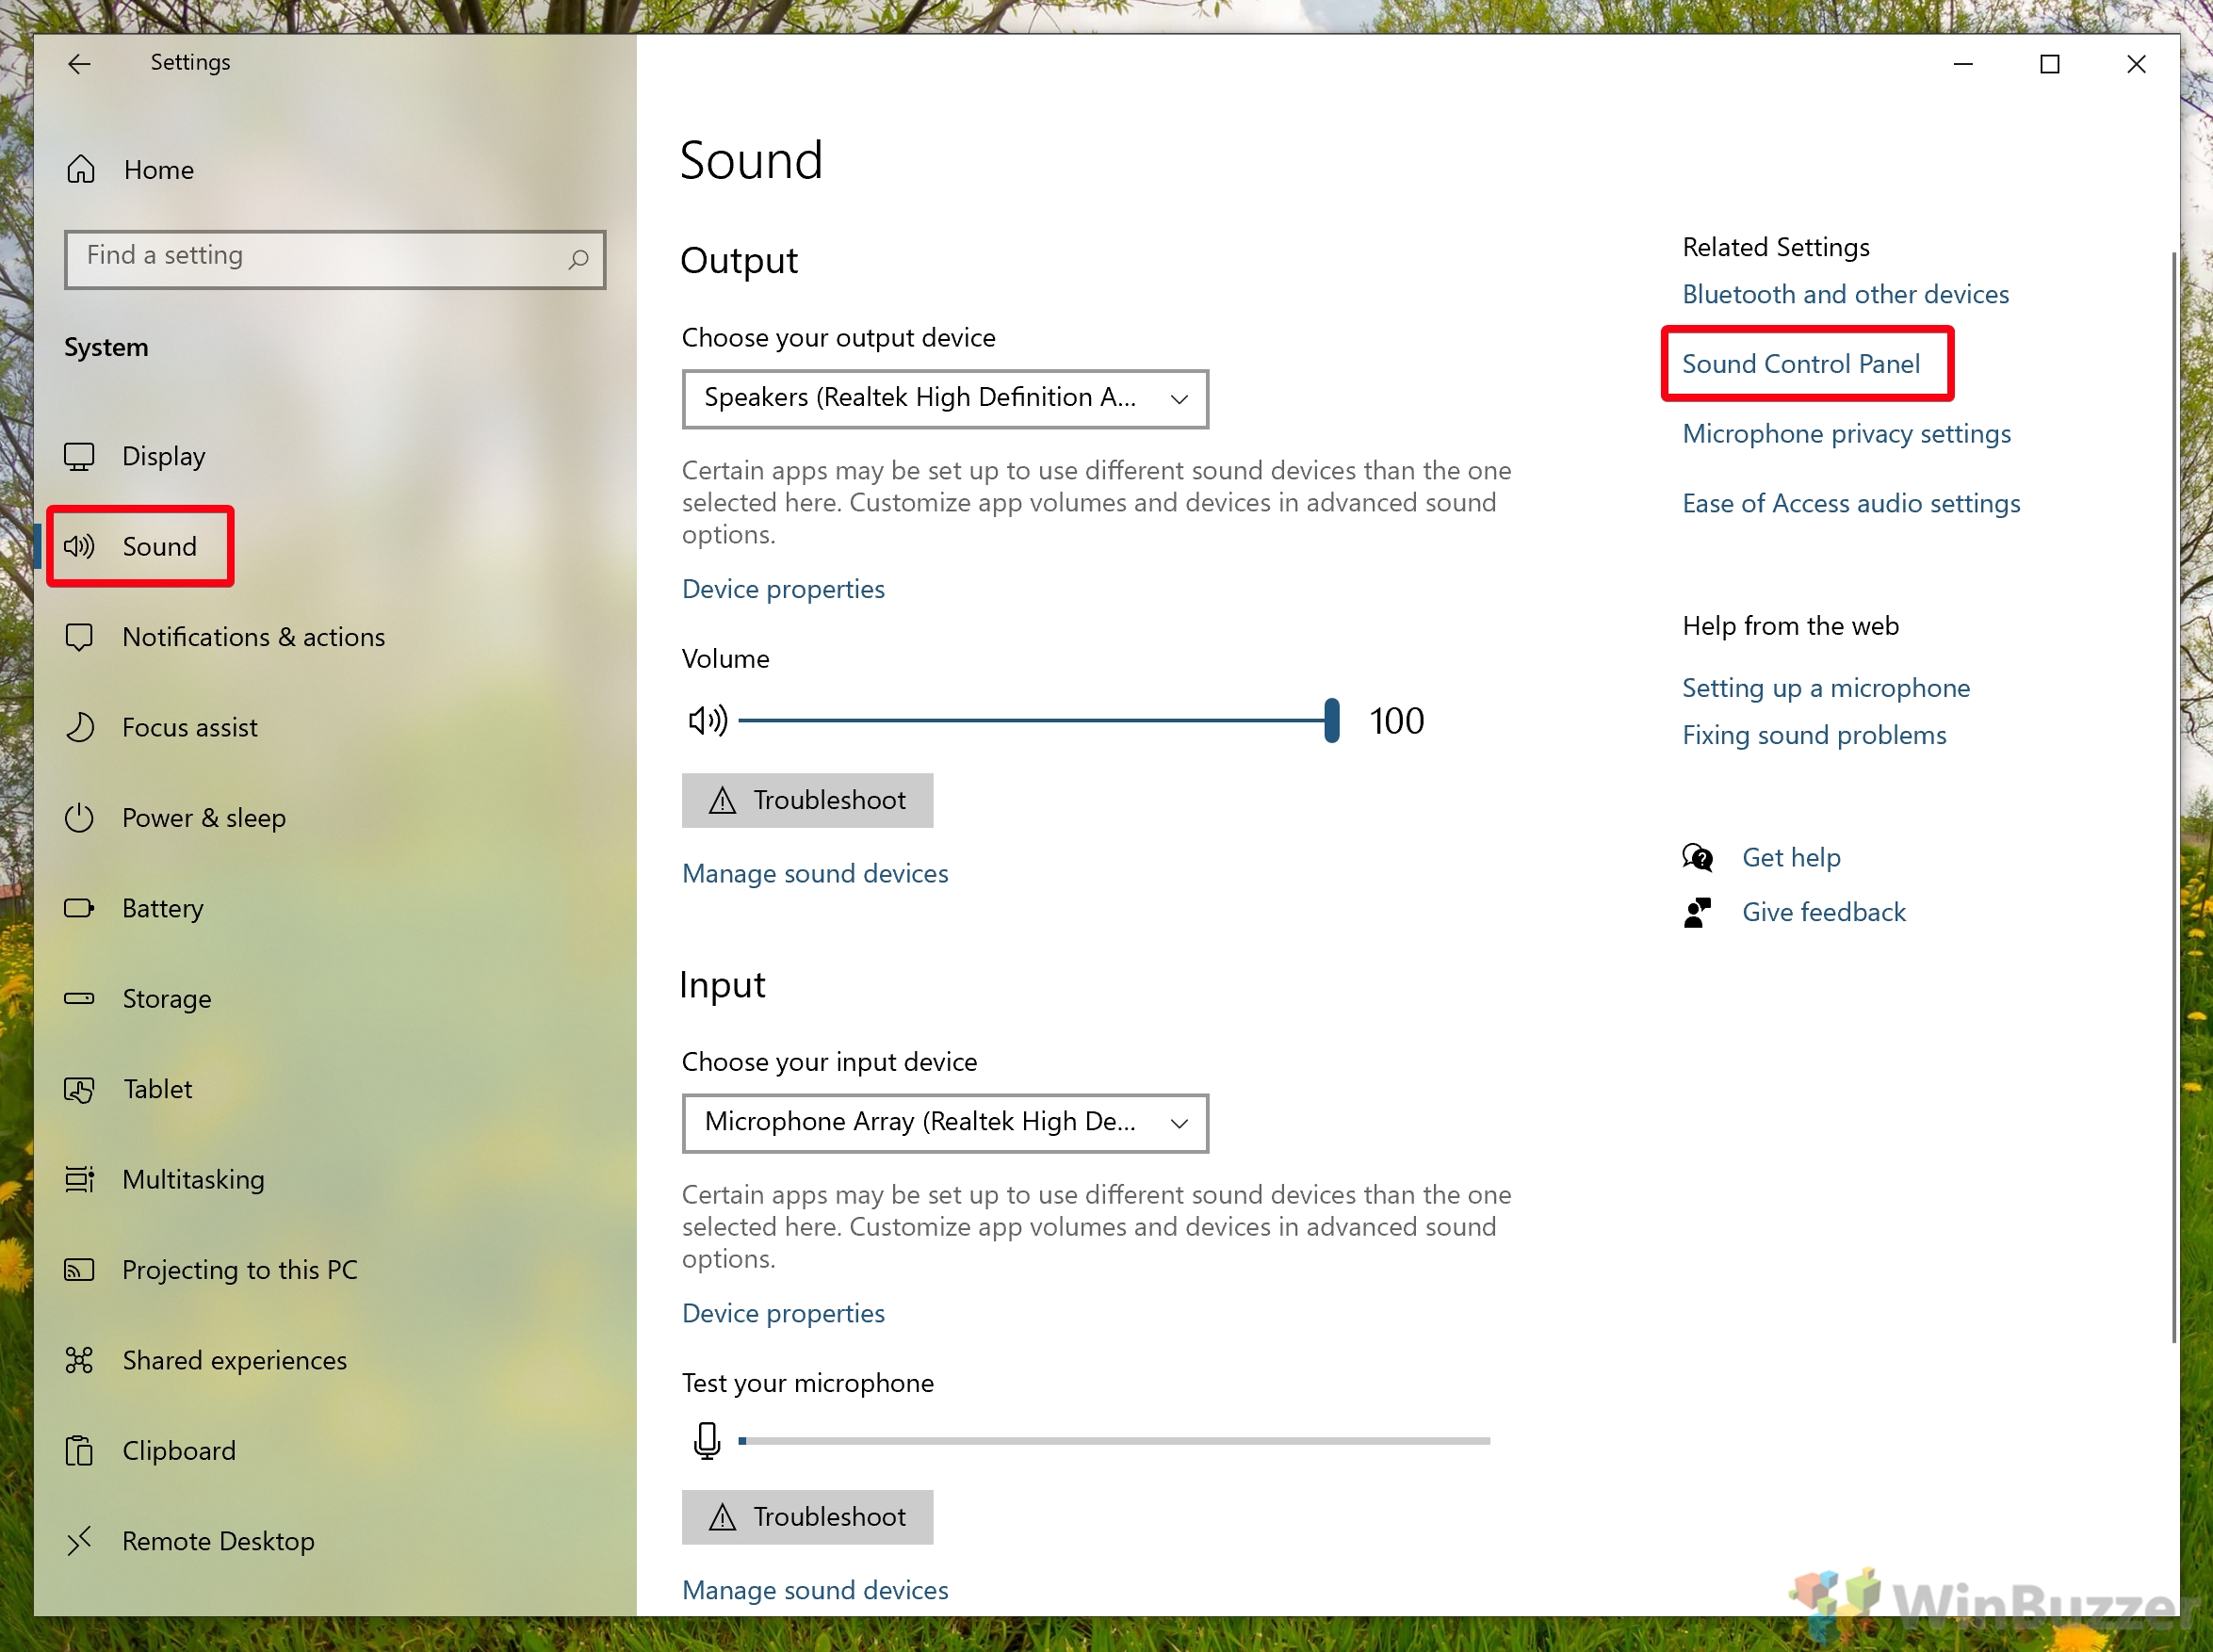
- Open the Sound Control Panel
In the Settings sidebar, click “Sound”, then press “Sound Control Panel” on the right-hand side.
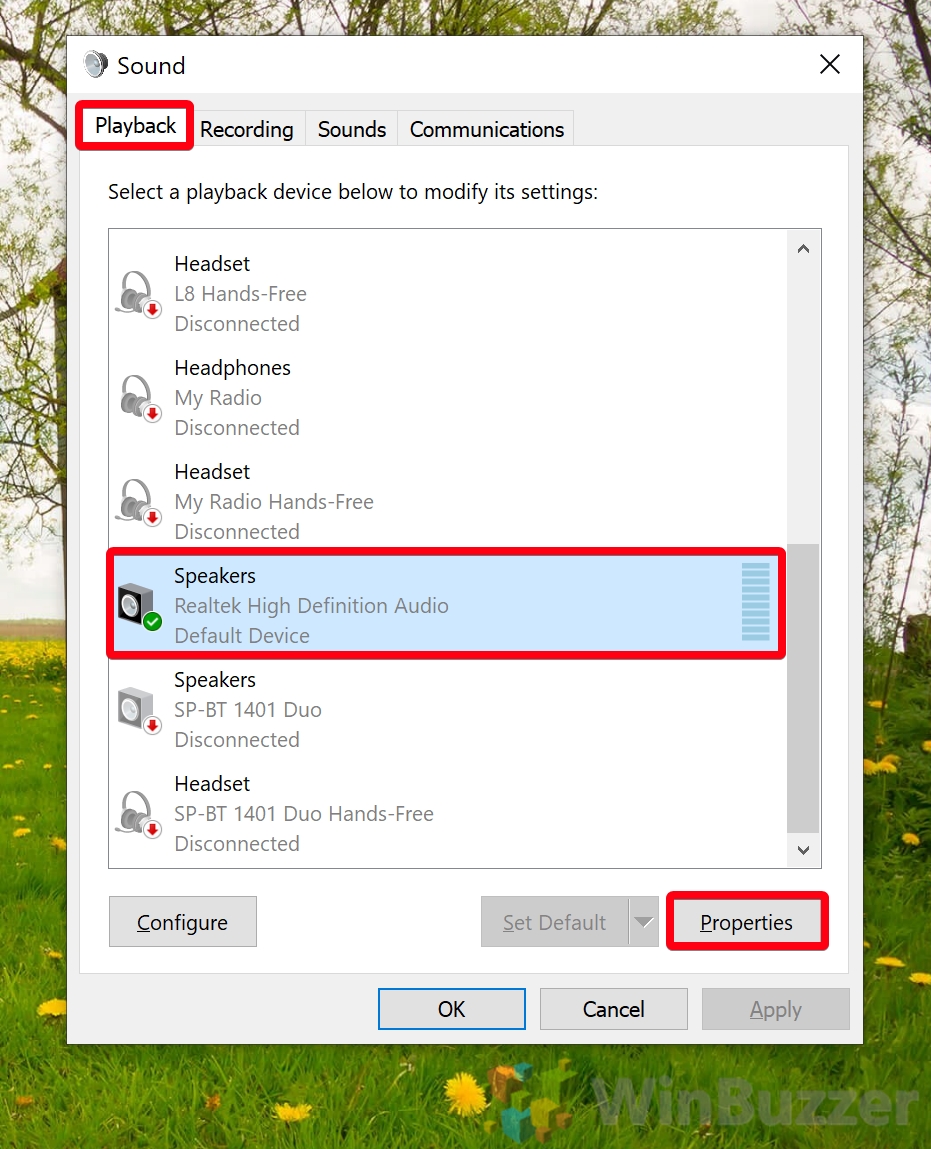
- Open your audio properties
Click on the “Playback” tab in the sound menu, then click on your active speakers or headphones and click “Properties” down the bottom.
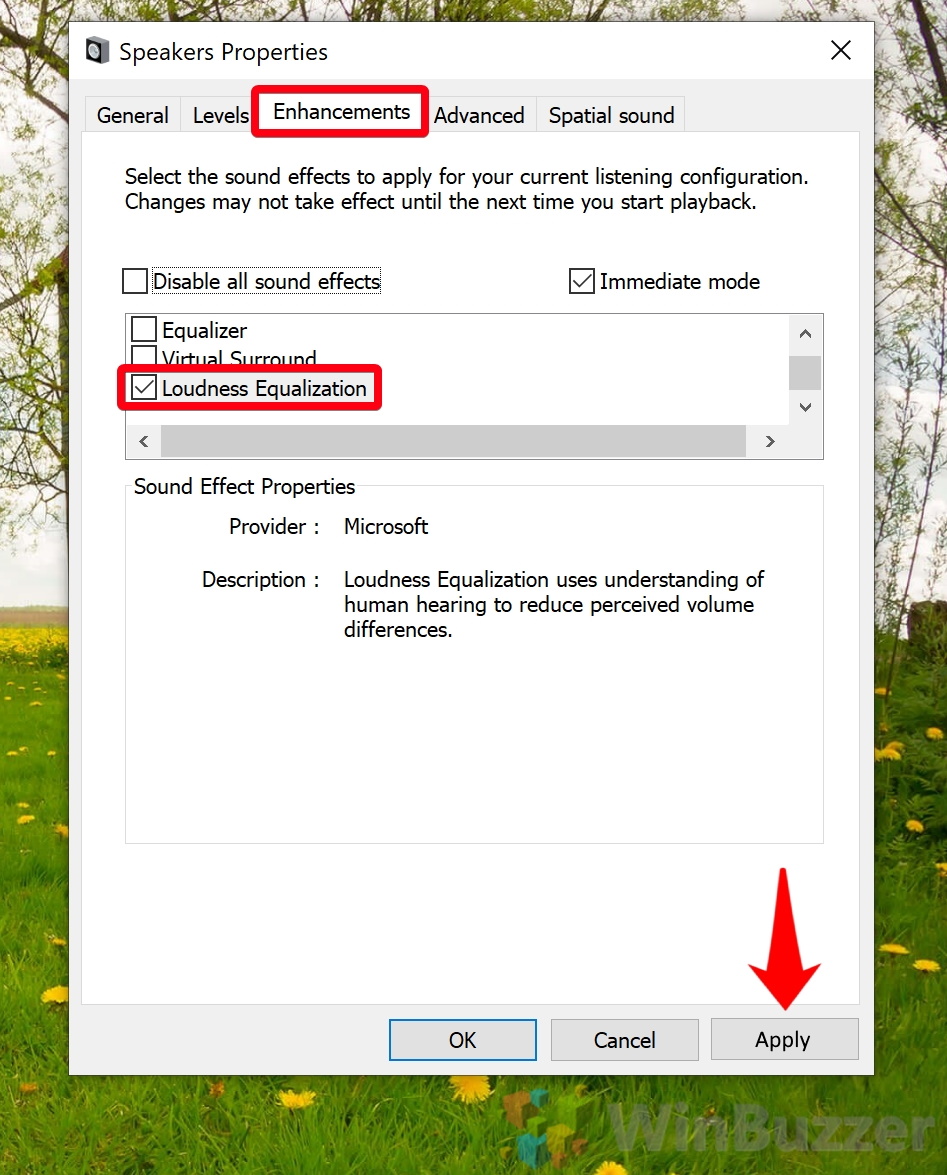
- Turn on Windows 10 loudness equalization
In the Properties menu, open the “Enhancements” tab. Click the tick box next to “Loudness Equalization” and press “Apply”.
You can now close your properties and settings windows and play a clip to test your audio normalizer.
How to Adjust App Sound Individually with the Volume Mixer
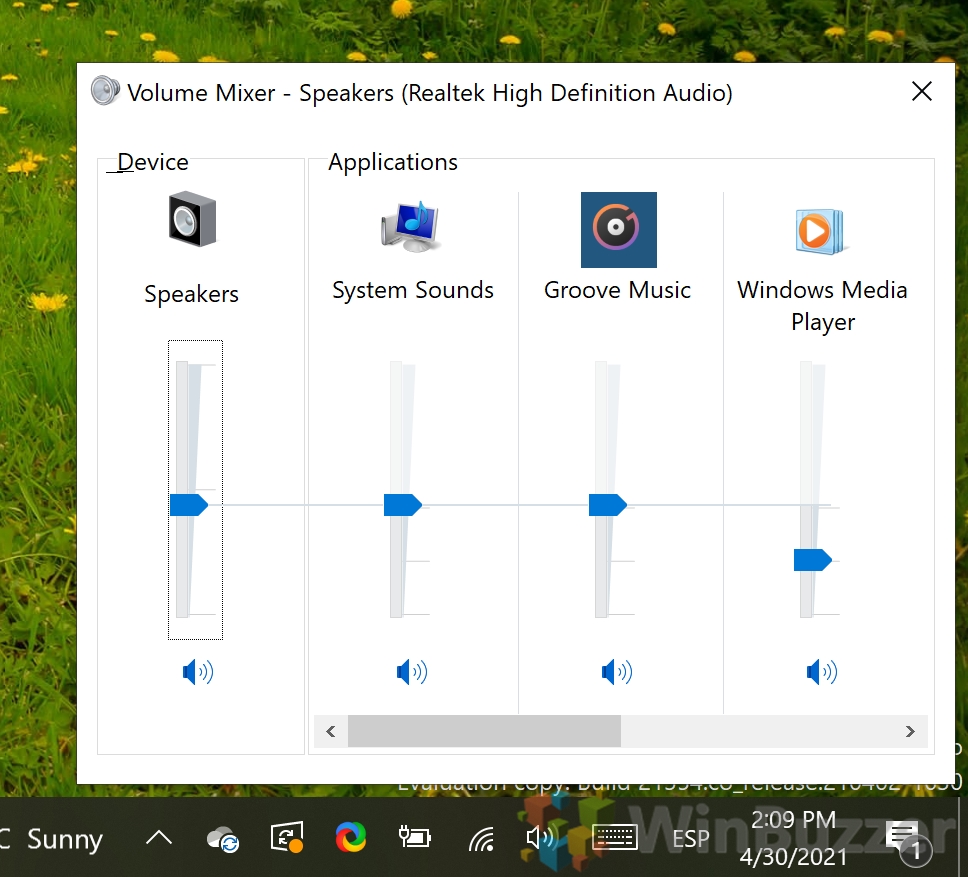
The Windows 10 Volume Mixer lets you adjust the volume of currently open apps to suit your preferences. This is very handy if you have a particular application that’s louder than others, letting you normalize volume manually.
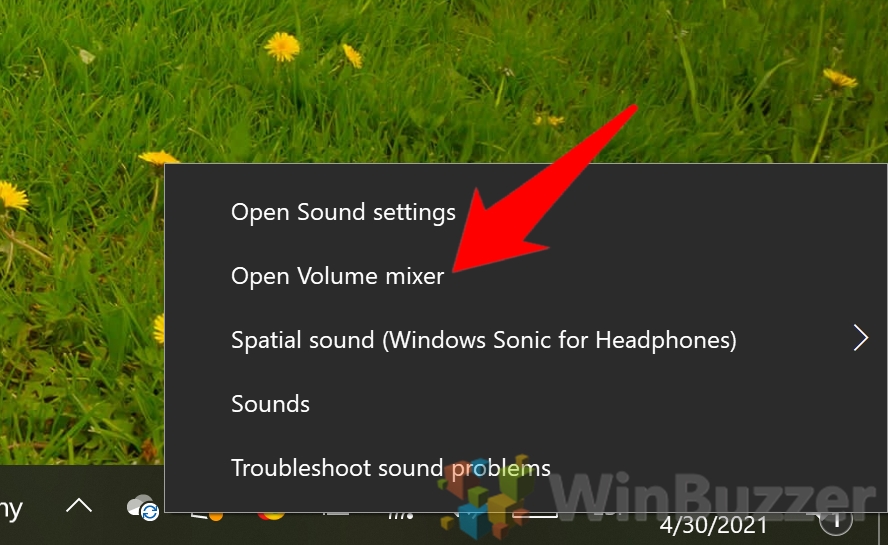
- Open Volume mixer
Right-click the speaker icon on your taskbar and select “Open Volume mixer”.
- Adjust the volume of your applications
Move the sliders to adjust the volume of each application to suit your preferences, with higher naturally being louder. The volume will adjust instantly and you can close the mixer when you’re done.
How to Adjust App Sound Individually in Windows 10 Settings
If you prefer Windows 10’s more modern interface, you can also adjust app sound individually in Settings, which gives you the additional ability to change output and input for each app with ease.
- Open Settings
Press Start and then press the Settings cog above the power button.
- Click “System”
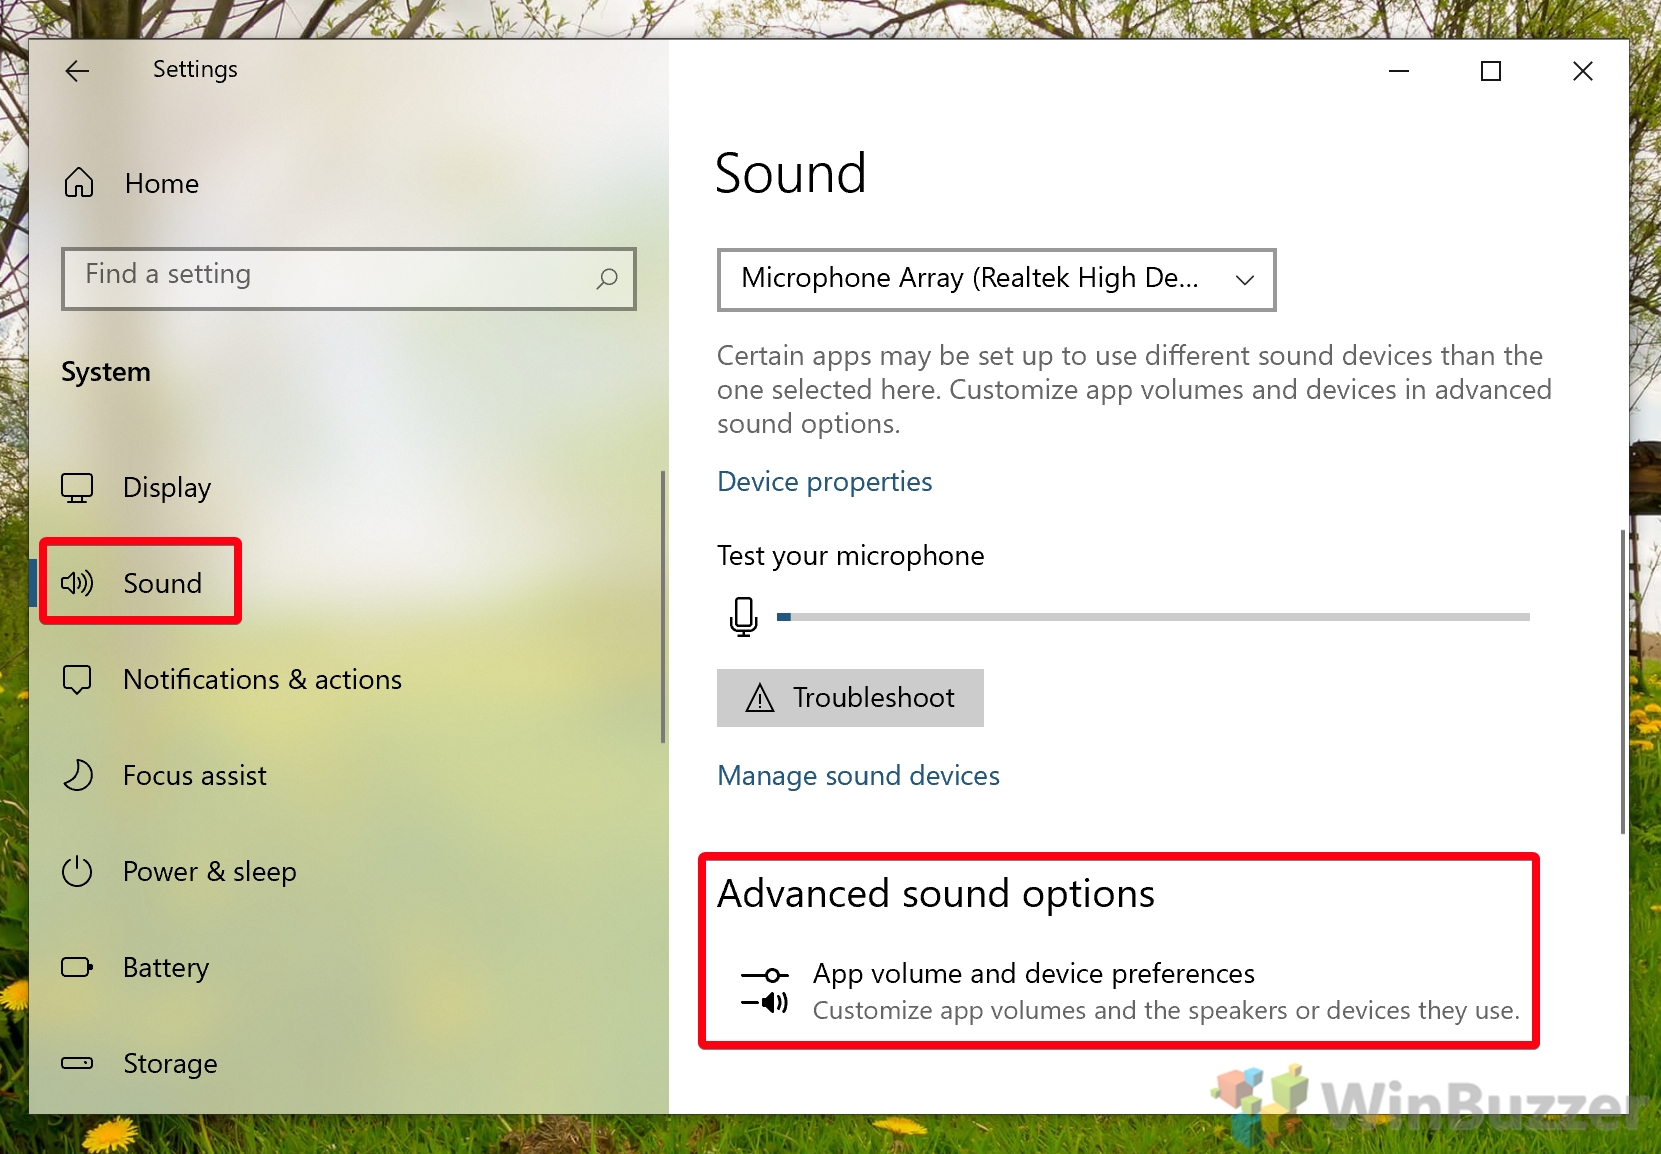
- Open Advanced sound options
Click “Sound” in the Settings sidebar, then click “App volume and device preferences” under the “Advanced sound options” heading in the main pane.
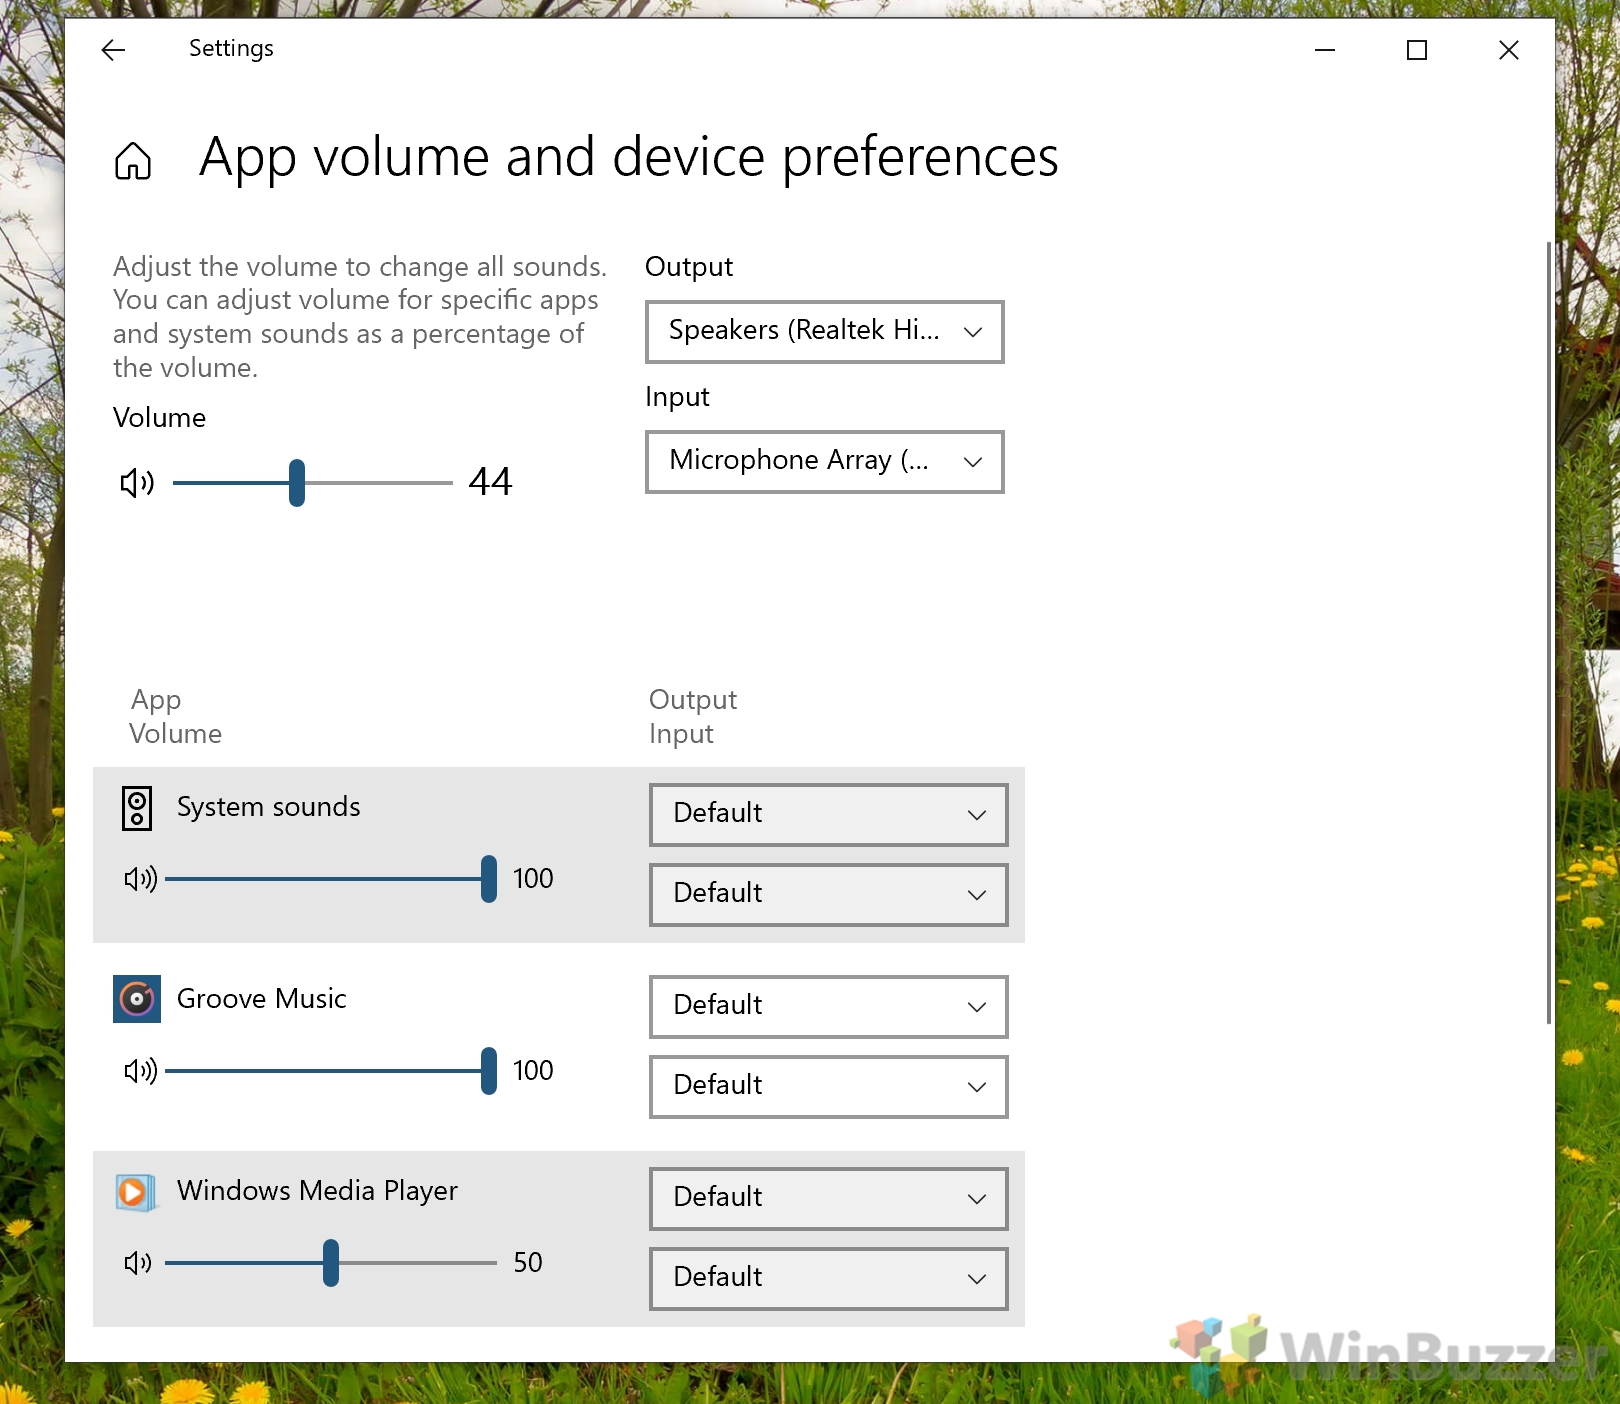
- Use the sliders to adjust your Windows 10 sound balance
You can additionally change the input and output of each application with the dropdowns next to the slider.
With that, you should have a pretty good idea of how to use the Windows 10 sound equalizer and loudness equalization settings. If you weren’t able to use the audio normalizer due to incompatibility, you can try one of the free third-party solutions available online.
If you’re looking for more in-depth audio controls, you may be a Windows 10 sound equalizer you’re looking for. Meanwhile, if you’re looking to improve the immersion of your audio, try Windows Sonic for Headphones.
Last Updated on February 14, 2022 7:45 pm CET by Markus Kasanmascheff


