

Long-time users of Microsoft Sticky Notes will notice that it’s had some upgrades over the past few years, and one major addition is the ability to backup Sticky Notes and restore them to the same or a different PC.
Reasons to Restore Sticky Notes in Windows 10 / Windows 11
Though it may not be a major deal for some, this ability can be incredibly useful for those changing account (as cloud sync only works if you log in) or people who need the extra data security.
Today we’re going to show you how to backup Sticky Notes, and then how to restore Sticky Notes should you need to. All you’ll need to follow this tutorial is Sticky Motes installed and the Windows 10 Anniversary Update or higher. If you’re on an earlier version of Windows 10, below 1511, or Windows 7, 8, or 8.1, you should instead look for the StickyNotes.snt file in the Sticky Notes AppData folder.
⚠️ Please note: The process described below is the same in Windows 11 as it is in Windows 10. However, bear in mind that we’ll be using screenshots from Windows 10, so your UI may look a little different. We’ll point out any changes you need to be aware of as they come up.
How to Backup Sticky Notes via File Explorer
Backing up Stick Notes is as simple as copying a single file from its AppData folder.
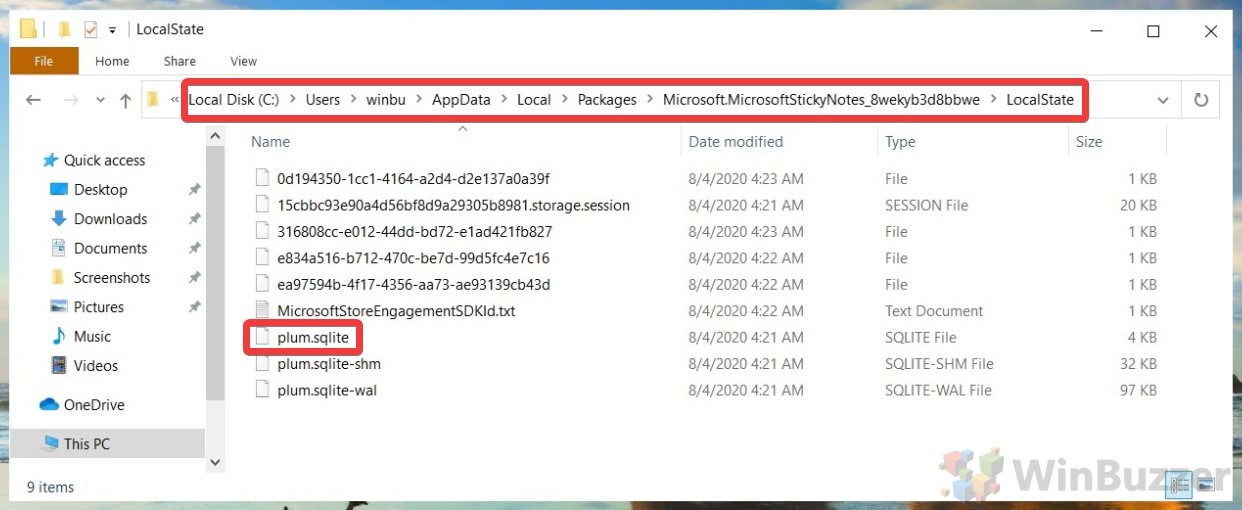
- Backup Sticky Notes
In File Explorer, navigate to%LocalAppData%\Packages\Microsoft.MicrosoftStickyNotes_8wekyb3d8bbwe\LocalState. Look for the file “plum.sqlite”, and copy it to your back up device, whether it’s a cloud service like OneDrive or a USB stick.
How to Recover Sticky Notes in Windows 10 / Windows 11
These days it’s a bit more fiddly to restore Sticky Notes, and you should know that doing so will replace any current notes you have on the PC. If you’re okay with that, here’s how to do it:
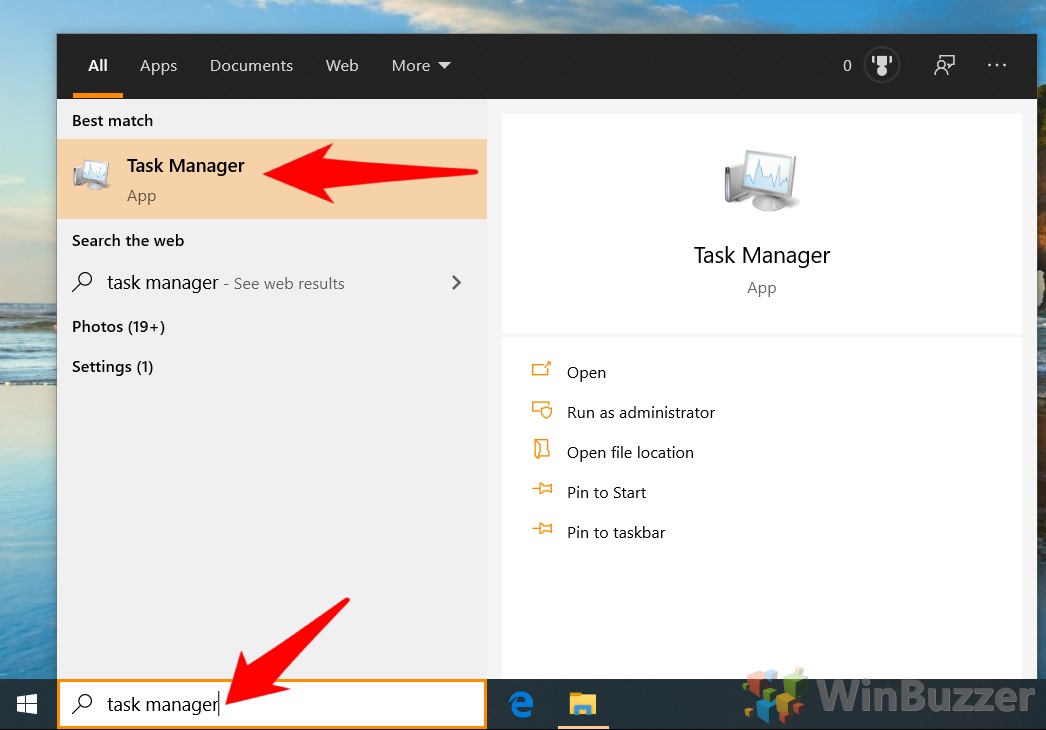
- Open Task Manager
Press “Start”, and type “Task Manager”, then click on the top result.
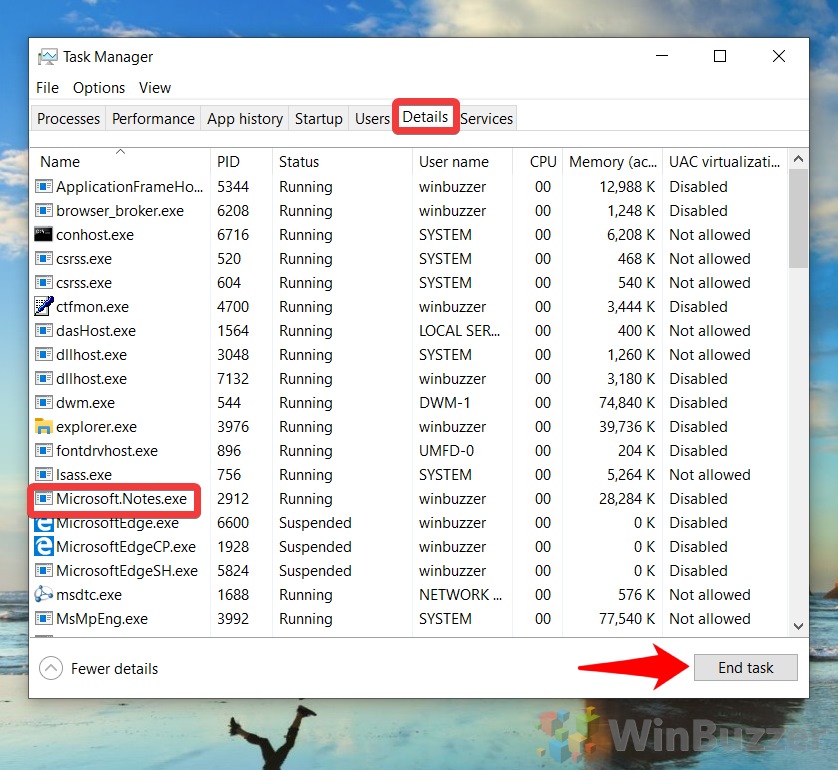
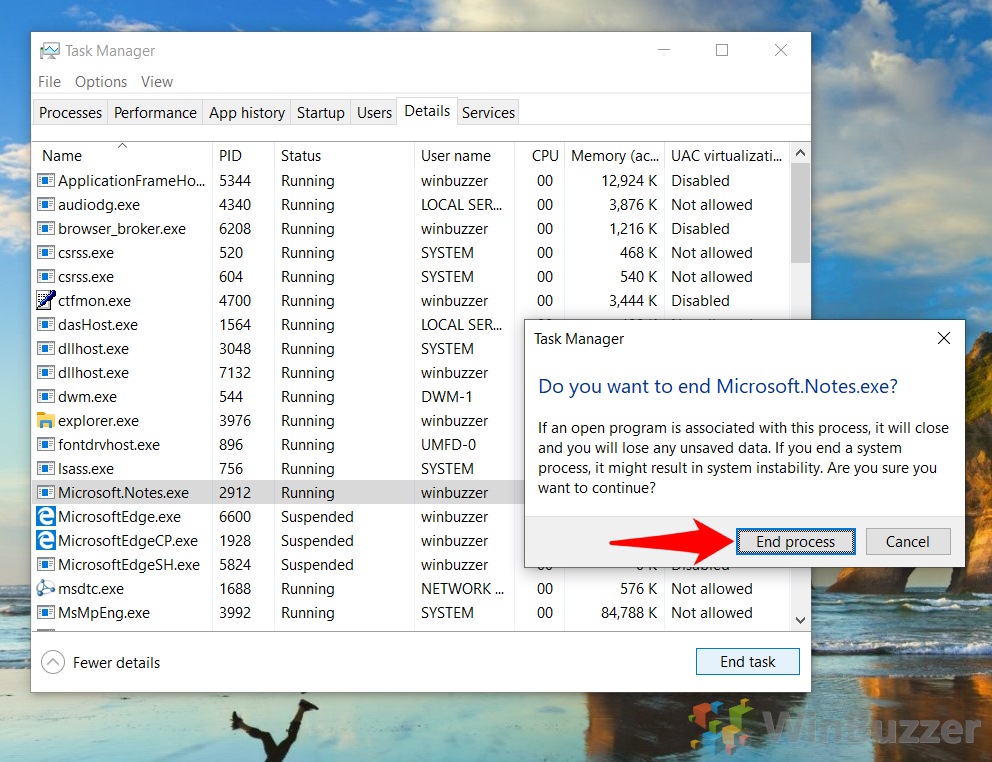
- End the Sticky Notes process
In Task Manager, switch to the “Details” tab and press “M” until you find the service “Microsoft.Notes.exe”. With it selected, click “End task”.
- Click “End process”
- Open settings
Press “Start”, then click the settings cog above the power button.
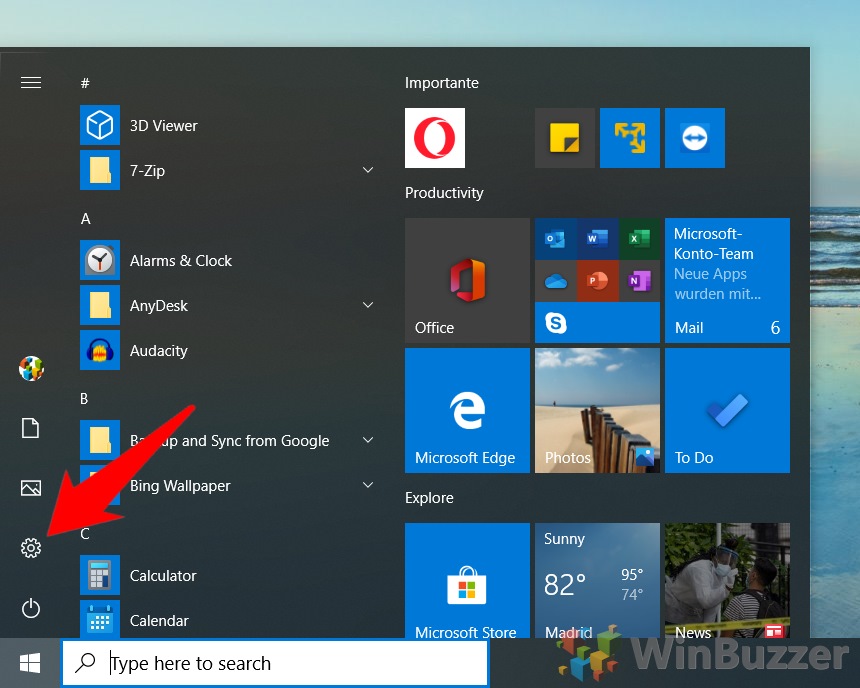
- Click “Apps”

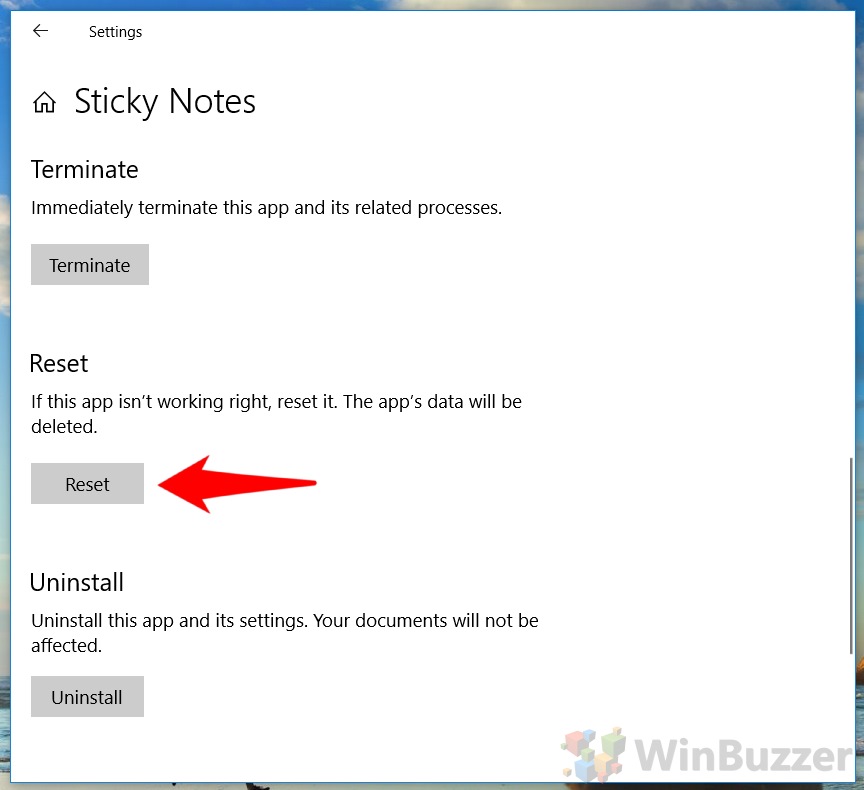
- Open Sticky Notes advanced options
In the left sidebar, click “Apps & features”, then find Sticky Notes in the main pane and click “Advanced options”.

- Choose “Reset”
- Confirm the reset
Windows 10 will surface another dialog to make sure you want to reset Sticky Notes. Click “Reset” again to continue.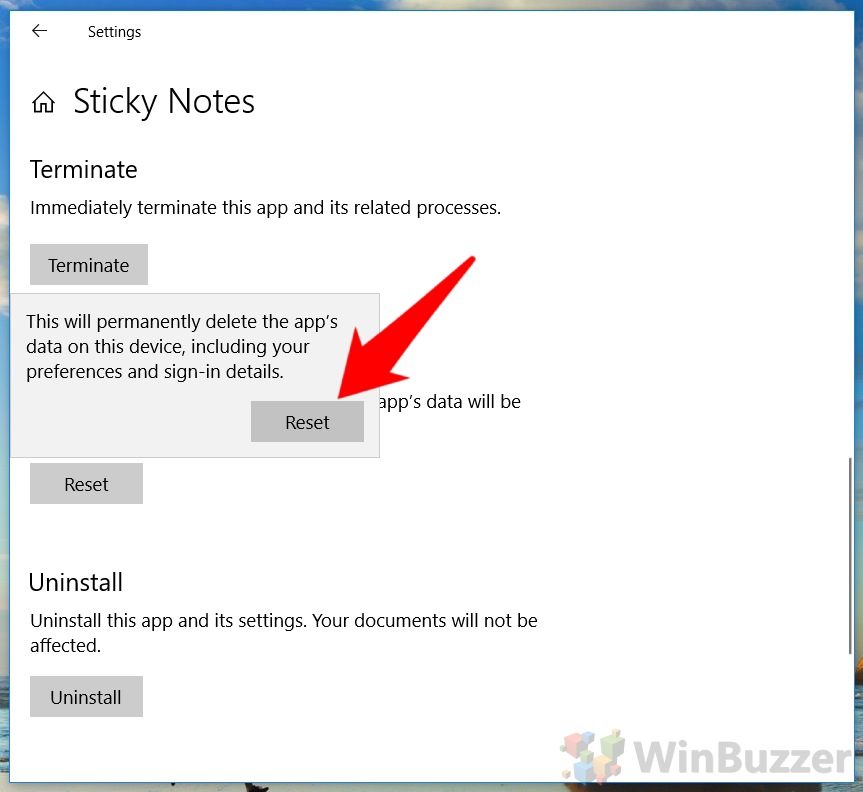
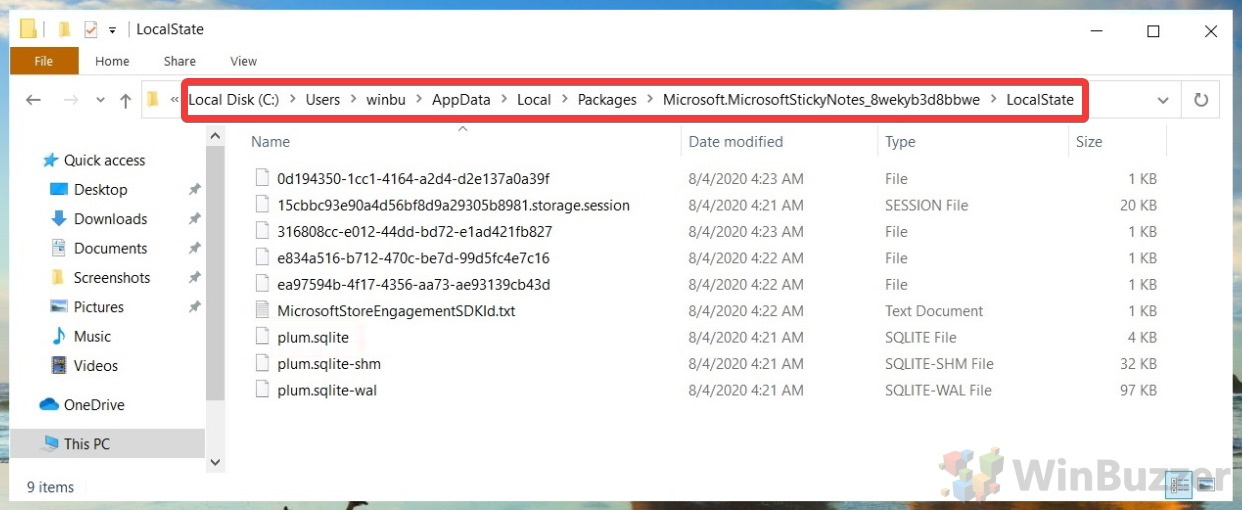
- Go to your Sticky Notes folder location
In your File Explorer top bar, paste%LocalAppData%\Local\Packages\Microsoft.MicrosoftStickyNotes_8wekyb3d8bbwe\LocalStateto enter your app data folder.
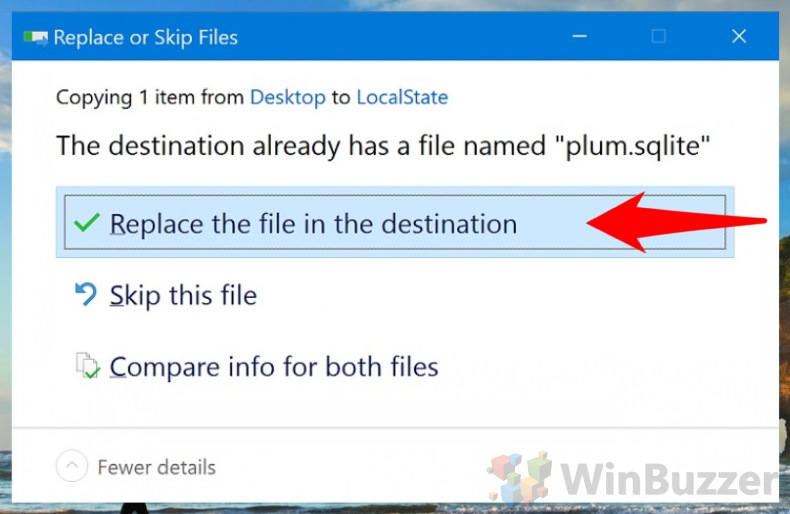
- Recover Sticky Notes in Windows 10
Drag your Sticky Notes backup into the Sticky Notes location and click “Replace the file in the destination” to perform the Sticky Notes recovery. When you next start the app, your backed up notes should appear.
Extra: How to Backup the Windows Registry in Windows 10 / Windows 11
If something goes wrong in Windows, you might easily get back to normal functioning if you have a registry backup. Windows will even do this for you automatically, and the feature can be configured as well.

Extra: How to Create and Restore a System Image in Windows 10 / Windows 11
It’s all too easy to forget to perform a Windows backup and all too quick to realize you don’t have one when you experience hardware or software failure. Forgetting to backup Windows can mean the loss of important documents, priceless images of family, or game saves with countless hours.
As a result, it’s a good idea to backup your computer regularly, and the most fool-proof way is to manually create a disk image in Windows and save it to an external hard drive.

Extra: How to use File History in Windows 10 / Windows 11
If you found this tutorial useful, you may also want to know how to use File History. File History is a Windows backup feature that saves each version of files in the Documents, Pictures, Videos, Desktop, and Offline OneDrive folders. Though its name implies a primary focus on version control, you can actually use it as a fully-fledged backup tool for your important documents.
Last Updated on January 25, 2023 10:58 am CET by Markus Kasanmascheff


