By default computer names in Windows 10 tend to be quite plain. By default, they tend to be ‘WIN’ or ‘Desktop’, followed by a string of random letters and numbers. This can make them quite difficult to identify, which leaves many wondering how to change their computer name in Windows 10.
The good news is that to rename a computer in Windows 10 is incredibly easy and there are multiple ways to do it. Doing so shouldn’t have any negative effect on your system or network and is easily reversible.
Today we’re going to show you how to change your computer name in Windows 10 via the settings menu, Control Panel, Command Prompt, and PowerShell. You can return your PC back to default by noting down its name and following the steps again. Let’s get started:
How to Change Computer Name via Settings
Unsurprisingly, the simplest way to change PC name in Windows 10 is via the Settings interface.
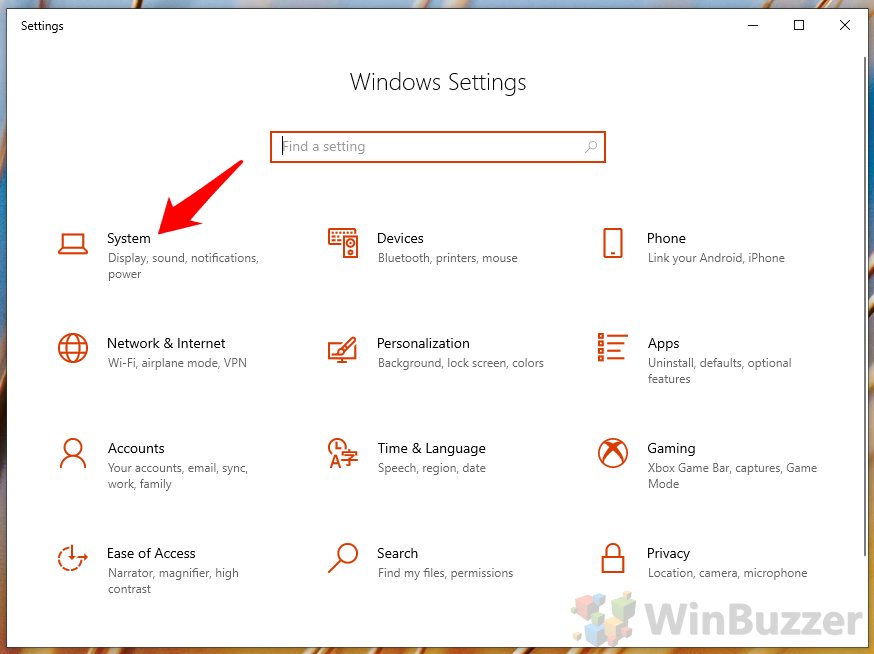
- Open Settings
Press the “Start” button, then the settings cog to open Settings.
- Click the “System” icon
- Rename your computer in Windows 10 Settings
Click “About” in the sidebar, then scroll down until you see “Rename this PC”. Click the button.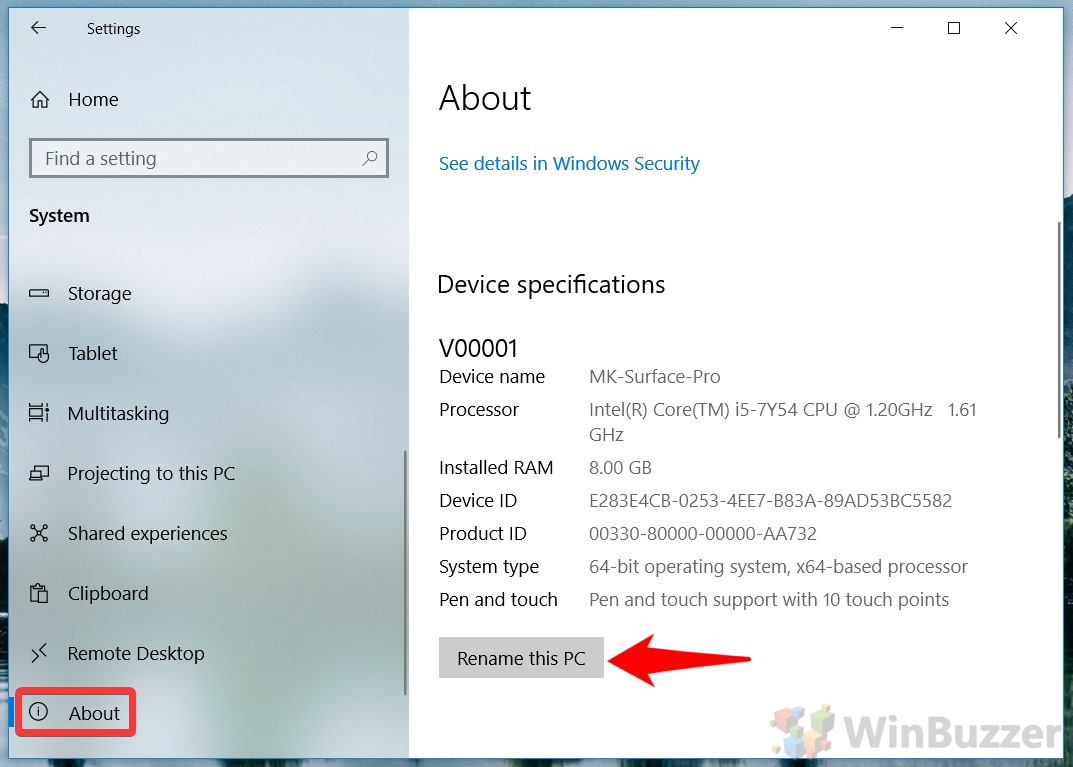
- Set your Computer name
Type the new name into the dialog box and click “Yes”. Bear in mind that you won’t be able to use symbols other than a hyphen.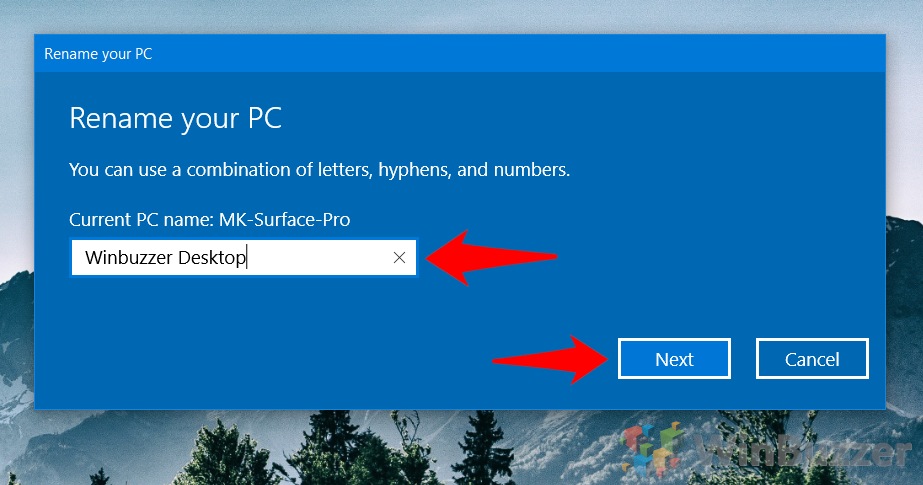
- Restart your PC
Microsoft will prompt you to restart your PC. You can do this now or later, but it’s best to do it immediately so you can make sure the change has stuck.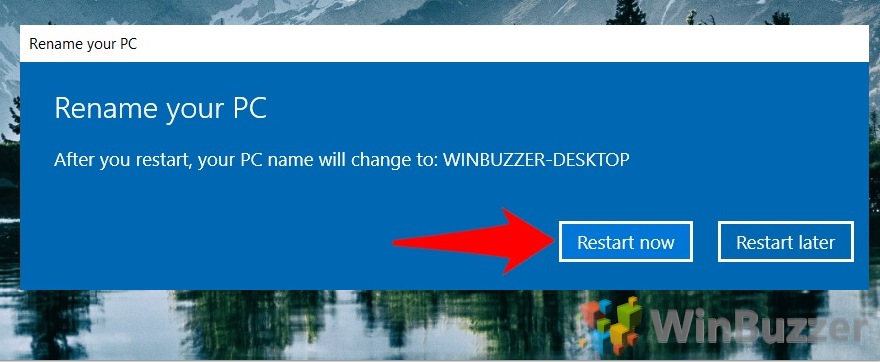
How to Change Computer Name in Windows 10 via Control Panel
If you prefer Windows 10’s legacy interface, you can also rename your PC via the Control Panel.
- Open Control Panel
Press “Start” and type “Control Panel”, then click the top result.
- Switch to the small icon view
Next to the “View by:” heading in Control Panel, click the “Category” dropdown and change it to “Small icons”.
- Open System settings
Click the “System” heading.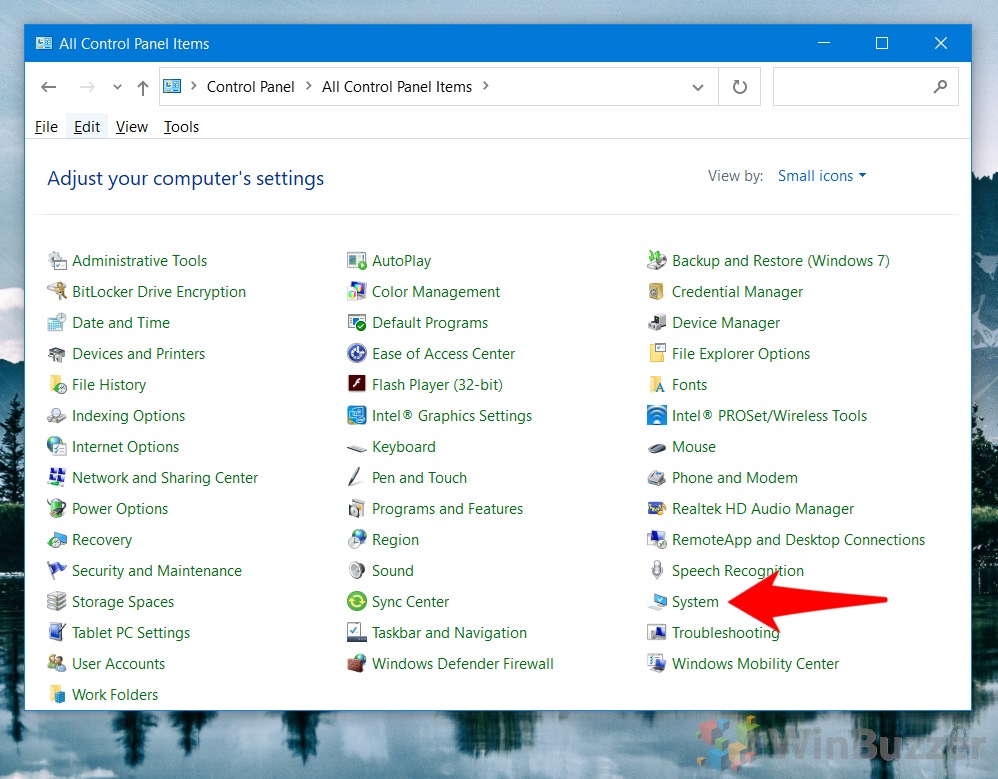
- Click “Change Settings”
Under “Computer name, domain, and workgroup settings”, click “Change settings”.
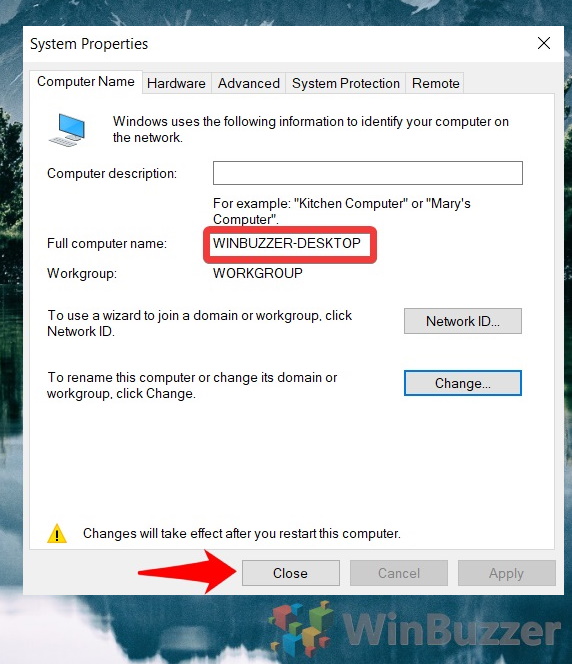
- Change PC name in Windows 10 Control Panel
In the “Computer Name” tab, click “Change…”.
- Enter your new computer name
Type the new label in the “Computer name” field and press “OK”.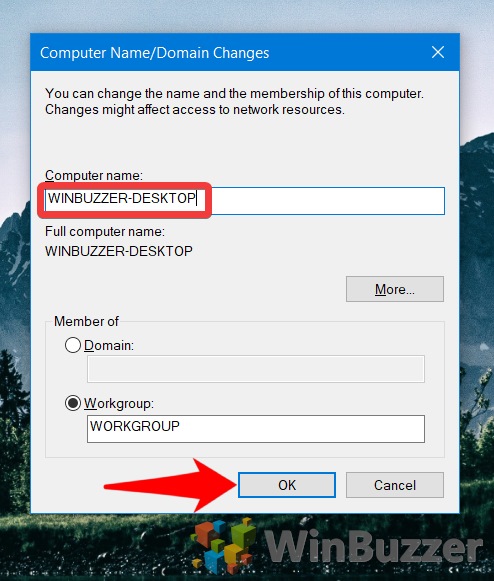
- Press “OK”
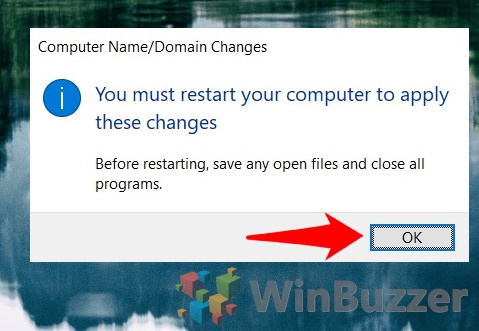
- Click “Close”
- Choose “Restart Now”
You’ll see your new name once your PC reboots.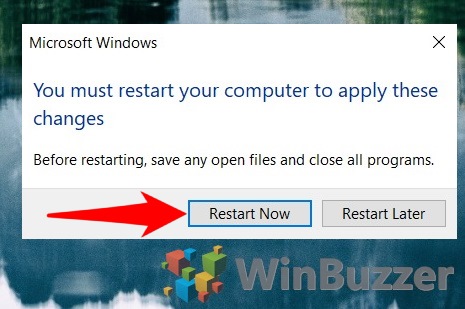
How to Change Computer Name via CMD
If you’d prefer to change computer name via the command-line, Command Prompt is also an option. This tends to be quicker and is helpful if you don’t have access to a GUI, on a Windows Server install for example.
- Open CMD
Press “Start” and type “cmd”, then click “Run as administrator” next to the “Command Prompt” entry.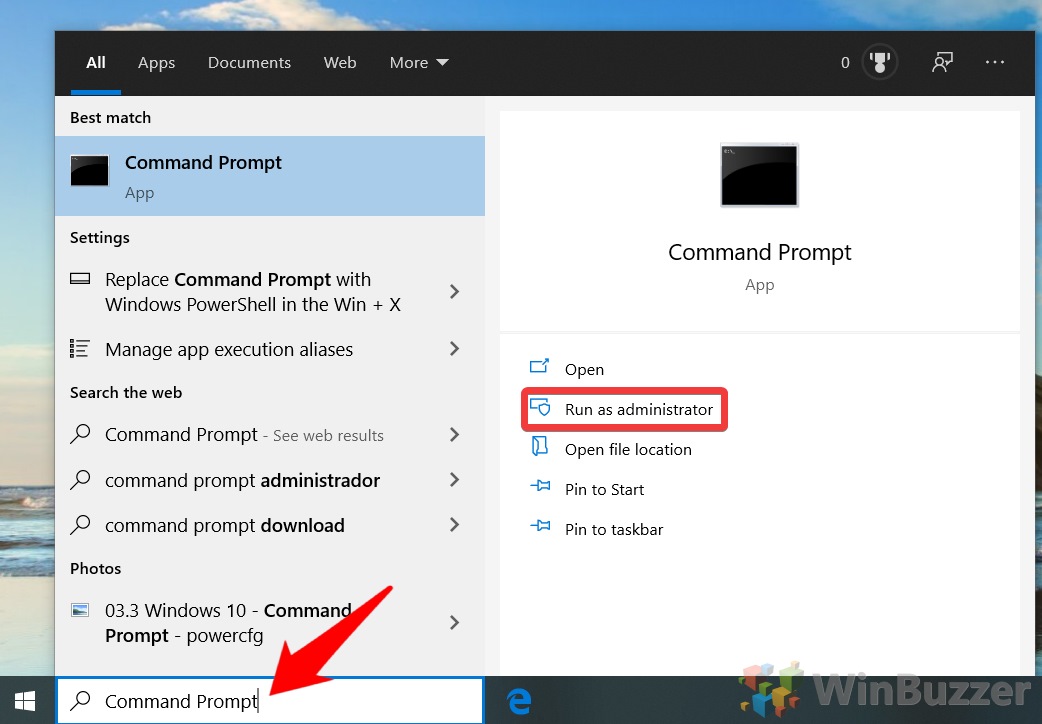
- Enter the change computer name CMD command
In Command Prompt, type the following and press “Enter”:wmic computersystem where name="%computername%" call rename="YOUR-NEW-NAME"
Naturally, you should changeYour-New-Namefor your PC name of choice. You’ll likely have to restart your PC for these changes to take effect.
How to Change Computer Name in PowerShell
Alternatively, you can use a PowerShell command to change computer name if you’re more comfortable with the tool.
- Open PowerShell
Press “Windows + X” to open the Start menu flyout, then click “Windows PowerShell (Admin)”.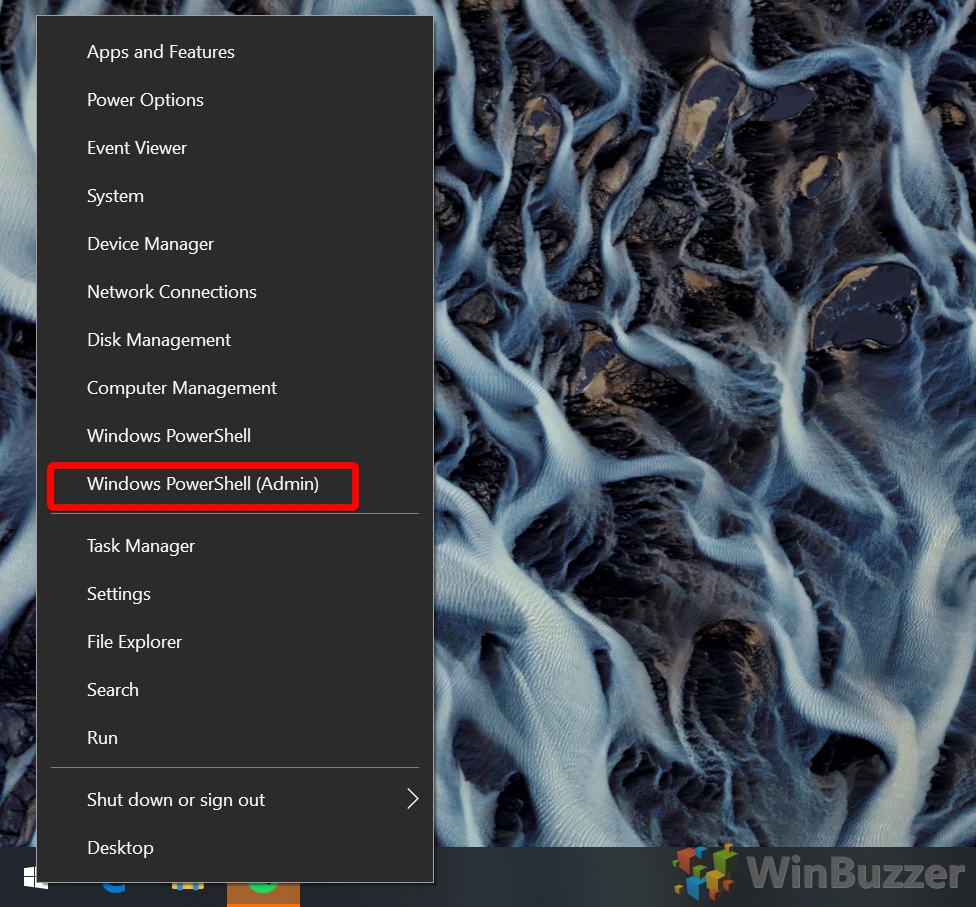
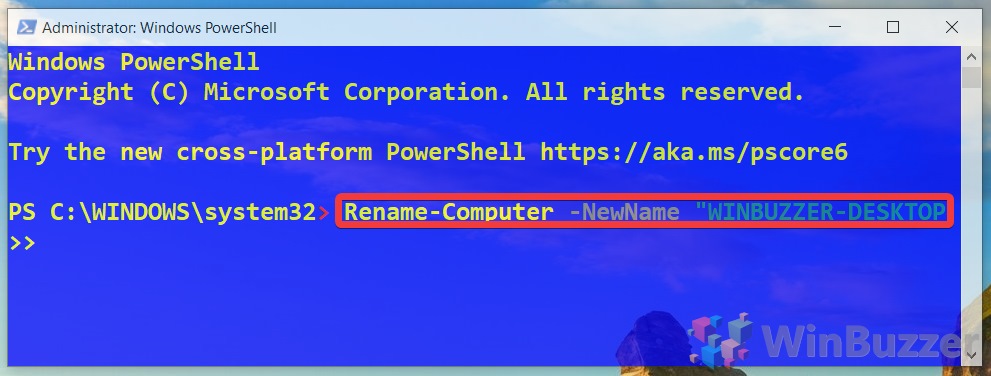
- Type the PowerShell change computer name command
Enter the following in PowerShell and press “Enter”, substituting ‘Winbuzzer-Desktop’ with your preferred name.Rename-Computer -NewName "WINBUZZER-DESKTOP"
Restart your PC for the changes to take effect.