Users quite often need to save a document as a PDF, but not every application supports that functionality. That’s where the concept of PDF printing comes in, with Microsoft Print to PDF and other third-party print to pdf software letting users save any file in the universal format.
Though Microsoft Print to PDF is built-in to Windows 10, its functionality is quite limited. It does the job as a quick solution, those with more complex requirements may struggle to get the document looking exactly as they want.
As a result, today we’ll be covering how to print to PDF with both Microsoft’s tool and Bullzip PDF Printer, which is completely free for personal use. This can also help if your Microsoft Print to PDF is missing or not working.
How to Print to PDF on Windows 10 (the simple way)
As mentioned earlier, the simplest way to Print to PDF on Windows 10 is via the Microsoft Print to PDF tool. This doesn’t give you many options, but it’ll do the job for most people.
- Open the print menu
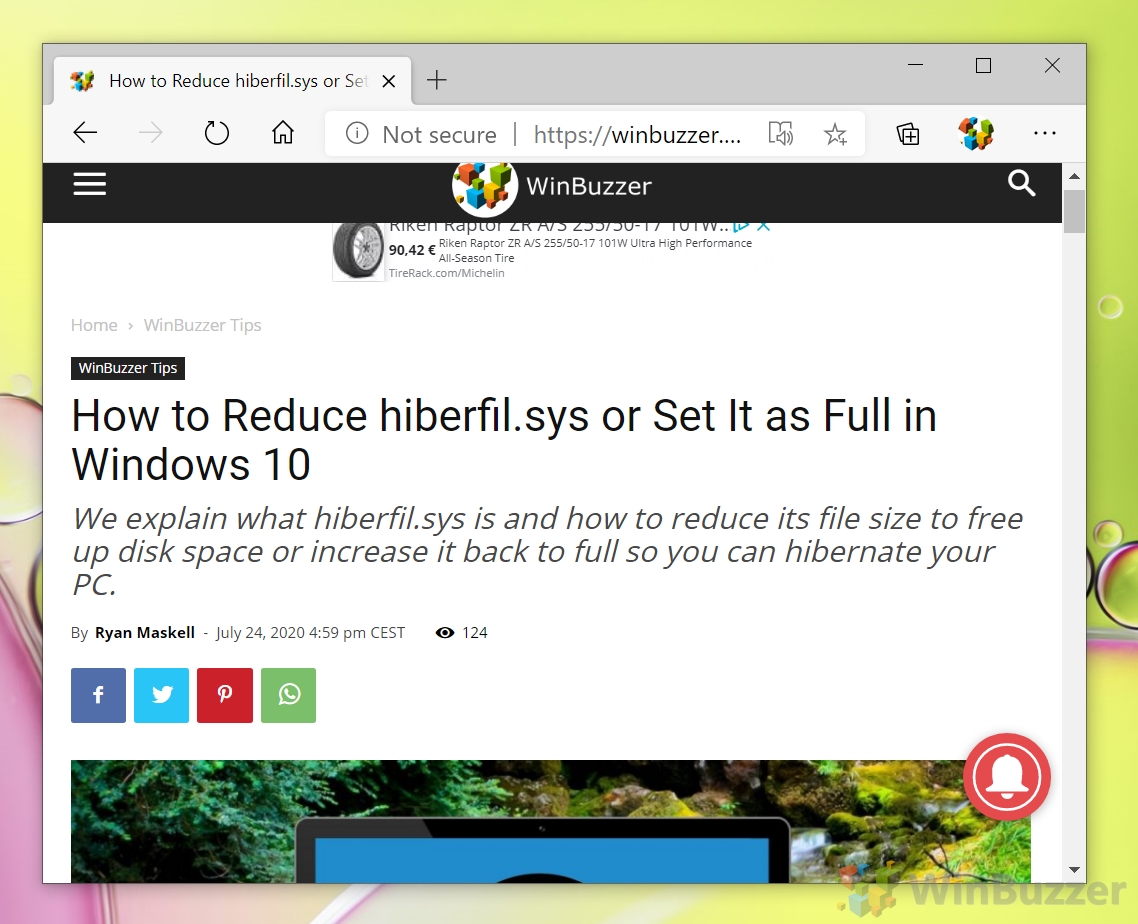
On the webpage, image or document you want to print to PDF, press “Ctrl+P” to open the print dialog.
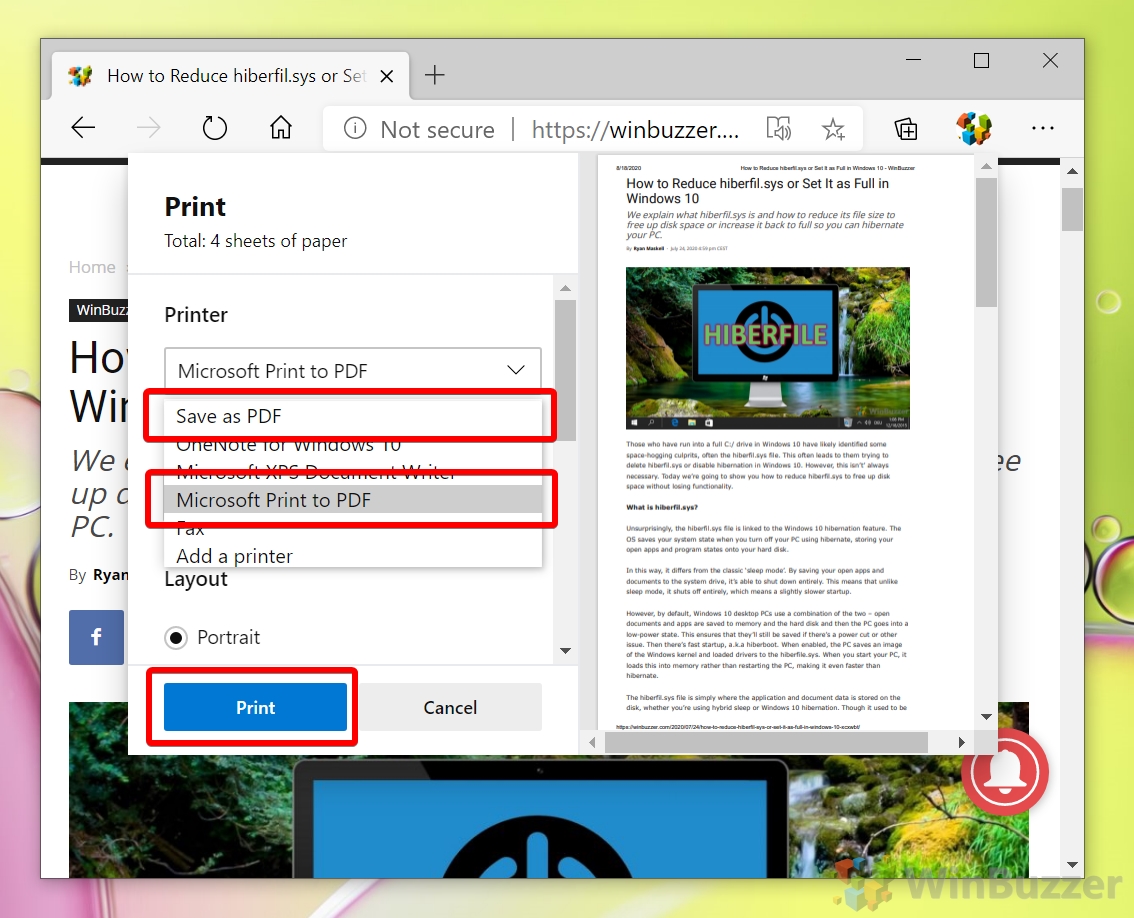
- Click “Microsoft Print to PDF” or “Save as PDF” or similar if you have other PDF printers installed
Once you’ve selected “Microsoft Print to PDF”, click “Print”.
- Save the PDF
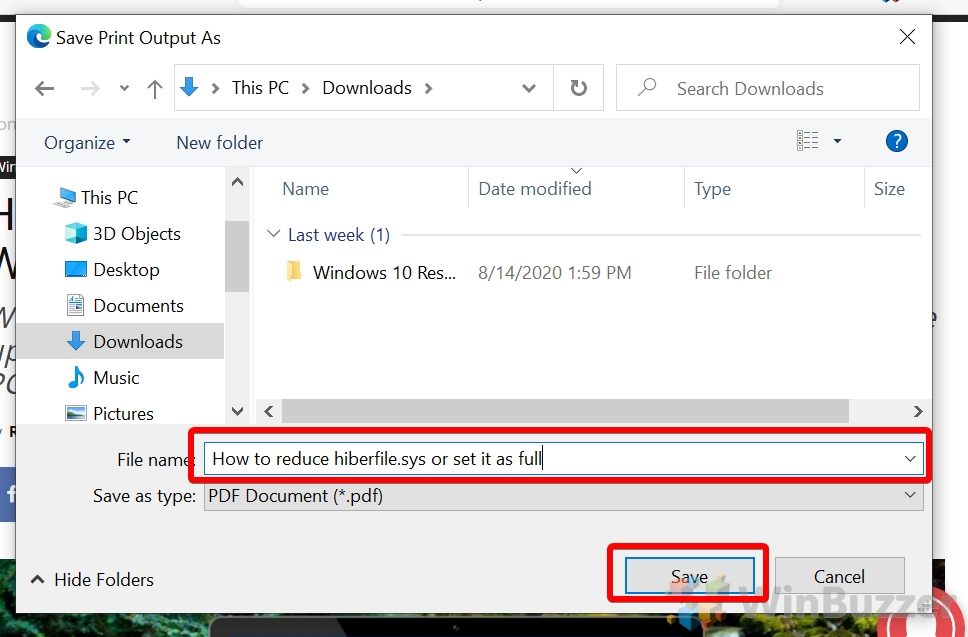
Choose the folder you want to download the PDF to, name it, and click “Save”. The file will now be present in that folder to use for whatever purpose you like.
How to Print to PDF using Advanced Features for Quality, Multi-Page, Password etc.
If you aren’t happy with how your PDF turned out via the usual route, you can access more options via a third-party print to PDF software. We recommend Bullzip PDF printer as it’s free and provides plenty of customization. This will also open options like PDF passwords, multi-page, and quality settings.
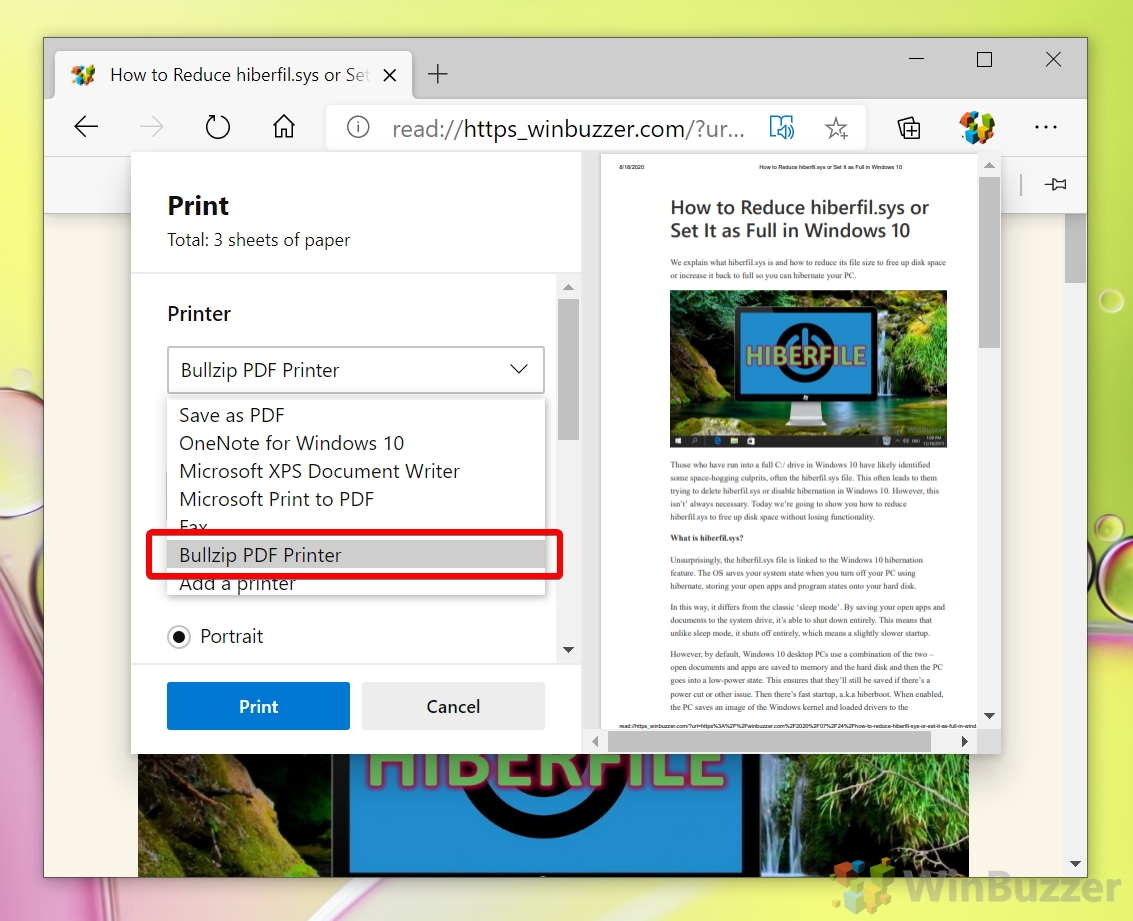
- Open the Print dialog and select Bullzip PDF Printer
Press “Ctrl +P” to open the print dialog and click “Bullzip PDF Printer”.
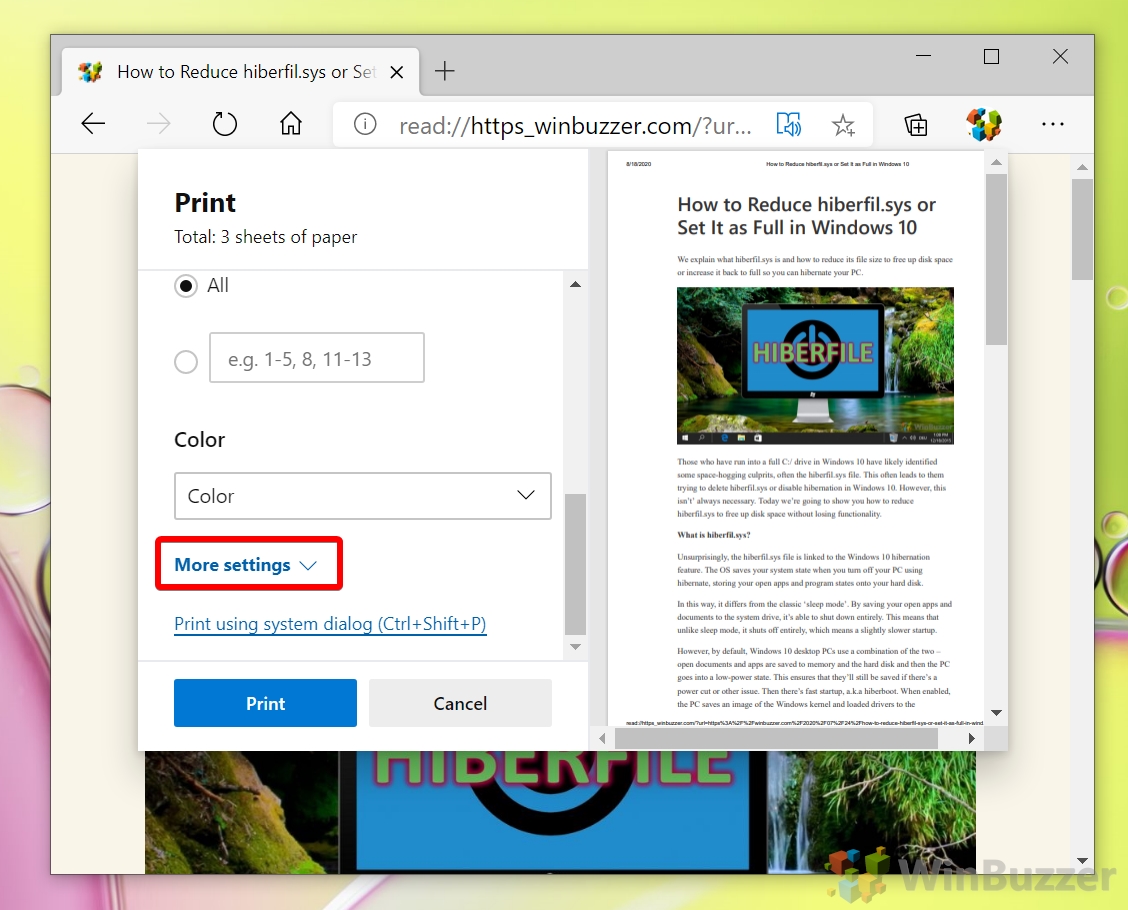
- Open advanced PDF options
With Bullzip PDF Printer selected, scroll down until you see the “Color” dropdown. Underneath it, click “More settings”.
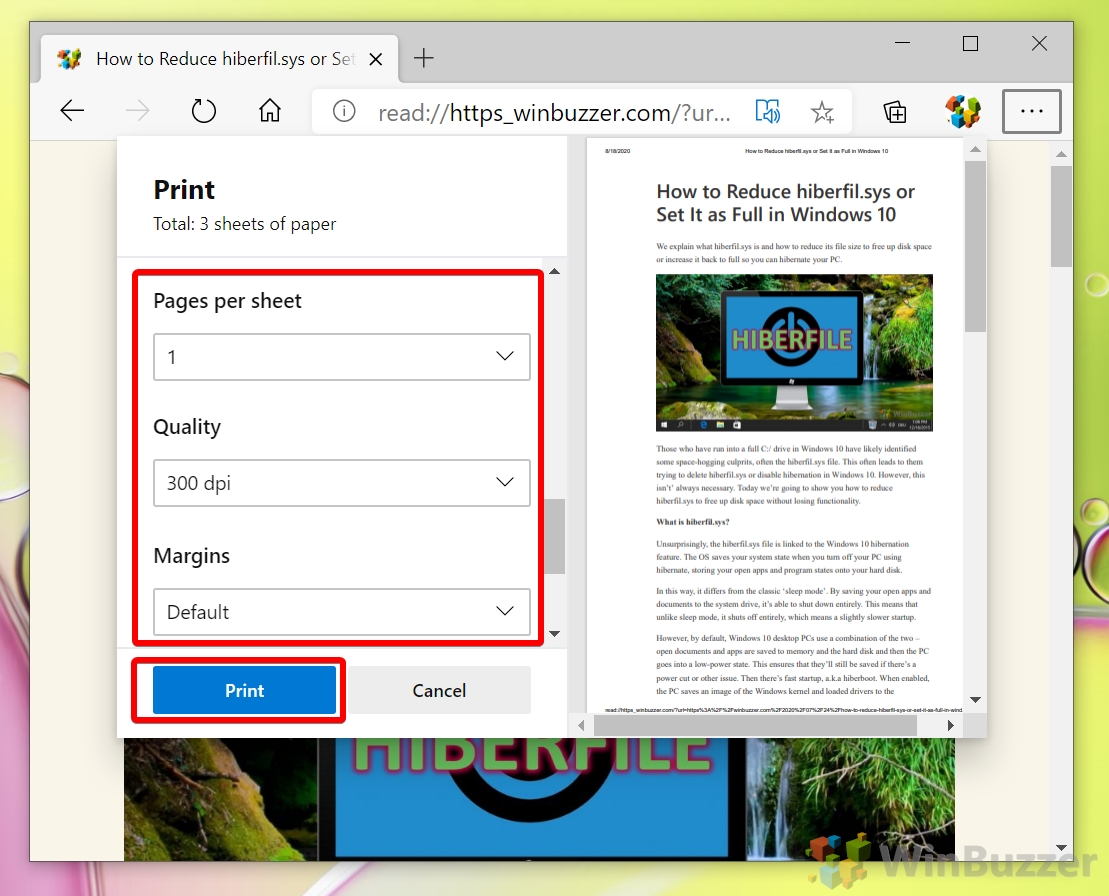
- Select quality, pages, and margin settings
300 dpi is generally recommended for physical printing but for high resolution photos you might want to increase quality. Once you’re done, click “Print”.
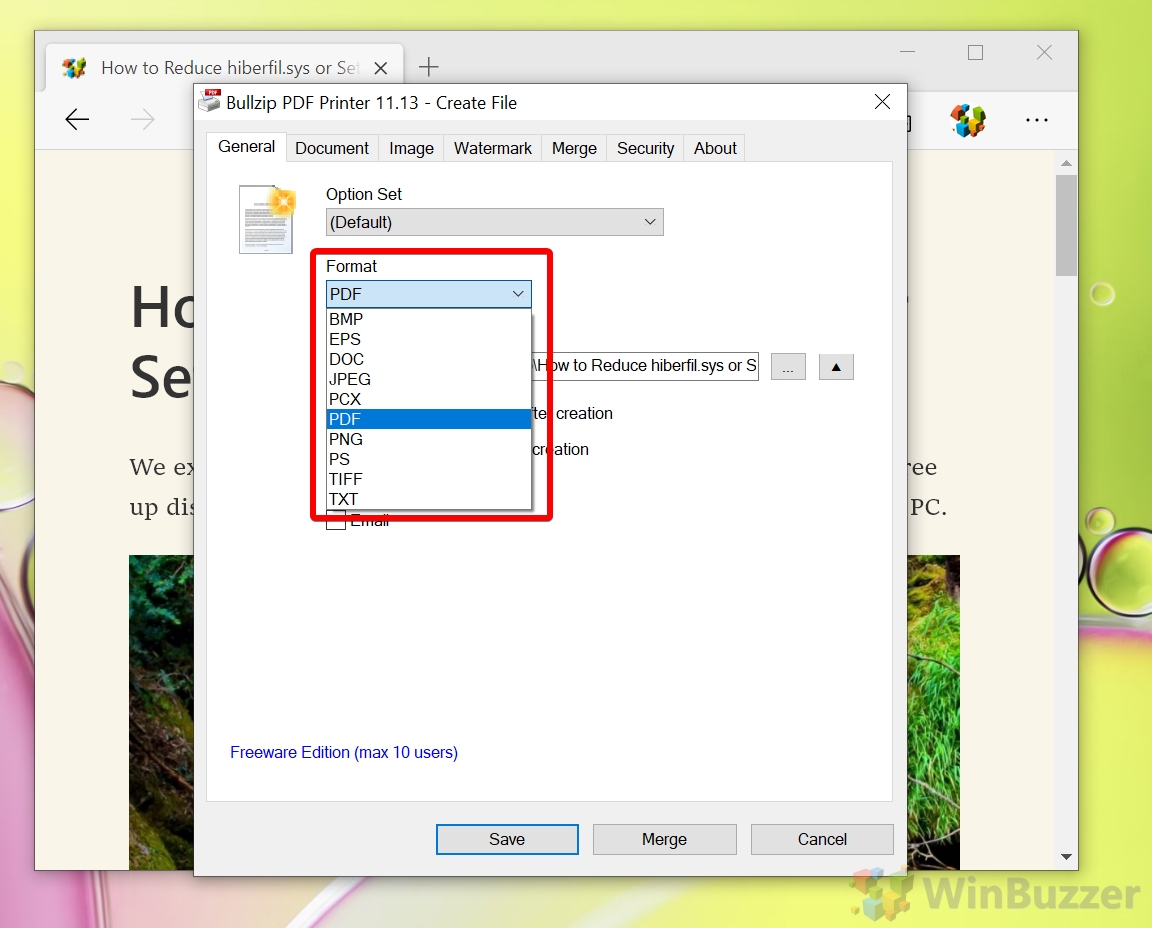
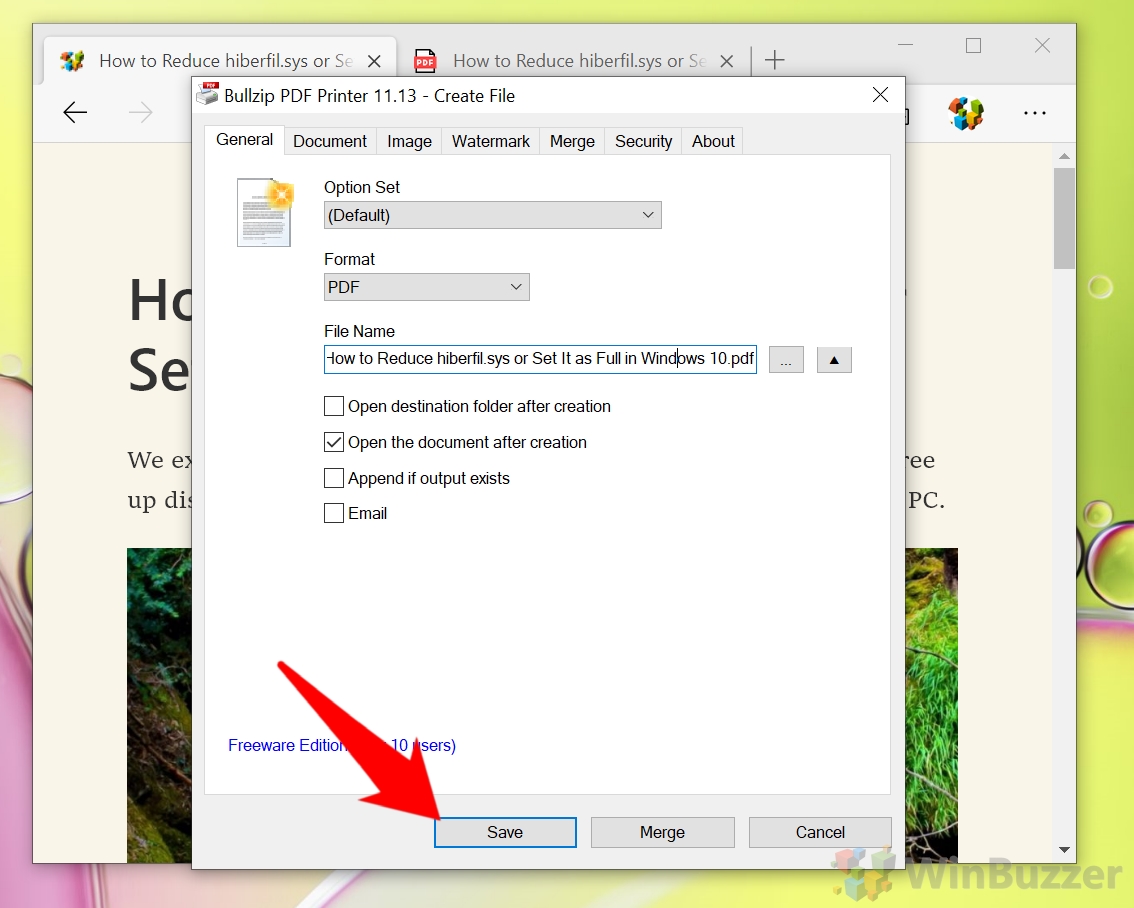
- In the Bullzip PDF Printer dialog, set the format to “PDF”

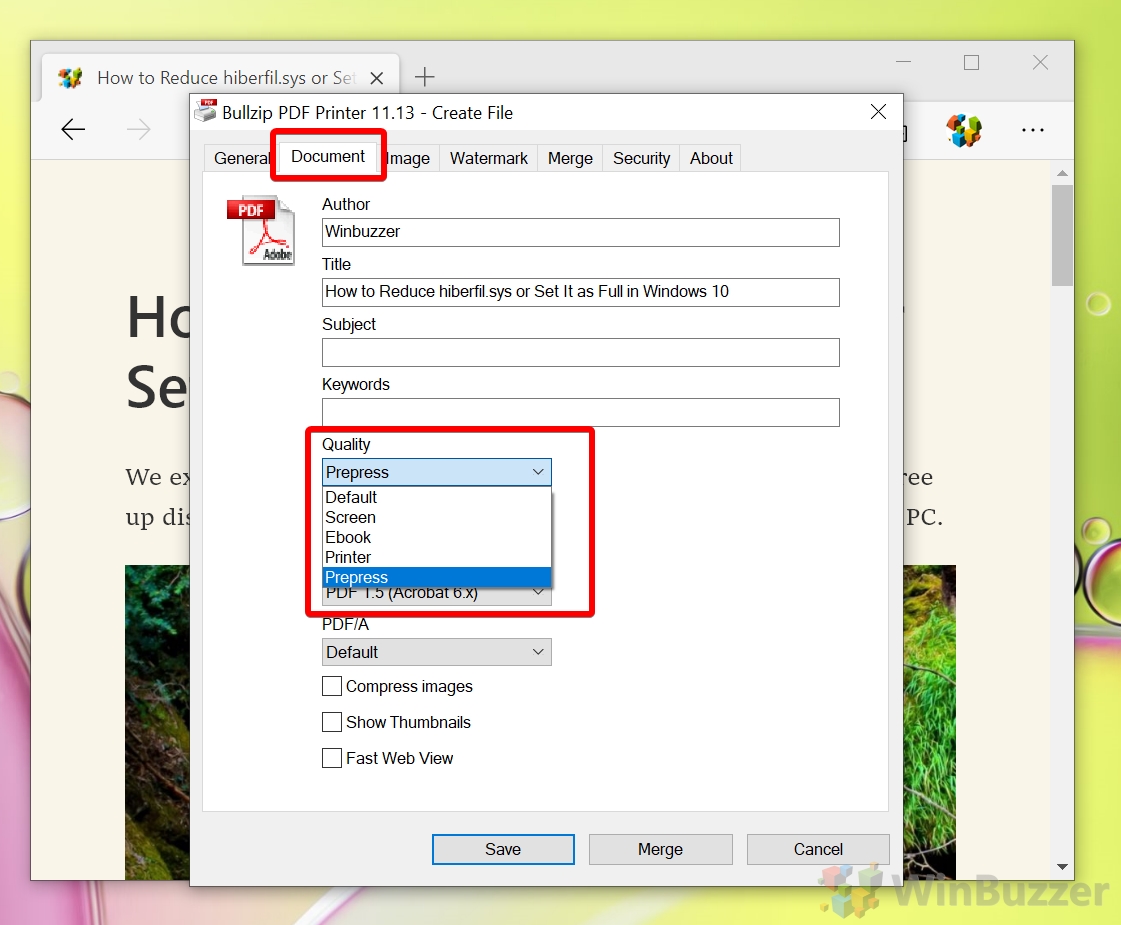
- Adjust Bullzip document settings
Switch to the “Document” tab and set the “Quality” dropdown to “Prepress” for best quality. The other presets will create smaller and compressed PDFs which are best for sharing online.
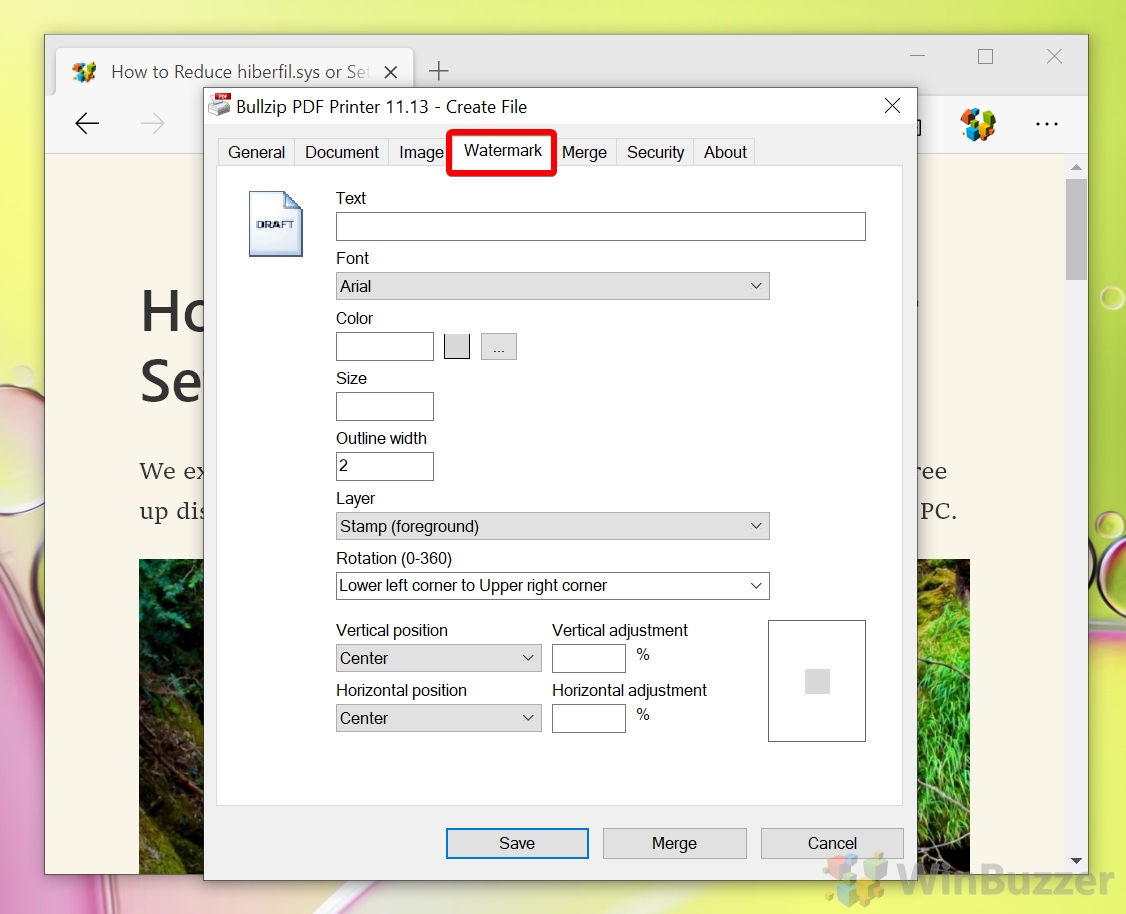
- Add a Watermark (if required)
This is useful if you have a document that should not be shared or you don’t want a draft being mistaken for the final version.
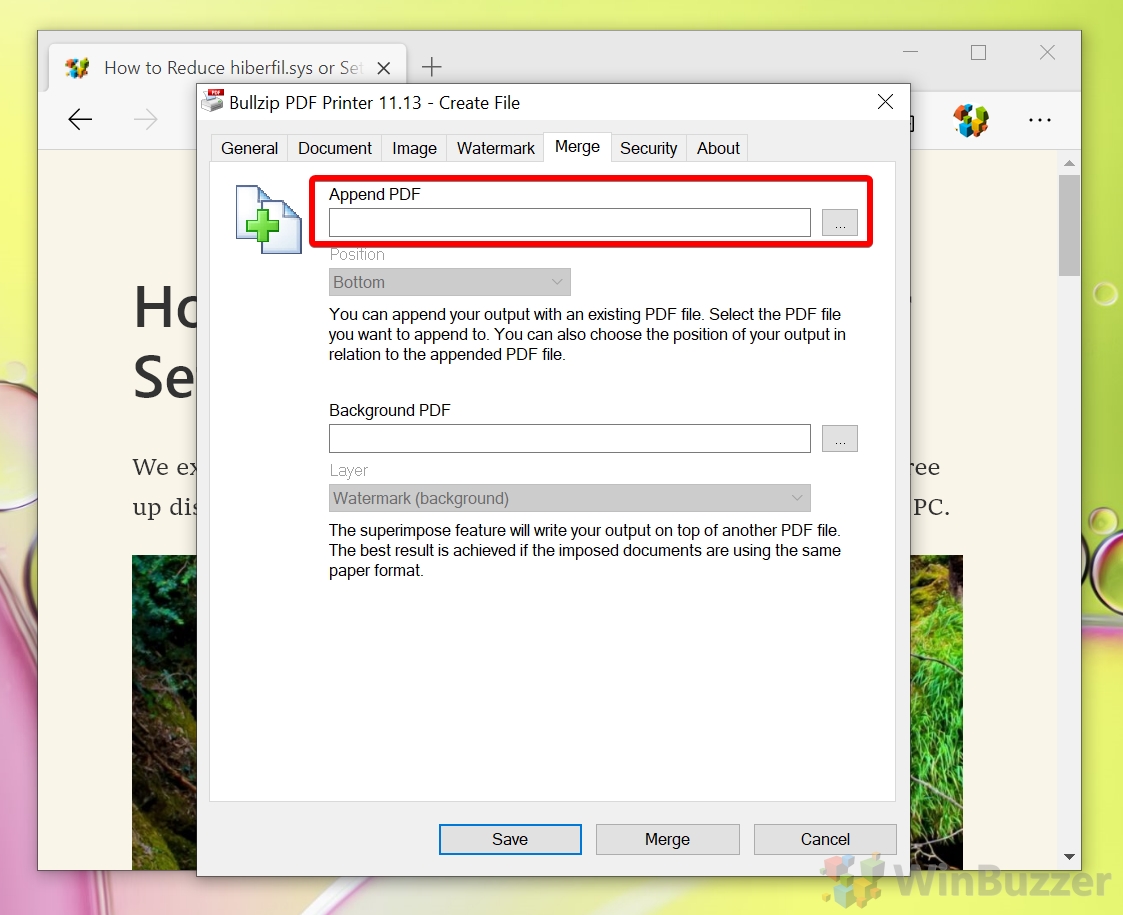
- Append your output to an existing PDF
If you’d like PDF on Windows 10 to be added as a page in an existing document, you can use the “Append PDF” feature in the “Merge” tab and browse to that file.
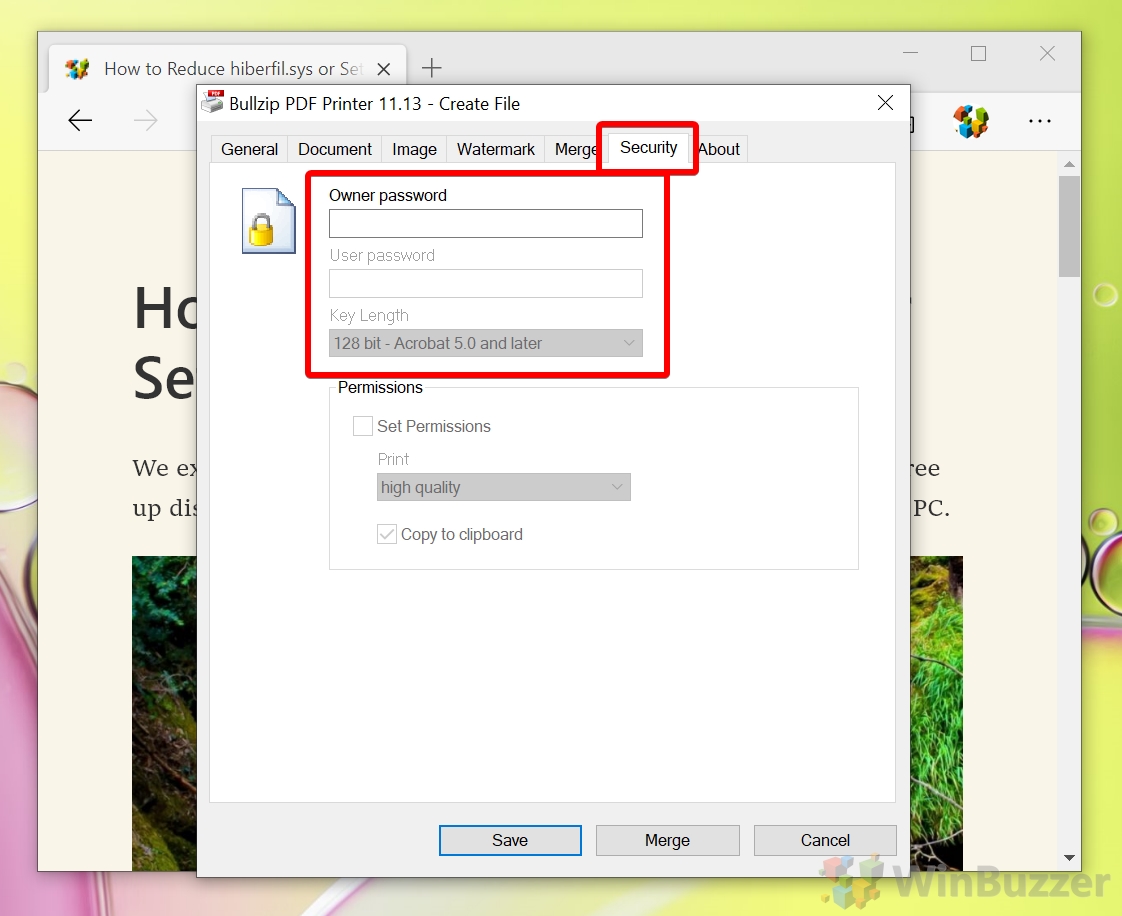
- Set a PDF Password
In the “Security” tab, set an owner and user password if required. You can also change print permissions and choose reduced quality for printing.
- Save your settings
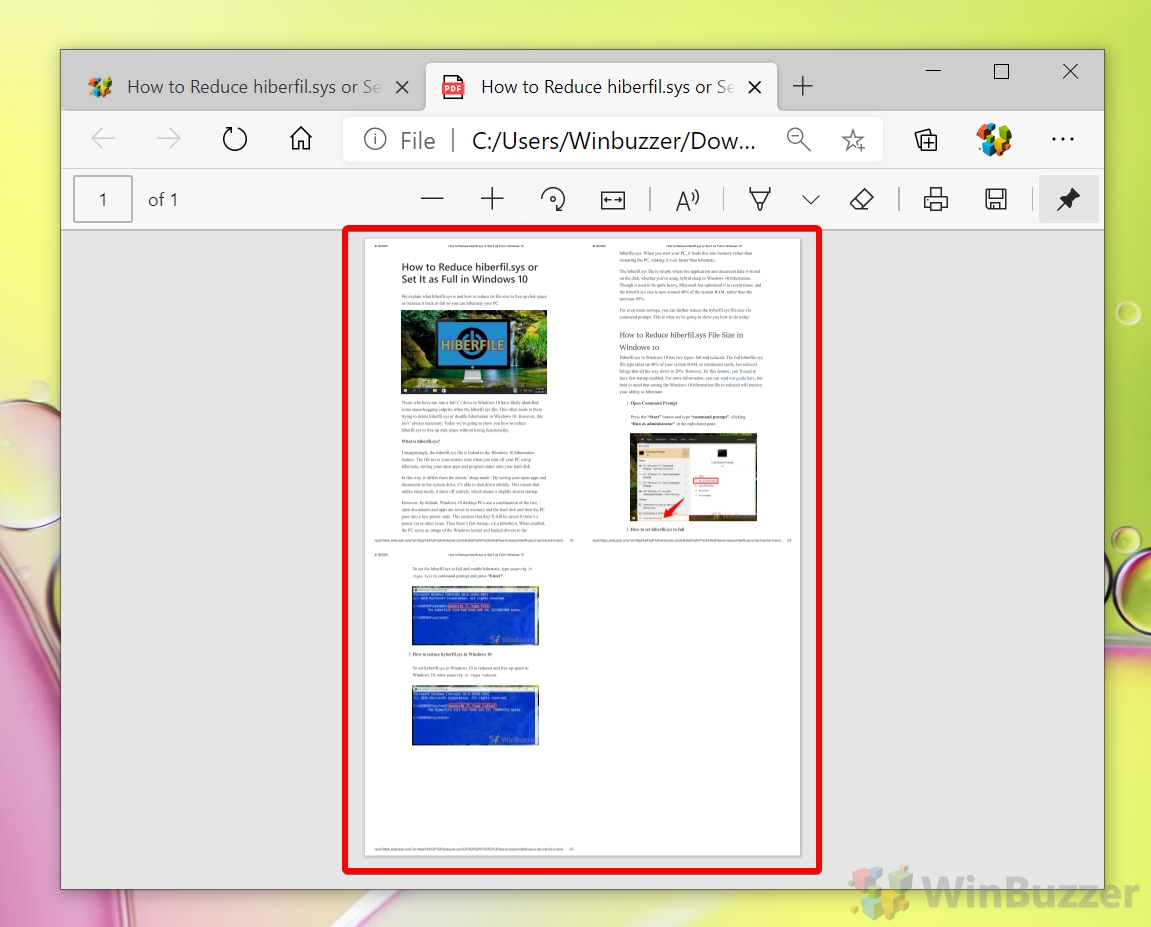
- Check the final document
Often, you’ll have to adjust the margins or other document settings to get it to display perfectly. Check the final PDF to make sure it came out right.
Now that’s done, you may want to consider checking out some of our existing tutorials, such as how to open Microsoft Word documents without Word and how to cancel print jobs.
