Installing apps in Microsoft’s latest OS can be surprisingly frustrating. While the process itself is relatively stable, both the Windows Store and .msi files insist on installing them in preset locations which may not match the user’s preferences. This leads many to wonder how to change the default installation location in Windows 10.
Though you can change the app install location for win64 apps during setup, it requires manual input each time. As a result, tiny OS drives can quickly fill up with hundreds of small programs that become a chore to delete.
Thankfully, there’s an often-overlooked method to change the default install location in Windows 10 for both types of apps. Microsoft provides a handy toggle in its ‘Settings’ app, but it’s quite difficult to spot if you aren’t specifically looking for it. Today, we’re going to show you how to find it and edit your Win32/64 and Microsoft Store download location.
How to Change Your Default Install/Download Location in Windows 10
- Open Settings
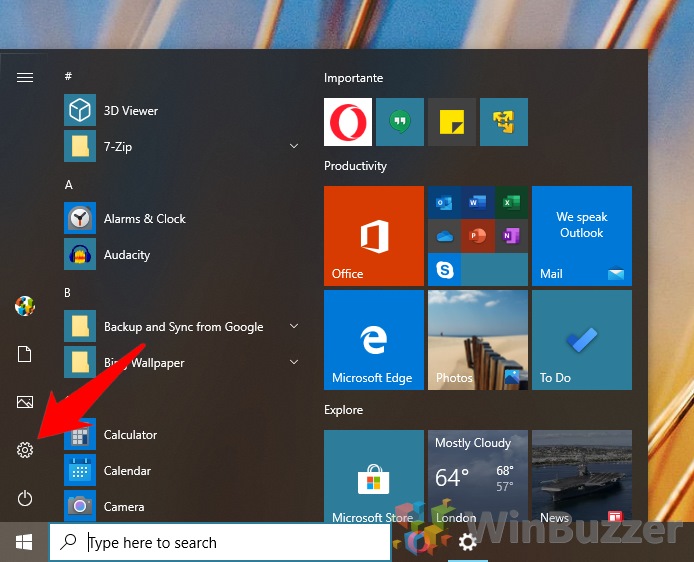
Press the Start button and click the Settings cog in the bottom-left corner, above the power button.
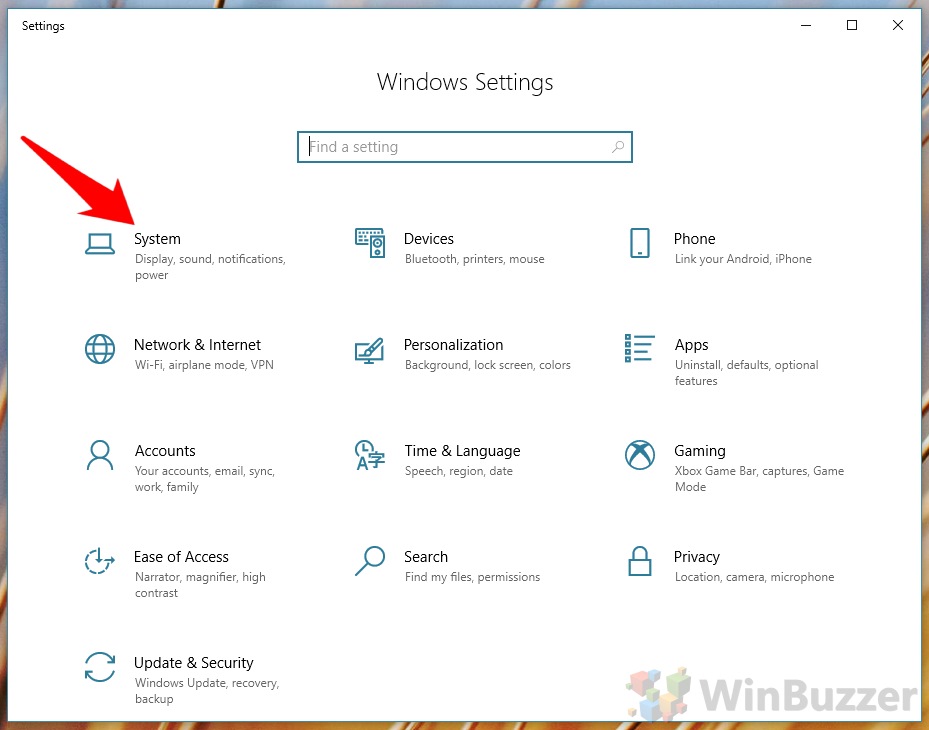
- Click on System Settings
- Find your Storage settings and click “change where new content is saved”
The Storage sub-menu can be found on the left sidebar. You can then access the menu to change the default install location in Windows 10.
- Change the default installation location to the drive of your choice
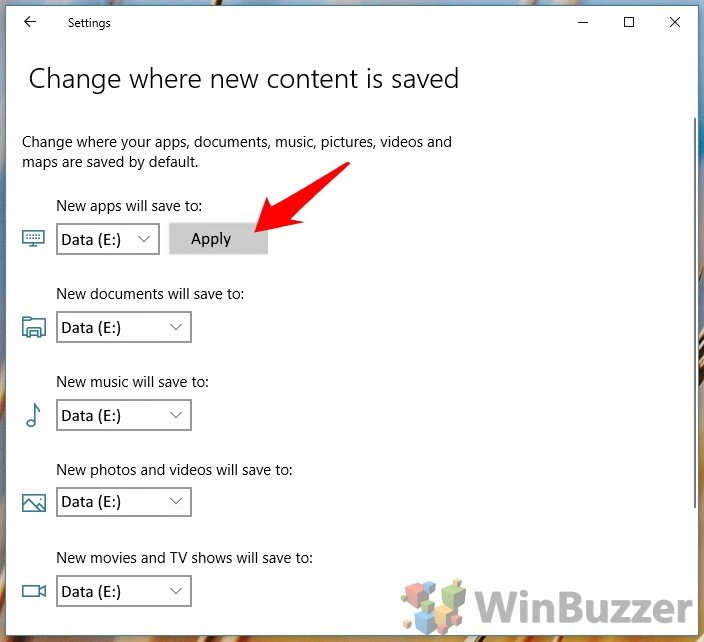
You’ll be presented with several dropdowns for different media content. Change the top one, “New apps will save to:”, to an alternative drive with enough free space.
- Apply your new installation directory
Next to the dropdown, don’t forget to hit “Apply” to ensure the changes persist. You can then close the settings menu and install your apps.


