Due to time zones and daylight saving, it’s quite common to wake up to the wrong time in Windows 10. There are many reasons your clock or date can go out of sync and this can lead to issues like incorrectly labeled messaged or missed appointments. Unfortunately, you can no longer change time in Windows 10 with a single click on the taskbar, but it’s not too difficult to remedy.
The new OS tucks away clock adjustment in settings to offer all configuration in one place. Users often find that the Windows 10 change date and time option is disabled here or that their clock changes back automatically.
As a result, we’re going to show you how to manually change the time and adjust your date. Though many prefer to sync their clock with an atomic time server, there are many situations where a manual change is necessary. For example, some find their clock on Windows 10 has the wrong date and time when running a virtual machine with no internet connection. Let’s jump into how to perform these changes:
Windows 10: Change Time and Date in Windows 10
Time needed: 3 minutes
A few minutes is all it takes to adjust your clock on Windows 10 and change the date format. Though it may seem your Windows 10 change date and time option is disabled, that’s never permanent. Most of the time, a simple settings toggle is all it takes to yourself back on track.
- Open Date & Time context menu
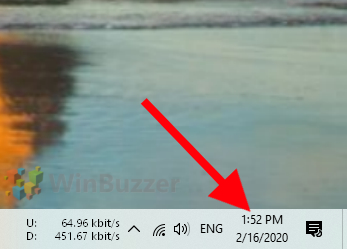
You can right-click the clock on your taskbar to open a context menu with various Windows options.
- Open Date & Time settings
Click “Adjust date/time” to enter the relevant settings window.
- Add a new time zone clock
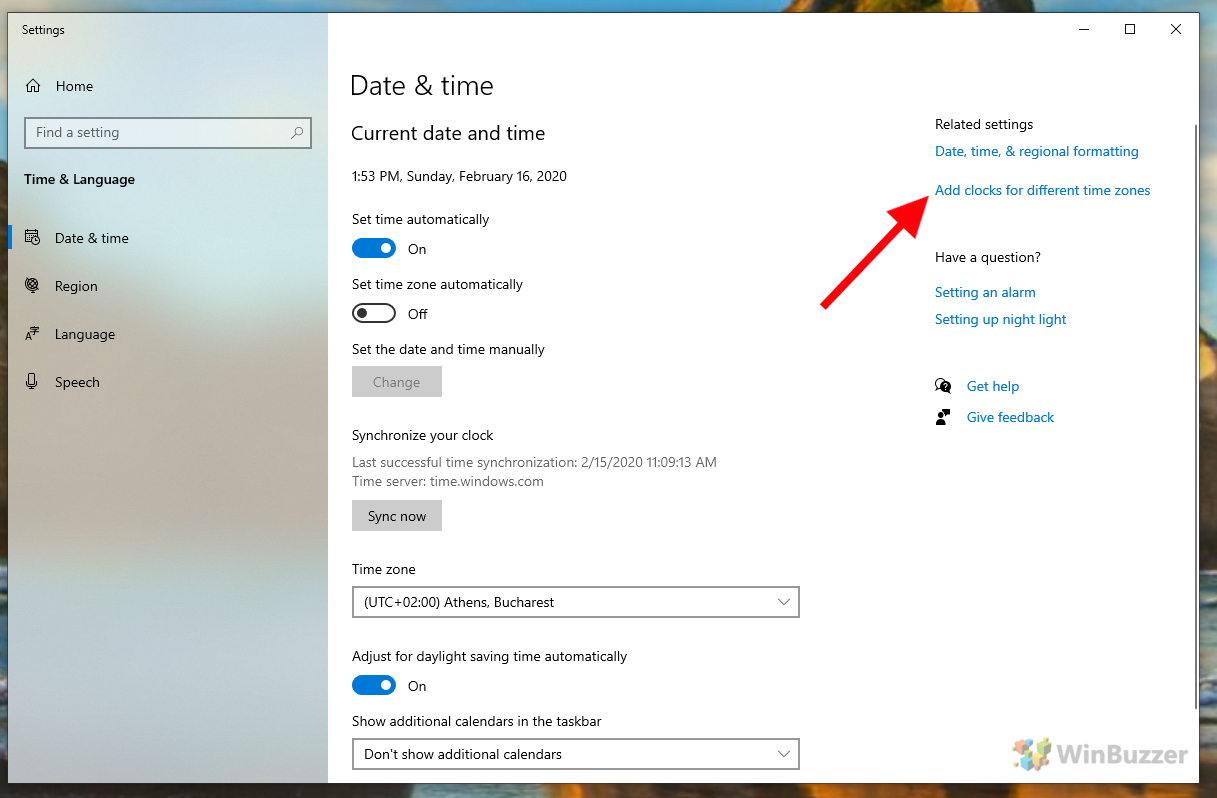
The Date & time settings page will show a text option labeled “Add clocks for different time zones”. This will be on the right-hand side if you have the window maximized, and at the very bottom otherwise. Click it.
- Open the settings window
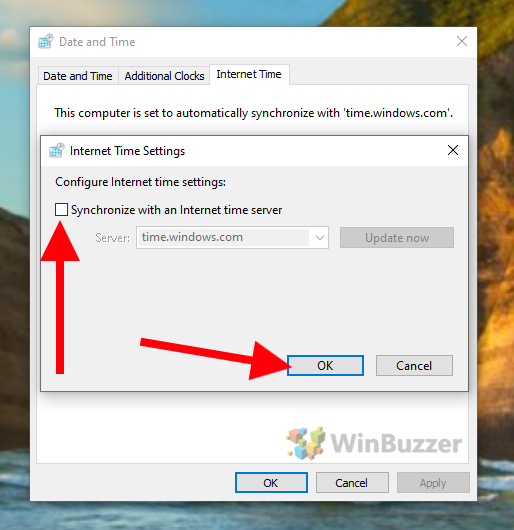
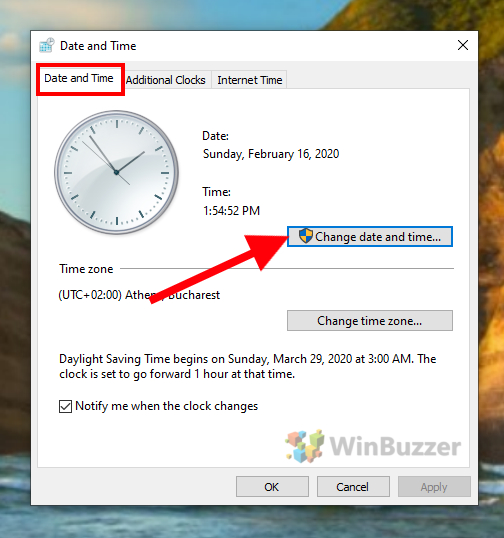
This will present you with yet another settings window, this time with the tabs “Date and Time”, “Additional Clocks”, and “Internet Time”. In the Internet Time tab, click “Change settings…”.
- Desynchronize the clock
In the Internet Time Settings dialog, untick “Synchronize with an Internet time server”. Press “OK”. This will stop Windows 10 from changing the time automatically.
- Open the Date and Time tab
You can now head back to the first tab, “Date and Time” and select “Change date and time…”.
- Change your time
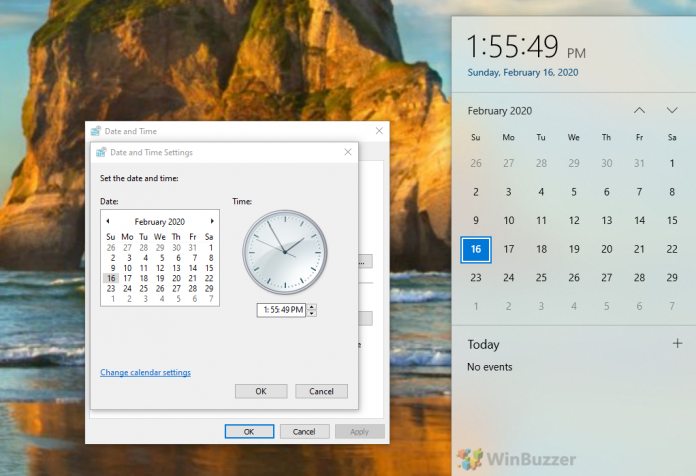
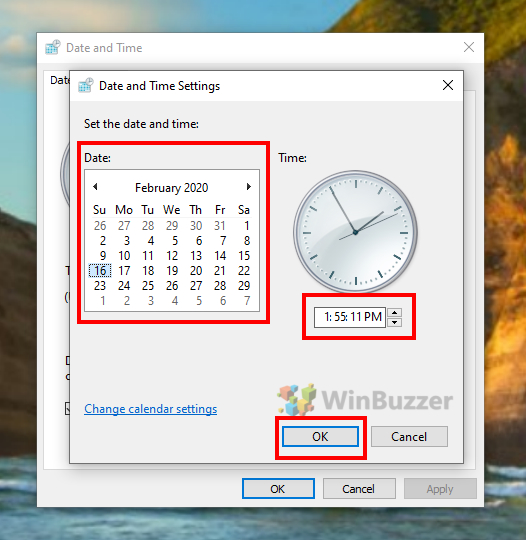
In the resulting pop-up, you can reset your clock in Windows 10 and fix wrong time issues.
Change the numbers on the clock to ones of your choice and click the date to set it correctly. You can change the date format in Windows 10 via the “Change calendar settings” text. Once you’re done, click “OK”.
