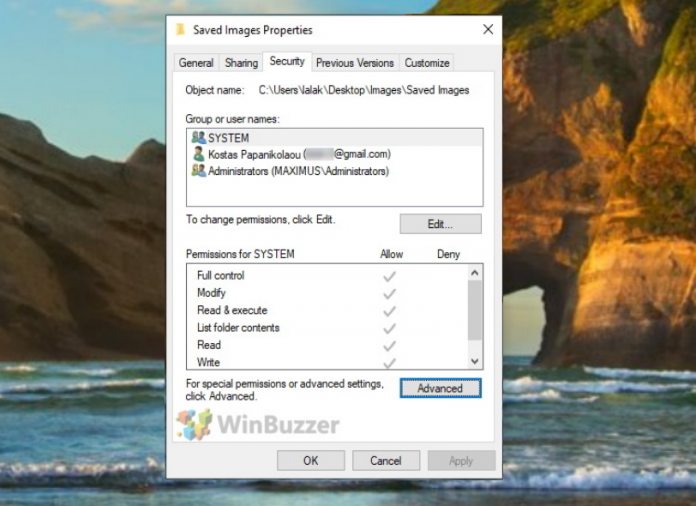
To safeguard and assign files and folders to specific users, Windows 11 and Windows 11 use the concepts of file ownership and permissions for certain actions such as reading, modifying, and writing.
The owner of a file or folder is automatically granted full access to all possible actions. Users marked as system administrators also have such extended rights. Additionally, you can revoke or grant certain permissions to other users or make them the new owner.
We will show you how this works with the example of folders. All files in the folder and subfolders will automatically “inherit” what you define for each folder.
With single files this works in the same way. To change the owner and permissions of files and folders in Windows 10 and Windows 11, you must be logged in as administrator.
Here are the two main methods to set file and folder permissions and to take ownership of files and folders in Windows. If you prefer a two click-solution also for the future you can alternatively add a “Take Ownership”-option to the right-click context menu.
⚠️ Please note: The process described below is the same in Windows 11 as it is in Windows 10. However, bear in mind that we’ll be using screenshots from Windows 10, so your UI may look a little different.
How to Set File and Folder Permissions in Windows
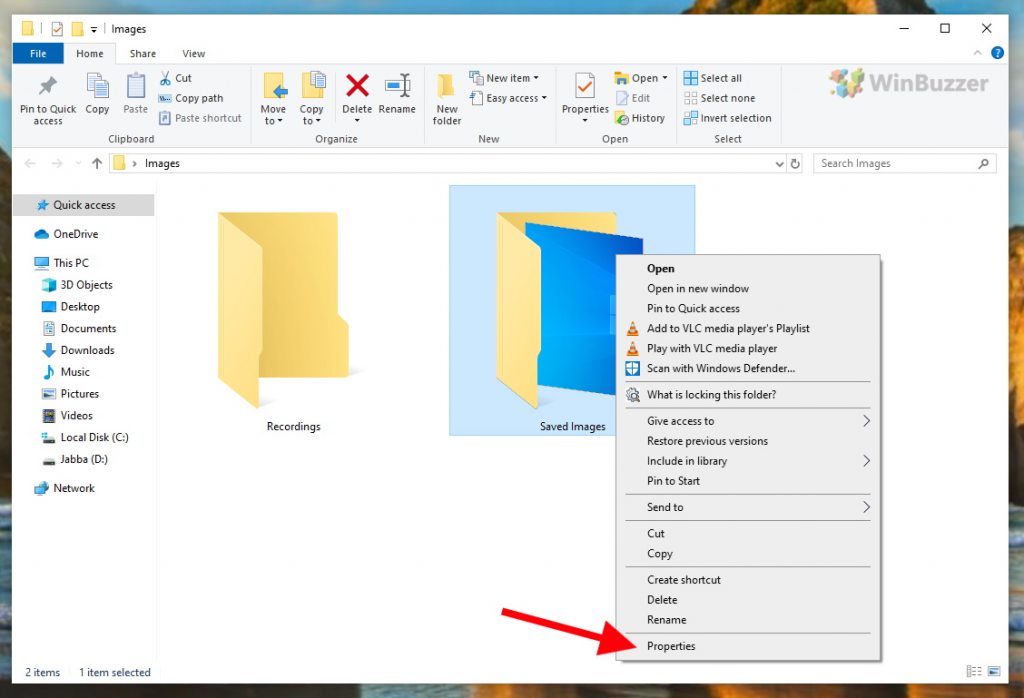
Right-click on the file or folder icon in File Explorer and select “Properties”. In Windows 11 you will have to click on “Show More Options” as an extra step.
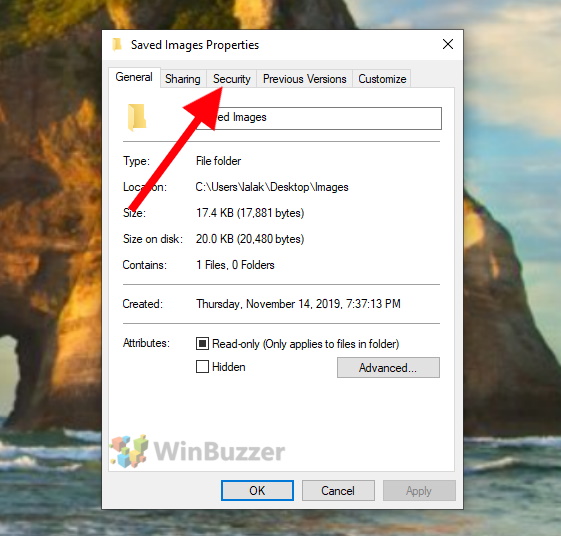
Then switch to the “Security” tab.
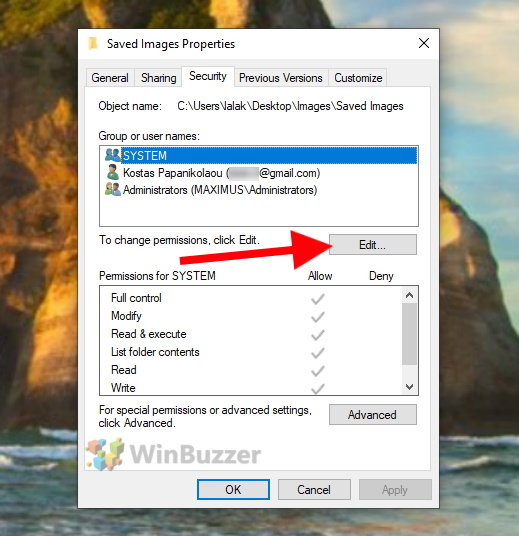
In the upper part of the window you can select the name of a user or a user group and the lower part of the window will show the respective file or folder permissions. In addition to the owner of the folder or file, also user groups “SYSTEM” and “Administrators” are displayed here. Click on “Edit” to change the permissions for the folder or file.
If the user you are looking for is not listed, first click “Add”. Otherwise you can ignore this and continue directly with the next but one step.
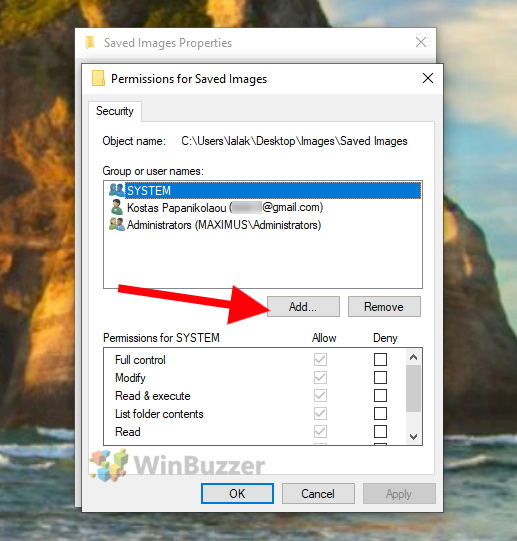
Now enter the username you want to add in the white text field and click “OK”. For users connected with a Microsoft account you would have to enter the corresponding email address.
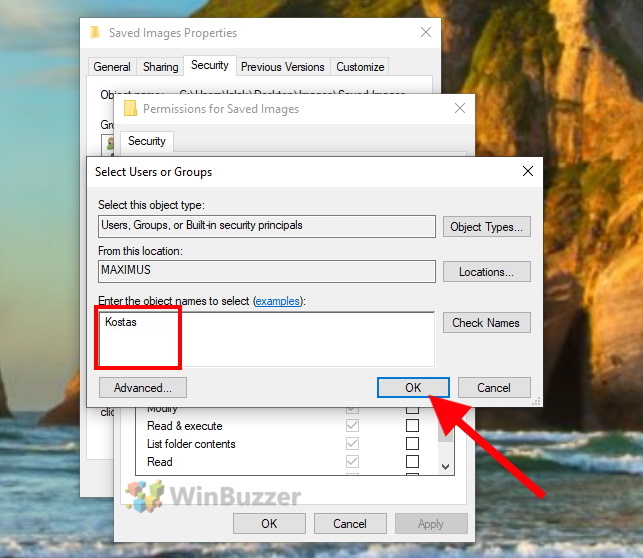
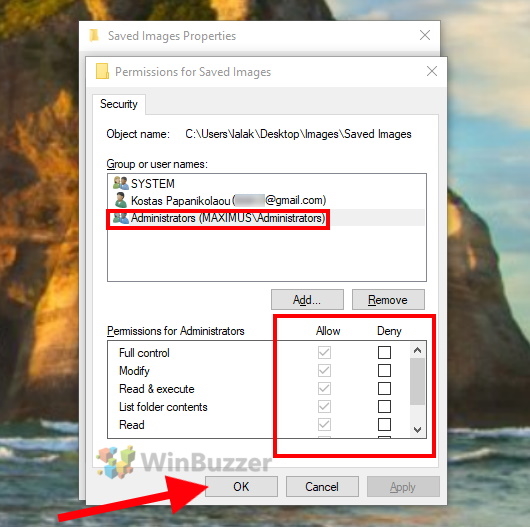
To adjust the permissions for a user, select the user in the upper part of the window and check either “Allow” or “Deny” for each permission. Click “OK” to accept the changes which will close the settings window.
How to Take Ownership of Files and Folders in Windows
As shown in the first step above, first open the file properties and then the “Security” tab. There you click on “Advanced”.
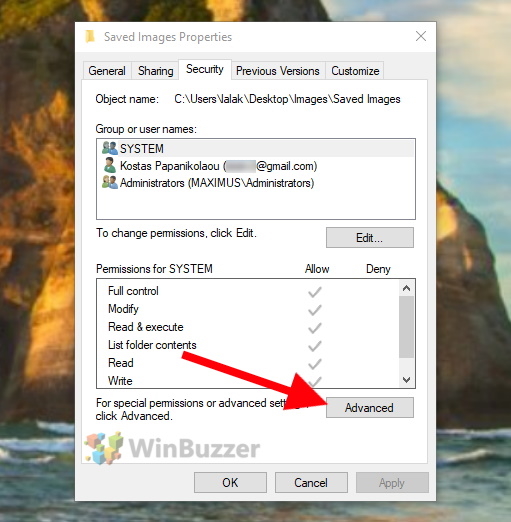
In the now shown dialog click on “Change” right next to the current file owner`s name.
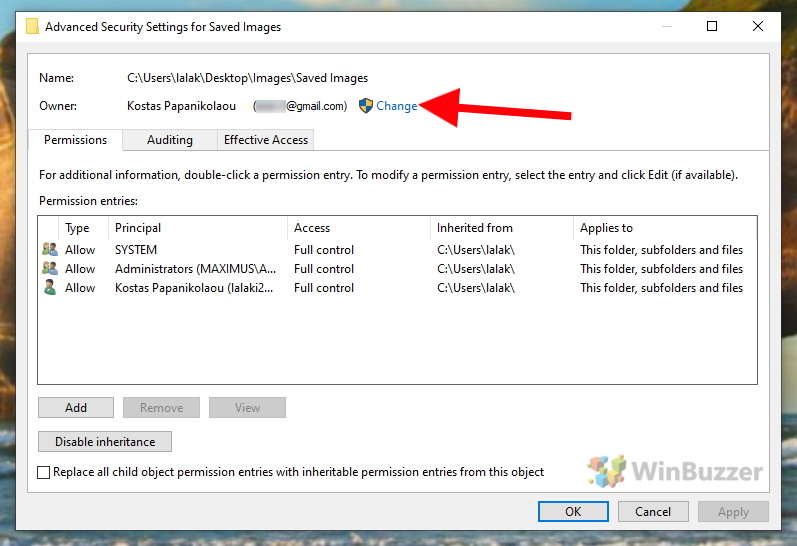
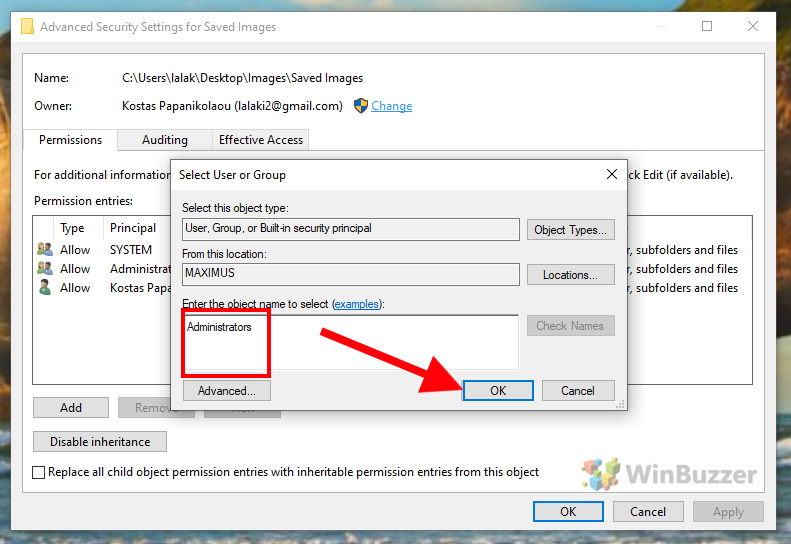
Now, Windows will ask you for your admin credentials (username and password) before you can proceed. After doing this, enter the user name of the new file owner in the white text field and click “OK”. For users connected with a Microsoft account, you must enter the corresponding email address.
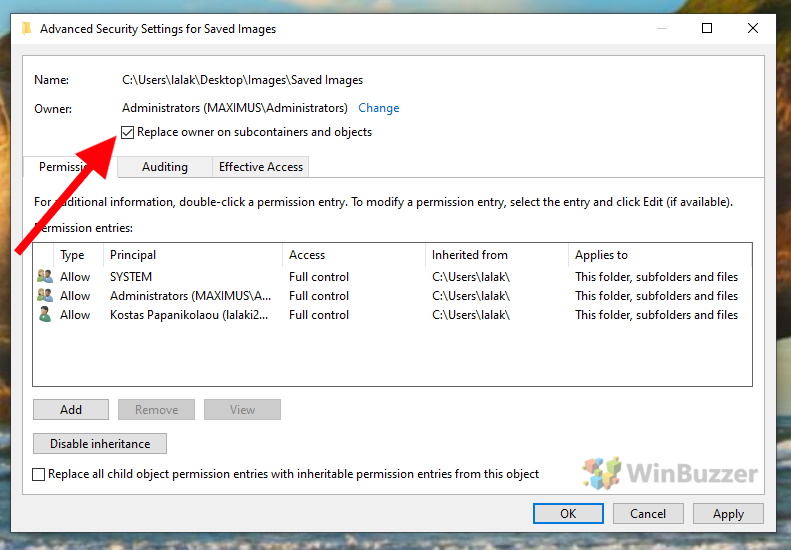
If you want to change the owner of all files and subdirectories of a folder at the same time, check the box “Replace owner on subcontainers and objects” . After clicking “OK” you will have successfully changed the ownership of the the given file or folder.
FAQ on Taking Ownership and Setting Permissions in Windows
What does “taking ownership” of a file or folder mean in Windows 10 and Windows 11?
Taking ownership means gaining full access rights to a specific file or folder, allowing you to modify permissions and control how it’s used.
How can I quickly take ownership of a file or folder?
Right-click the file or folder, choose ‘Properties’, go to the ‘Security’ tab, click ‘Advanced’, then ‘Change’ next to the owner’s name, and enter your username.
Is it possible to take ownership of multiple files at once?
Yes, by changing the owner of a folder, you can opt to replace the owner on all subcontainers and objects within that folder.
Can standard users take ownership of files without admin rights?
No, you need administrative privileges to change ownership of files and folders in Windows 10 and Windows 11.
How do I add a user to access a specific file or folder?
In the ‘Security’ tab of the file or folder’s properties, click ‘Edit’, then ‘Add’, and enter the username or email (for Microsoft accounts) of the user you want to add.
What’s the difference between ‘Allow’ and ‘Deny’ in folder permissions?
‘Allow’ grants the selected permission to the user, while ‘Deny’ explicitly forbids the user from exercising that permission.
Can I set different permissions for different users on the same folder?
Yes, you can set unique permissions for each user or user group for a folder.
How do I remove a user’s access to a file or folder?
Go to the ‘Security’ tab, click ‘Edit’, select the user, and either uncheck all ‘Allow’ boxes or check ‘Deny’.
What happens if I deny all permissions for a user on a file?
The user will not be able to view, modify, or interact with the file in any way.
Can file ownership be transferred to a user group instead of an individual?
Yes, you can assign ownership to a user group, granting all members of the group full access.
What are the implications of taking ownership of system files?
Modifying ownership or permissions of system files can affect system stability and security, and should be done cautiously.
How can I revert ownership changes?
Follow the same steps to change ownership, but select the original owner’s username instead.
Does taking ownership affect file sharing over a network?
Ownership and permissions can impact how files are accessed over a network, so ensure proper settings for network sharing.
Can ownership be automatically set for new files in a folder?
New files inherit the permissions of their parent folder, but not ownership. You need to set ownership manually for each new file.
Is it possible to bulk change file permissions for multiple files at once?
Yes, by changing the permissions of a folder, you can opt to apply these to all subfolders and files within that folder.
Last Updated on December 31, 2023 3:59 pm CET by Markus Kasanmascheff
