
Windows 10 uses Windows Defender as a free default antivirus solution. While protection is solid, Windows Defender seems to lack an option for scheduled scans. But luckily there is a hidden option for automated scans which is just missing in the interface.
Windows 10 improves many features and offers a much better experience than Windows 8. But nothing has done with Windows Defender. Microsoft´s own free antivirus app comes with the same reduced feature set it already had in Windows 8.
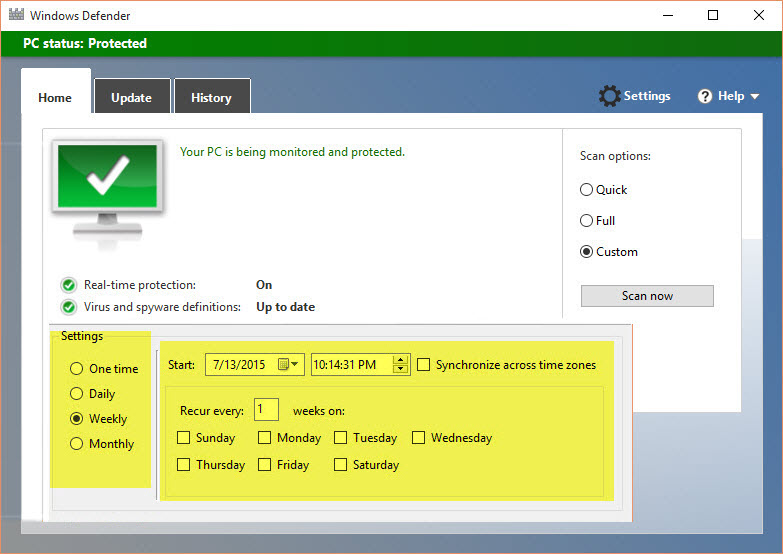
Windows Defender still lacks an option for automated / scheduled scans in its interface.
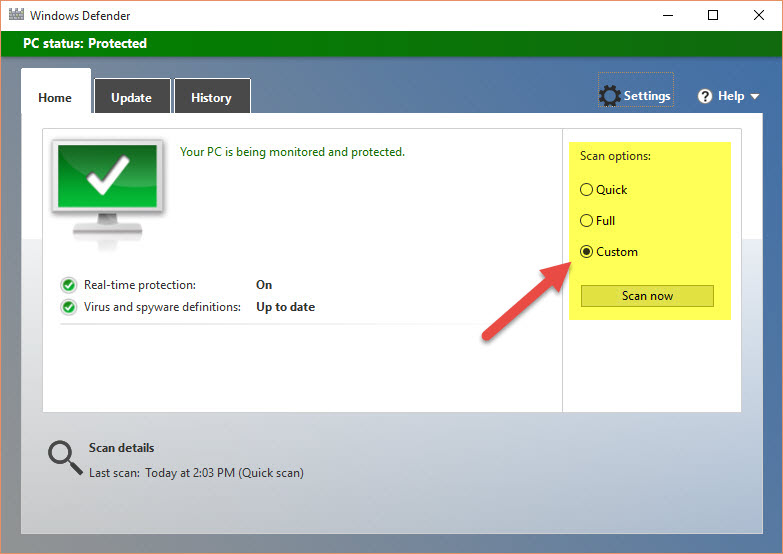
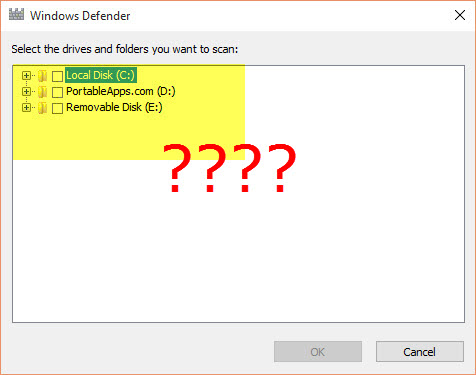
There is a custom scan option which offers nothing else than picking the drives and folders for scanning. “Custom options” – a bold exaggeration.
Turning on automated virus scans with the hidden scheduler
But not so quick! In best Microsoft style, a feature for scheduled scans is indeed there – but they just didn´t put it into Windows Defender´s interface. To use it, you have to refer to the Windows 10 Task Scheduler.
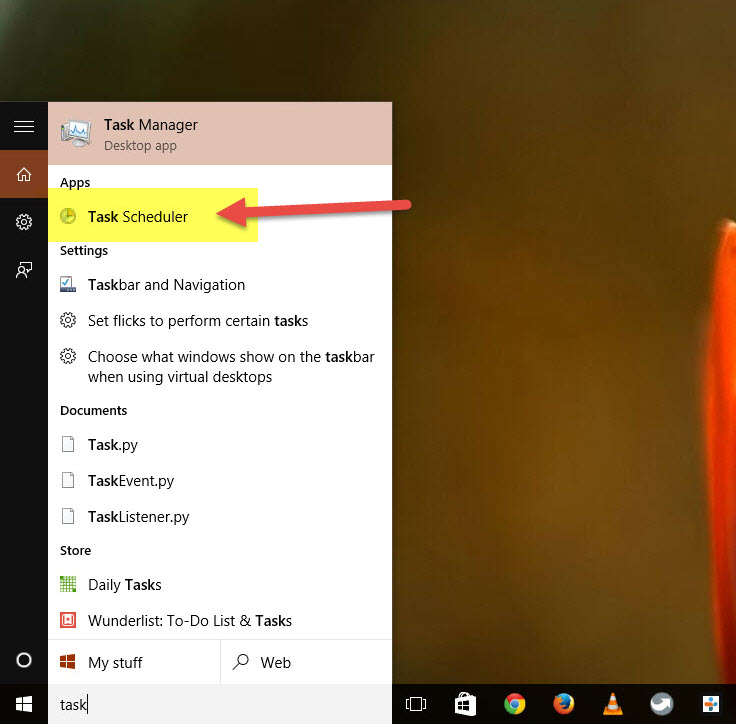
1. Open the Windows 10 Task scheduler
Type task in the search bar and click on Task Scheduler
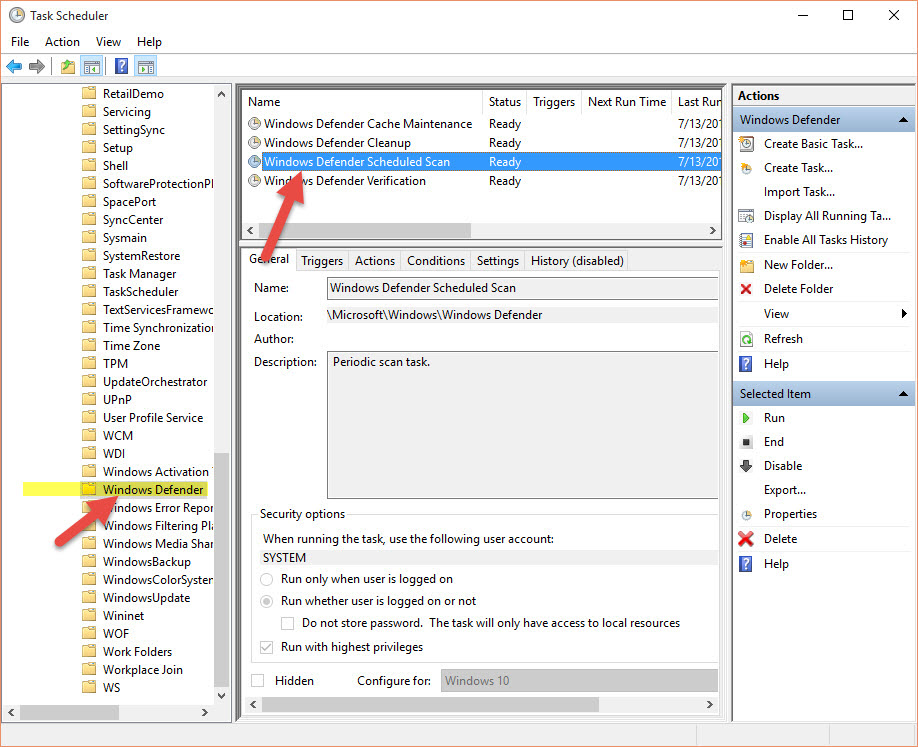
2. Open Scheduled Scans in the Windows Defender task section
Once the Task Scheduler opens, browse down to Microsoft -> Windows -> Windows Defender in the left-hand pane. Search the item Windows Defender Scheduled Scan in the right-hand side and double-click on it.
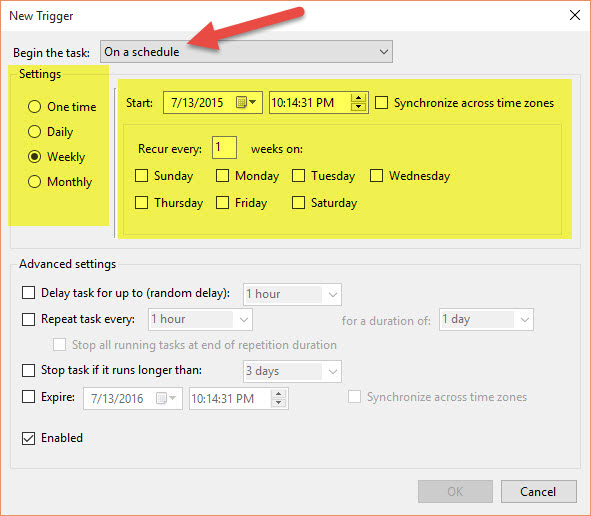
3. Create a Trigger
Change to the Trigger tab and click new to create a new trigger. In the On a schedule panel you can select the time and date you want it to run. You can do a scan every day, or weekly or at specific days every week.
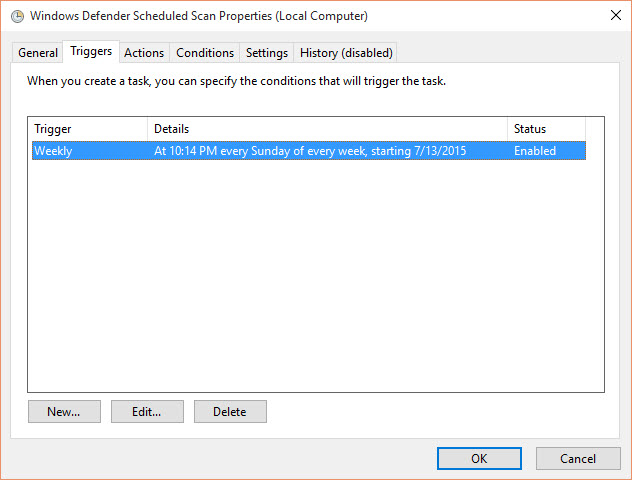
That´s everything. Once you save your trigger and reboot, your automated scans should be active. Windows 10 will show your scheduled virusscan in a list. If you want you could also combine different triggers.
Last Updated on February 2, 2017 2:10 pm CET by WinBuzzer


