

Colour images are great, but they can also cause too much distraction from the text in your document. In such a case, you may want to use Microsoft Word to convert the image to black and white.
The ability to remove color from a picture in Word has existed for many years, but these days it’s simpler and has more options than ever. Microsoft Word has several preset filters you can use to get varying black and white or sepia outputs.
How to Make a Color Picture Black and White in Word
To follow this guide, you’ll need a Word document open with any color image inserted. If you haven’t yet done this, take a second to grab an image from Google and copy and paste it in.
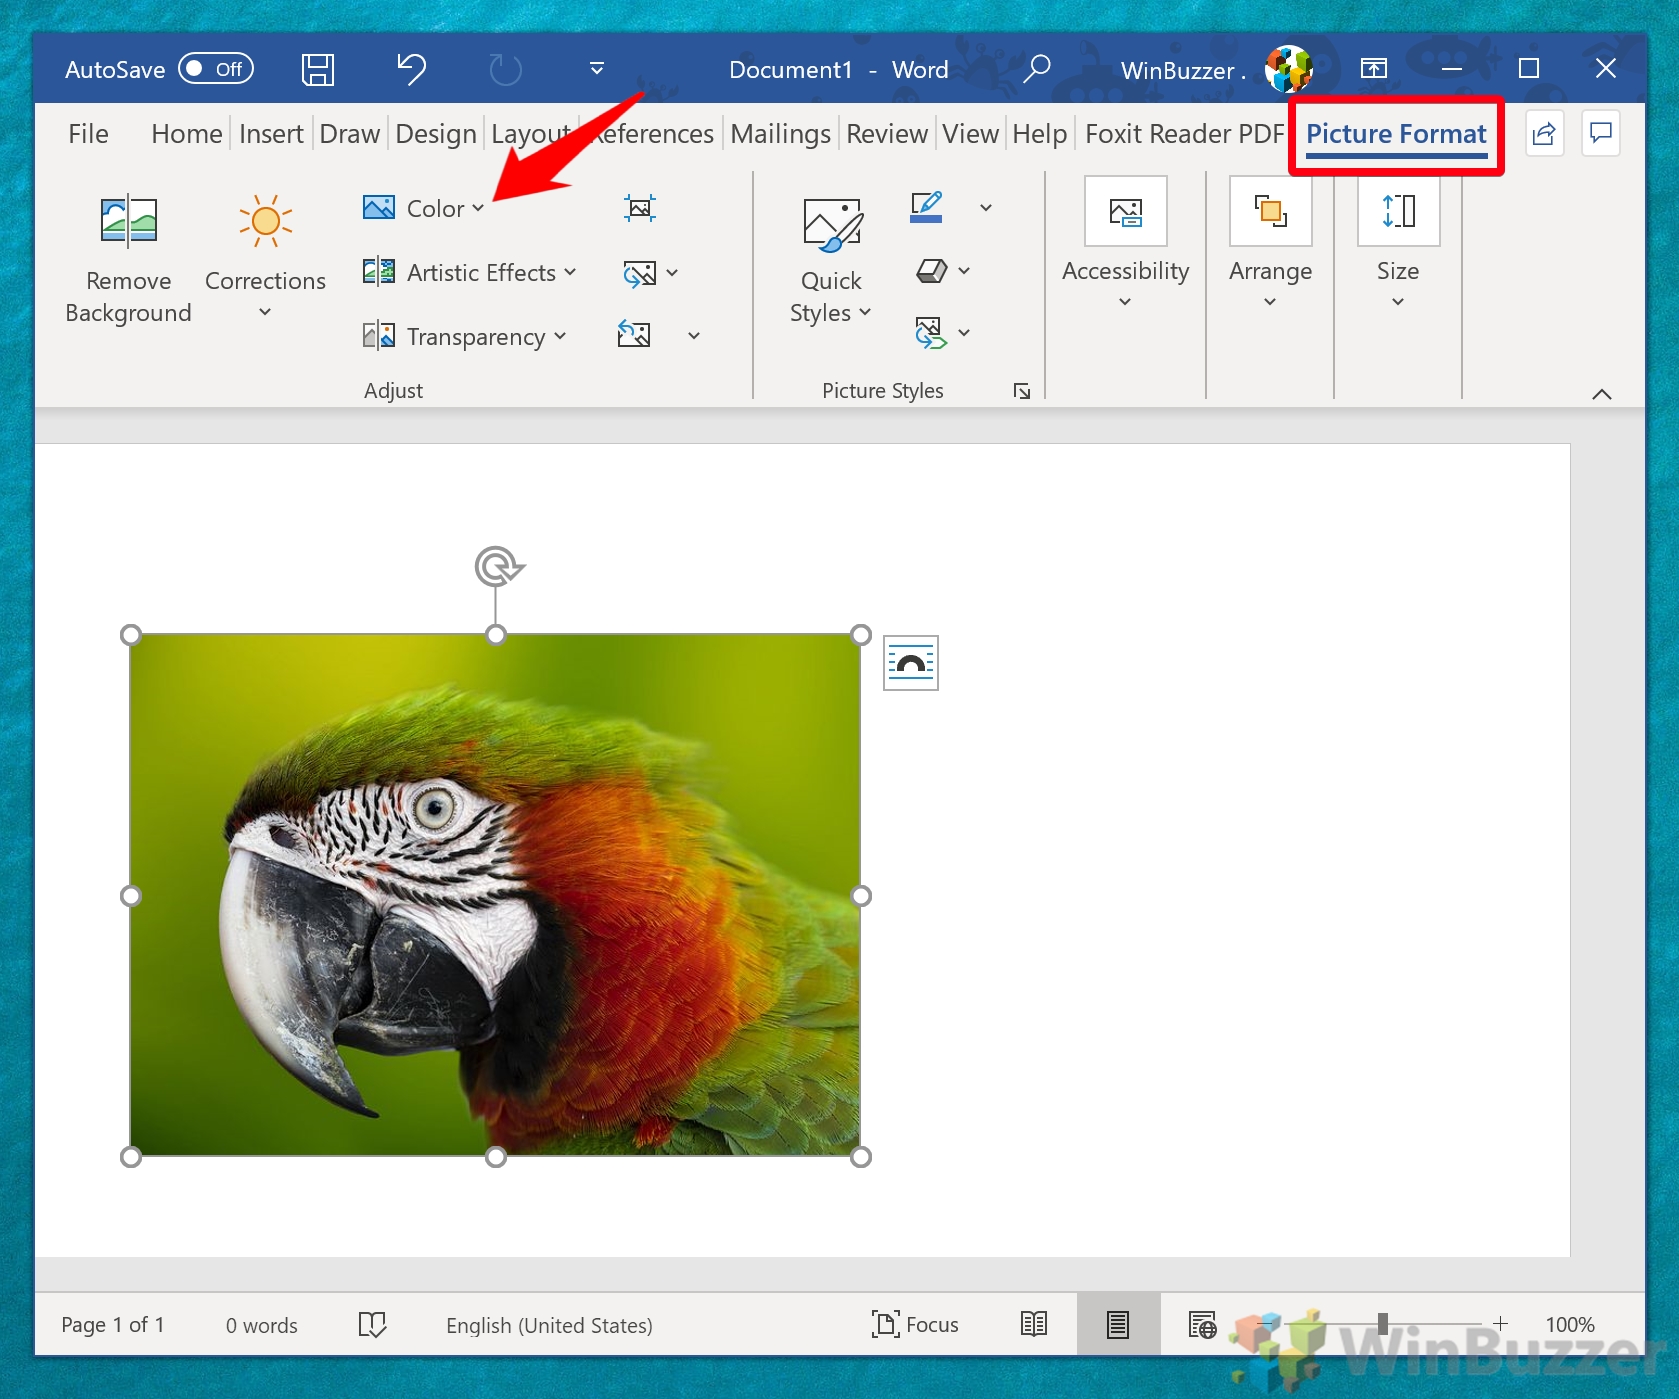
- Select Your Image
Click on the image to select it. This will make the “Picture Format” tab visible on the ribbon. Navigate to this tab and click on the “Color” option on the right side to prepare your image for conversion.
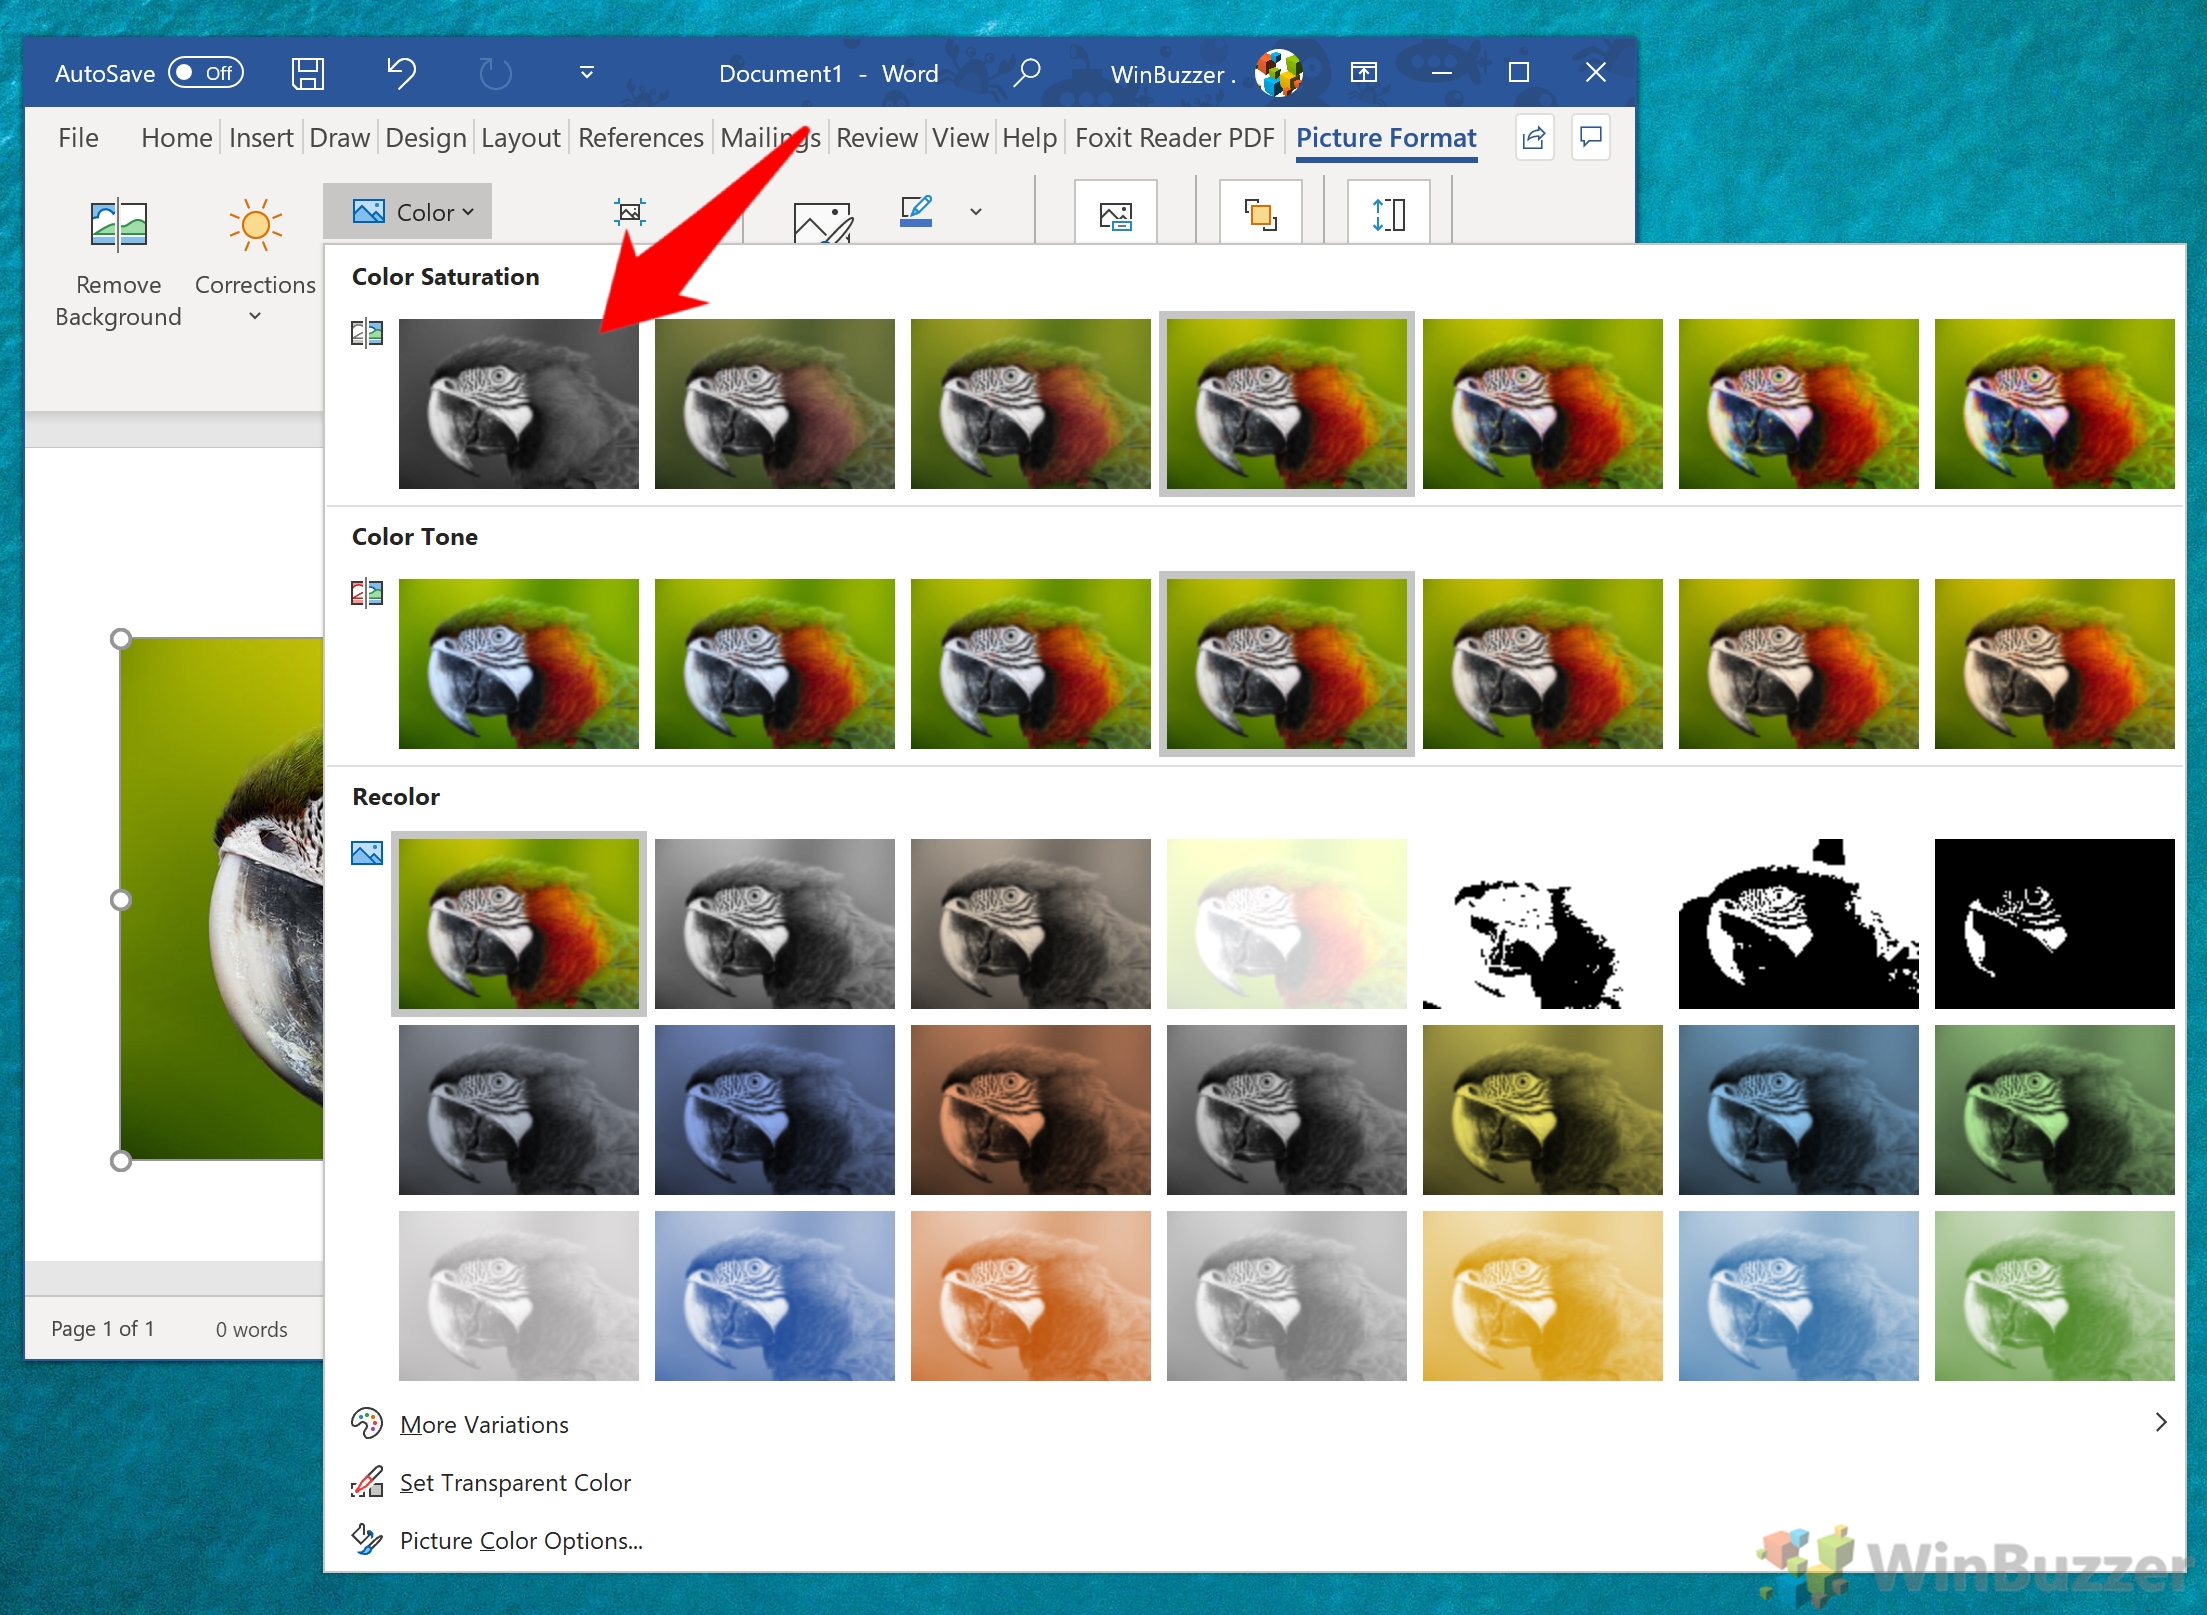
- Convert to Black and White
Within the “Picture Format” tab, find the “Color Saturation” section. Here, select the greyscale option on the far right or explore the “Recolor” options for different black and white styles.
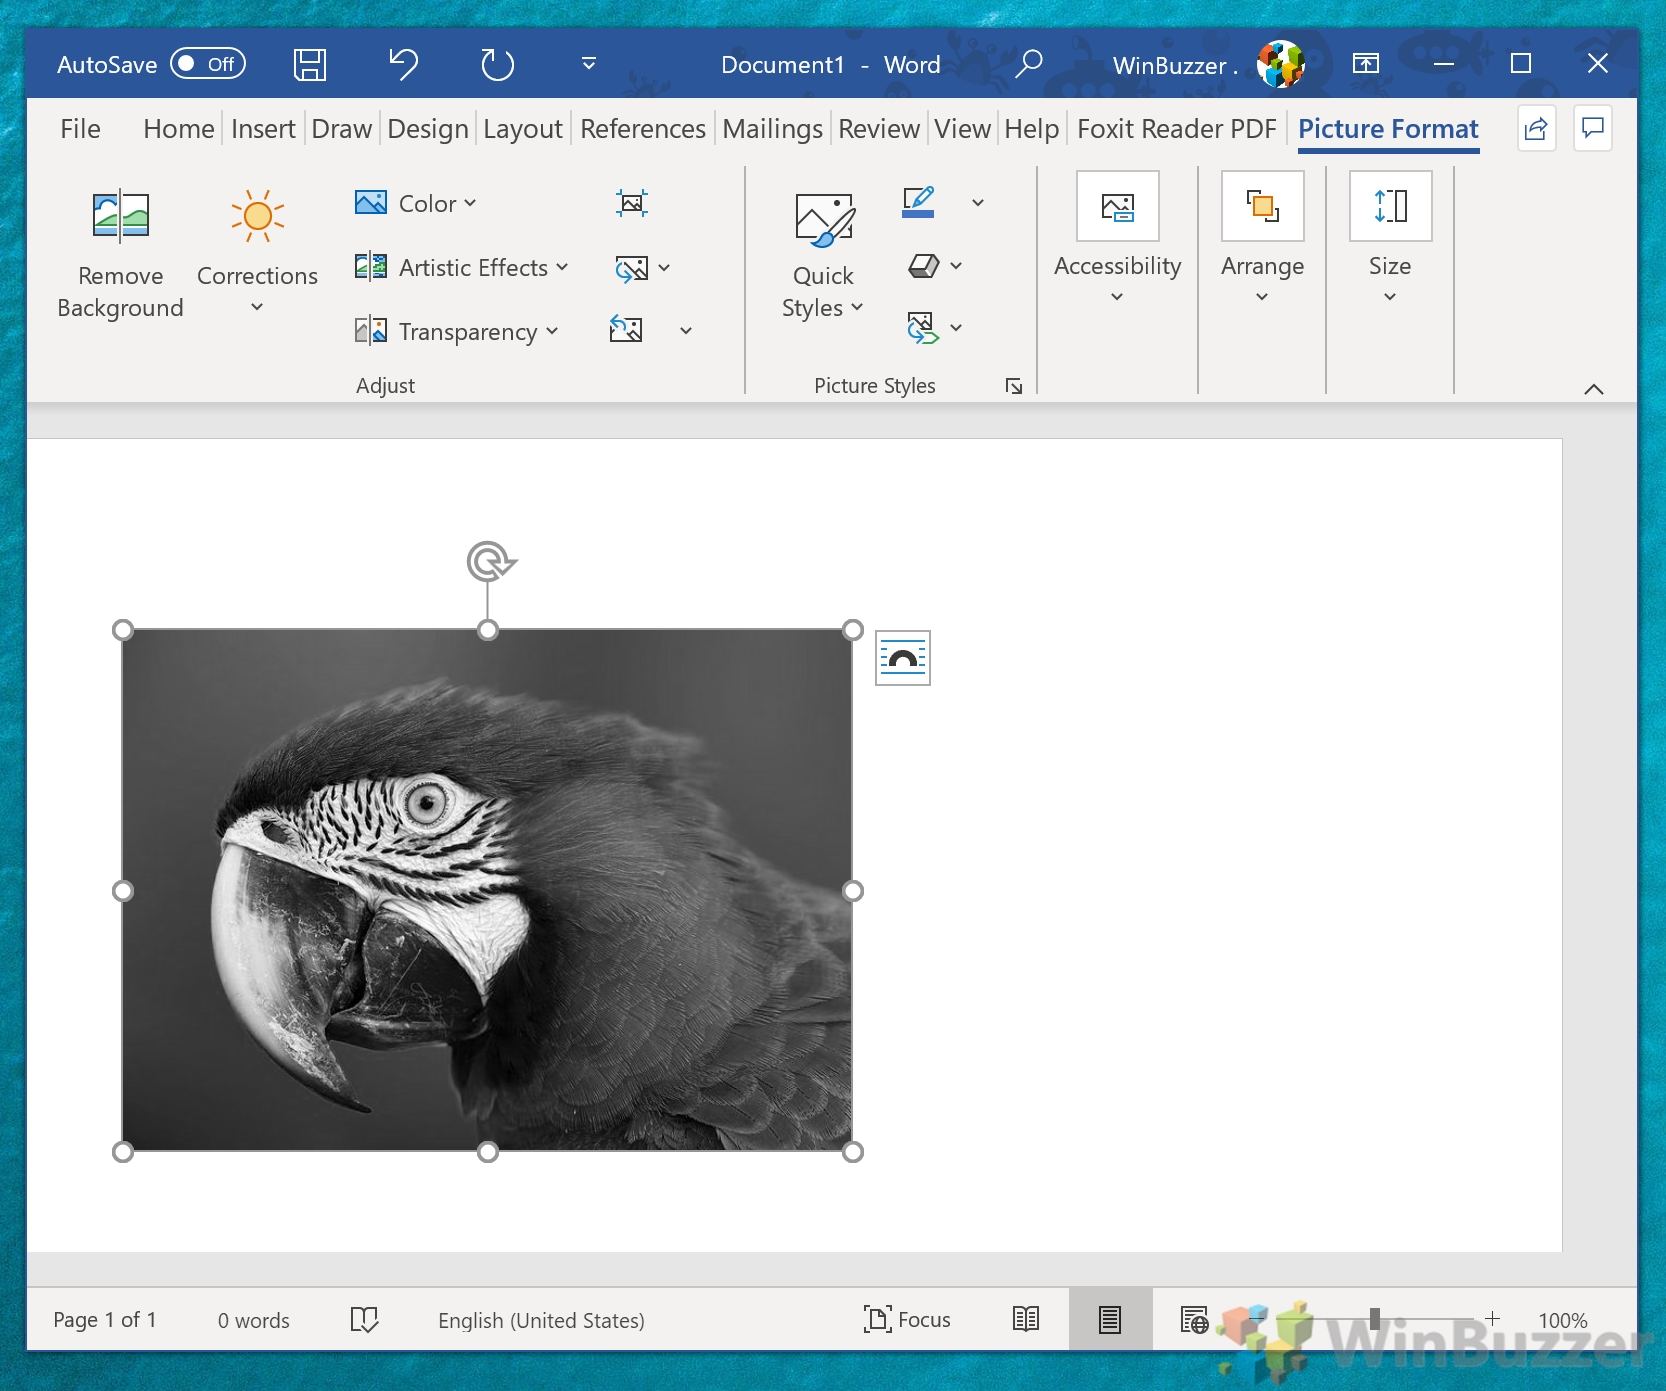
- Review Your Image
After applying the black and white filter, review the outcome in your Word document. If the conversion doesn’t meet your expectations, you can adjust the changes in the following steps.
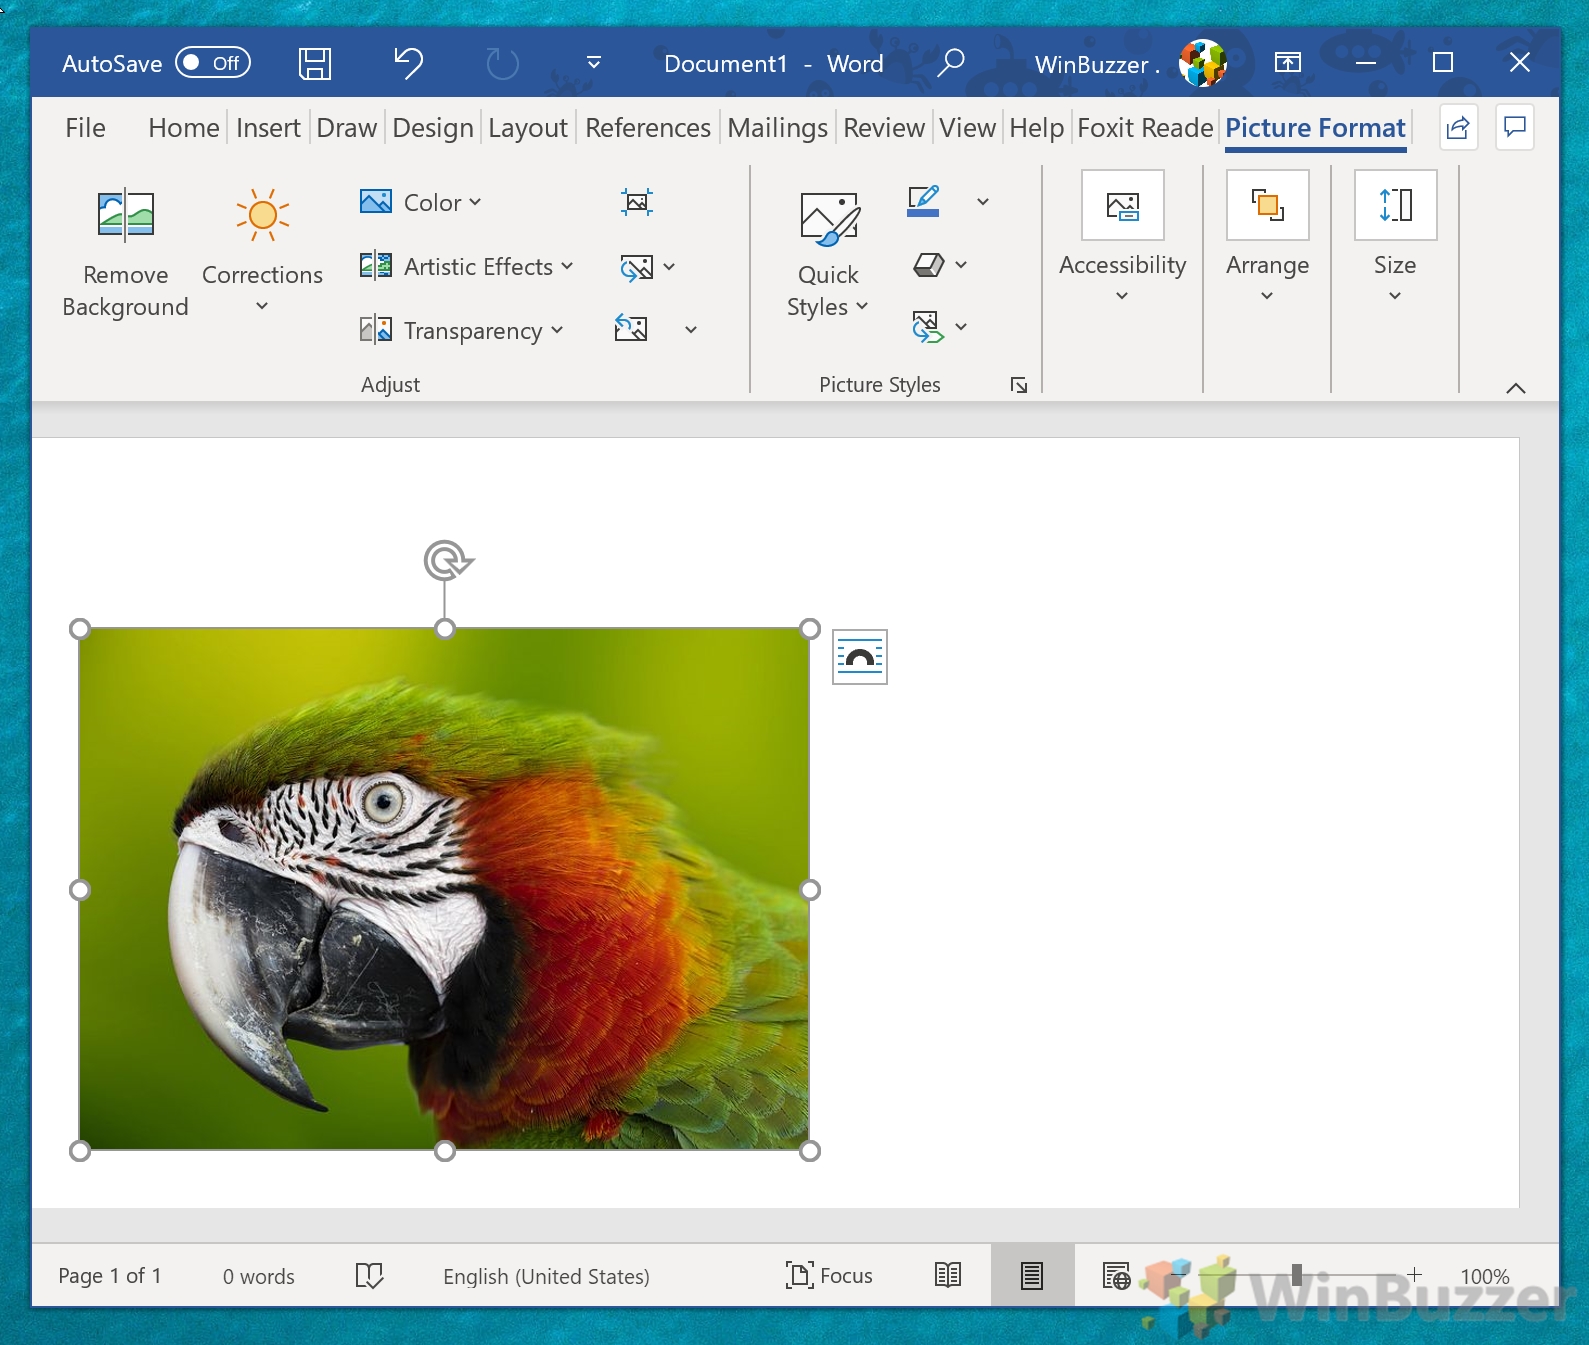
- Resetting the Image
If you’re dissatisfied with the black and white conversion, click on “Reset Picture” in the “Picture Format” tab to revert the image back to its original color state.

- Finalize Your Image
With the conversion complete, feel free to experiment with different options to find the look that best suits your document. Enhance your Word documents by mastering this simple yet effective technique.
FAQ – Frequently Asked Questions About Images in Word
How do I insert an image into my Word document?
To insert an image into a Word document, open the document and navigate to the “Insert” tab located on the ribbon at the top of the program interface. Once there, click on “Pictures” and a dialog box will appear, prompting you to choose an image from your computer. After selecting the desired image file (acceptable formats include JPG, PNG, and GIF), click insert to add the image to your document. You can then move and resize the image as needed by dragging its corners or edges.
Can I convert multiple images to black and white at once in Word?
Unfortunately, Microsoft Word does not offer a built-in feature for converting multiple images to black and white simultaneously. Each image needs to be selected and converted individually following the steps provided in the tutorial. If you are dealing with a large number of images, using a dedicated photo editing software that supports batch processing might be more efficient.
Can I apply a sepia tone instead of black and white?
Yes, applying a sepia tone to an image in Word is possible and can be done for aesthetic purposes or to give your document an antique look. After selecting your image, proceed to the “Picture Format” tab, then choose the “Recolor” option. Within the “Recolor” dropdown menu, you will find various color effects, including sepia. Selecting sepia will immediately apply the tone to your image.
Are these black and white conversion steps applicable to all versions of Word?
The provided steps for converting images to black and white are tailored for newer versions of Microsoft Word (2013 and later). While the overall process remains similar across different versions, the user interface and exact locations of options might vary slightly. Users of older versions may need to explore the “Format” or “Picture Tools” tabs to find color adjustment options.
Does converting an image to black and white reduce its file size?
Converting a color image to black and white in Microsoft Word doesn’t significantly reduce the file size. This is because Word maintains the original image’s resolution and details to ensure quality. For noticeable reduction in file size, consider using photo editing software to change the image to black and white and then compress the file before inserting it into Word.
Can I perform detailed image editing in Word apart from color adjustments?
Microsoft Word offers a range of basic image editing tools including cropping, resizing, rotating, and applying a variety of artistic effects. However, for more detailed edits such as adjusting brightness, contrast, or removing specific elements from an image, you’ll need to use specialized photo editing software. After making these detailed edits, you can then insert the edited image into your Word document.
How do I ensure the best quality for my black and white images in Word?
To ensure the best quality for black and white images in Word, start with a high-resolution color image. Higher resolution images offer more detail, making the conversion to black and white more striking. After converting the image to black and white using the tutorial steps, review the outcome and adjust the brightness or contrast if necessary using the “Picture Format” tab. This lets you fine-tune the image to achieve the desired visual impact.
Can I save the black and white image as a separate file from Word?
Direct saving of images from Word documents as separate files isn’t a straightforward process within Word itself. However, you can right-click the converted black and white image in your document, select “Copy”, and then paste it into a photo editing or paint program. Once pasted, you can save the image in your preferred format (such as JPG or PNG) to your computer.
Is it possible to undo the black and white conversion without using the ‘Reset Picture’ option?
The “Undo” feature in Word (shortcut Ctrl + Z) allows you to revert changes, including the black and white conversion, step-by-step, back to the original state of the image. Keep in mind that the “Undo” feature has a limit on the number of actions it can reverse, so it’s best used immediately after making changes you wish to revert. If significant changes have been made since the conversion, using the “Reset Picture” option may be more effective.
Can I add text over a black and white image in Word?
Yes, adding text over an image in Word is done by inserting a “Text Box“. Navigate to the “Insert” tab and click on “Text Box.” You can then draw the text box over your image and type your desired text. The text box is fully customizable, allowing you to adjust the font, size, color, and transparency, enabling the underlying image to be seen through the text if desired.
Are there any limitations to the types of images I can convert to black and white in Word?
Microsoft Word can convert most common image formats, such as JPG, PNG, and GIF, to black and white without any significant limitations. However, the complexity and outcome of the conversion might vary based on the original image’s quality and content. Images with higher contrast and resolution typically translate better into black and white.
How can I enhance the contrast of a black and white image in Word?
Enhancing the contrast of a black and white image in Word is limited to basic adjustments using the “Picture Format” tab, where you can adjust brightness and contrast sliders. For more advanced contrast enhancements, it’s recommended to use dedicated photo editing software before inserting the image into your Word document. This approach gives you greater control over the image’s appearance.
Will converting a color image to black and white in Word affect its print quality?
The print quality of an image converted to black and white in Word primarily depends on the original image’s resolution. Converting to black and white doesn’t inherently affect the resolution, so as long as the original image is high-quality, the black and white version should maintain its clarity and sharpness when printed.
How can I use black and white images to improve my document’s aesthetics?
Black and white images can significantly enhance a document’s aesthetic by providing a classic, timeless look. They can also help to focus attention on specific content, reduce distractions from varying colors, and create a cohesive look throughout a document. Consider the overall theme of your document and use black and white images to complement textual content and other design elements.
Can black and white images in Word documents be exported for use in other programs?
While Microsoft Word does not offer a direct feature for exporting images, you can use a workaround by right-clicking the image, selecting “Copy,” and then pasting it into an image editing program. From there, you can save the image in your desired format. Additionally, taking a screenshot of the image in your Word document and editing it in an image editor is another method to export images for use in other programs.
Related: How to Change Background Color or Insert a Background Image in Word
The default white background color for Microsoft Word documents provides the best level of contrast for most people. Unfortunately, it also has the tendency to blind you if you’re doing some late-night text editing. If you work in marketing or are creating a brochure, a Word background image can do a lot of the heavy lifting visually. Though they can risk looking tacky, a well thought out, subtle background image texture can bring a document to the next level. In our other guide, we show you how to change background color in Word, set a Word background image, or apply a background image texture.

Related: How to Bulk Resize Images with PowerToys
If you have a dozen, or even hundreds of images to resize, using any of them is going to take a very long time. In our other guide, we show you how to resize photos in Windows using the PowerToys Image Resizer, which lets you bulk resize images in two clicks.

Related: How to Resize an Image (Online or Offline)
Managing image sizes is crucial for both storage efficiency and ensuring your photos look their best on any platform. Whether you’re working with high-resolution images from a DSLR or snapshots from your smartphone, resizing images can help you optimize them for specific uses. In our other guide, we show you how to resize a photo using a variety of offline and online tools, such as Microsoft Photos, Paint.net, and online tools.

Related: How to Make Business Cards in Word (Template or from Scratch)
Creating your own business cards in Microsoft Word is a straightforward process that can save you time and money. Whether you’re using a template or starting from scratch, Word provides all the tools you need to design professional-looking business cards. In our other guide, we show you how to make your own business cards in Word by modifying a template or using Word’s in-built table and formatting tools to create them from scratch.


