

Microsoft Defender, previously known as “Windows Defender”, is a built-in utility on Windows 10 and Windows 11 that aims to protect your PCs from attacks and viruses. Because new malware or threats are developing on your PC, you must keep your Windows Defender antimalware Definition up to date to provide numerous effective antimalware to protect your PC on Windows 11.
How Microsoft Defender Definitions Updates Work
Microsoft regularly updates security intelligence in antimalware products to cover the most recent threats. It improves detection logic, improving the capacity of Microsoft Defender Antivirus and other Microsoft antimalware solutions to identify threats effectively. This security intelligence collaborates directly with cloud-based protection to give AI-enhanced, next-generation protection that is quick and powerful.
If you have Microsoft Defender switched on, it will update automatically most of the time. However, in rare situations, Microsoft Defender does not update itself for an extended time, leaving your machine vulnerable to unwanted attacks. With the requirement for many individuals to update Windows Defender, there are often two options: automatically and manually updating Microsoft Defender for Windows 10 and 11.
⚠️ Please note: The process described below is the same in Windows 11 as it is in Windows 10. However, bear in mind that we’ll be using screenshots from Windows 11, so your UI may look a little different. We’ll point out any changes you need to be aware of as they come up.
How To Update Microsoft Defender Via Windows Security
If you are used to making things flawless, select the option of automatically upgrading Microsoft Defender. As a result, Microsoft Defender Antimalware and antivirus may always acquire the most up-to-date definitions on Windows 11.
- Access Windows Security
Click on the “Windows” icon, type “Windows Security,” and select it from the results.

- Navigate to Updates
Select “Virus & threat protection” followed by “Protection Updates”.

- Initiate Update
Click on “Check for Updates” to refresh your Defender’s definitions.

How To Update Microsoft Defender Via Command Prompt
You can use the command prompt to update the Microsoft Defender in Windows 11. Follow along.
- Open Command Prompt
Click the “Windows” icon, type “Command Prompt,” and open it.

- Prepare for Update
Enter the following command in the command prompt"%ProgramFiles%Windows DefenderMpCmdRun.exe" -removedefinitions -dynamicsignatures
After running this command, you can see all the version definitions of the Windows Defender.

- Execute Update Command
To update, run the following command in the command prompt"%ProgramFiles%Windows DefenderMpCmdRun.exe" -SignatureUpdate

How To Update Microsoft Defender Automatically using Task Scheduler
- Open Task Scheduler
Click on the “Windows” icon, type “Task Scheduler,” and select it from the results.

- Create a New Folder
In the Task Scheduler, right-click on “Task Scheduler Library” and choose “New Folder” from the context menu.

- Name the folder “Antivirus” and click “OK”

- Create a New Task
Right-click on the “Antivirus” folder you just created and select “Create Task…” from the context menu.

- General Settings
In the “Create Task” dialog, under the “General” tab, select “Run whether user is logged on or not”.

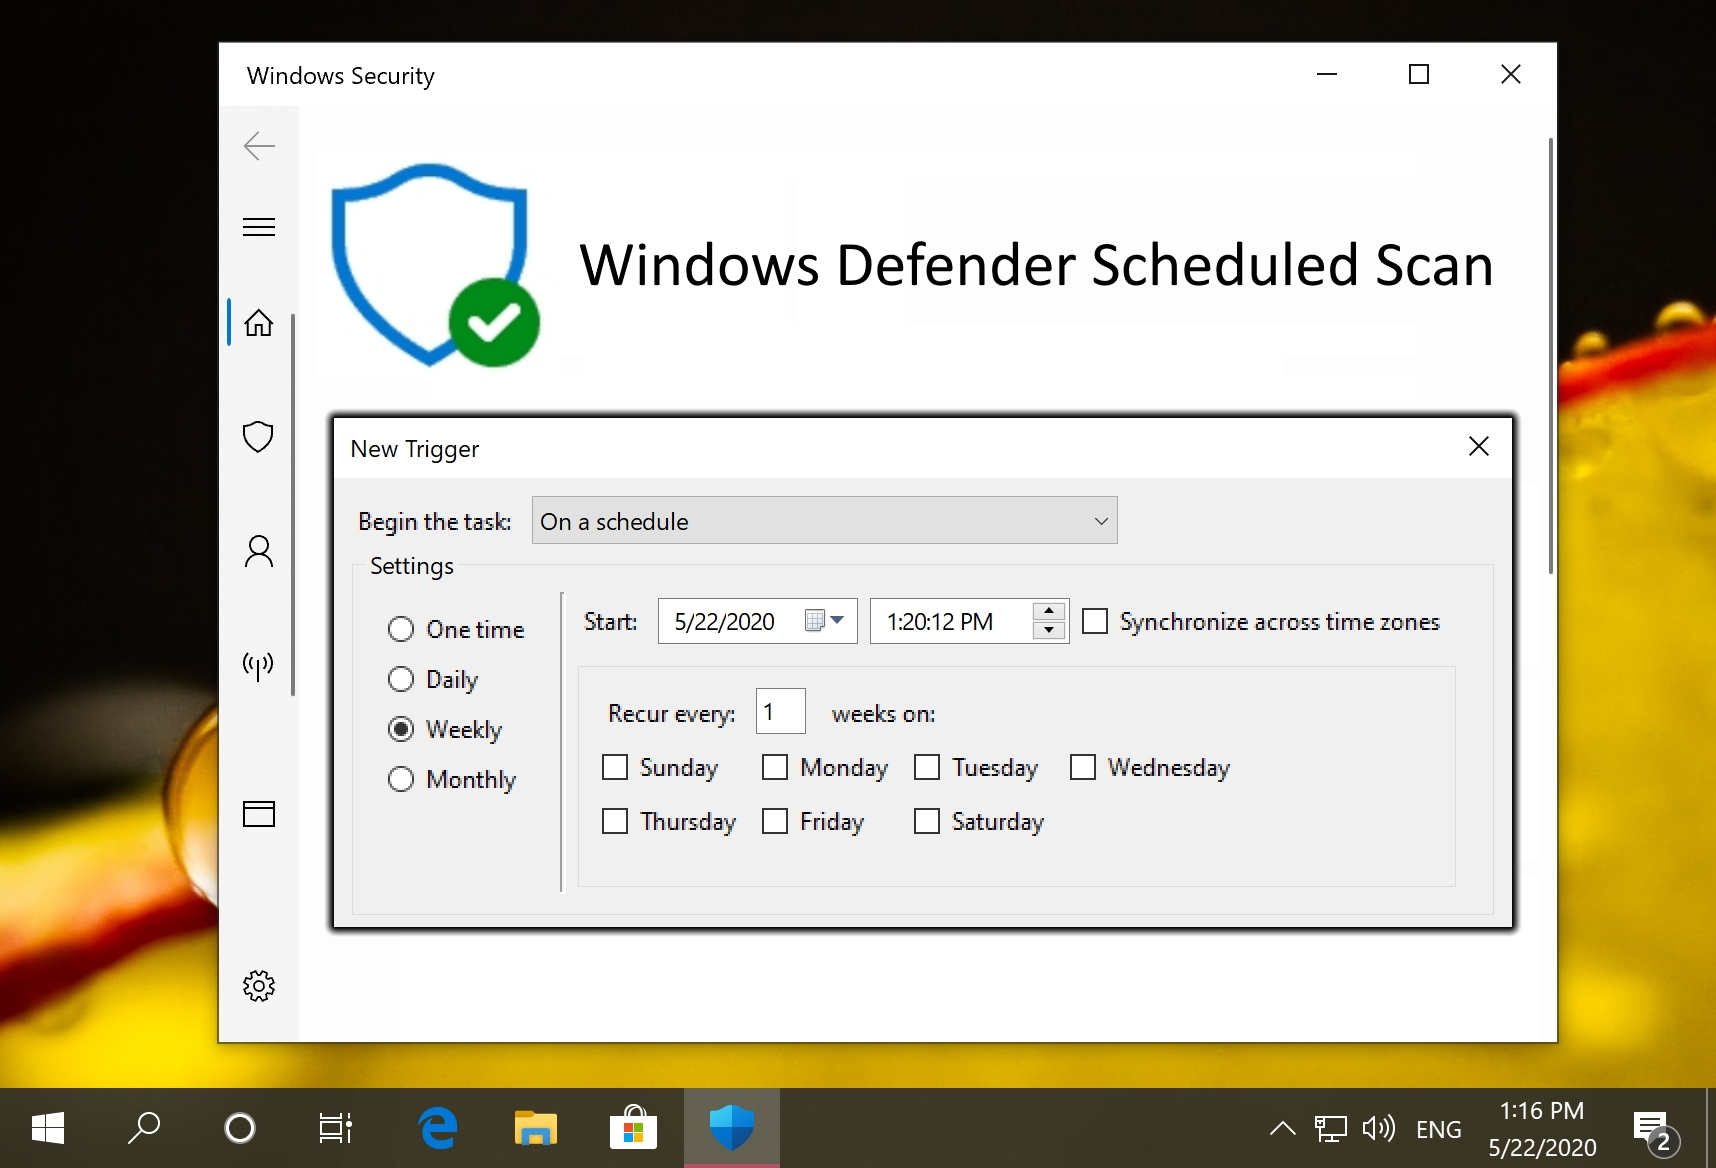
- Set a Trigger
Switch to the “Triggers” tab and click on “New…”.

- Set the task to start
Choose “On a schedule,” specify the start time, and select “Daily” for the frequency.

- Create the First Action
Move to the “Actions” tab and click “New…”.

- Define the First Action
In the “New Action” dialogue box, select “Start a program” from the action list, type in the following command in the “Program/script,” and then click “OK”"%ProgramFiles%Windows DefenderMpCmdRun.exe" -removedefinitions
Add the following argument as shown in the picture:
-dynamicsignatures

- Create the Update Action
Still under the “Actions” tab, click “New…” again to add another action.

- Define the Update Action
In the “New Action” dialogue box, select “Start a program” from the action list, type in the following command in the “Program/script,” and then click “OK”."%ProgramFiles%Windows DefenderMpCmdRun.exe"
Add the next argument as shown in the picture:
-SignatureUpdate

- Configure Conditions: (If applicable)
In the “Conditions” tab, adjust settings as necessary for your specific needs.
- Adjust Settings
In the “Settings” tab, ensure all options are configured according to your preferences. Typically, you’d want to make sure the task runs as scheduled and that it can run on demand.

- Finalize and Enter Credentials
Click “OK” to close the “Create Task” dialog. You may be prompted to enter your username and password to grant the task permission to run.

-
Review the Task
Ensure your new task appears in the “Antivirus” folder and double-check the settings if necessary. -
Test the Task
It’s a good idea to right-click your new task and select “Run” to ensure it works as expected. This will initiate the update process immediately. -
Monitor Scheduled Updates
Keep an eye on your scheduled task to ensure it runs as expected. You can check the “Last Run Time” and “Last Run Result” columns in the Task Scheduler for your task.
How to Run a Scheduled Scan with Microsoft Defender
Though Microsoft Defender tries to perform scans when it won’t have an impact on performance, it isn’t’ always successful. This has led to some turning it off entirely, which is naturally not recommended. However, you can use the task scheduler to run a scheduled Microsoft Defender scan at a time of your choosing.
How to Run Windows Defender from the Command Line (CMD)
Knowing how to run Windows Defender from the command line can be very useful. Perhaps you’ve been locked out of its UI due to malware, are trying to run a scan from recovery media, or are using a GUI-less Windows Server install. In any of these situations, knowing a scan command or two can save you a lot of trouble.

Windows Defender Application Guard: How to Turn It On or Off
Windows Defender Application Guard and its enforcer, Windows Defender Application Control, are tools to keep employees productive and prevent attacks. Under the system, administrators can prevent regular access to anything other than manually selected work-related sites. In our other tutorial we show you how to turn Windows Defender Application Guard on or off.

How to Turn on the Hidden Adware Blocker in Microsoft Defender
Windows is great at preventing trojans, ransomware, and other serious issues, but it can fail to stop adware and potentially unwanted programs in its default configuration. Thankfully, the Microsoft Defender has an adware blocker just for this, and it’s great at stopping unwanted changes to your system or annoying pop-ups.

FAQ – Frequently Asked Questions About Microsoft Defender Updates
Can I manually update Microsoft Defender if my PC is offline?
Yes, you can update Microsoft Defender on an offline PC by downloading the latest Security intelligence updates for Microsoft Defender Antivirus and other Microsoft antimalware from the Microsoft website on another device with internet access. Transfer the update file to the offline PC using a USB drive or another storage medium. Then, run the update file on the offline PC to manually update Microsoft Defender. Ensure you download the correct update file that matches your system architecture (32-bit or 64-bit).
How do I know if my Microsoft Defender is up-to-date?
To verify if Microsoft Defender is up-to-date, open the Windows Security app, navigate to “Virus & threat protection“, and look under “Virus & threat protection updates“. Here, you’ll find information about the last update, including the version number and the date it was applied. Microsoft Defender updates several times a day, so recent update timestamps indicate that it is current.
What should I do if Microsoft Defender is not activating or turning on?
If Microsoft Defender won’t activate or turn on, first ensure there’s no third-party antivirus software running, as this can disable Defender automatically. If no other antivirus is active, try restarting your PC. If the issue persists, open Windows Security, go to “Virus & threat protection“, and try to activate Defender from there. If you still face issues, use the Windows Troubleshooter for Windows Security or consider resetting the Windows Security app through Windows Settings under “Apps & Features.”
Is it safe to use Microsoft Defender as my only antivirus protection?
Microsoft Defender offers comprehensive protection against various types of malware, including viruses, spyware, and ransomware. It integrates real-time protection, a firewall, and cloud-based services, making it a robust option for most users. While it’s highly effective for general use, the adequacy of Defender as the sole antivirus solution can depend on your specific online habits, the sensitivity of your data, and your need for advanced security features.
How can I restore a file Microsoft Defender has quarantined?
To restore a quarantined file, open the Windows Security app, go to “Virus & threat protection“, and select “Protection history“. In this section, you’ll find a list of all actions taken by Defender, including quarantined items. Find the file you wish to restore, click on it, and select the option to restore the item. Be cautious when restoring files, as they were quarantined for being potentially harmful.
Does updating Microsoft Defender also update its software version?
Regular updates for Microsoft Defender primarily include the latest security intelligence definitions to protect against new threats. These are separate from software version updates, which enhance the program’s functionality and are typically delivered through Windows Update. To ensure you have the latest software version, keep your Windows operating system up to date.
Can I exclude specific files or folders from Microsoft Defender scans?
Yes, you can exclude specific files, folders, file types, or processes from Microsoft Defender scans to prevent false positives or for other reasons. To set exclusions, open Windows Security, go to “Virus & threat protection“, select “Manage settings” under “Virus & threat protection settings“, and scroll down to “Exclusions“. Here, you can add or remove exclusions. Use this feature cautiously, as excluded items will not be scanned for threats.
What’s the difference between quick scan and full scan in Microsoft Defender?
A quick scan in Microsoft Defender checks locations on your PC where threats are commonly found, such as system files and running programs, and usually completes within a short time. A full scan, on the other hand, thoroughly examines every file and running program on your PC, which provides a comprehensive check for threats but can take much longer to complete, especially on systems with large amounts of data.
How do I schedule a regular full scan with Microsoft Defender?
To schedule a regular full scan with Microsoft Defender, open the Windows Security app, go to “Virus & threat protection“, and select “Manage settings” under “Virus & threat protection settings“. Scroll down to “Scan options” and choose “Full scan“. Note that while you can initiate a full scan here, scheduling regular scans requires using the Task Scheduler as described above.
Will Microsoft Defender remove malware automatically, or do I need to take action?
Microsoft Defender is configured by default to take automatic action on detected threats, which usually involves quarantining suspicious files. After automatic actions are taken, you can review and manage these items in the “Protection history” section of the Windows Security app, where you can see details of the detected threats and take further actions, such as allowing a false positive or removing malware.
How does Microsoft Defender’s cloud-based protection enhance security?
Microsoft Defender’s cloud-based protection, also known as “Microsoft Advanced Protection Service,” enhances security by analyzing suspicious files and activities in real-time with the latest global threat intelligence from Microsoft’s cloud. This allows Defender to quickly identify and respond to new and emerging threats by comparing suspicious behavior against a vast database of known threats, improving its ability to detect and block threats more effectively.
Can I use Microsoft Defender for business or enterprise environments?
While Microsoft Defender provides solid protection for individual users and small businesses, larger enterprises may require more advanced features and management tools. For these environments, Microsoft offers Microsoft Defender for Endpoint, an enterprise-grade version of Defender that includes more comprehensive threat protection, attack surface reduction, post-breach detection, and automated investigation and response capabilities, along with management tools suited for larger organizations.
What is the impact of Microsoft Defender on system performance during scans?
Microsoft Defender is designed to minimize its impact on system performance, even during scans. However, full scans can be resource-intensive and may affect system performance, especially on older hardware or systems with limited resources. To mitigate this, schedule full scans during times the computer is less likely to be in use, such as overnight. Quick scans and real-time protection are optimized to run efficiently in the background without significantly impacting system performance.
How do I temporarily disable Microsoft Defender to install certain software?
To temporarily disable Microsoft Defender, open the Windows Security app, go to “Virus & threat protection“, and under “Virus & threat protection settings“, click on “Manage settings.” Here, you can toggle off “Real-time protection.” Remember, this will make your system temporarily vulnerable, so it’s crucial to re-enable real-time protection as soon as possible after installing your software. For software installations, it’s generally safer to use exclusions rather than disabling Defender entirely.
What happens to Microsoft Defender when I install a third-party antivirus?
When you install a third-party antivirus program, Microsoft Defender will automatically recognize it and disable its real-time protection features to prevent conflicts between the two programs. This ensures that your system remains protected without the potential issues that can arise from running multiple antivirus programs simultaneously. If you decide to remove the third-party antivirus later, Microsoft Defender will typically reactivate.


