

The instances where you’d want to draw in Word in a professional environment are slim, but that doesn’t mean you shouldn’t do it.
Drawings can add some extra flavor to your documents while remaining suitable for certain audiences. We’re going to show you how to draw on Word documents using two tools: the freehand tool and the shapes tool.
Drawings in Word
The Shapes tool lets you create illustrations using a variety of preset shapes or its line tool. It’s best suited for those using a keyboard and mouse, as it allows you to get passable drawings without having a steady hand.
Freehand drawing in Word is primarily designed for those with touchscreens or tablets. It forgoes shapes for a series of more traditional pens and markers. You can choose whichever of these suits you and follow along below:
How to Draw in Word with the Shapes Tool
Drawing with the shapes tool doesn’t produce the best results, but it’ll definitely do in a pinch. You can even use the freeform: scribble tool to draw any shape you want. Here’s how to use it:
- Open the “Insert” tab of your ribbon and click “Illustrations > Shapes > Freeform: scribble”
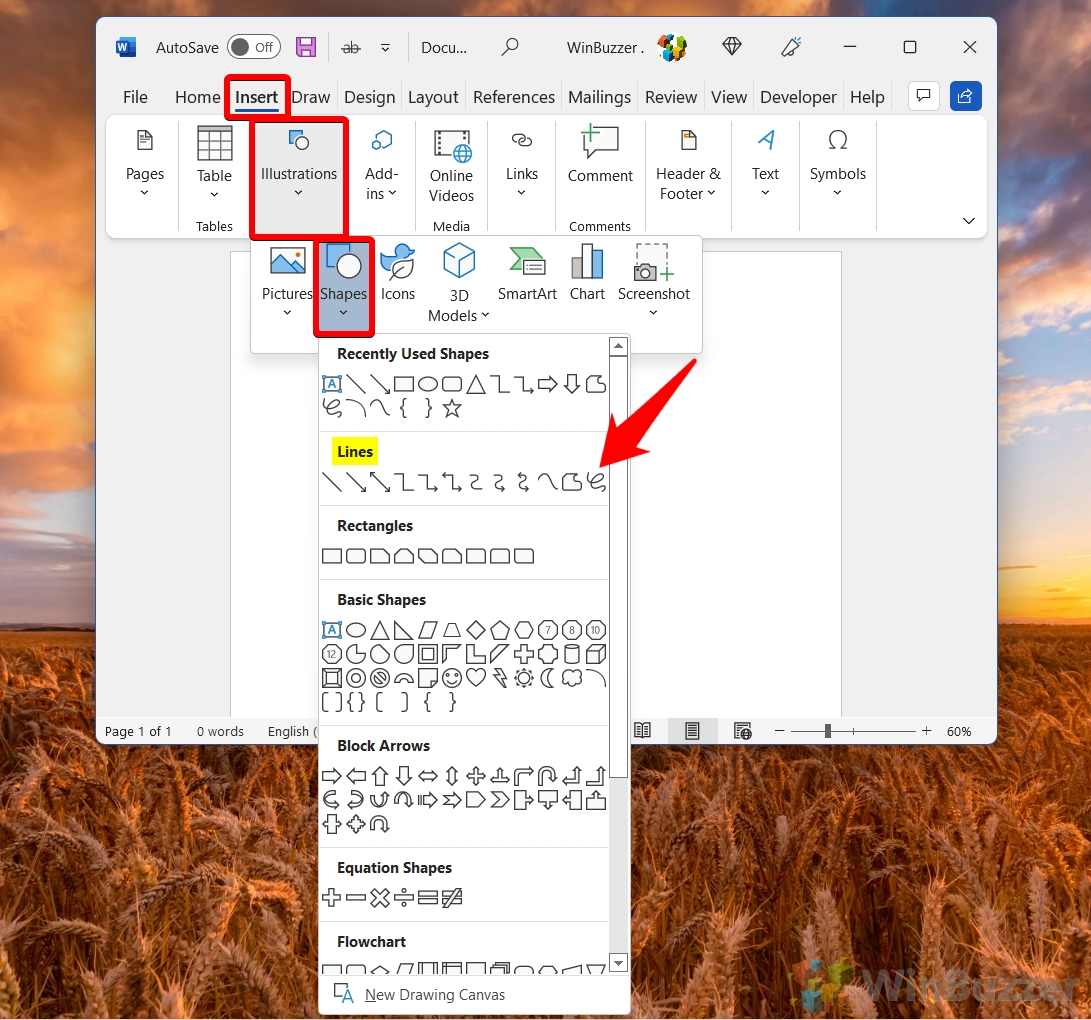
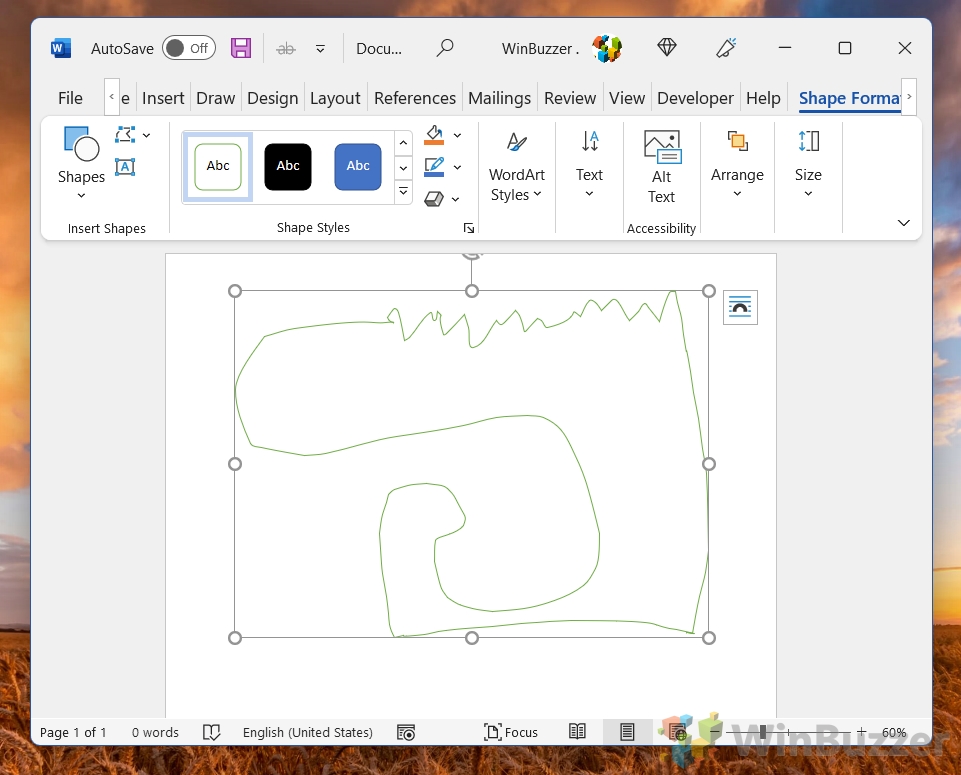
- Click and drag on your canvas to draw
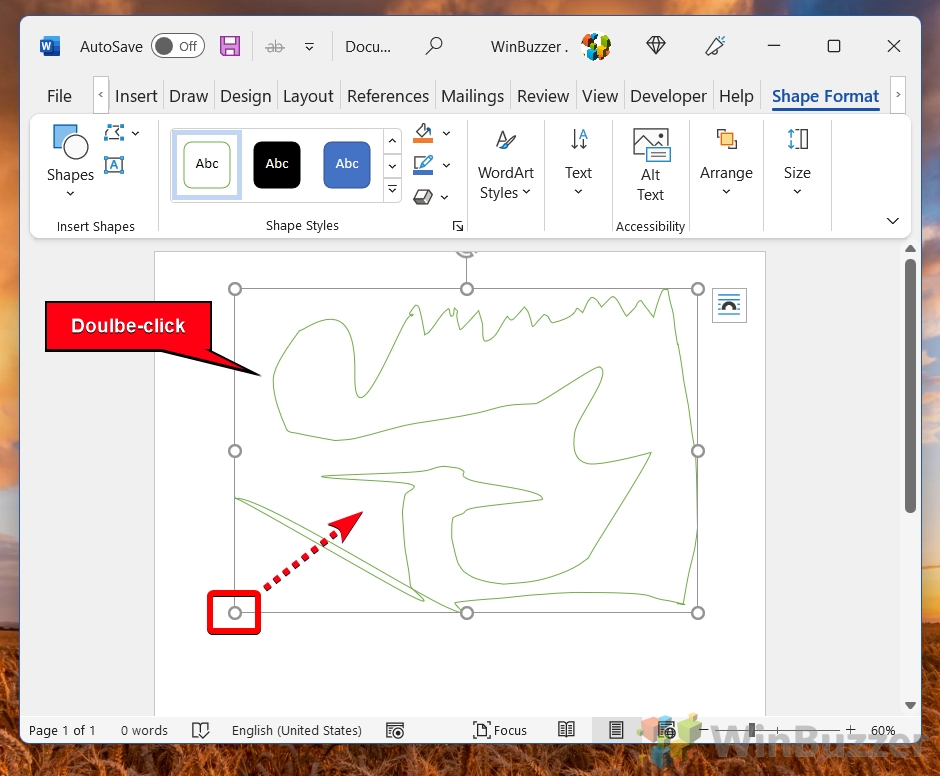
- Modify your drawing by double-clicking it and pressing “Edit points icon > Change shape”
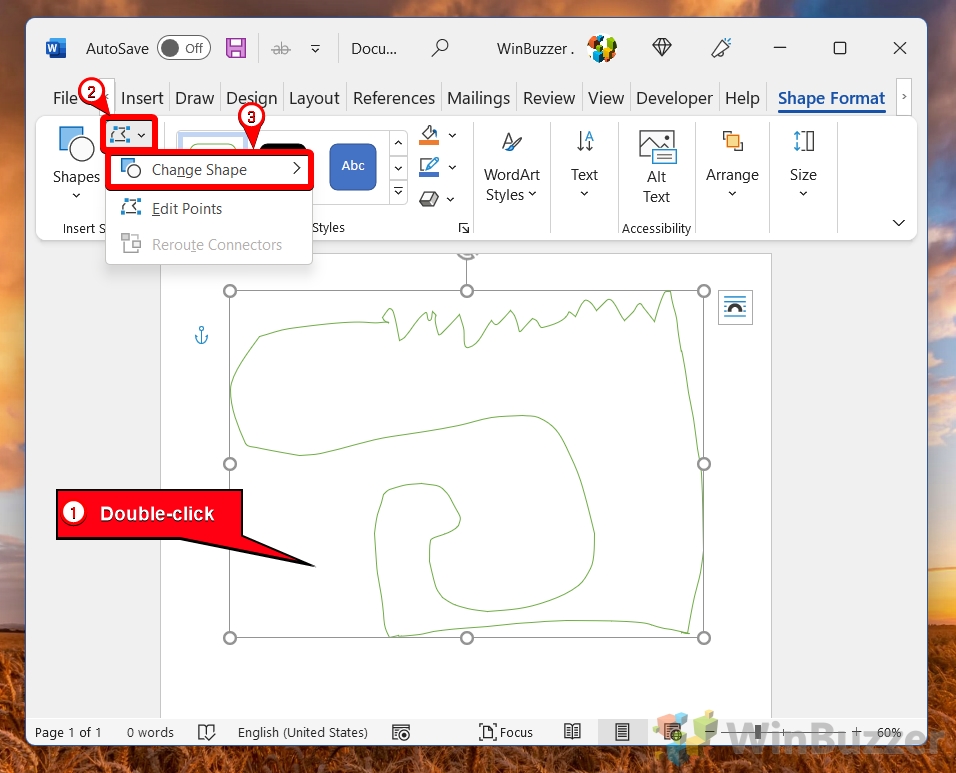
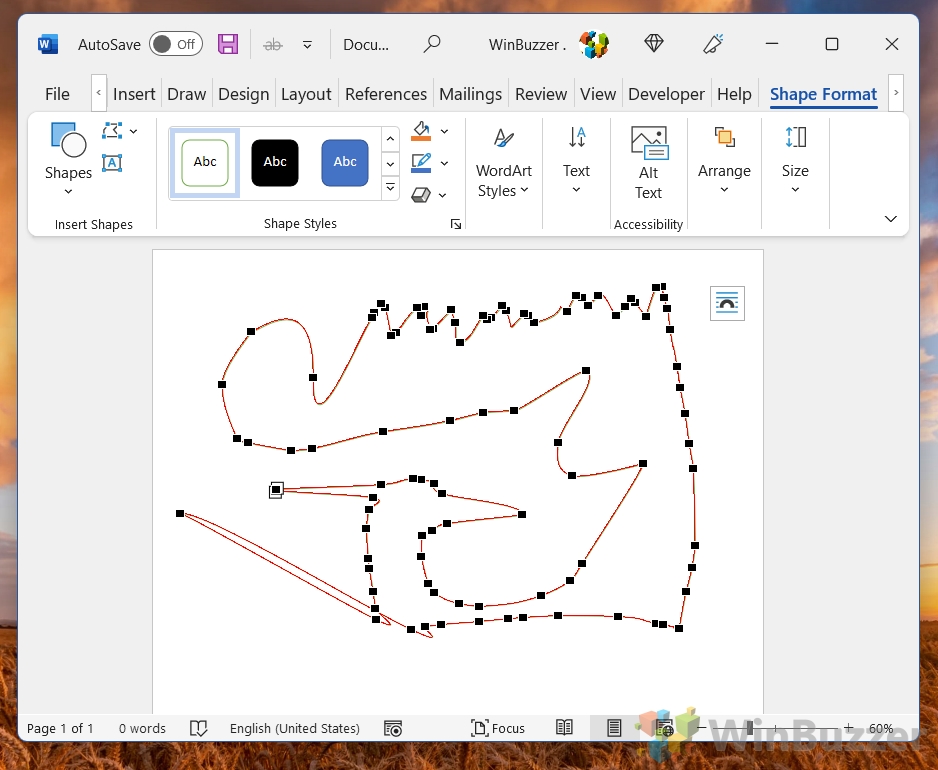
- Move the points around to edit your drawing
Click away when you’re done to apply the changes.
- Double-click the shape and drag a corner or other anchor point to resize it
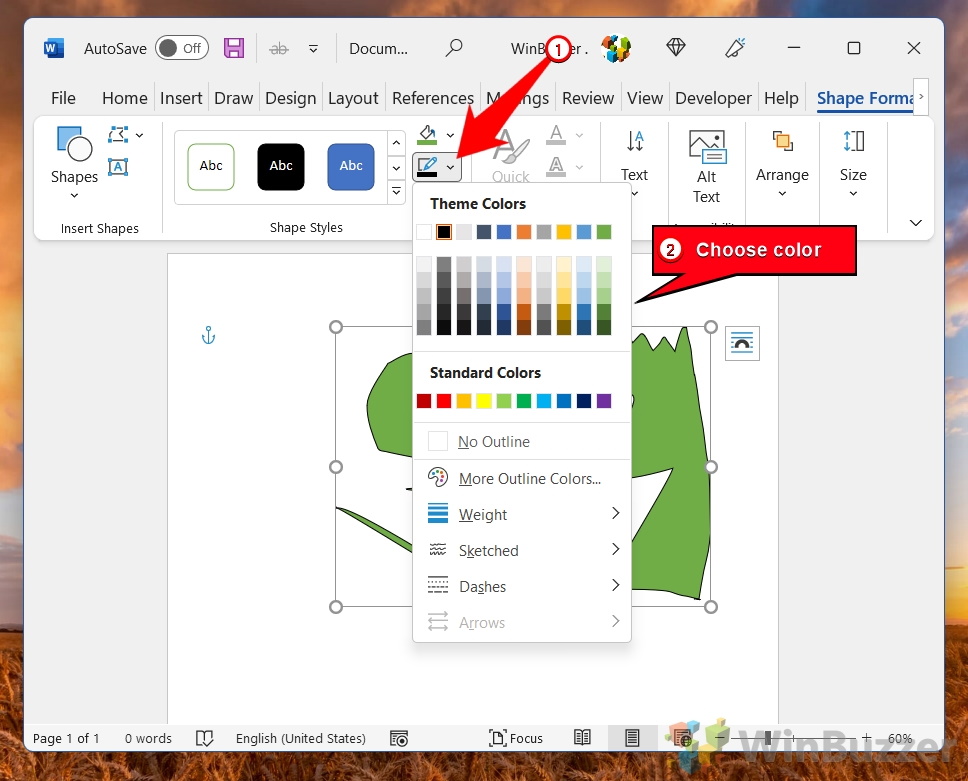
- With the shape selected, press the paint bucket and choose a color to fill it in

- Click the pencil icon to choose a stroke color
- Click the “A” in a box on the left to add text and use the pop-up menu to adjust its formatting
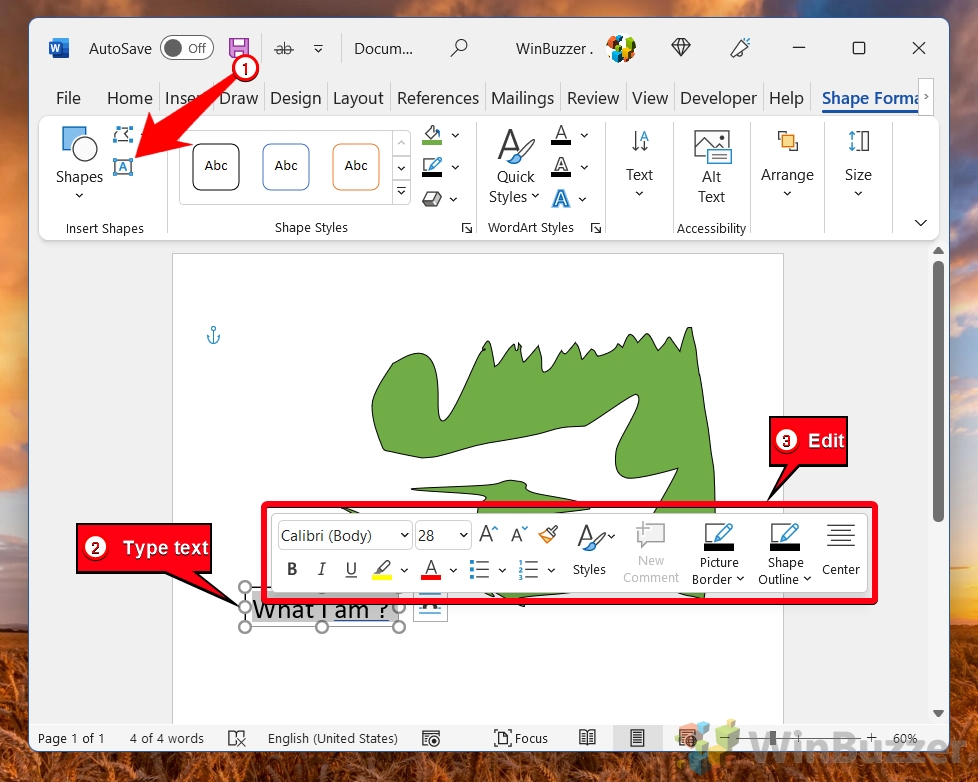
- Click the “WordArt Styles” link in the ribbon and add gradients, shadows, and textures
Once you’re done, you can right-click it and press “Save as Picture…” to save it as a shareable image file.

How to Draw on a Word Document with the Microsoft Word Drawing Tool
The Microsoft Word drawing tool uses the Microsoft Ink engine for a very competent drawing and annotation experience. It supports advanced features like pressure sensitivity and allows you to choose between a variety of pen/pencil textures for your brush. Here’s how you use it:
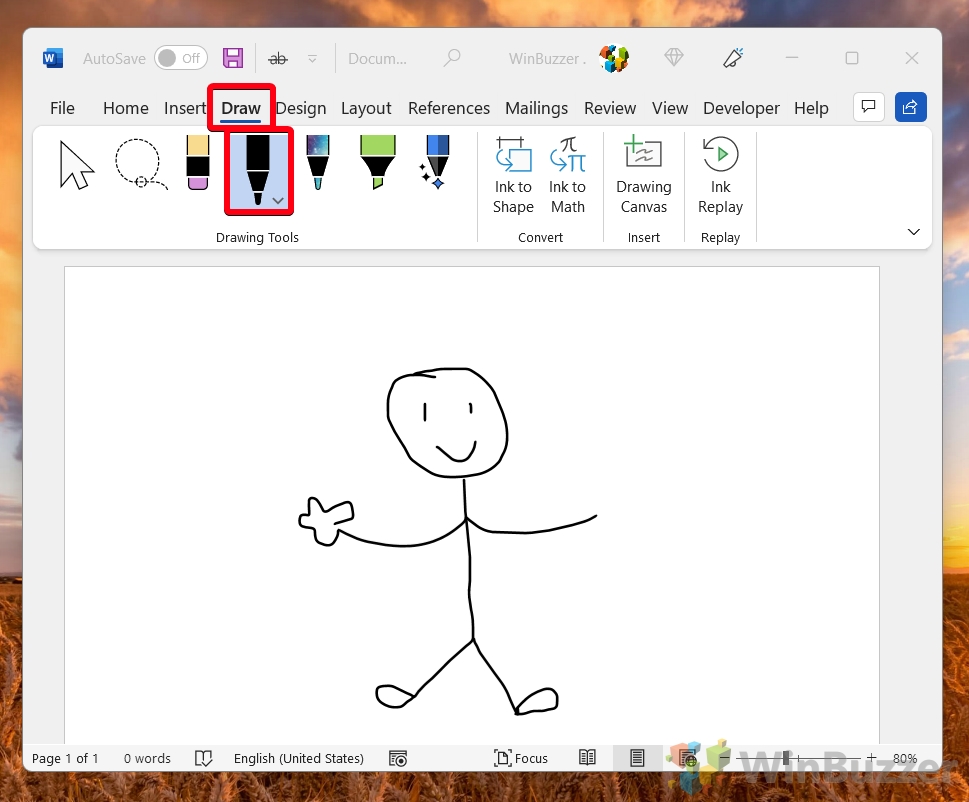
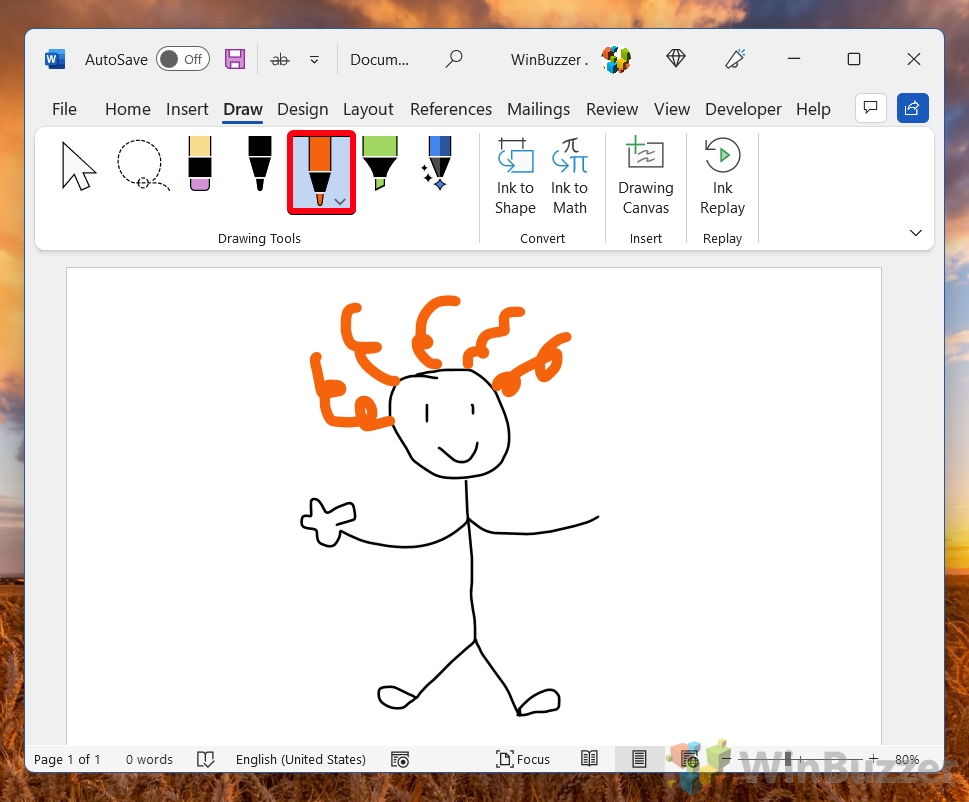
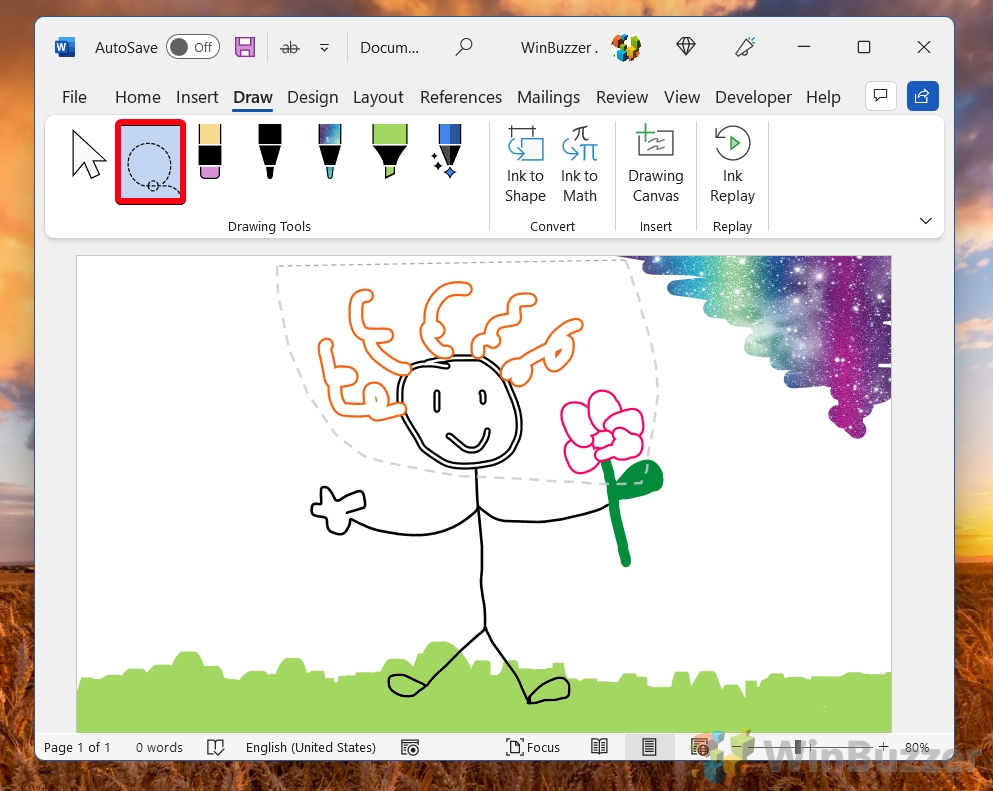
- Open the “Draw” tab of the ribbon and click on the pen tool
Click and drag with your cursor, finger, or tablet pen to draw.
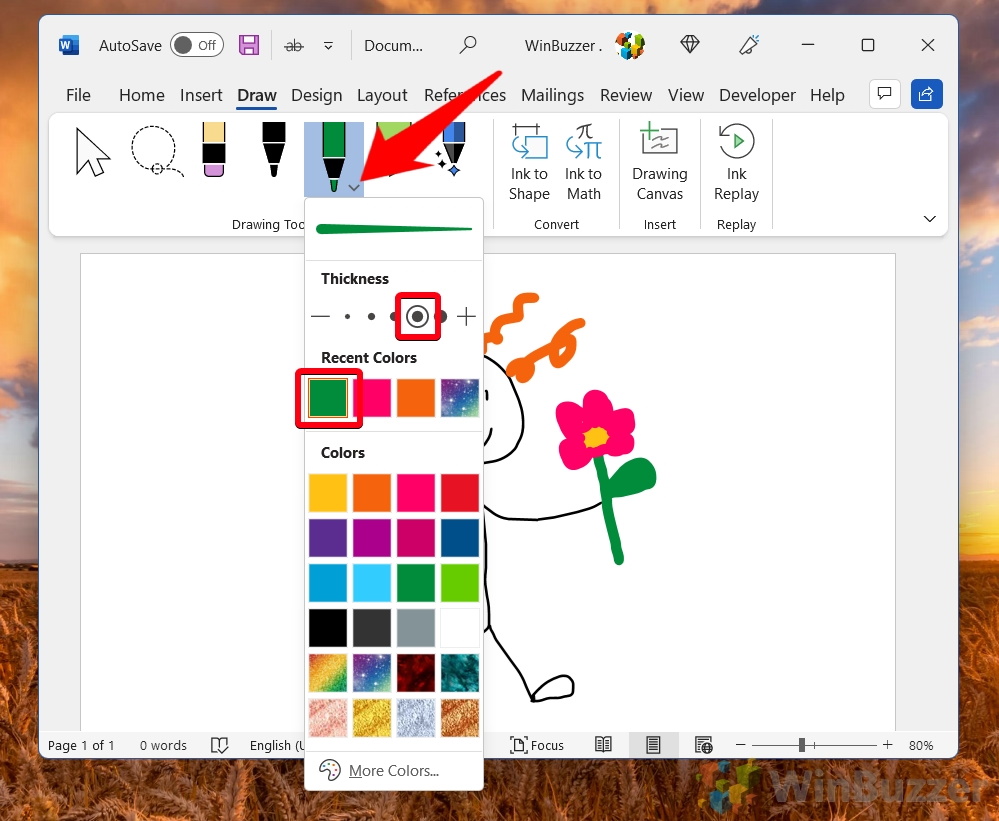
- Add some color via the colored pen icon
Technically, you can change the color of the regular pen, but having a separate tool helps you to quickly switch between different colors and thicknesses.
- Press the down arrow on the colored pen to modify color and thickness
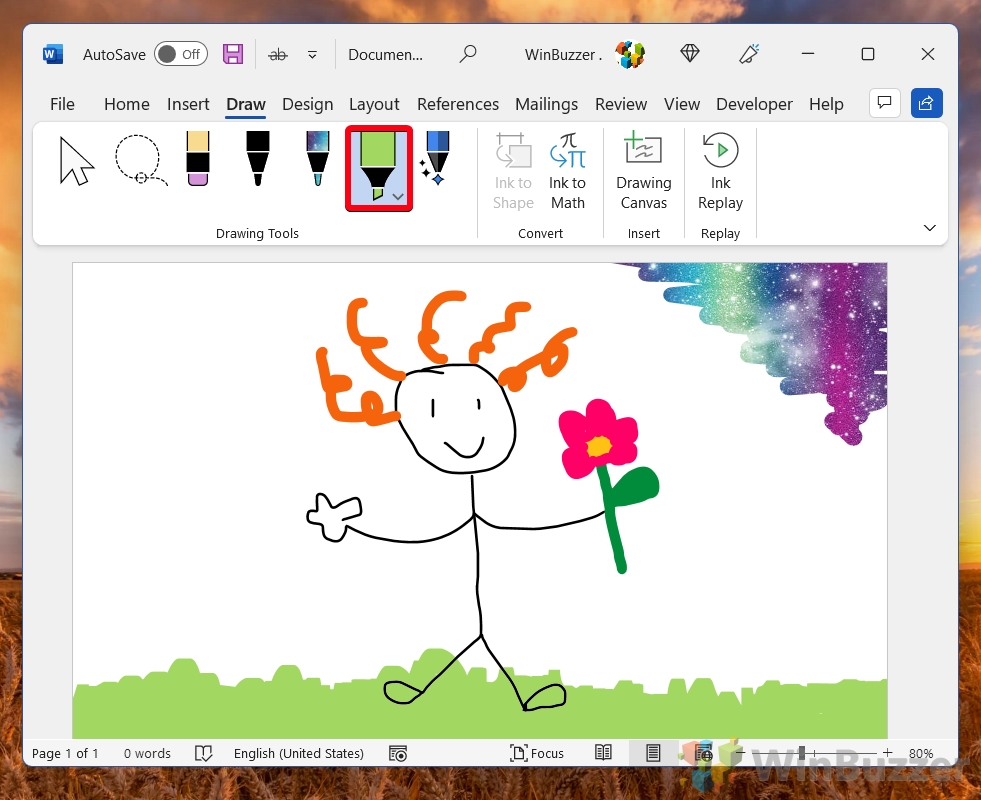
- Press one of the images to use it as a pen texture

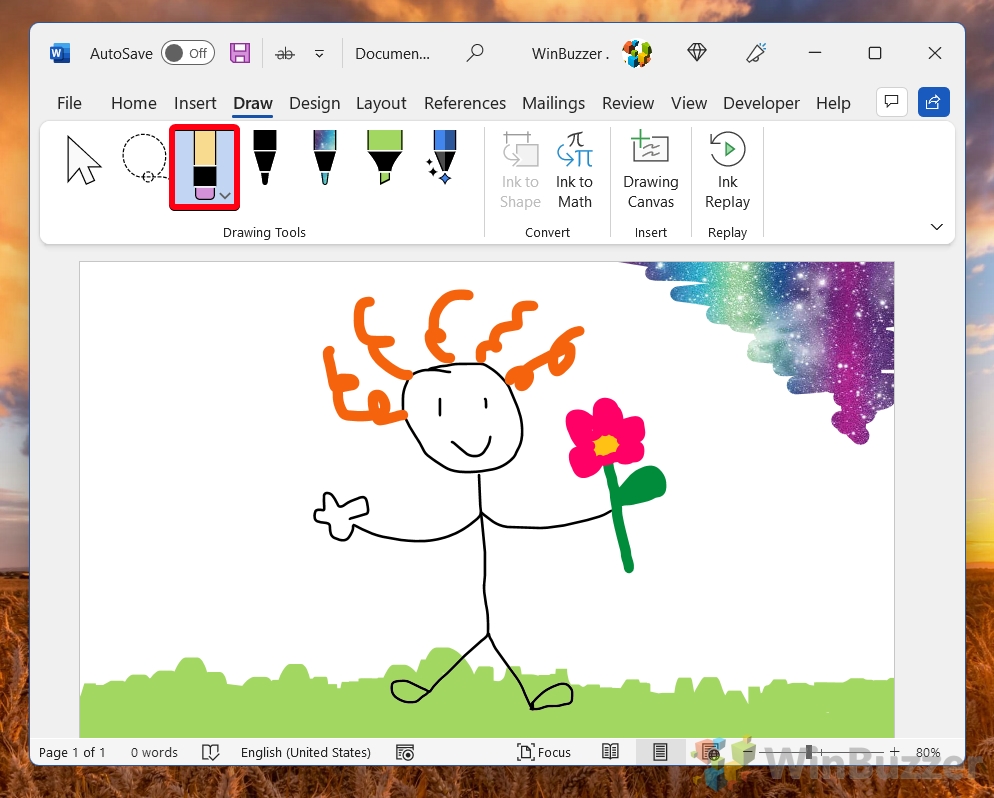
- Use the highlighter pen for a square brush
- Press the eraser icon and use it to clean up your image
You can just click and drag over lines with this tool to remove them.
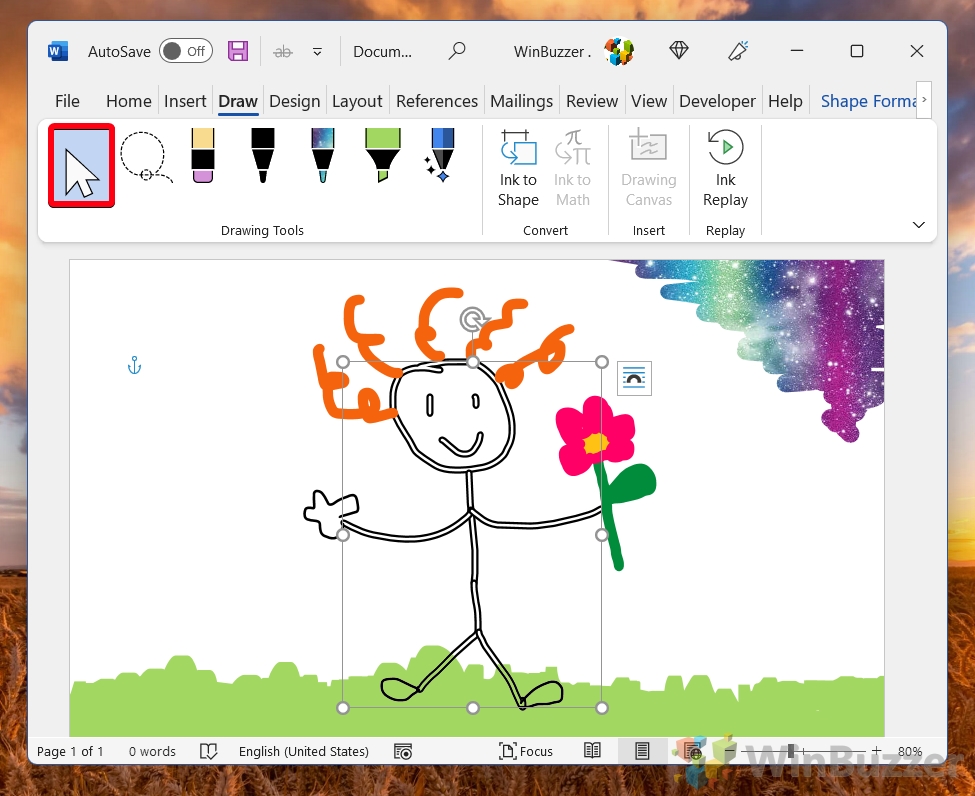
- Select shapes by clicking the lasso tool and dragging around them
- Click and drag with the cursor tool to move your lines
- Click on the action pen and choose “Track Changes”
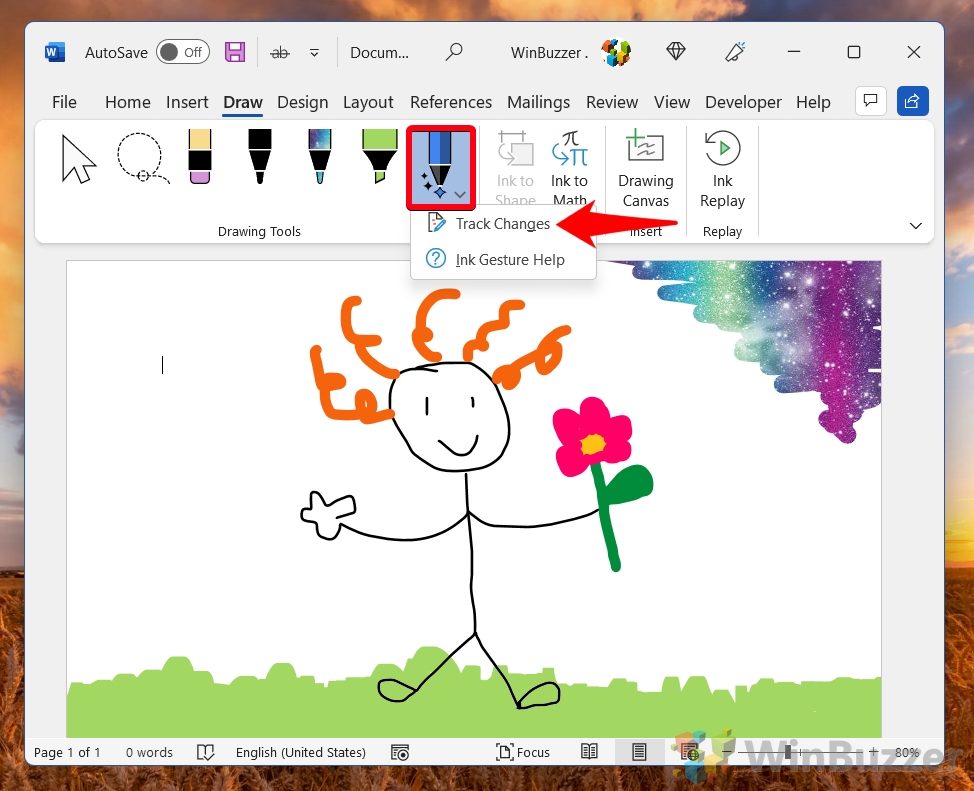
- Annotate on text with typical editing marks to modify it

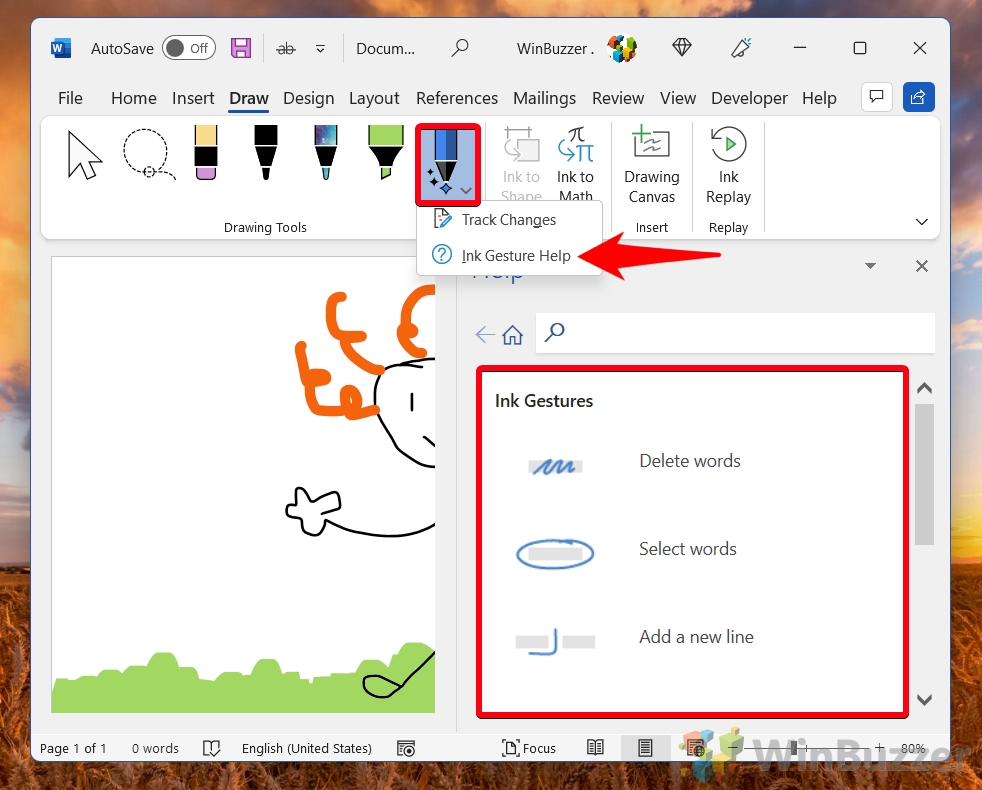
- For editing mark tips, click the action pen and press “Ink Gesture Help”
FAQ – Frequently Asked Questions About Drawing in Microsoft Word
How can I smooth out jagged lines in my freehand drawings in Word?
Word’s drawing tools are basic and might not offer advanced smoothing features found in specialized graphic design software. For smoother lines, try drawing with quick, confident strokes, and experiment with different pens and thicknesses in the “Draw” tab to find one that best mimics a smoother line. If precision is crucial, consider using a graphics tablet or creating your drawing in a dedicated graphics application that offers line smoothing, then importing the finished image into Word.
Can I import custom shapes into Word for my drawings?
While Word does not directly support importing custom shapes in a format like SVG or EPS, you can work around this by creating your shapes in a vector graphics editor, saving them as images (PNG, JPG), and then inserting these images into your Word document. This method maintains the visual quality of your shapes but they won’t be editable as Word shapes. For more intricate designs that need to be adjustable within Word, use the “Freeform: Scribble” tool to manually trace over your imported image, creating a customizable shape.
Is it possible to use layers for organizing multiple drawings and shapes in Word?
Word organizes objects based on their order of creation and layering commands (“Bring Forward“, “Send Backward“), rather than a dedicated layer panel like in graphic design software. To manage complex arrangements of drawings and shapes, strategically use these layering options and group related items together (select multiple objects and right-click to find the “Group” option). This approach helps in mimicking a layer-like organization, making it easier to edit and move objects in relation to one another.
How do I add a hyperlink to a drawing or shape in Word?
To add a hyperlink to any drawing or shape, right-click on the object and select “Hyperlink” from the context menu. In the dialogue box that appears, you can type or paste the URL you wish to link to, or explore options to link to a document, an email address, or a specific location within the document. This feature is particularly useful for creating interactive documents where visual elements act as navigation aids.
Can I use the drawing tools in Word for creating flowcharts or diagrams?
Yes, Word’s Shapes tool is quite suitable for creating basic flowcharts and diagrams. Start by inserting shapes that represent different elements of your flowchart (using the “Insert” tab, then “Shapes“). For connecting these elements, utilize lines or arrows, ensuring they are anchored to the shapes so that they move together. Word also offers formatting options to customize the appearance of your shapes and lines, allowing for a clear and professional-looking diagram.
How can I match the color of my drawing to another element in my document?
To precisely match the color of a drawing or shape to another element in your document, use the “Eyedropper” tool available in the color selection menus for both fill and outline colors. When you select the “Eyedropper” tool and hover over any part of your document, it will capture the exact color under the cursor. Click to apply this color to your selected drawing or shape. This tool is invaluable for maintaining a consistent color scheme throughout your document.
Is it possible to animate drawings in Word?
Word itself does not support animations within documents. If you’re looking to add dynamic elements to your drawings or shapes, consider using PowerPoint, which offers a wide range of animation options. You can create your animated element in PowerPoint, then embed the PowerPoint slide into your Word document as an object. Keep in mind that the animation will only play when the document is opened in PowerPoint or when the embedded object is activated.
Can I use touch gestures for drawing in Word on a touch-enabled device?
On touch-enabled devices, Word supports touch gestures for drawing, making it convenient to sketch or annotate directly on the screen with your finger or a stylus. Activate the “Draw” tab and select your preferred pen or marker to start drawing. For a more natural drawing experience, especially on devices like Microsoft Surface, you can use a stylus with pressure sensitivity, offering more control over line thickness and opacity based on how hard you press.
How do I convert my drawing to text or editable shapes in Word?
Word’s capabilities in converting freehand drawings to text or shapes are limited. For handwritten text conversion, you can use the “Ink to Text” feature available in the “Draw” tab on some versions of Word, but results may vary based on handwriting clarity. For more complex conversions, such as turning freehand drawings into editable vector shapes, consider using external OCR or vectorization software, then importing the results back into Word as text or images.
Can I collaborate with others on a drawing within a Word document?
Collaboration on Word documents, including those with drawings, is facilitated through Word’s integration with Office 365 and SharePoint. When a document is stored on OneDrive or SharePoint, multiple users can edit it simultaneously, including adding or modifying drawings. Real-time collaboration works best with straightforward edits and comments; complex graphical changes might require communication outside of Word to ensure clarity and intent among collaborators.
Is there a way to save my frequently used drawing tools for quick access?
While Word does not offer a custom toolbar specifically for drawing tools, you can customize the Quick Access Toolbar to include your most-used drawing commands. Right-click on any command in the Ribbon (including those under the “Draw” tab) and select “Add to Quick Access Toolbar“. This will keep your favorite drawing tools readily accessible at the top of the Word window, regardless of which tab you’re in.
How do I make my freehand drawing fit into a specific area of my document?
After creating a freehand drawing, you might need to adjust its size and position to fit a specific area. Select the drawing, and you’ll see sizing handles appear around it. Use these handles to resize the drawing proportionally (hold the “Shift” key while dragging a corner handle) or non-proportionally. To move the drawing, simply drag it to the desired location. For precise placement, consider using the alignment and position tools under the “Format” tab when the drawing is selected.
Can I create a watermark using the drawing tools in Word?
To create a custom watermark using drawing tools, first draw or insert your desired image and adjust its size. Then, right-click on the image, select “Format Picture“, and find the transparency slider under the “Fill” options to make the image more transparent. Position the transparent image where you want the watermark to appear. Note that this method places the watermark on a single page; for a document-wide watermark, use the “Watermark” feature under the “Design” tab and choose “Custom Watermark” to insert your image.
How can I ensure my drawings are print-ready in Word?
To ensure your drawings print correctly, first, check the print preview (File > Print) to see how your document, including drawings, will appear on paper. Ensure drawings are within the printable area margins and that their resolution is high enough to prevent pixelation when printed. Use the “Format” options to adjust the size, position, and quality of your drawings. Consider printing a test page to check the output before printing multiple copies.
Is it possible to link drawings in Word to Excel data for dynamic updates?
Direct dynamic linking between drawings in Word and Excel data isn’t supported. However, for a workaround, you can embed an Excel chart or table into your Word document, which retains a link to the source Excel file. Any updates to the Excel file can reflect in the Word document upon refreshing the linked object. This method is beneficial for data-driven visuals like charts but does not apply to freeform drawings or artistic elements.
Related: How to Draw on Google Docs
If you prefer to use Google’s text editing tools, drawing gets a bit less intuitive, but it’s still entirely possible. Here’s our existing guide on how to draw on Google Docs.

Related: How to Annotate Screenshots with Snip and Sketch
You can also take a screenshot and annotate on it directly using Microsoft’s Snip and Sketch tool. Here’s our tutorial on the matter.

Last Updated on April 22, 2024 11:38 am CEST by Markus Kasanmascheff


