

Hanging indents are a staple in formatting the citations and references sections of academic papers. This stylistic convention, which involves indenting all but the first line of a paragraph, facilitates the clear delineation of individual entries, enhancing readability and organization. Hanging indents usually offset the second and subsequent lines of a paragraph five spaces, which translates to half an inch.
While the concept of a hanging indent is straightforward—typically a half-inch space from the margin—the execution, especially in digital documents, can sometimes be less intuitive.
Hanging indents are most used in the bibliography in academic papers to allow the reader to easily see the breaks between citations. You can see the difference between a regular paragraph and one with a hanging indent below:

Google Docs offers several methods to implement hanging indents, each catering to different user preferences. From utilizing the Format menu for a more guided approach, manipulating the ruler for those who prefer a hands-on visual method, to employing keyboard shortcuts for efficiency aficionados, the platform accommodates a variety of workflows.
How to Make a Hanging Indent on Google Docs via the Format Menu
This method utilizes Google Docs’ built-in formatting options accessible through the Format menu. It is particularly useful for those who prefer navigating through menu options to apply formatting changes. This approach allows for precise control over the indentation settings, including the ability to set the exact size of the indent, making it ideal for users who need to adhere to specific formatting guidelines.
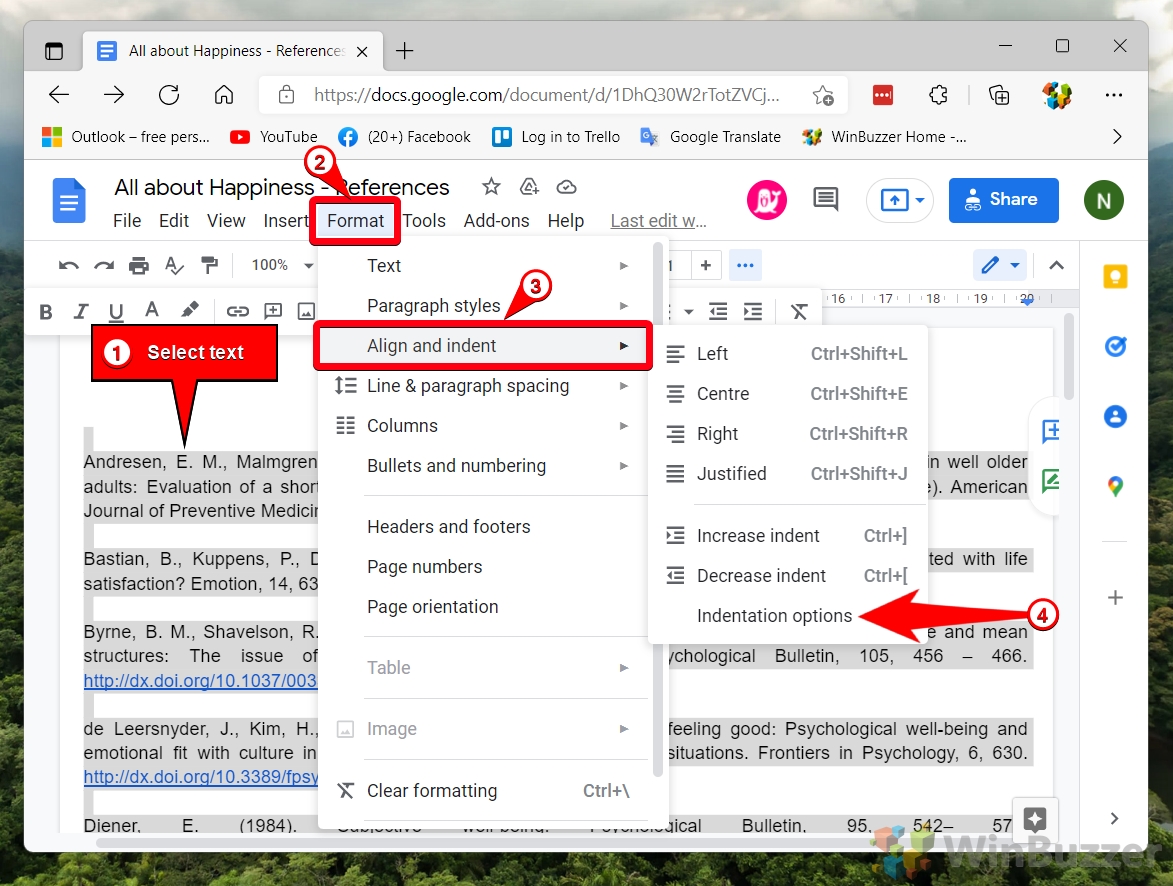
- Select the Text
Highlight the text you wish to format with a hanging indent. This step is crucial for applying the format correctly to the desired content. Then, navigate to “Format > Align & Indent > Indentation options”. This path leads you to a menu where you can adjust various indentation settings.
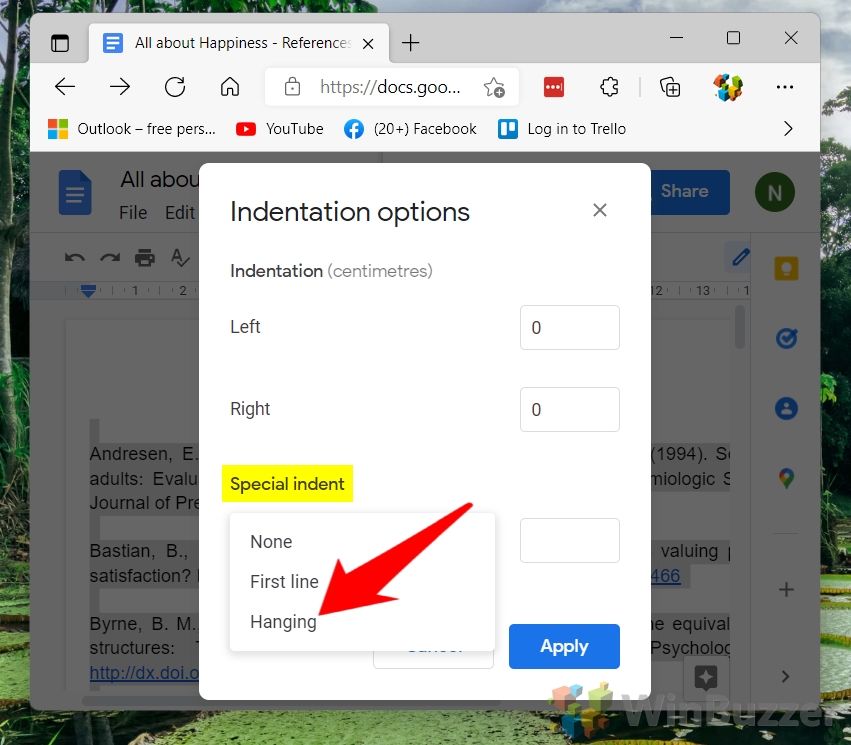
- Choose Hanging Indent
Within the indentation options, locate the “Special indent” section and select “Hanging” from the dropdown menu. This action sets the indentation type to hanging, which is ideal for formatting citations or references.
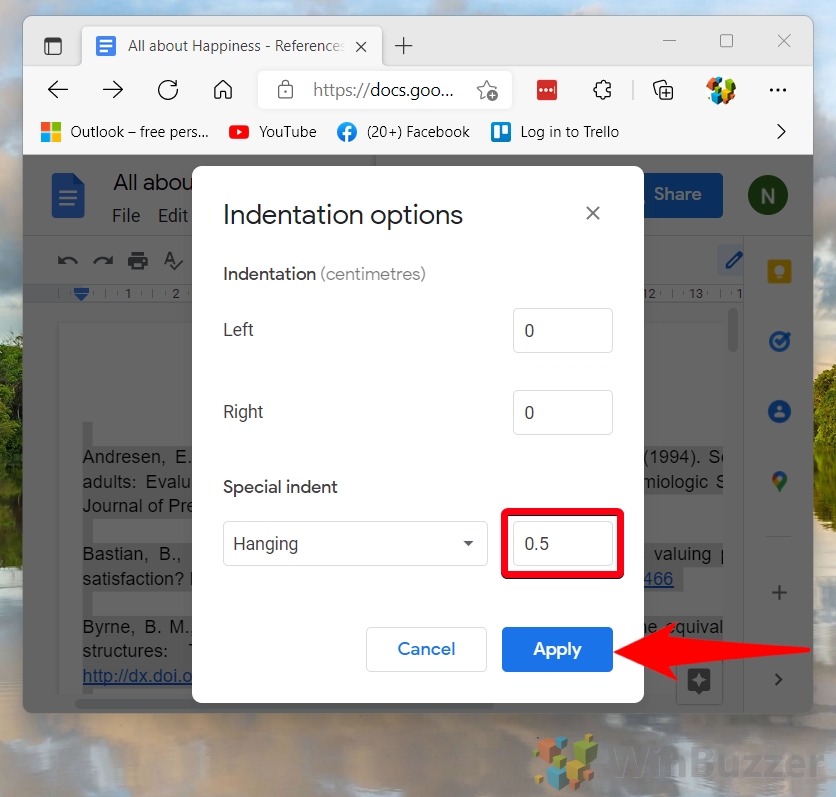
- Set the Indentation Amount
Input “0.5” in the indentation field or adjust according to your document’s formatting guidelines, then click “Apply”. This step finalizes the hanging indent, offsetting the second and subsequent lines by the specified amount.
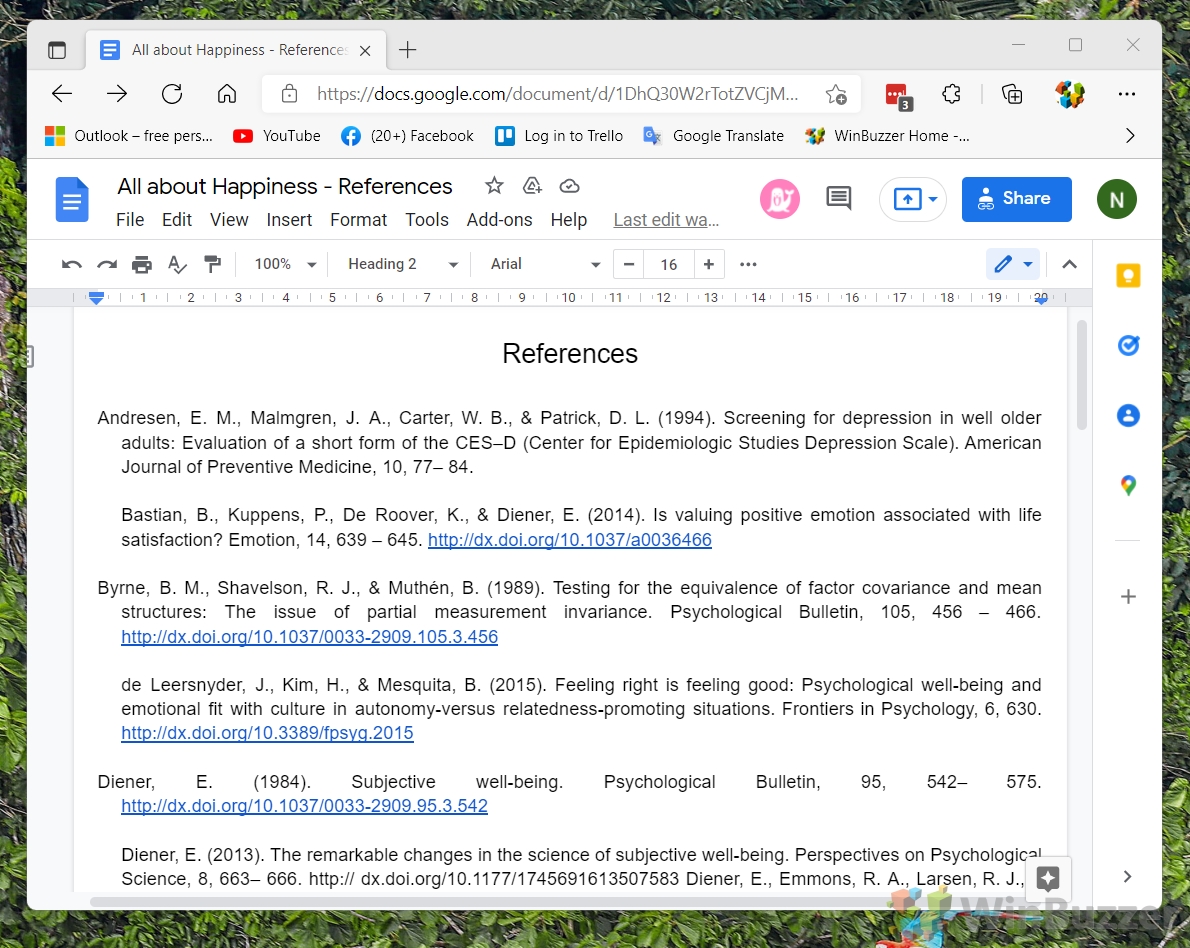
- Check the Results
Google sheets will indent your second line.
How to Indent the Second Line in Google Docs with the Ruler
Using the ruler to create a hanging indent is a more visual and intuitive method. It is perfect for users who prefer a hands-on approach to formatting. By directly manipulating the indent markers on the ruler, you can quickly adjust the indentation of selected text.
- Activate the Ruler
Ensure the ruler is visible by selecting “View > Show ruler”. If the ruler is not displayed, this step will make it appear at the top of your document.

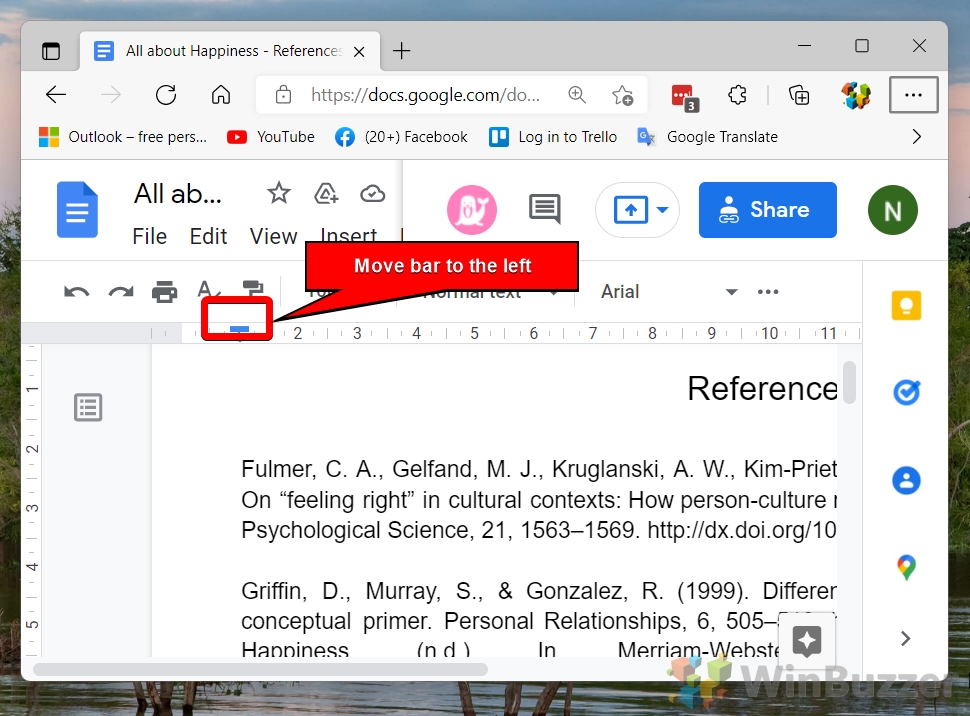
- Adjust the Indent Markers
Highlight the intended text and drag the left indent marker (the small blue triangle) to the right to set the hanging indent. The first line indent marker (the rectangle above the triangle) should remain at the start of the line to keep the first line unindented.

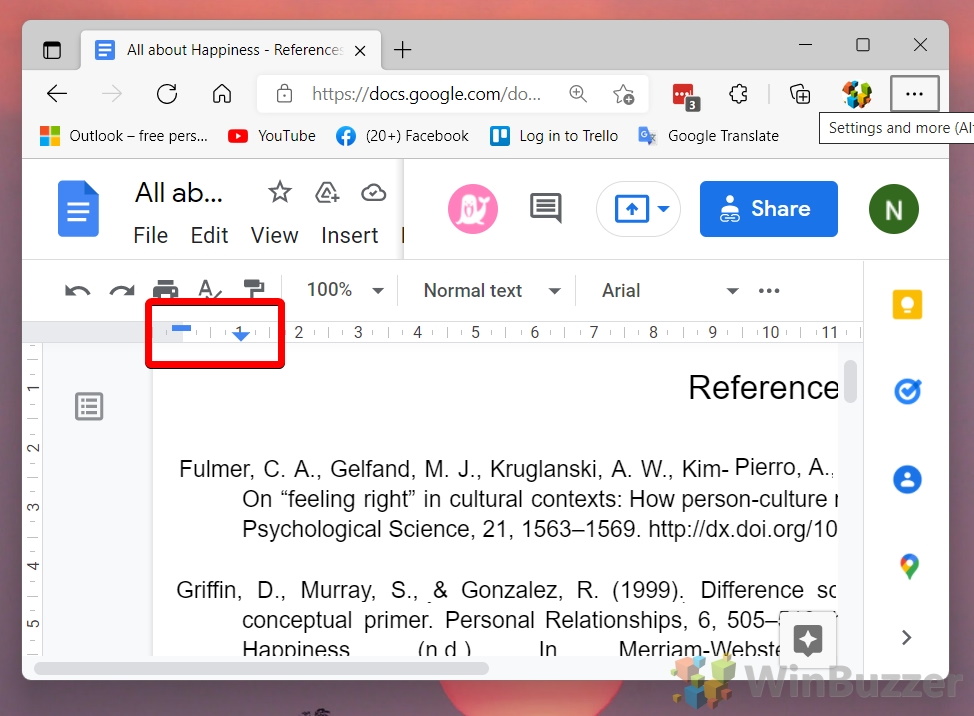
- Fine-tune the First Line Indent
If necessary, adjust the first line indent marker (the rectangle) to align with the document’s overall formatting, ensuring that only the first line starts at the margin and subsequent lines are indented.
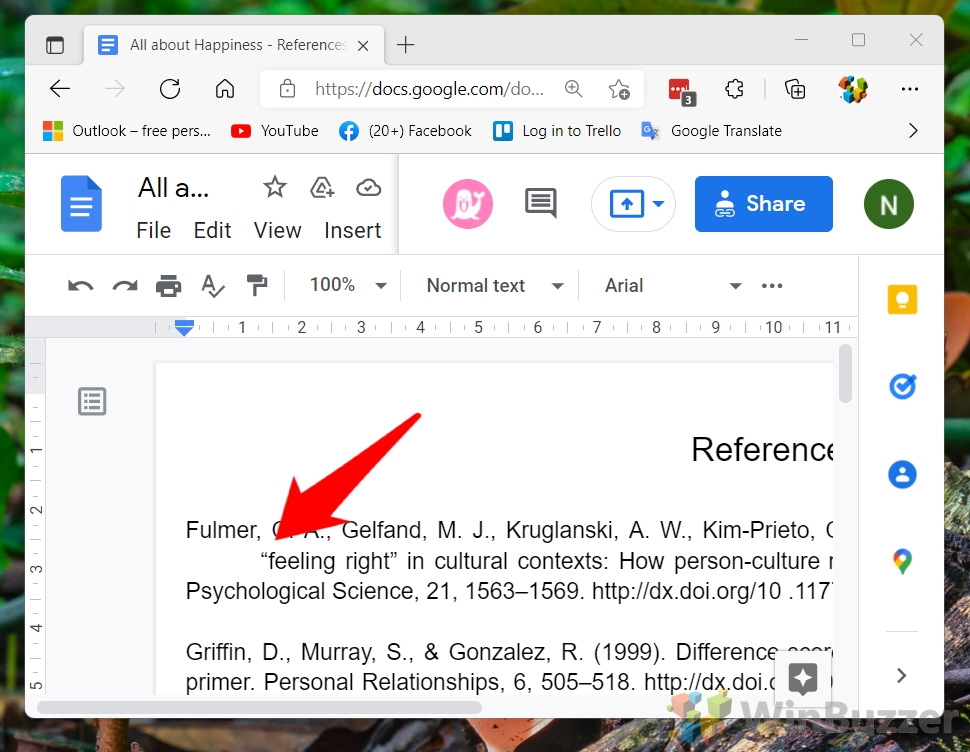
- Adjust the Spacing
After setting the indent markers, you can further customize the spacing to suit your document’s requirements. This step allows for precision in setting the hanging indent, ensuring it meets your formatting needs.
How to Make a Hanging Indent Using a Keyboard Shortcut
Keyboard shortcuts offer a fast and efficient way to format documents without taking your hands off the keyboard. This method is best suited for users who are familiar with keyboard commands and prefer using them to navigate and format documents swiftly. Using a simple combination of keys, you can instantly apply a hanging indent to a paragraph, significantly speeding up the formatting process.
-
- Position the Cursor and Press the Hotkey
Place your cursor at the beginning of the line you want to use a hanging indent in and press “Shift + Backspace” and then “Tab” or “Shift + Enter” and then “Tab“.

- Position the Cursor and Press the Hotkey
- Your selected line will indent
FAQ – Frequently Asked Questions About Hanging Indents in Google Docs
What does a hanging indent look like in a citation or bibliography?
In a citation or bibliography, a hanging indent formats the first line of each entry to align with the left margin, while all subsequent lines are indented typically by half an inch. This layout helps differentiate individual entries, making it easier for readers to scan through a list of references or cited works.
Why might I be unable to create a hanging indent in Google Docs?
Common issues preventing the creation of a hanging indent in Google Docs include not selecting the text properly before applying the formatting, misusing the indent markers on the ruler, or not having the ruler visible. Ensure the text for the hanging indent is highlighted, the ruler is enabled (View > Show ruler), and the correct indent markers (the left indent marker and the first line indent marker) are being adjusted.
How do I fix formatting issues in Google Docs, such as unwanted indents or spacing?
To resolve unwanted indents, select the affected text, then navigate to “Format > Align & Indent > Indentation options” and adjust the settings, or use the ruler to manually correct the indent markers. For spacing issues, use “Format > Line spacing” to customize line spacing, paragraph spacing, and other related settings to ensure the document adheres to your desired formatting.
Do all citations require a hanging indent in academic papers?
Most academic styles, including APA, MLA, and Chicago, typically require hanging indents for reference lists or bibliographies. This formatting helps clearly separate individual entries, improving readability. Always consult your specific style guide or academic institution’s guidelines to ensure compliance with their formatting requirements.
How can I ensure my document’s formatting, including hanging indents, is consistent across different platforms or when converting between Google Docs and Word?
To maintain consistency in formatting, particularly for hanging indents, when moving documents between Google Docs and Word, use style settings available in both platforms for indentations, spacing, and fonts. After converting your document, review and adjust the formatting in Word as necessary, as some features might not transfer perfectly due to differences in the applications’ default settings and formatting capabilities.
How do I adjust the default line spacing and font size in Google Docs for academic papers?
To adjust line spacing, navigate to “Format > Line spacing” and select your desired spacing option (e.g., single, double). For font size and style adjustments, go to “Format > Font” and choose the appropriate font style and size from the dropdown menus. These settings can help ensure your document meets the formatting guidelines specified by your academic institution or style guide.
Can I apply hanging indents to multiple paragraphs at once in Google Docs?
Yes, you can apply hanging indents to multiple paragraphs simultaneously by highlighting all the paragraphs you want to format. Then, apply the hanging indent using your preferred method (Format menu, ruler, or keyboard shortcut). This bulk formatting can save time when working with documents that contain numerous references or citations.
How do I use hanging indents in a Google Docs table or within a text box?
Applying hanging indents within a table cell or text box in Google Docs can be more challenging due to the constrained formatting options. One workaround is to format the text with a hanging indent before inserting it into the table or text box. Alternatively, you may need to manually adjust the indent markers for each line of text within the table cell or text box, though this method might not be as precise.
Is there a way to save my hanging indent settings as a default for all new documents in Google Docs?
Google Docs doesn’t currently support setting custom default styles, including hanging indents, for all new documents. You’ll need to apply the hanging indent formatting manually for each new document. As a workaround, you could create a template document with predefined styles, including hanging indents, and make a copy of this template for each new document you start.
How do I ensure my hanging indents are correctly formatted for submission to an academic journal or for a class assignment?
Double-check your document against the specific formatting guidelines provided by the academic journal or your instructor, paying close attention to details such as indent size, line spacing, and font requirements. Utilize Google Docs’ formatting tools to adjust your document as needed, and consider having a peer review your formatting or using online formatting guides specific to the citation style you’re using (e.g., APA, MLA) to ensure compliance.
What’s the difference between indenting and adjusting paragraph spacing in Google Docs?
Indenting in Google Docs shifts the starting position of text lines horizontally, either for the first line of a paragraph (first-line indent) or for all lines except the first (hanging indent). In contrast, paragraph spacing involves adjusting the vertical space before and after paragraphs, which can help separate paragraphs without indenting the first line, offering a cleaner look to documents such as resumes or reports.
Can hanging indents be used effectively in non-academic documents, such as reports or resumes?
While less common outside academic writing, hanging indents can enhance the readability and organization of non-academic documents like reports, resumes, and bibliographies within professional portfolios. They help to visually separate items like job descriptions, project summaries, or lists of publications, making the document easier to scan and information more accessible.
How do I remove a hanging indent if I no longer need it in my document?
To remove a hanging indent, select the text with the unwanted indent, then either go to “Format > Align & Indent > Indentation options” and set the Special indent to “None” or manually adjust the indent markers on the ruler back to their original positions. This will revert the selected text to standard paragraph formatting.
Are there any keyboard shortcuts to quickly increase or decrease indentations, including hanging indents, in Google Docs?
For normal indents, “Ctrl + ]” (“Cmd + ]” on Mac) increases the indent level, and “Ctrl + [” (“Cmd + [” on Mac) decreases it. For hanging indents, after setting the initial indent using the menu or ruler, these shortcuts can adjust the indent levels, but Google Docs does not have a specific shortcut to directly create a hanging indent beyond the “Shift + \textbackslash” and “Tab” method.
How do I handle citations that extend over more than one line when creating a hanging indent?
Ensure the entire citation is highlighted before applying the hanging indent to ensure all lines after the first are uniformly indented. If a citation extends beyond one line, the hanging indent will automatically apply to these subsequent lines, maintaining the correct formatting for extended citations. This uniform indentation helps readers easily distinguish between individual citations in your document.
Extra: How to Change Default Line Spacing and Font Size in Google Docs
You’ll likely need to make further formatting changes before your paper meets standards. Here’s how to change default font style, line spacing, and font size to match your style guide.

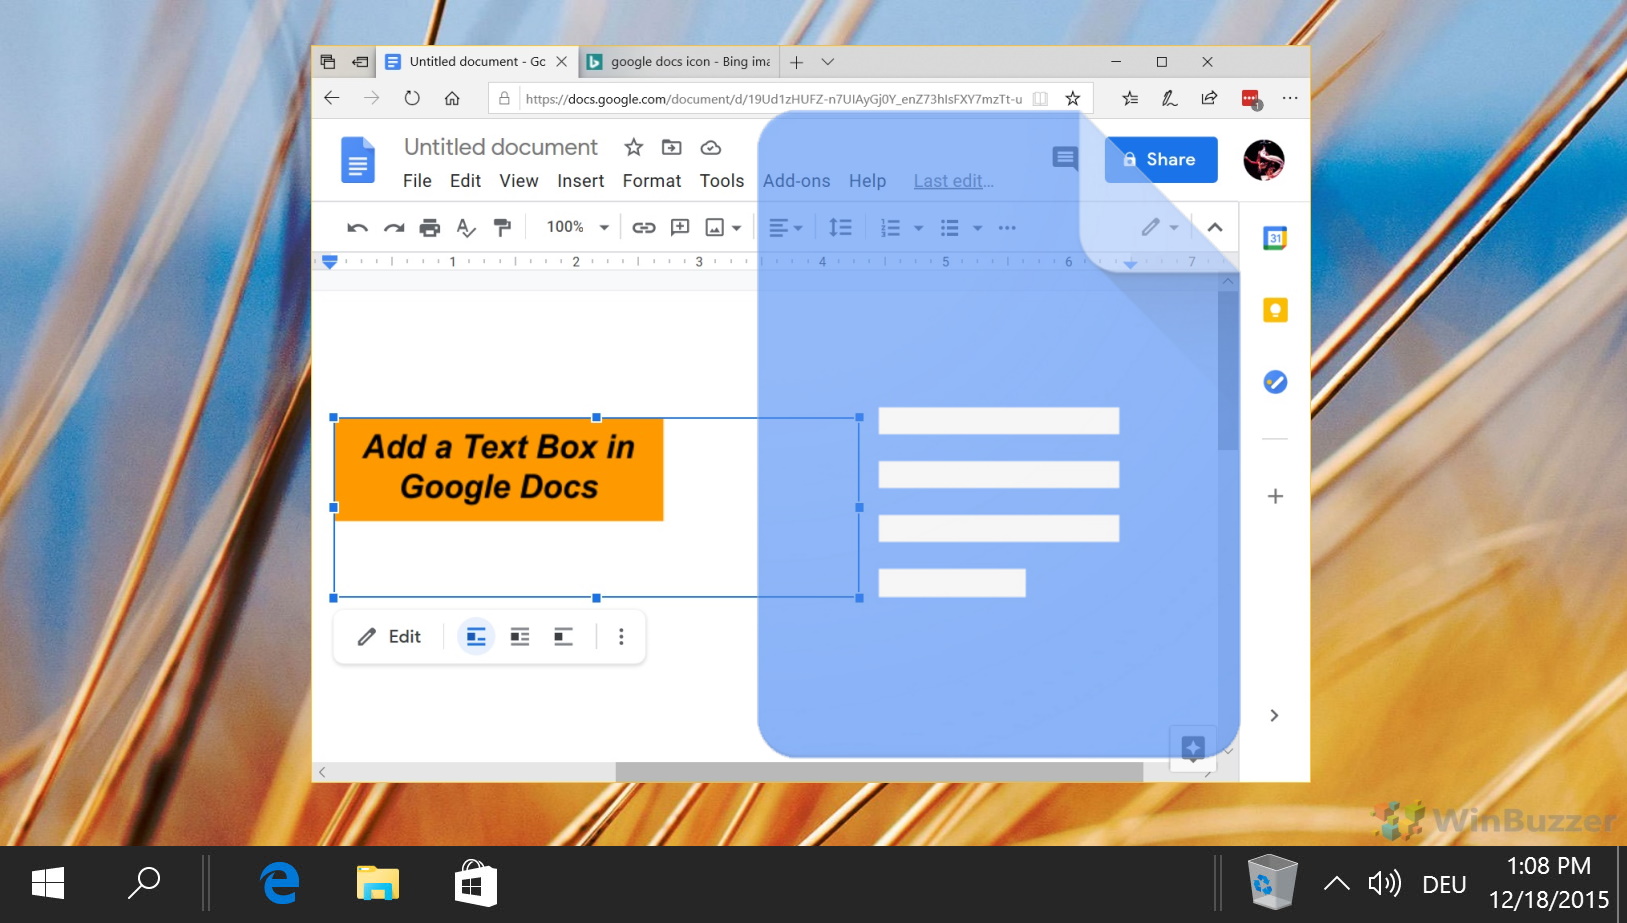
Extra: How to Insert a Text Box in Google Docs or Sheets
The process to insert a text box in Google Docs isn’t as intuitive. For whatever reason, Google has hidden the feature behind an entirely different menu that is rarely frequented. In our other guide, we show you how to insert a text box in Google Docs or Google Sheets, while disclosing a small trick to put a text box over an image.
Extra: How to Add a Table of Contents in Google Docs and Update It for Changes
Adding a table of contents to your Google Docs is important once they reach dozens of pages. While many overlook this feature in favor of the document outline, it’s a useful tool to tell readers what’s in the document and help them navigate it. In our other guide, we show you how to create a table of contents in Google Docs via the use of heading styles, and then update it to reflect any changes you make in the editing process.
Extra: How to Change Default Line Spacing and Font Size in Google Docs
You’ll likely need to make further formatting changes before your paper meets standards. Here’s how to change default font style, line spacing, and font size to match your style guide.


