When a friend or colleague has an issue with their computer, it’s easy enough to help out. You can sit down, take the reins and get to the root of the problem. When you can’t be there in person, however, things quickly get difficult. Explaining exactly what to do without direct control can be incredibly frustrating. Enter Quick Assist in Windows: a tool that grants you remote access to their PC.
What is Quick Assist?
Windows Quick Assist is a tool for remote assistance in Windows 11 and Windows 10 based on Microsoft’s successful Remote Desktop Protocol. It lets a user take control of another computer without the need to touch it physically.
Windows 11 Quick Assist is often confused with “Windows Remote Assistance”, a tool offered in earlier Windows versions that has similar functionality. Quick Assist does have some minor upgrades, however, including the ability to use the helper’s keyboard layout and a pause button for the help session.
Critically, Quick Assist is very simple to use for both users. Today, we’ll be showing you how to set up Quick Assist in Windows 11 from both ends, as well as how to use Quick Assist once you’re connected.
How to Set Up and Use Quick Assist in Windows 11 and Windows 10
Providing or receiving remote assistance is streamlined with Quick Assist in Windows 11 and Windows 10, allowing users to share control of a computer for troubleshooting. This guide will walk you through the setup and use of Quick Assist.
Setting Up Quick Assist
Quick Assist’s setup is straightforward, catering to both the helper and the recipient. Follow these steps to get started.
One of the major benefits using Quick Assist to take control of another computer is that it’s very fast to set up. Getting connected should only take a minute.
However, as a person receiving help, you do need to make sure that you fully trust the person who is repairing your computer. There are many scammers that use Quick Assist to show you false reports of viruses. A popular technique is to use the “tree” command in CMD and pretending its output means there are viruses.
If you believe you are being scammed, you should hang up immediately and consult this FTC page for guidance.
- Opening Quick Assist
Press the Start button, search for “Quick Assist“, and open the application to begin the assistance process.

- Choose to Give or Get Assistance
If you’re looking to help, select “Assist another person” under the “Give assistance” section to prepare for generating a session code.

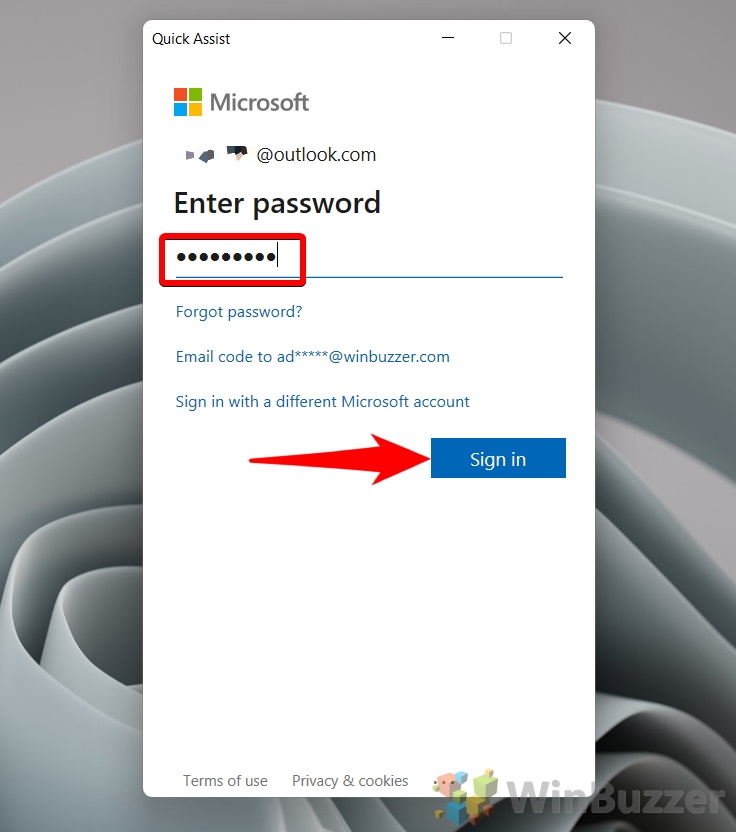
- For the Helper: Signing In
Enter your Microsoft account details and follow the prompts to sign in, ensuring you’re authenticated to provide help.

- Enter your password and press “Sign in”

- Stay Signed In?
Choose whether to remain signed in on this device for future sessions, considering the device’s privacy. Choosing “Yes” will prevent you from having to sign in every time you help somebody, but can be the wrong option if you’re using somebody else’s PC.

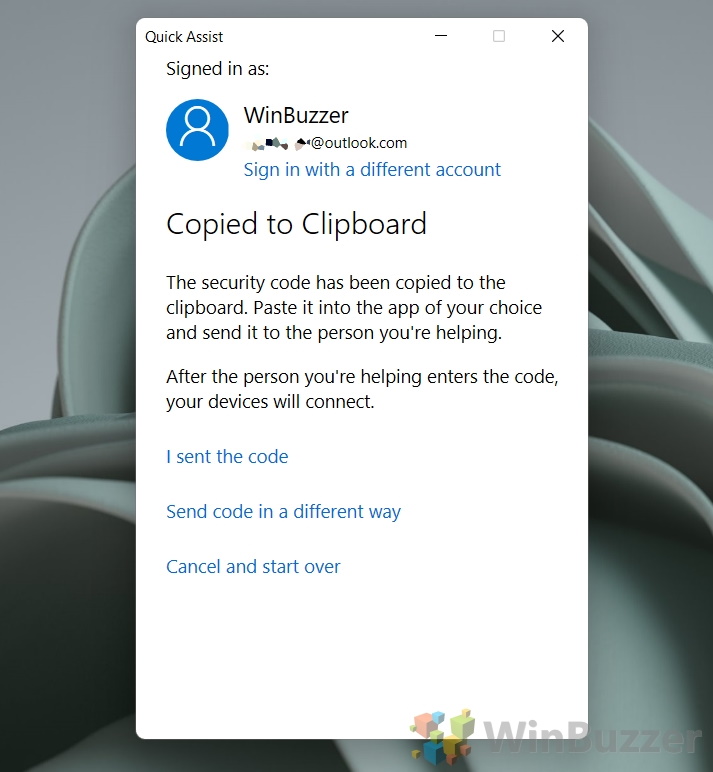
- Copy the Security Code
After signing in, copy the generated security code to share with the person you’re assisting.


- Share the Security Code
Send the security code securely to the person needing assistance to initiate the connection. You can paste the code by pressing “Ctrl + V” on your keyboard. You may also want to save it to a notepad or WordPad file in case you need it again later.

- For the Person Being Helped: Connecting to Quick Assist
Open Quick Assist to start the screen-sharing session. Remember, you must have a Windows 10 or Windows 11 PC to be able to use the Quick Assist app.

- Enter the code in the box under the “Get assistance” heading and press “Share screen”

- Allow Screen Sharing
Click “Allow” to permit the helper to view or control your screen, depending on the chosen settings.

- Choose Control Level
Select whether the helper can view your screen or take full control, then click “Continue” to finalize the connection.


How to Use Quick Assist in Windows 11 and Windows 10
Once you, the helper, has connected to a user’s PC, you’ll have several tools and options at your disposal. Here is a detailed overview:
- The helper will be presented with this Remote Assist UI
Get acquainted with the Remote Assist interface to navigate and use its features efficiently.

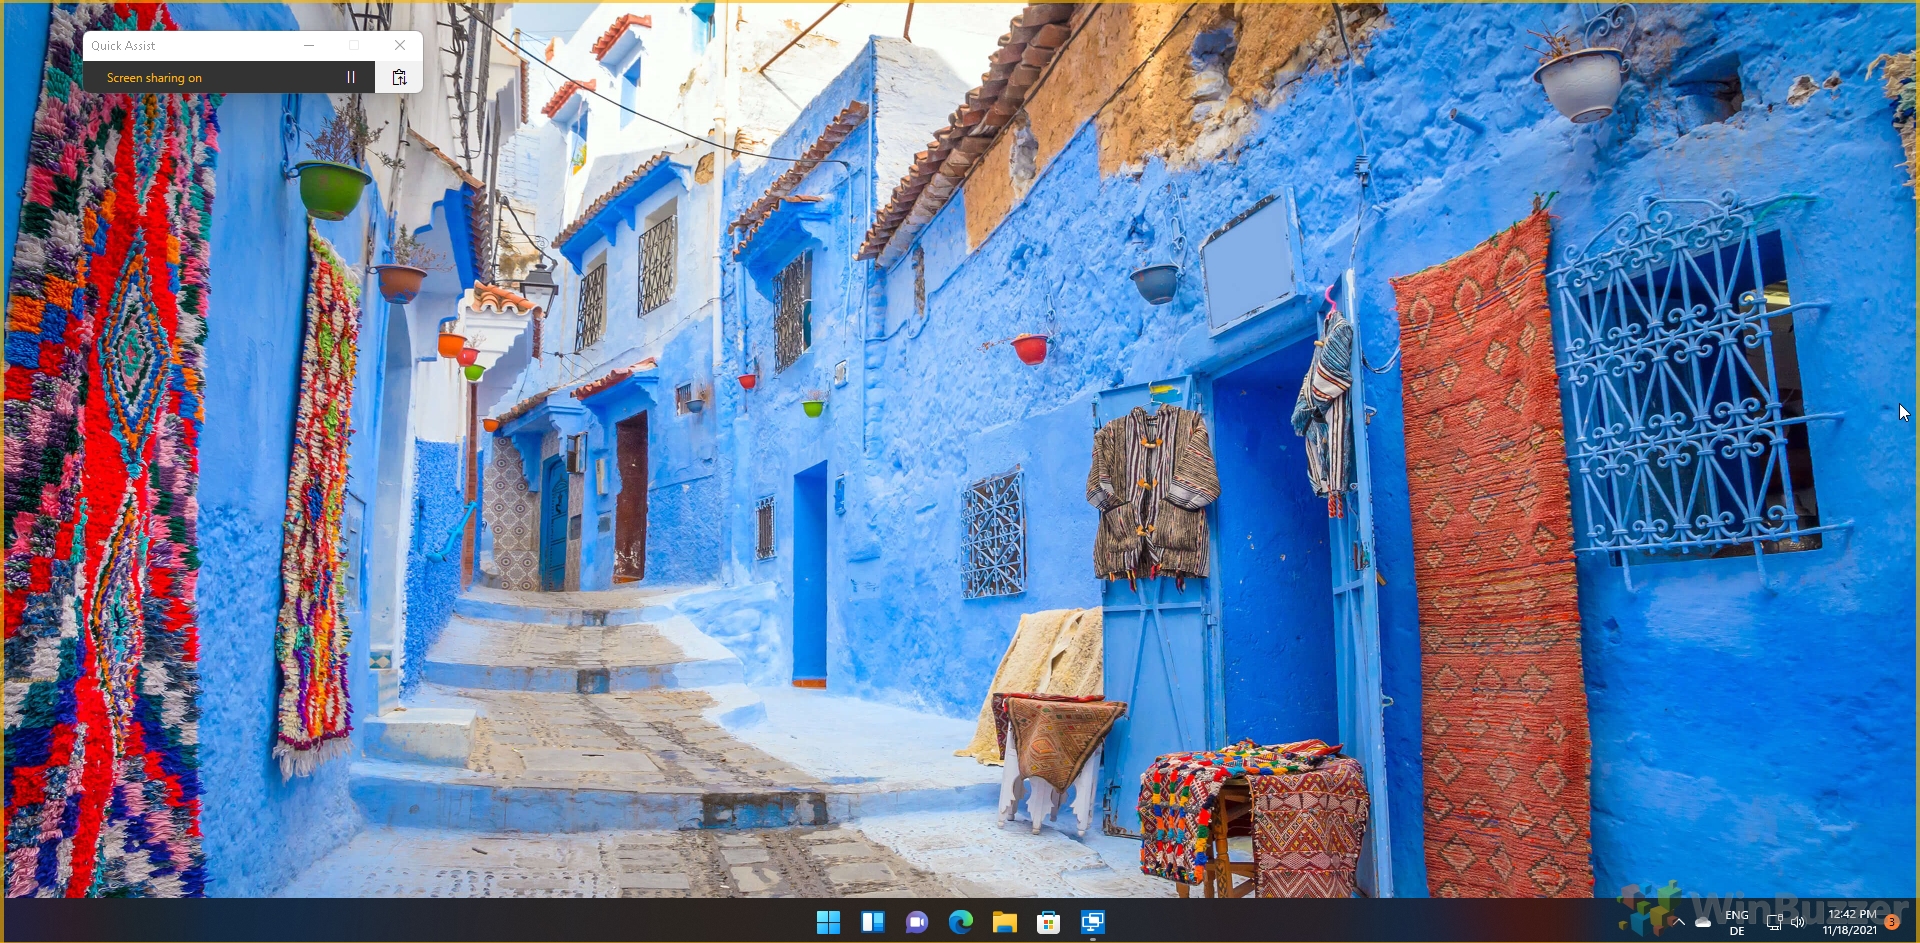
- The person being helped with see a box reading “Screen sharing on”

- Annotate on the screen for both parties with the pencil button
This feature allows the helper to guide the user visually by drawing on their screen.

- Press the form icon to open Task Manager
Using this button you can access Task Manager on the remote device for troubleshoot ing.

- Press the circular arrow to restart the computer you’re controlling
Use this option carefully as it restarts the remote PC, but the session will resume automatically post-restart.

- Press the pause or stop button to pause or stop the connection
Manage the session’s continuity with these controls for efficiency and security.

- To stop receiving assistance, press the “X” or pause icon in the Quick Assist pop-up
This ensures the user can end the session at any time for privacy and control.

FAQ – Frequently Asked Questions About Quick Assist in Windows 11 and Windows 10
Can I use Quick Assist to assist someone on Windows 8 or earlier?
Unfortunately, Quick Assist is not available for Windows 8 or earlier versions. It is a feature specifically introduced in Windows 10 and continued in Windows 11. For older versions of Windows, you might consider other forms of remote assistance such as Windows Remote Assistance, available in earlier versions, or third-party remote desktop software like TeamViewer or AnyDesk, which are compatible with a wider range of operating systems.
Is it possible to transfer files using Quick Assist?
Quick Assist does not support file transfer functionality directly within its interface. If you need to share files with the person you are assisting, you should use alternate methods such as email, cloud storage services (e.g., OneDrive, Google Drive), or other file-sharing platforms. These options provide a secure way to transfer files without exiting the Quick Assist session.
How can I improve security when using Quick Assist?
To enhance security while using Quick Assist, ensure that your Microsoft account’s password is strong and unique. Only share Quick Assist codes via secure methods, confirming the receiver’s identity before initiating the session. Be cautious with the permissions you grant; if possible, allow only screen viewing instead of full control for added safety. After the session, review any system changes made during the session for unauthorized actions. Avoid staying signed in if using a public or shared computer to prevent unauthorized access to your account.
Can Quick Assist work over different networks?
Yes, Quick Assist can facilitate connections across different network configurations as both computers are connected to the internet. This means assists can occur regardless of whether the computers are on the same local network, different private networks, or even when one or both parties are using public or cellular networks. However, the quality of the connection might be influenced by the network’s stability, speed, and firewall settings, which might require adjustments to allow Quick Assist connections.
Why can’t I find Quick Assist on my computer?
Quick Assist should be readily available on any supported version of Windows 10 or 11. If you’re unable to find it, your Windows installation may be outdated or customized in a way that excludes it. Ensure your operating system is up to date through Windows Update, as newer versions may include Quick Assist or updates to it. If updates do not resolve the issue, check if Quick Assist is disabled in the Windows features settings or controlled by a Group Policy in business or educational environments. Contacting your system administrator for help may be necessary if it’s a managed device.
What happens if the remote session is disconnected?
If a Quick Assist session is unintentionally disconnected, perhaps due to network issues, you’ll need to restart the application and initiate a new session using a new security code. This ensures the connection remains secure. It’s a good practice to check the stability of the internet connection before restarting to avoid recurring disconnections. Quick Assist does not automatically reconnect to previous sessions to protect privacy and security.
Can Quick Assist be used for technical training or demonstrations?
Absolutely, Quick Assist is a valuable tool for conducting one-on-one training sessions, software demonstrations, or guiding someone through a new task. Its screen sharing functionality allows the “viewer” to see everything happening on the “sharer’s” screen in real-time, while the annotation feature can highlight specific areas of interest or action steps. These interactive sessions can be powerful for educational purposes, although it is limited to two participants at a time.
How can I ensure the best performance when using Quick Assist?
To optimize Quick Assist’s performance, both the assistant and the recipient should ensure they have a stable, high-speed internet connection. Closing non-essential applications can also free up computer resources and bandwidth, contributing to a smoother experience. Bear in mind that the performance may also be affected by the capabilities of the remote computer, so adjusting the visual settings for the session can also help with performance issues.
Are there alternative tools to Quick Assist for remote assistance?
Several alternatives to Quick Assist offer similar or additional functionalities, catering to a broader range of needs and platforms. TeamViewer and AnyDesk provide remote access and file transfer capabilities across multiple operating systems, including earlier Windows versions, macOS, Linux, and mobile platforms. Zoom and Microsoft Teams also have screen sharing features suitable for demonstrations or educational purposes, though they lack direct control capabilities.
How do I troubleshoot Quick Assist if it’s not working?
If Quick Assist fails to work as expected, first verify both parties have an active internet connection and are using compatible versions of Windows (10 or 11). Update Windows to the latest version to ensure all software components are current. Check the firewall and antivirus settings, as they may block Quick Assist connections; adding Quick Assist as an exception might be necessary. If issues persist, restarting the application, or in more stubborn cases, the computer, can often resolve connection problems.
Can Quick Assist sessions be recorded?
While Quick Assist itself does not offer a recording feature, sessions can still be captured through third-party screen recording software. When recording a session, it is imperative to have the consent of all involved parties to comply with privacy laws and ethical considerations. Choose a screen recorder that suits your needs, ensuring it captures both visual and audio elements if necessary.
Is Quick Assist suitable for fixing hardware issues?
Quick Assist excels in addressing software-related issues by allowing a remote user to view or control another’s desktop. For hardware problems, Quick Assist can be used for diagnostic purposes—guiding someone through checking connections or observing error messages. However, physical hardware issues such as faulty components or physical connections require in-person inspection and cannot be resolved through Quick Assist alone.
Can Quick Assist access a computer that is not logged in?
Quick Assist cannot start from the Windows lock screen or power-on state. The application requires an active user session on both ends to establish a connection. This means that the person needing assistance must be logged into their Windows account and have Quick Assist open to receive help.
How do I manage permissions during a Quick Assist session?
During a Quick Assist session, the recipient has control over the level of access granted to the assistant, choosing between allowing them to view their screen or granting full control. Permissions can be adjusted before and during the session from the Quick Assist interface. Exercise caution when granting full control and always ensure you are granting access to a trusted individual.
What should I do if I receive unsolicited Quick Assist codes or requests?
Never enter a Quick Assist code or accept a session from unknown or unsolicited sources, as this could expose your computer to unauthorized access or malicious activity. Always verify the identity of the person offering assistance, and ensure it’s someone you trust before proceeding. If you receive unsolicited requests, it’s advisable to report them to your organization’s IT department or ignore them if on a personal device. Security awareness is crucial in preventing potential cyber threats.
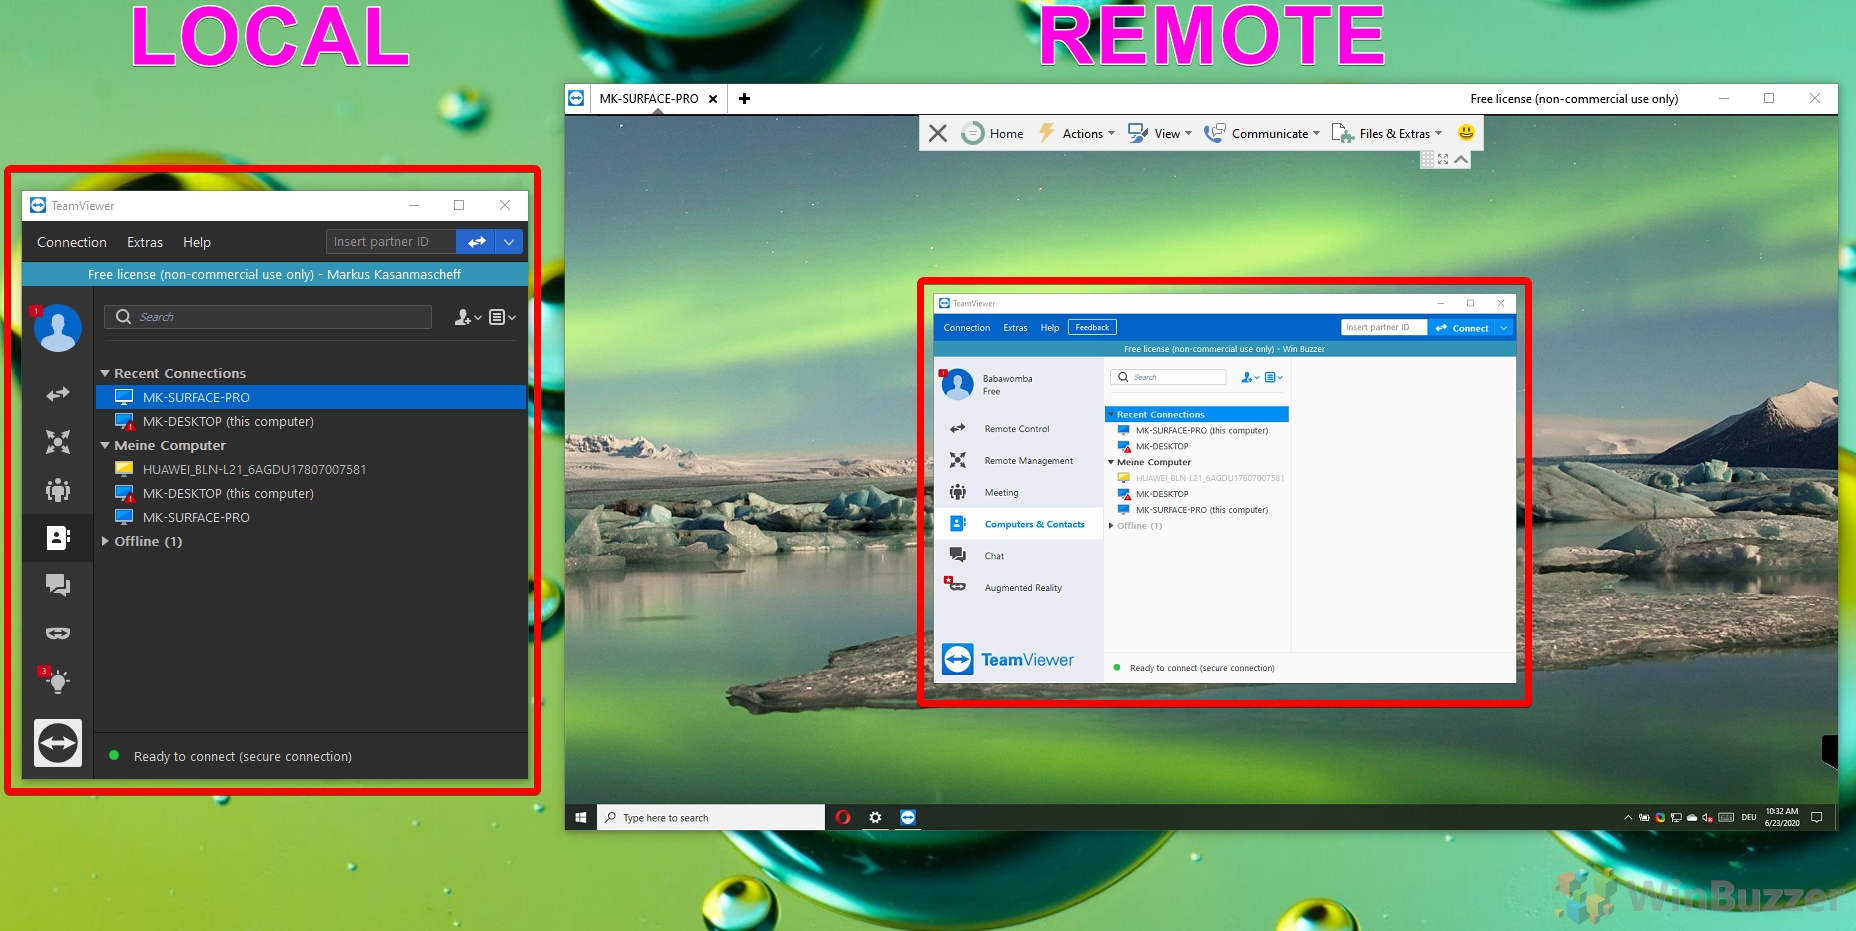
Related: How to Use TeamViewer to Fetch Files from a Remote PC
In 2020, Microsoft discontinued OneDrive fetch, which let you grab any file on your PC via OneDrive, It did not need to be in your OneDrive, Documents, Pictures, or Desktop folder – and be in Program Files or any random directory. If you want to continute to remoteley access all files without uploading them to the cloud, you can use TeamViewer as a free replacement for the OneDrive Fetch Files Feature.
Related: How to Perform a Clean Boot on Windows 10 to Identify and Fix Software Conflicts
Across your computer’s lifetime, you will have installed a variety of different software that runs automatically, from screenshot applications to your anti-virus solution. At times, these can conflict with Windows services, drivers, and other applications you’ve installed, causing issues. To get your PC to a point where you can identify what’s causing the problem, you may need to perform a clean boot. In our other guide, we show you how to perform a clean boot in Windows, then walk you through how to troubleshoot your issues and return to a normal state.
Related: How to Reset Windows 11 or Windows 10 (Normal or Factory Reset)
If you have a persistent issue with your PC that you have been unable to fix, the best option is to usually to reset your operating system. This will give you the option to keep your files (refresh), remove everything, or perform a factory reset. In our other guide, we show you how to factory reset Windows 11 and Windows 10 using both Advanced Startup Options and the OS’s in-built Settings apps.