
Bored of having a grey icon as your Windows 10 profile picture? Still have the account picture from your Outlook account in 2010? This guide is for you. We’ll be showing you how to change your Windows 10 profile picture to give your login screen and start menu a fresh look.
First, though, you should know that there are two types of account in Windows 10 and they have different methods to change profile pictures. If you have a Windows 10 local account, follow the first section of the guide.
If you sign in to your Microsoft account to log in to Windows 10, as most of us do, you can instead follow the second section.
How to Change Account Picture on a Windows 10 Local Account
If you use a Windows 10 local account it’s nice and simple to change your account picture. You don’t have to visit any external websites and can instead do everything from the in-built settings app. Here’s how:
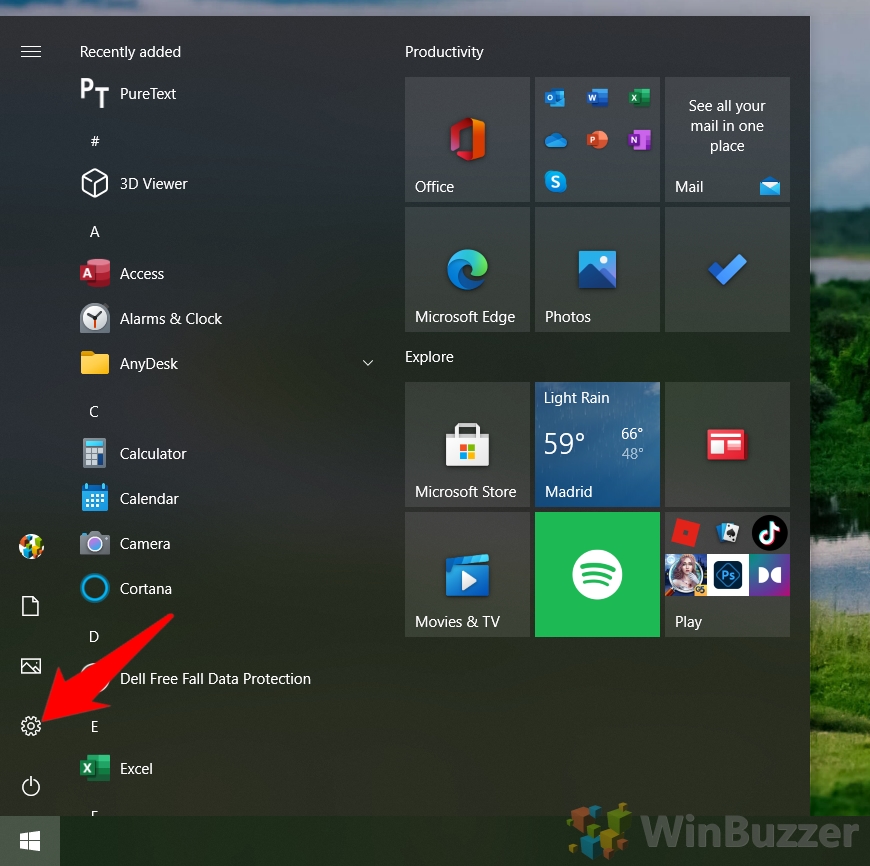
- Open Settings
Press the Start button on your keyboard and press the cog button above the power button. Alternatively, press Windows + I.

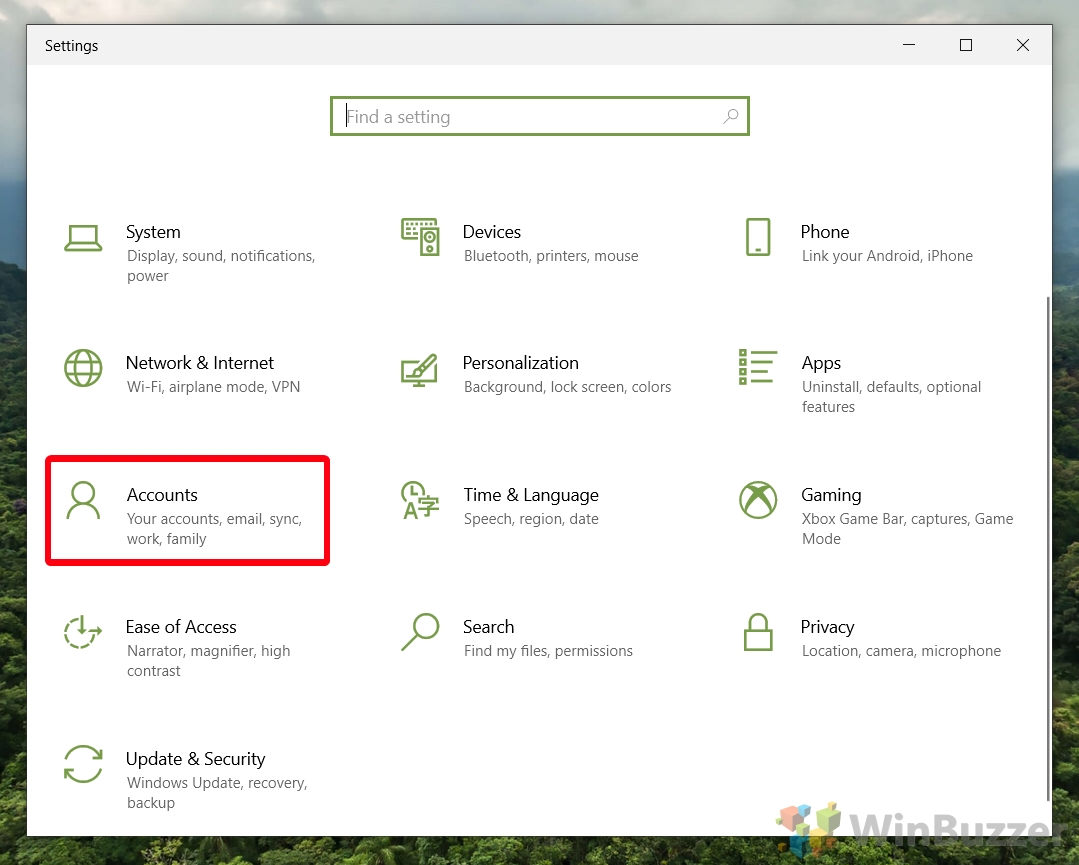
- Click on the “Accounts” heading in settings

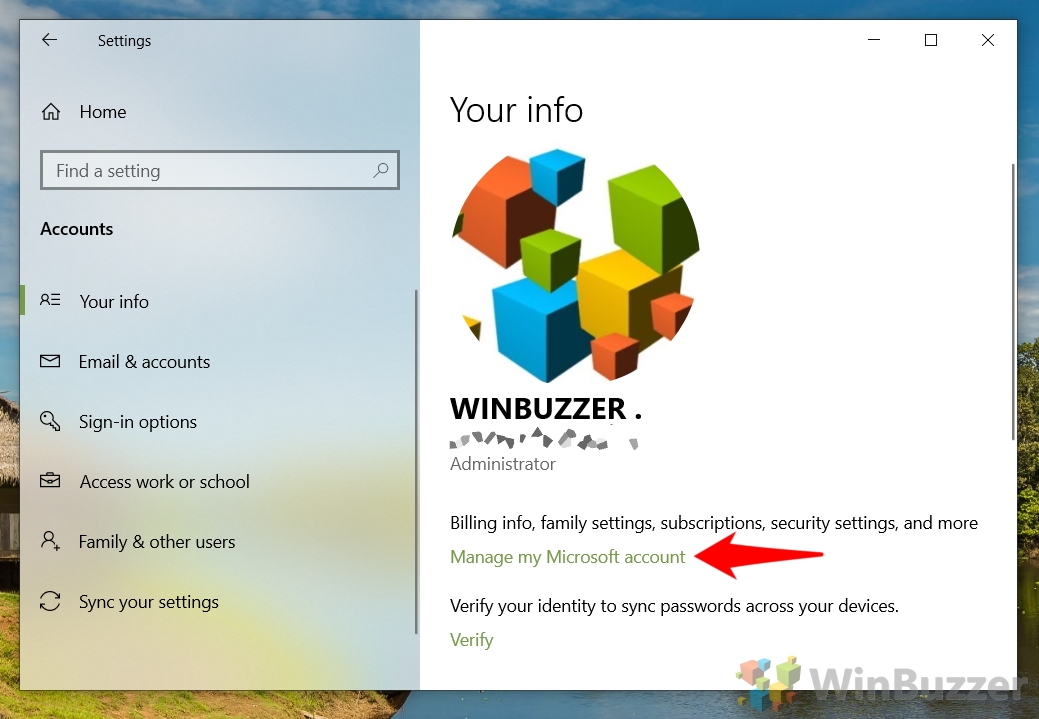
- Click on “Your info” in the Settings sidebar, then on “Camera” or Browse for one”
Naturally, you should click “Browse for one” if you already have a picture saved, and “Camera” if you’re wanting to take one with your webcam now.
Either browse to your picture and press “Open” or press the shutter button on the camera app. The picture will instantly replace your default profile picture.


How to Change Your Microsoft Profile Picture in Windows 10
If you use a Microsoft account you’ll need an internet connection to change your profile picture. This is because your profile picture will follow whatever is in your Microsoft account settings. Here’s how you change it:
- Press Start and click the settings cog above the power button

- Click the “Accounts” heading in the Settings app

- Click “Manage my Microsoft account” with the “Your info” section selected in the Settings sidebar

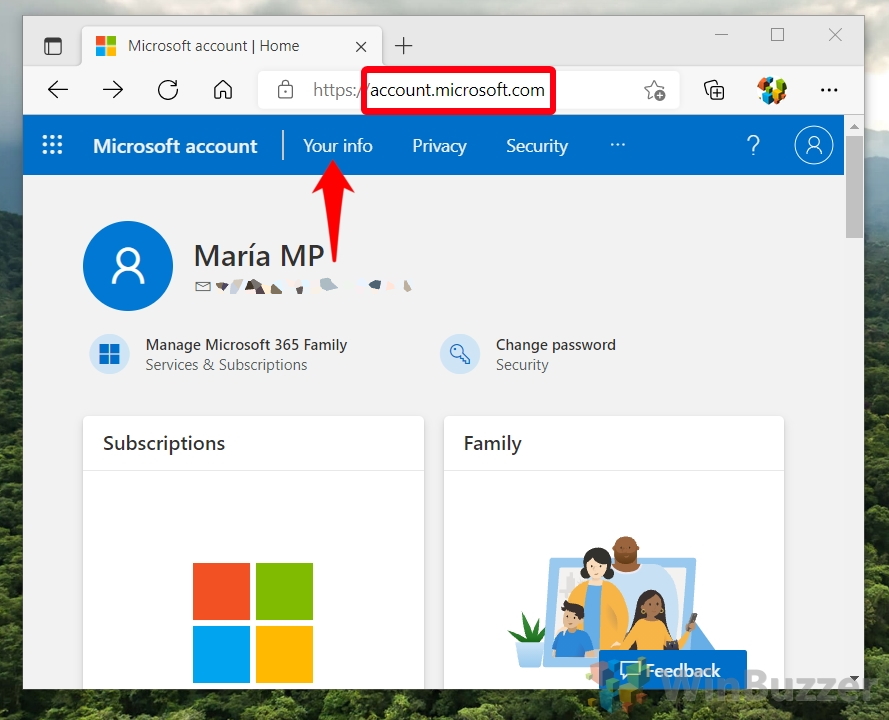
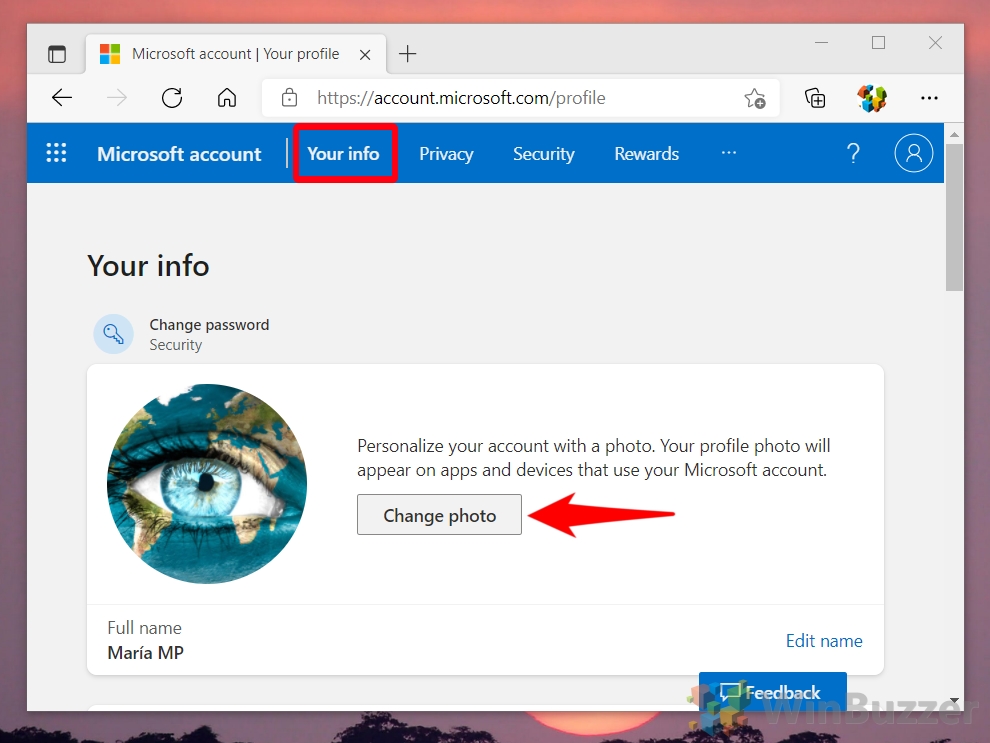
- Wait for the Microsoft account settings webpage to open and press “Your info” at the top of it
If the webpage doesn’t open automatically, you can instead paste
account.microsoft.com in your browser’s URL bar.
- Press “Change photo” under the “Your info” section

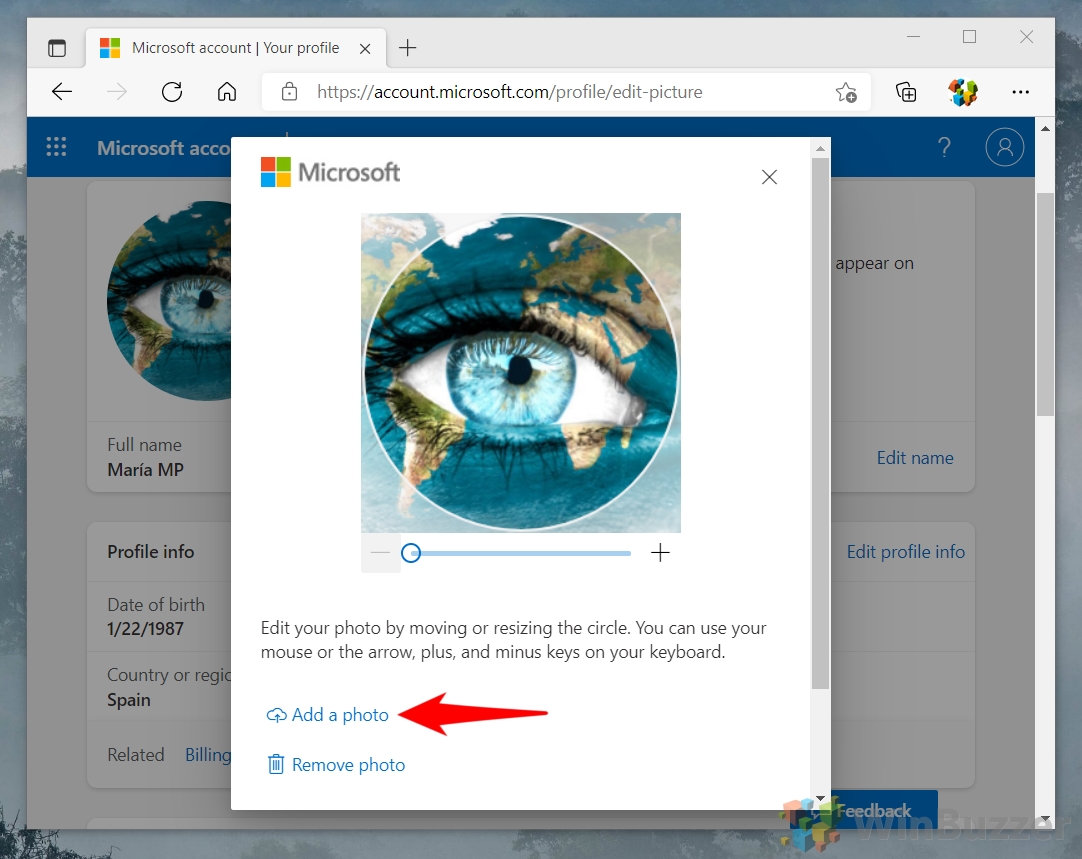
- Click “Add a photo”, browse to your new Microsoft profile picture, and press “Open”
You can adjust the zoom level of the picture in your browser by moving the slider to the right or left.

How to change account name or password in Windows 10
Now that you know how to change your profile picture and account picture in Windows 10, you can do it whenever the mood strikes. For further customization, you may also want to follow our tutorials on how to change your Windows 10 account name and password.
Last Updated on February 14, 2022 7:40 pm CET by Markus Kasanmascheff


