

Just like clearing your browser cache, when you clear a cache in Windows 10 it can improve performance, free up disk space, and increase stability. Today we’re going to show you how to clear your cache in Windows 10, focusing on four key areas: disk cache, DNS cache, Store cache, and Microsoft Store cache.
What is the cache in Windows 10?
The Windows 10 cache, or really collection of caches, are locations in which the operating system stores data so that it can access it faster in the future. For example, Windows might store file thumbnails in a cache so that it doesn’t have to generate them again every time you open File Explorer.
However, while your PC caches are intended to speed things up, they can have the opposite effect if they become more bloated. They can also store corrupted or incorrect files that slow down or cause issues on your PC. As a result, it’s good practice to clear caches in Windows 10 every now and then.
Here’s how to clear the computer cache in Windows 10:
How to Delete Temporary Files in Windows via the Disk Cleanup Tool
Windows stores a lot of temporary files by default, from thumbnails to your recycle bin items and Direct X shader cache. Here’s how to delete those temporary files using the intuitive Disk Cleanup tool:
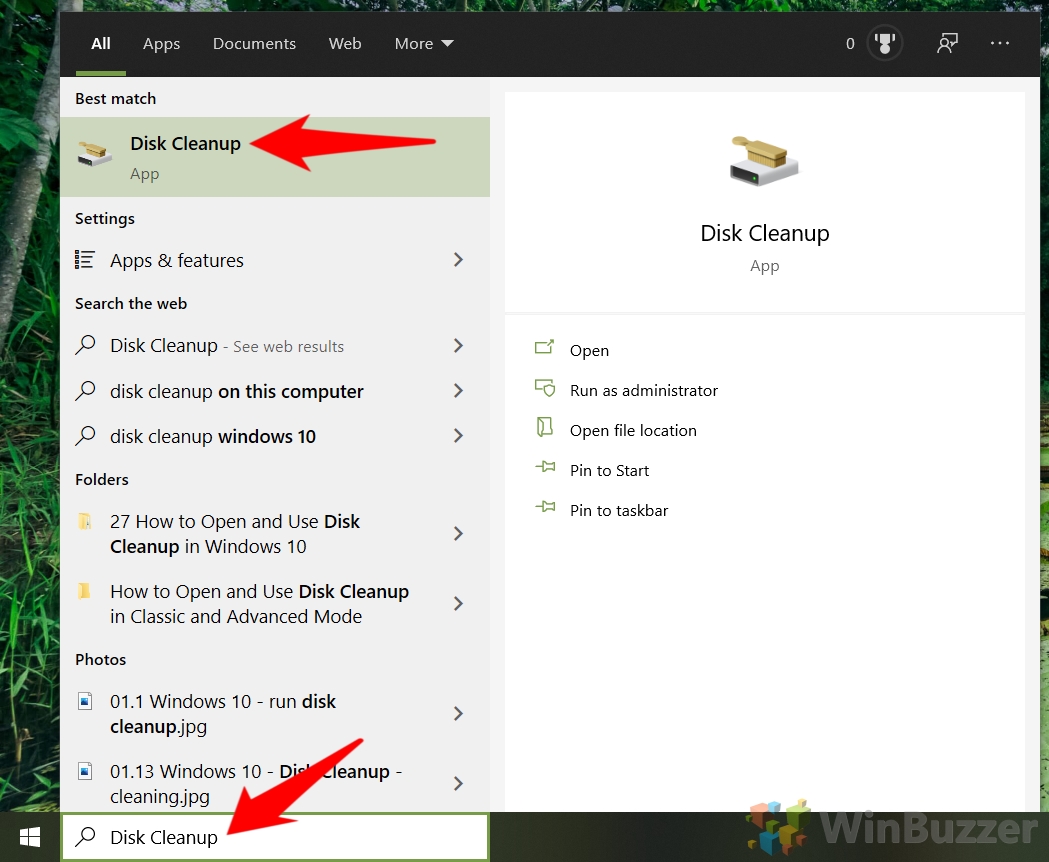
- Open Disk Cleanup
Press Start and then type “Disk Cleanup”. Click the top result.
- Wait for Disk Cleanup to scan your temporary files

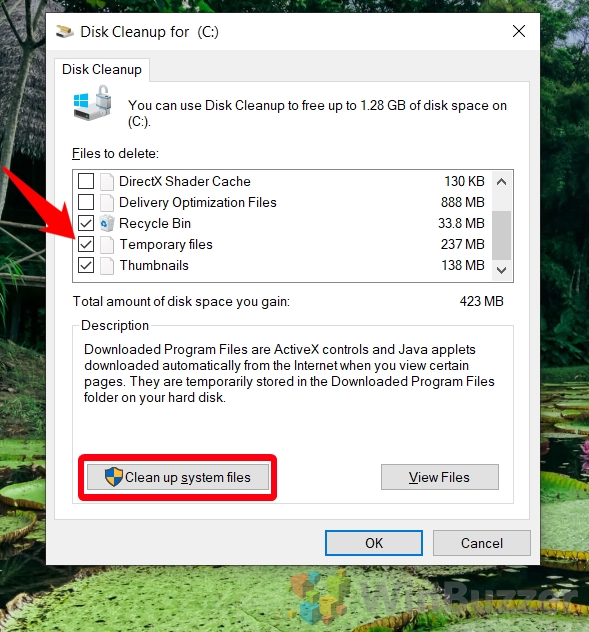
- Tick “Temporary files” and press “Clean up system files”
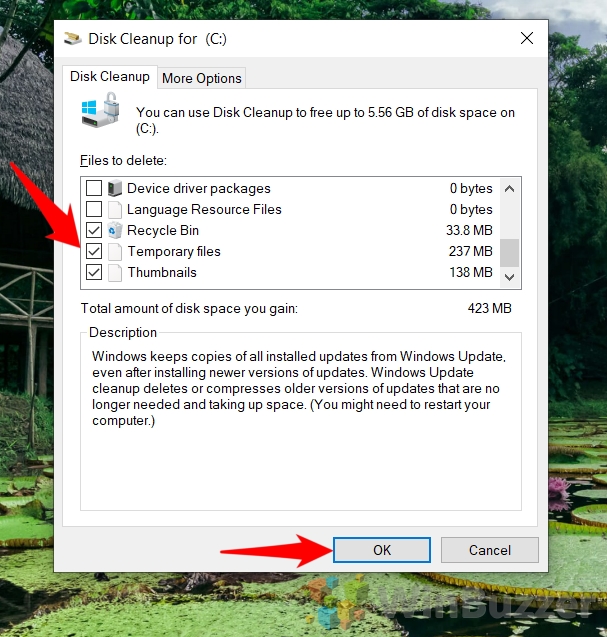
- Tick “Temporary files” again and press “OK”
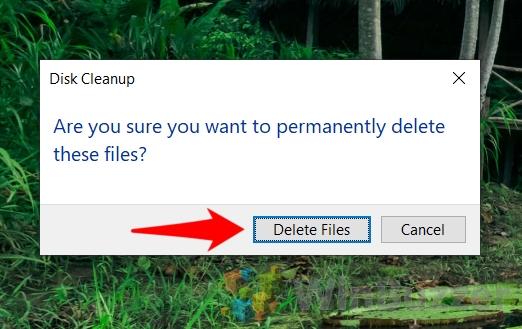
- Delete your temporary files in Windows Disk Cleanup
A prompt will warn you that your files will be permanently deleted. Click “Delete Files” if you’re happy with that.
How to Clear DNS Cache in Windows 10
The DNS cache doesn’t have much impact on your storage space, but it does experience issues often that can lead to a loss of internet connection. Flushing the cache often resolves this.
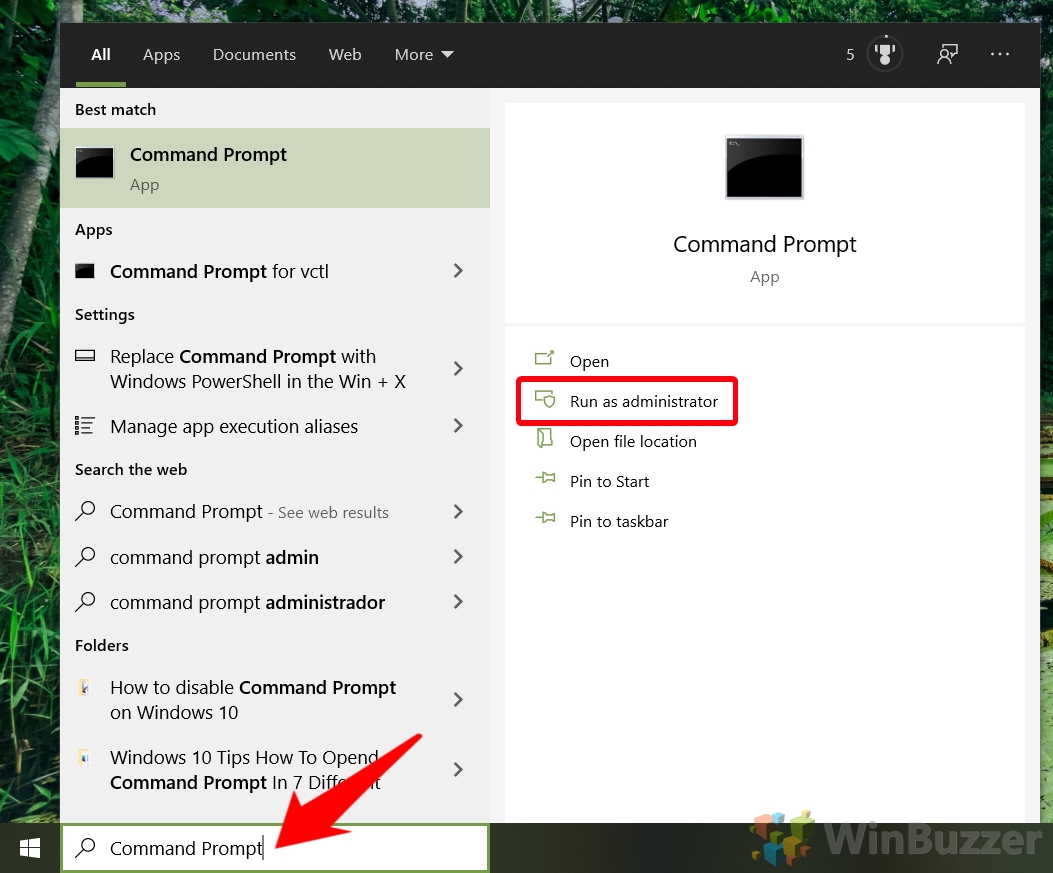
- Open Command Prompt as an administrator
Press Start and type “Command Prompt”. On the right-hand side of your Start menu, press “Run as administrator”.
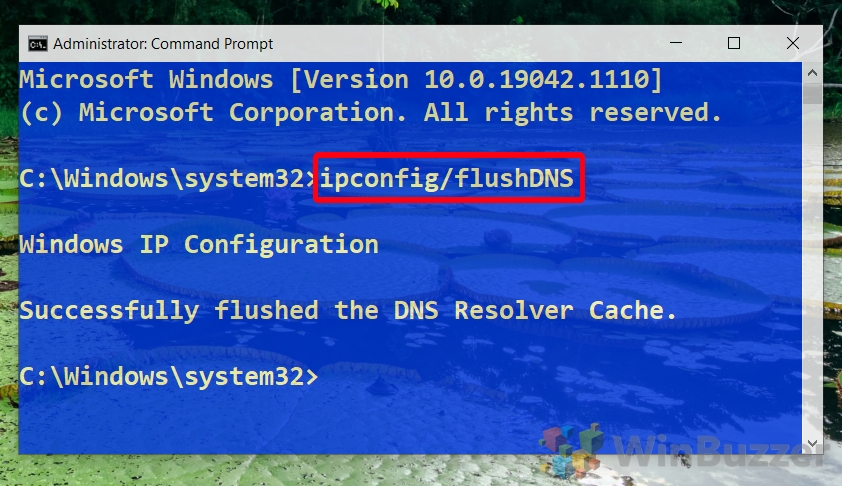
- Type the Windows 10 flush DNS command
In your Command Prompt window, type the following and press Enter:
ipconfig /flushDNSYou’ll receive the message “Successfully flushed the DNS Resolver Cache” once the process is completed. This should only take a second or two.
How to Clear the Windows Store Cache in Windows 10
If you’re experiencing crashes or other issues with your Windows clearing its cache can be helpful, too. To do this, we use the WSReset tool.
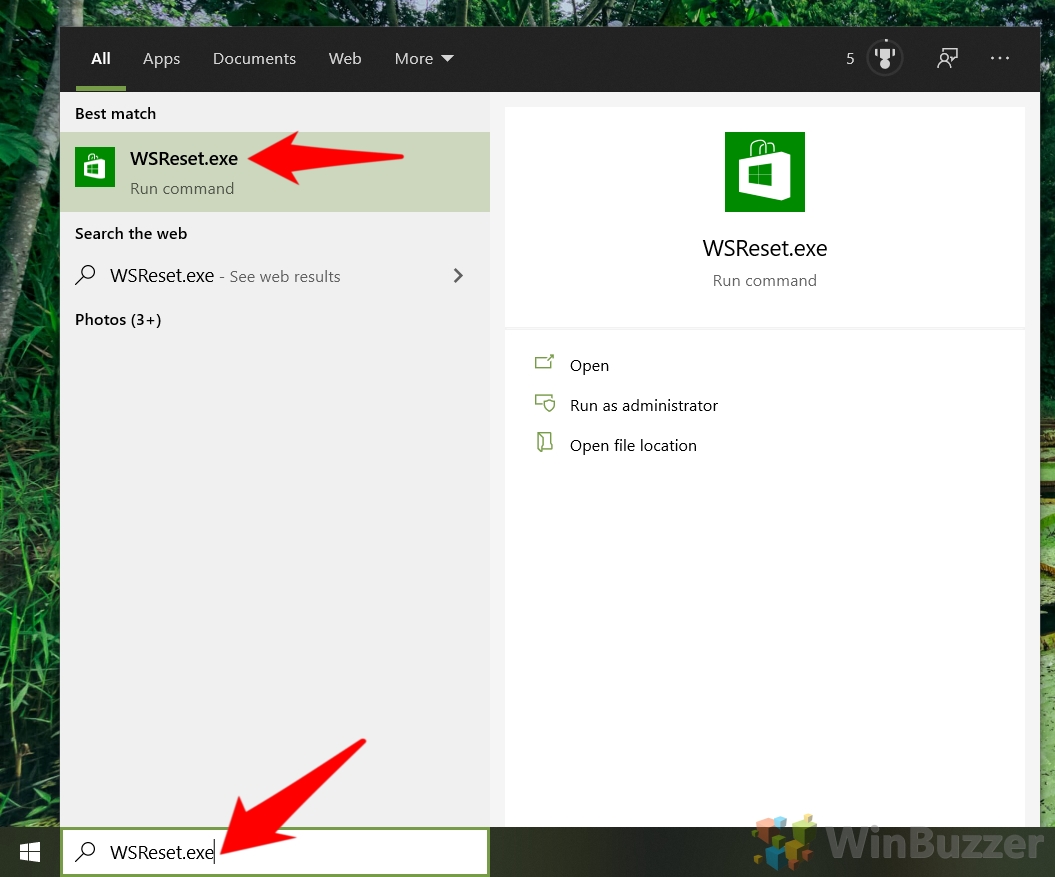
- Open WSReset
Press Start and then type “WSReset.exe”. Click the top result.
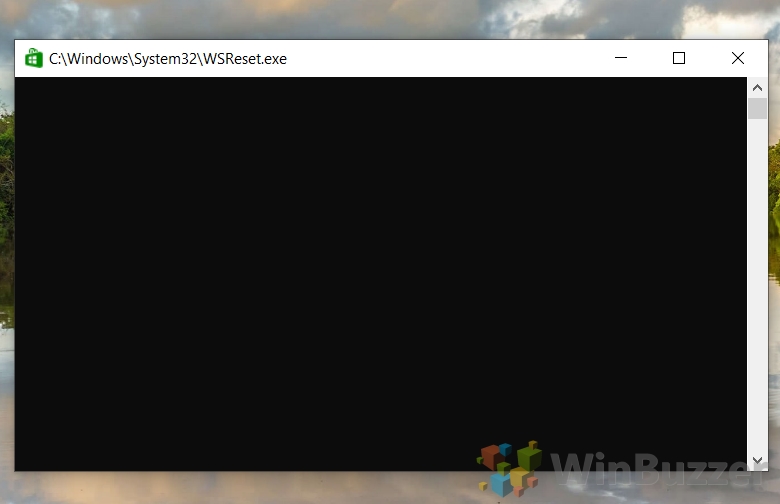
- Wait for WSReset to clear the Windows Store cache
A black terminal window will appear with a blinking white cursor. The process will take a minute or two, so all you need to do is wait a minute or two for the process to complete. Once it’s done, it will automatically close and the Microsoft Store will open.
If the process doesn’t complete, you may want to clear the Windows store cache using one of the methods mentioned in our dedicated tutorial.
How to Clear the Windows Location Cache
The final method area to clear a cache in Windows 10 is your store of location data. The location cache is already stored for a limited amount of time but clearing it manually could help to resolve issues and claw back a tiny bit of disk space.
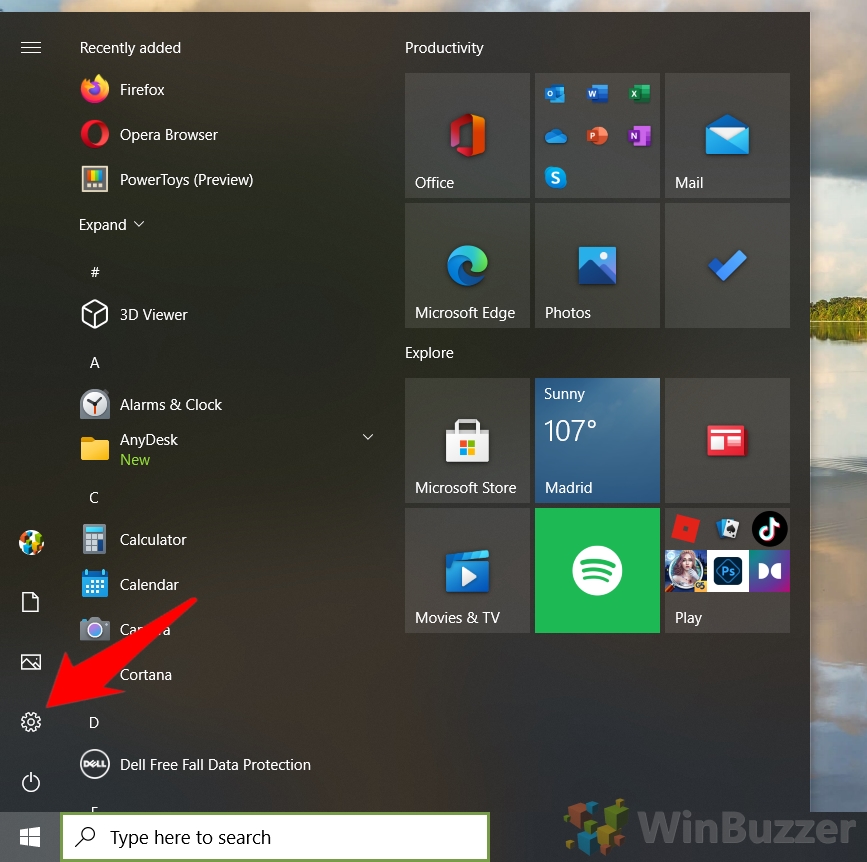
- Open Settings
Press the “Start” button, then click the settings cog, above the power button. Alternatively, press Windows + I.
- Click “Privacy”

- Click “Location” in the sidebar and press “Clear”

How to Clean up the WinSxS Folder and Disable Reserved Storage
If you need to free up even more disk space, consider following our tutorials on how cleanup the WinSxS folder and how to disable reserved storage. If more drastic measures are required, you can also use CompactOS compression to free up 2-5GB more.
Last Updated on February 14, 2022 7:43 pm CET by Markus Kasanmascheff


