

Using SSH on Windows 10 used to be a pain that required third-party software such as PuTTy. In 2018, though, Microsoft enabled native SSH commands via an OpenSSH Windows integration.
If you’re unfamiliar with SSH, it stands for Secure Shell, a protocol typically used for connecting to Linux servers. The command-line SSH tool lets you log into your server and run commands remotely to perform any required task.
The Integrated OpenSSH for Windows Client
The OpenSSH client for Windows is installed by default on Windows Server 2019 and Windows 10 build 1809 and later. However, if SSH commands aren’t working for you, it’s because you need to enable them in your Windows features. We’re going to walk you through enabling SSH on Windows 10 via this method, then show you how to use it. Let’s get started:
How to Install the SSH Client on Windows 10
Though Windows 10 OpenSSH is installed by default on most versions, it may not be for everyone. Thankfully, enabling SSH only takes a few seconds. Here’s how:
- Press the Search button and type “Optional feature”
Click the top result, which should read, “Add an optional feature”.

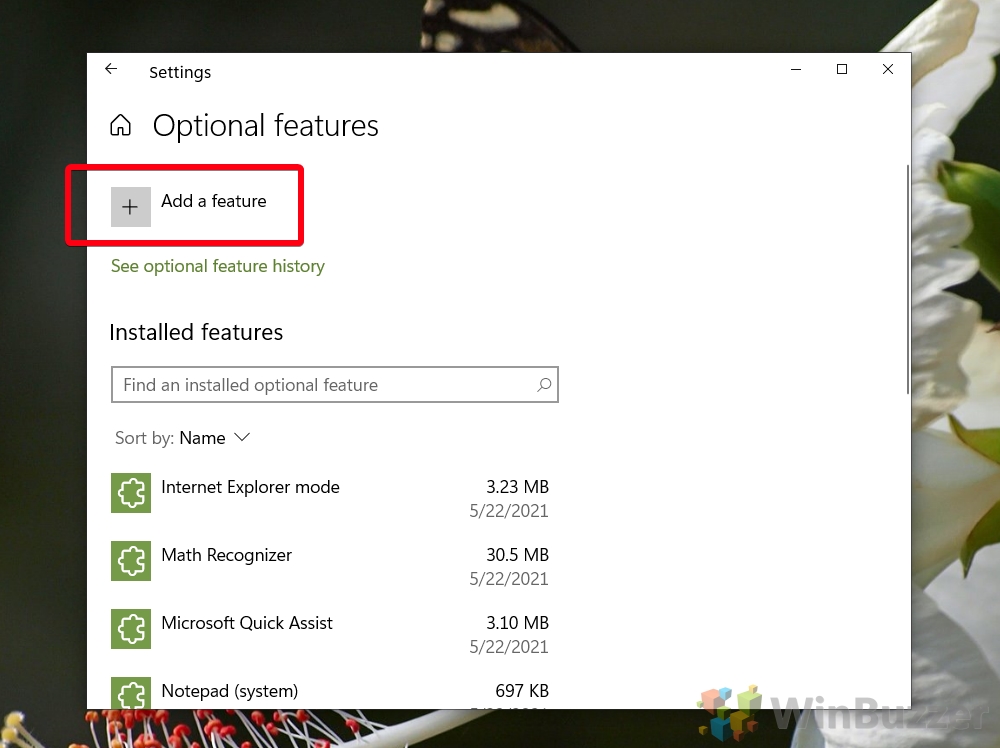
- Click “Add a feature” in Settings
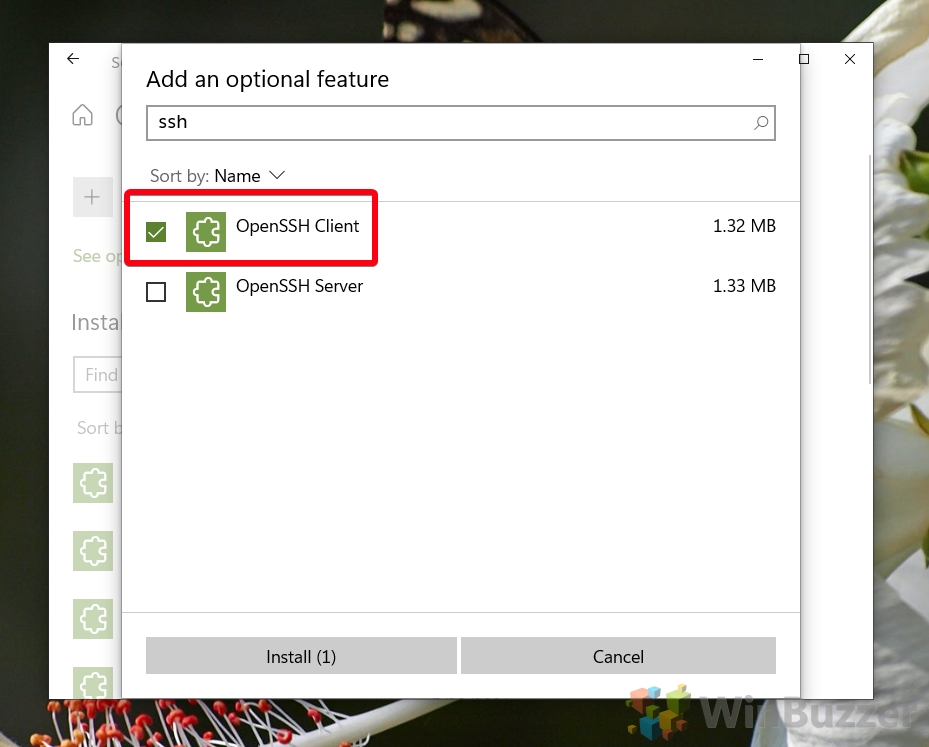
- Install the Windows OpenSSH Client
Type “SSH” in the optional features search bar, then tick the entry that reads “OpenSSH Client”. Finally, click the “Install” button at the bottom of your Window. The process will take a few seconds to complete and shouldn’t require a restart.
How to Use SSH Commands in Windows 10
Once you have the Windows 10 SSH client installed, using it is a simple matter. You can use Command Prompt for this, or PowerShell SSH, whichever you prefer. The SSH commands are the same across both applications, so you can still follow along.
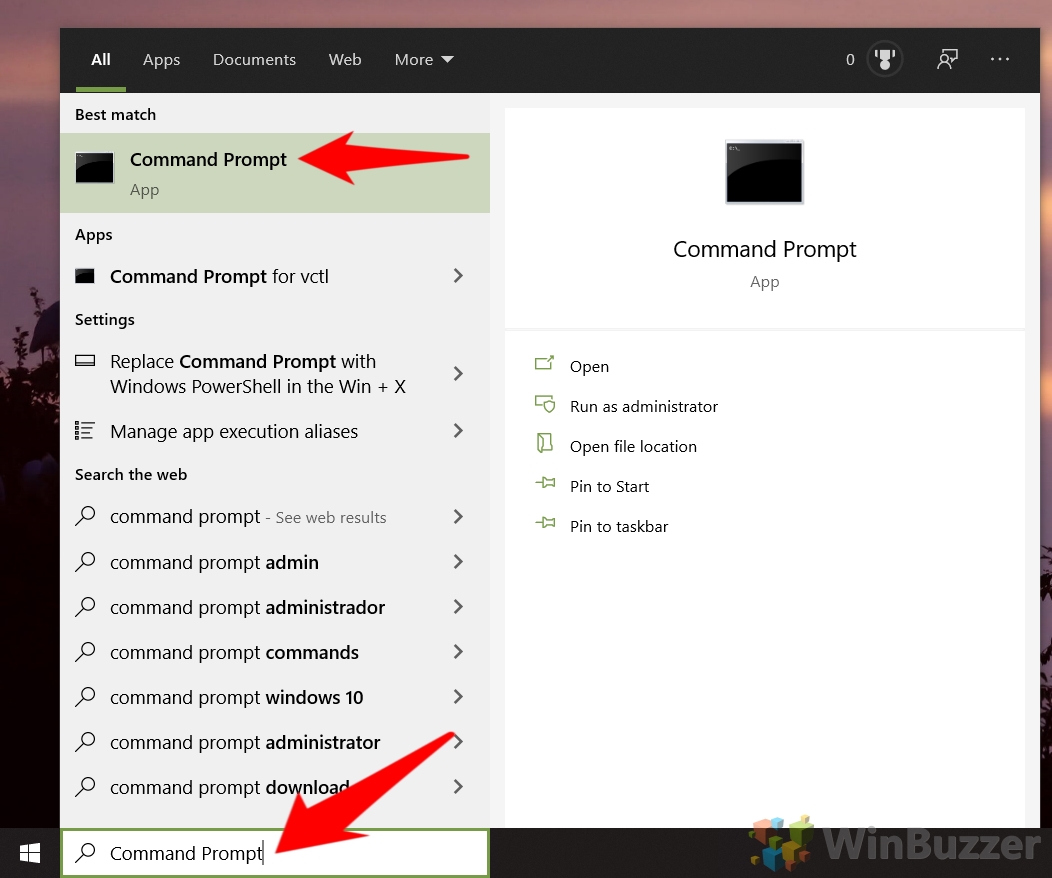
- Open Command Prompt (or PowerShell)
Press Start and then type “Command Prompt”. Click the top result.
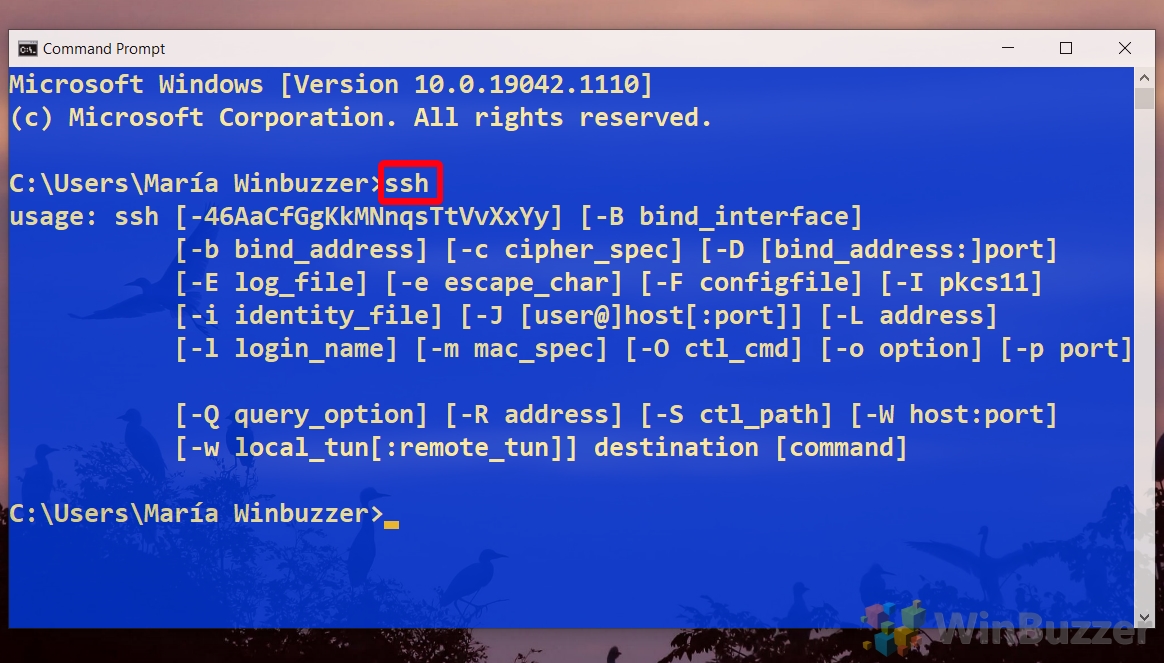
- Run the SSH command to view its usage guide
Command Prompt will return a full list of options and syntax for you to use as you require.
- Connect to your server via your Windows Open SSH client
In most cases, you won’t need the above options to connect to your SSH server. Instead, you can simply run:
ssh username@host
You’ll be prompted for your server’s root password, which you can type and press Enter to log in.
If your server uses a different port to the standard for SSH, you can specify it by adding
-p portnumberto the end of your command.The first time you connect to a server, you’ll receive a warning asking if you’re sure you want to connect. Type
yesand press Enter to connect.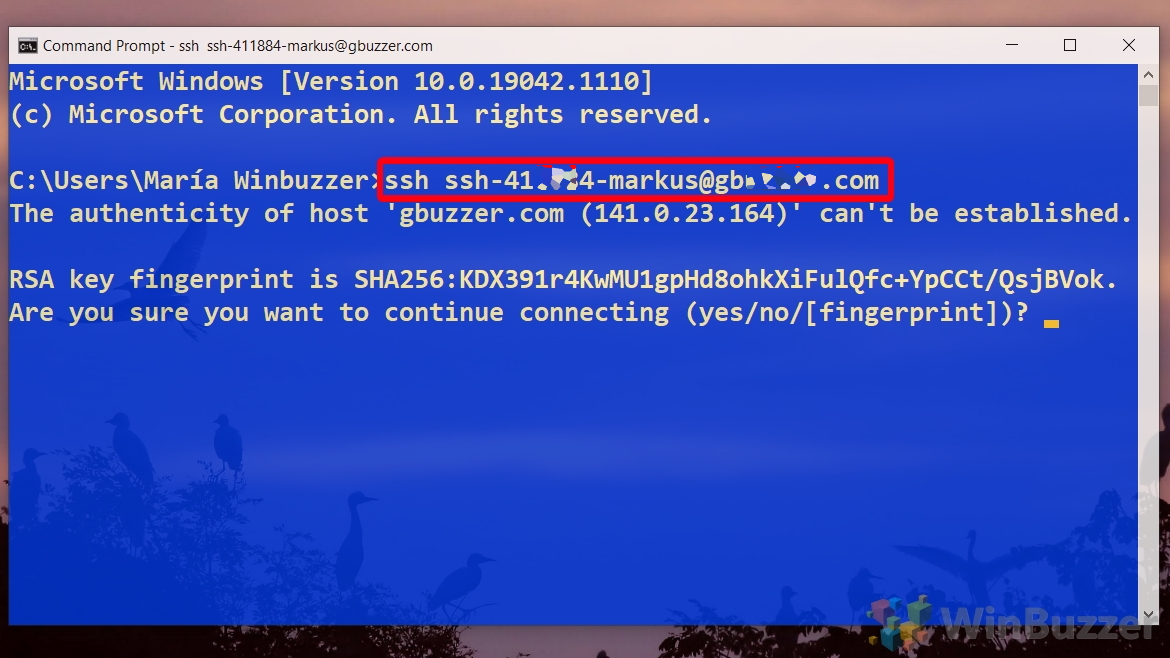
How to Open a Port in Firewall or Enable the Telnet Client
Now you know how to install SSH on Windows. However, if you’re still having issues, you may need to follow our tutorial on how to open or close a port in Windows 10 Firewall to add an exception for your SSH port.
Finally, if your server uses the older Telnet protocol, you may want to follow our tutorial on how to enable the Telnet client in Windows 10 instead.
Last Updated on February 14, 2022 7:43 pm CET by Ryan Maskell


