

If you’re wondering where print screens go after you take them, the simple answer is your Pictures folder. The more complicated answer, though, is that the screenshots folder can be wherever you want it to be. Today we’re going to show you how to change your Windows 10 screenshot location so that you can access them with ease.
First, though, bear in mind that there are numerous ways you can take a screenshot in Windows 10. You can use the Snip & Sketch tool, your Print Screen button, or third-party software.
The method we describe today will affect screenshots taken with the Print Screen hotkey. If you’re using third-party software, your best bet is to check its settings for a location option. With that, let’s get started:
How to Change the Windows 10 Screenshots Folder Location
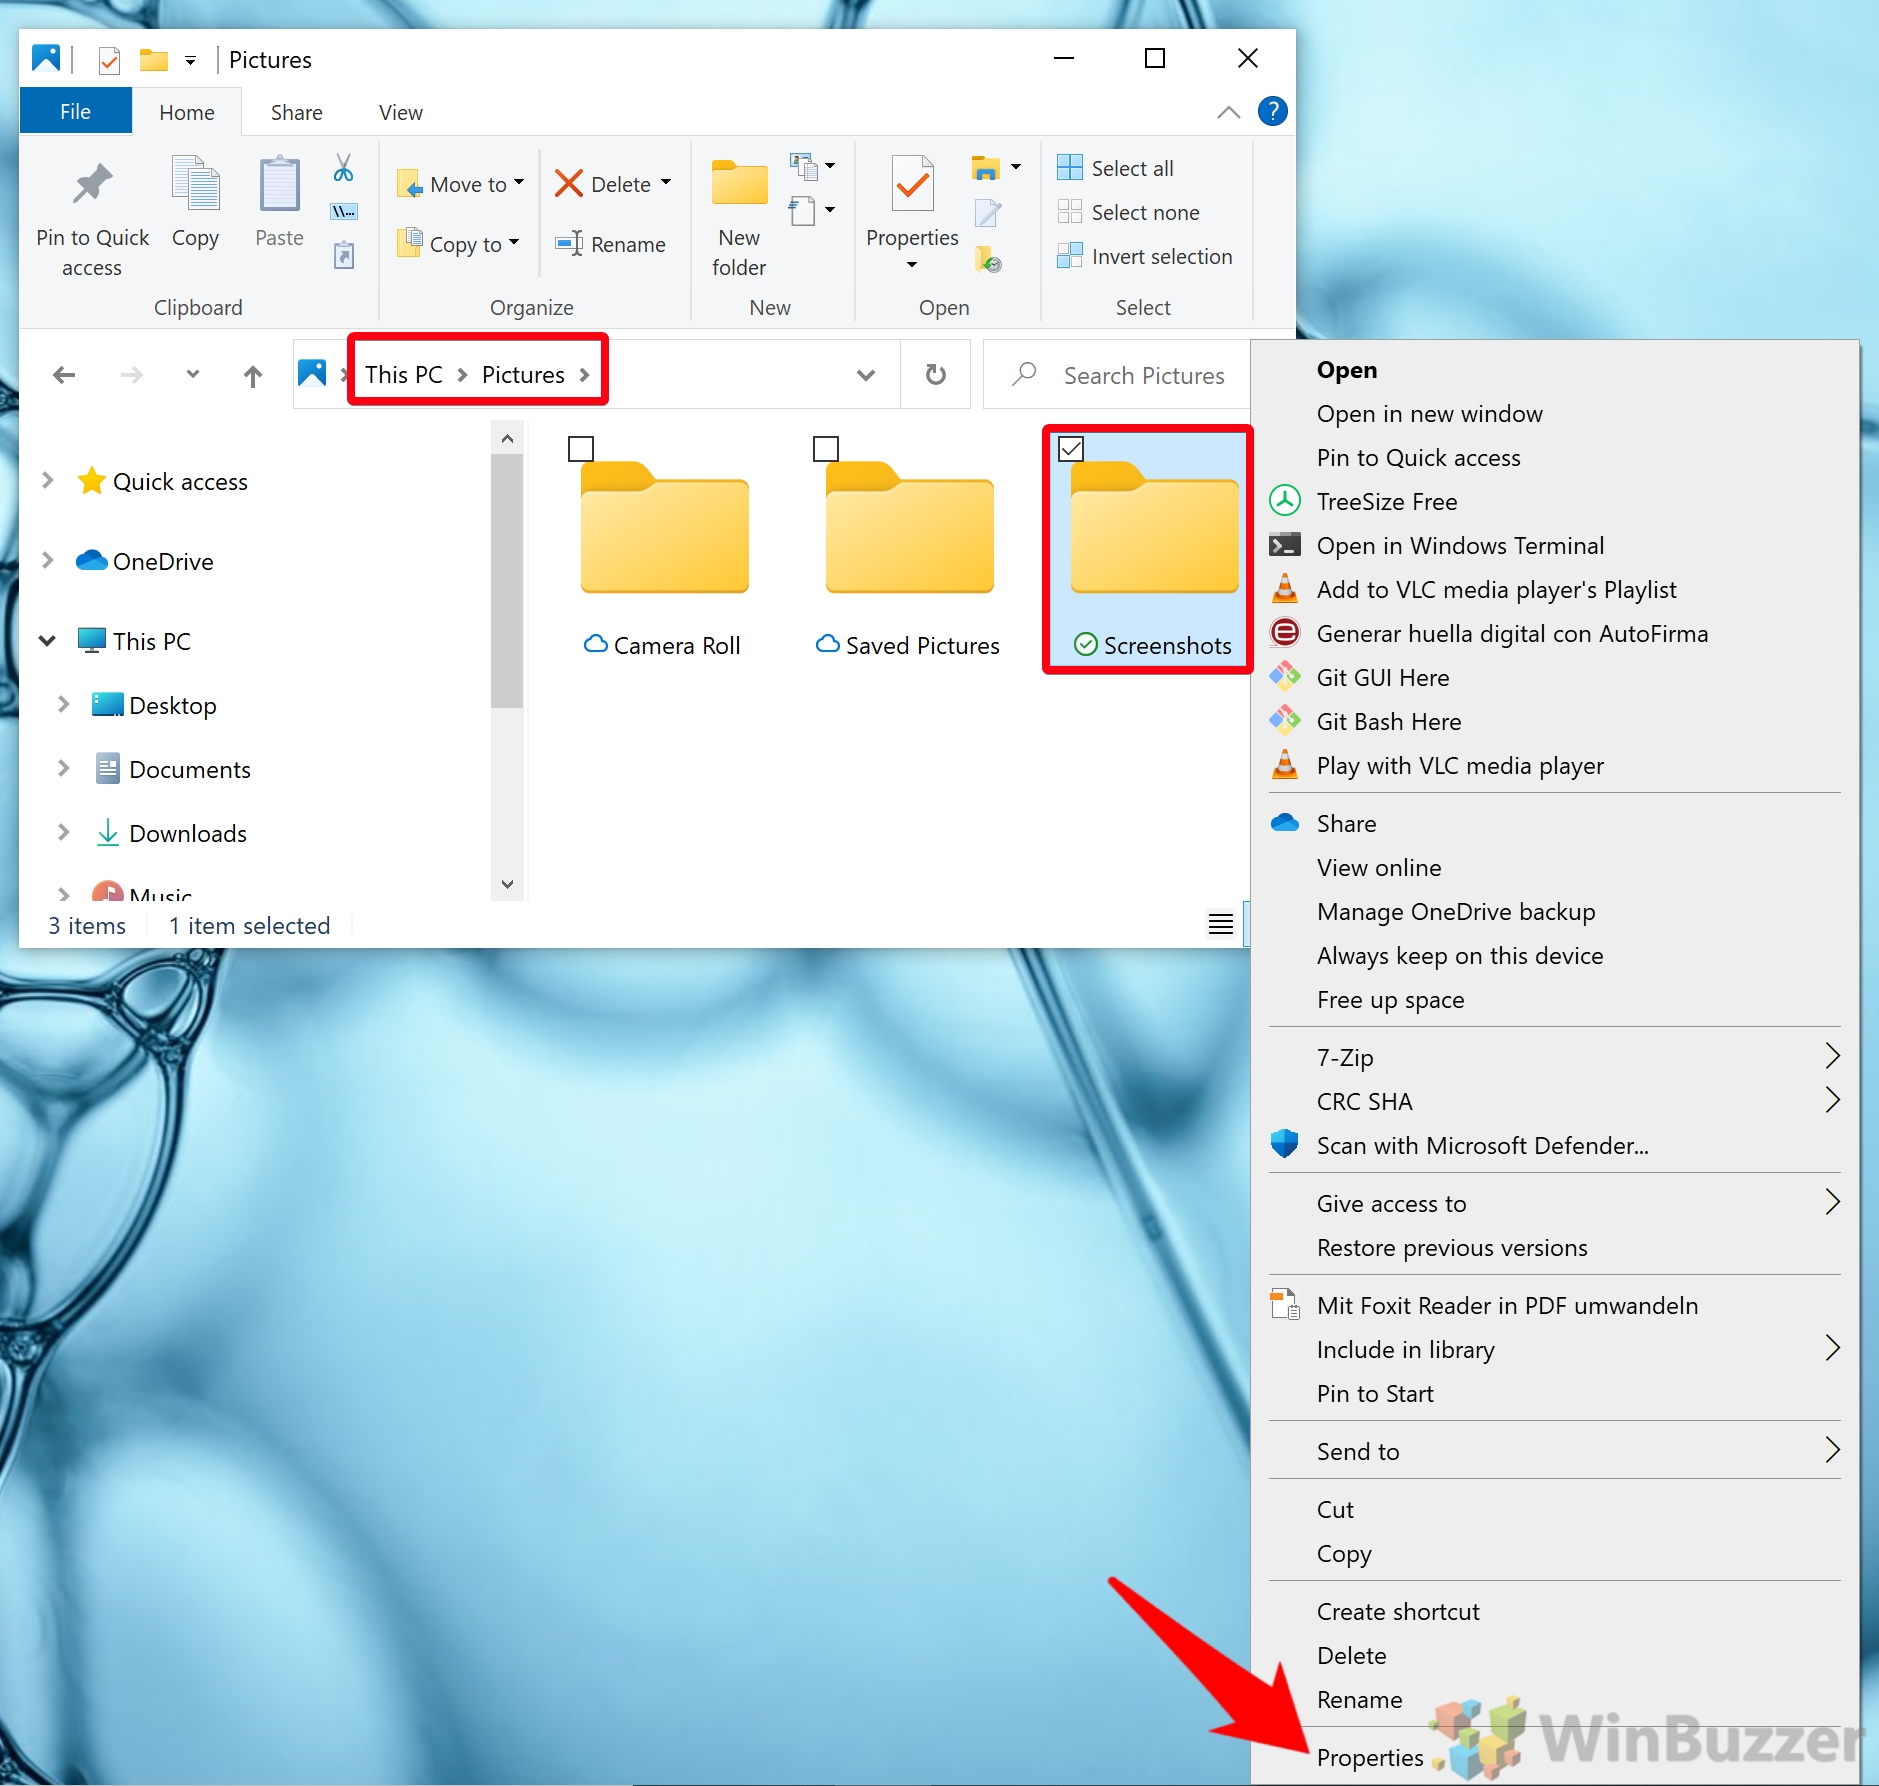
As we mentioned earlier, your print screen folder is usually located in C:\Users\%username%\Pictures. You can navigate there before you start by pasting the path into File Explorer. If you don’t have a screenshots folder, it might be because you haven’t taken a screenshot by pressing Windows + PrtScrn yet.
- Right-click the Screenshots folder and press “Properties”
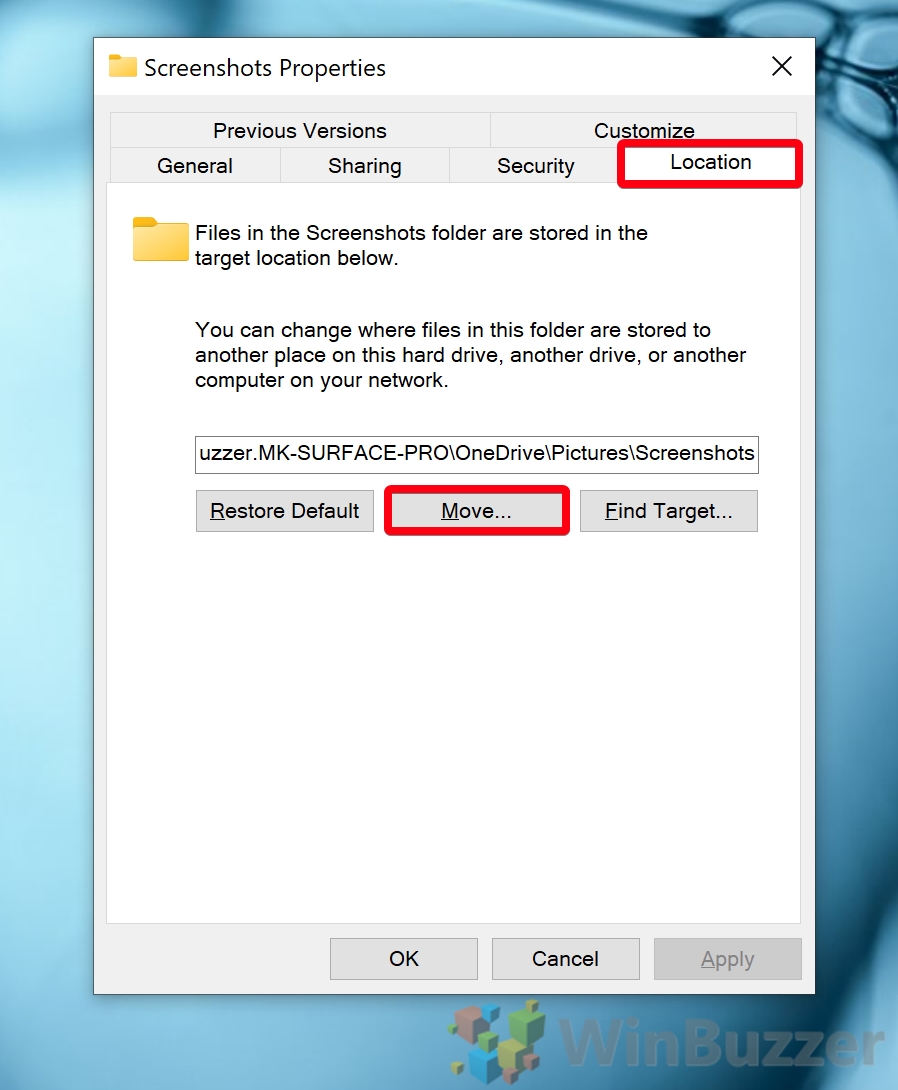
- Open the “Location” tab and click “Move…”
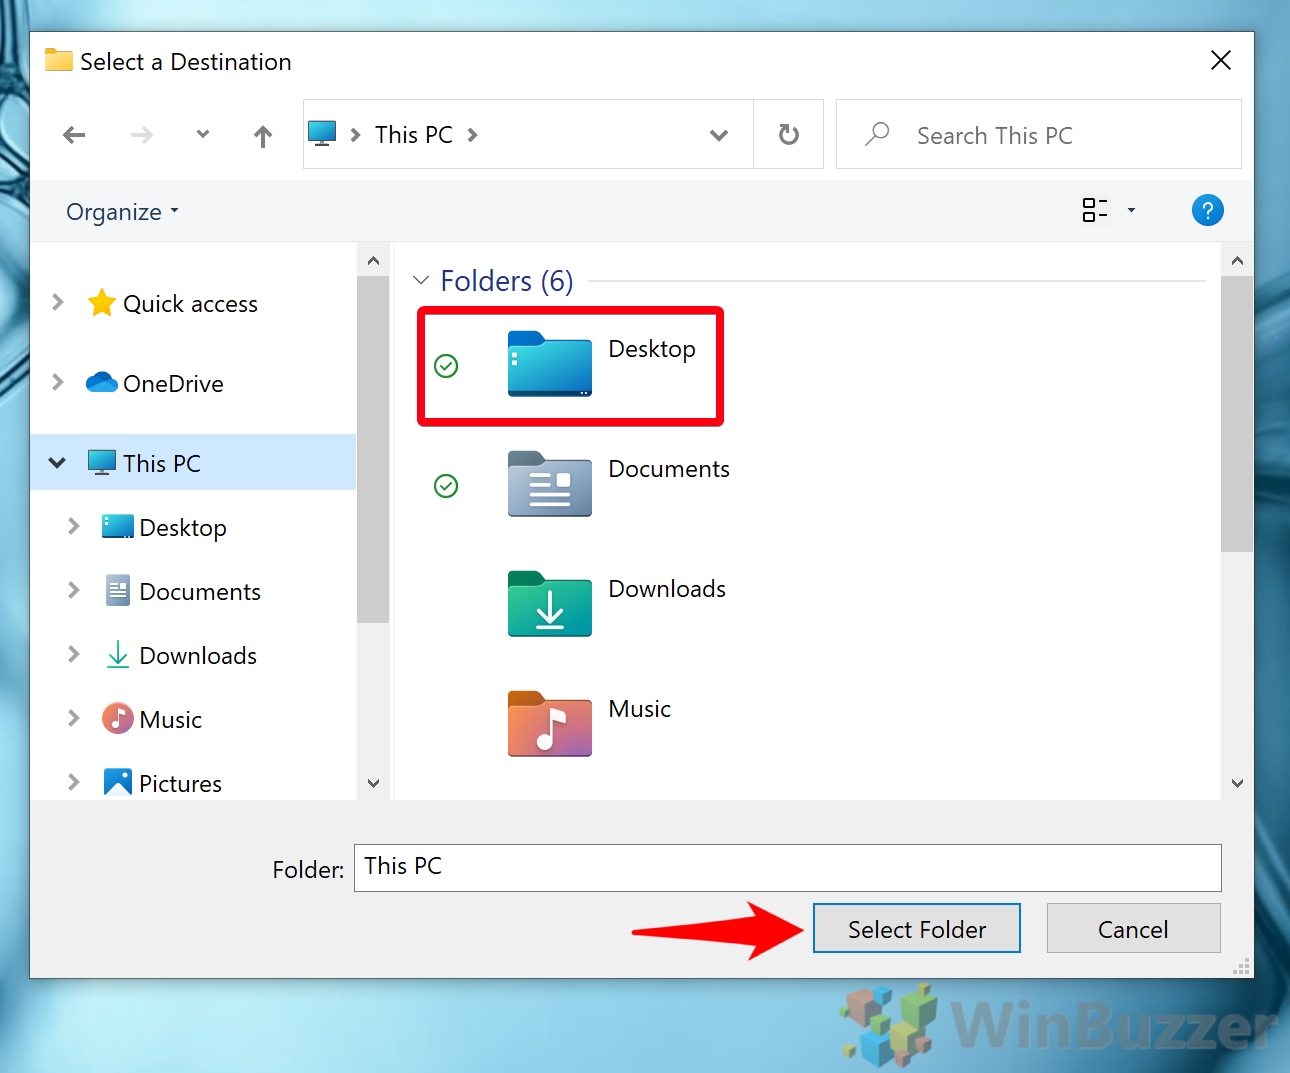
- Browse to your new folder and press “Select Folder”
In our example, we choose the desktop, but you can select anything you wish (so long as it isn’t your root directory). You can also right-click anywhere in the File Explorer window to create a new folder in which to store them.
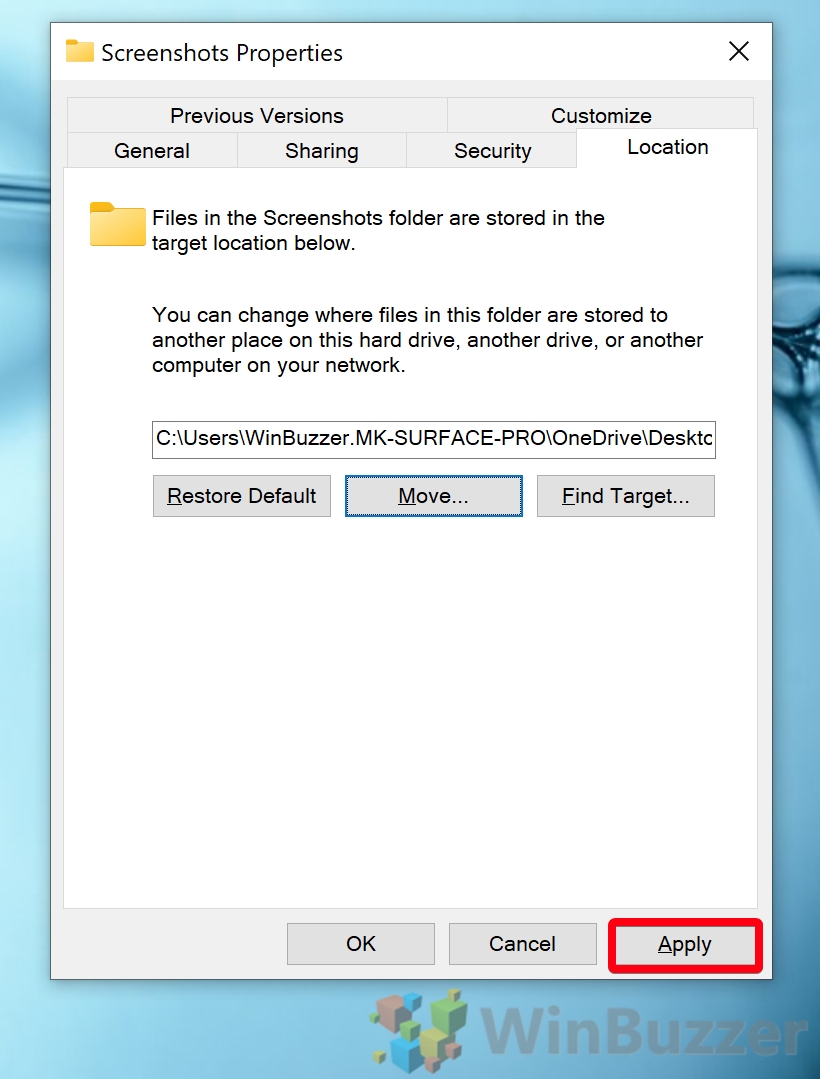
- Press Apply in your screenshot folder properties window
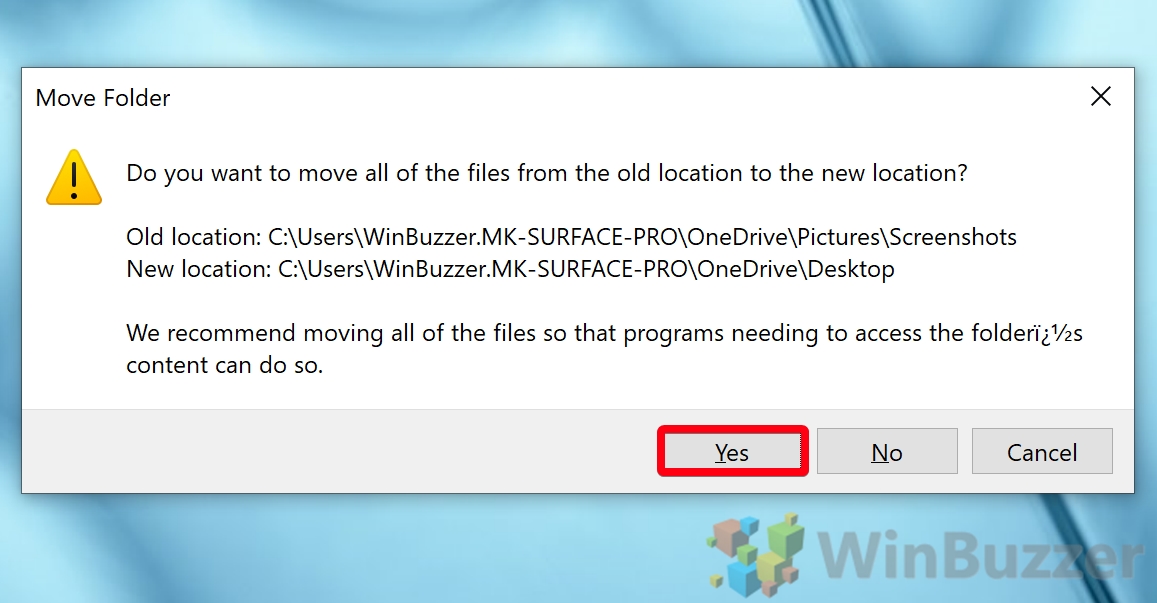
- Press “Yes” to accept the folder move
Windows will ask you if you’re sure you want to move all the files in your current Windows 10 screenshot location to the new one. It’s recommended that you press “Yes”.
- Agree to redirect your Windows 10 screenshot folder
Press yes to the redirection prompt so that all screenshots will go to your new screenshot save location.

- Click “OK” in your print screen folder properties
If you need to restore the original location at any point, you can just click the “Restore Default” button.

That’s it. You don’t need to do anything else to change where print screens go in Windows 10. While we have you, though, you may want to learn how to hide and unhide your screenshots folder at will, or even set it as your default start folder for File Explorer. Happy screenshotting!
Last Updated on February 14, 2022 7:44 pm CET by Markus Kasanmascheff


