

If you believe you have malware on your PC and aren’t sure your anti-virus has removed it, you can use the Microsoft Safety Scanner tool. Safety Scanner, also known as MSERT, is a standalone Windows 10 malware removal tool that can find many malware types.
Microsoft Safety Scanner is a portable malware removal tool
The main difference between Microsoft Safety Scanner (MSERT) and Microsoft’s Malicious Software Removal Tool is its portable nature. Though Safety Scanner works similarly, you won’t need to install it or download additional malware definitions via Windows Update.
Instead, your Microsoft Safety scanner download will always be up to date and include the latest detection patterns. This is beneficial for simplicity, and the lack of installation may allow it to work when other anti-virus solutions are blocked by the malware.
However, it should be noticed that MSERT should not be used as a replacement for other Microsoft anti malware solutions like Windows Defender. Nor should it replace third-party solutions like Malwarebytes. This is because the MSERT does not contain real-time protection. It will not stop a virus infecting you in the first place – only help to clean up particularly stubborn ones.
If you’re wondering how to use the Windows safety scanner, read on below:
How to use Microsoft Safety Scanner to Find and Remove Malware
Using the Windows Safety Scanner is even easier than Windows Defender. The harder part is finding the legitimate Microsoft Safety scanner download and ensuring its the right one for your system. We’ll be covering everything you need to know below:
- Visit the Microsoft Safety Scanner download page
Head to the Microsoft support site for MSERT and choose between the 32-bit and 64-bit download. If you’re unsure which is right for your system, follow the steps below. Otherwise, you can skip to step 5.
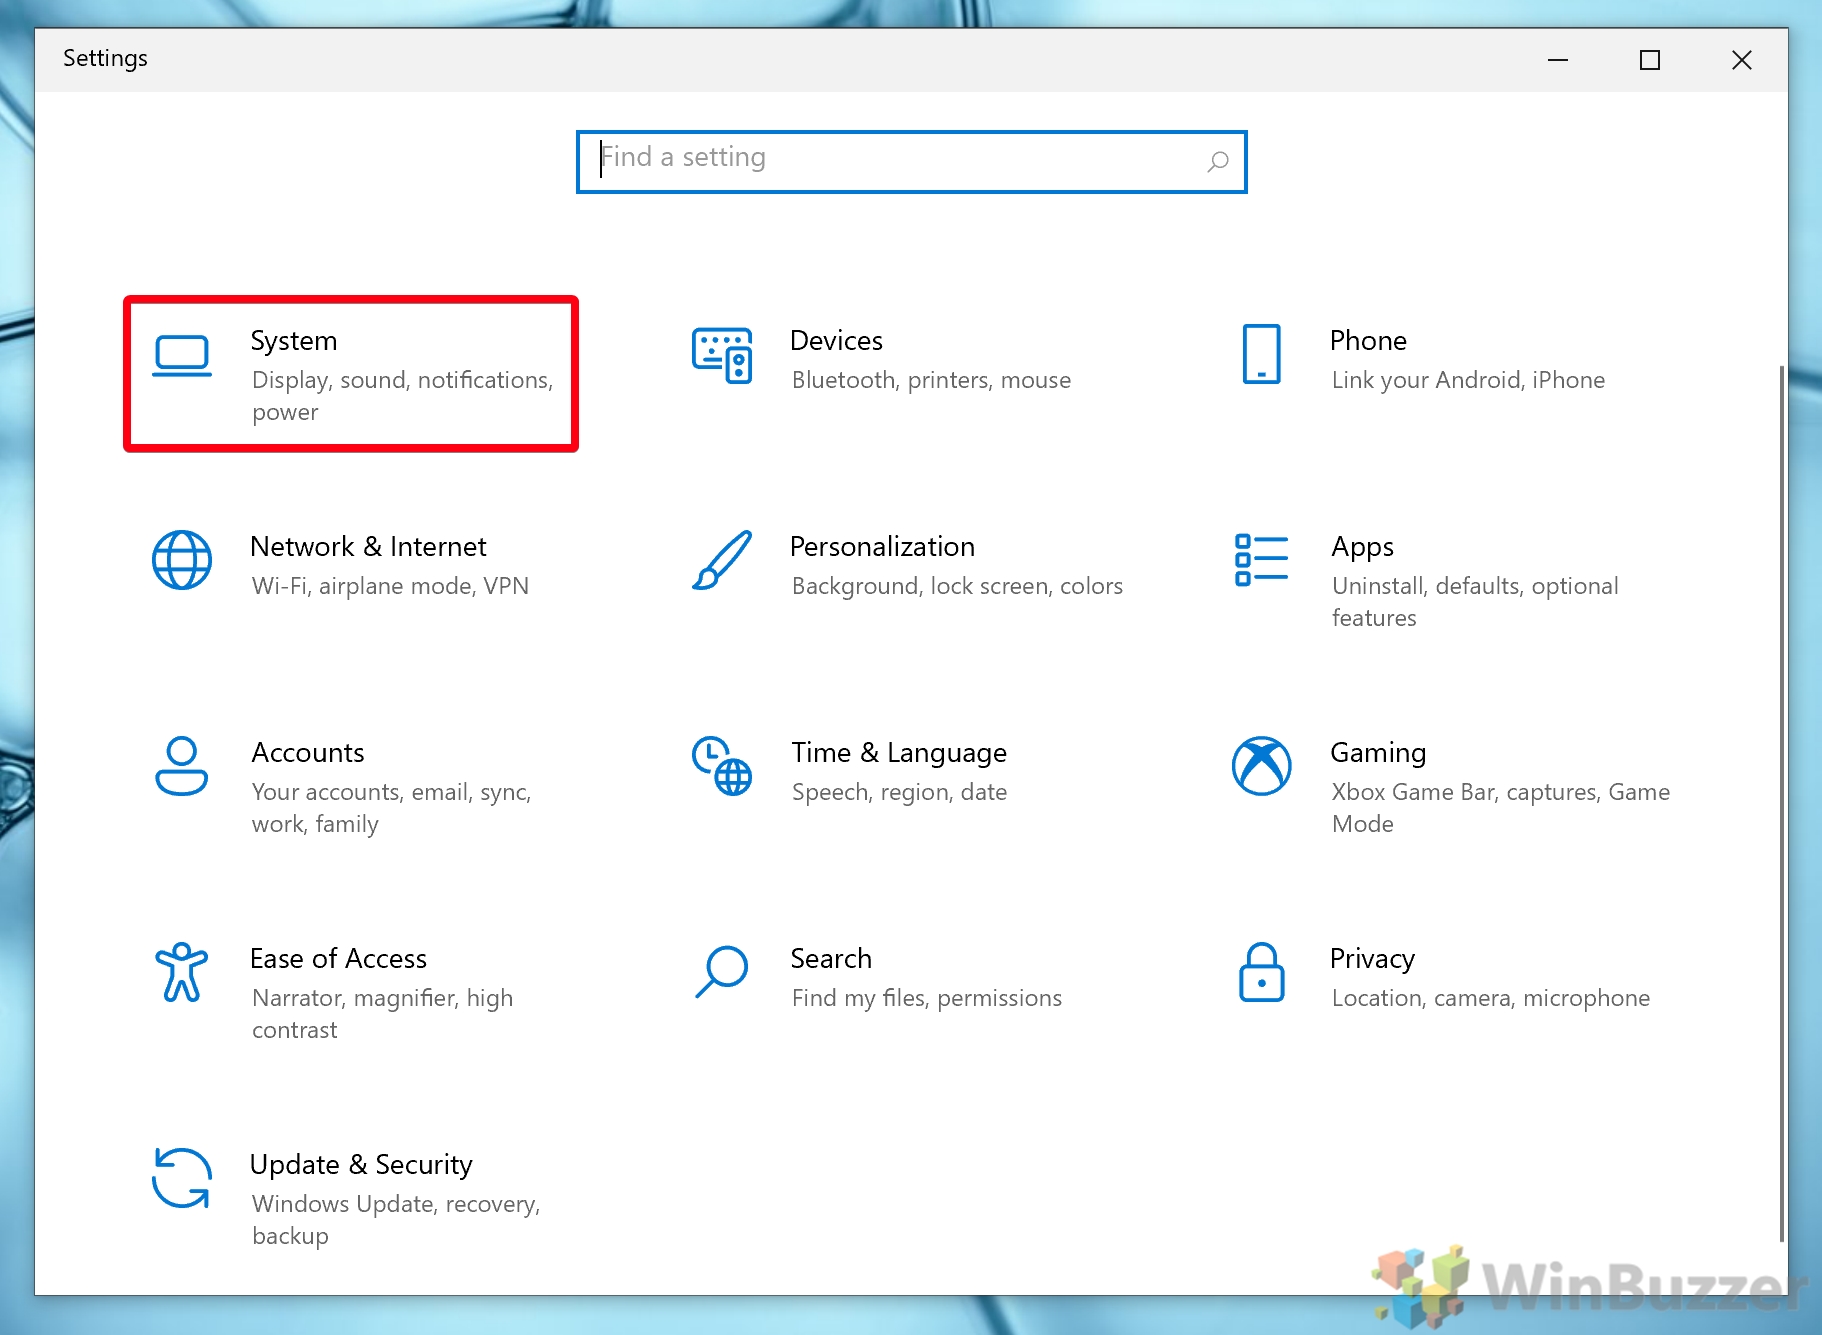
- Open Settings
Press the “Start” button, then click the settings cog, above the power button. Alternatively, press Windows + I.

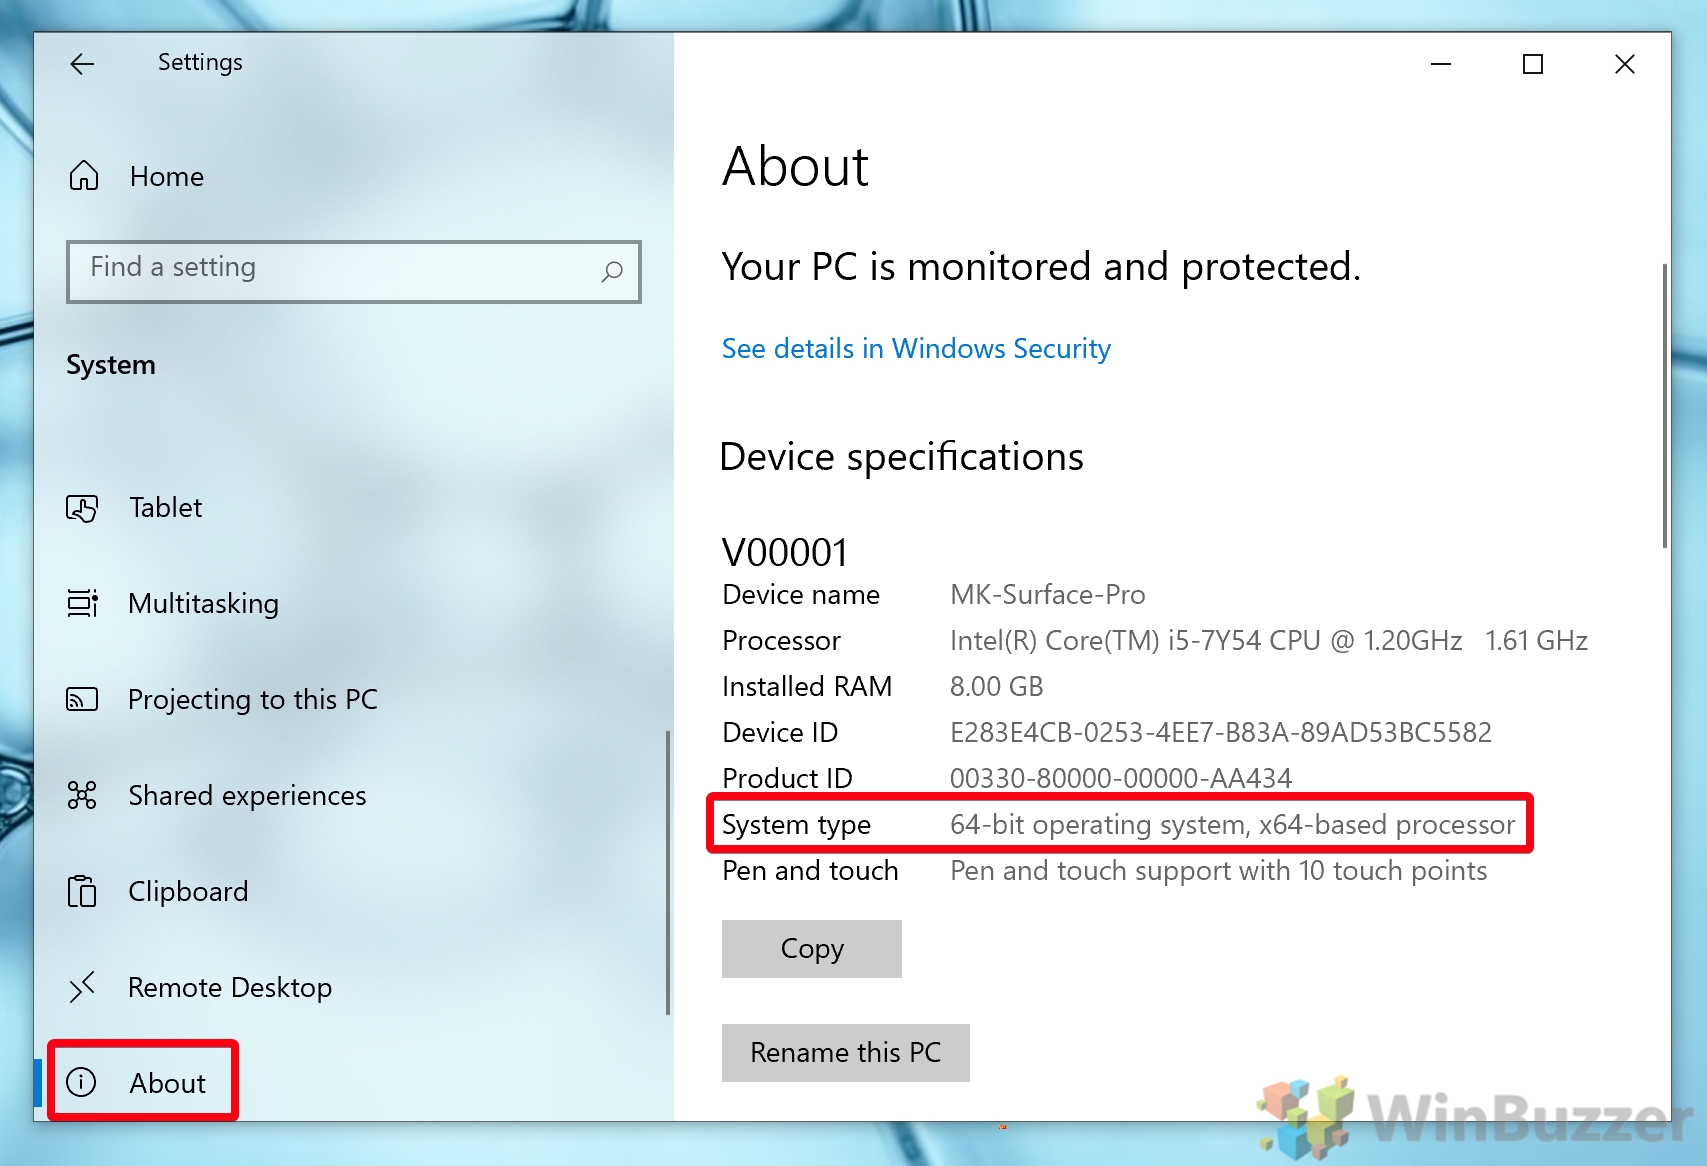
- Click “System”

- Press “About” in the sidebar and check your System type
If you have a 64-bit operating system, you should download the 64-bit version of Safety Scanner. If it doesn’t, download the 32-bit version.

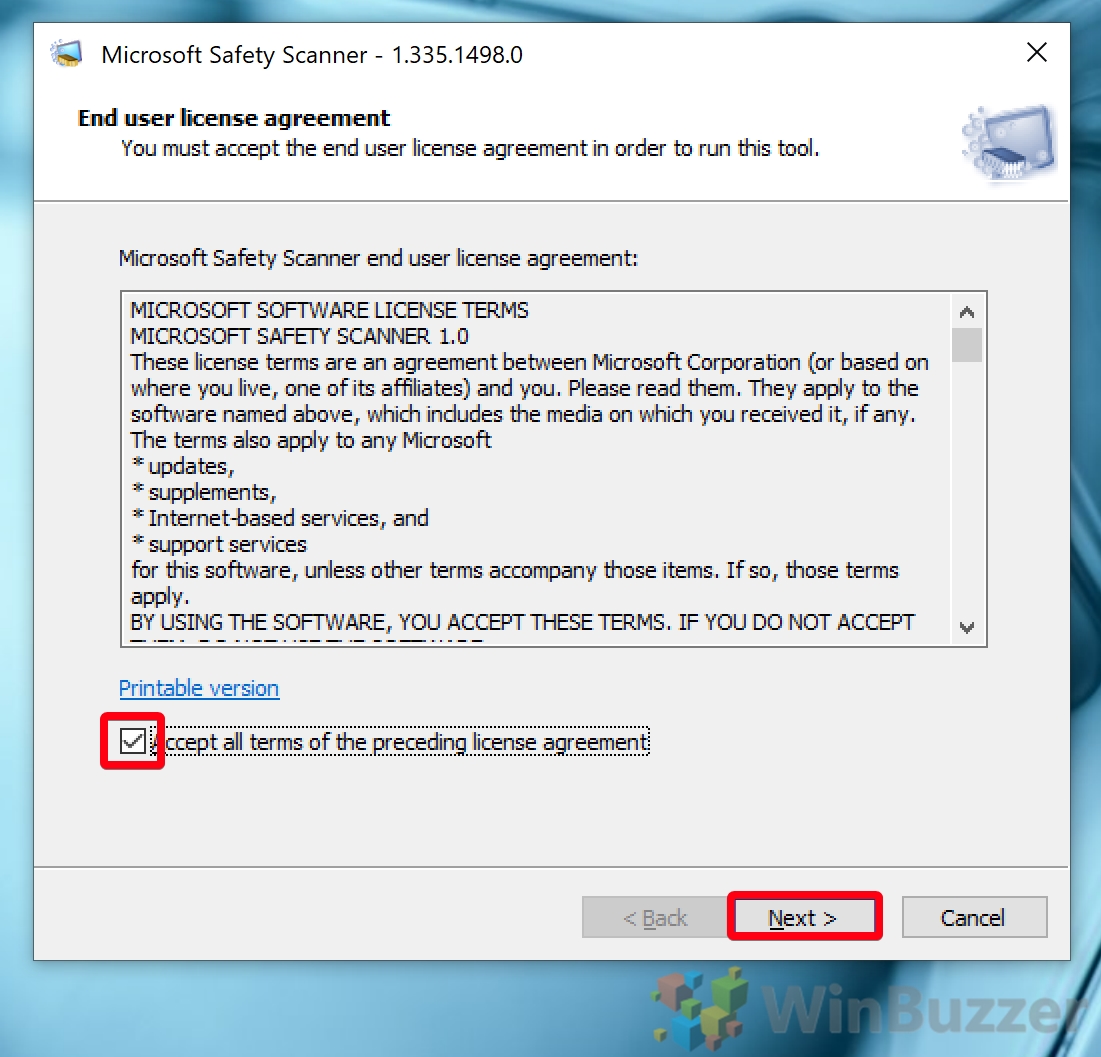
- Run MRST.exe and accept the license agreement
After downloading Microsoft Safety Scanner, double-click its .exe, tick “Accept all terms of the preceding license agreement” and press “Next”.

- Press “Next” again on the warning screen

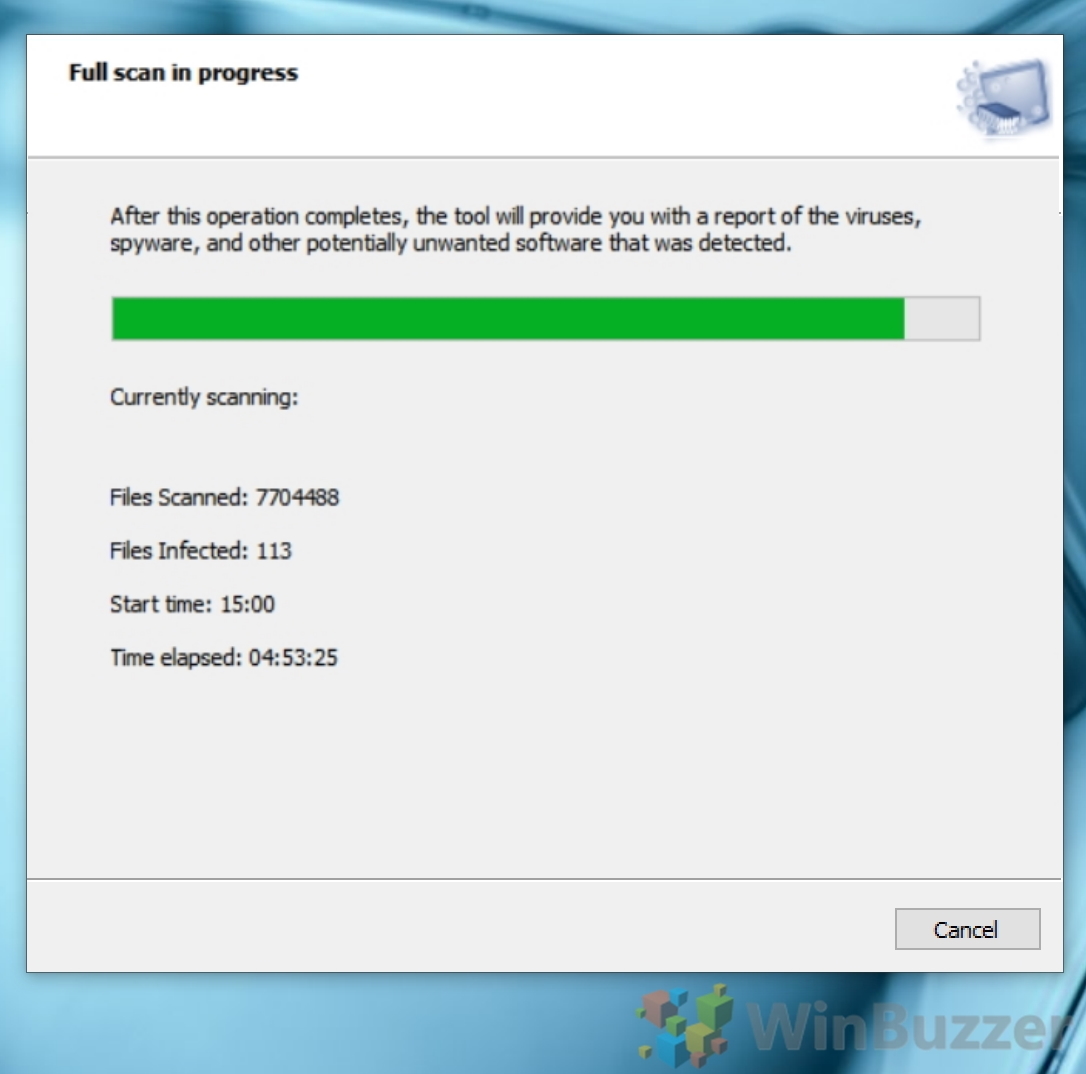
- Wait for the Microsoft anti malware scan to complete

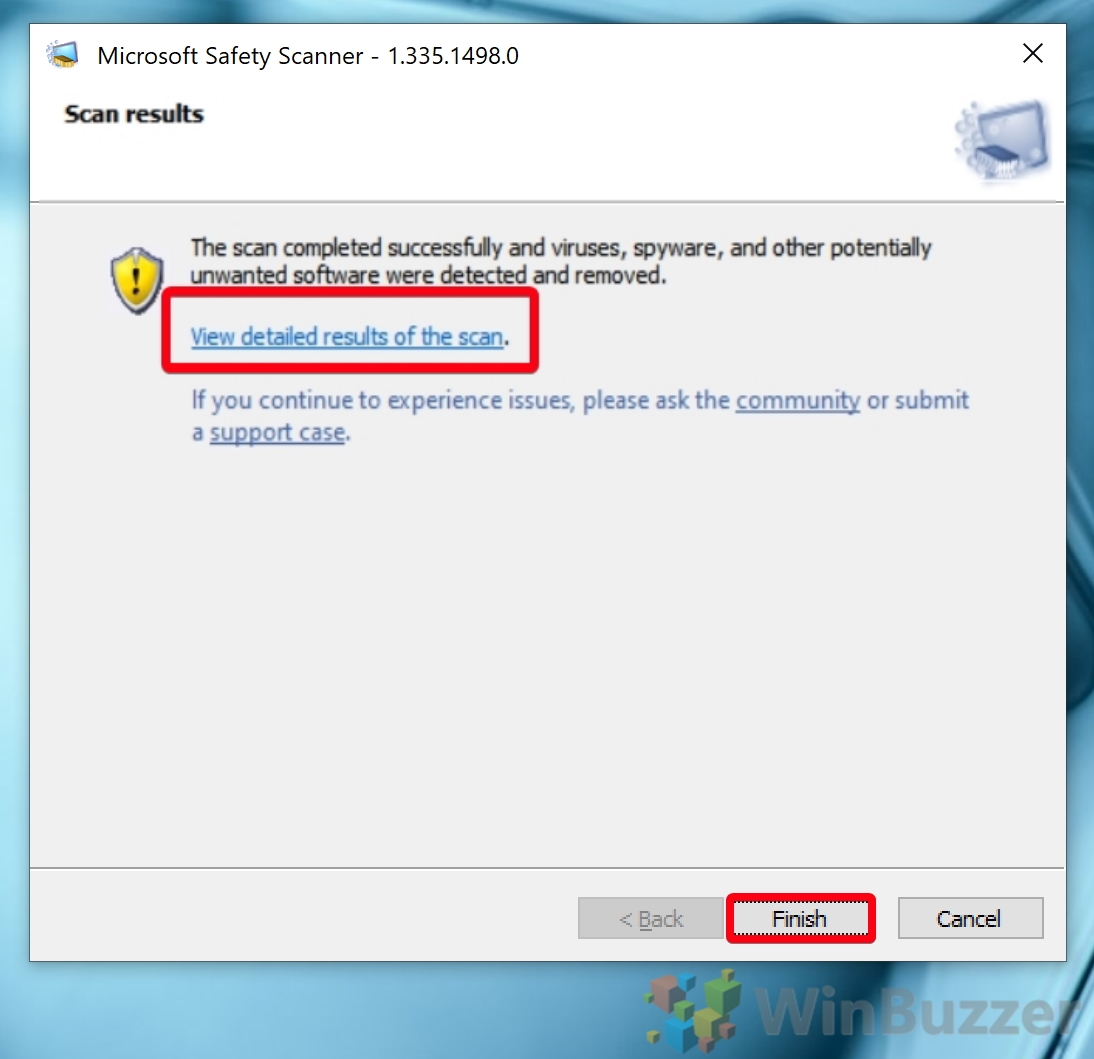
- Press “View detailed results of the scan”
If the malware removal tool found anything suspicious, you’ll see a yellow shield with a link underneath that reads “View detailed results of the scan”. Click the link or press “Finish” if it didn’t find anything.
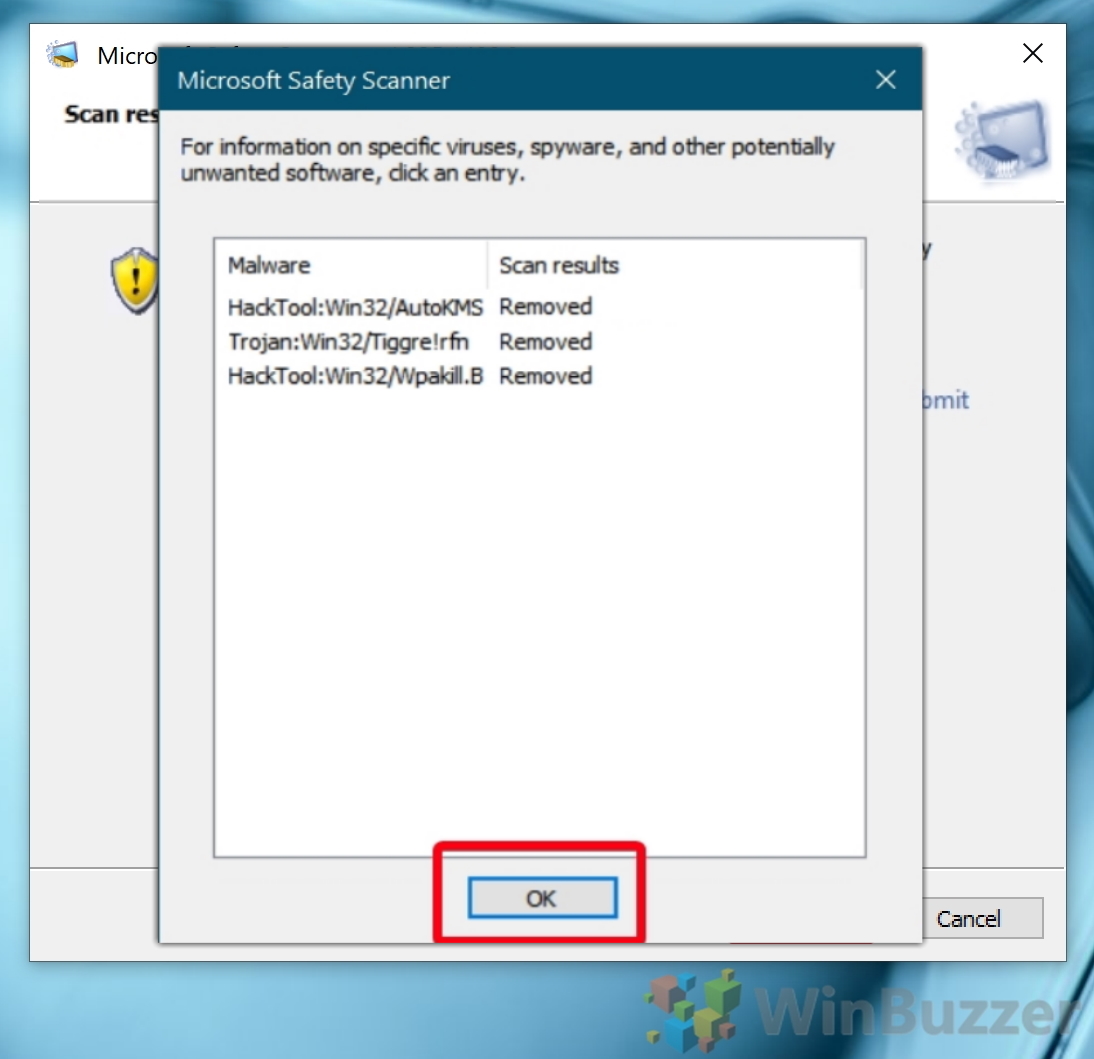
- Make note of the detected malware and press “OK”
Keeping note of the malware will help you to research it if it comes back and assess what damage it may have had on your system.


How to Use the Microsoft Safety Scanner via Command Prompt
If you’re on a Windows Server install or are running from recovery media, you can run MSERT from Command Prompt.
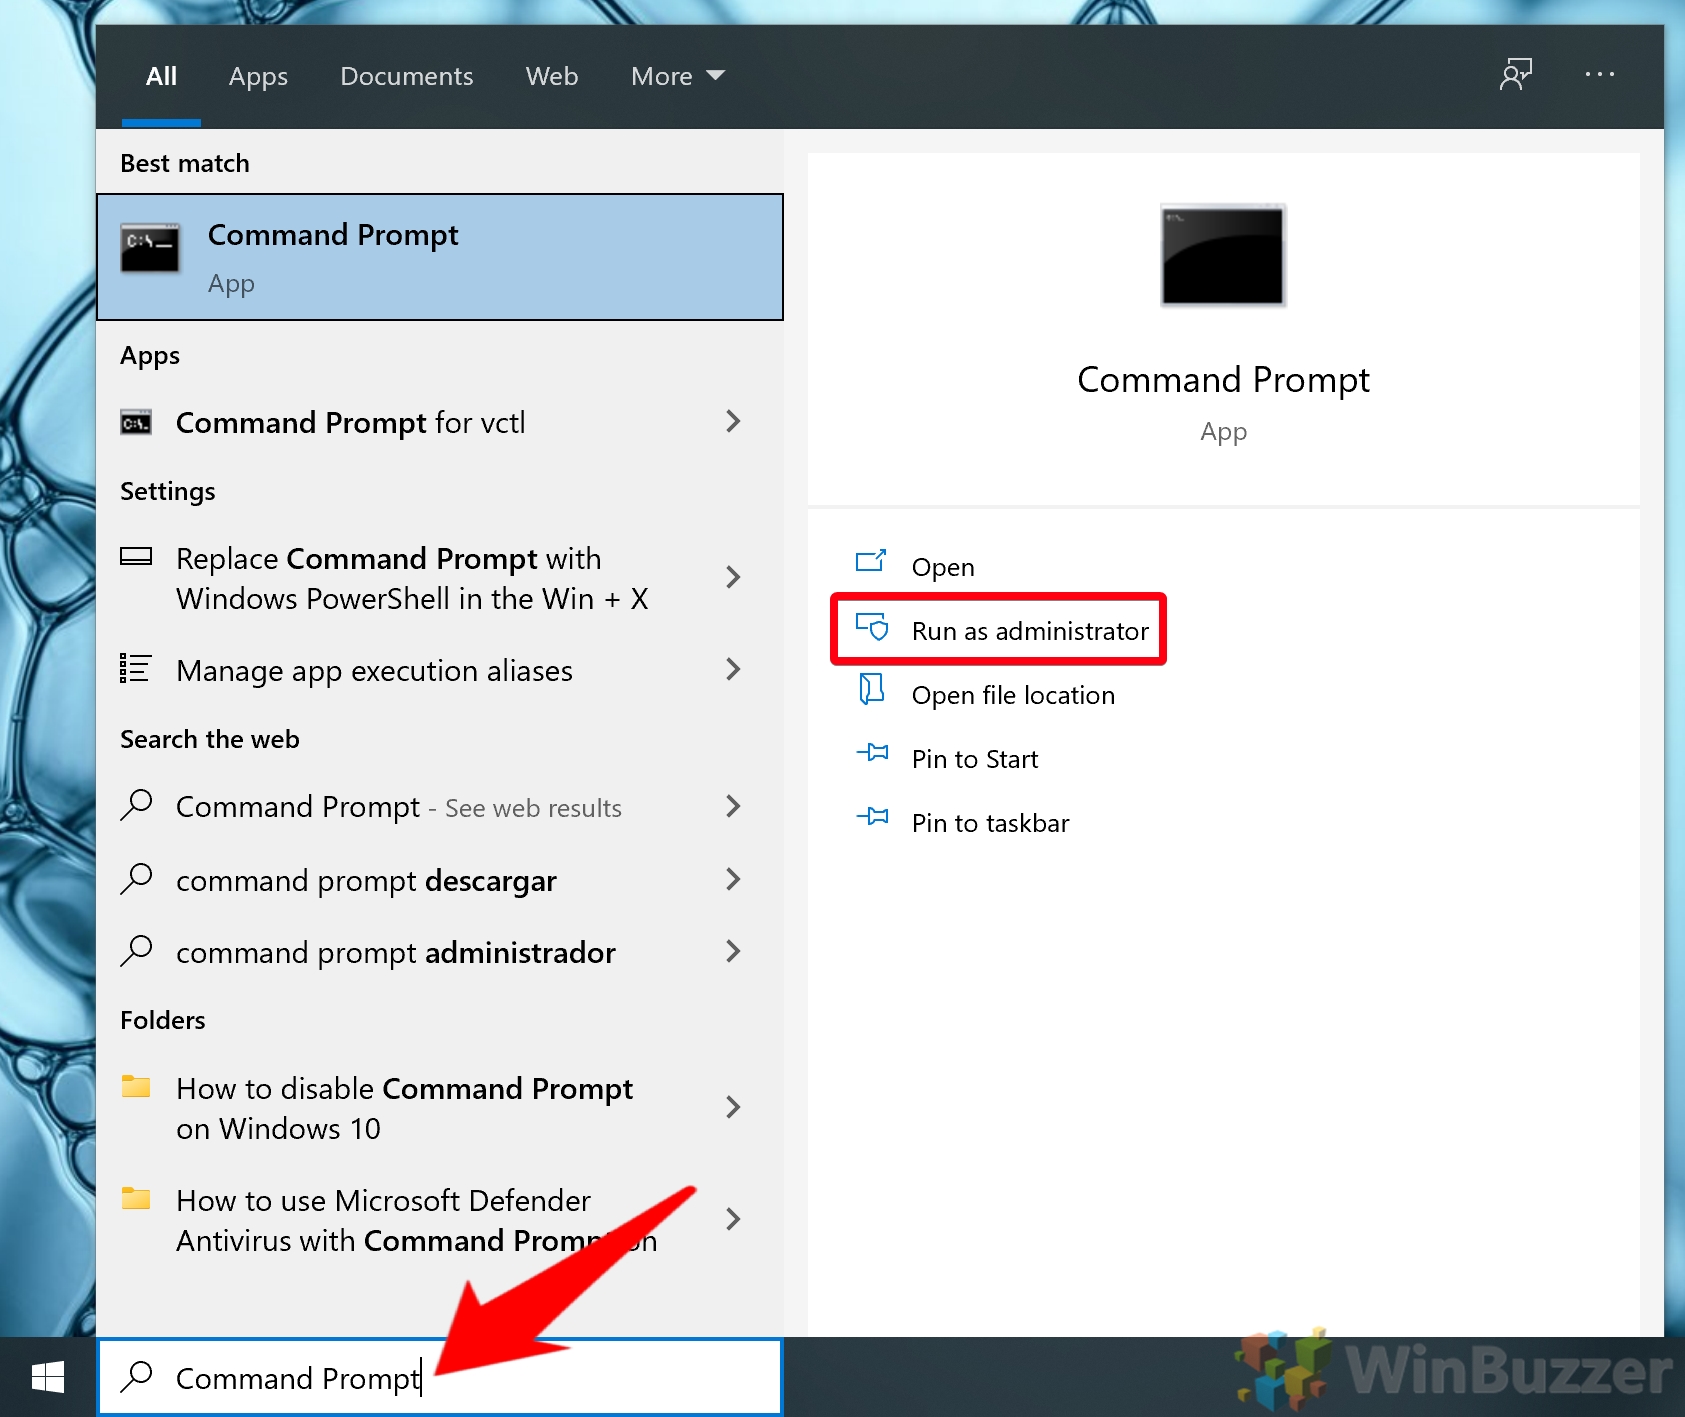
- Open Command Prompt
Press Start and type “Command Prompt”. With Command Prompt selected, press “Run as administrator”.
- Navigate to your Microsoft Safety Scanner download directory and run the MSERT command
In Command Prompt, navigate to the directory you downloaded MSERT to with
cd. For example:cd C:\Users\WinBuzzer.MK-SURFACE-PRO\Downloads
Once you’re in the correct directory, run the following command to start Microsoft Safety Scanner:
msert /f
The
/foption executes a full scan. You can optionally add /q to run a full scan without a user interface.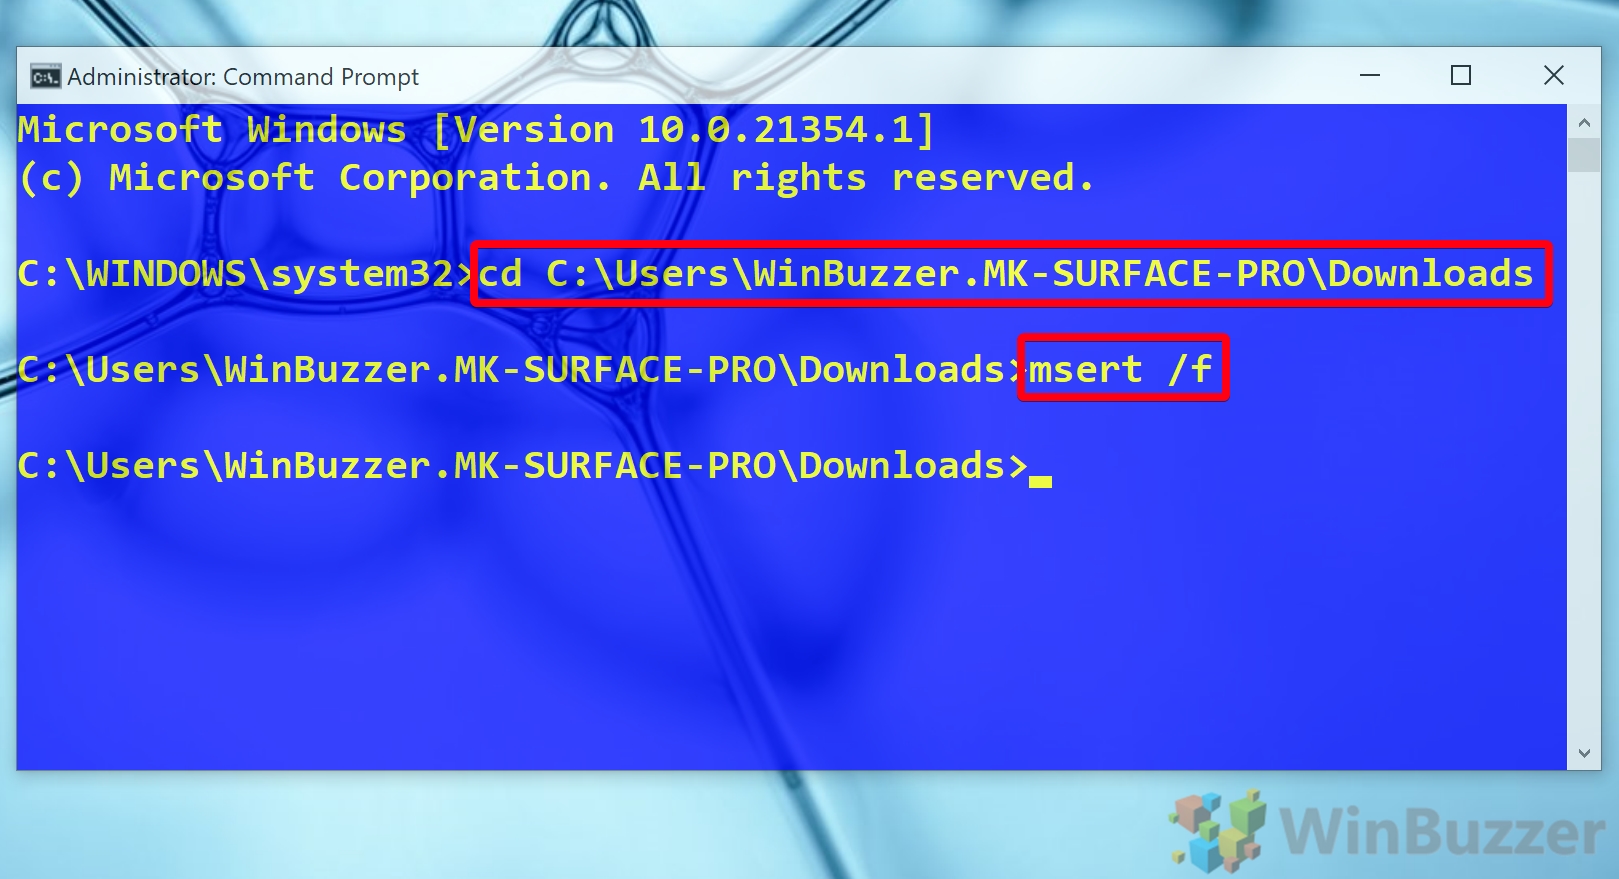
- Accept the license agreement and press “Next” to continue the scan
Microsoft Safety Scanner will automatically remove any detected files.

That rounds up this Windows 10 malware removal tool tutorial. To better protect your system in the future, you can turn on the hidden adware blocker and Windows Defender Application Guard.
Last Updated on February 14, 2022 7:44 pm CET by Markus Kasanmascheff


