If you’ve been combining multiple data sources, you can quickly end up with duplicate rows or cells in Excel. Whether it’s due to an accidental copy and paste or a typing error, this can be time-consuming to remedy. Thankfully, though, there are several tricks you can use to find duplicates in Excel and remove them.
Creating duplicate content is so common that Microsoft’s spreadsheet software has an in-built Remove Duplicates tool. This isn’t always the best way to delete duplicate rows in Excel, however – sometimes the find and replace or advanced filtering options will be more efficient. Knowledge of these three different duplicate checks will help you to make the right choice for your scenario.
How to Find and Remove Duplicates in Excel with the Remove Duplicates Tool
The duplicate remover is a very handy built-in tool that will do all of the heavy lifting for you. It’ll automatically find any cells with the same text.
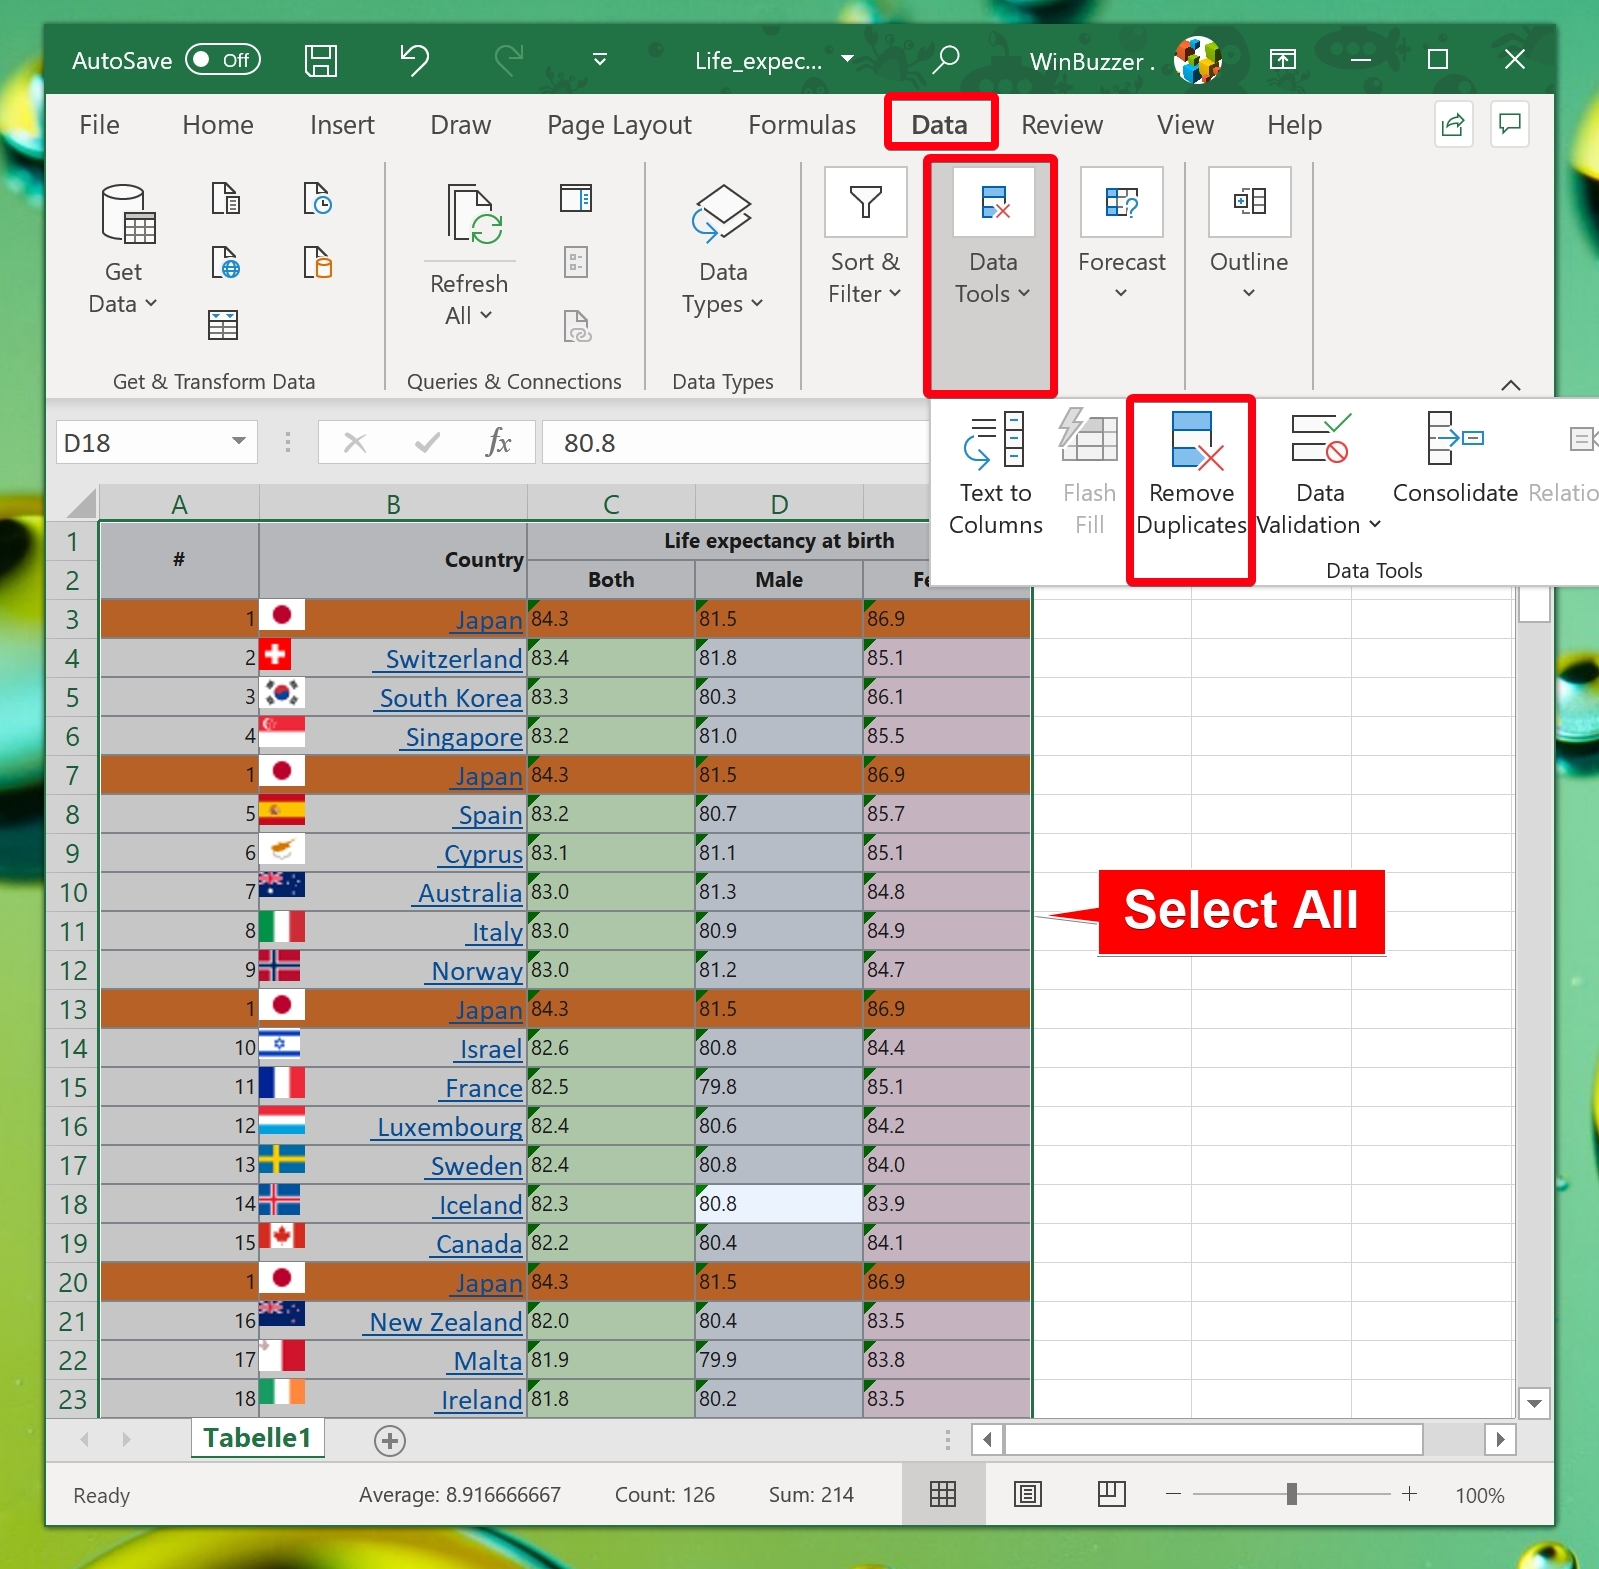
- Select Your Entire Table and Access the Remove Duplicates Tool
To start, press Ctrl + A to select your dataset. Then, navigate to the “Data” tab on the Excel ribbon and click on “Data Tools > Remove Duplicates” to prepare Excel for scanning your data for duplicates.
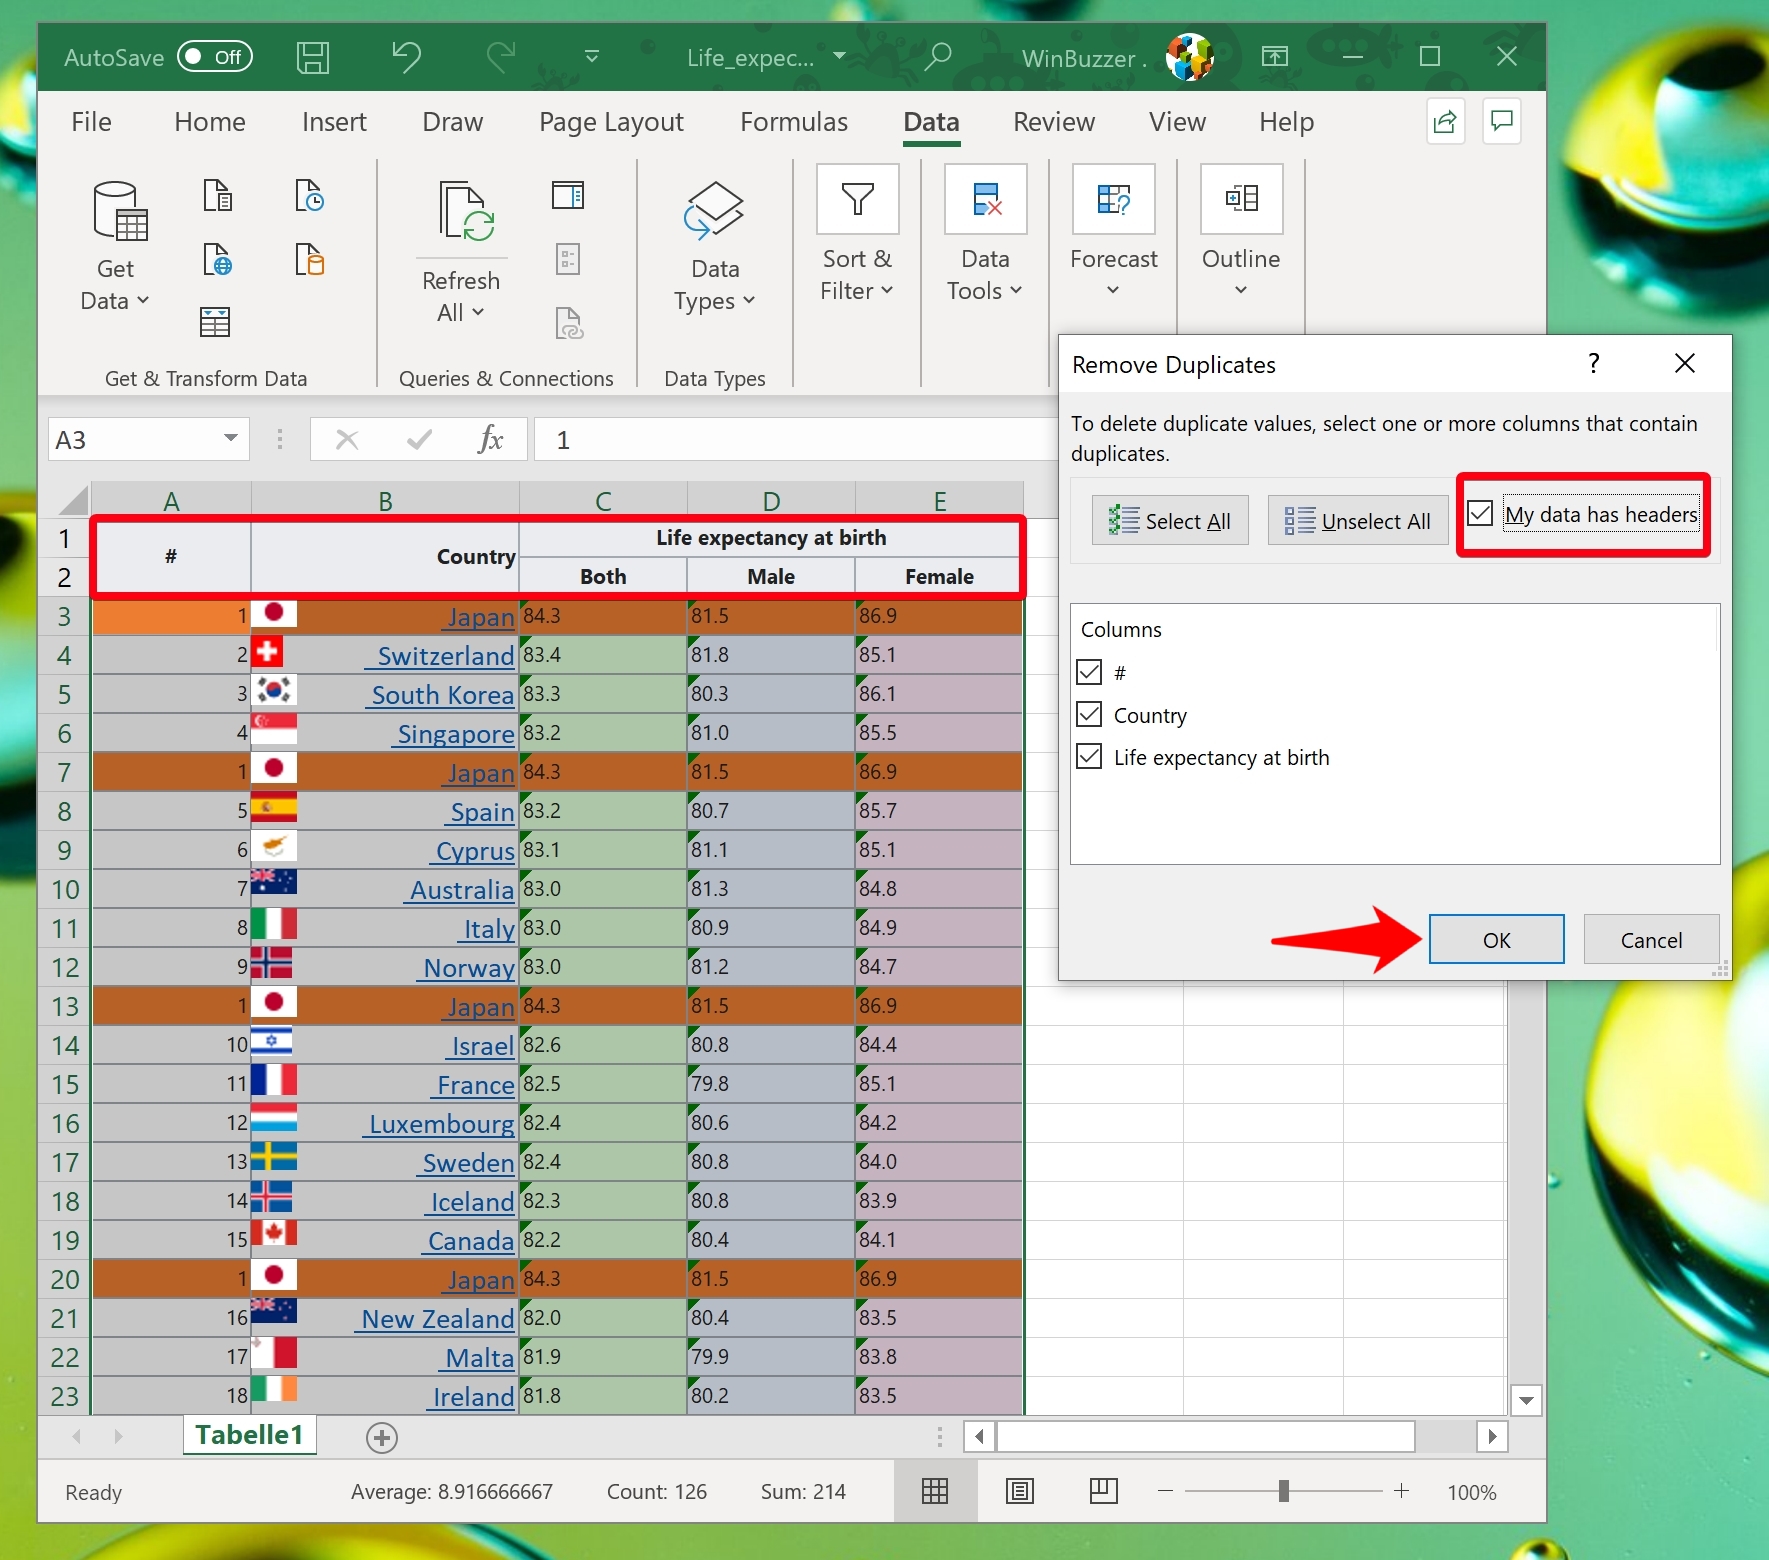
- Tick or Untick “My Data Has Headers”
If your data starts from the first row, untick “My data has headers”. Otherwise, leave it ticked. Excel will then display your column names in the subsequent window. Click “OK” to proceed.
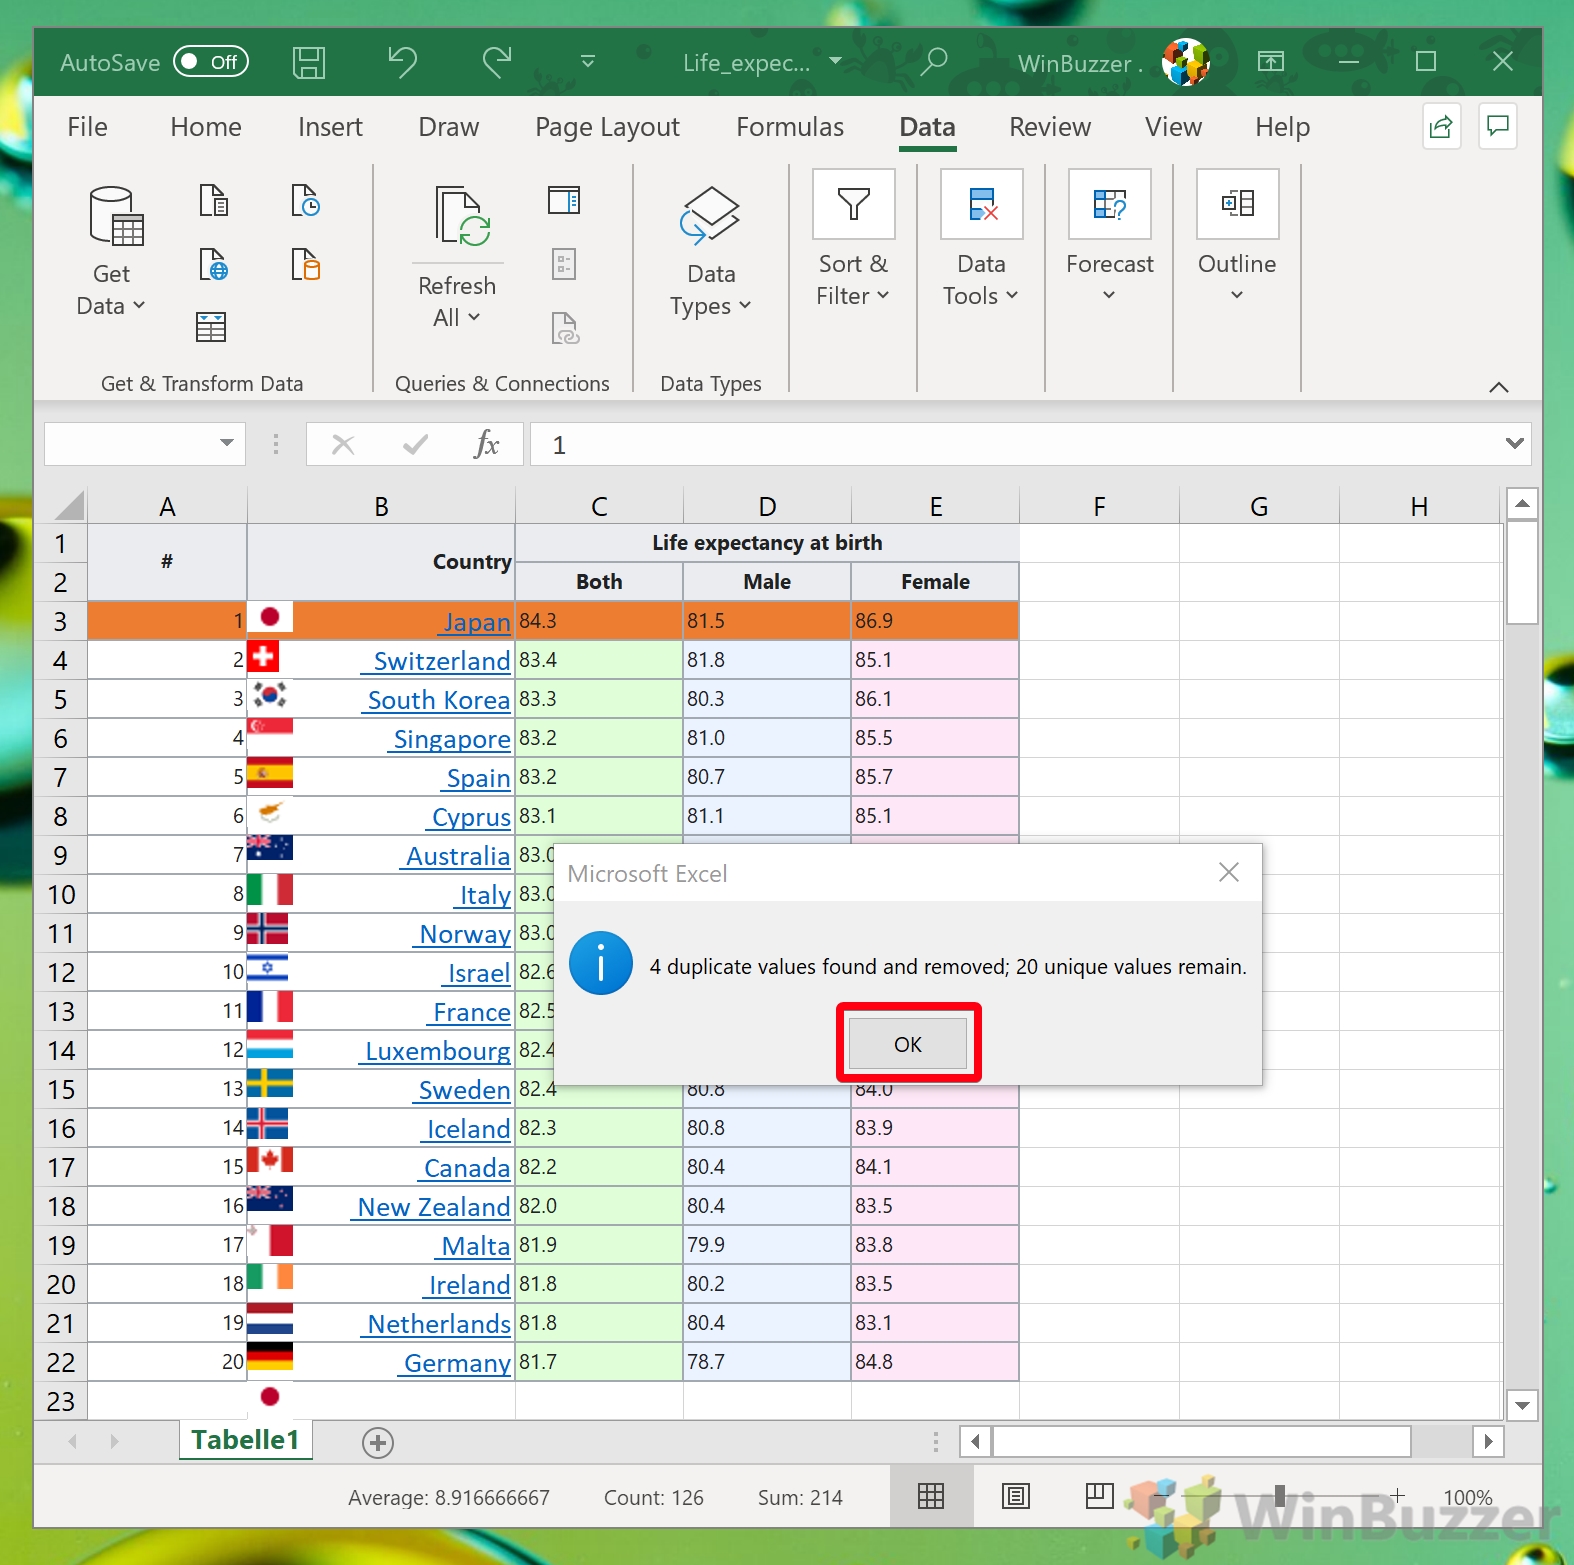
- Wait for Excel to Delete Duplicate Rows
Excel will now search for and remove any duplicates within your dataset. Once completed, a dialogue box will inform you of the number of duplicates removed. Press “OK” to finish.
How to Find Duplicates in Excel with Advanced Filtering
Advanced Filtering offers a nuanced approach to managing duplicates by hiding them instead of outright removal, allowing for a review before final decisions are made. This tool will help you to perform a quick duplicate check but will hide duplicate rows rather than removing them. You can then manually copy and paste only the table to another sheet without the duplicates without altering the original.
- Run the Advanced Filtering Tool
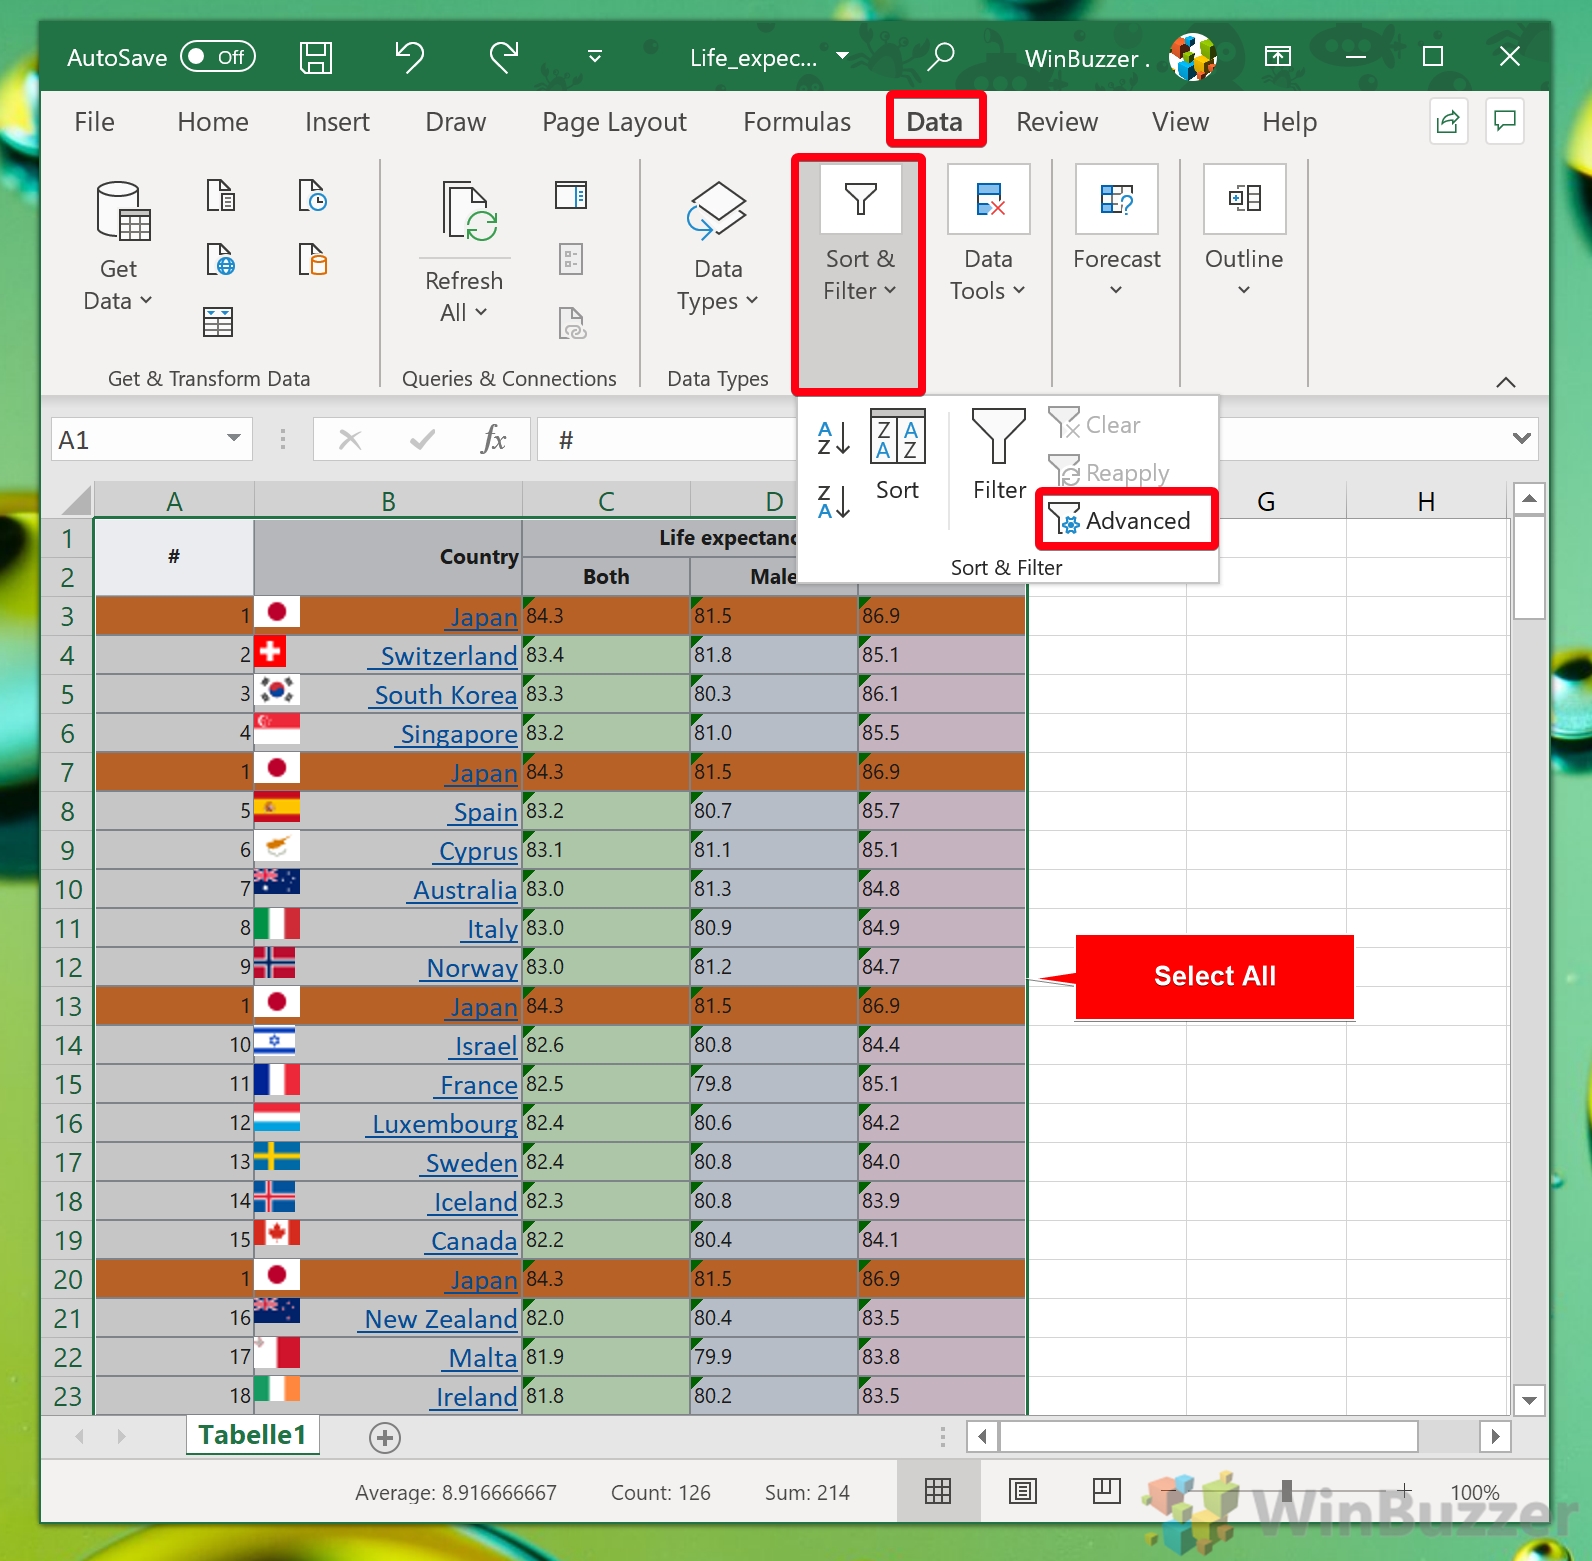
Select your data range and switch to the “Data” tab on the ribbon, then click “Sort & Filter > Advanced” to initiate a detailed search for duplicates.
- Tick “Unique Records Only” and Press “OK”
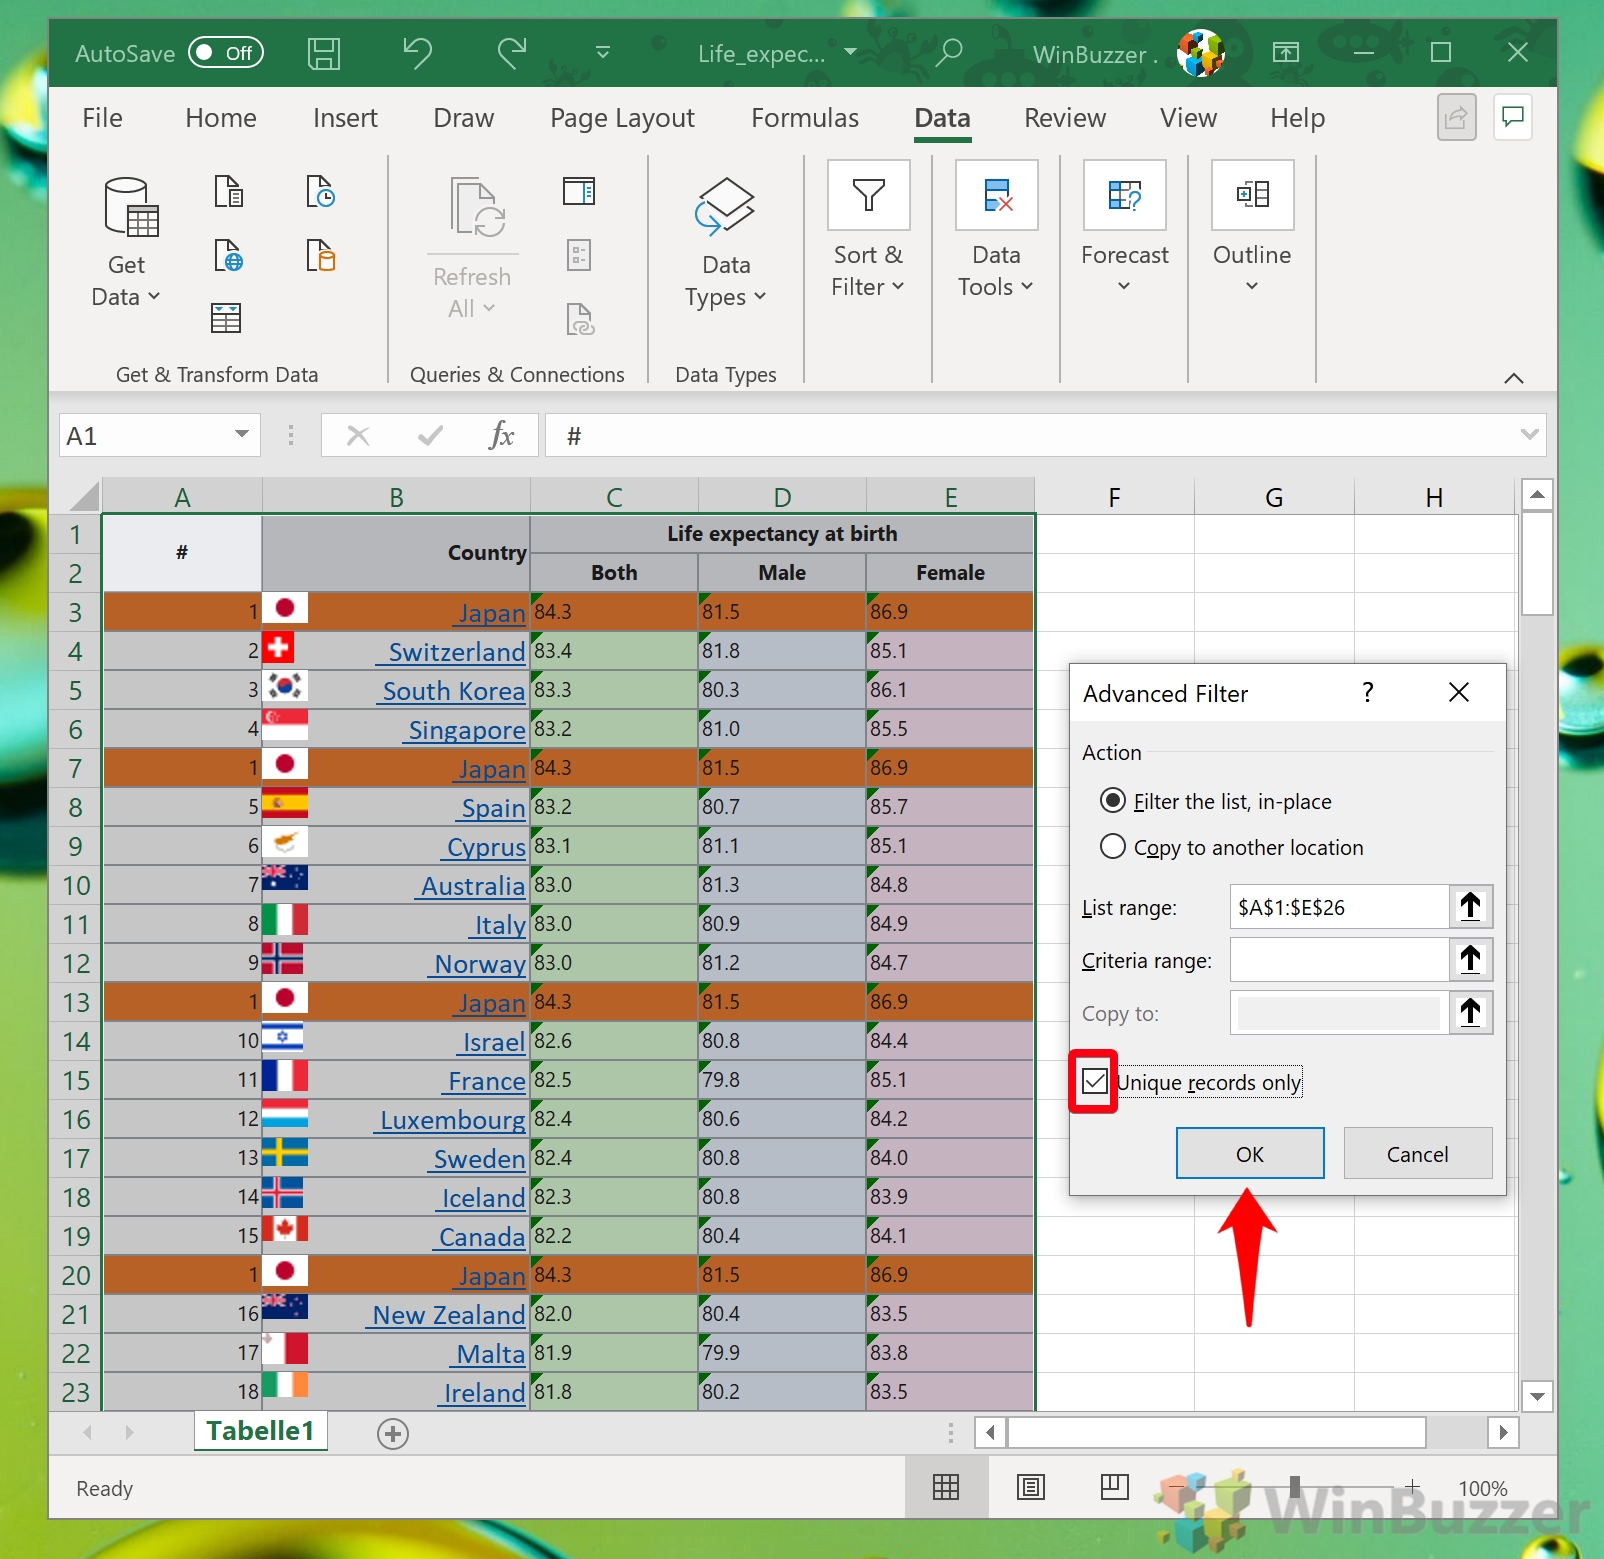
Check the “Unique records only” option in the Advanced Filter dialogue box to filter your dataset, displaying only unique rows. Click “OK” to apply the filter.
- Delete or Hide Any Remaining Duplicates
Manually delete or hide the first instance of a duplicate row if necessary, ensuring your dataset is completely free of duplicates. By default, Excel’s Advanced Filtering will assume that there are headers in your table. This means that whatever is in the top row you selected will stay there.

How to Find Duplicates in Excel and Replace Them
When removing duplicates isn’t enough, and you wish to replace them with different data, the Find & Replace tool offers a precise method to search for and update specific content across your dataset.
- Copy the Duplicated Row
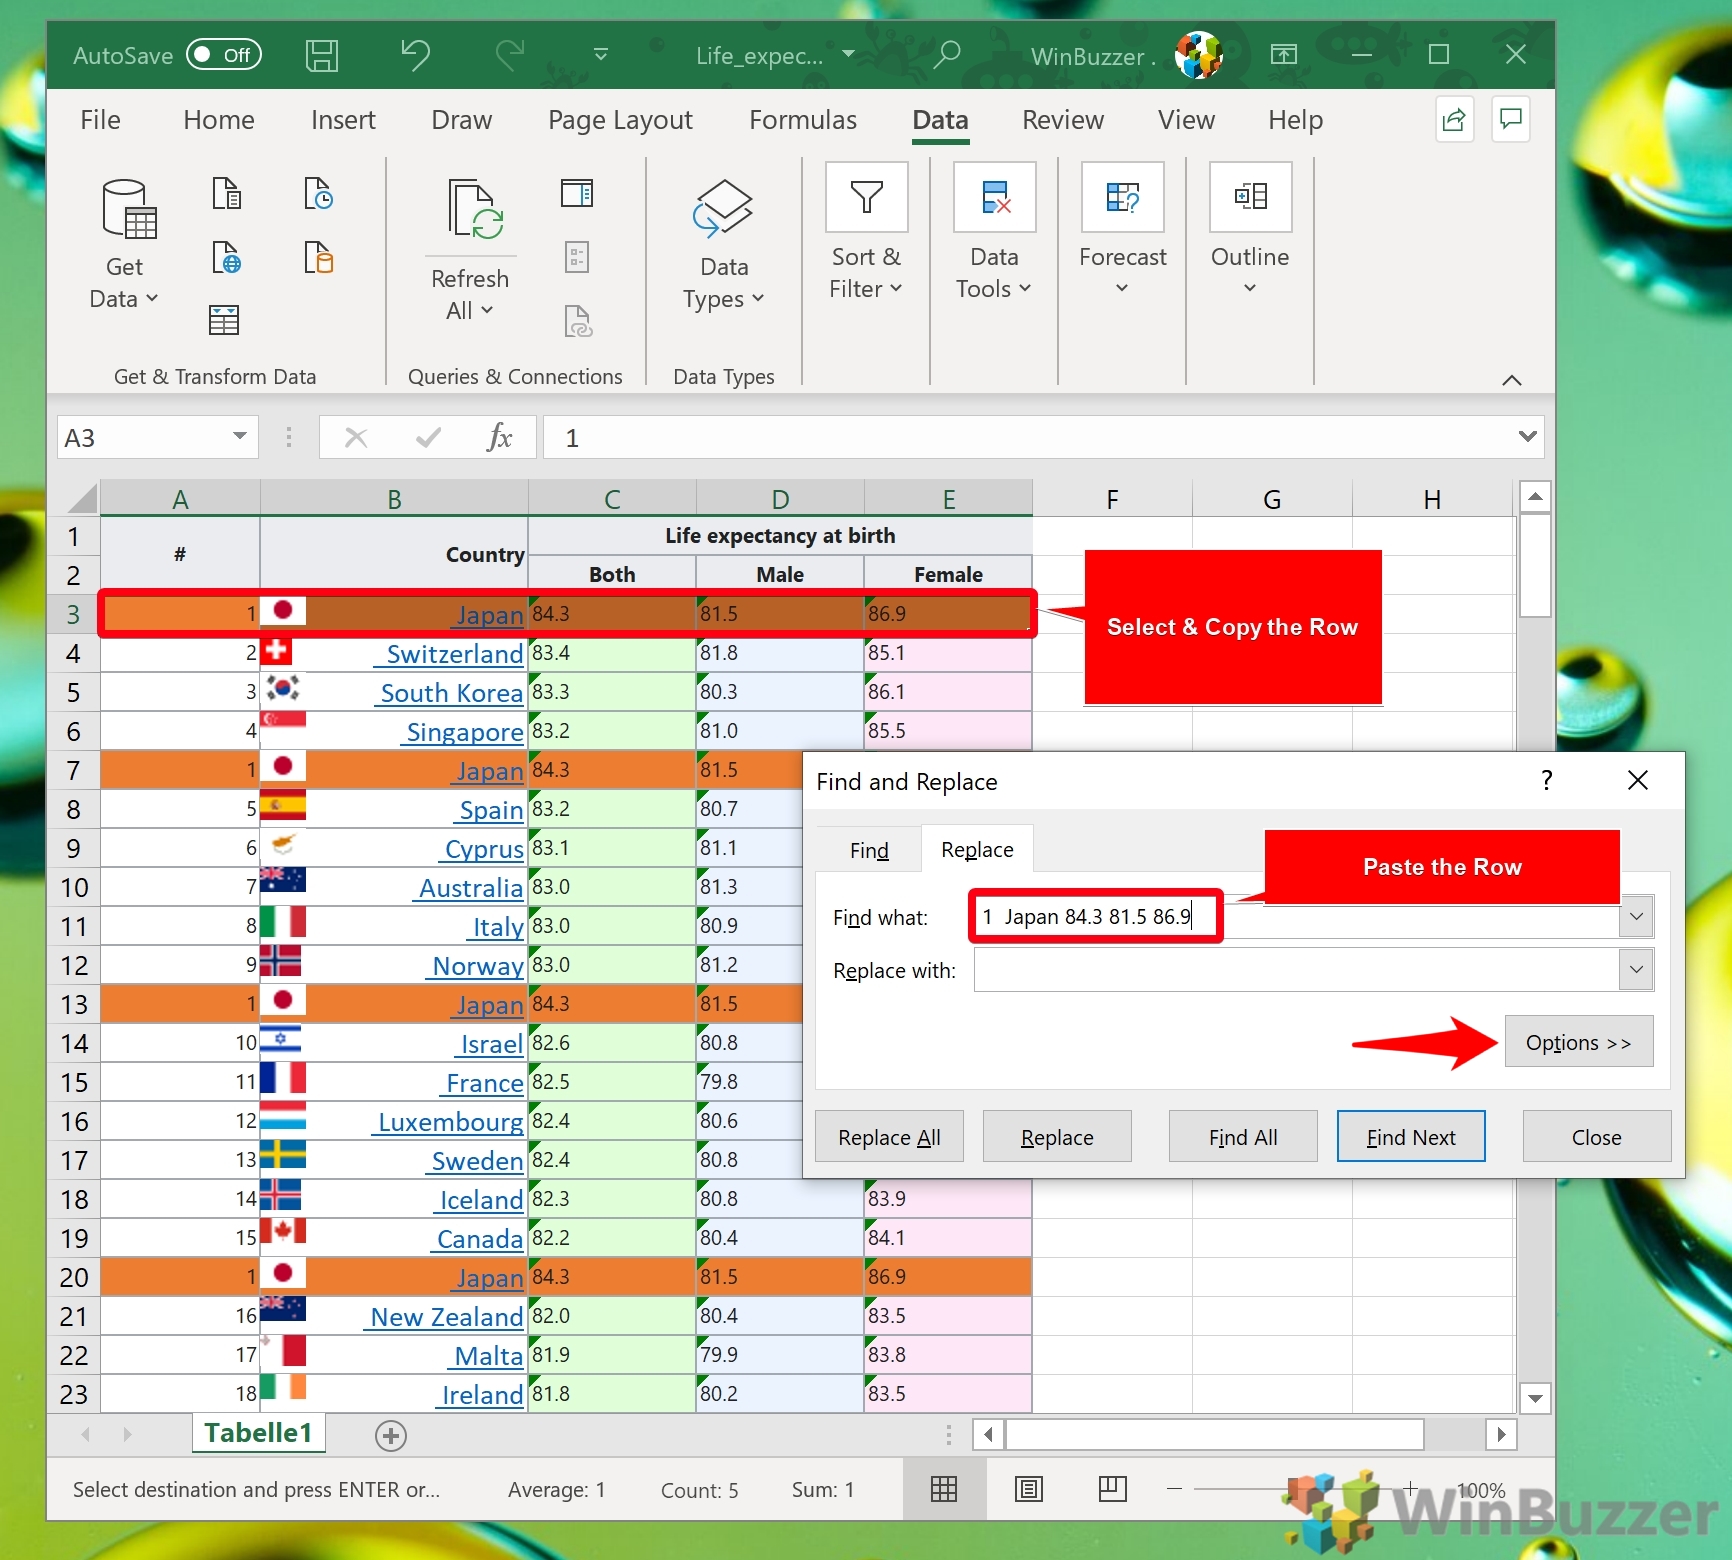
Identify and copy the duplicated row by pressing Ctrl + C. Open the Find and Replace window with Ctrl + H, paste the row content into the “Find what” field using Ctrl + V, and click on the “Options >>” button.
- Match Cell Contents and Replace
Tick “Match entire cell contents” for accuracy and enter the new text in the “Replace with” field. Click “Replace All” to update your dataset.

- Wait for Excel to Complete Replacements
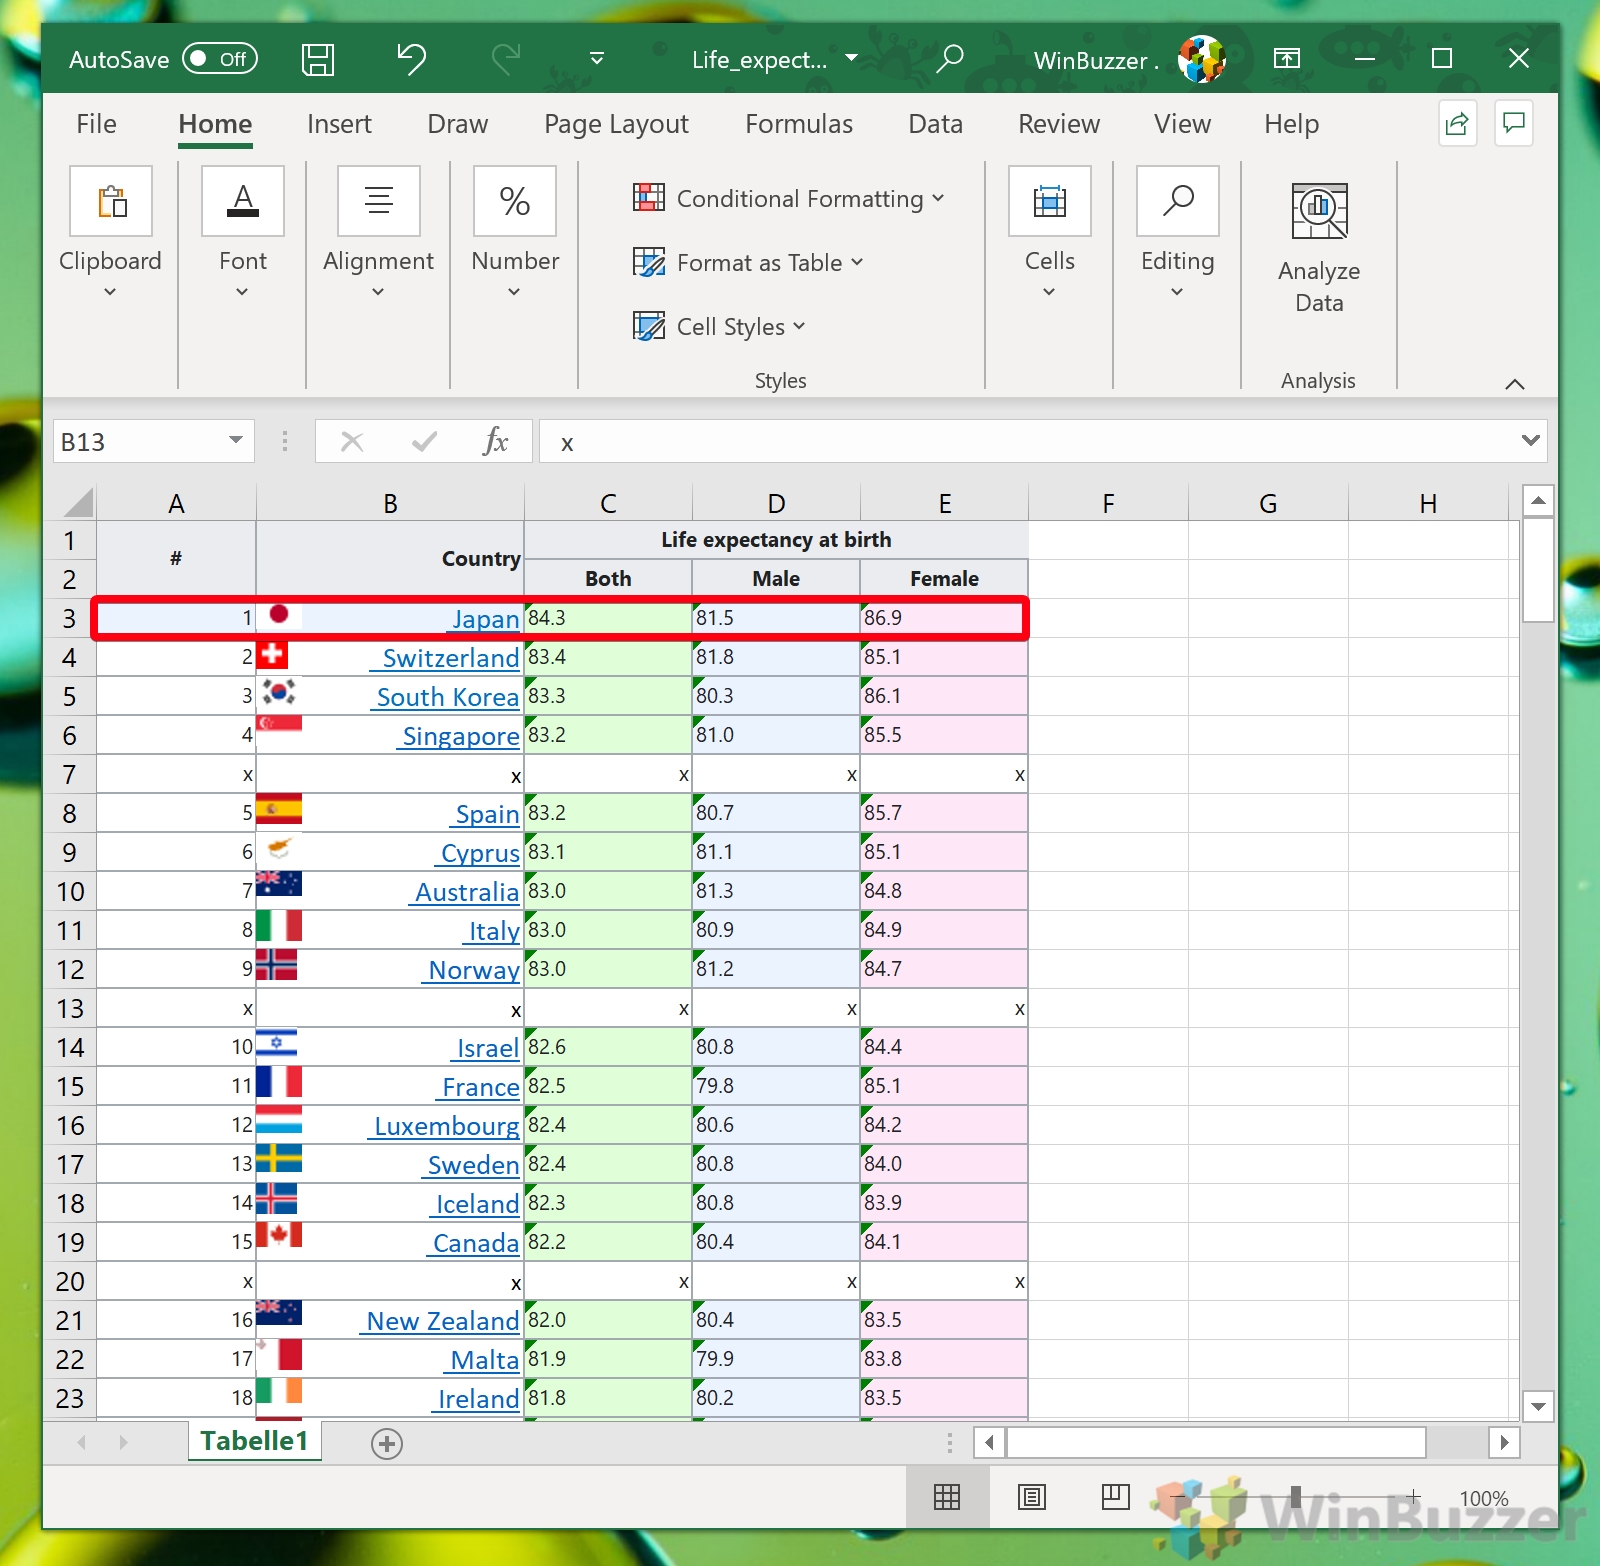
After replacements are made, a message will indicate the number of changes. Press “OK” and close the window. You’ll notice that each cell of the row you deleted has been replaced by the text specified.

- Paste Your Original Row Back In
Use the data in your clipboard to paste the original row back into its position, maintaining the integrity of your dataset.
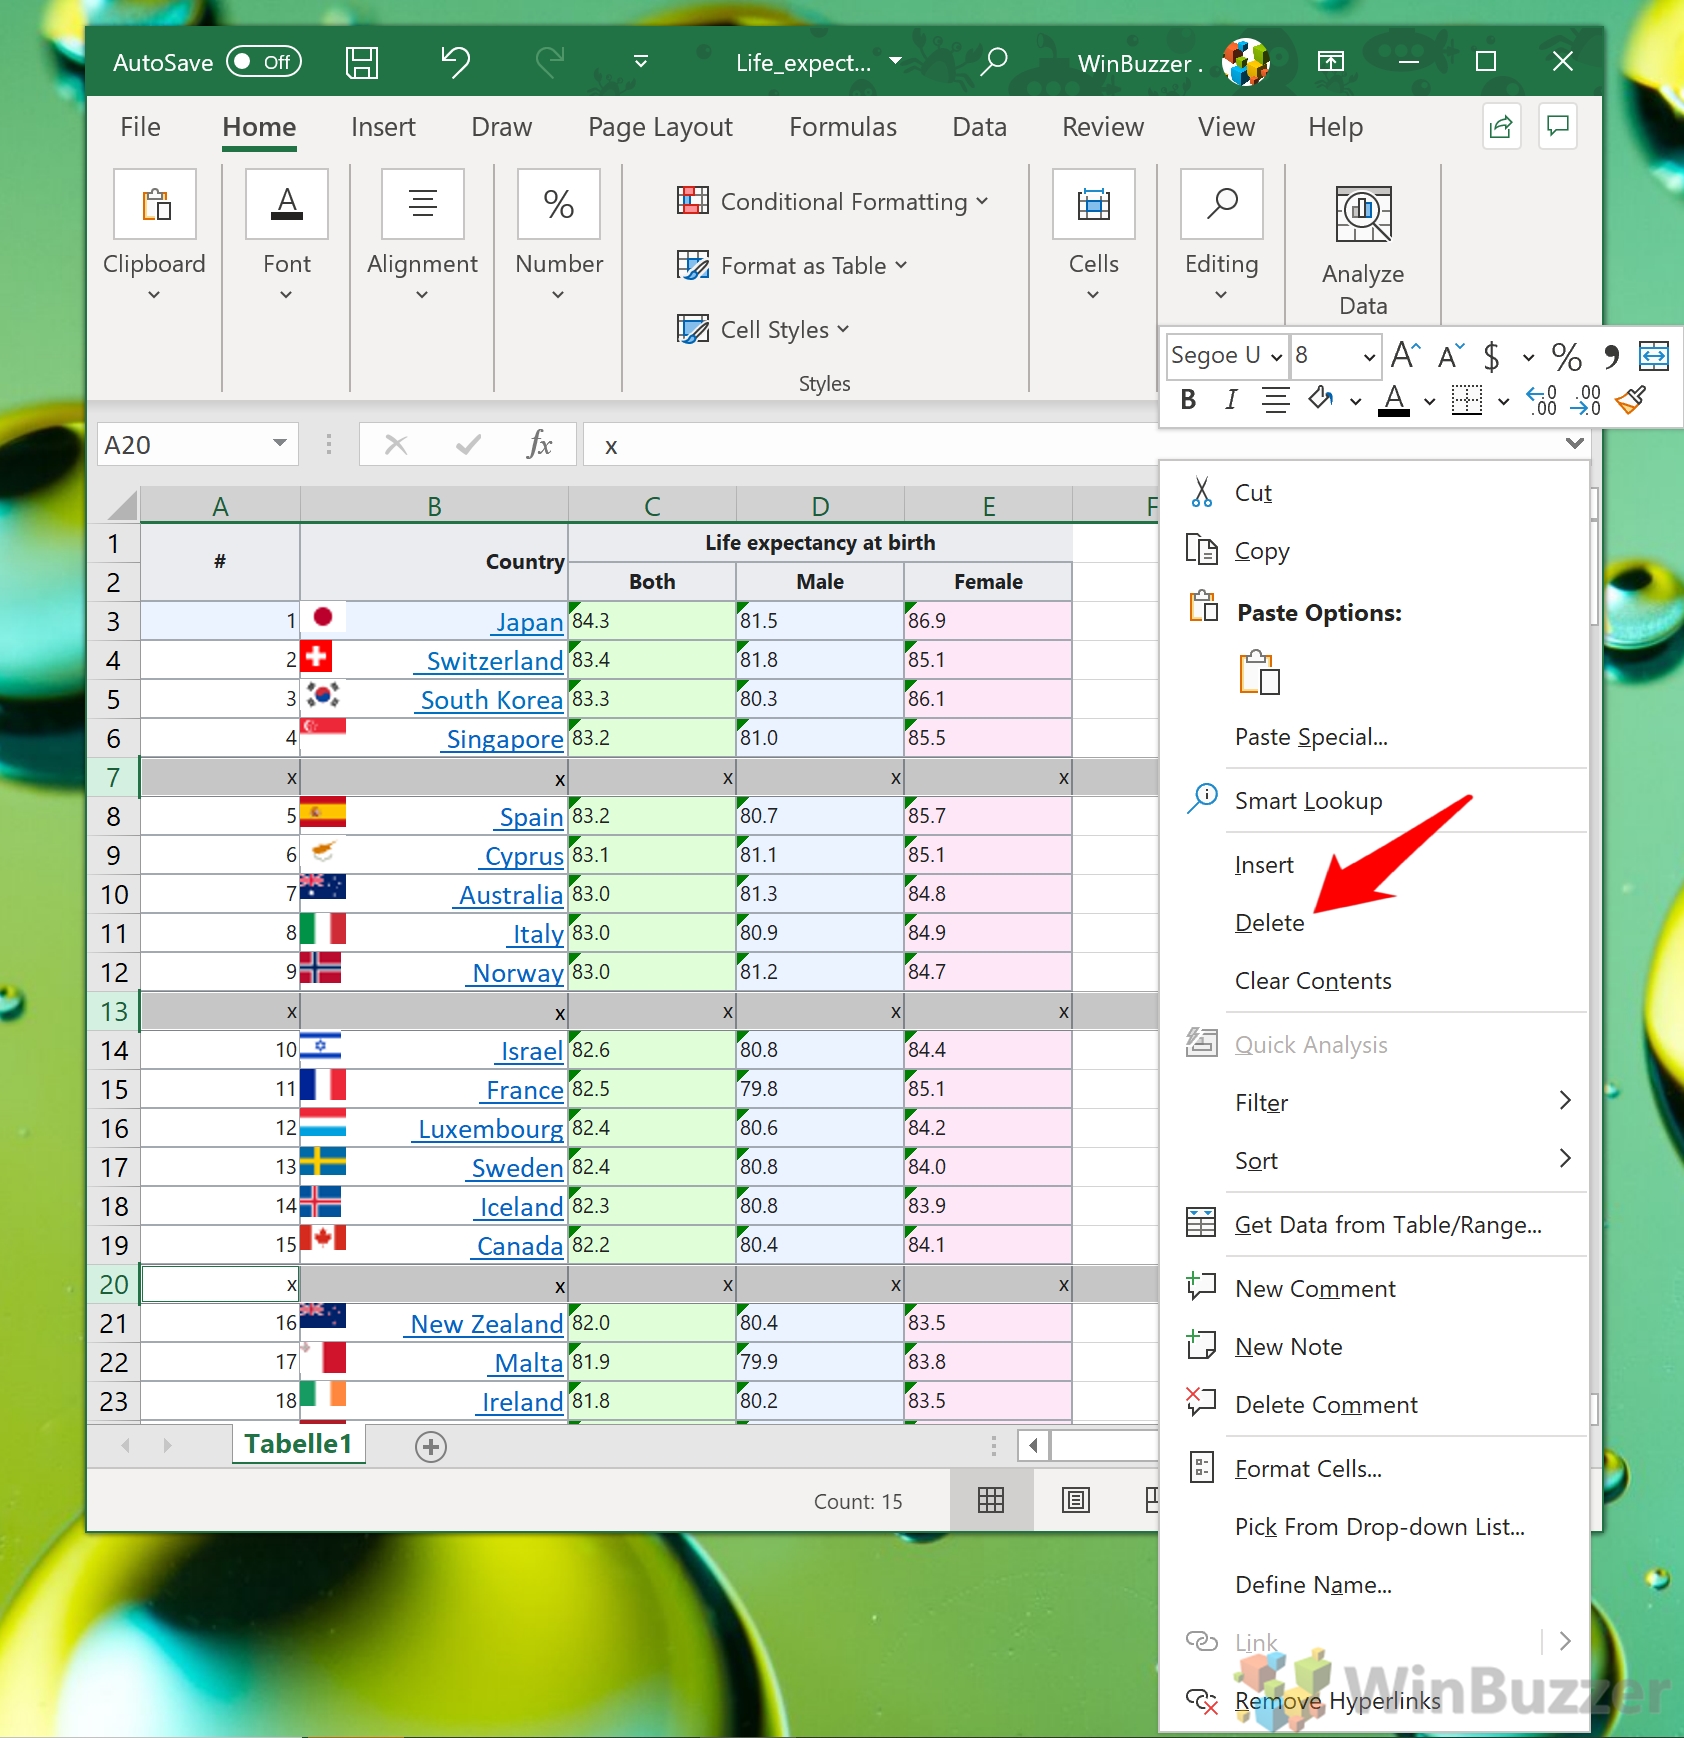
- Delete the Replaced Rows if Necessary
Quickly delete redundant rows by selecting them, Ctrl + click the cell number to the right of each row and choosing “Delete”.
- Check for Any Remaining Duplicates
Ensure all duplicates have been addressed. Adjust search criteria or manually remove any remaining duplicates. If you accidentally added an additional letter to one, it wouldn’t match exactly and, therefore, would not be removed. Save your document to finalize changes.

FAQ – Frequently Asked Questions About Excel Data Management
How can I prevent duplicate entries when entering new data into Excel?
To prevent duplicates while entering new data in Excel, utilize the Data Validation feature found under the Data tab. Set up a formula-based rule that compares the entry in a cell to the rest of the column to reject duplicates. This proactive approach can significantly help in maintaining data integrity from the outset.
Is there a way to automate the removal of duplicates for regular data updates?
For automating the removal of duplicates, consider recording a macro while performing the duplicate removal process using Excel’s built-in tools. Alternatively, writing a VBA script offers more flexibility and can be tailored for complex data structures, enabling one-click automation for repeating the cleaning process on regularly updated datasets.
What happens if I accidentally delete essential data using the Remove Duplicates tool?
If essential data is accidentally deleted using the Remove Duplicates tool, immediately use the undo function (Ctrl + Z) to restore the data. If the session was closed or further changes were made, restore a previously saved version of the workbook or resort to a backup. Regularly saving your work and maintaining backups are crucial practices to prevent permanent data loss.
Can the Advanced Filter be used to extract unique values to another location?
Yes, the Advanced Filter tool offers the capability to extract unique values to a different location in your workbook. This is particularly useful when wanting to preserve the original data set while working with a filtered list of unique entries. After setting the filter criteria, specify the target location for the unique records under the “Copy to” option found within the Advanced Filter dialog.
Can I find and remove duplicates across multiple sheets?
Directly finding and removing duplicates across multiple Excel sheets is not supported by Excel’s built-in features. However, consolidating data from multiple sheets into a single sheet allows the use of duplicate removal tools. For a non-manual solution, custom VBA scripting can automate the process of identifying and removing duplicates across sheets by iterating through each sheet’s data.
How can I compare two columns for duplicates within the same worksheet?
Comparing two columns for duplicates within the same worksheet can be achieved through Conditional Formatting or using formulas like =IF(COUNTIF(A:A, B1)>0, “Duplicate”, “Unique”). The former visually identifies duplicates, while the latter provides a systematic approach by labeling duplicates and unique values based on comparison results, allowing for more nuanced data analysis and cleaning.
How can I identify duplicates without immediately removing them?
To identify duplicates without removing them, utilize the Conditional Formatting feature, employing a formula rule that highlights duplicate values across the selected range. This visual approach allows for a thorough review of the flagged duplicates, giving users the flexibility to manually inspect and decide on the appropriate action for each duplicate identified.
What precautions should I take before removing duplicates?
Before removing duplicates, always ensure to backup your data to prevent unintended loss of information. Additionally, it is advisable to thoroughly review your dataset to determine the best criteria for identifying duplicates, considering nuances like headers or columns that should be excluded from the de-duplication process. Understanding the structure and content of your data enables more accurate cleaning and safeguards data integrity.
Can I use conditional formatting to automatically delete duplicates?
While conditional formatting is a powerful tool for highlighting duplicates within a dataset, it does not possess functionality to automatically delete these highlighted entries. After identifying duplicates through conditional formatting, manual intervention is required to delete or manage these identified duplicates according to the user’s discretion.
What is the difference between Remove Duplicates and the data filter for unique values?
The fundamental difference lies in the permanence of action: Remove Duplicates permanently deletes duplicate entries, leaving only unique records within the dataset. On the other hand, filtering for unique values is a non-destructive operation that temporarily hides duplicate entries, thereby allowing users to view unique records without altering the original data structure.
How can I ensure the accuracy of data after duplicates are removed?
Ensuring data accuracy post-de-duplication involves several steps: prior to removal, validate the criteria for identifying duplicates to avoid unintentional data loss; post-removal, conduct spot checks by comparing the cleaned dataset against backup versions to ensure that only intended duplicates were removed; and lastly, consider employing integrity checks for key metrics or summaries to confirm that the dataset’s meaningfulness remains intact.
Can I reverse the effects of Find & Replace if I make an error?
If an error is made during a Find & Replace operation, reversing the action can be immediately done using the undo function (Ctrl + Z). However, this reversibility is limited to the current session and prior to any subsequent operations or the closing of the workbook. To mitigate risks, performing such actions on a copied dataset or having backups is recommended for safeguarding original data.
How do I deal with duplicates when they have slight variations in spelling or formatting?
Dealing with duplicates that have slight variations requires a more sophisticated approach, such as utilizing Excel functions that approximate matches (e.g., TRIM, UPPER, or SUBSTITUTE to normalize data before comparison) or incorporating fuzzy matching tools and add-ins that can identify and manage near-duplicates based on a similarity threshold, thereby handling variations in spelling or formatting more effectively.
Is it possible to highlight duplicates using more than one condition or criteria?
Highlighting duplicates based on multiple conditions or criteria can be intricately setup through Conditional Formatting by combining formulas that consider various data points. Logical functions like AND/OR can be used within these formulas to meticulously define the conditions under which duplicates should be highlighted, offering granular control over the duplicate identification process.
Can I specify a range for the Find & Replace tool to limit its scope?
Prior to activating the Find & Replace function, users can specify a particular range by selecting it on their sheet. The Find & Replace operation will then be confined to this selected area, allowing for targeted searching and replacing within a dataset. This feature is especially useful for focusing on specific data sections without affecting unrelated data areas.
Related: How to Move or Swap Columns in Excel
In a perfect world, you’d never need to rearrange columns in Excel. Planning a spreadsheet in advance should save you from having to perform large-scale rearrangement of your documents. The world isn’t perfect though, and the chances are that you’ll think of better ways to layout your spreadsheet or receive additional information to http://integrate.In our other guide, we show you how to move or swap columns in Excel.
Related: How to Freeze a Row or Column in Excel
Excel’s freeze pane feature is an invaluable tool for navigating large datasets without losing sight of your reference points. Whether you’re working with financial reports, data analysis, or any extensive spreadsheet, the ability to lock specific rows or columns in place as you scroll through your data can drastically enhance your productivity and data interpretation accuracy. In our other guide, we show you multiple ways to freeze and lock the rows and columns in an Excel sheet using the ribbon interface.

Related: How to Hide and Unhide Rows and Columns in Excel
The ability to hide and unhide rows and columns in Excel is particularly useful for managing large datasets, protecting sensitive information, and maintaining a clean, focused workspace. Our other tutorial shows you how to hide and unhide rows and columns in Excel, ensuring that you can control the visibility of your data with ease.

Related: How to Alphabetize Data in Excel Columns or Rows
One of the most common types of sorting in Excel is alphabetical sorting. Whether it’s a list of names, businesses, or mail addresses, sorting helps to organize and keep track of what you’re doing. In our other guide, we are showing you how to alphabetize in Excel for both rows and columns.