

When you perform a fresh install of Windows 10, you may notice that the registered owner is set to “Windows User”, and the organization name is missing. While this won’t be important for many, some applications will reference this. In a professional environment, keeping up appearances can be important.
Thankfully, it is possible to change owner name in Windows 10, though Microsoft doesn’t make it simple. You won’t find the option in the regular settings app and will instead have to make a quick edit to the registry.
Luckily for you, we’ll be here to guide you through the entire process. Long story short, if you make sure to back up your registry first, you’ll be fine even if you make a mistake.
How to Change Registered Owner and Organization Name in Windows 10
The registered owner name and organization name are controlled by two separate registry keys. These should already exist on your PC, making it a simple matter to change them. However, it’s worth noting that you will need to be an administrator to make these changes. If you’re unsure if you have the permissions, you can always activate the hidden administrator account.
- Open the Registry Editor
Press the Start button and type “Registry Editor” click the top result to open it.

- Navigate to the organization name entry and modify it
Paste the following into your Registry Editor address bar:
Computer\HKEY_LOCAL_MACHINE\SOFTWARE\Microsoft\Windows NT\CurrentVersionLook for the registry entry called
RegisteredOrganizationIn the main pane and double-click it. Change the “Value data” to the organization name of your choice. In our case, that’s “Winbuzzer”. Click “OK” when you’re done.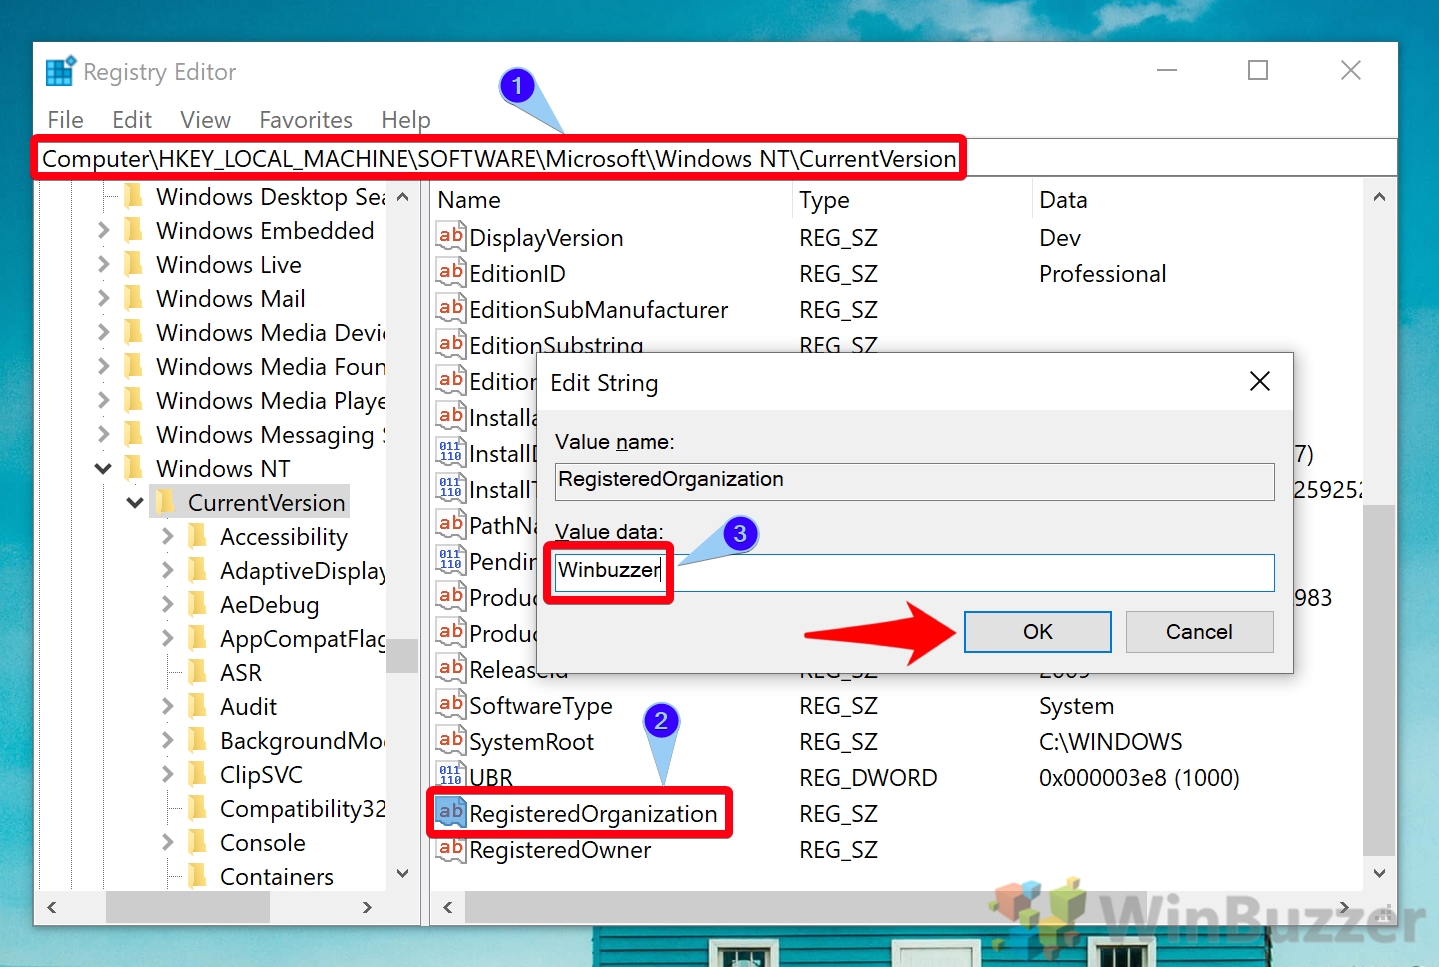
- Navigate to the registered owner key and modify it
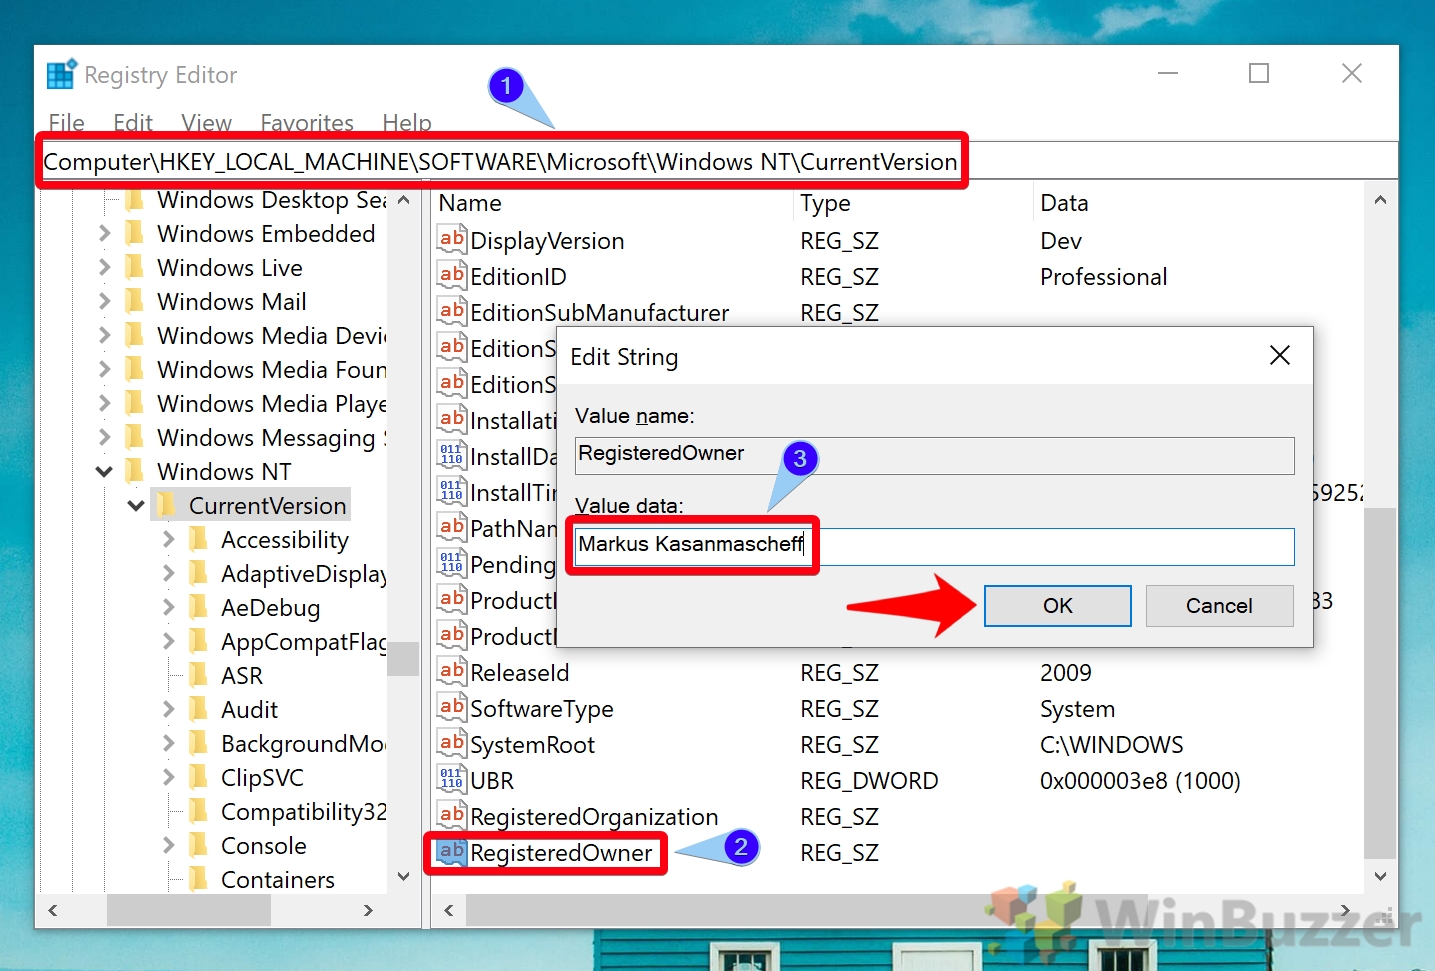
To change owner in Windows 10, paste the following into your regedit search bar:
Computer\HKEY_LOCAL_MACHINE\SOFTWARE\Microsoft\WindowsNT\CurrentVersionLook for the “RegisteredOwner” entry and double-click it. Change the “Value data” to your name and press “OK”.
- Navigate to the registered owner key and modify it
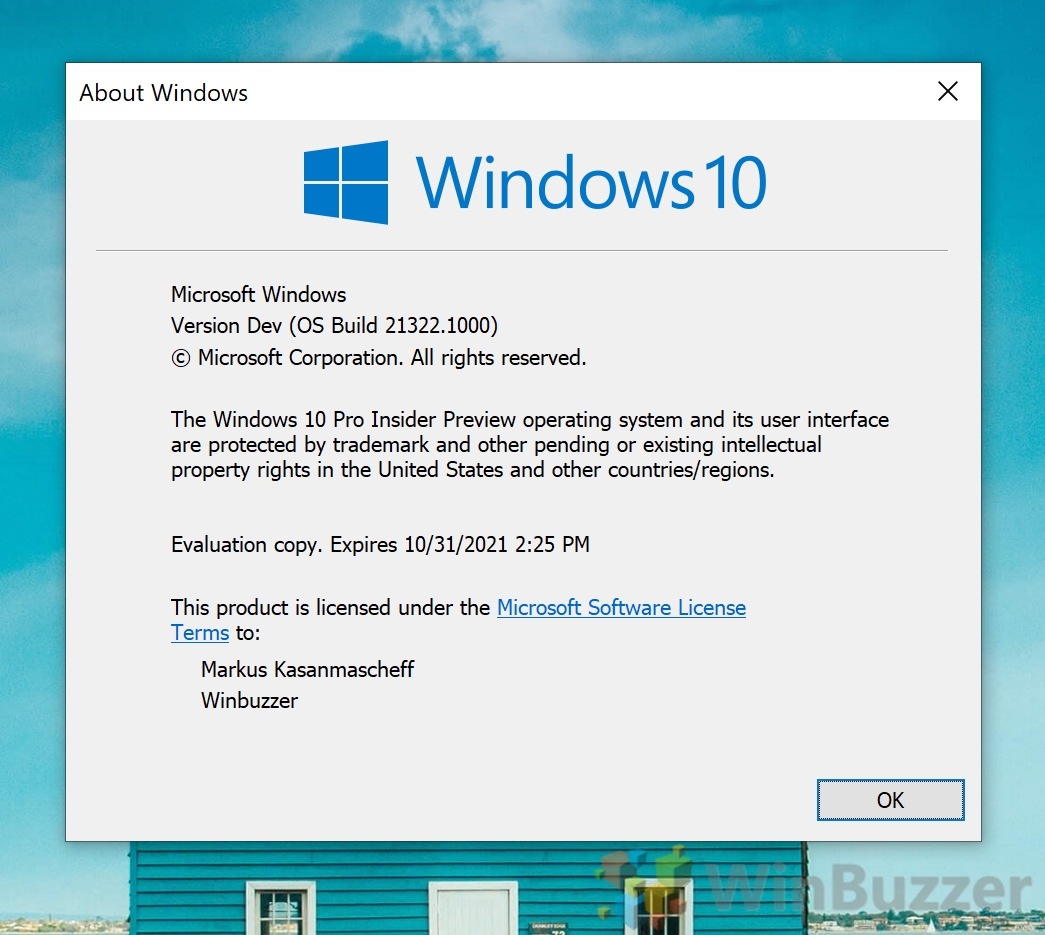
- Check your registered owner name with the “About” tool
Press Windows + R on your keyboard and enter “winver.exe” in the Run dialog. Press “OK” and you should see that your registered owner name and organization have changed, like below:
That’s it. You now know how to change owner name in Windows 10. However, you may now want to change your computer name to match, as well as your account name.
Last Updated on February 14, 2022 7:45 pm CET by Markus Kasanmascheff


