

For many years now, Microsoft Office has used an intuitive ribbon system to help users easily find and organize the tools they require. Though many are familiar with the interface, fewer realize that you can actually customize the ribbon in MS Word, PowerPoint, Excel, and Outlook.
What is the ribbon in Word?
Before we show you how to use the Office ribbon editor to achieve this customization, let’s quickly cover what the ribbon is, how it works, and why you might want to change things up.
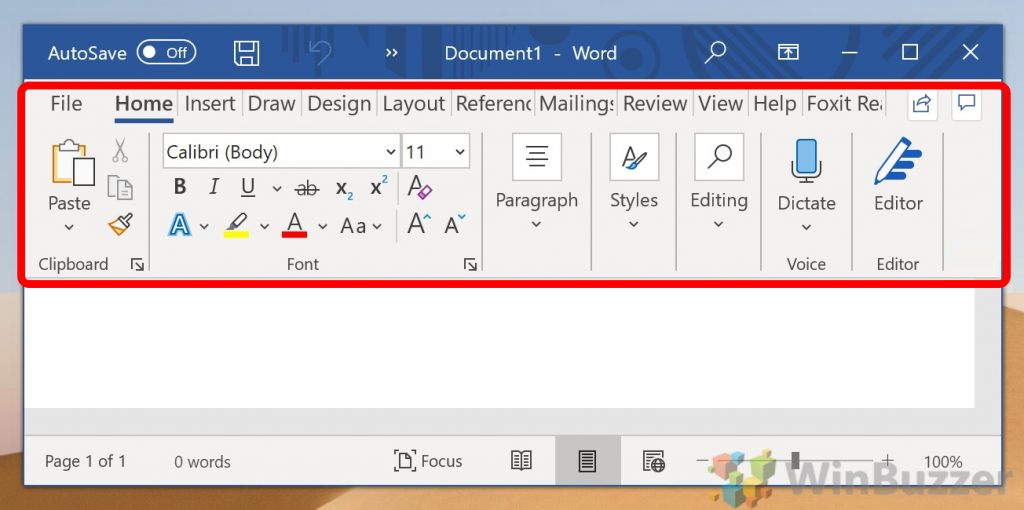
To put it simply, the Microsoft Word ribbon is a UI element at the top of your document that provides access to most of its tools, which Microsoft calls “Commands”. For ease of use, there are ribbon tabs, which break up these commands into different sections, and groups within that. All other Office components such as Excel and PowerPoint and most of many modern Windows Applications use a ribbon interface.
However, while these default categories clearly made sense to the designer, they may not make sense to you. For example, the “Review” tab doesn’t contain a button to mark a document up with digital ink.
With a few clicks, you can use the Office ribbon editor to adjust which tabs show, or even create your own tab with the tools you use most. As you can imagine, this can have quite a positive effect on productivity.
First, though, let’s cover how to show the ribbon in Word, PowerPoint, Excel, or Outlook in case you’ve hit that pesky auto-hide button.
How to Show the Ribbon in Word, Excel, PowerPoint, and Outlook
Though Microsoft doesn’t particularly advertise it, the Office ribbon menu has two modes: pinned and collapsed. The default, which many are used to, is pinned, which constantly displays it at the top of the screen. If you prefer a more minimal look, however, the collapsed mode shows only the tab headings. Here’s how you can switch between them:
- Collapse the ribbon in Microsoft Word
You can minimize the ribbon in Word or any Office app by simply pressing the arrow in its bottom-right corner.
- Access your ribbon by clicking on a tab
You can just click one of the tab headings at the top of your document to view the ribbon again. It will stay visible until you click back on your main document, at which point it will minimize again.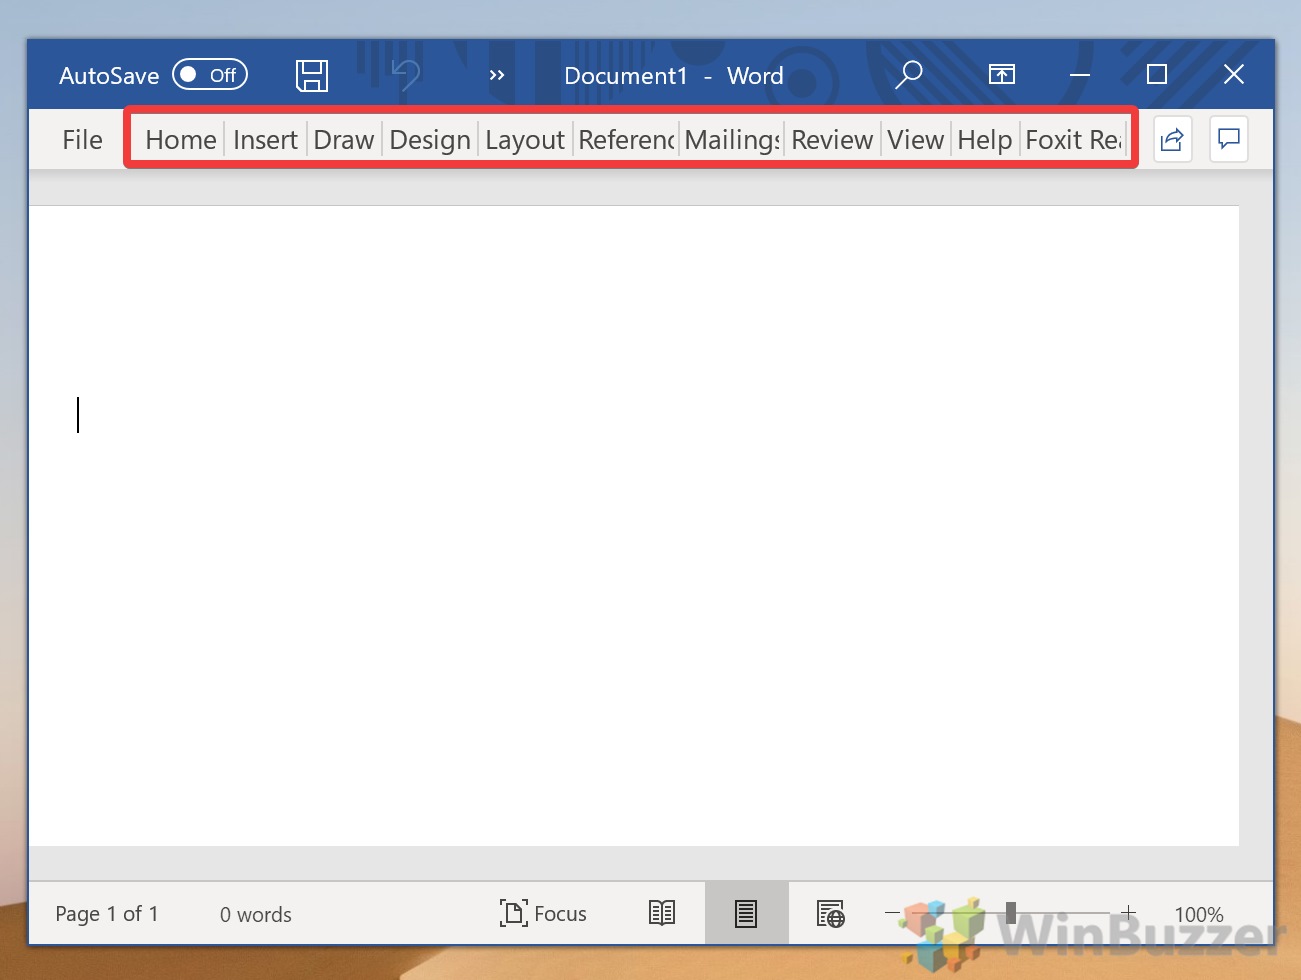
- How to show the ribbon in Word
If your Office ribbon keeps auto-hiding, you can click one of the tabs, then press the pin button in the bottom-right corner. This will ensure it stays stuck to the top of your screen.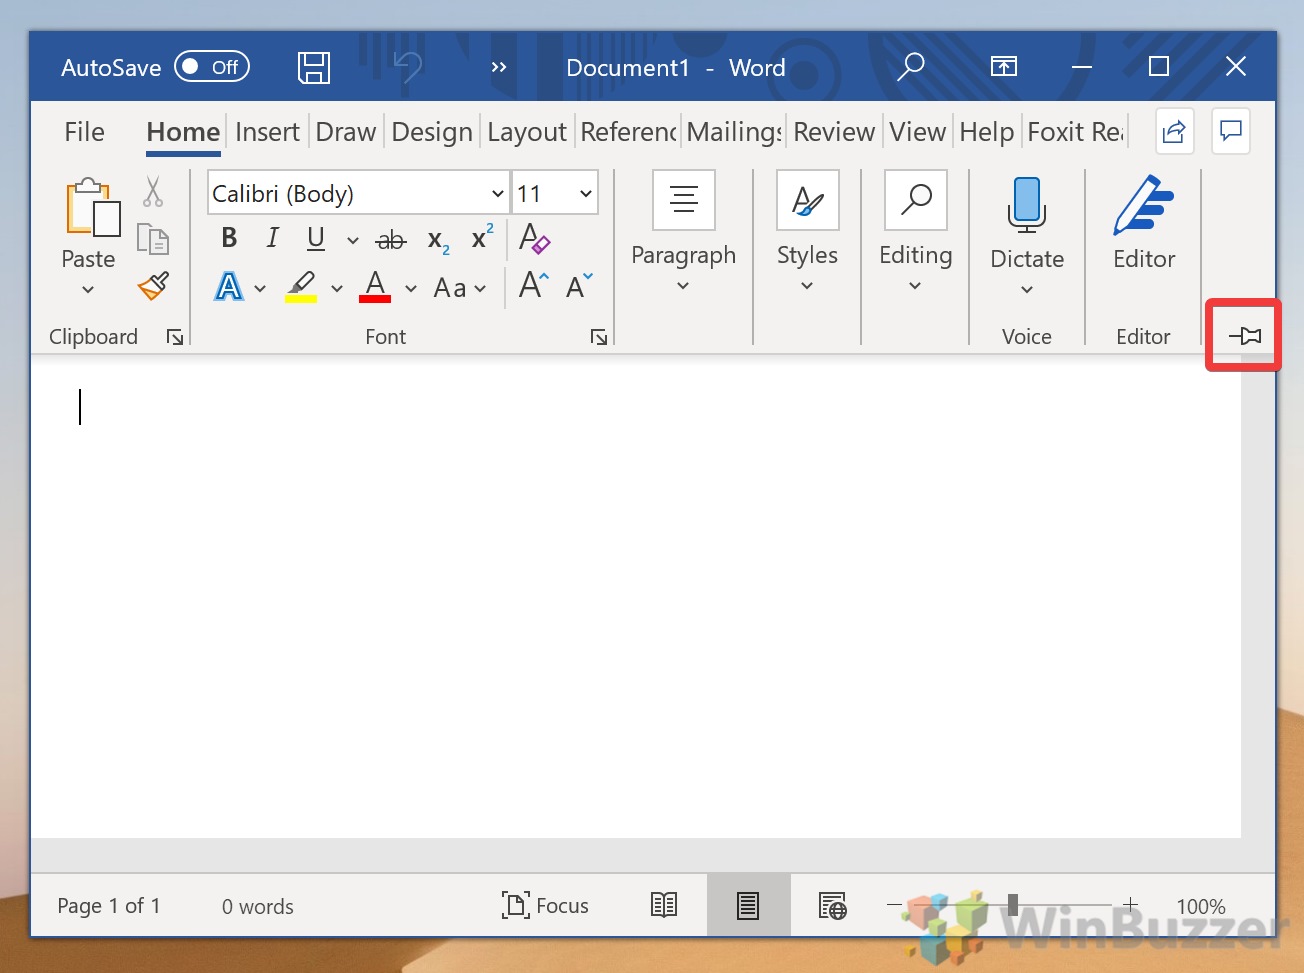
- How to reset the Office ribbon
If your Microsoft Office or Word ribbon tabs have disappeared or have some other issue, you can reset them via the options menu.
Press “File” in your ribbon, or Ctrl + F3 on your keyboard, then click “Options” at the bottom of the screen.
- Reset your Office Ribbon in Options
Click “Customize Ribbon” in the sidebar, then look for the heading towards the bottom that says “Customizations: Reset”. Press the “Reset” button, then click “Reset all customizations”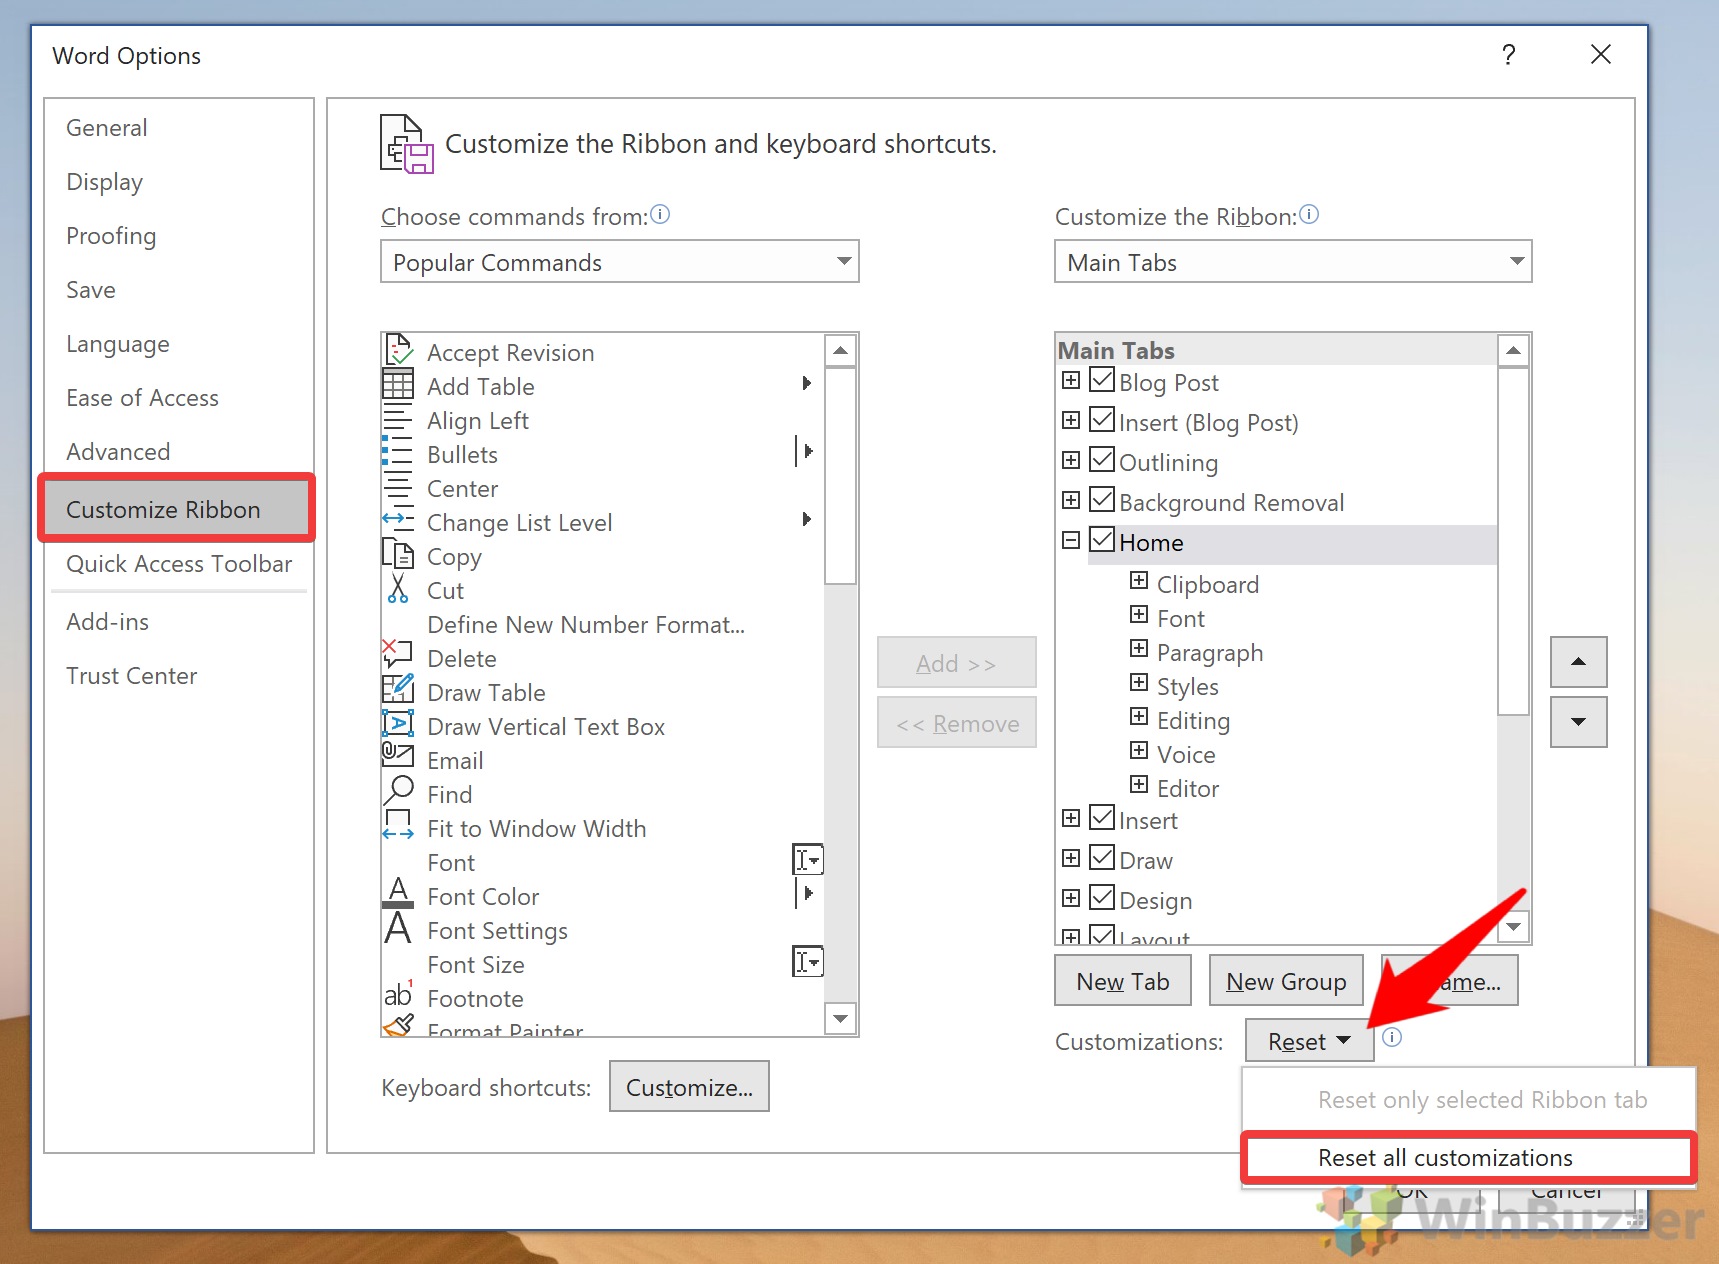
- Delete all Ribbon and Quick Access Toolbar customizations
Press “Yes” to the warning prompt that appears. This will simply reset your ribbon in Microsoft Word to its default state, and won’t cause any kind of damage to your install.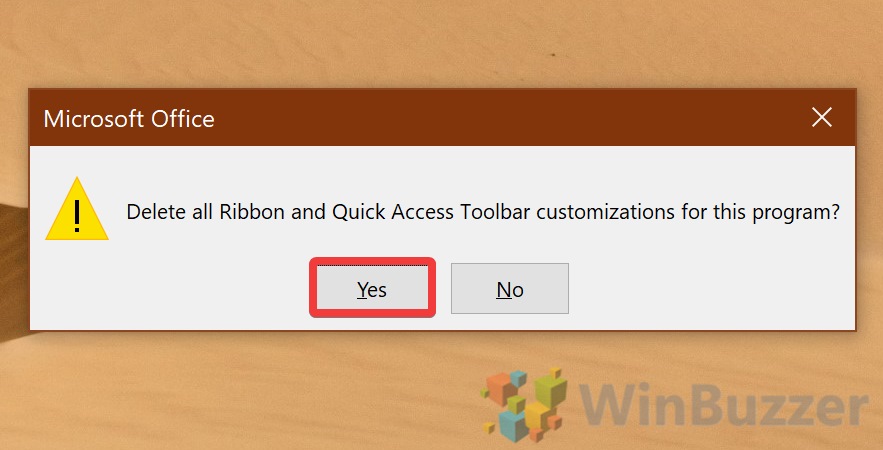
- Press “OK” in the Word Options window
If you previously made customizations to your Word, PowerPoint, Excel, or Outlook ribbon, you should now see that they’re back to normal.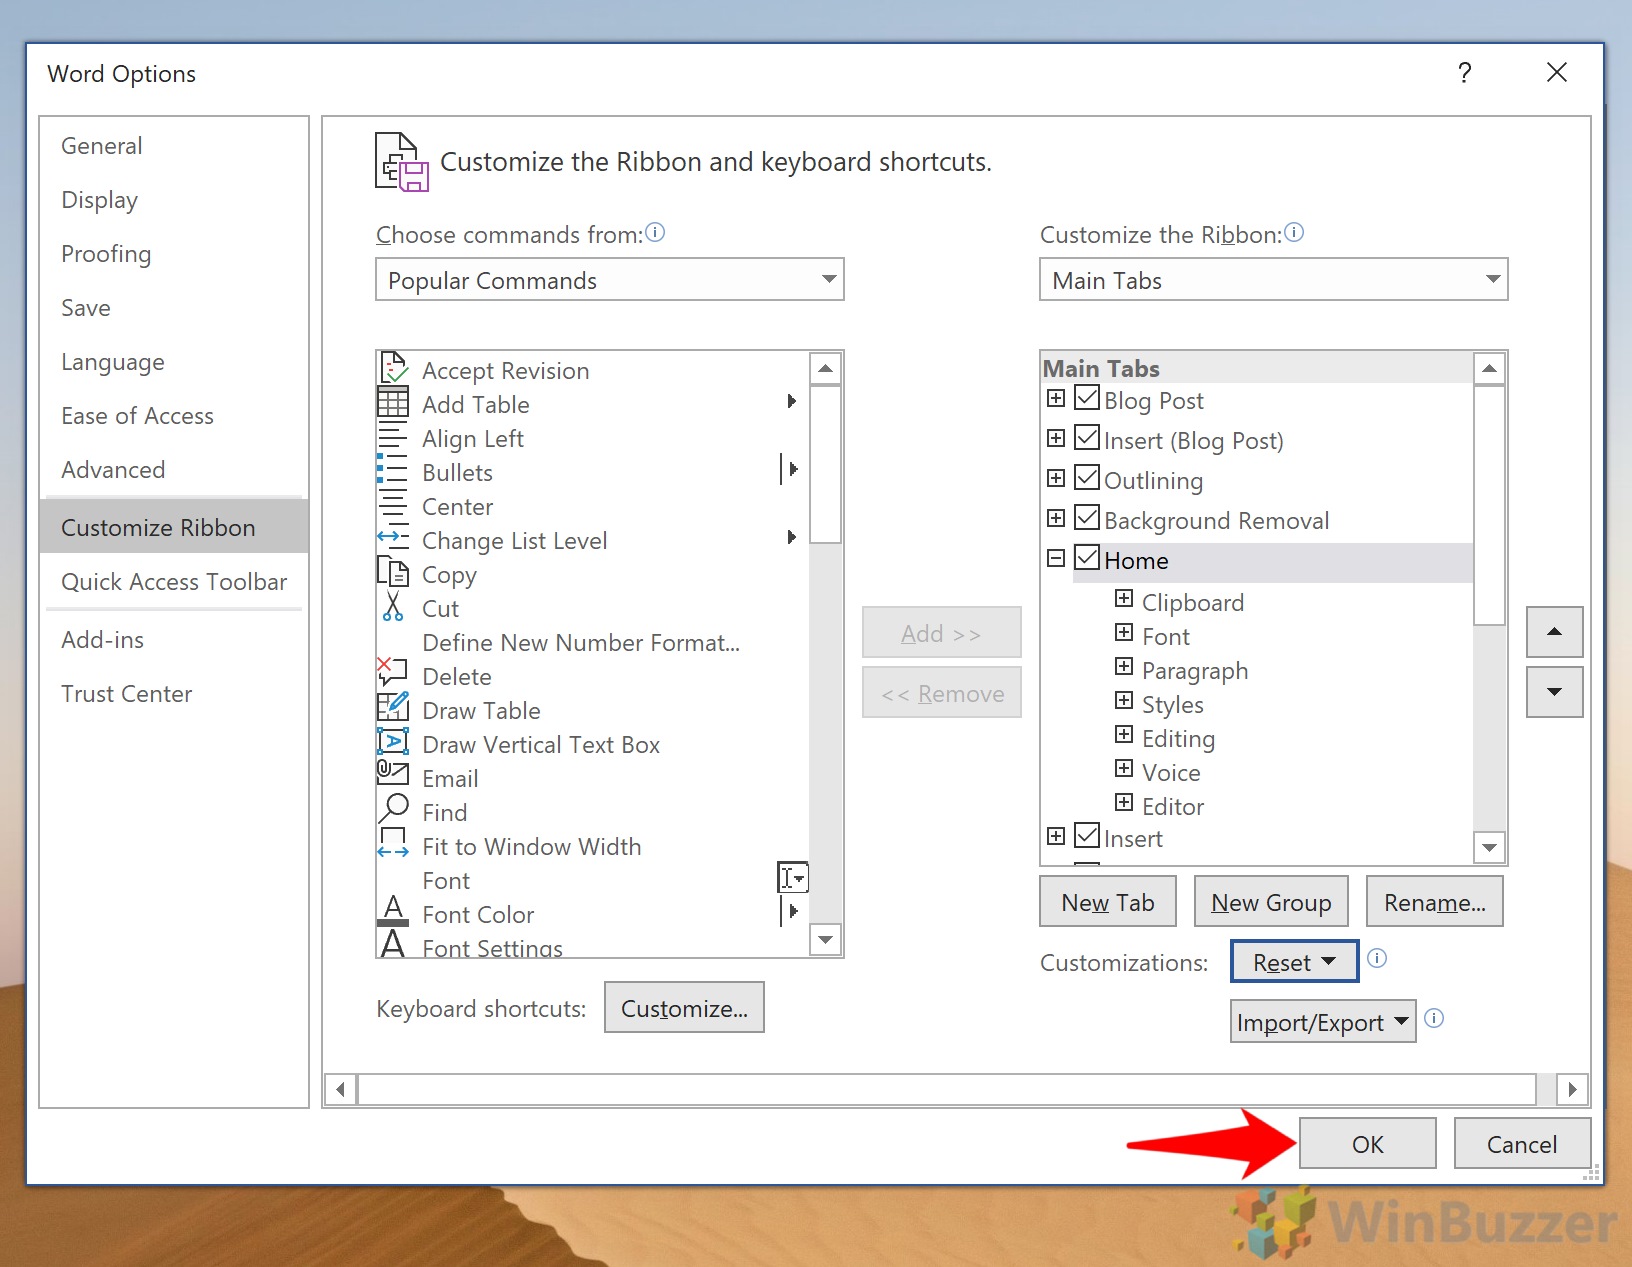
How to Customize the Ribbon in Word, PowerPoint, Excel, or Outlook
So, how do you change which ribbon tabs show up, or the positions of existing tabs? Quite easily, it turns out. The built-in Office ribbon editor lets you quickly chop and change to suit your preferences.
- Open the options menu
Press the “File” button in your ribbon and then click “Options” in the bottom-left corner.

- Create a new ribbon tab
Click “Customize Ribbon” on the left-hand side, then press “New tab” underneath the right-hand column in the Office Ribbon editor.
- Rename your new Ribbon tab
By default, your new tab will be called “MyTab (Custom)”. We don’t want that, so find it in the list, click it, then press “Rename…”. If you’re curious, you can also use this method to change the name of any of Word’s existing tabs. Quite nice if you want to change “Review” to something like “Editing”, for example.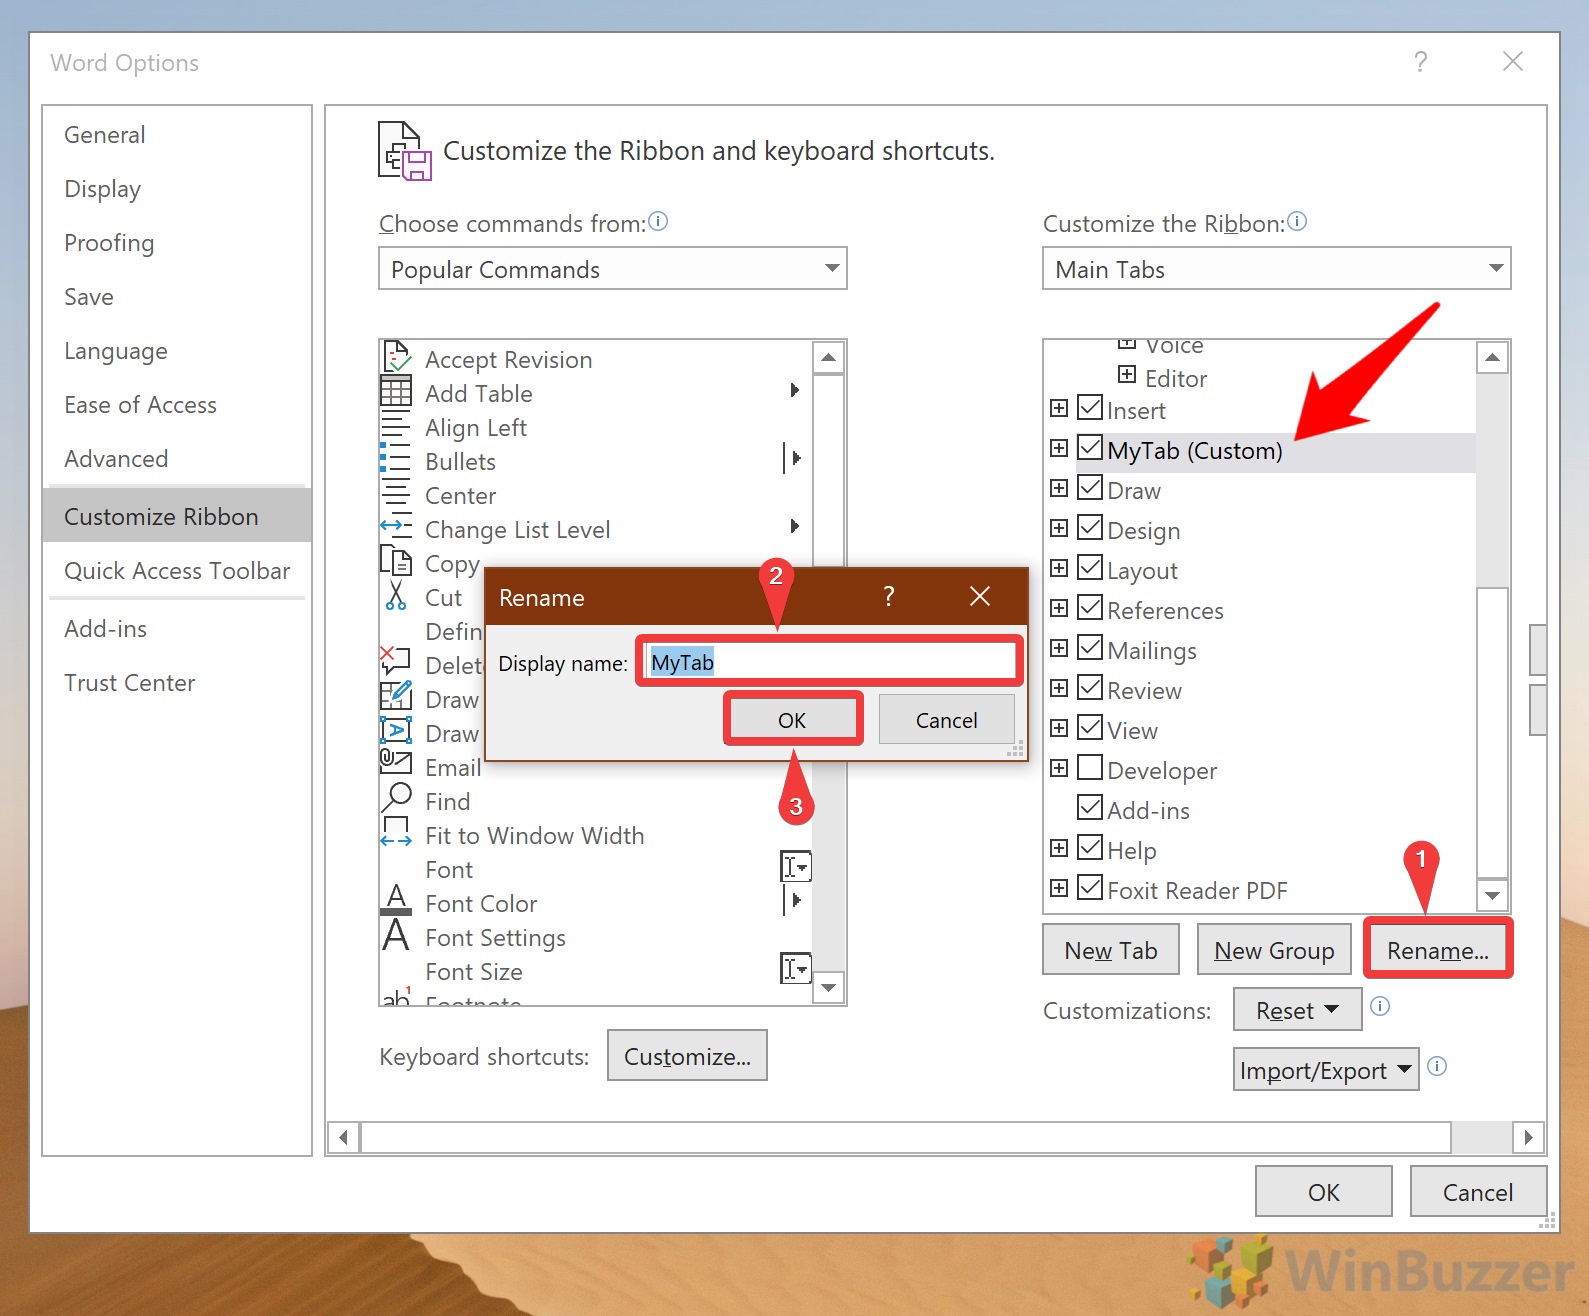
- Change the order of your Ribbon tabs
If you’re like me, the “Review” tab is one of your most used, yet it’s right near the end of the Word Ribbon menu. You can change this, or move your newly created tab, by clicking “File > Options”.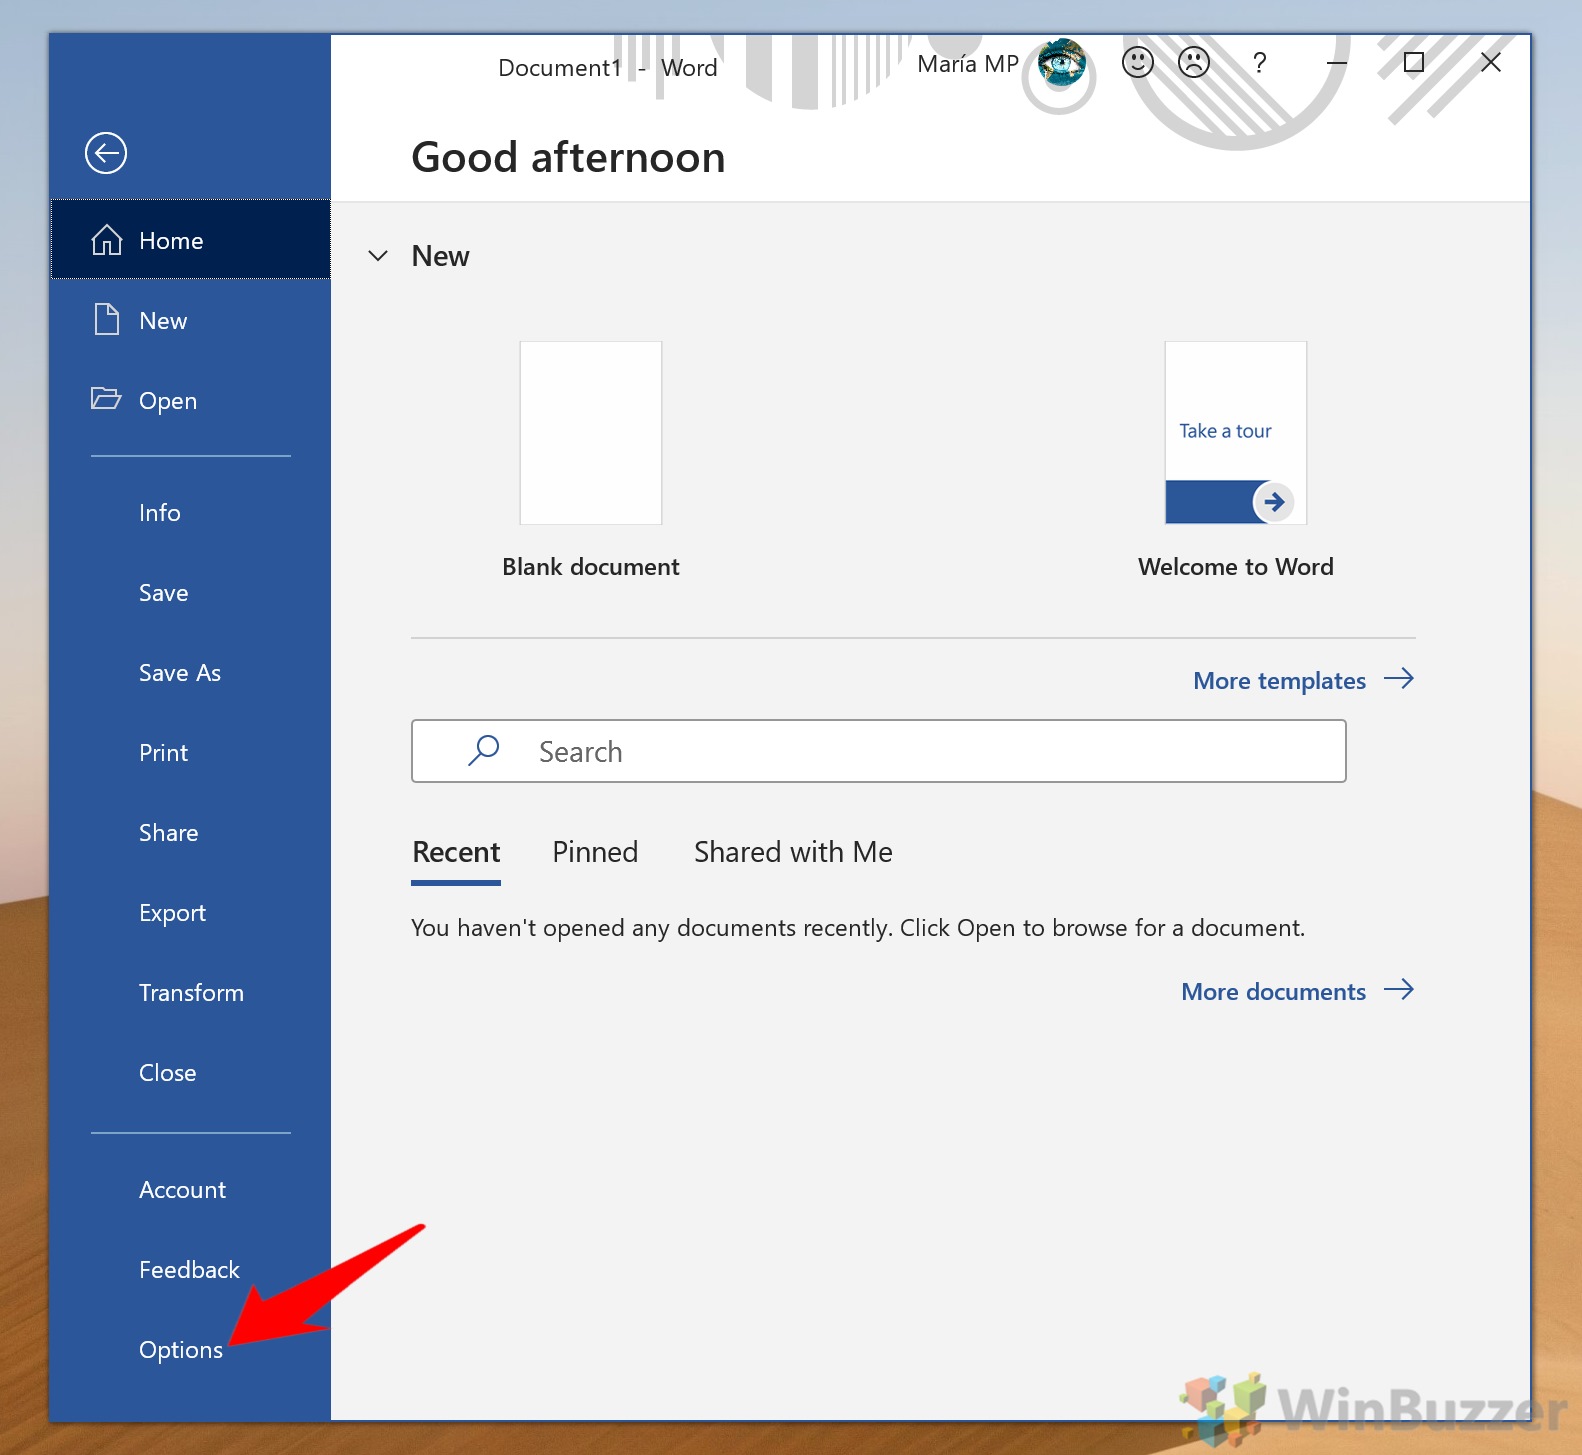
- Customize your Ribbon tab order
Click “Customize ribbon” in the sidebar, then click the tab you’d like to move in the right-hand column and press the up and down arrows to the right of it to move its position. The higher up it is, the further to the right it will be in your Office ribbon. Press “OK” to apply the changes.
- Hide or show a ribbon tab
If there are tabs you don’t use or ones that aren’t showing up, you can untick them to hide or show them.
- Tick or Untick a Ribbon Tab in the Ribbon Editor
Click “Customize Ribbon” in the sidebar, then tick or untick the tabs you want to display. Note that Office has some built-in tabs that will be disabled by default, such as the “Developer” tab.
Press “OK” when you’re done with your changes.
- Delete a Microsoft Office Ribbon tab
First, press “File > Options” to open the ribbon tab.
If you made a custom tab that you no longer need, you can completely delete it. Bear in mind that you can’t delete default Ribbon tabs, though, only hide them.
- Right-click the tab and press “Remove” in the Ribbon editor
Click “Customize Ribbon” in the sidebar, then right-click your custom tab and press “Remove” to delete it.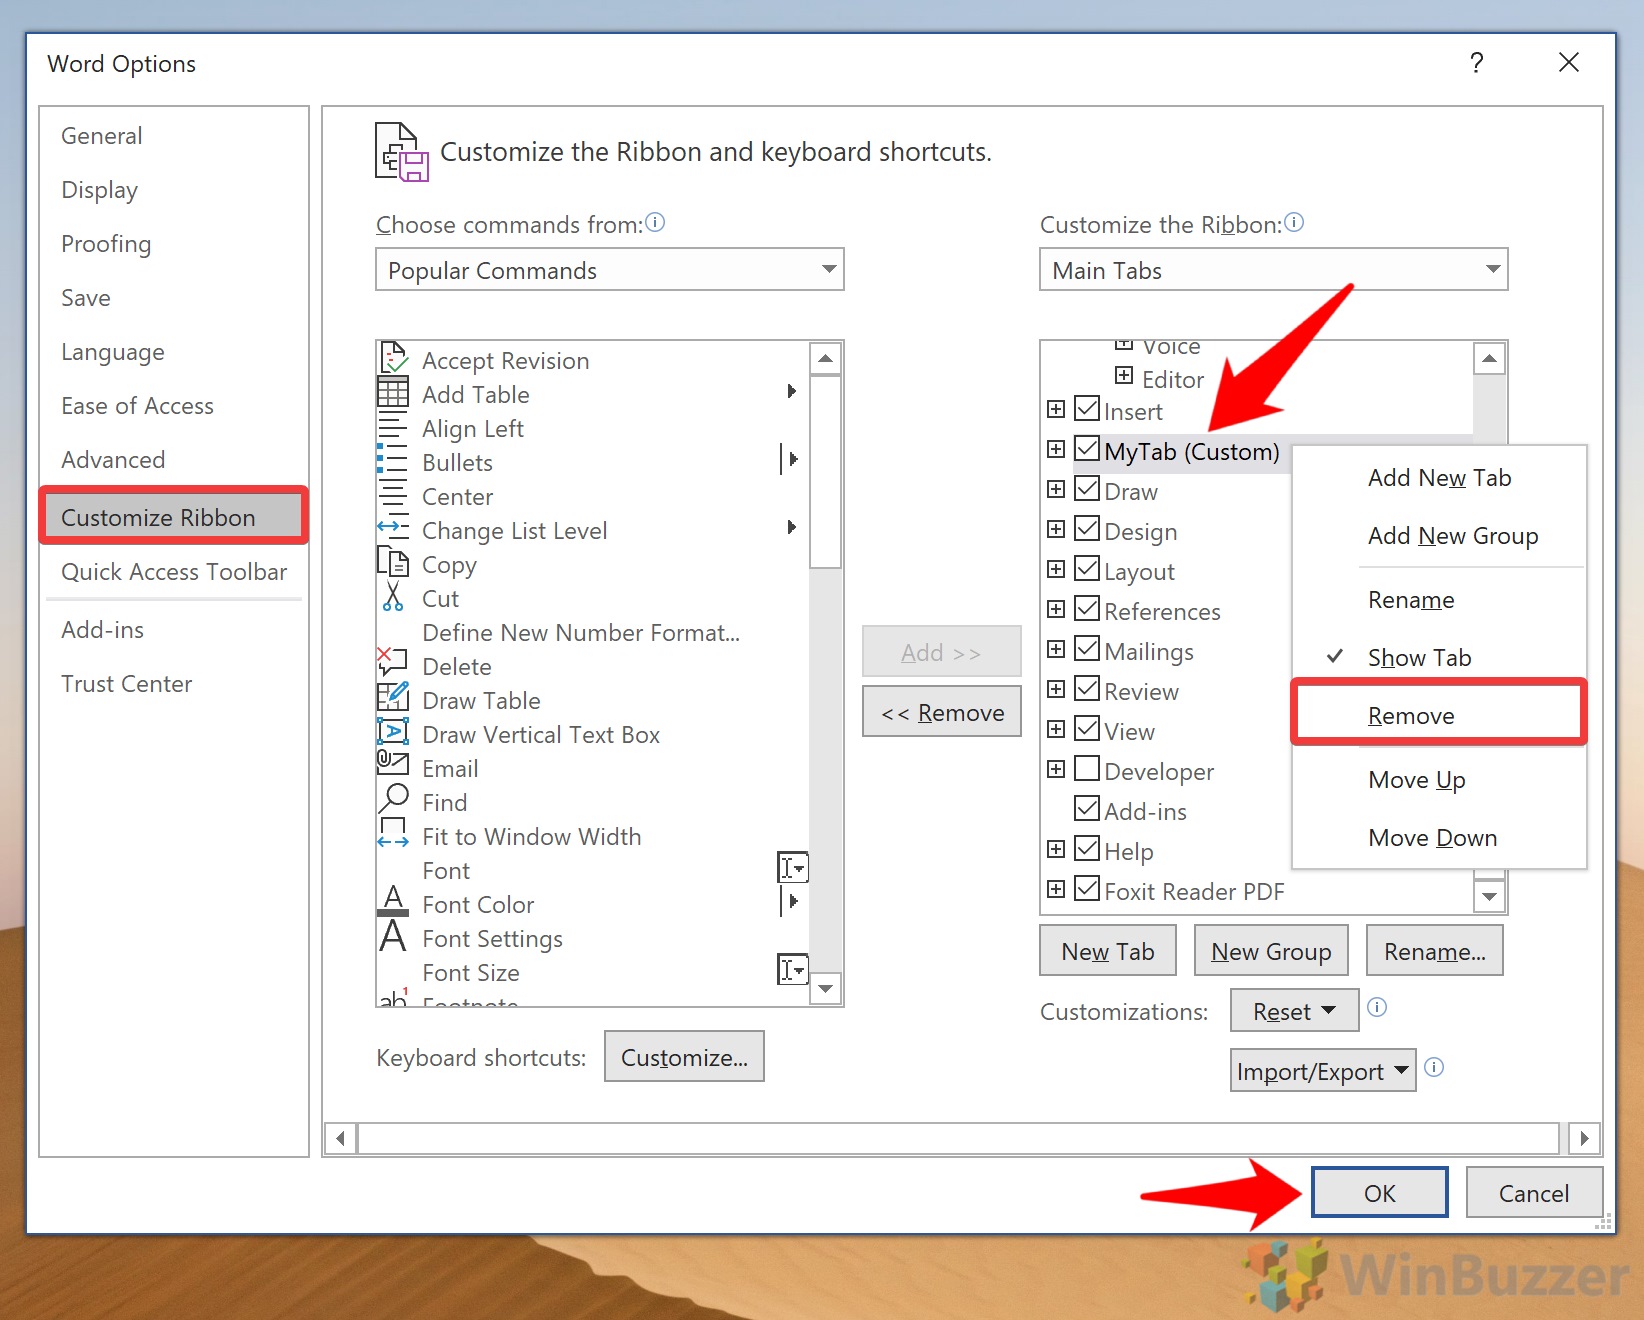
How to Customize Ribbon Tab Groups in Microsoft Office
You may have noticed that each of your Ribbon tabs is split into its own sections, separated by a single vertical line with different headings underneath. These are referred to as “Command groups”, and you can create, rename, or change the icon of them in your custom tabs.
- Press “File > Options”

- Create a New Group
Click “Customize Ribbon” in the sidebar, then a tab you’d like to modify. Below the right-hand column, click “New Group”.
- Rename your group
By default, your group will be called “New Group (Custom)”. That’s not particularly descriptive, so you’ll want to click it immediately and press “Rename…” at the bottom of the right-hand column.
Call it something that makes a bit more sense and choose a symbol if you wish. Press “OK”.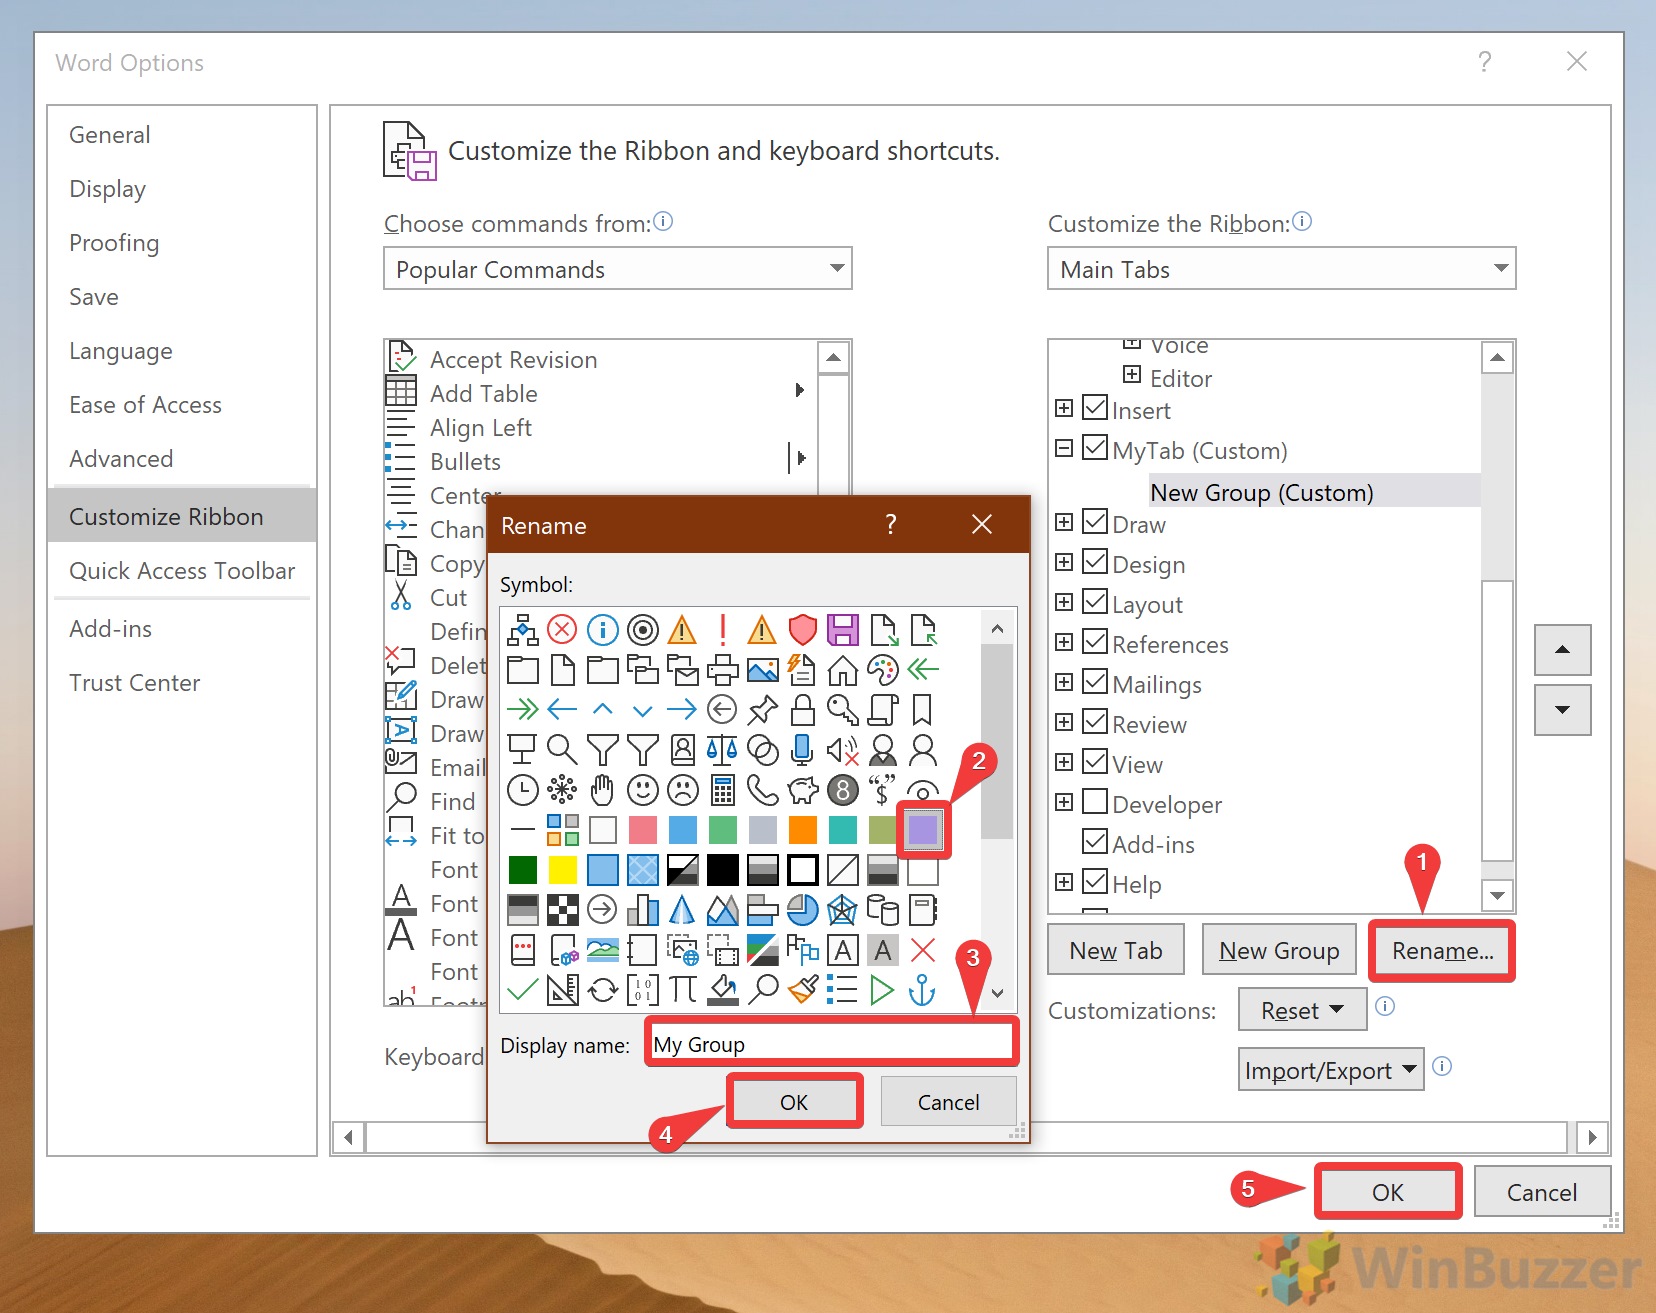
- How to re-order your command groups
Just like tabs, you can re-order your ribbon groups, with the highest group displaying on the left-hand side.
To start, click “File > Options”.
- Move your command group up or down
In the Office Ribbon editor sidebar, click “Customize Ribbon”, then select the group you’d like to move in the right-hand column. Click the arrows beside it to move it up or down. It’s worth noting that you can do this with any group, including the default ones.
Once you’re finished, don’t forget to hit “OK”.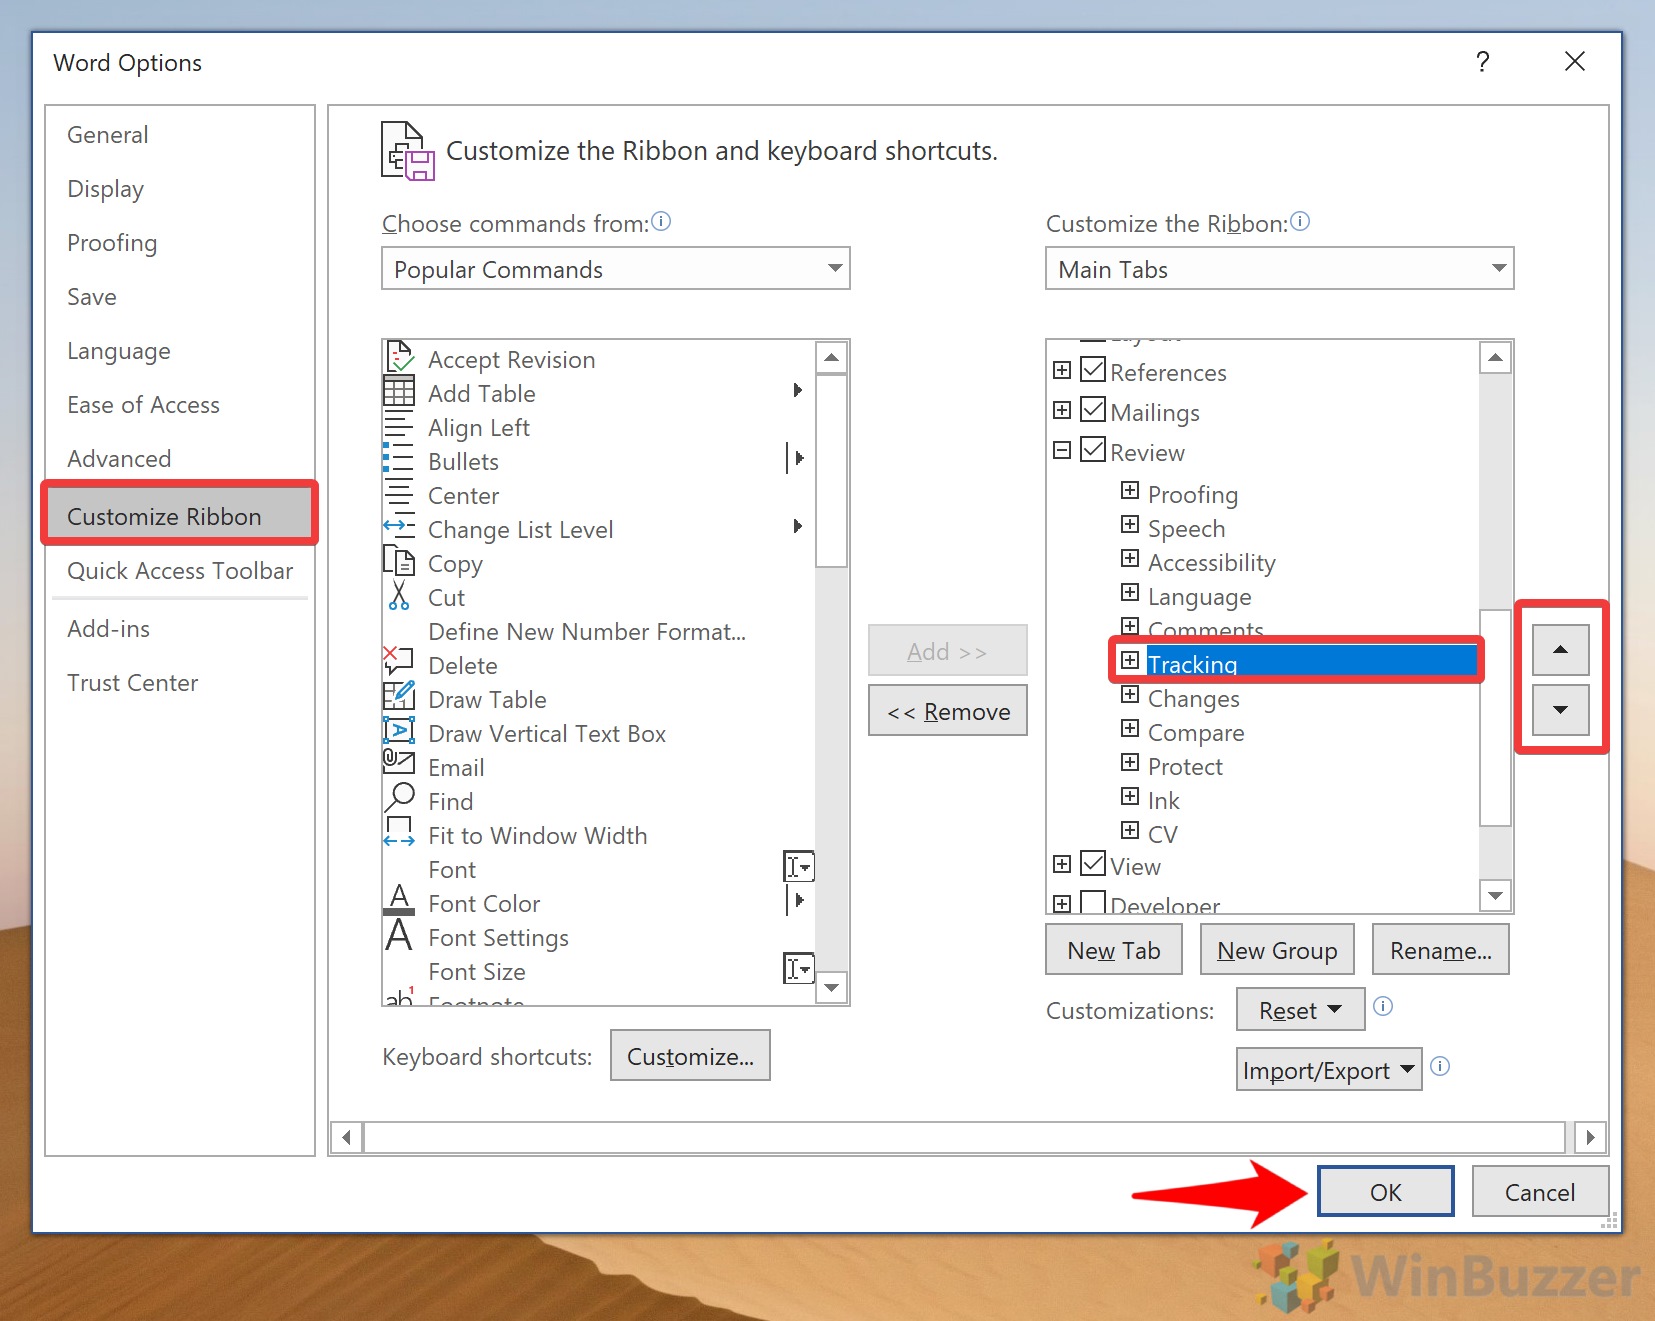
- How to remove a command group
To start removing a group of commands from the ribbon in MS Word, press “File > Options”.
- Remove the command group via right-click
Click “Customize Ribbon” in the sidebar, then select the command group you want to remove in the right-hand column. Bear in mind that it must be a custom group or you won’t be able to delete it.
Right-click your command group and then press “Remove” and “OK”.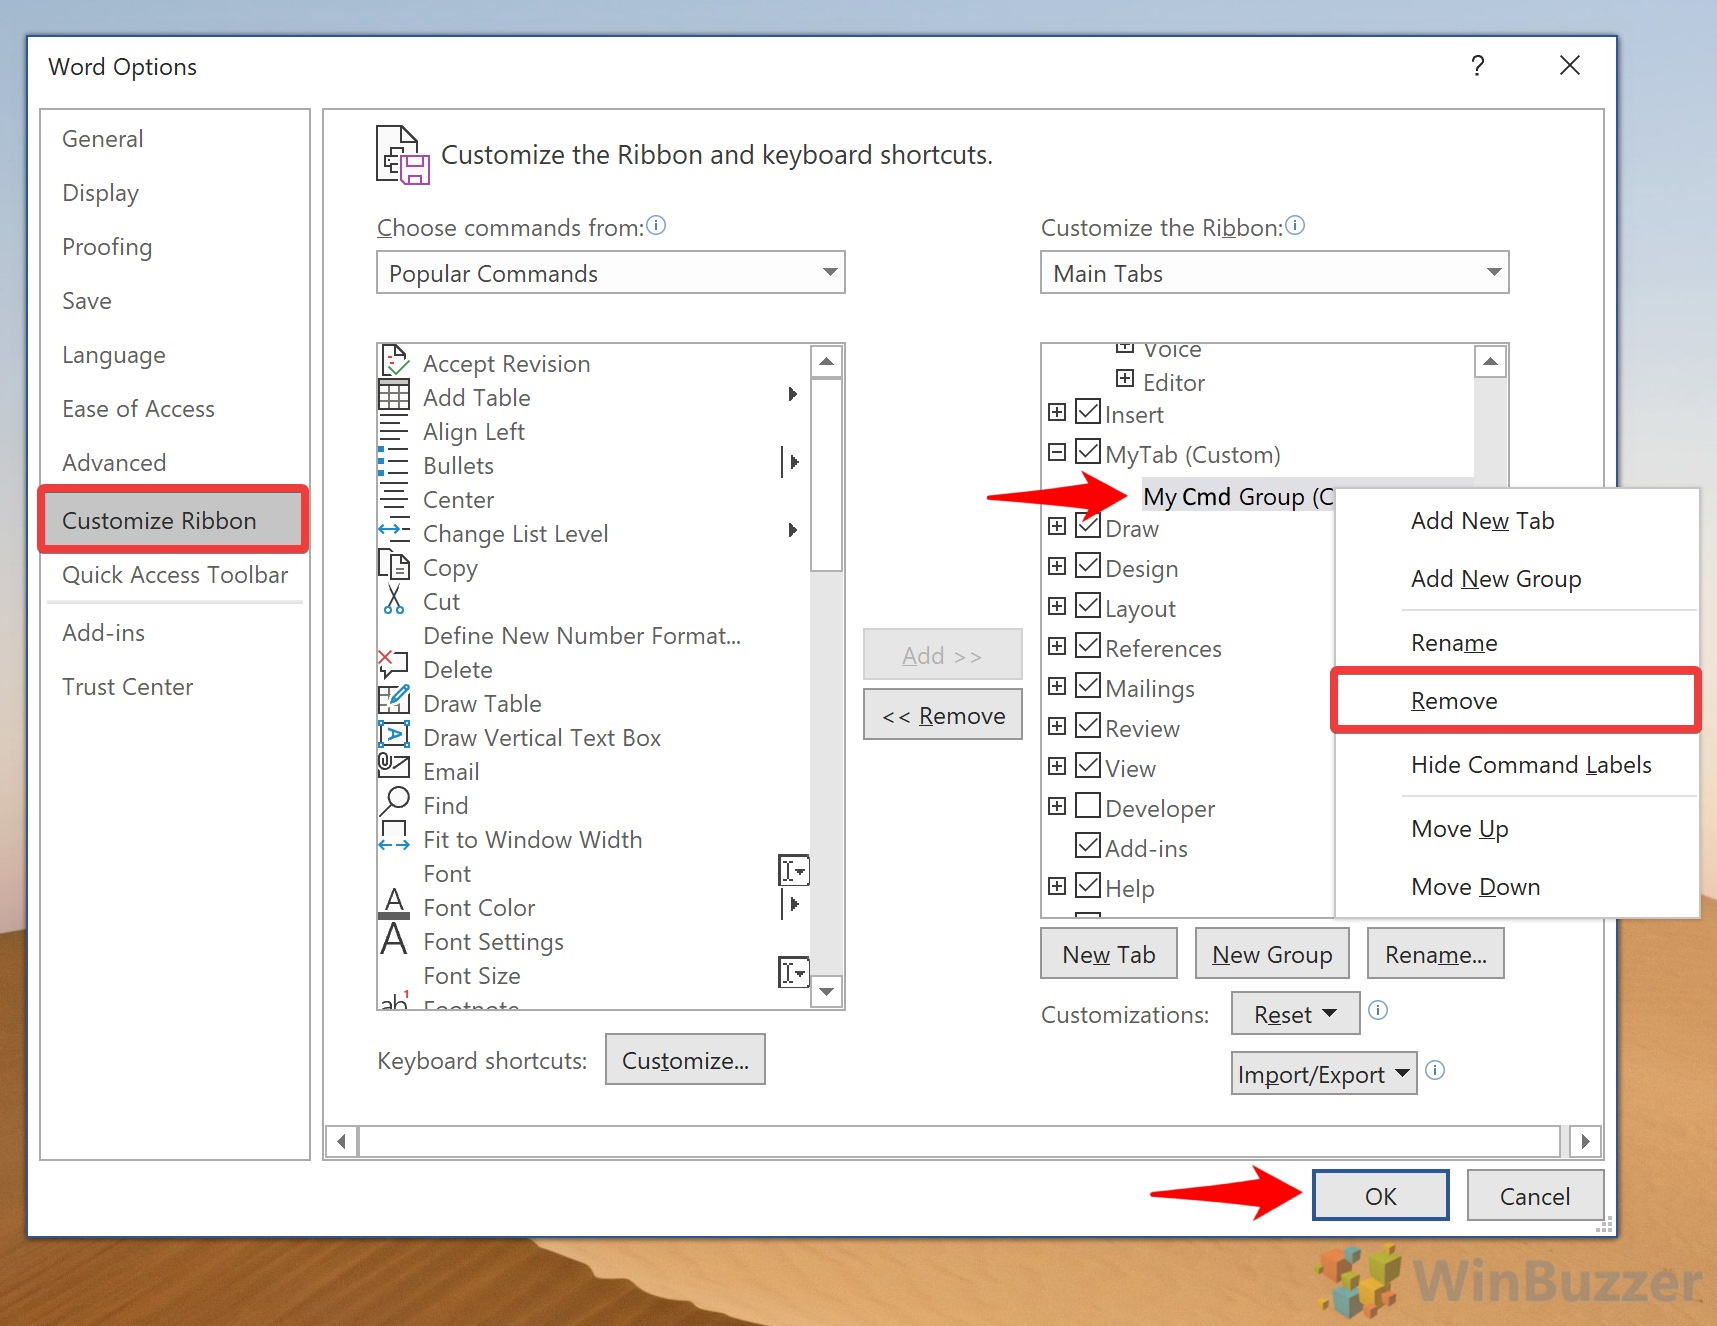
How to Customize Group Commands in the Outlook, PowerPoint, Excel, or Word Ribbon
One of the most useful ways you can customize your ribbon in Microsoft Word is by changing which commands (Ribbon icons) show in which tab. With the Ribbon editor, you can add specific tools to your custom tab or change which tools show in the default tabs. Here’s how:
- Open Microsoft Office Options
In your Office app of choice (in our case Word), click “File > Options”. - Add ribbon commands to your command group
In the sidebar, click “Customize Ribbon”. Then, in the left-hand column click the ribbon icon you’d like to add to your group. Select the command group in the right-hand tab, then click “Add >>” to move it across. Repeat this process for each command you’d like to add to your ribbon tab.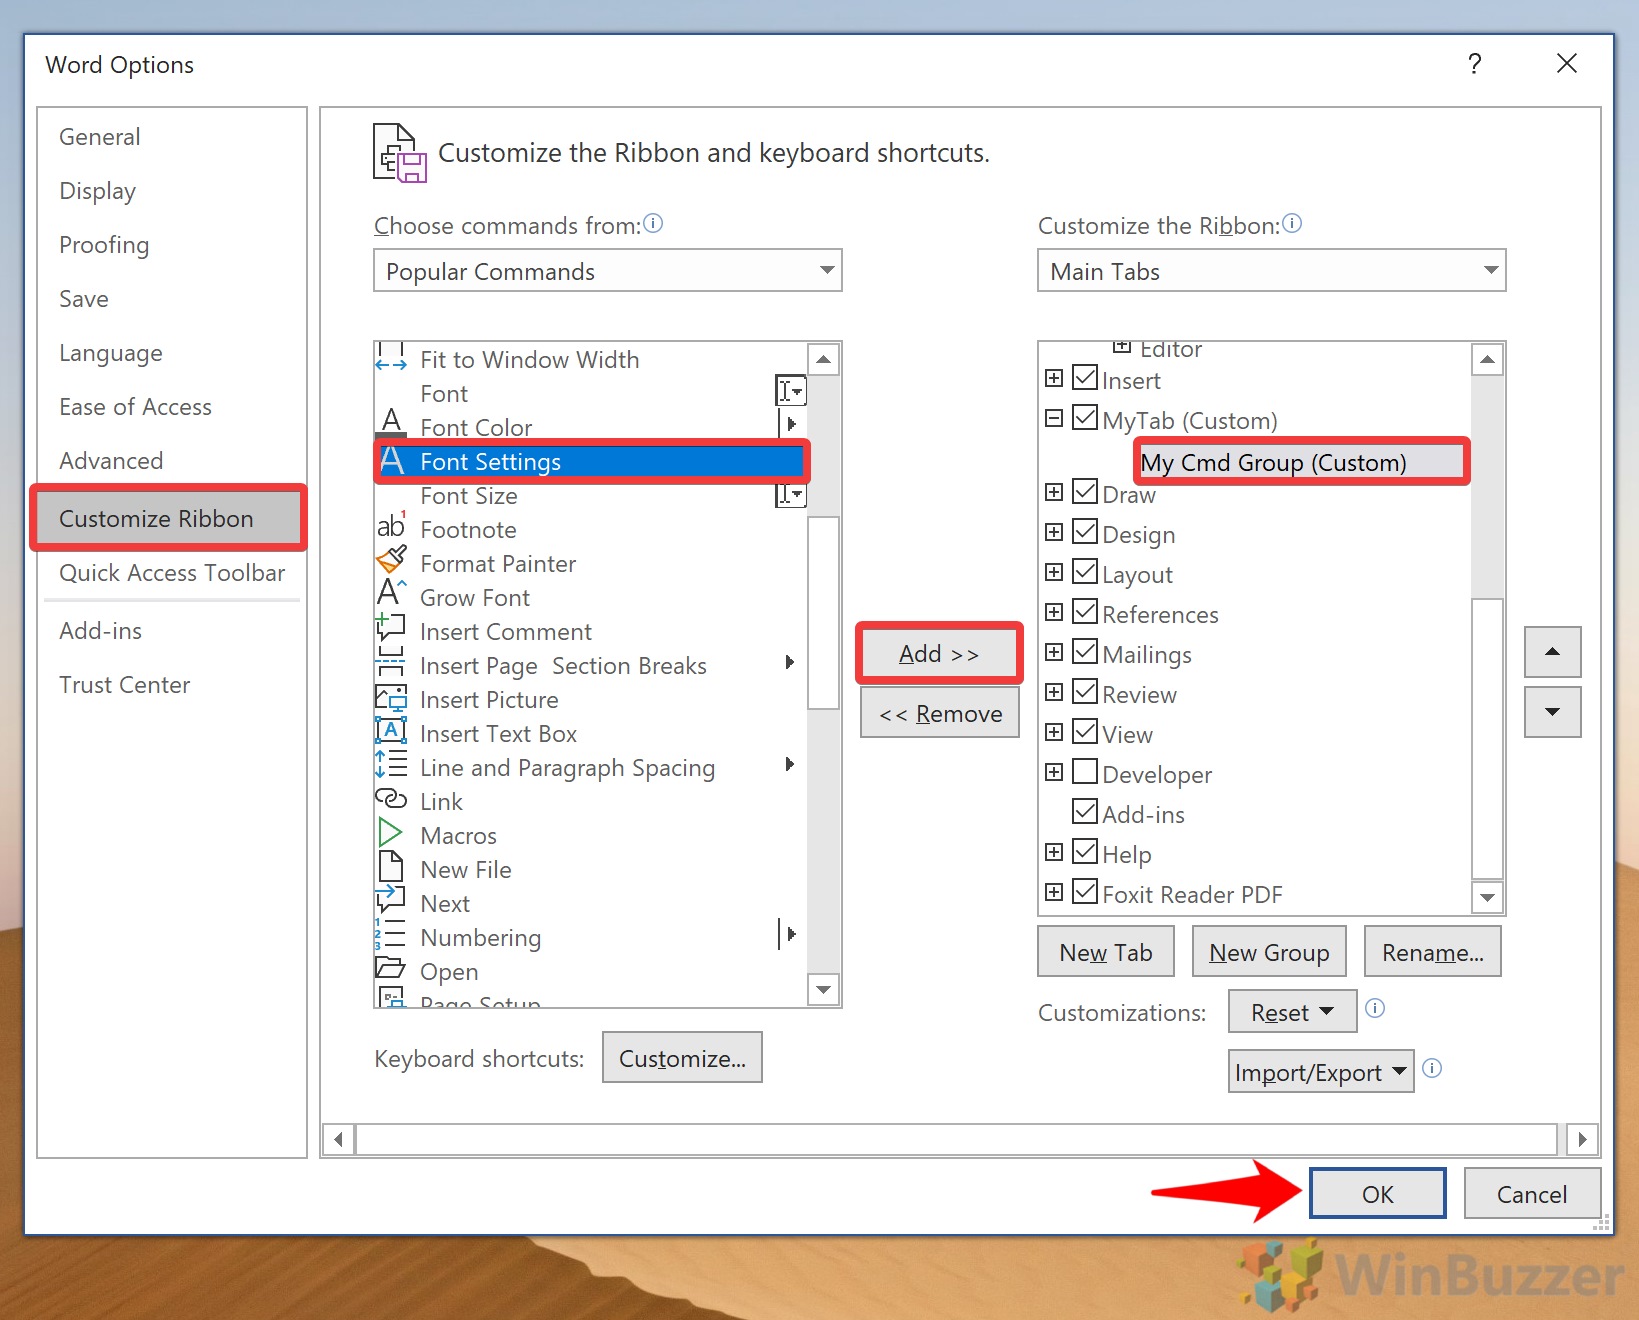
- Remove a ribbon icon from your custom ribbon tab
Sadly, you can only remove commands from command groups/ribbon tabs that you have created. However, you can always hide a default ribbon tab and recreate it minus the icons you don’t want.
Anyway, to remove a ribbon icon, click on it in the right-hand column and then press the “<< Remove” button between the two columns.
- How to change the order of your Office Ribbon commands
You can also change the position of your Ribbon commands inside their groups, moving them left or right. To get started, press “File > Options“.
- Move your Office/Word Ribbon commands up and down in the editor
Click “Customize Ribbon” in the word options window, then select the command you want to move by expanding its group and clicking on it. Press the up and down arrows to its right to move it. Unfortunately, you won’t be able to do this for Word’s default tabs, but you can always recreate them in a different order and hide the original.
Press “OK” to save the changes.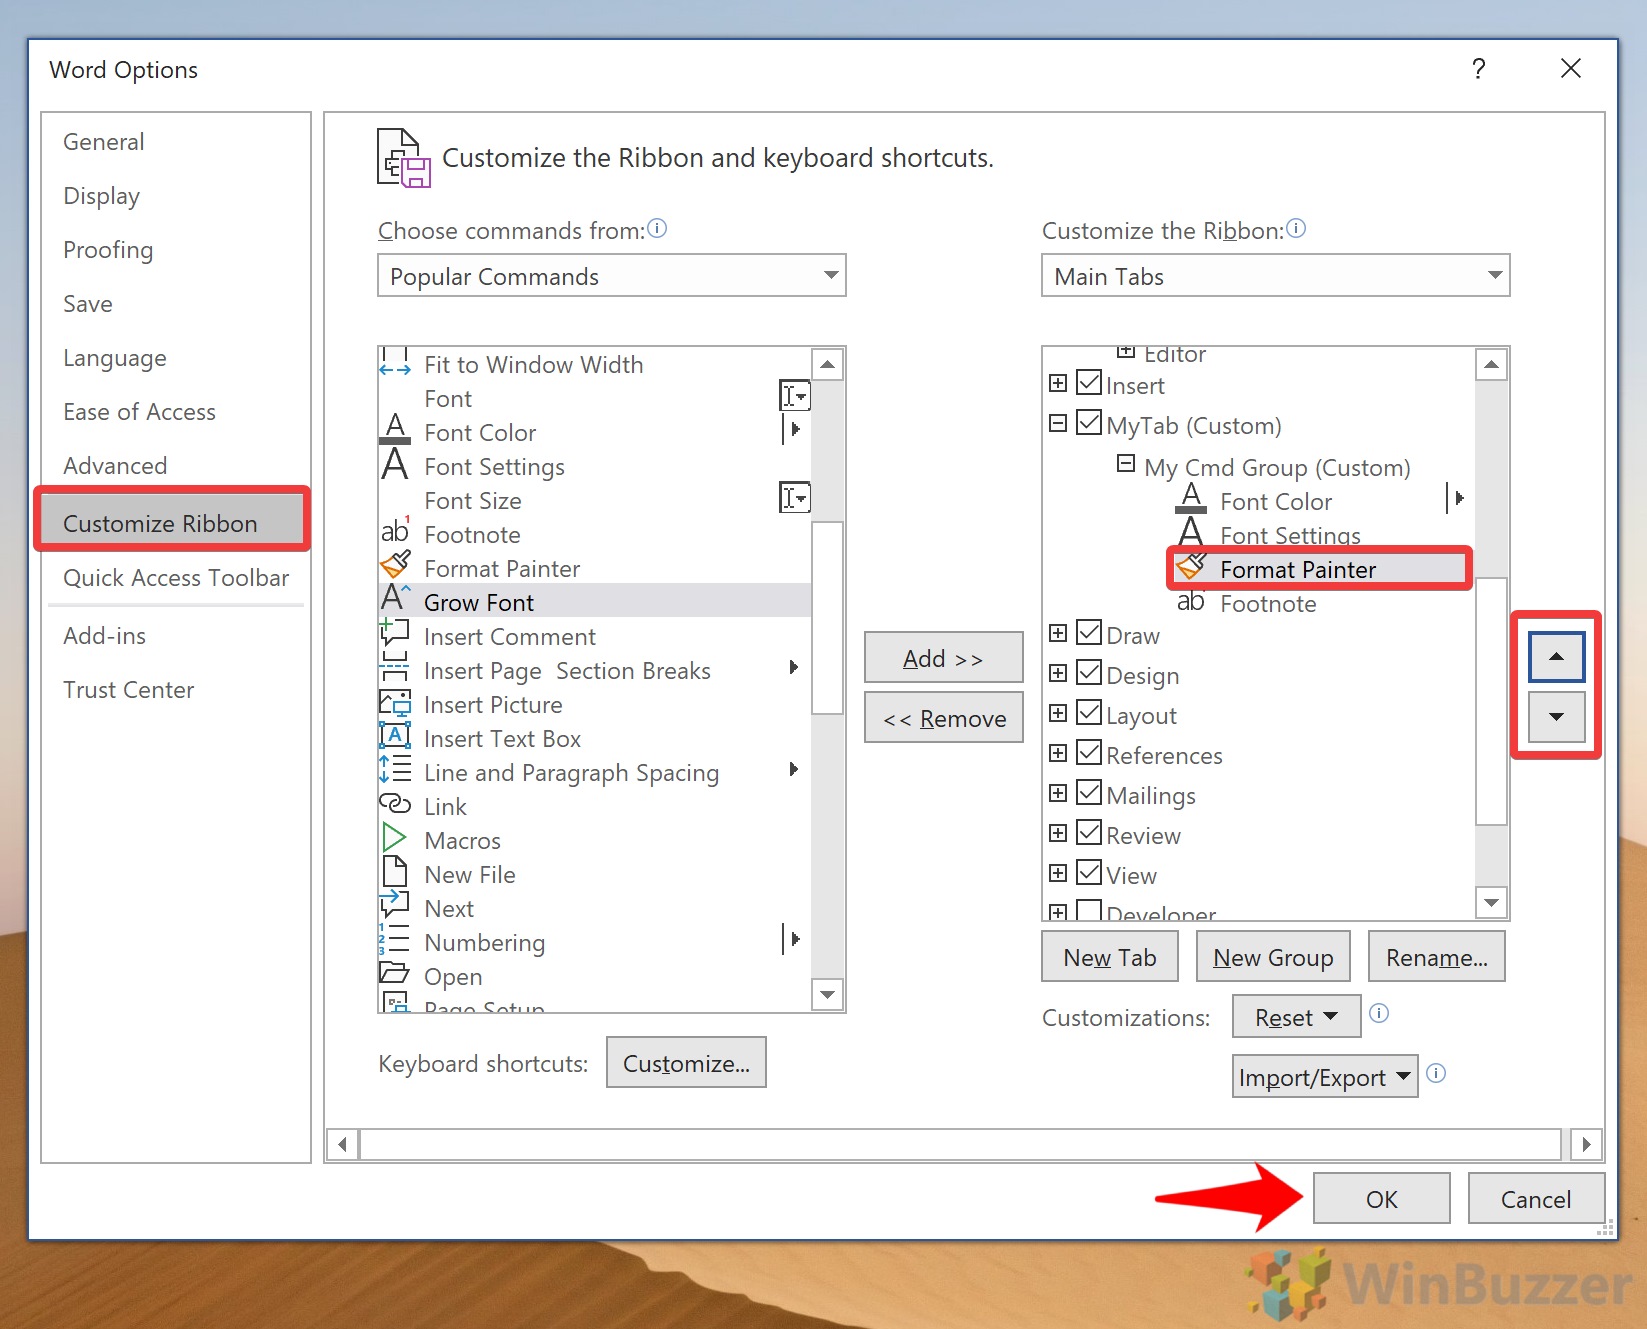
- How to rename a Ribbon group command
If you find a tool’s default description confusing, you can modify it to something more memorable. You could also use this to translate options to your native language.
To get started, press “File > Options”.
- Rename your Ribbon icons
Press “Customize Ribbon” in the options sidebar, then select each command you’d like to change in the right-hand column and press “Rename…”. Call it anything you like, then press “OK”, and “OK” again in the main Word options page.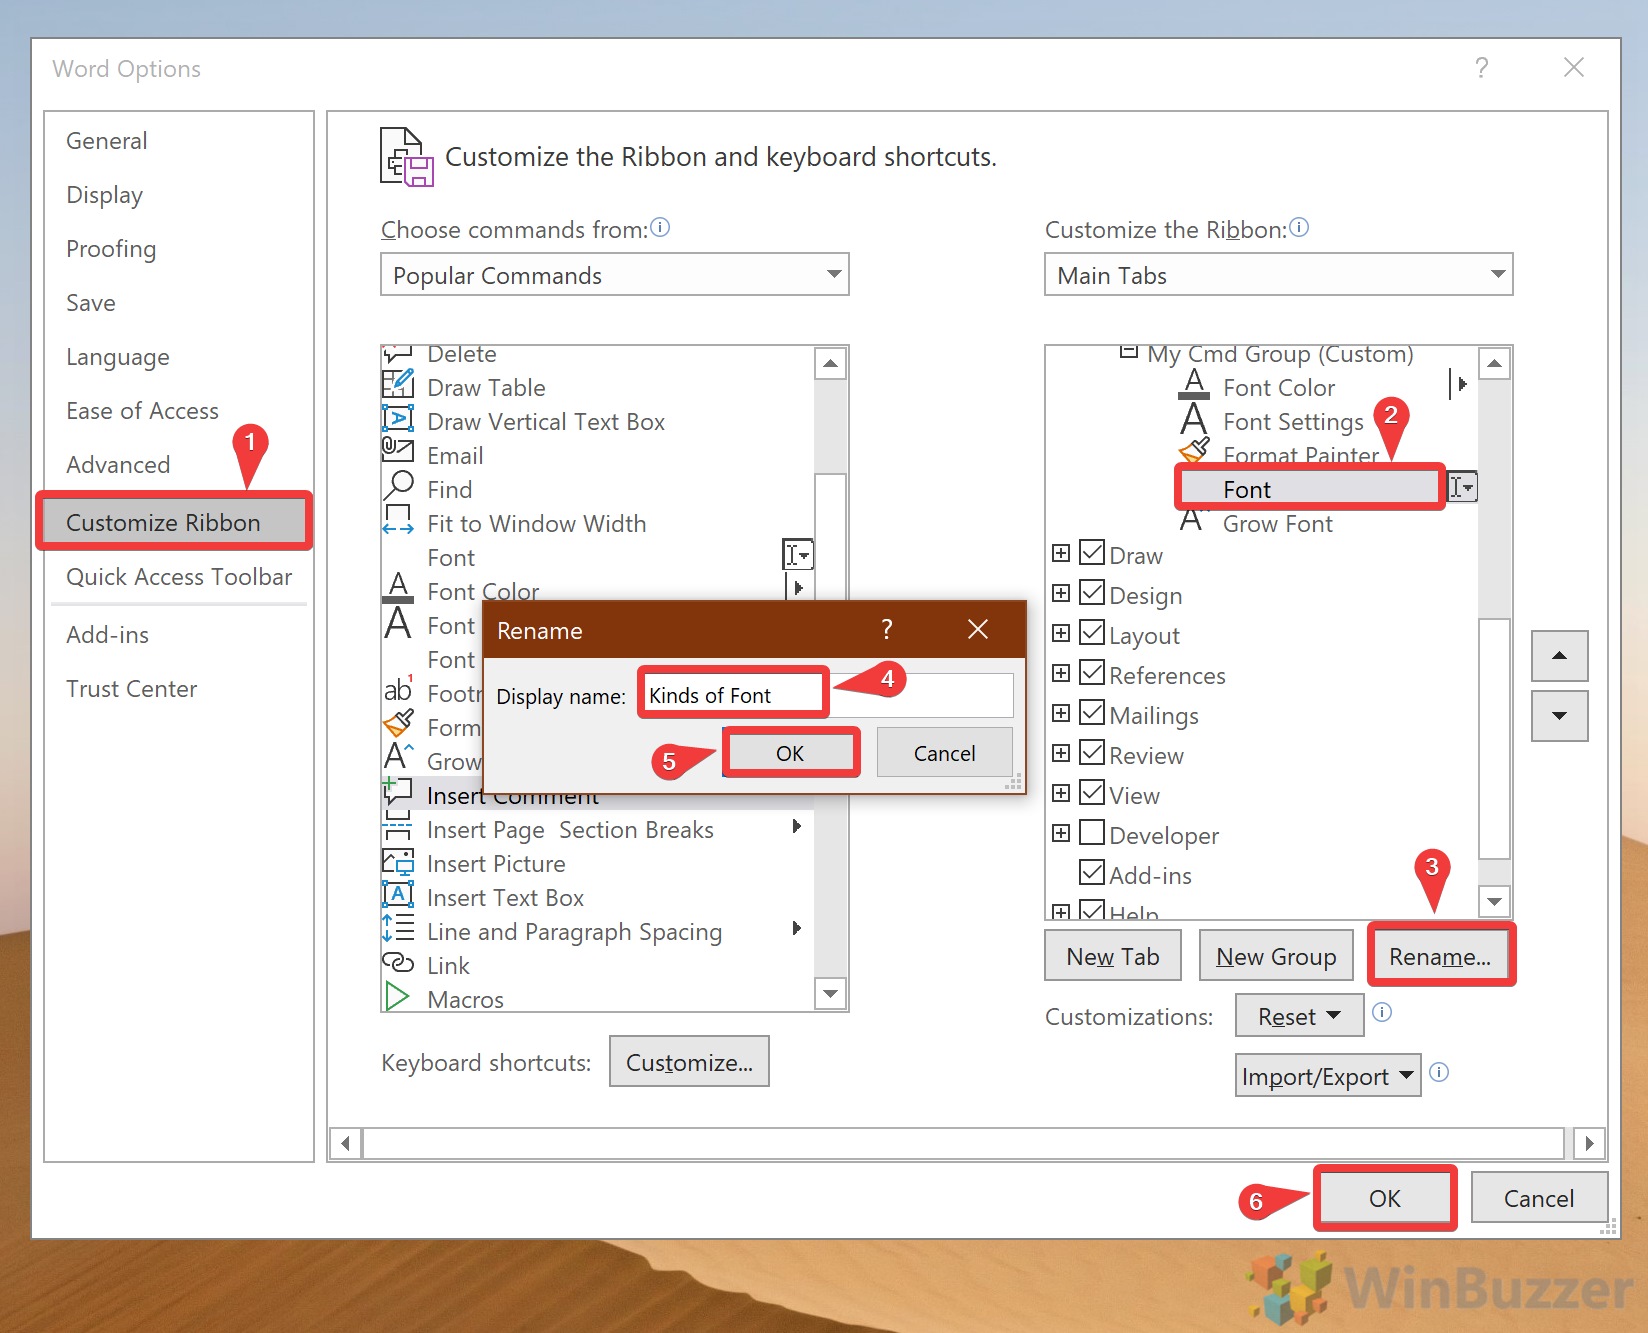
That brings this lengthy tutorial to a close. You should now know everything you know about the MS Word ribbon, including how to show it, create new tabs, and modify items within those tabs. You can repeat these steps to customize the ribbon of any Office application for a more bespoke experience.
However, there’s more you can do yet to customize your Office install. Why not check our guides on how to enable dark mode for the suite or change background color in Word?
Last Updated on February 14, 2022 7:45 pm CET by Markus Kasanmascheff


