Windows 10’s PowerShell is a very useful and powerful multi-purpose tool that works across various OSes. With it, a user can perform almost any task on their system – but this represents a security challenge for parents and IT admins. As a result, you may want to disable PowerShell in Windows 10.
What is Windows PowerShell?
Windows PowerShell is a command-line tool that lets users run scripts, modify system settings and even perform basic operating system tasks such as creating folders and text files.
Unfortunately, this means an uneducated user could also do a lot of damage with PowerShell. They could inadvertently run a malicious script, purposefully delete system files, or bypass other restrictions.
For these reasons, many will be wondering how to remove PowerShell from Windows 10. Thankfully, Microsoft has created at least three ways to deactivate it. We’ll be covering each of them in detail below. If you also want to disable the Command Line (CMD) check our other tutorial.
How to Block PowerShell via Group Policy Editor (gpedit)
The easiest and recommended way to disable PowerShell is GPO, or Group Policy. Many admins will already be familiar with this tool. It’s worth noting, though, that it’s only available in Windows 10 Pro and higher.
Don’t know your Windows version? Here’s how to check.
- Open the Group Policy Editor
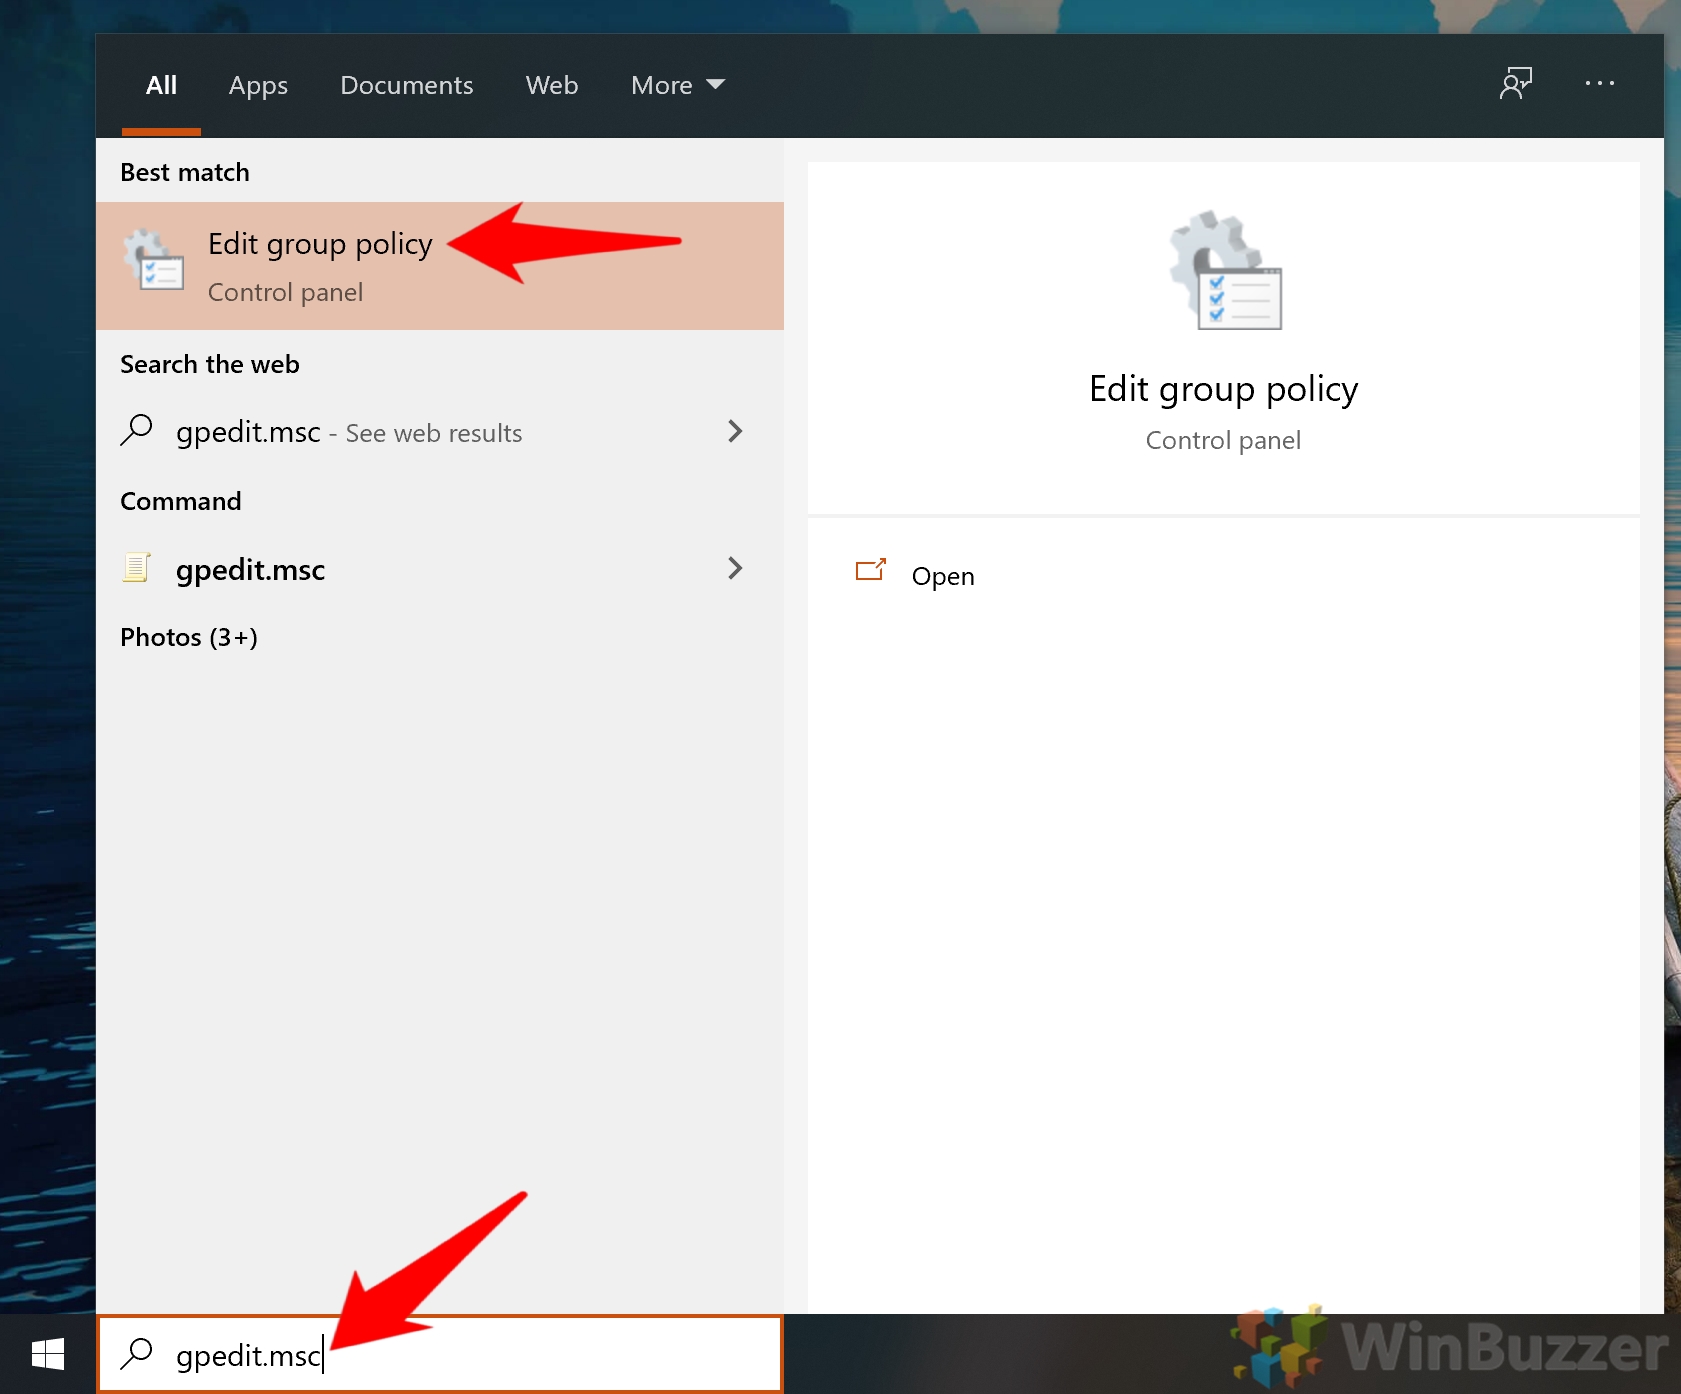
Press “Start” and then type “gpedit.msc”. Click the top result.

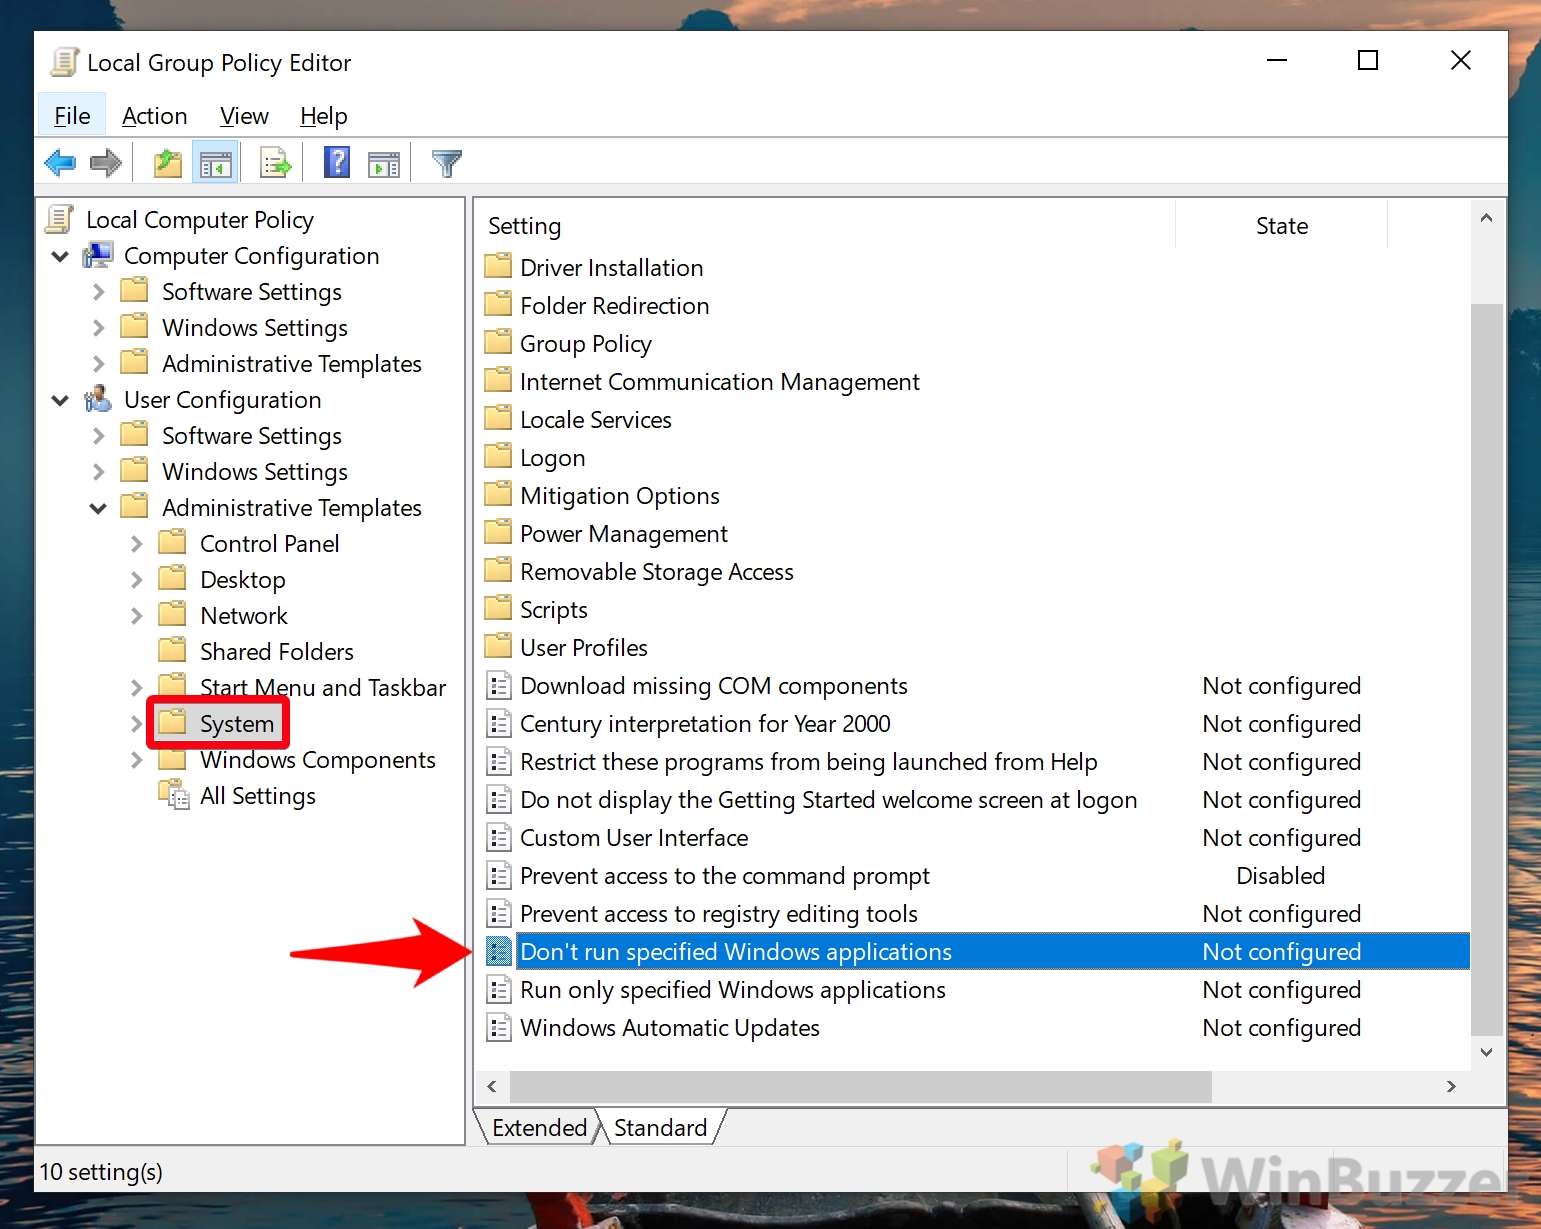
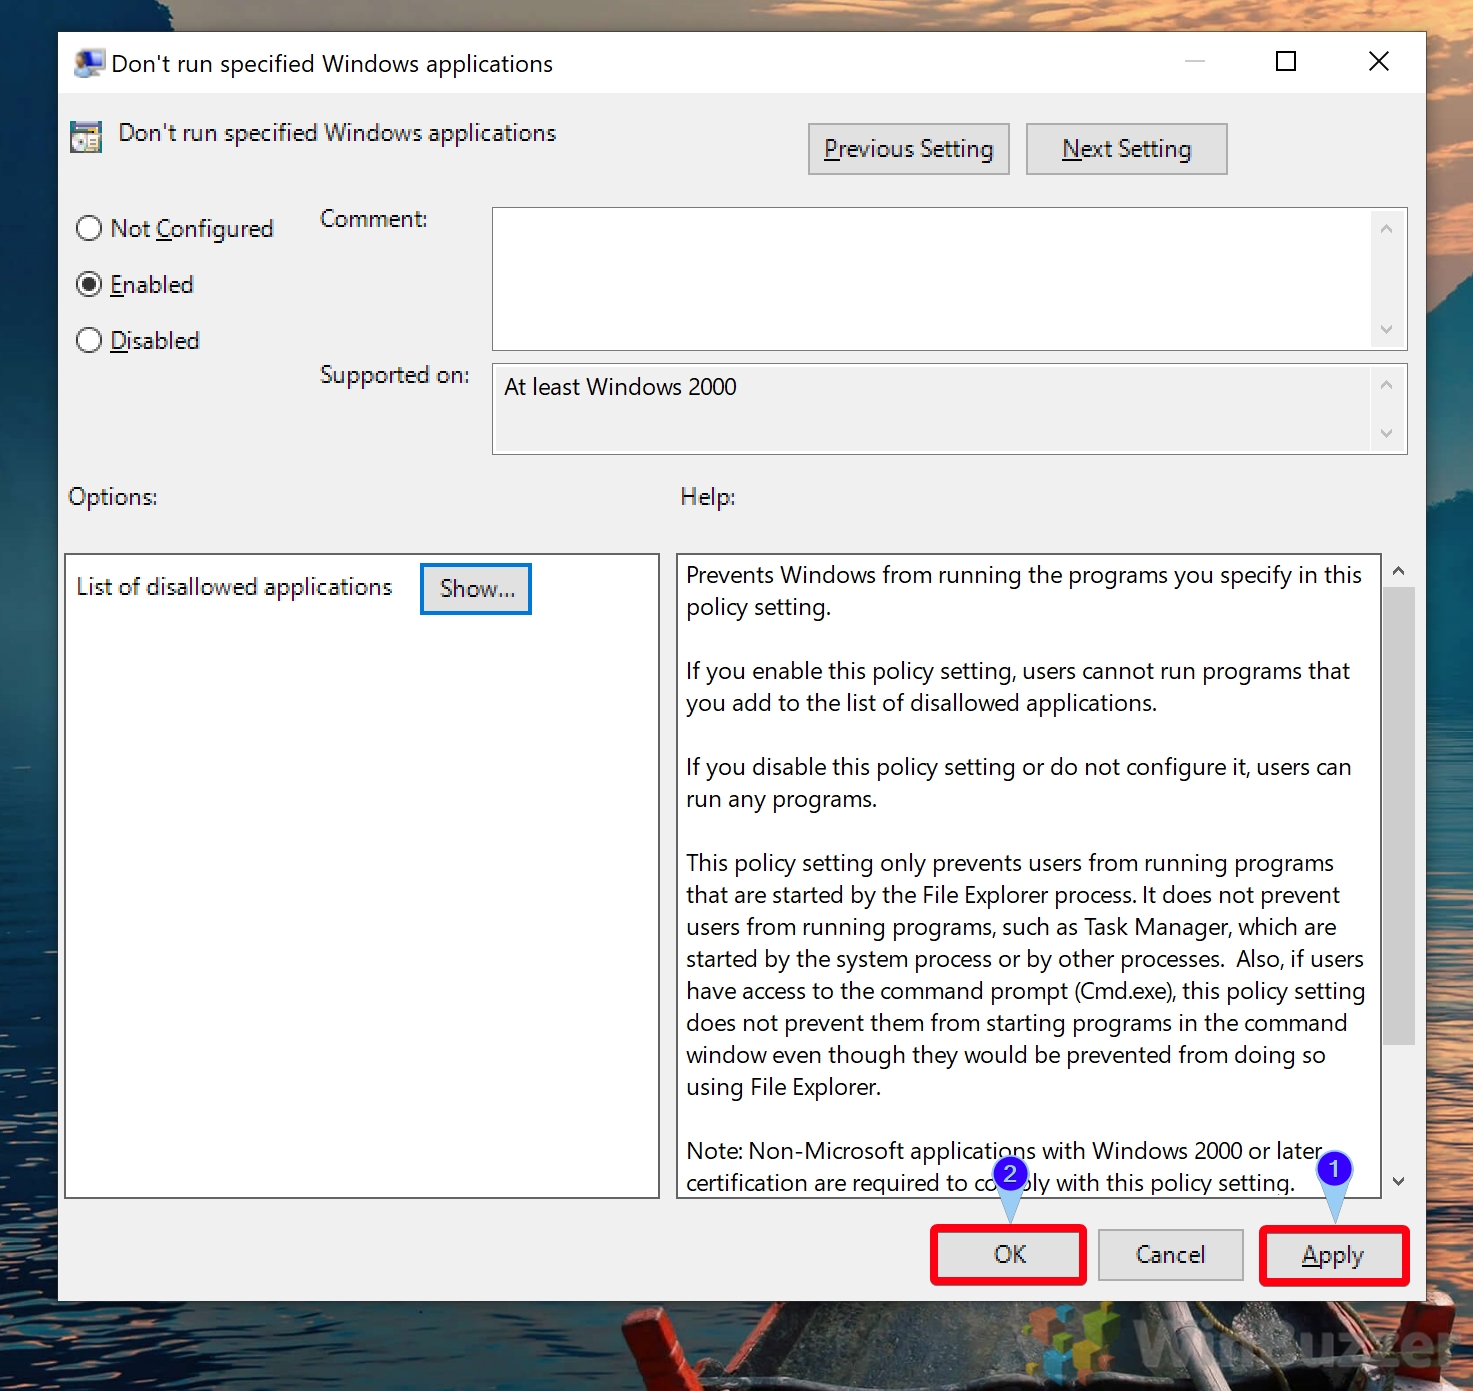
- Open the “System” folder and double-click “Don’t run specified Windows applications”
The System folder can be found underUser Configuration > Administrative Templates. - Create your PowerShell GPO
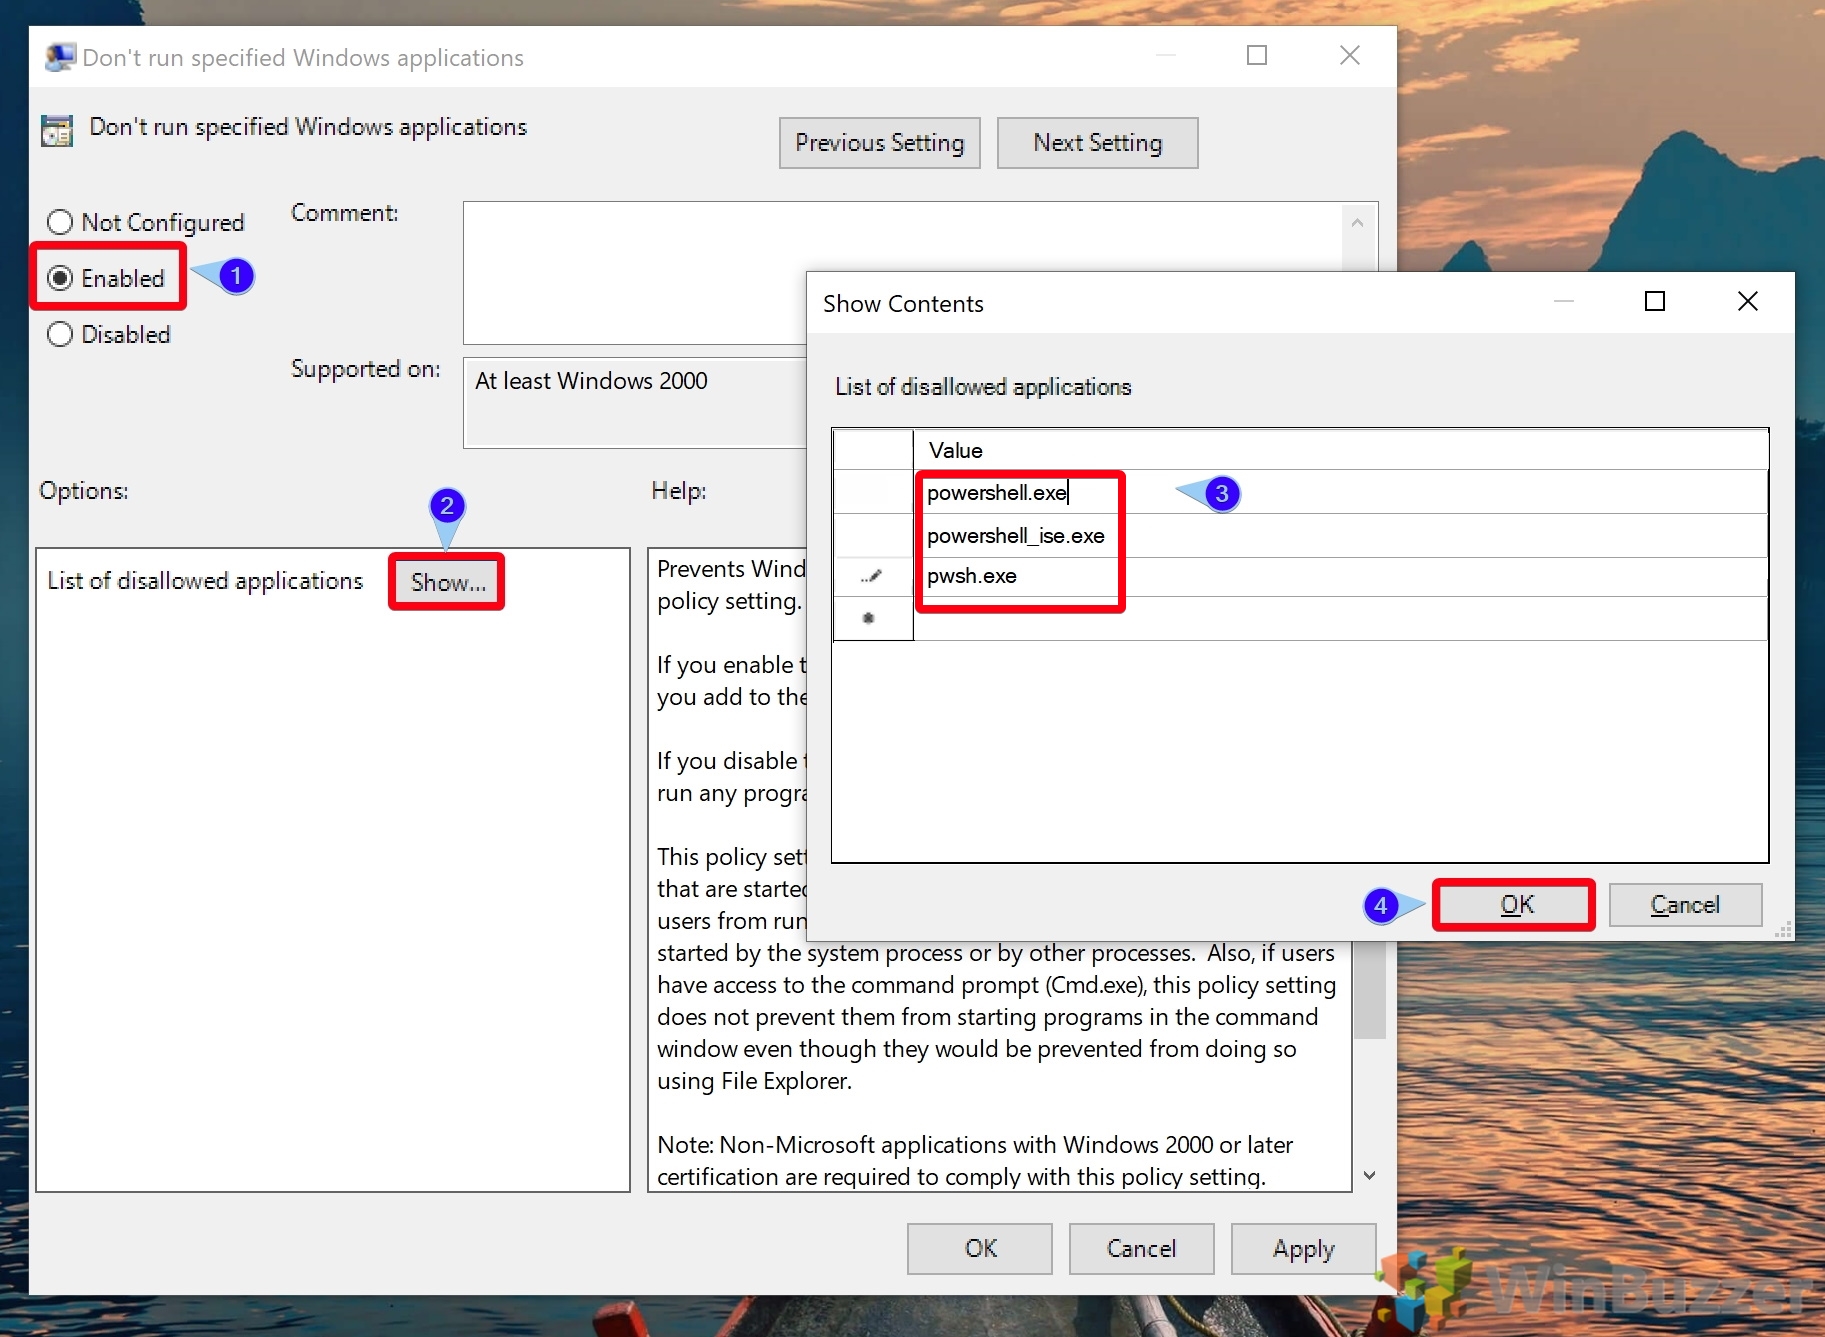
The process to turn off PowerShell is slightly different to Command Prompt as it doesn’t have a dedicated group policy. Instead, switch the policy to “Enabled” and then Click “Show…” next to “List of disallowed applications”.In the “Value” column of the “Show Contents” field, add three rows with each version of PowerShell.
These are:powershell.exe
powershell_ise.exe
pwsh.exeOnce you’re done, press “OK”.
- Press ‘OK’ and ‘Apply’ in the main policy window
You should then test whether Windows PowerShell is disabled. If PowerShell is blocked successfully, you’ll get an error message such as “This app has been blocked by your system administrator”.
If you’re wondering how to enable PowerShell again, just change the policy from “Enabled” to “Disabled”.
How to Disable PowerShell in Windows 10 via Security Policy
Alternatively, you can stop PowerShell from working by setting up a Local Security Policy. This takes a little longer but is still quite simple.
First, press Start, search for “Local Group Policy”, and click the top result to open it. Then you can follow the steps below:
- Create a new hash rule in the Additional Rules folder
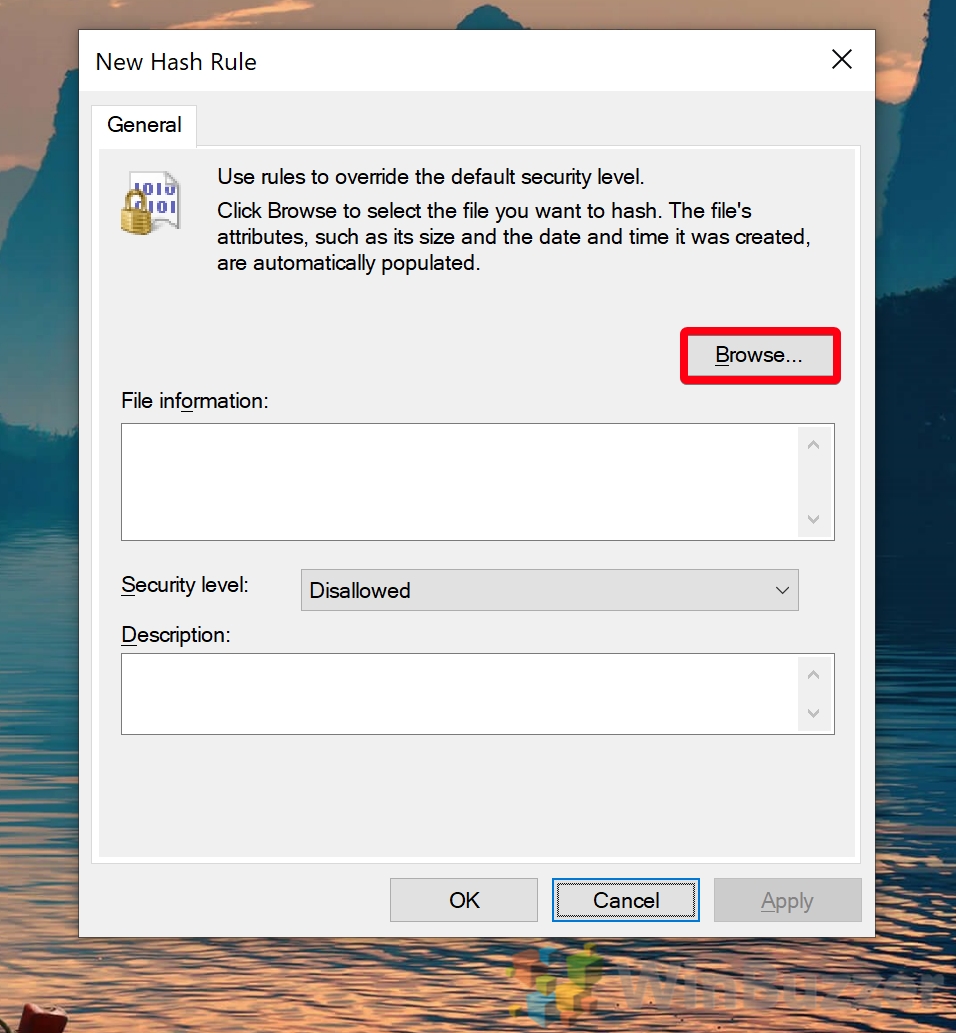
In the sidebar, navigate to “Software Restriction Policies > Additional Rules”. Right-click the folder and select “New Hash Rule…”.
- Press “Browse” in the New Hash Rule window

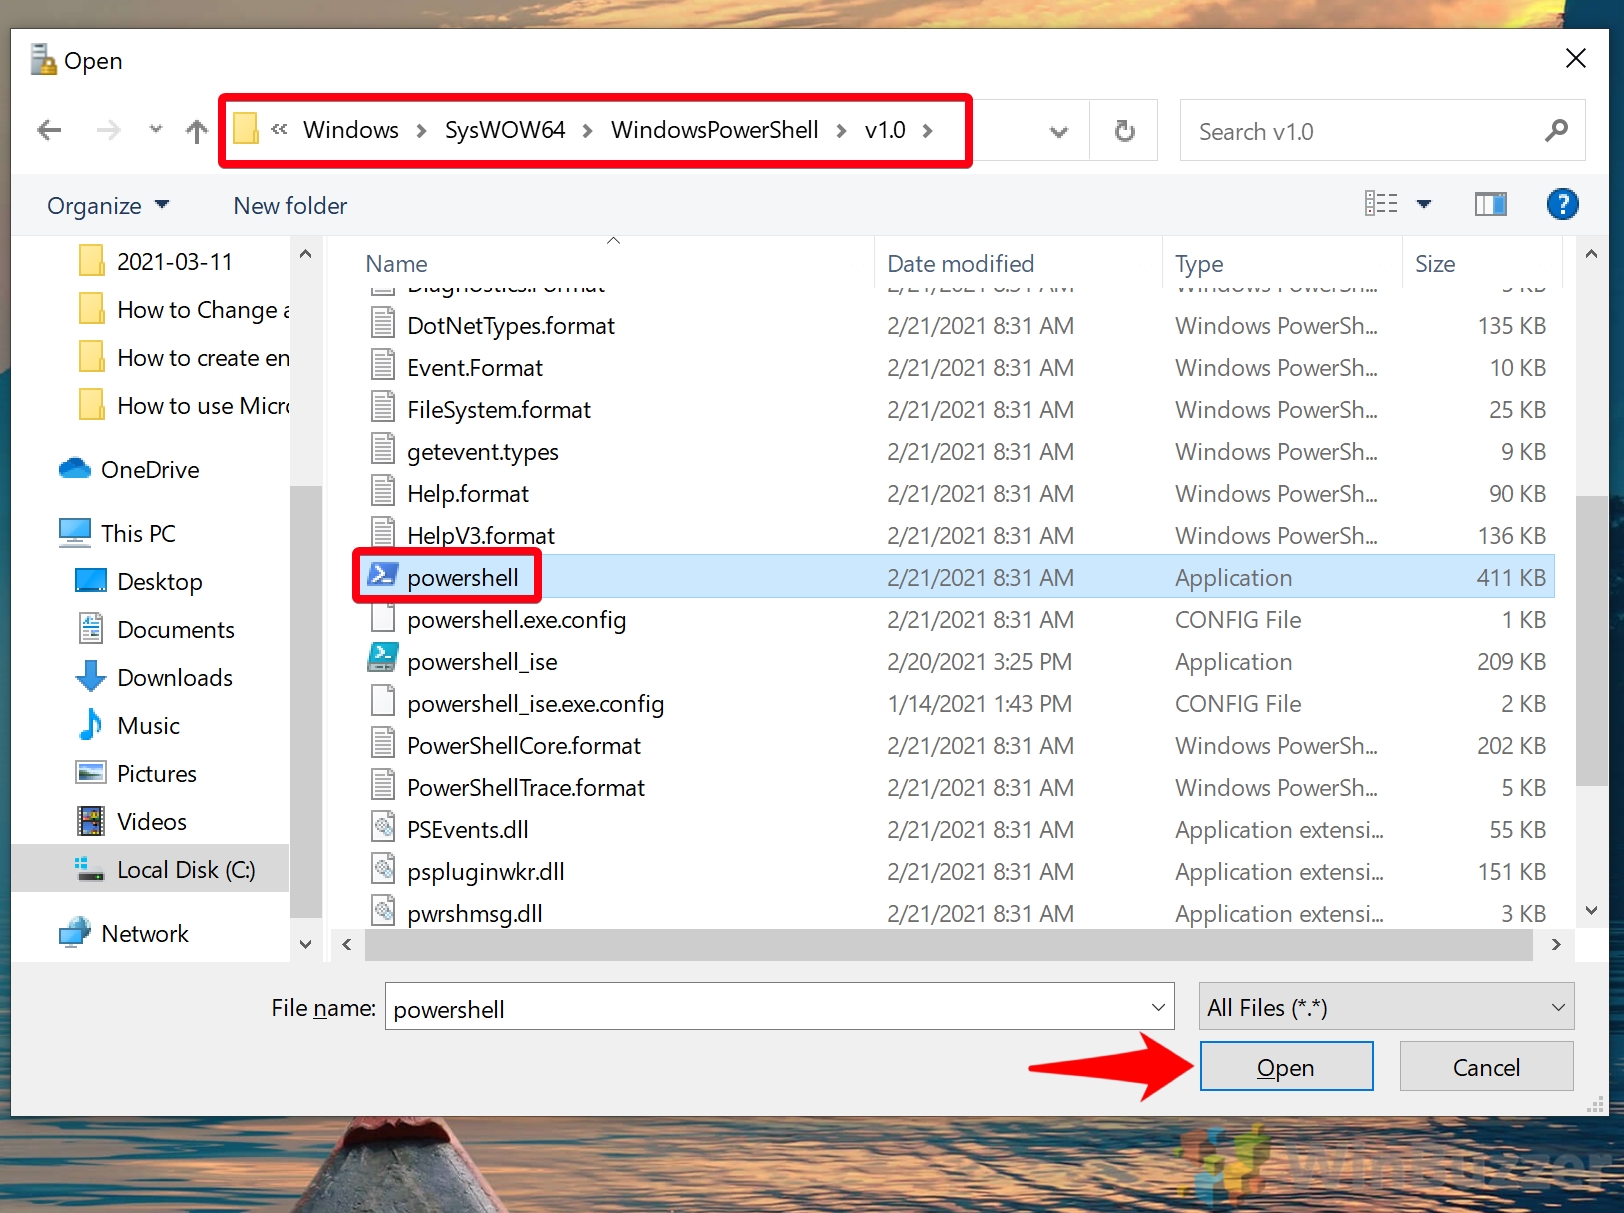
- Open powershell.exe
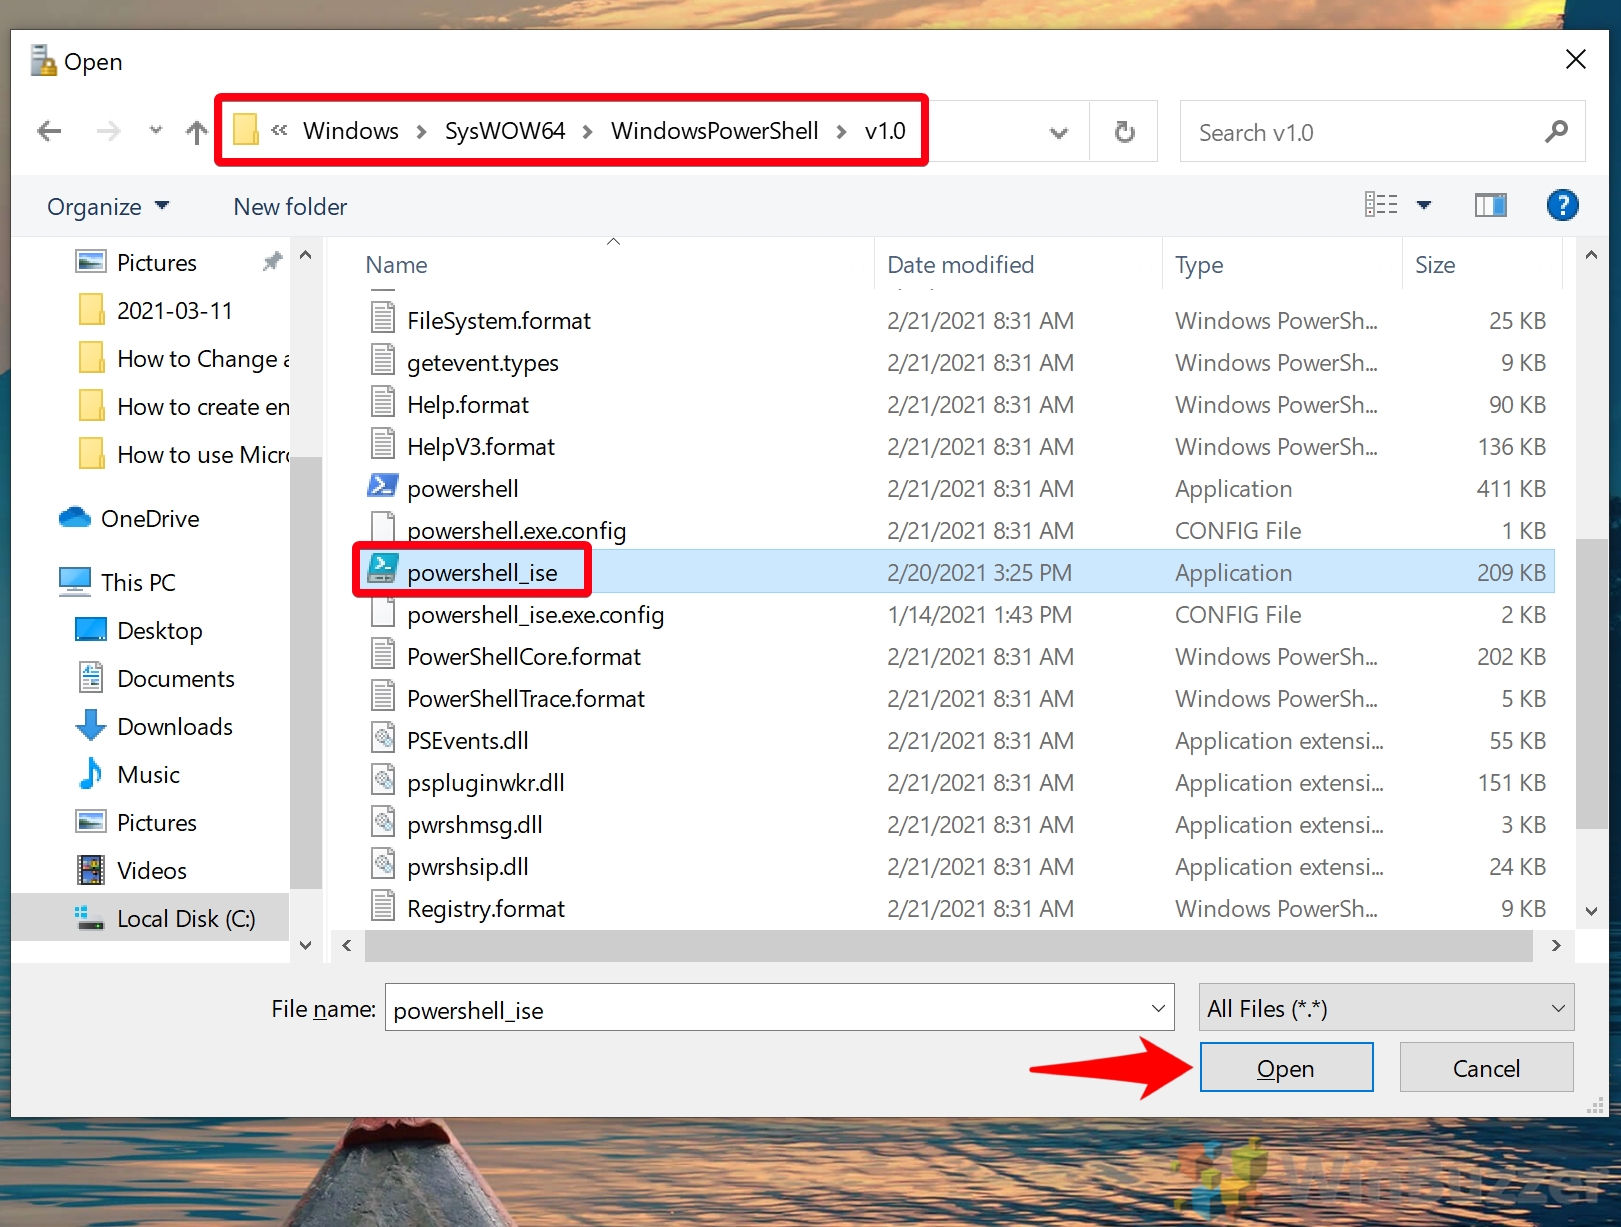
A File Explorer window will open. In the top bar, paste%SystemRoot%\system32\WindowsPowerShell\v1.0. This will take you to the PowerShell folder, where you can click on “powershell” and press “Open”.

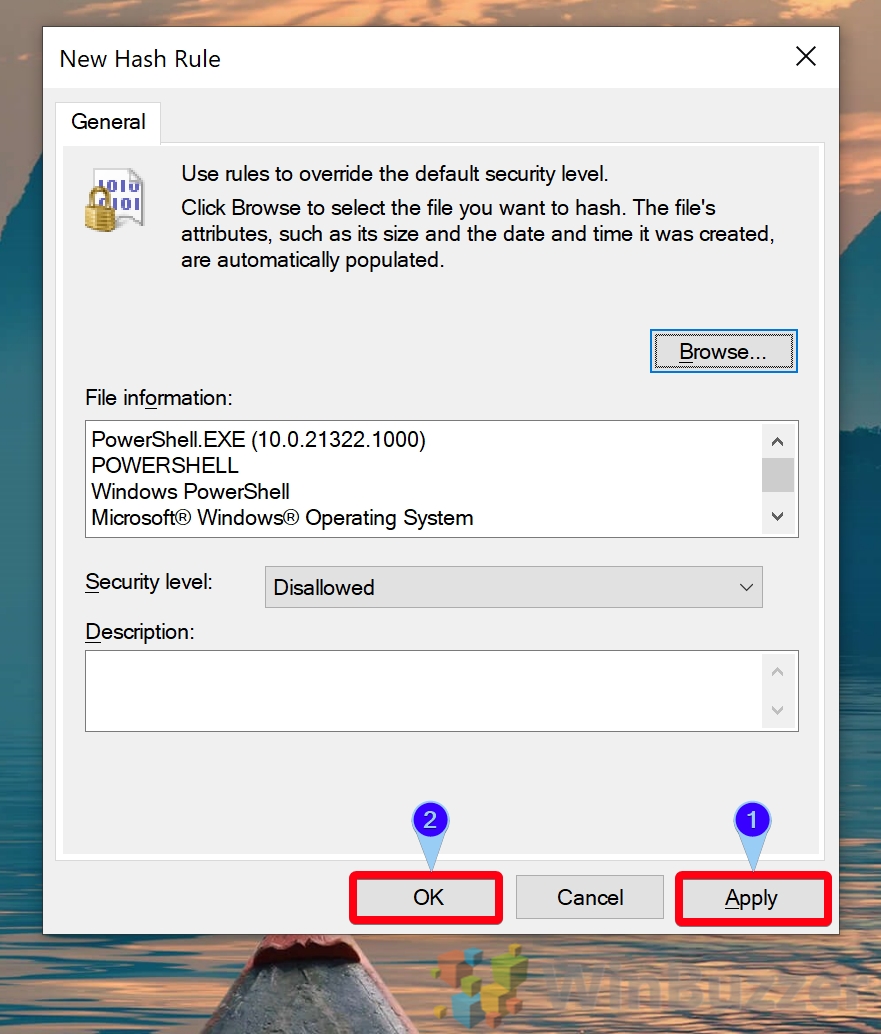
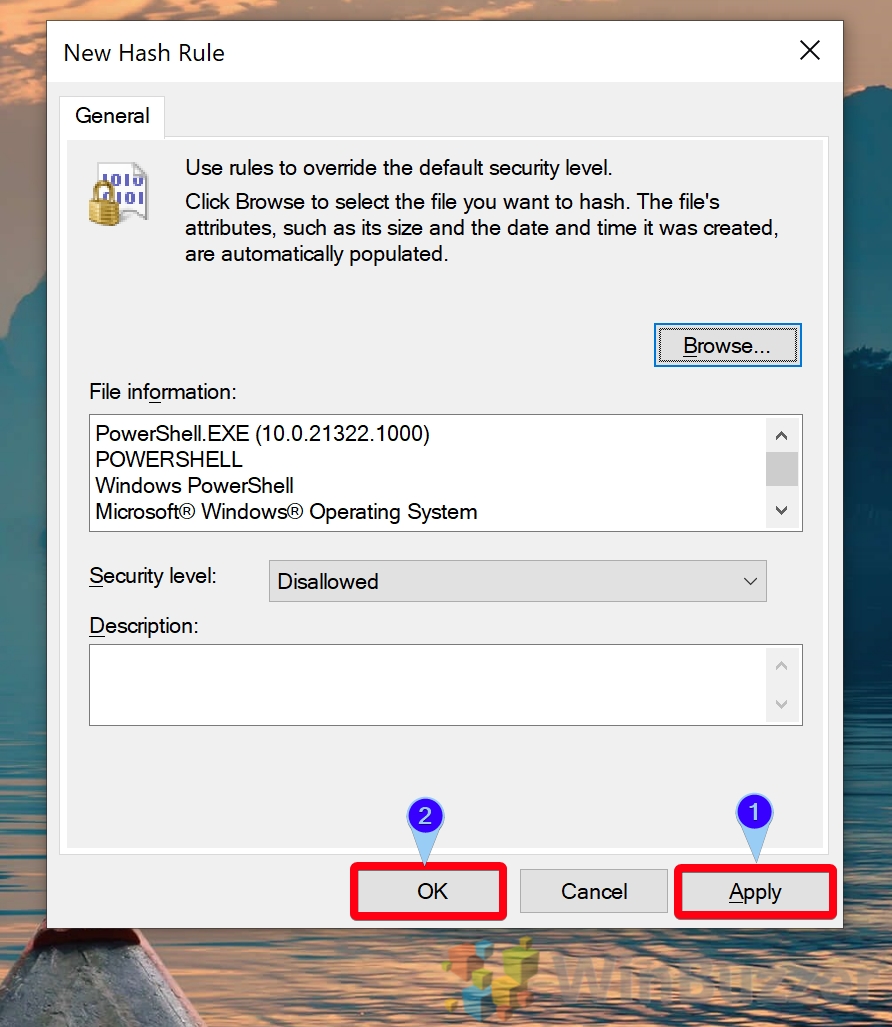
- Press “Apply” and “OK”

- Add the 32-bit version of PowerShell as a hash rule
Repeat steps 1 – 2 above, but this time paste the following into your File Explorer window:
%SystemRoot%\SysWOW64\WindowsPowerShell\v1.0. Press “Open” to add it to your hash rule. - Press “Apply” and “OK”
If you’d like, you can add PowerShell 7 here by visiting
%SystemRoot%\Program Files\PowerShell\7\pwsh.exeor follow the steps later on to uninstall it. - Block PowerShell_ISE
Now we need to block the 32-bit and 64-bit versions of PowerShell_ISE. To do so, repeat steps 1 – 2, then paste the following in your File Explorer directory bar:
%SystemRoot%\system32\WindowsPowerShell\v1.0Click “powershell_ise” in the folder and press “Open”.
- Press “Apply” and “OK”

- Add 64-bit PowerShell ISE as a hash rule
Follow steps 1 – 2 once more and paste%SystemRoot%\SysWOW64\WindowsPowerShell\v1.0in your Explorer bar. Click on “powershell_ise” and then press “Open”.

- Press “OK” and “Apply”

How to Remove PowerShell 7 from Windows 10 by Uninstalling the App
If the device you’re working on also have PowerShell 7, you can just uninstall it. Here’s how:
- Open Settings
Press the Start button, then click the settings cog, above the power button. Alternatively, press Windows + I.
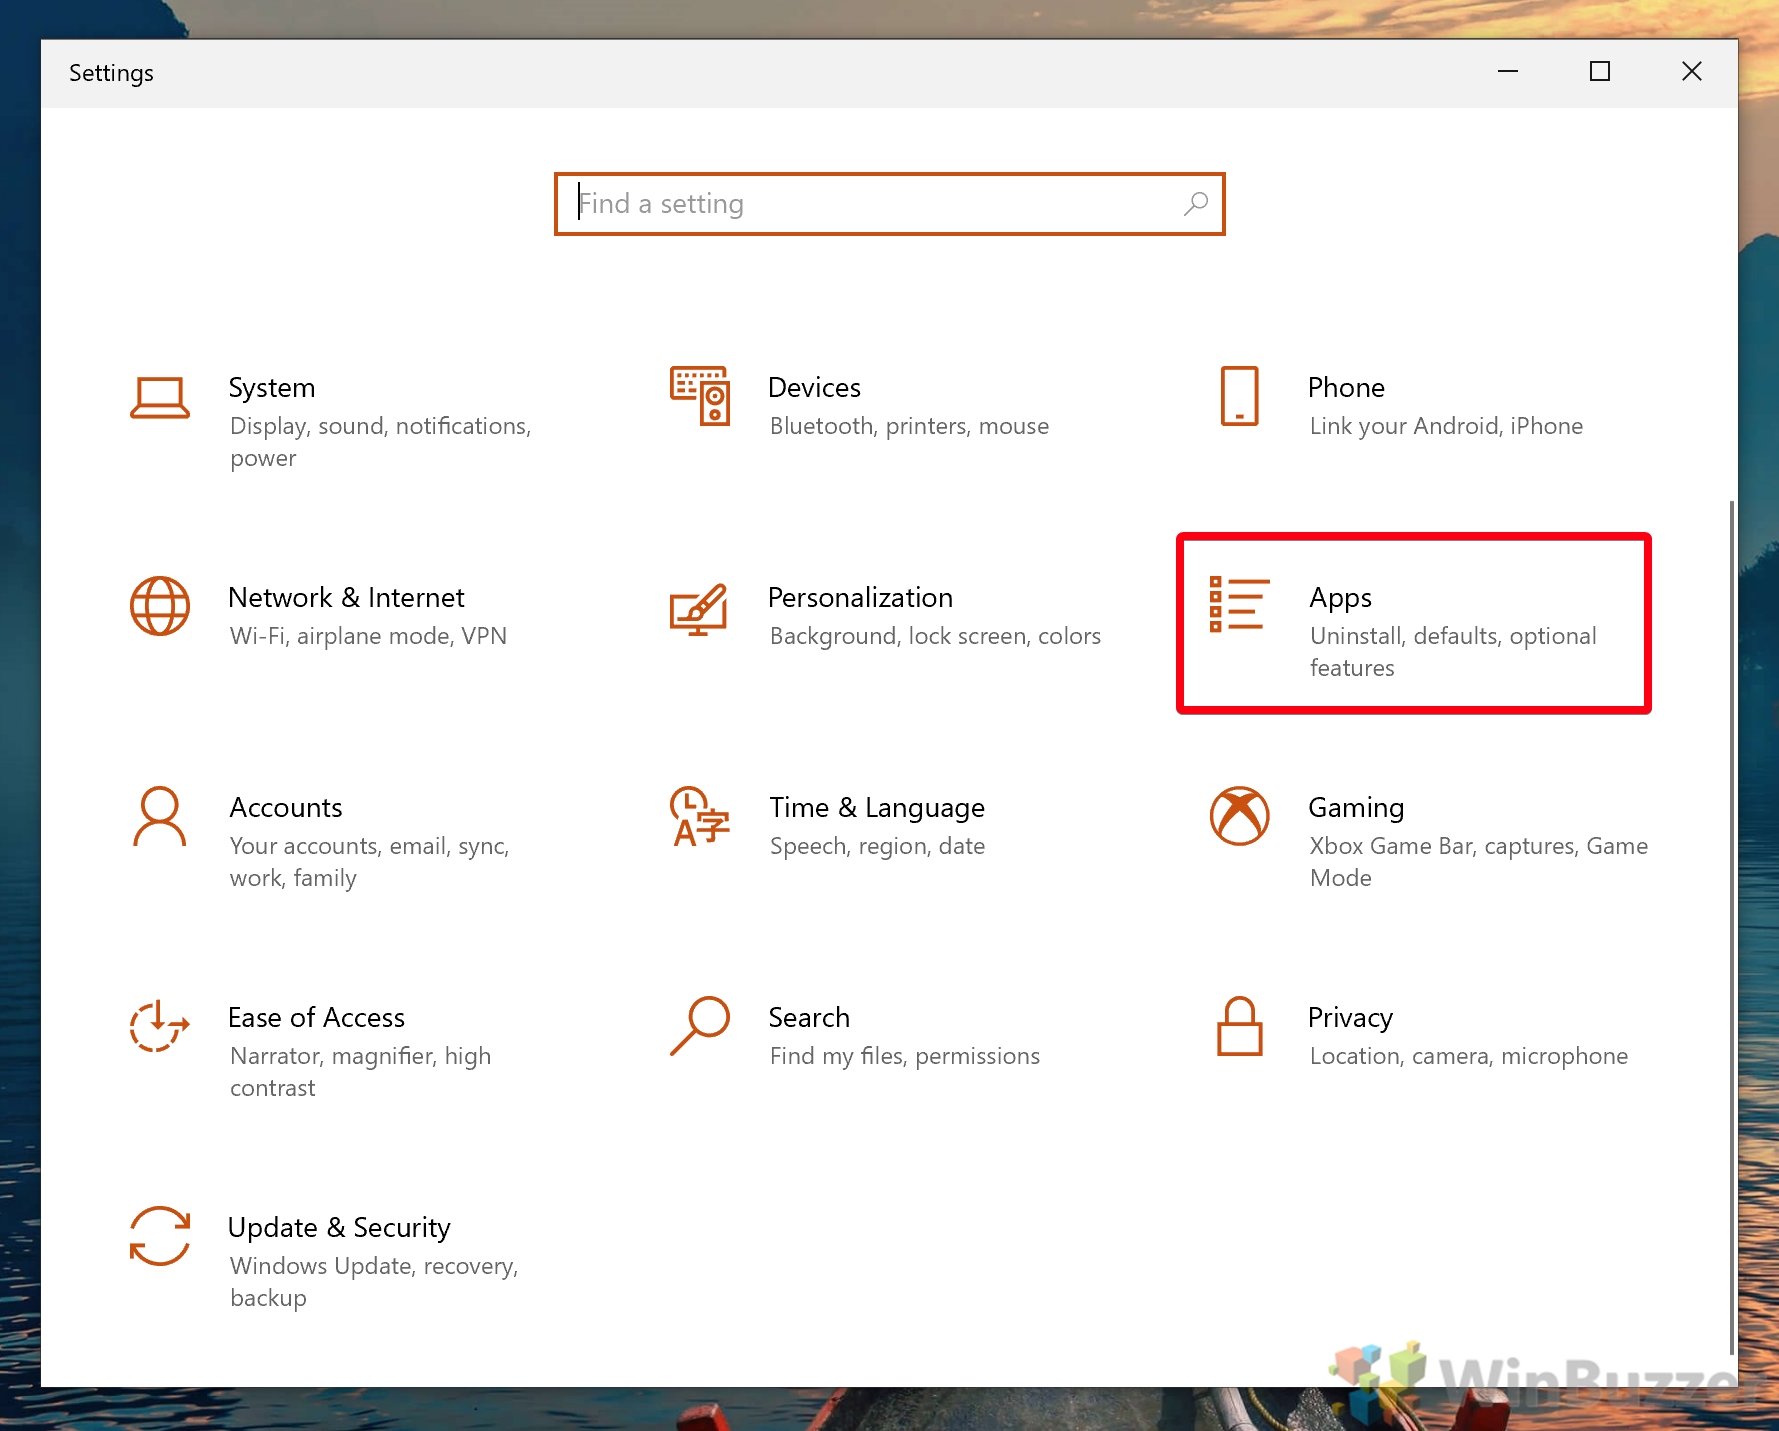
- Click ‘Apps’

- Search for PowerShell 8 and uninstall it Step title
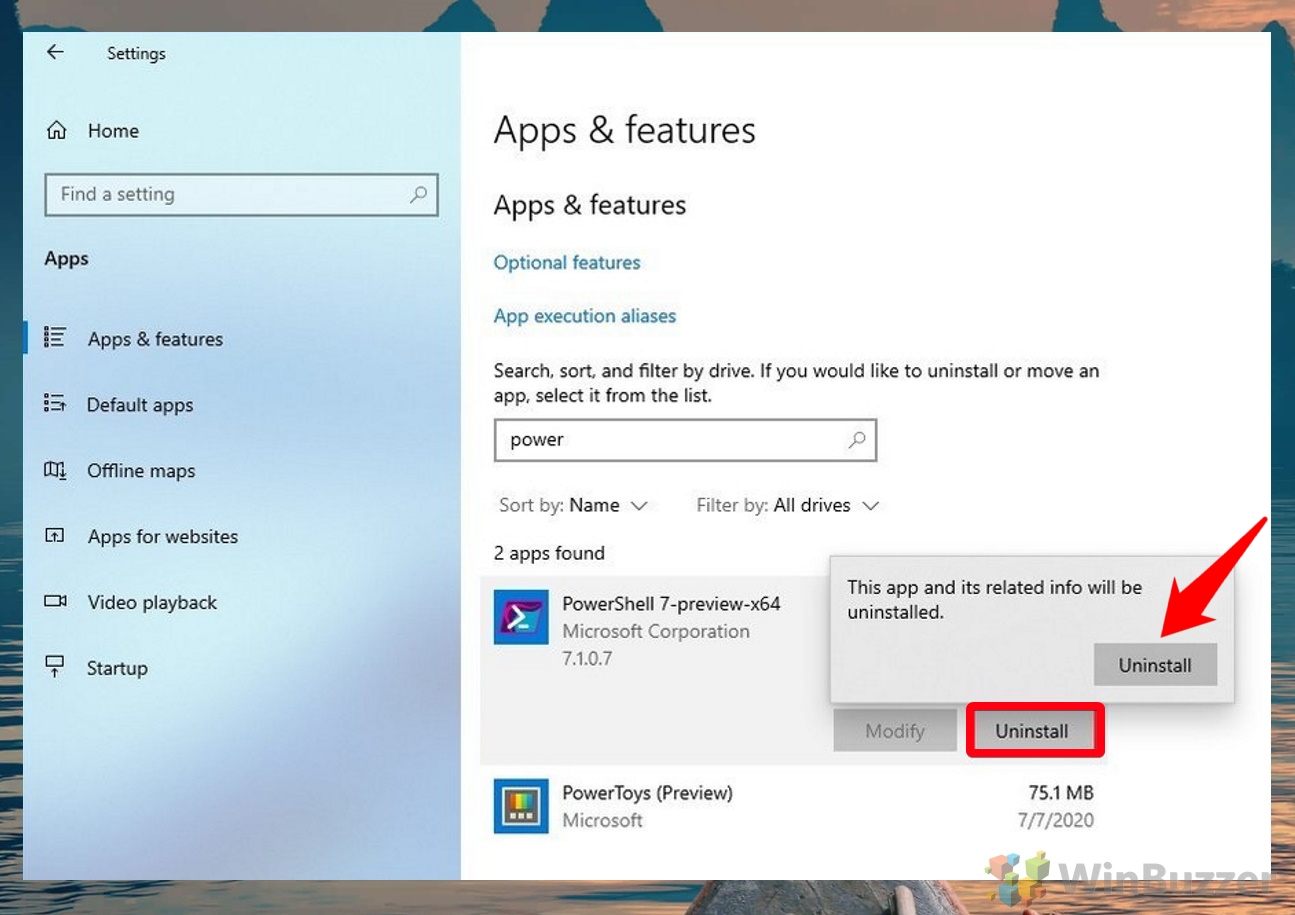
In the “Apps & features” section, type “Power” into the search bar. Once you see PowerShell 7, click it, press “Uninstall”, and then click “Uninstall” again.
With that, you should know how to disable all instances of PowerShell on your system. Though you’ll see that using a GPO PowerShell toggle is the easiest, it’s always good to have alternatives.
Though PowerShell is now disabled, you shouldn’t forget about Command Prompt, as it has similar functionality. If you need to lock down your system further, you can also consider enabling kiosk mode, which limits users to certain apps.
Last Updated on February 14, 2022 7:46 pm CET by Markus Kasanmascheff
