

When you sign up for an internet service provider (ISP), they assign you to a DNS server of their creation. This function makes it possible for you to access all your favorite sites and services without manually typing their IP address. Unfortunately, however, not all DNS servers are created equal. There are several reasons you may want to change DNS in Windows 10, but it’s necessary to learn what they are and how they work so you can make an informed decision.
What is a DNS server?
So, what exactly does DNS server mean, and why do you need one? DNS stands for Domain Name System, with the “Domain” referring to the URLs you type in your browser. Most of us take these for granted – we type in the website’s name and it automatically takes us to where we expect.
Behind the scenes, however, there is a Domain Name System server that turns the URL you type into a format that your computer can understand – an IP address. Theoretically, the faster this process is performed the lower your latency will be and the faster your browser will be able to fetch pages for you.
Why change DNS in Windows 10?
As mentioned earlier, not all DNS servers are created equal. A DNS server is a server like any other, meaning it can go down or experience mediocre performance. It will also be faster the closer it is to your location. If your ISP has not properly invested in its infrastructure, its DNS service could cause problems with latency or an inability to load websites.
There’s also the issue of privacy and censorship. Depending on your location, your ISP may retain logs of your DNS queries, which acts as a list of every website you’ve ever visited. In some countries, they then share this data with government agencies as a form of mass surveillance. Some ISPs even deliver advertisements when you enter a URL that doesn’t exist.
So, should you change your DNS server? Probably not. As Lifehacker explains, in most cases your ISP’s DNS server will result in a faster experience. This is because most major websites these days use something called a Content Delivery Network (CDN) to serve content to you. CDNs fetch data from their closest available server to your location. Alternate, public DNS servers may not be as close as your ISP’s. They could, for instance, only be in the nearest major city. As a result, the website may deliver its data to you from that city. The result? Potentially, slower download speeds.
So, then, it comes down to this – you should probably only change your DNS server if you’re concerned about your privacy or you’re experiencing issues with your ISP’s. Usually, we’re talking about a few milliseconds difference in latency. That said, it doesn’t hurt to experiment. You can always change it back later.
What are the best DNS servers
The best DNS server typically depends on where you are. Yandex DNS, for example, is Russia-based and therefore has poor performance in the United States. That said, there are some DNS providers who have excellent coverage across the world. According to site DNSPerf, these are the fastest free public DNS’ worldwide (from fastest to slowest).
- Cloudflare DNS (1.1.1.1, 1.0.0.1)
- NextDNS (45.90.28.42, 45.90.30.42)
- Neustar DNS (64.6.64.6, 64.6.65.6)
- Google DNS (8.8.8.8, 8.8.4.4)
This, of course, could change depending on the part of the world you live in, so it’s worth checking for yourself. Cloudflare, however, is well-known, has excellent infrastructure across the world, and is private. As a result, below we’re going to focus on how to change your DNS to Cloudflare in Windows 10. Google DNS servers are another good choice if you’re in the states.
How to change DNS settings in Windows 10 via the Control Panel
Changing your DNS servers through the Control Panel can be faster and less confusing than Microsoft’s built-in settings app. Here’s how you can do it:
- Open Control Panel
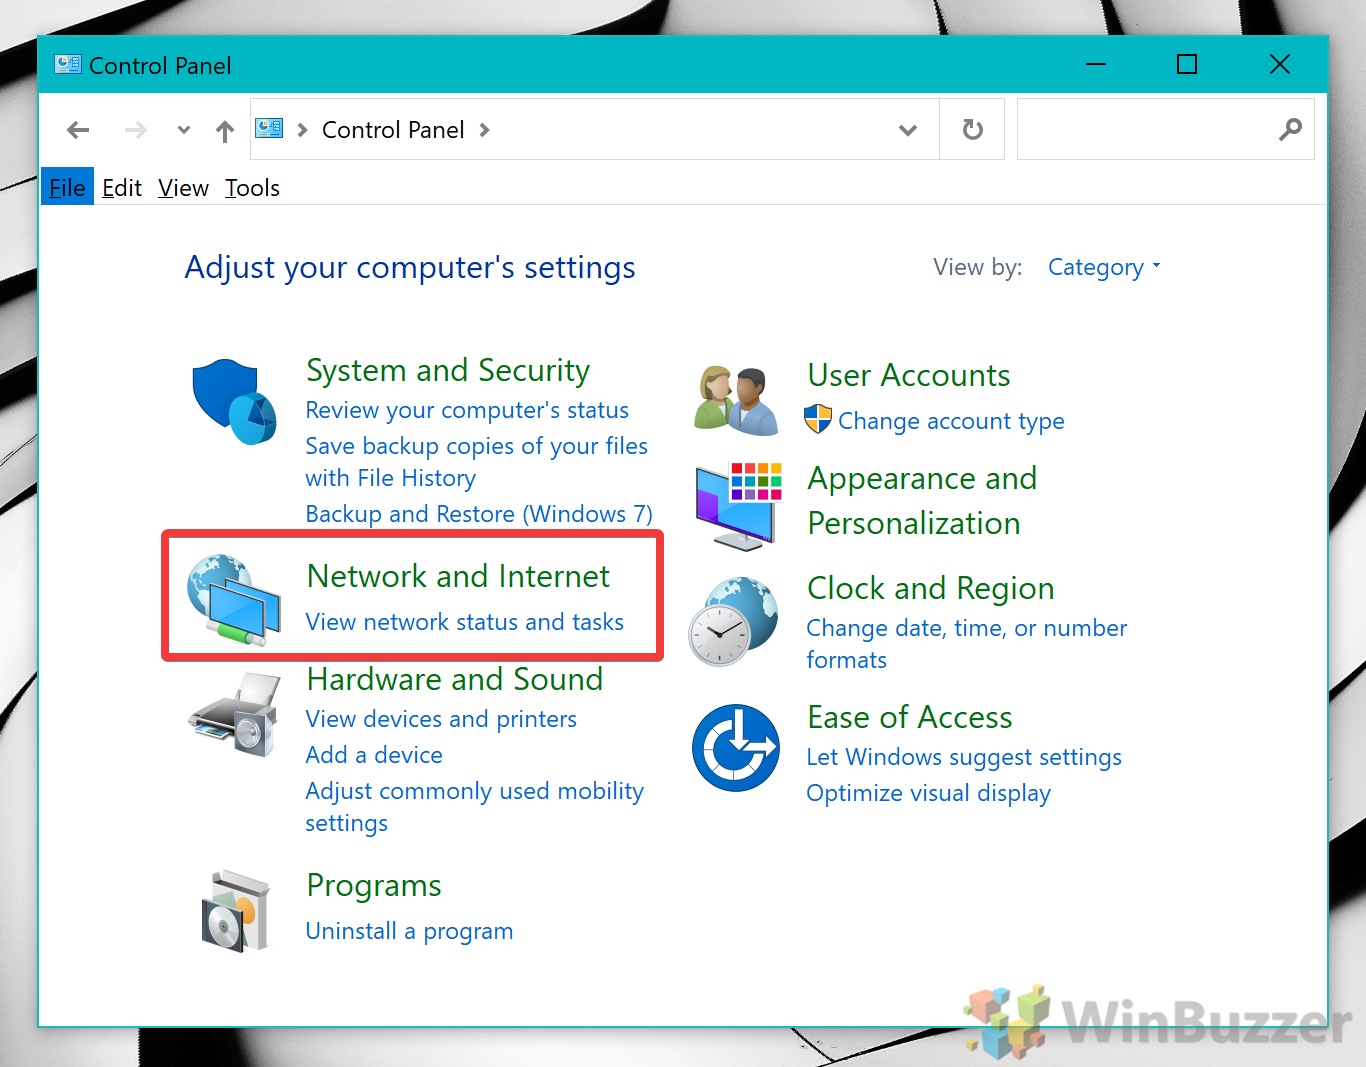
Press “Start” and then type “Control Panel”. Click the top result.
- Click ‘Network and Internet’
- Press ‘Network and Sharing Center’
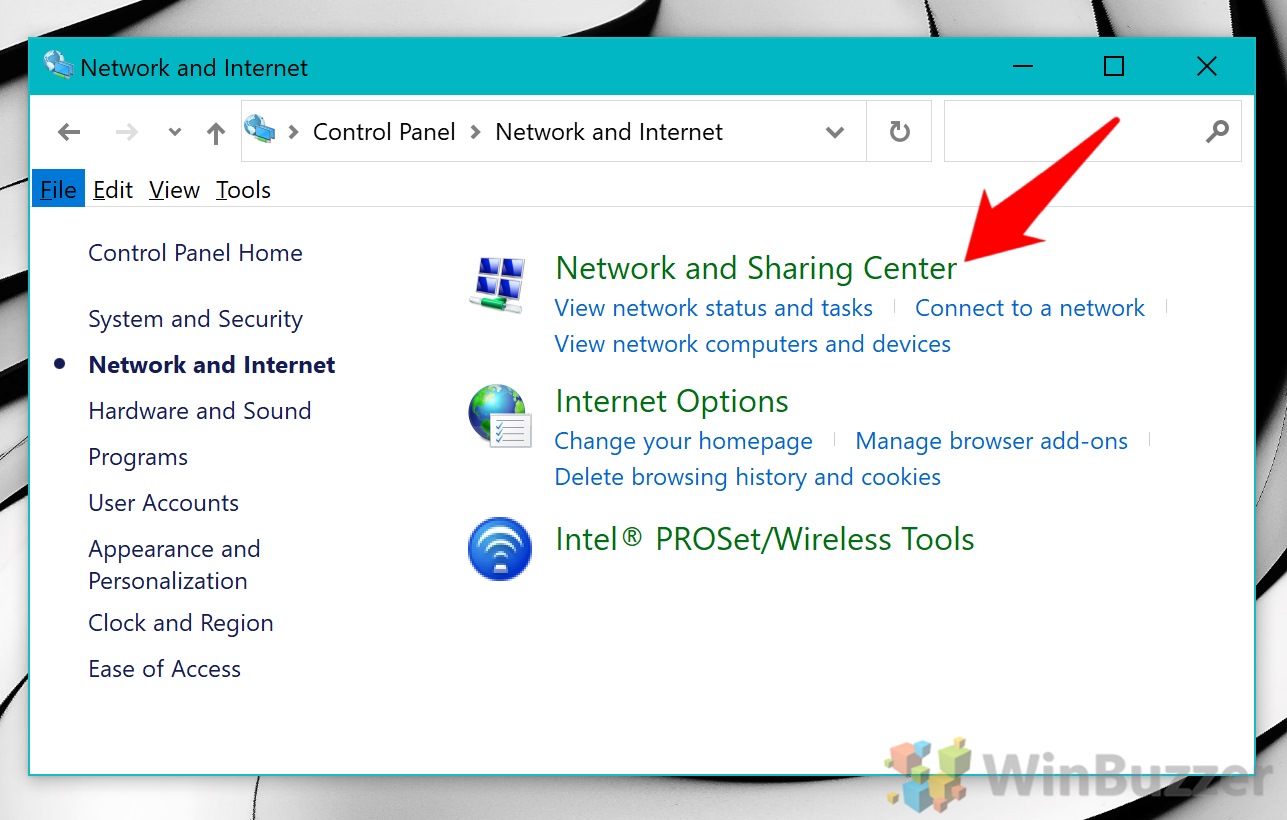
- Click ‘Change adapter settings’ in the sidebar

- Open your network properties
Right-click on the network you’re using, which will be under your Wi-Fi or ethernet adapter. At the bottom of the context menu, click “Properties”.
- Open IPv4 properties
In the networking tab, look for “Internet Protocol Version 4 (TCP/IPv4)”. Click it, then press “Properties” underneath the selection window.
- Configure your DNS settings
In the “General” tab, tick “Use the following DNS server addresses” and enter the addresses you chose above. In our case, we’re using Cloudflare, so the numbers should be 1.1.1.1 for the preferred DNS server and 1.0.0.1 for the alternate DNS server.
Once you’re done press “OK”. The changes will apply immediately. You can verify that by visiting this page and clicking “What’s My DNS Server?”.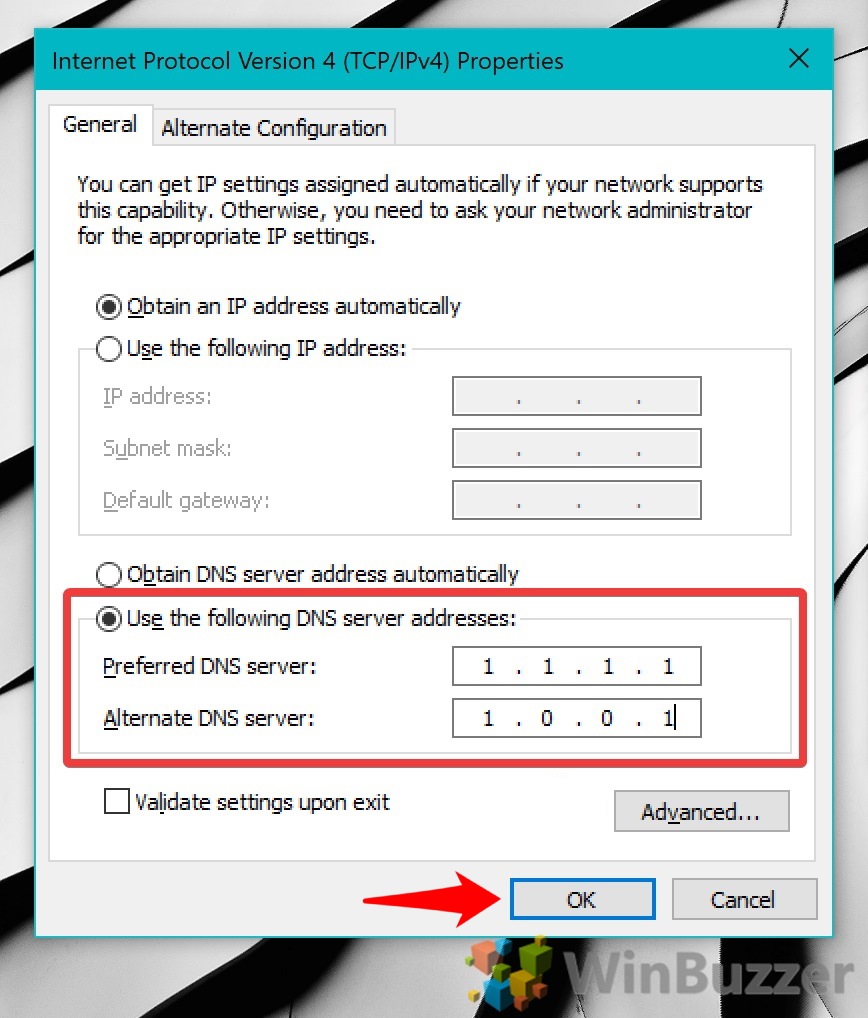
How to Change DNS on Windows 10 via Settings
In later Windows 10 versions, you can also change DNS settings via the Settings app.
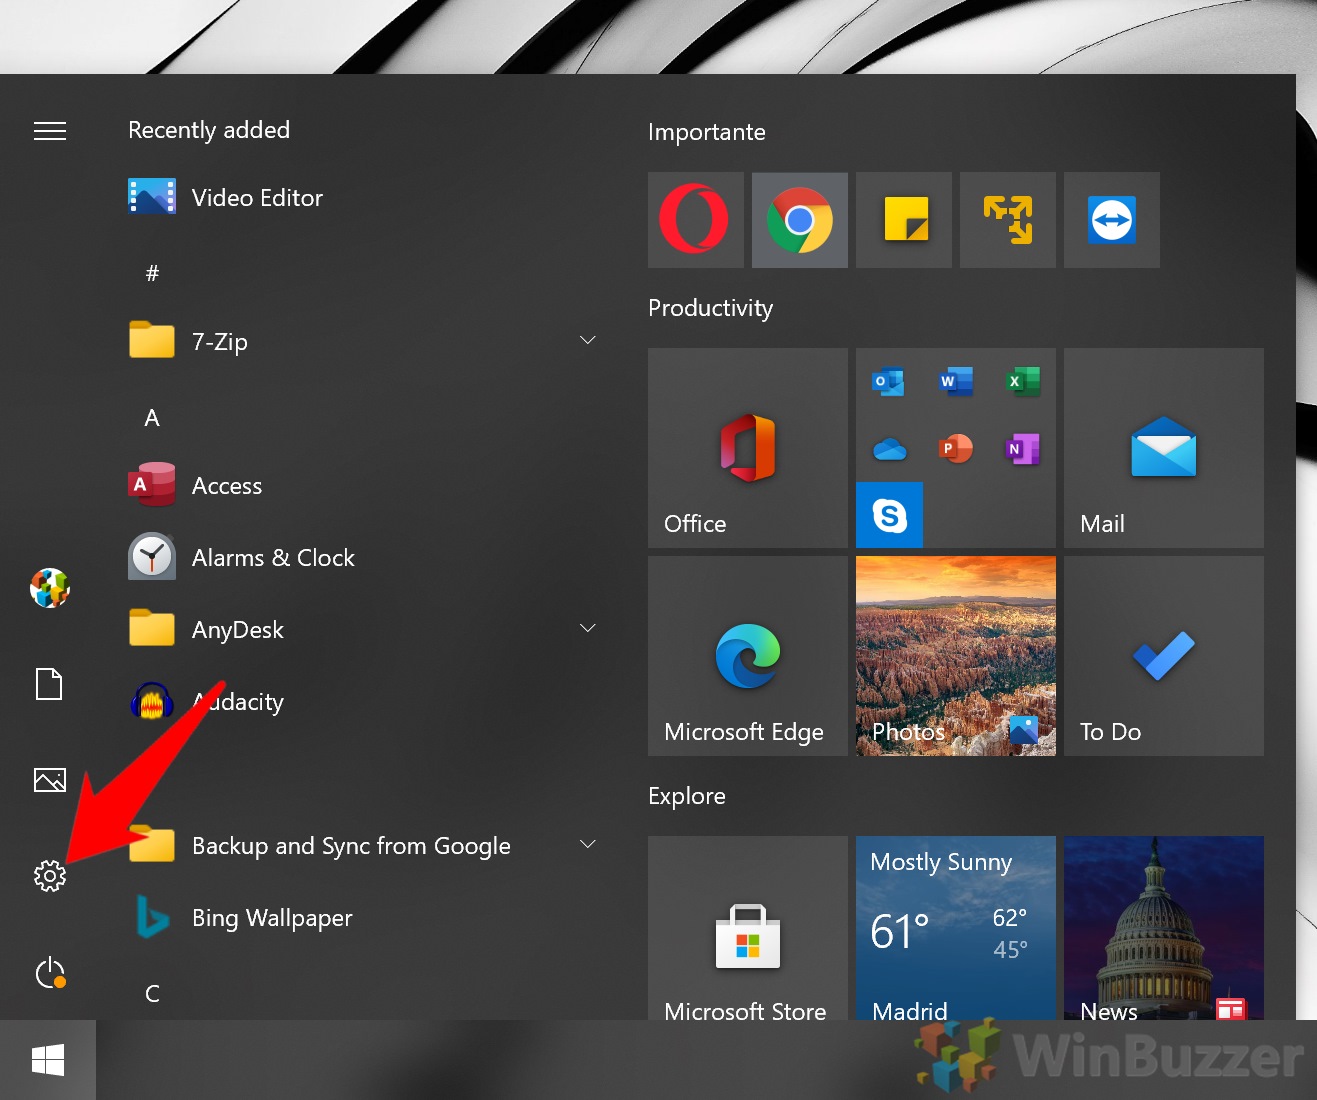
- Open Settings
Press the “Start” button, then click the settings cog, above the power button. Alternatively, press Windows + I.
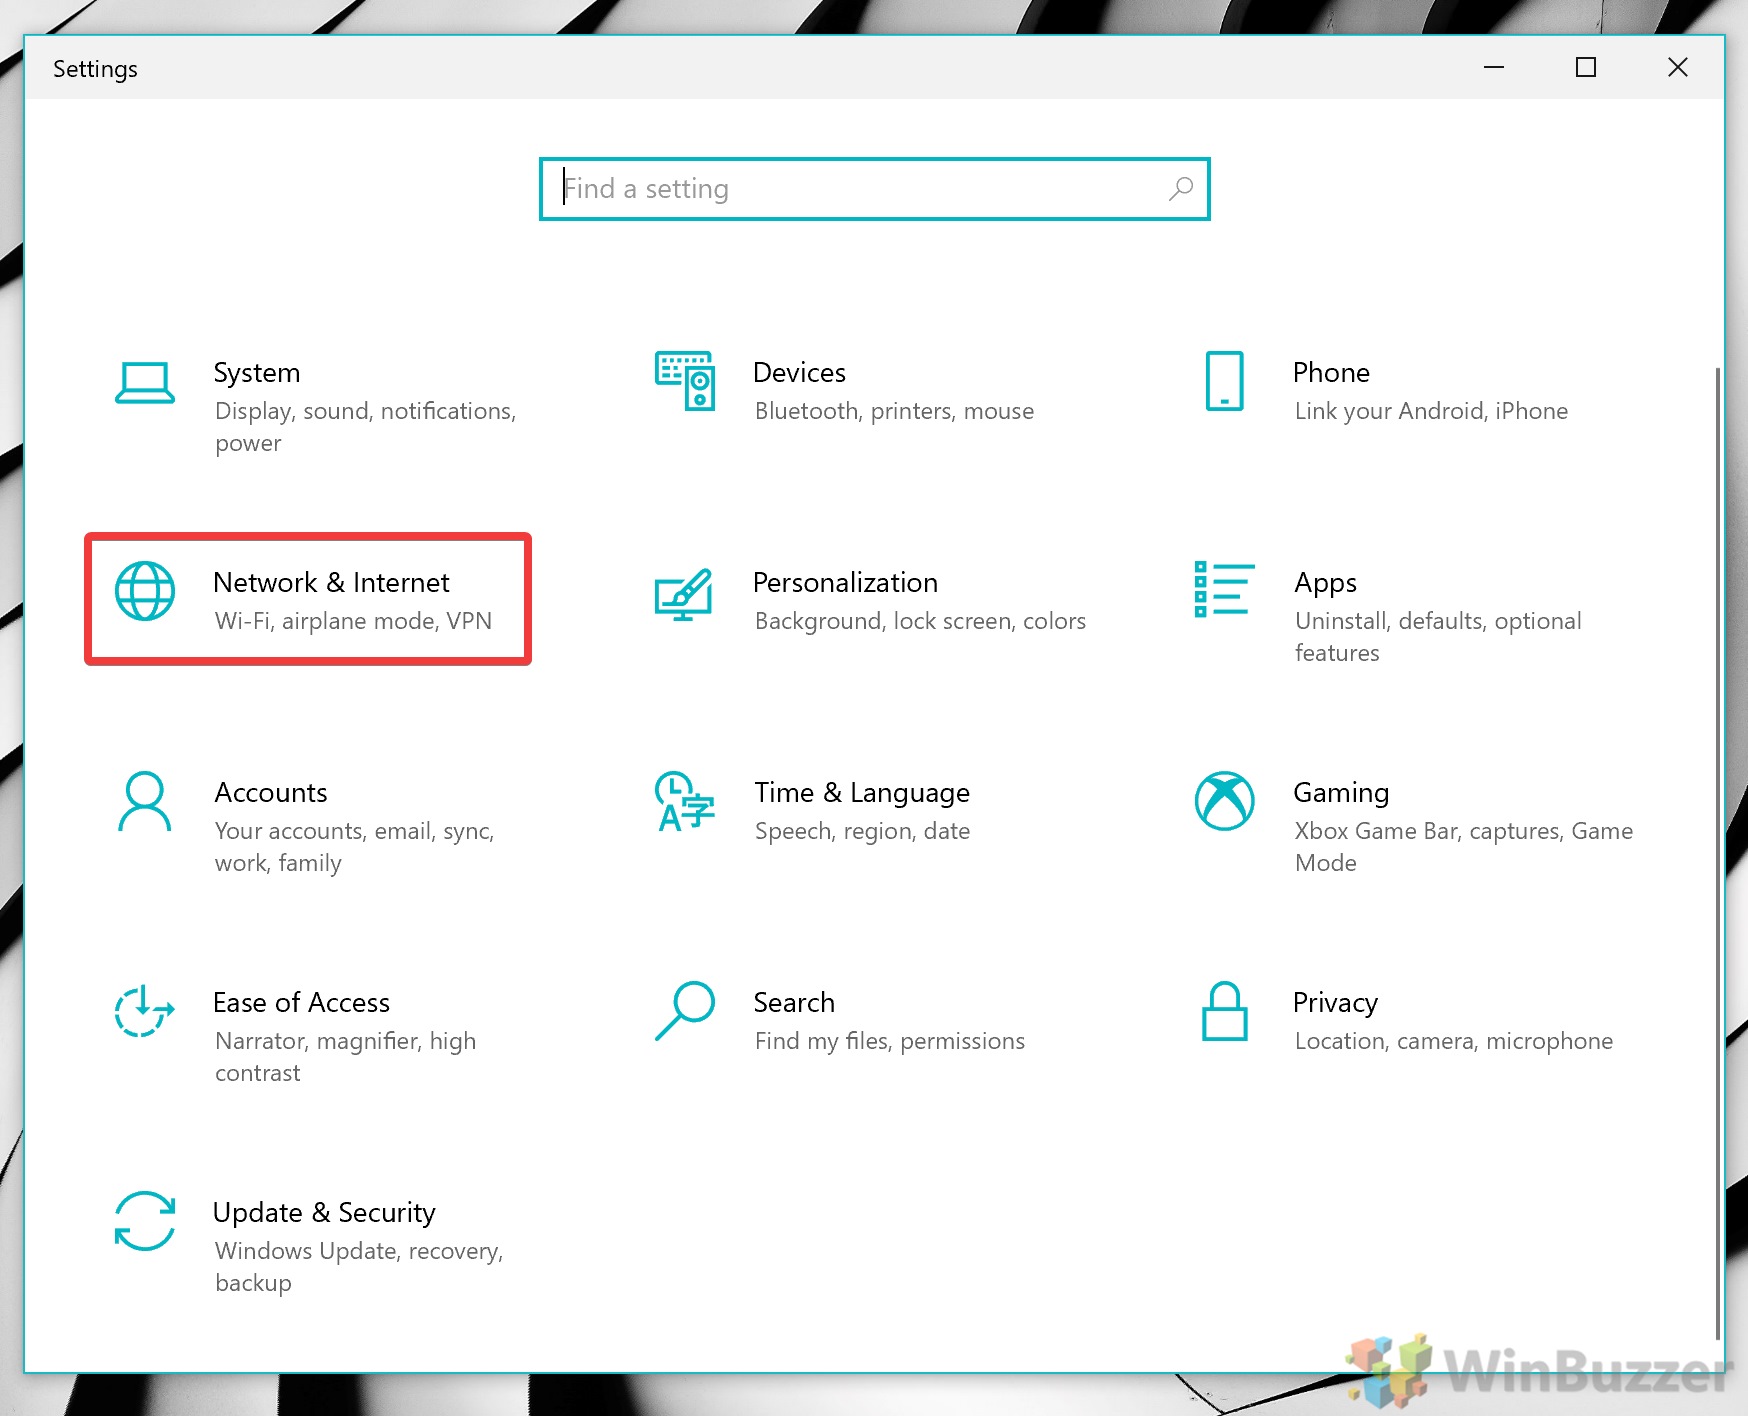
- Click ‘Network & Internet’
- Open your Wi-Fi/Ethernet settings
If you’re on Wi-Fi, click the “Wi-Fi” heading in the sidebar, then click your network in the main pane.
If you’re using a wired, ethernet connection, instead click “Ethernet” and the “Properties”.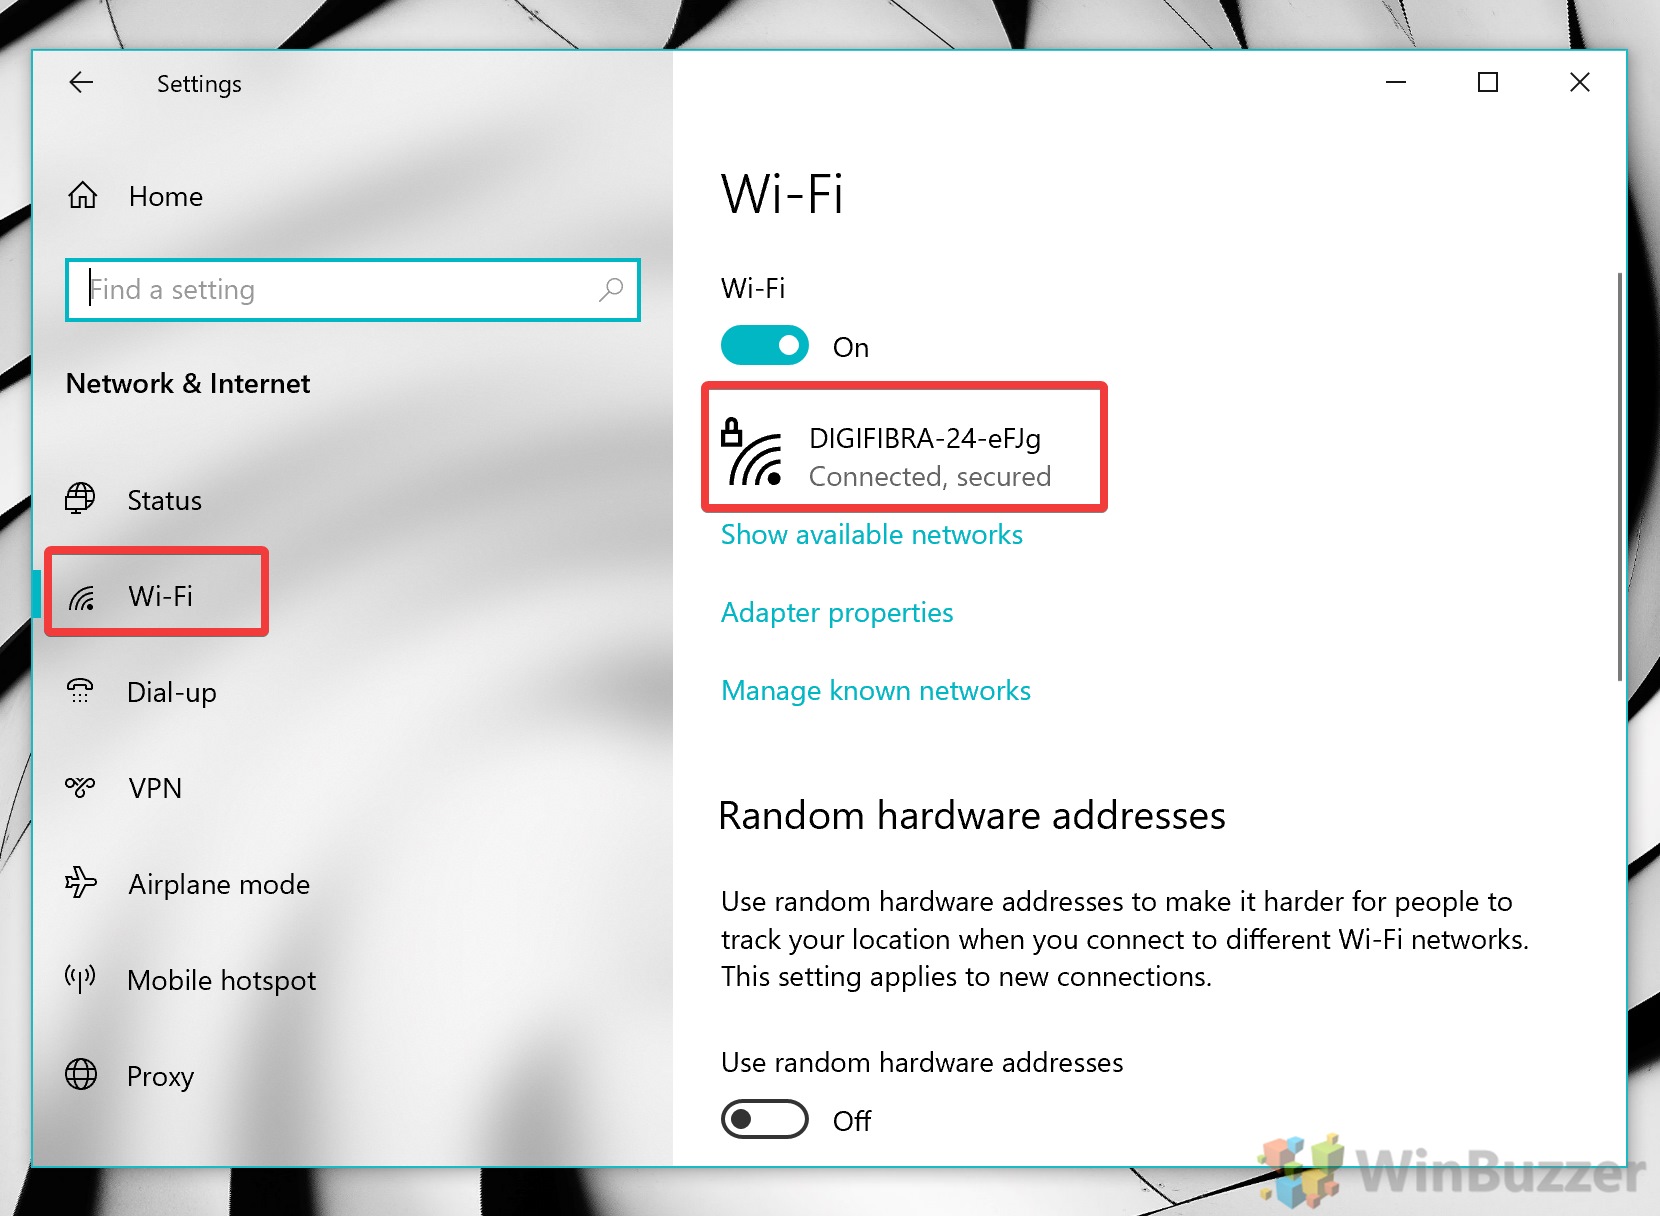
- Edit your Network IP settings
Under the “Network IP settings” header, click “Edit”.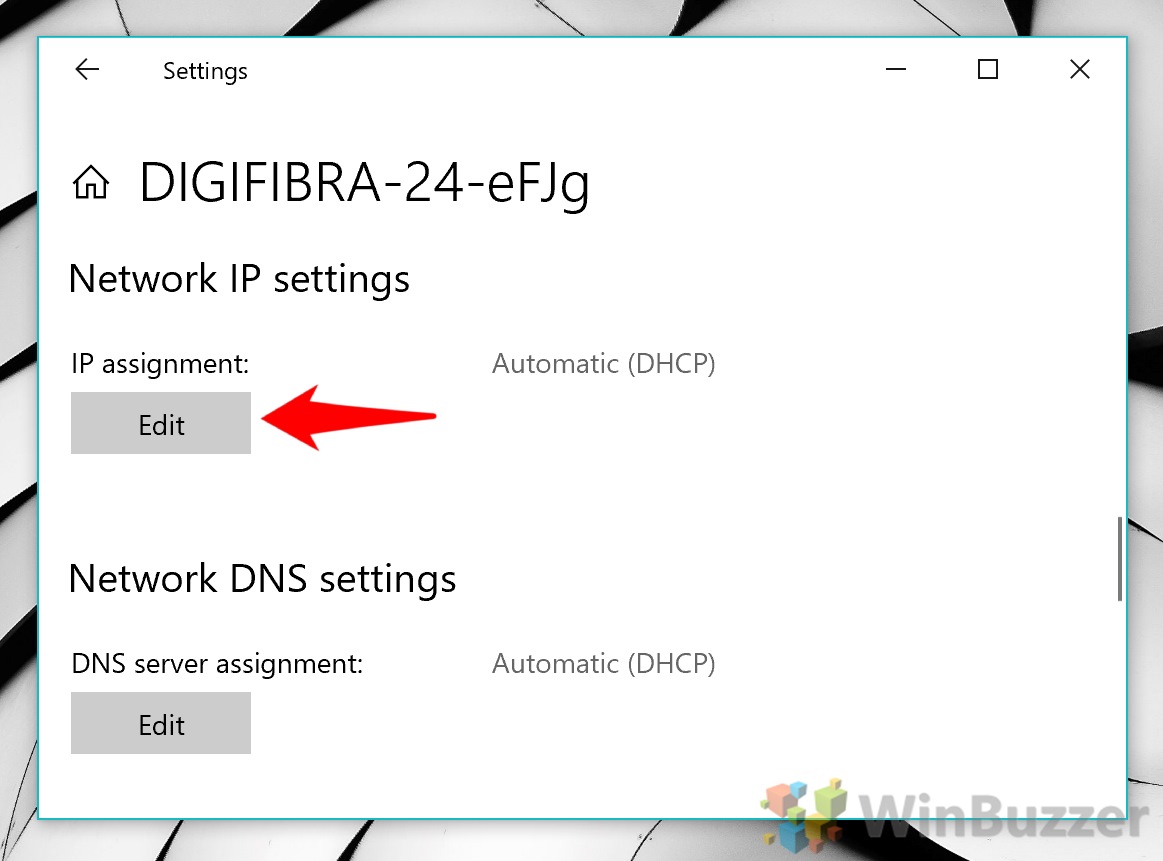
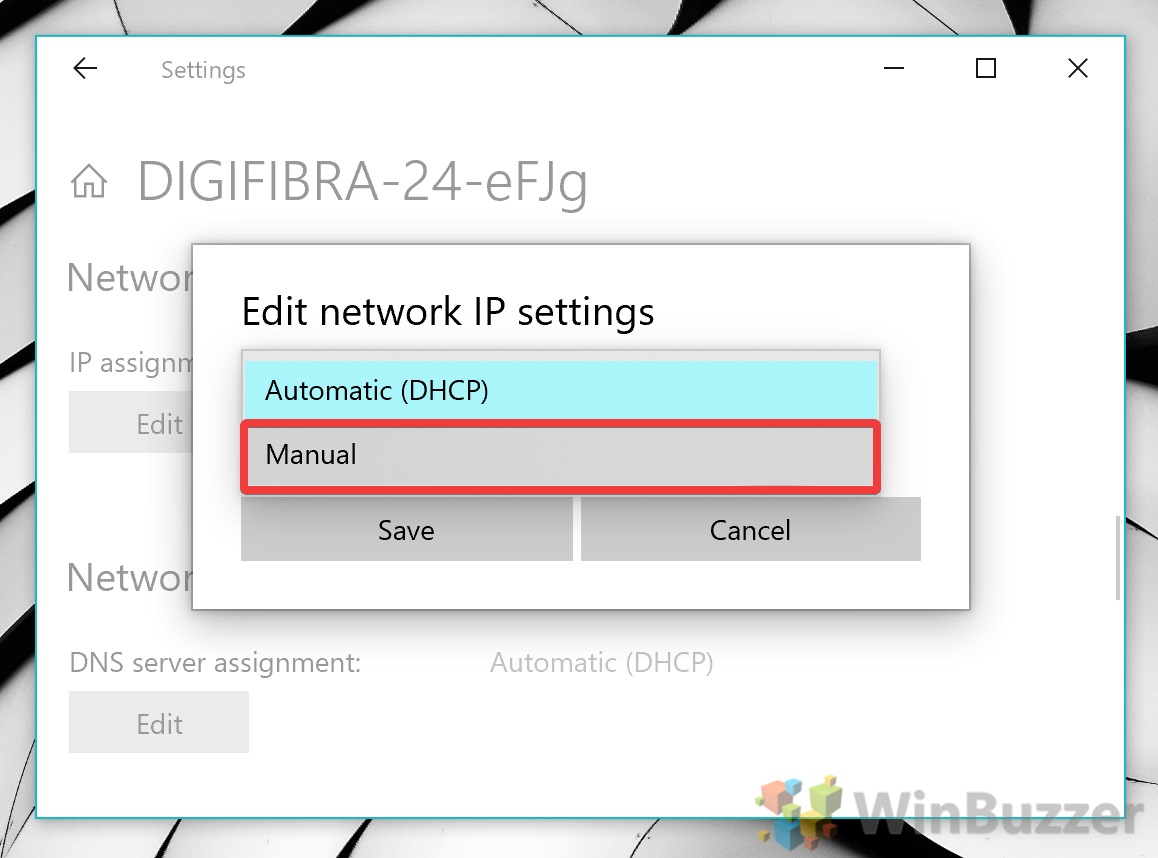
- Select ‘Manual’ from the dropdown
- Perform your DNS configuration
Tick toggle “IPv4” to “On” and enter your chosen DNS servers in the “Preferred DNS” and “Alternate DNS” boxes. If you chose Cloudflare, this will be “1.1.1.1” and “1.0.0.1”. There’s no need to fill in any of the other information, so you can simply press “Save” once you’re done.
The changes will apply immediately. You can verify that by visiting this page and clicking “What’s My DNS Server?”.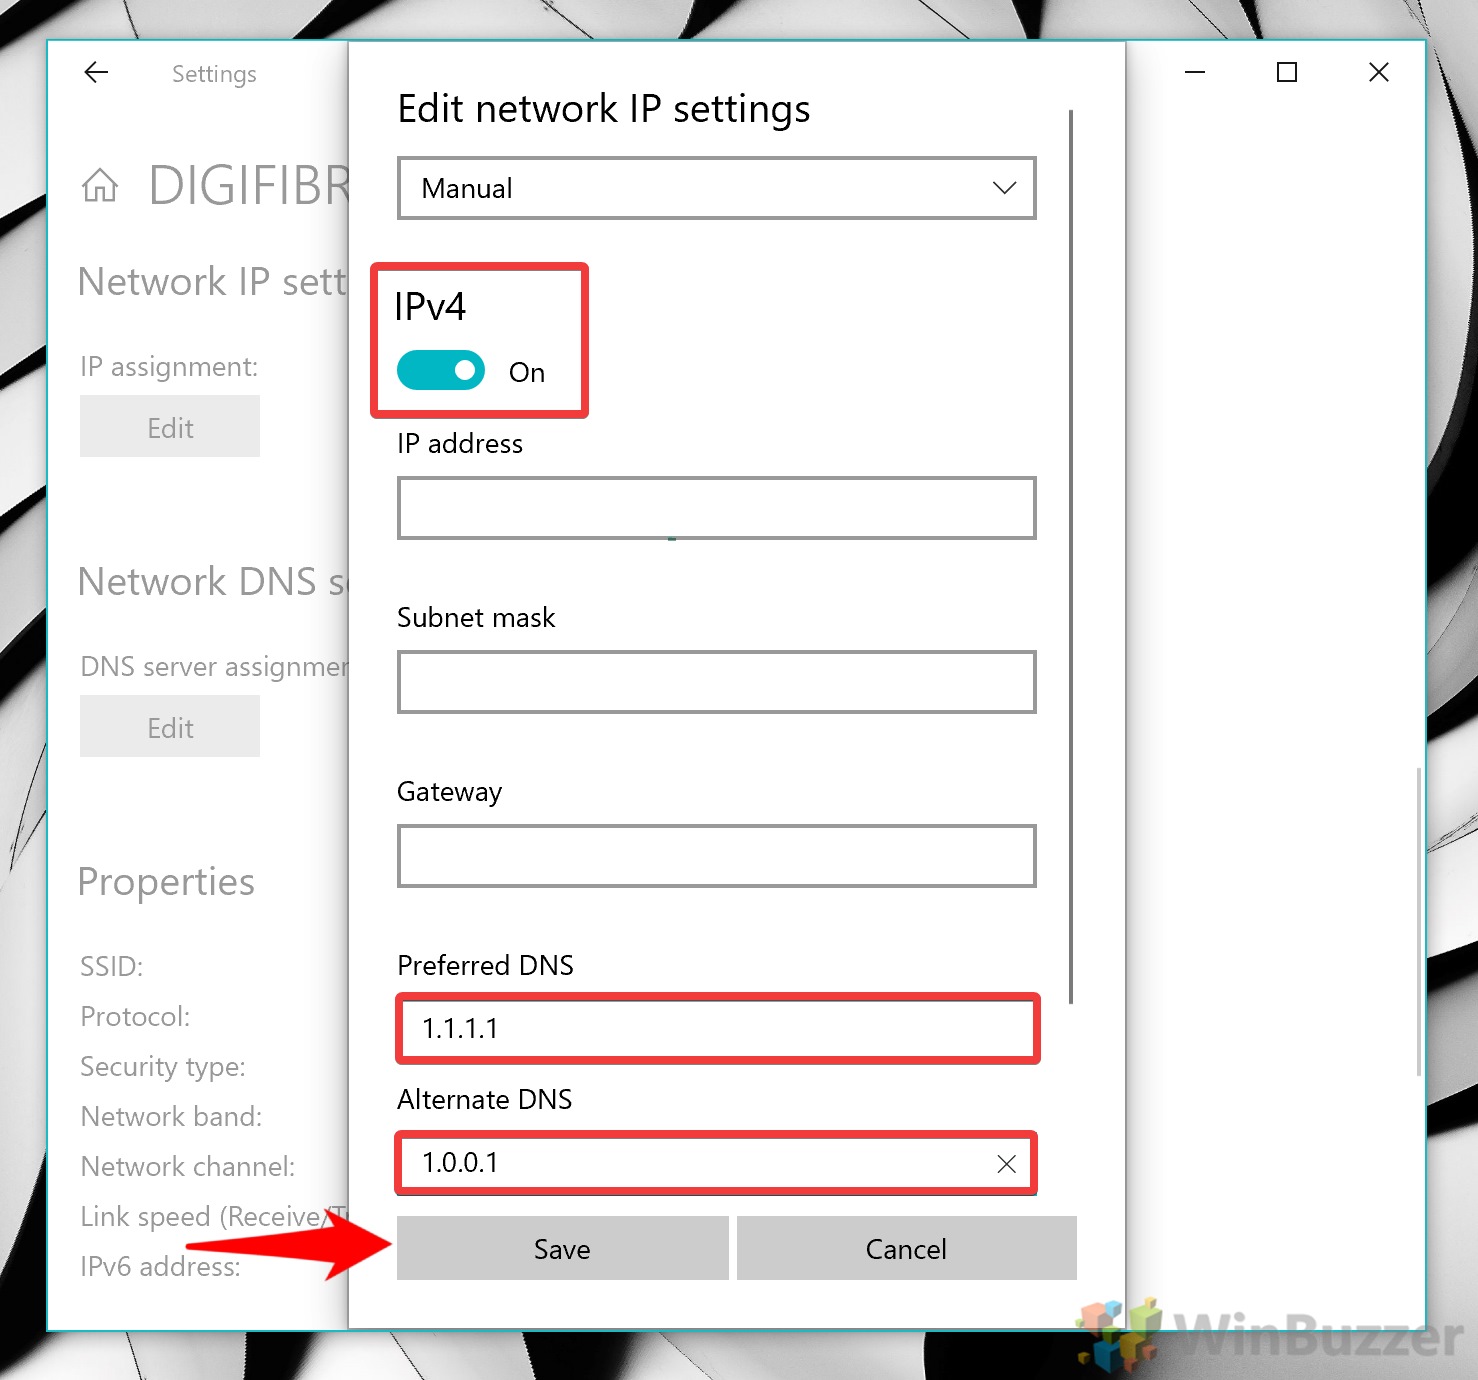
How to change DNS in Windows 10 with DNS CMD Commands
If you don’t have access to the GUI or just prefer to set your DNS via command-line, you can do so via Command Prompt:
- Open Command Prompt as an administrator
Press “Start” and then type “Command Prompt”. Click “Run as administrator” on the right-hand side.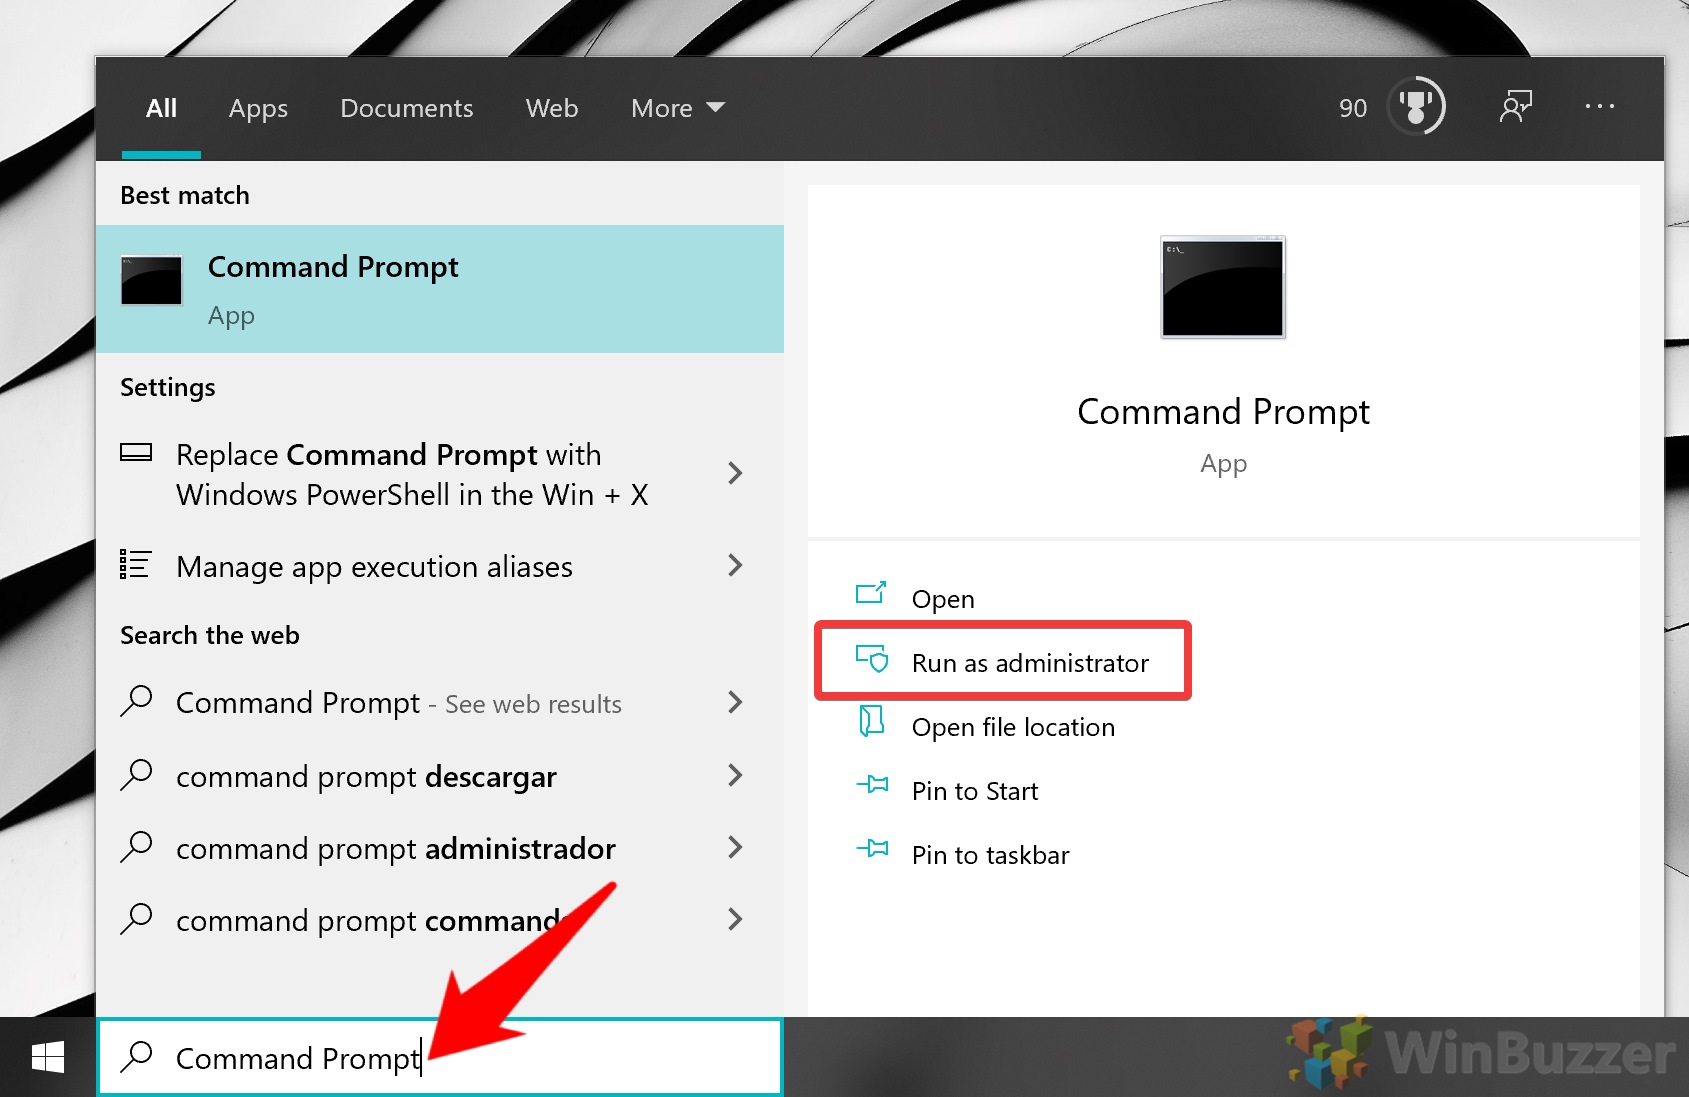
- Enter the DNS CMD commands
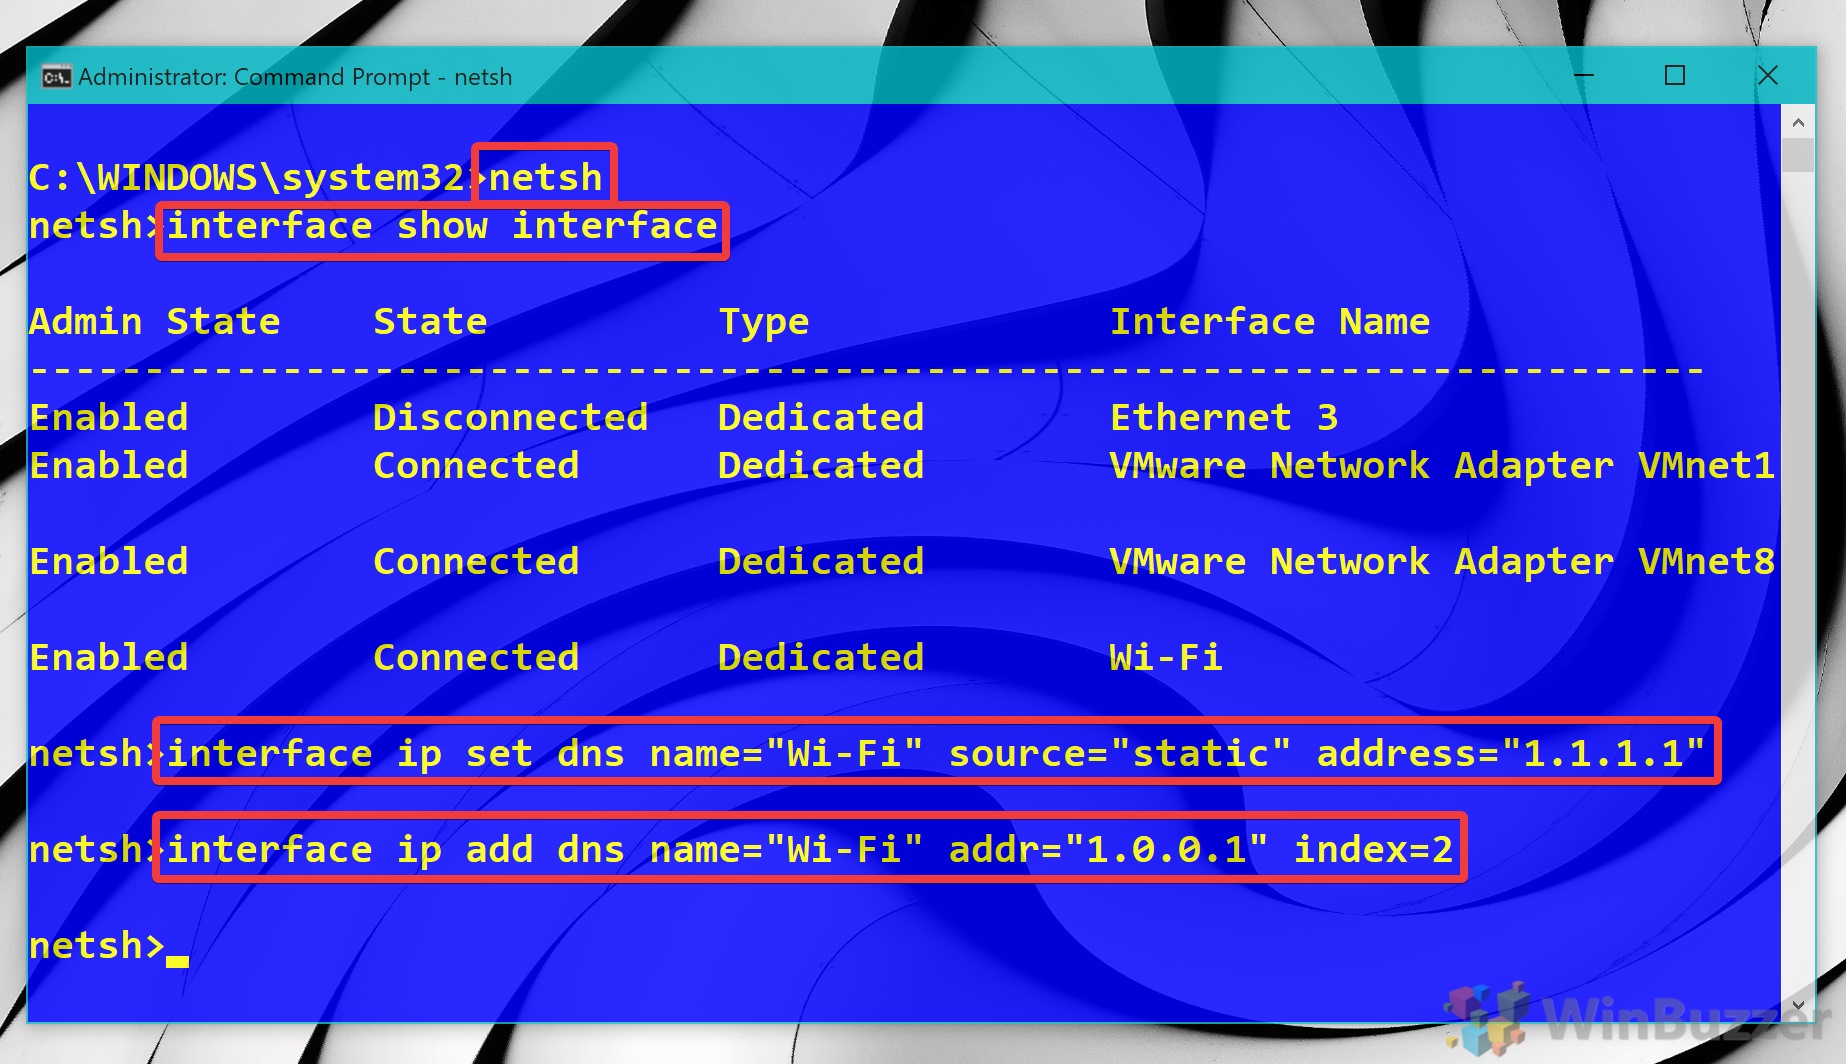
First, we need to find the name our network adapter. You can do so by entering:netsh interface show interface
Find your network in the list. Now, to change your primaryy DNS in Windows 10, enter the following, substituting “Wi-Fi” to the name of your network adapter and “1.1.1.1” for the primary DNS server you chose earlier.
interface IP set dns name="Wi-Fi" source ="static" address="1.1.1.1"
Do the same for your secondary DNS server and its address by adding
index=2to the end of your command:interface IP set dns name="Wi-Fi" source ="static" address="1.0.0.1" index=2
That’s it. The changes will apply immediately. You can verify that by visiting this page and clicking “What’s My DNS Server?”.
Thanks for following this Windows 10 DNS tutorial. If you’re interested check out our guide to enabling or disabling network adapters, or follow our network reset tutorial if your DNS change didn’t go well.
Last Updated on February 14, 2022 7:46 pm CET by Markus Kasanmascheff


