

PCs are power-hungry machines, and they can affect your power bill or battery life even when they’re in sleep mode. Unfortunately, though, it’s far too easy to forget to turn your PC off at night or when you leave for work in the morning. If only you could create a Windows 10 shutdown timer that only runs when you haven’t used your PC in a while…
Well, if you read the headline, you’ve probably guessed that there is. Using Task Scheduler, we’ll teach you how to automatically shut down your PC at a scheduled time if you haven’t used it in a while.
That said, we should point out that the sleep and hibernate modes in Windows have come a long way since their inception. They draw little to no power and allow your PC to start up faster.
For most people, this will be the best option, but they do have some downsides. If you’d like to forge ahead with a Windows 10 auto shutdown as a result, follow the steps below:
How to Schedule a Windows 10 Automatic Shutdown
Creating a PC auto shutdown task is surprisingly easy and can be completed regardless of whether you’re on Windows 10 Pro or Windows 10 Home. Here’s how:
- Open Task Scheduler
Press the Start button and type “Task scheduler” in your search bar. Then, click the top result in your Start menu.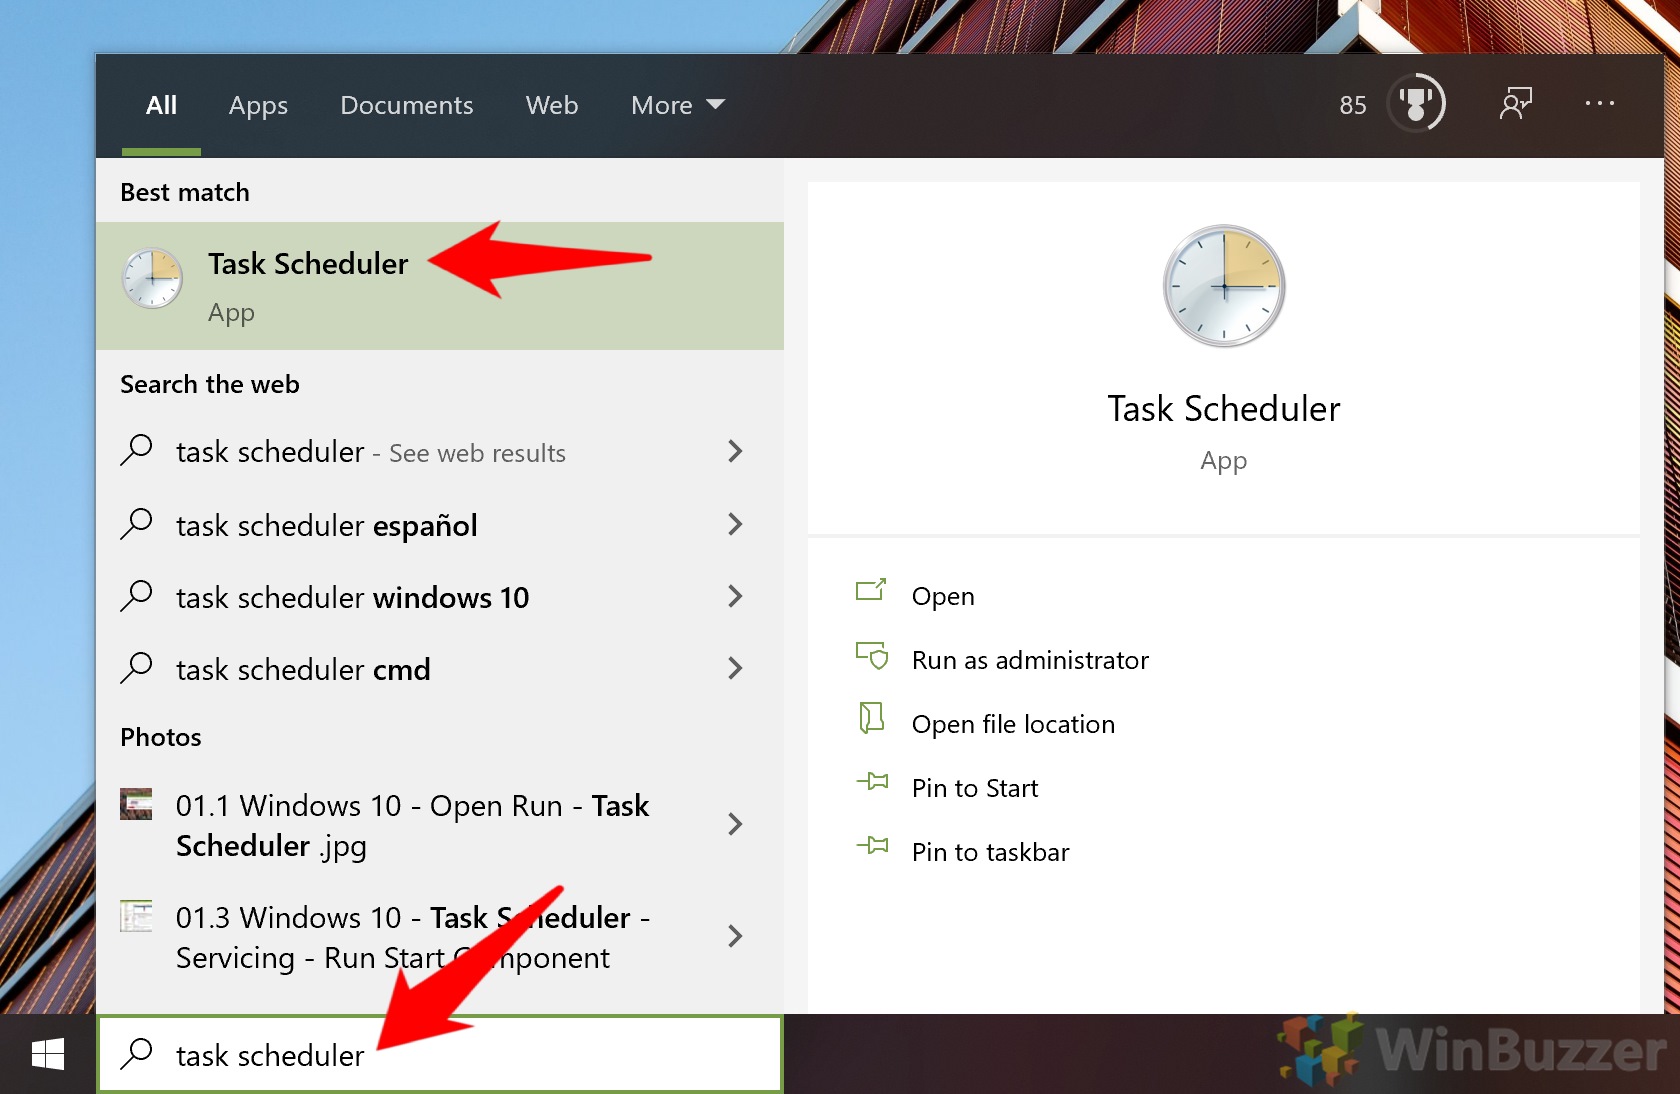
- Create a new task
In Task Scheduler, look for the “Actions” sidebar on the right-hand side and click “Create Task…”.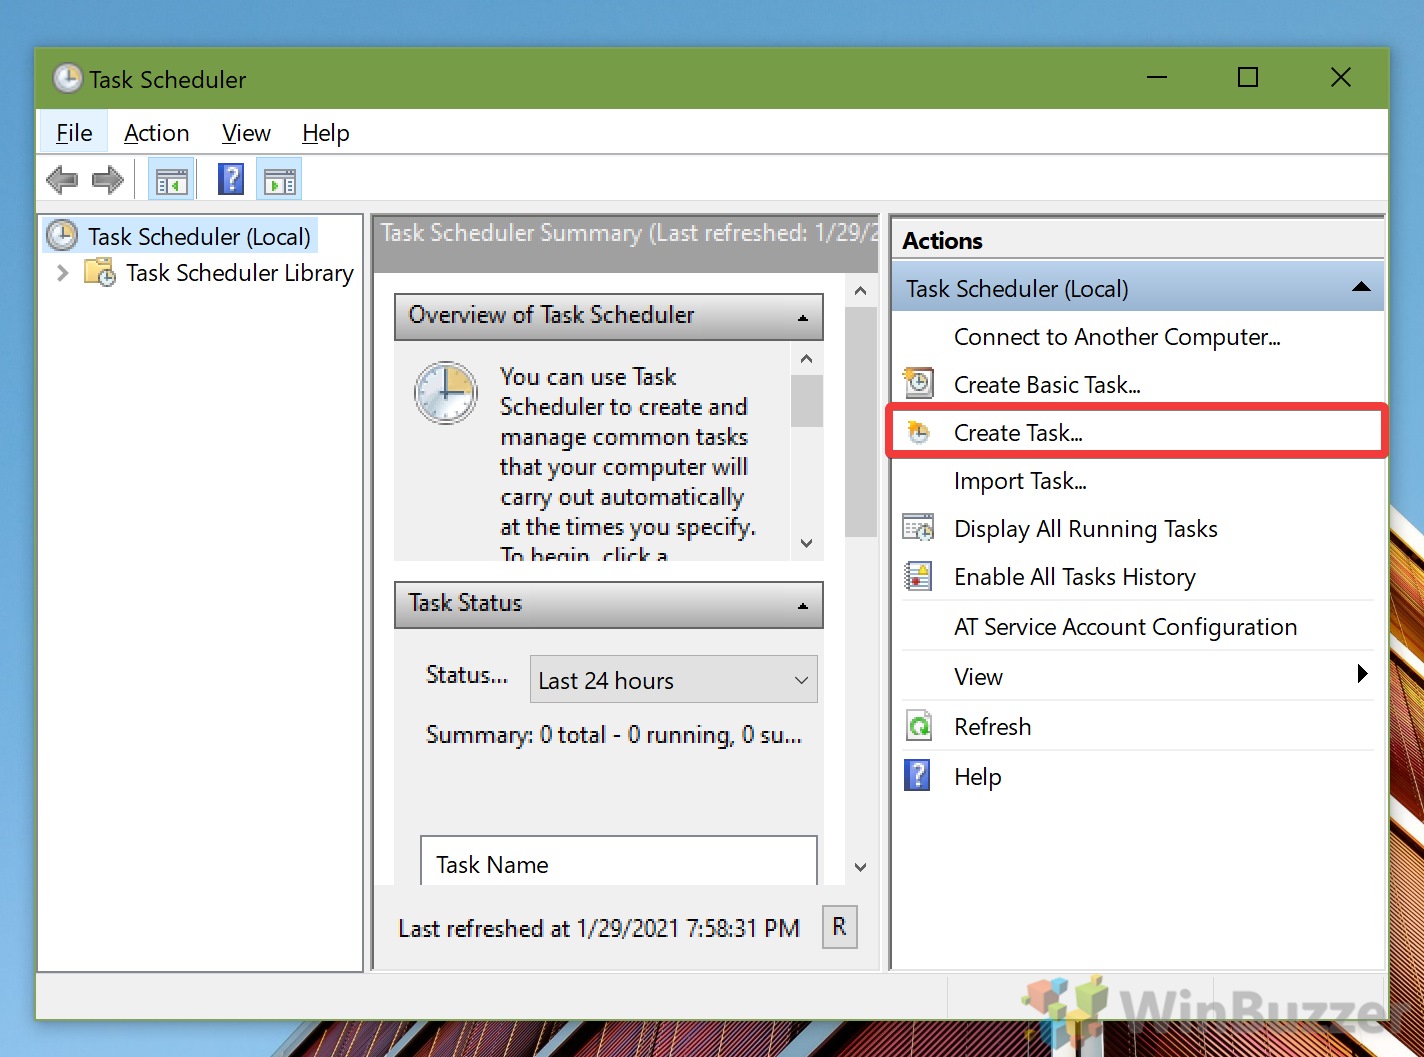
- Name and prepare your auto shutdown task
In the “General” tab, add a name for your task, for example, “Shut Down PC at Night”.
Also make sure to tick “Run whether user is logged on or not” and “Run with highest privileges”. Finally, change the dropdown next to “Configure for:” to “Windows 10”.
- Add a trigger to your task
Click on the “Triggers” tab and press the “New…” button in the bottom-left.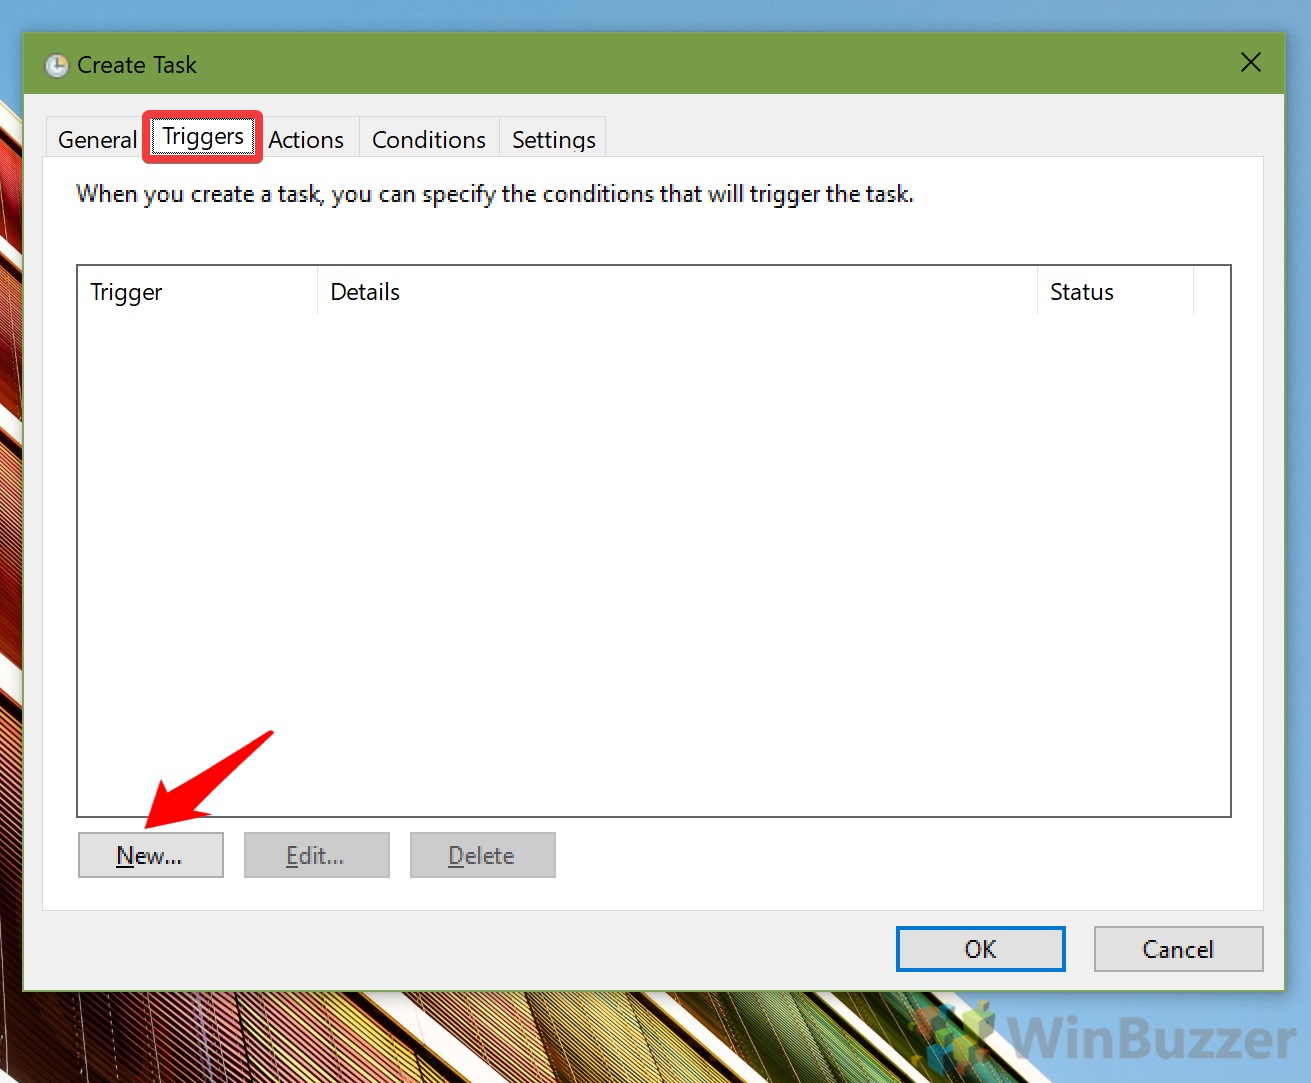
- Change your trigger options
Set “Begin the task:” to “On a schedule”, then tick “Daily” below it on the left-hand side.
In the “Start” section, add the time you want your PC to shut down if you aren’t using it. If you want it shut down when you go to sleep, set it to an hour or so after your usual bedtime, for example. Change “Recur every” to “1 days” and press “OK”.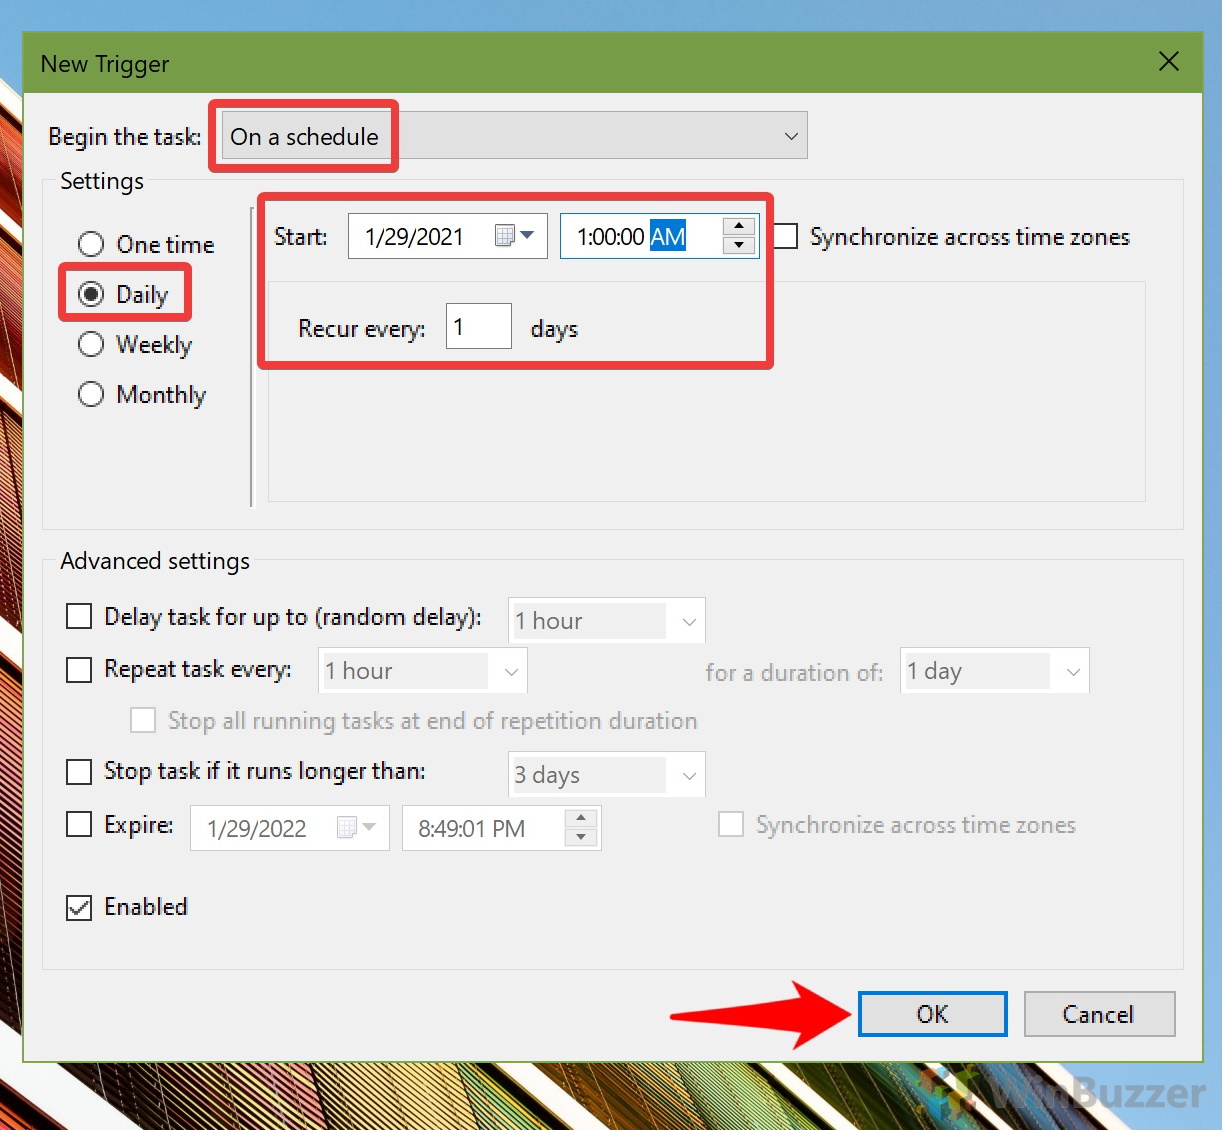
- Add an Action to your Windows 10 automatic shutdown
We’ve told Windows when we want it to perform a task, but now we have to tell it what to do when those conditions are met. For that, switch to the “Actions” tab and click “New…”.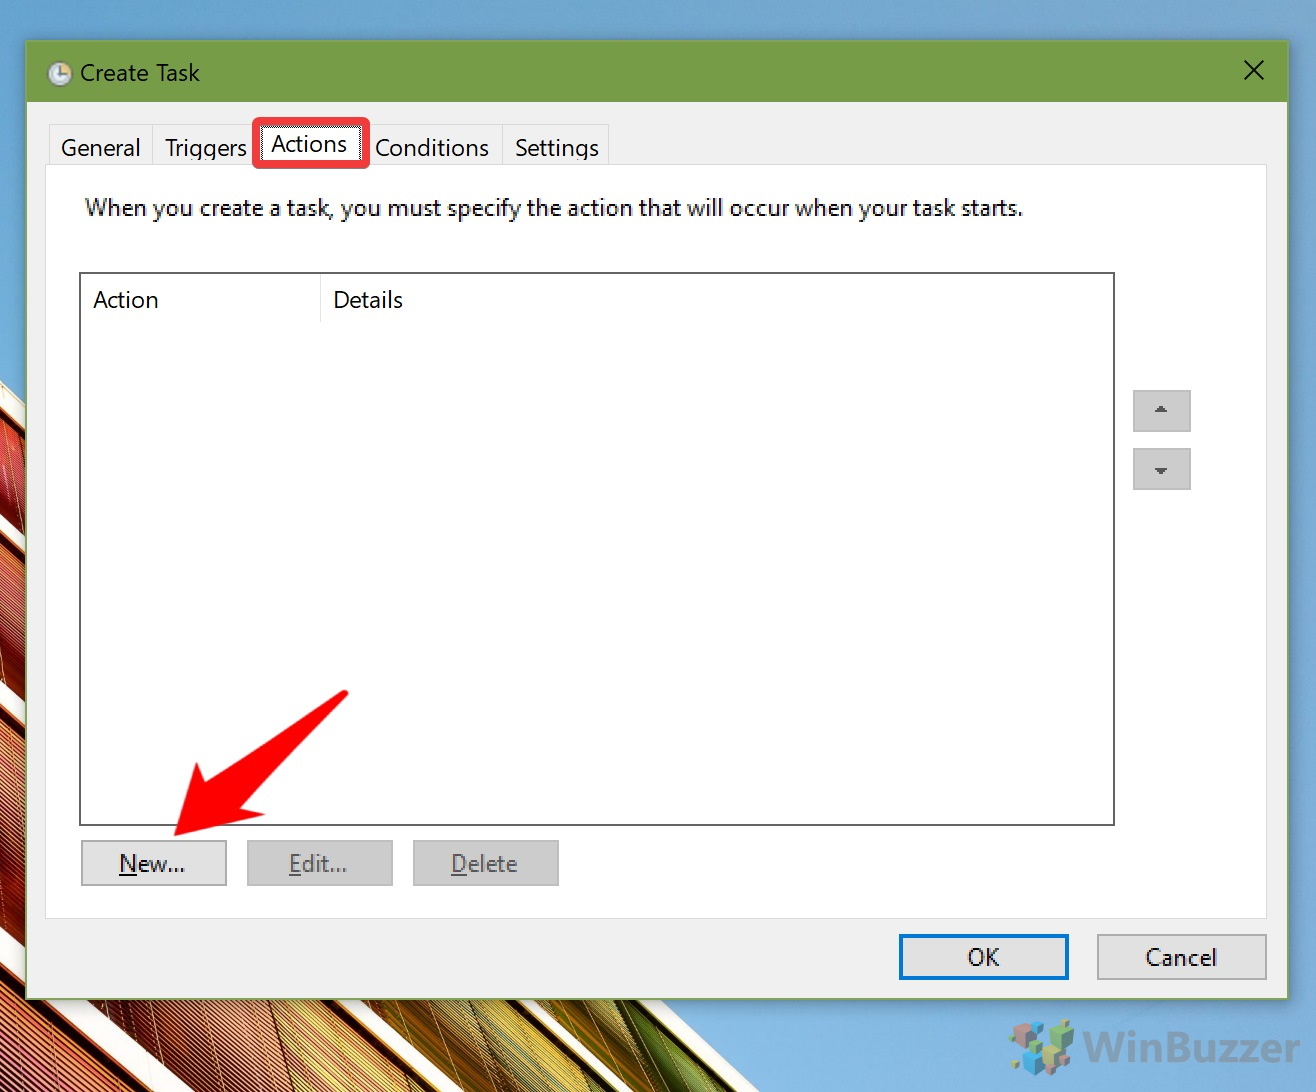
- Create the auto shutdown action
Set your “Action” to “Start a program”, then typeShutdownin the “Program/script” field.
Finally, in the “Add arguments” field, type/S. Press “OK”.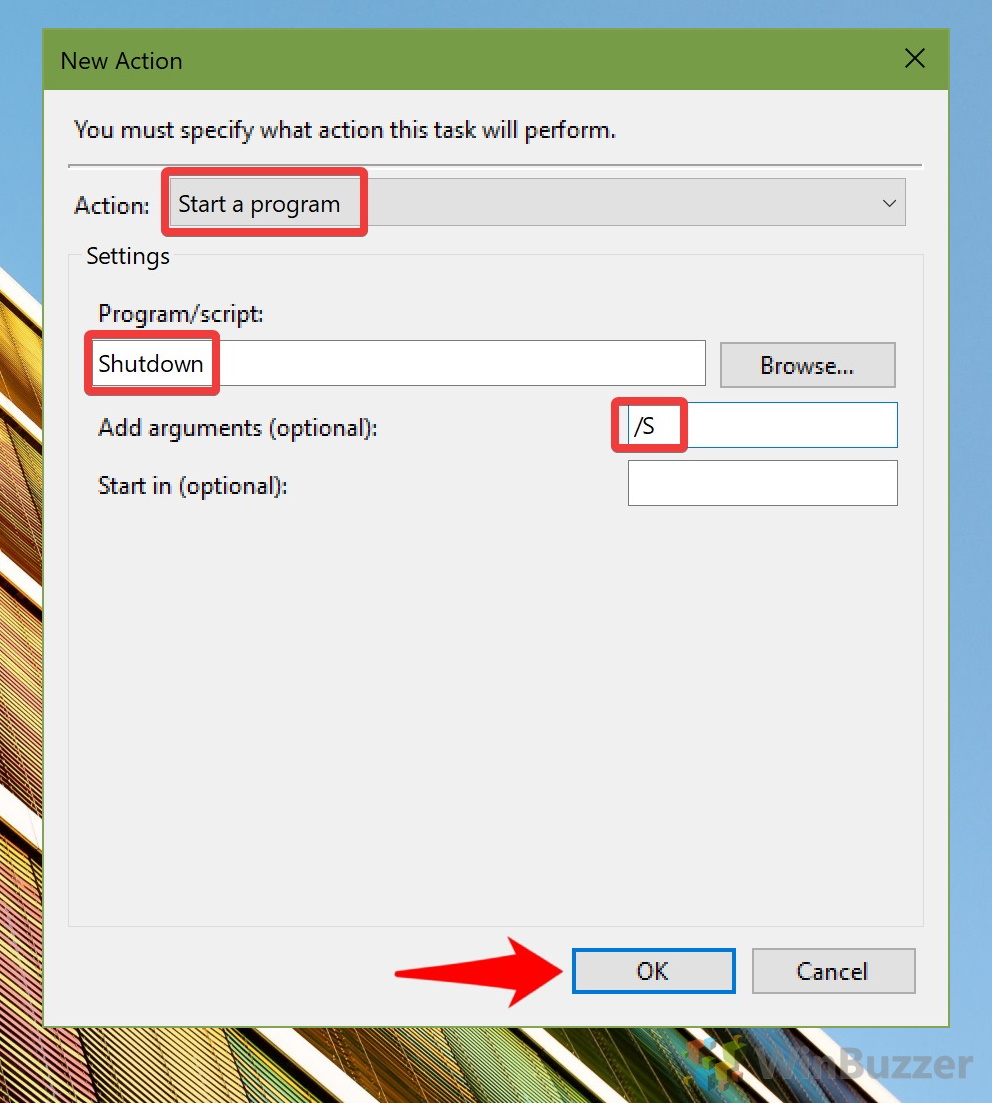
- Change your task’s conditions
We aren’t done quite yet. As it is, your PC will shut down regardless of what you’re doing at the specified time. Essentially, it’s just a regular old Windows 10 shutdown timer. Instead, we want to head over to the “Conditions” tab and set some parameters.
Tick “Start the task only if the computer is idle for:”, “Stop if the computer ceases to be idle”, and “Restart if the idle state resumes”.
Set the values to something that makes sense to you. In our case, we set the idle time to “10 minutes” and the “Wait for idle for” to “1 hour”. Press “OK” when you’ve settled.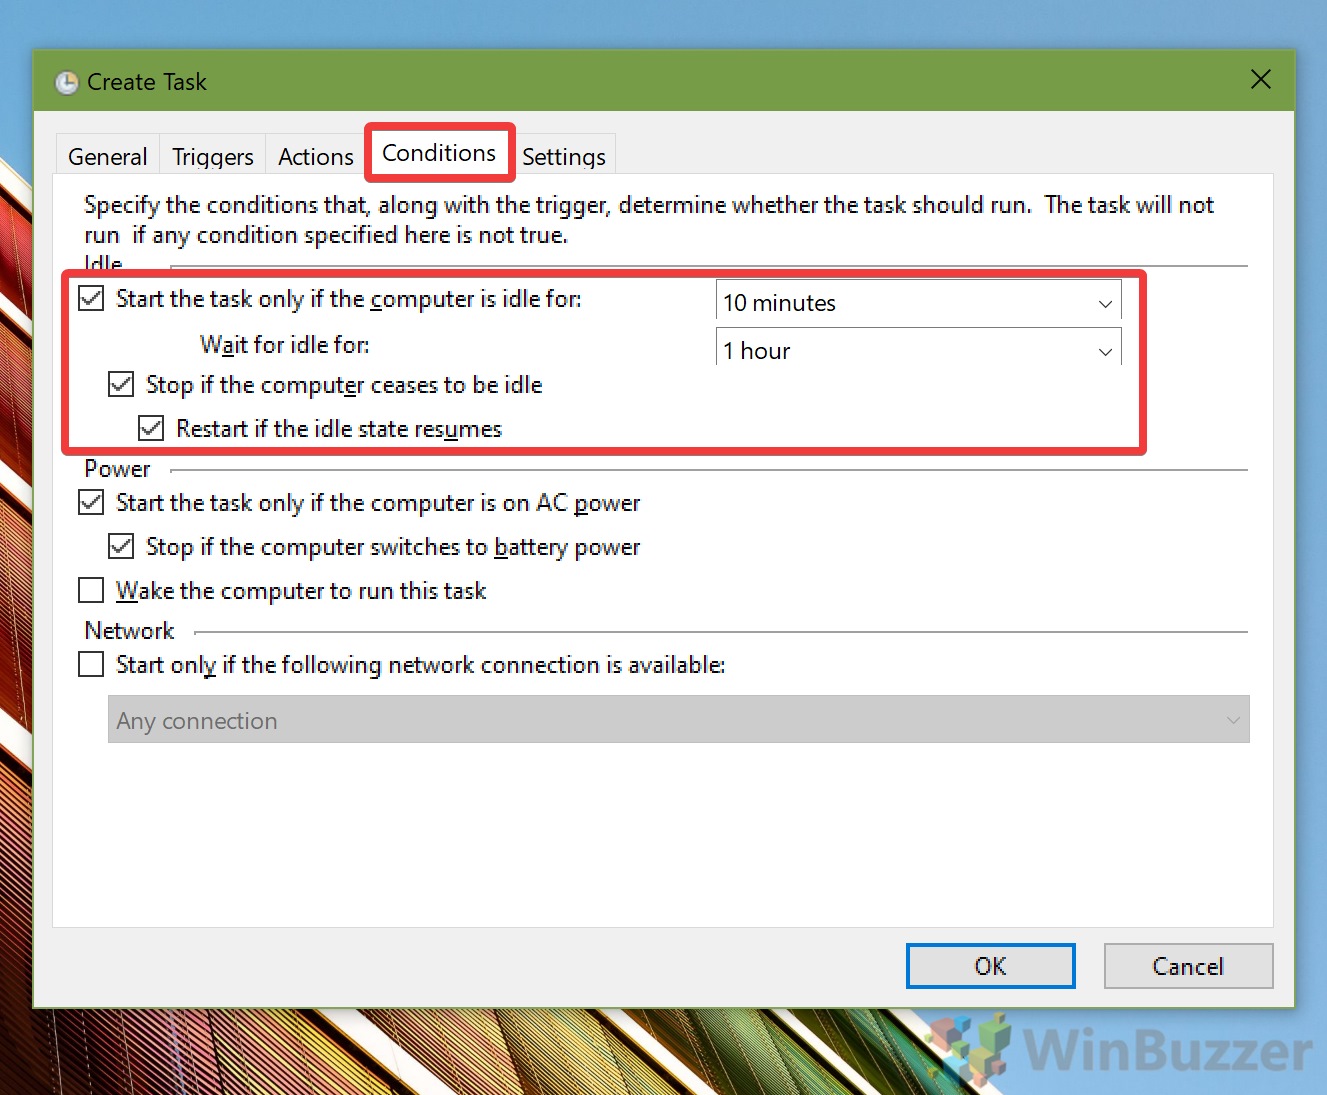
- Change your auto shutdown settings
Last, but not least, modify your settings so that it will run again automatically if it fails.
Tick “If the task fails, restart every:” and set it to “1 minute”, and “3 times”. Press “OK”.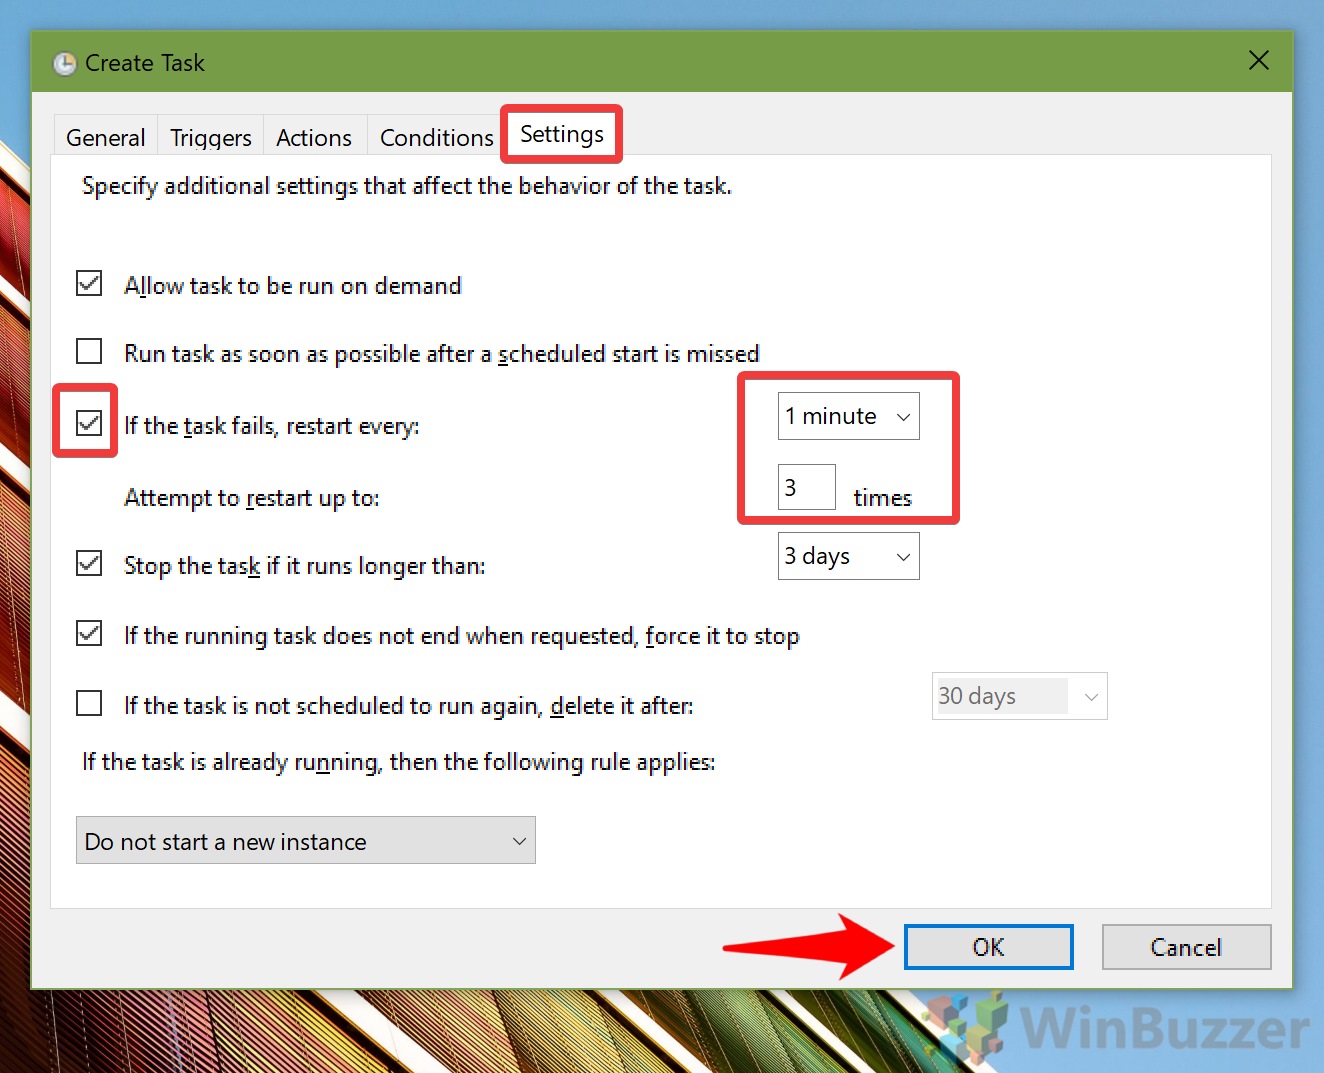
- Enter your password
Windows won’t let you make such a change to your PC without further authorization. Type your Windows password when prompted and click “OK”.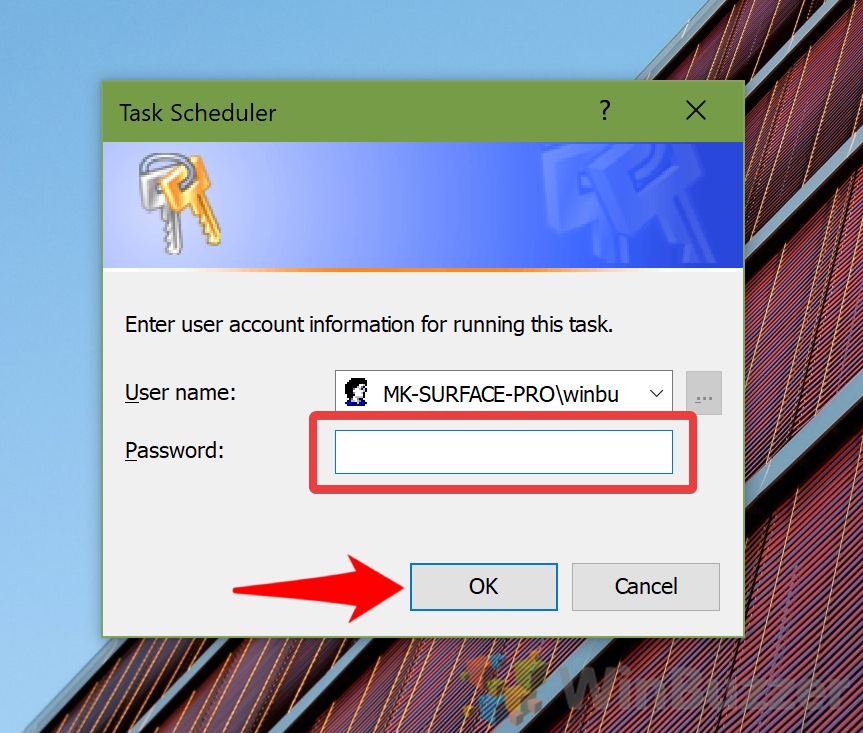
There you go. Your PC will automatically shut down at your scheduled time if you haven’t used it in a while. If you want to save power further, you can turn off your hard disk on idle or enable power throttling.
Last Updated on February 14, 2022 7:46 pm CET by Markus Kasanmascheff


