We’ve all been there. Maybe you’re running repeatedly in a game or just trying to get your Shift key to work. You hear a bleep and the dreaded “Do you want to turn on Sticky keys?” dialog interrupts what you’re doing. If you run into this issue frequently, it may be time to turn off Sticky Keys in Windows 10.
What is Sticky Keys in Windows 10?
Sticky Keys is an Ease of Access feature that helps you to press keyboard shortcuts. Rather than pressing both keys at the same time, you can press a modifier key, let go of it, and then press the other. The modifier keys include Shift, Ctrl, and Alt.
Microsoft’s intentions with Sticky Keys are good. Having the setting enabled by default means those with accessibility issues can access it easily. It can also be useful if you only have one hand available to type with and your second hotkey is on the other side of the keyboard.
Most of the time, though Sticky Keys just gets in the way. It pops up when you’re in the middle of things and can make it seem like your control and shift keys are not working. Because of this, we’re going to show you how to turn off Sticky Keys in Windows 10, but also how to turn it on again if you need it.
How to Turn Sticky Keys On or Off via Keyboard Shortcut
If you already prompted a Sticky Keys notification, you can simply turn it on or off via the pop-up Windows 10 provides. If you don’t have the pop-up, try pressing Shift five times in short succession.
How to Enable or Disable Sticky Keys via Settings
If you want more control over Sticky Keys, for example, you want to get rid of Sticky Keys pop-ups, the Settings app is the place to go.
- Open Settings
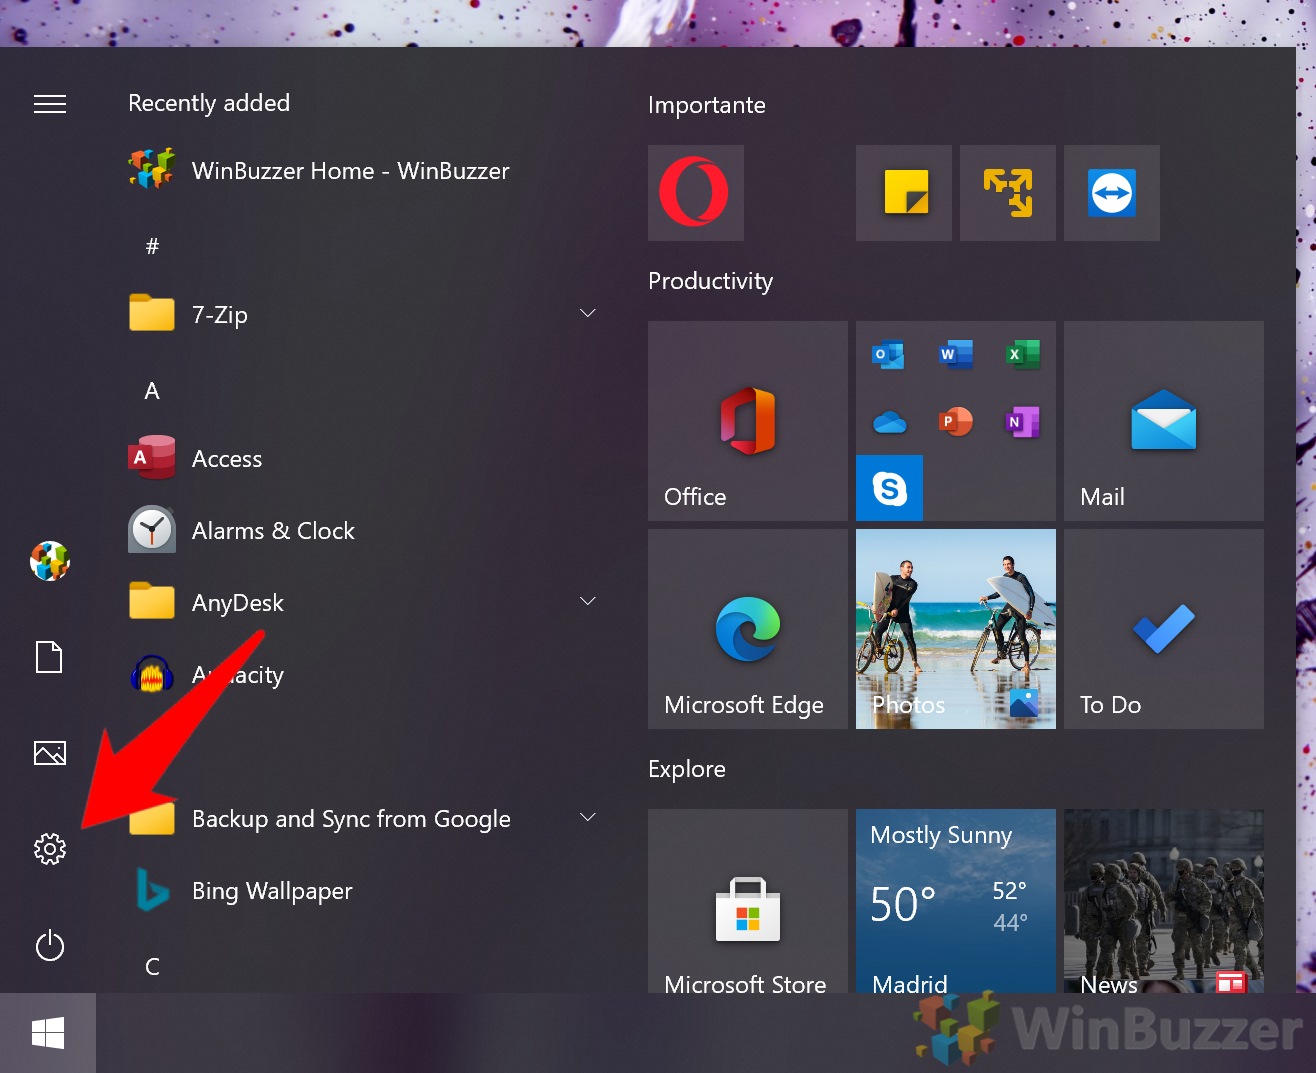
Press the Start button, then click the cog above the power button. Alternatively, hit Start + I.
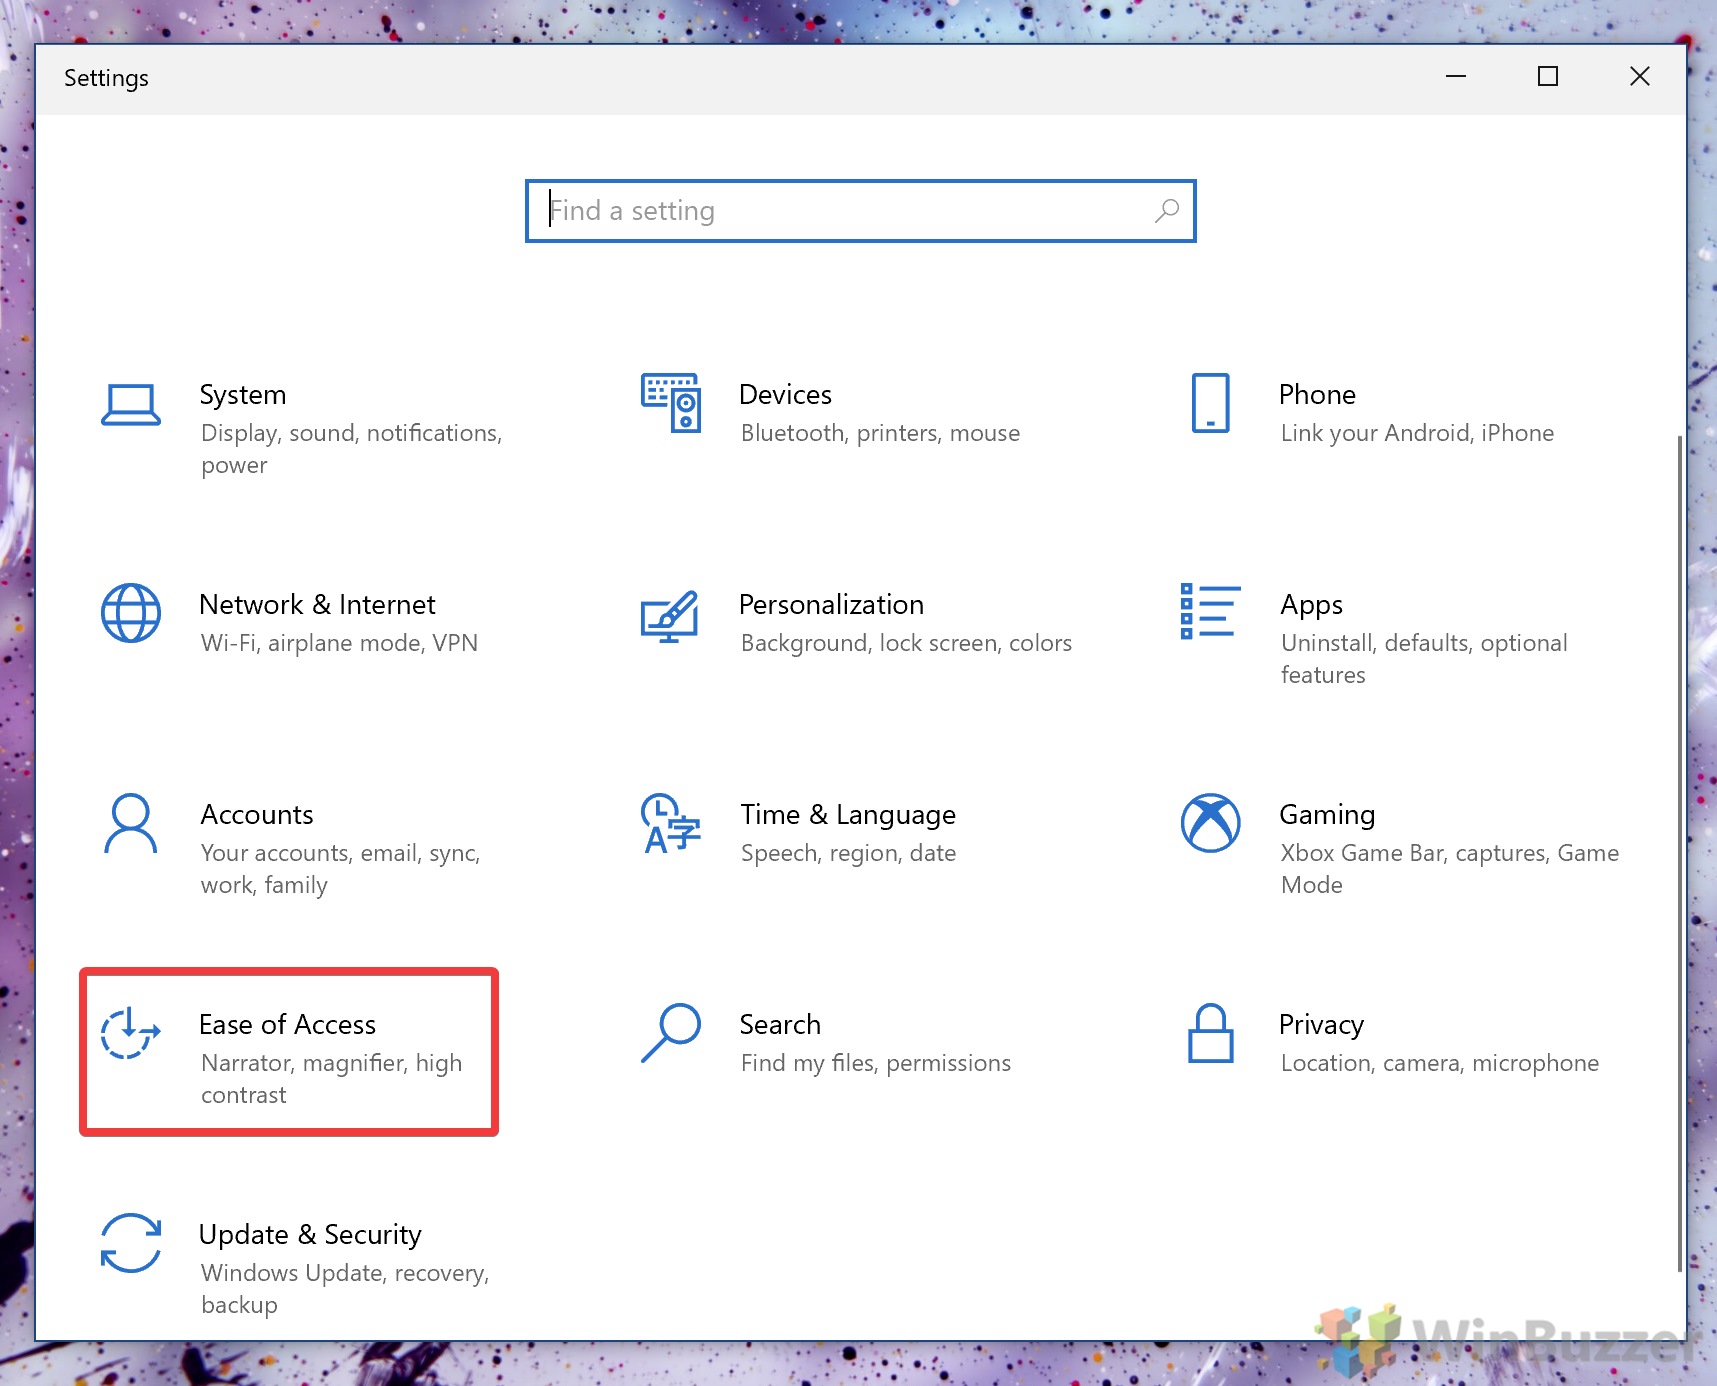
- Click ‘Ease of Access’
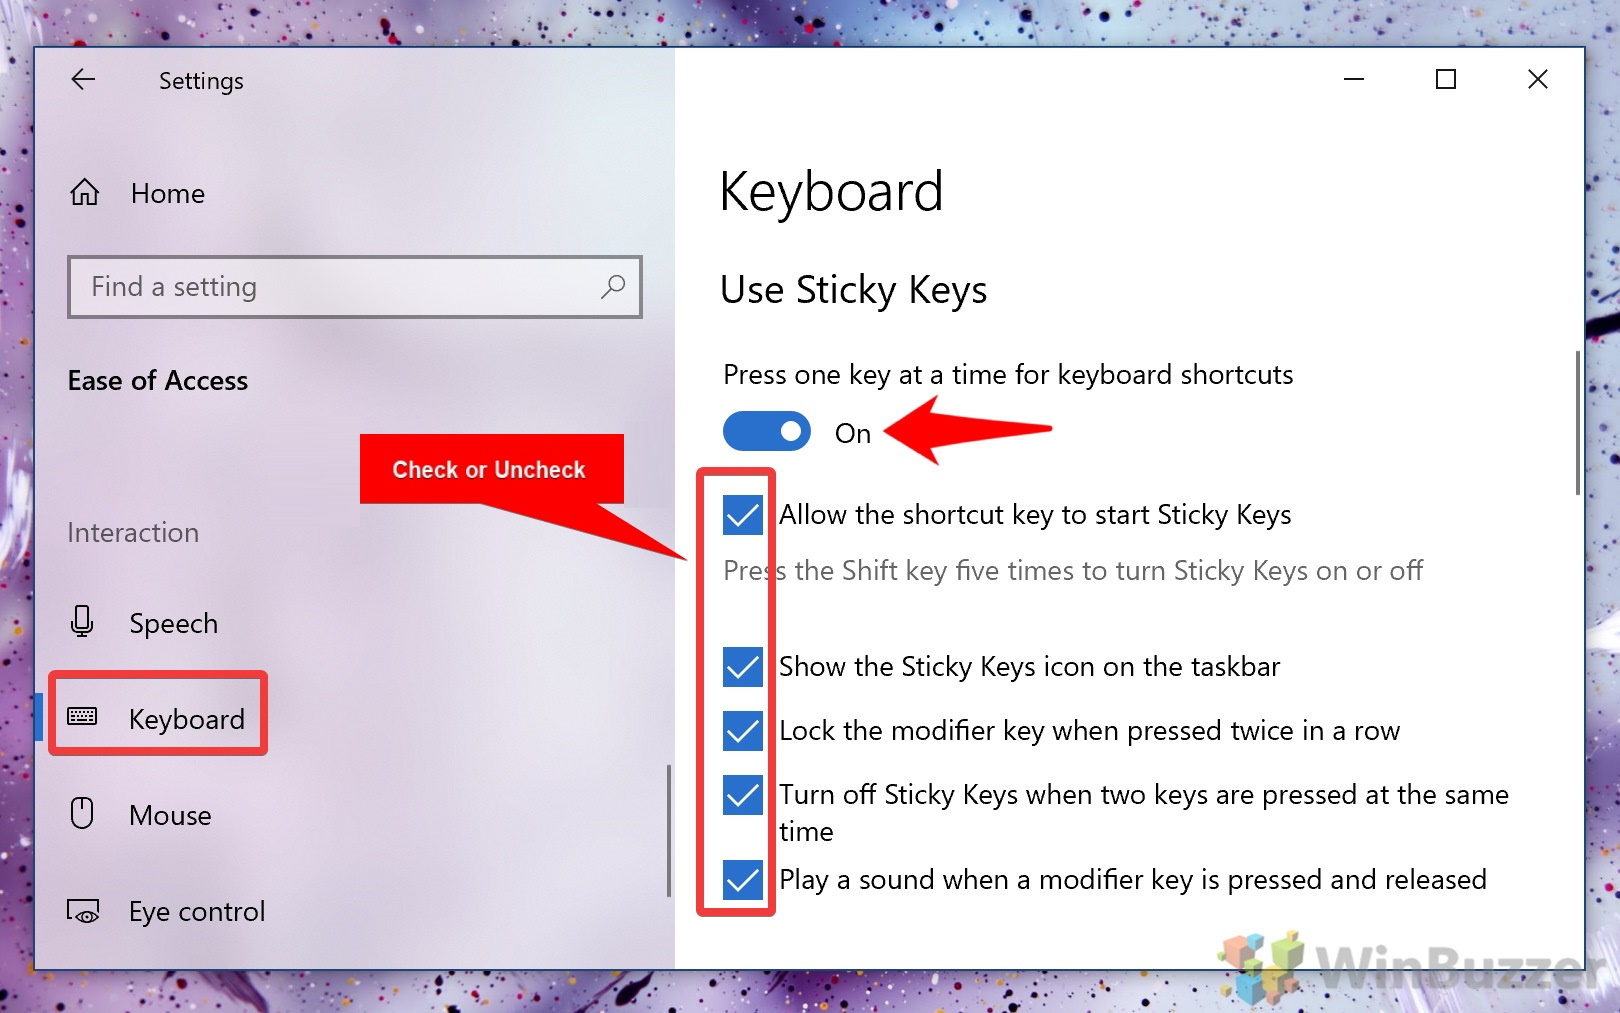
- How to turn on Sticky Keys in Windows 10
In the Ease of Access sidebar, click the “Keyboard” heading, then look for the “Use Sticky Keys” heading. Toggle “Press one key at a time for keyboard shortcuts” on, then check or uncheck the options below it suit your preferences.
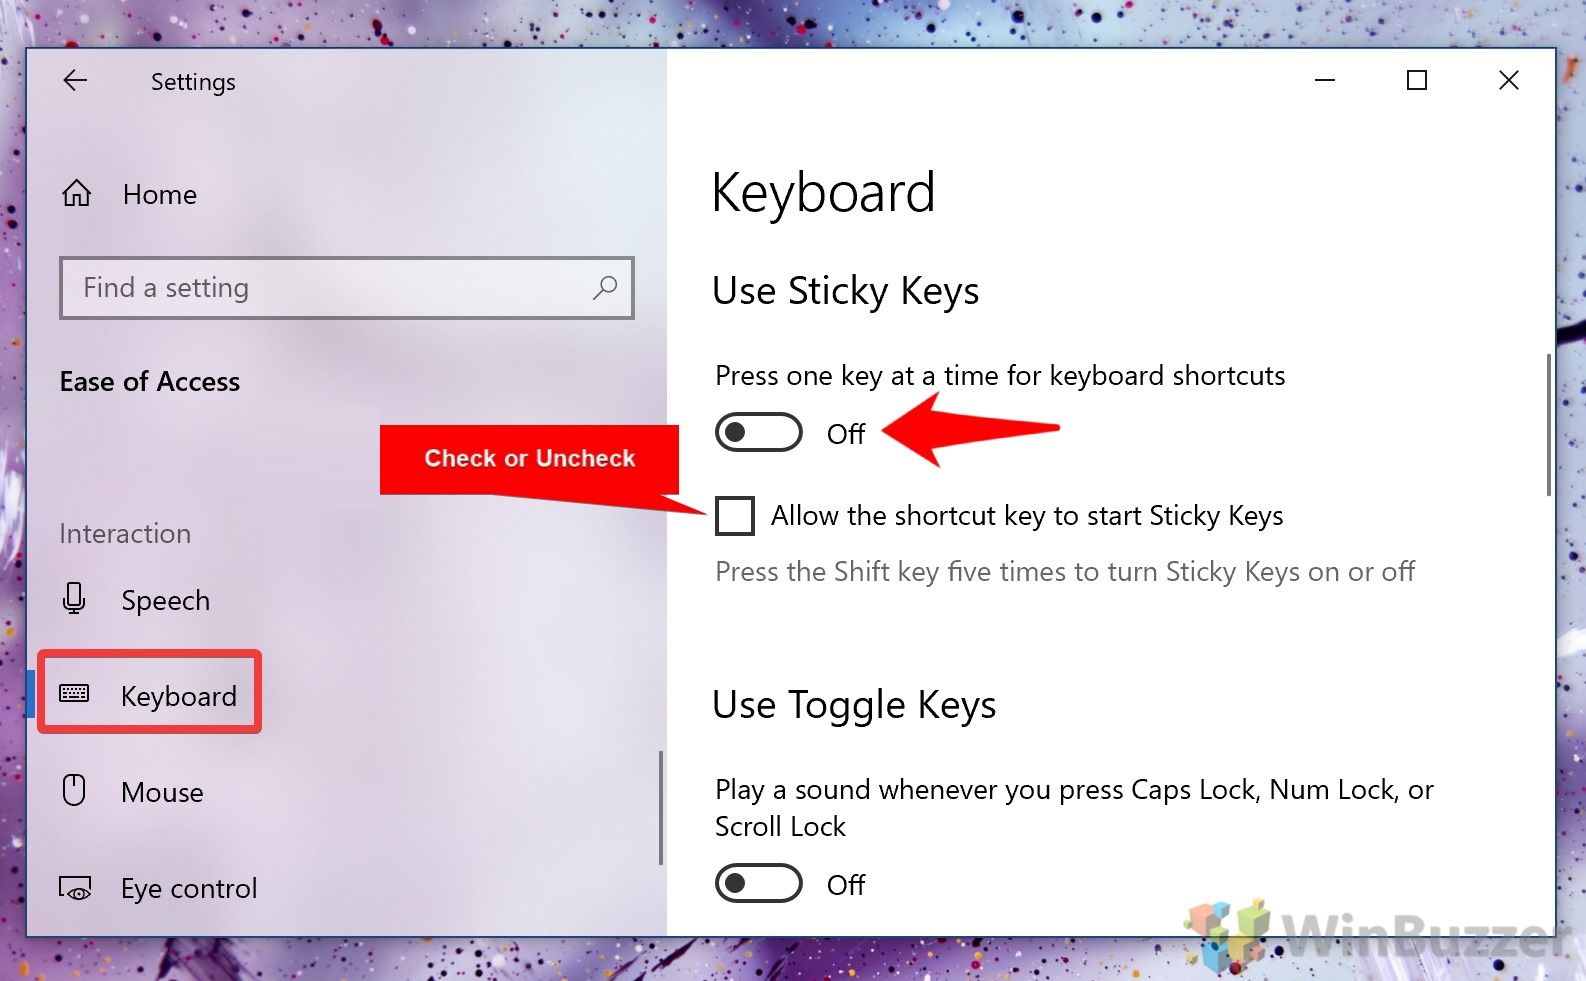
- How to turn off Sticky Keys in Windows 10
In the Ease of Access sidebar, click the “Keyboard” heading, then look for the “Use Sticky Keys” heading. Toggle “Press one key at a time for keyboard shortcuts” On.
Make sure “Allow the shortcut key to start Sticky Keys” is also unticked, then close your settings window. The changes should take effect immediately.
How to Turn On or Off Sticky Keys via the Control Panel
If you’re on Windows 7 or just don’t like the Windows 10 settings app, you can modify Sticky Keys settings in the Control Panel instead.
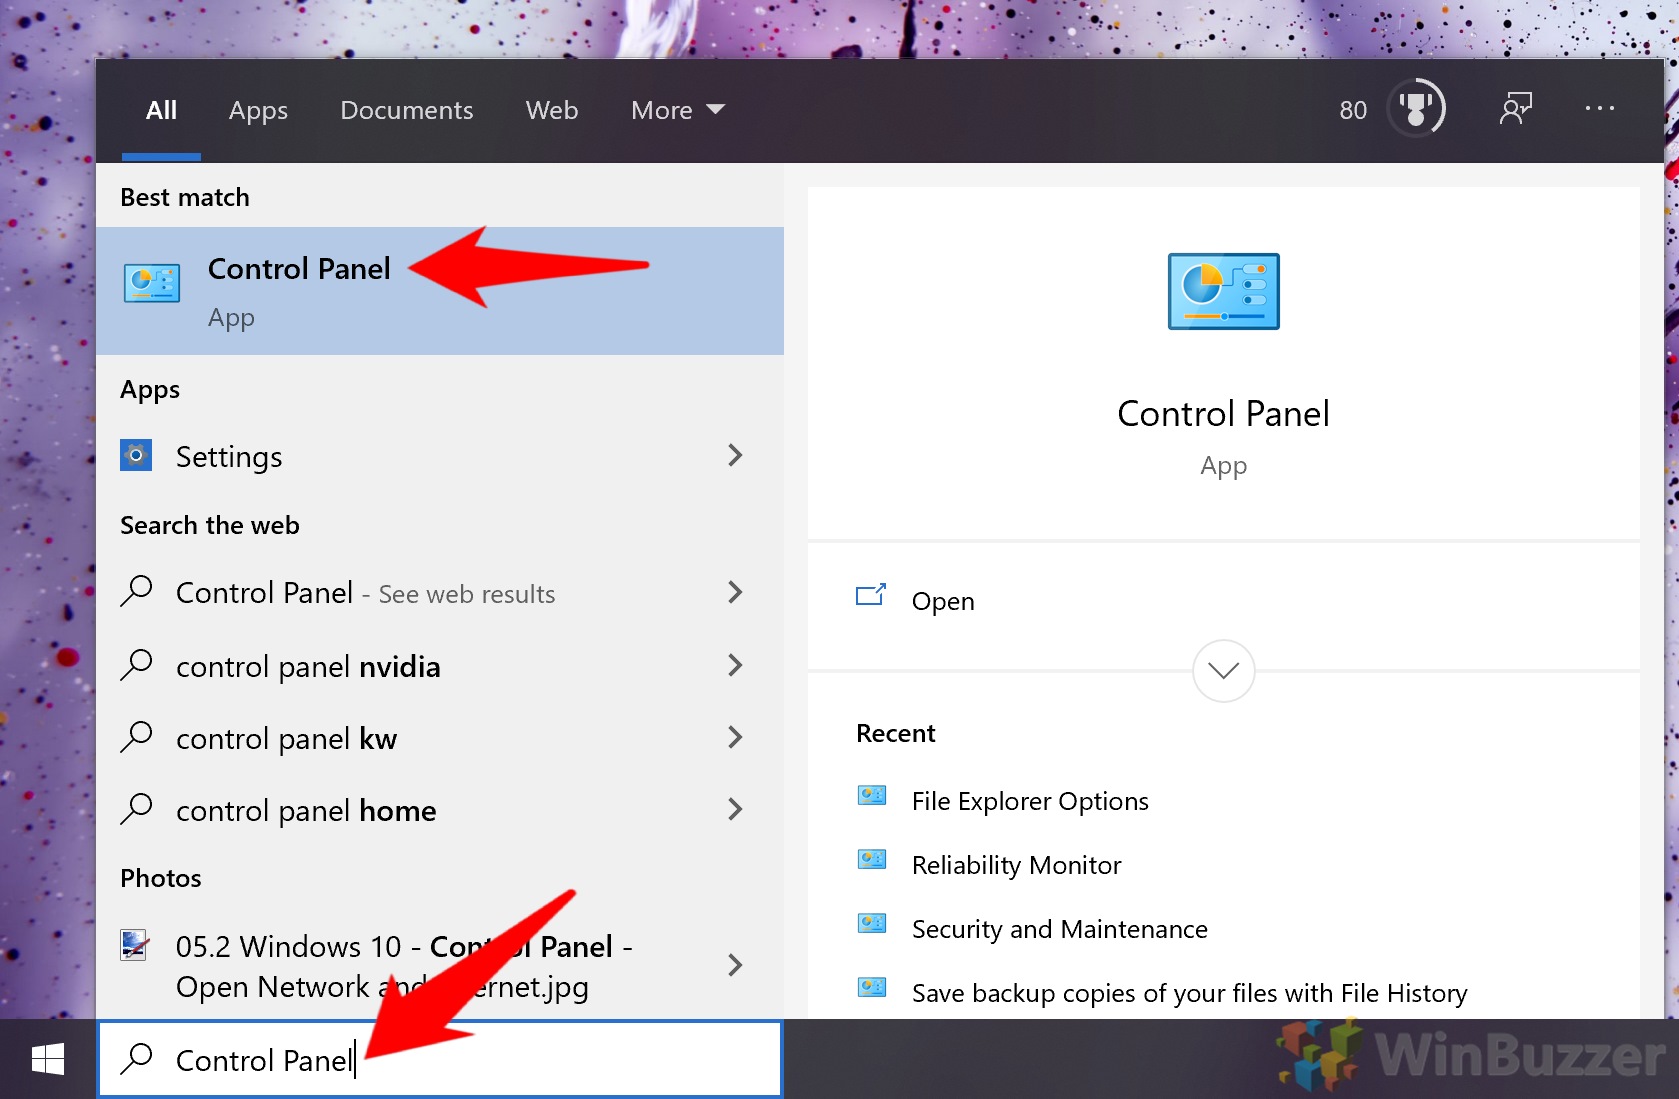
- Open Control Panel
Press Start, then type “Control Panel”. Click the top result.
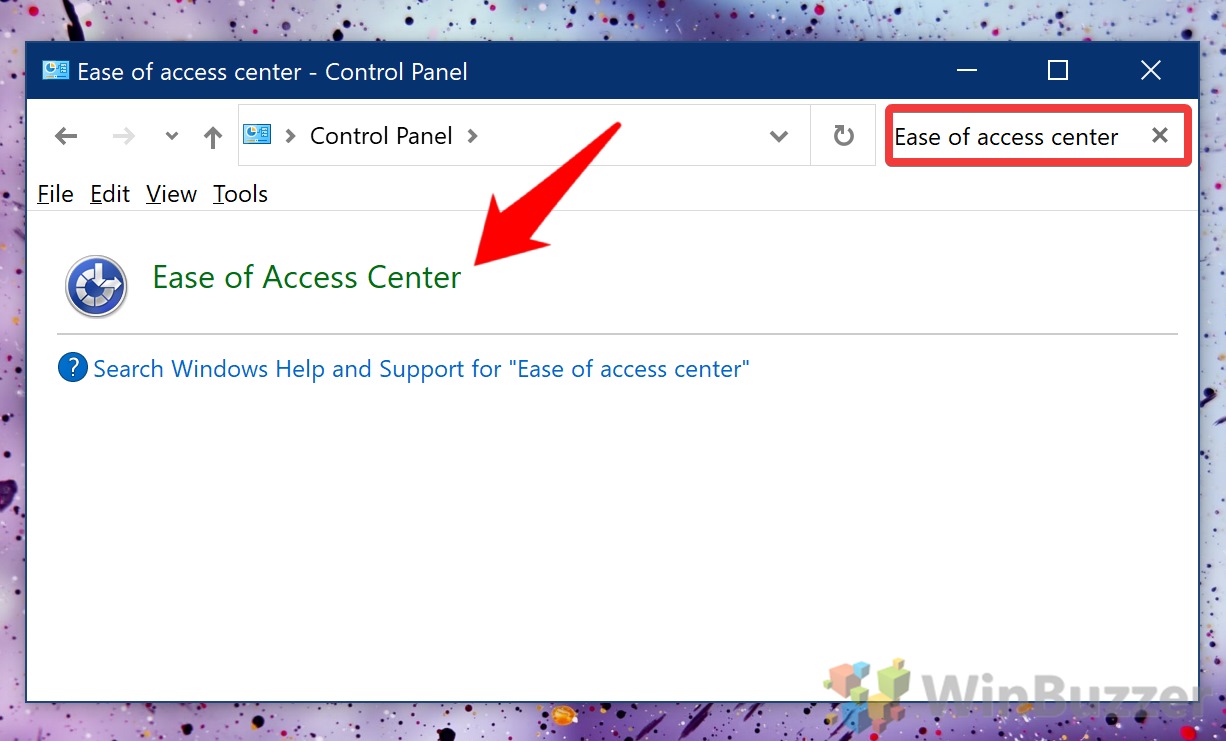
- Open Ease of Access center
In the Control Panel search bar, type “Ease of Access Center”. Click the relevant “Ease of Access Center” heading below.
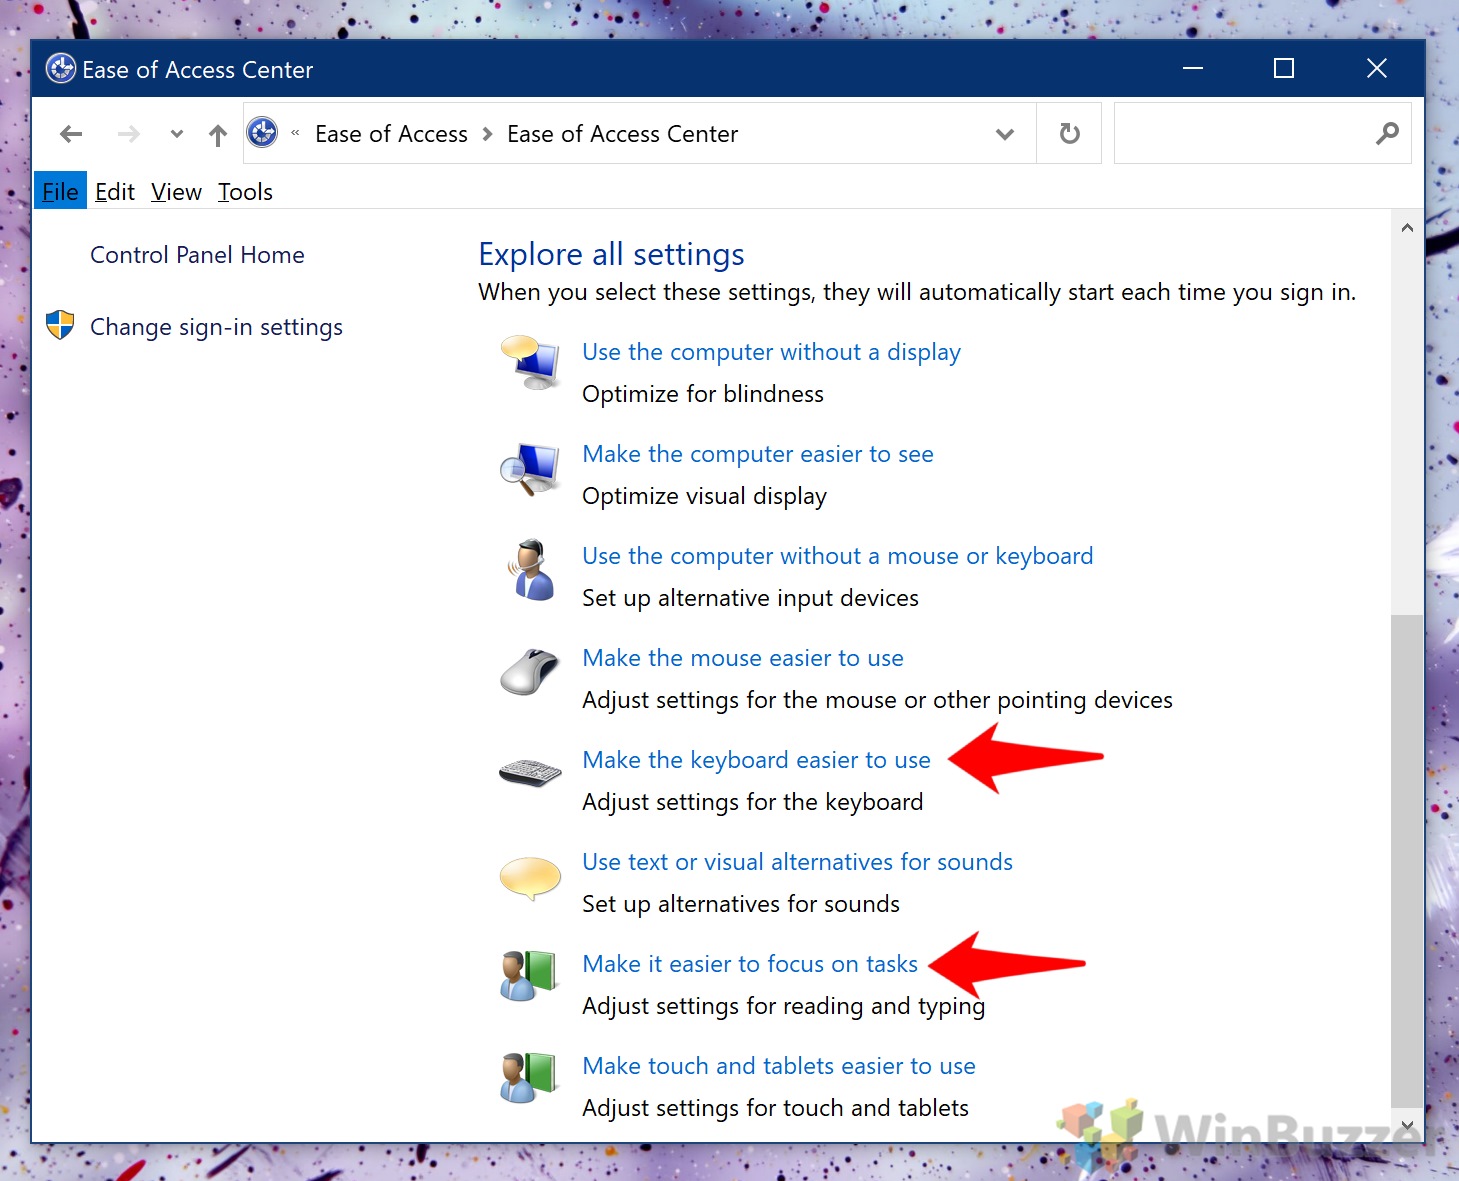
- Click ‘Make the keyboard easier to use’ or ‘Make it easier to focus on tasks’
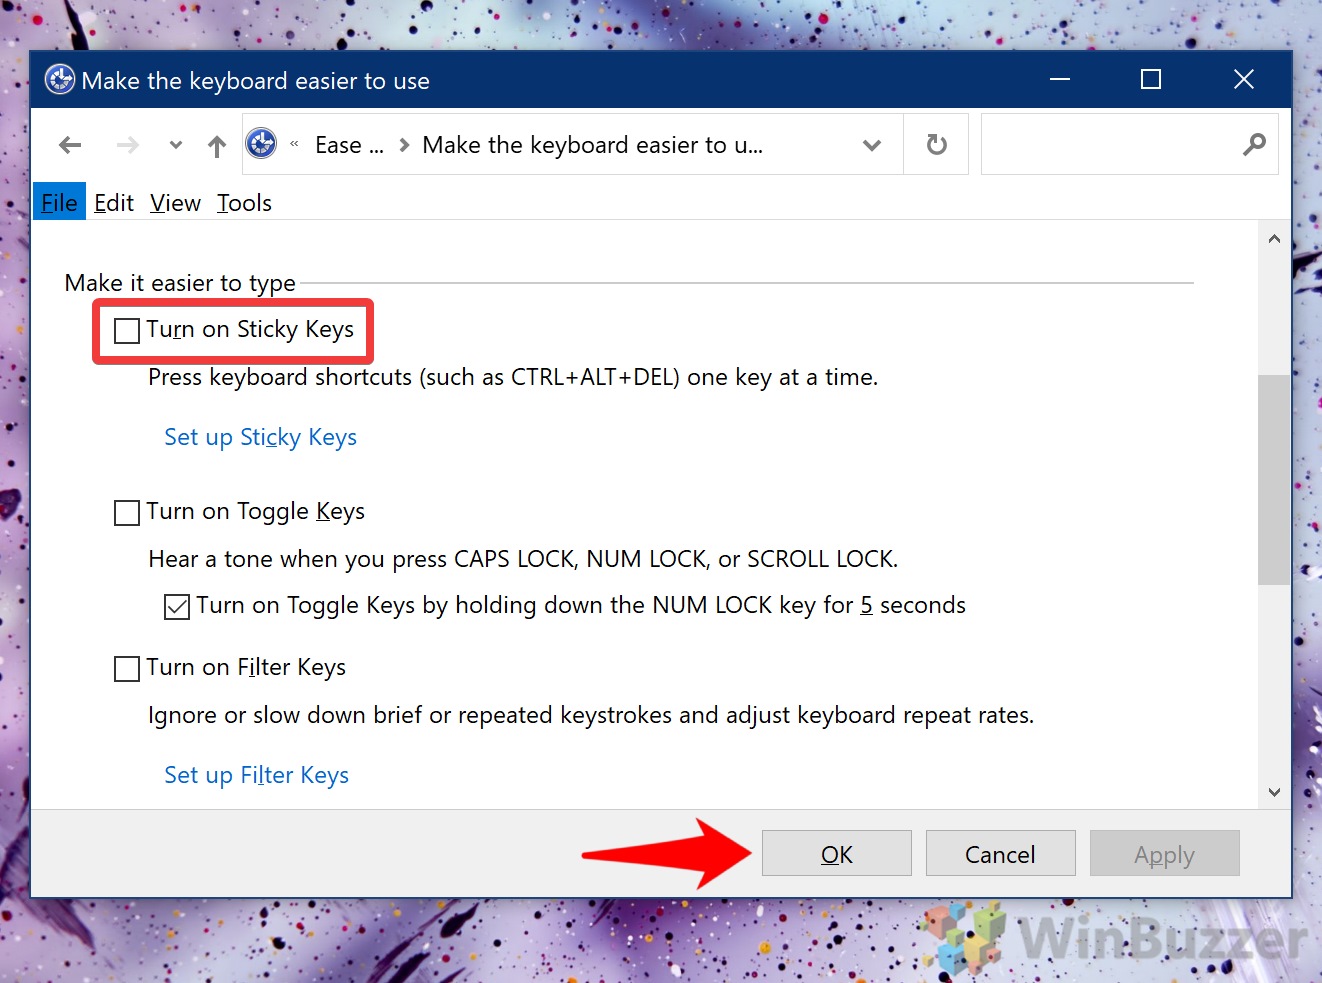
- Turn Sticky Keys on or off
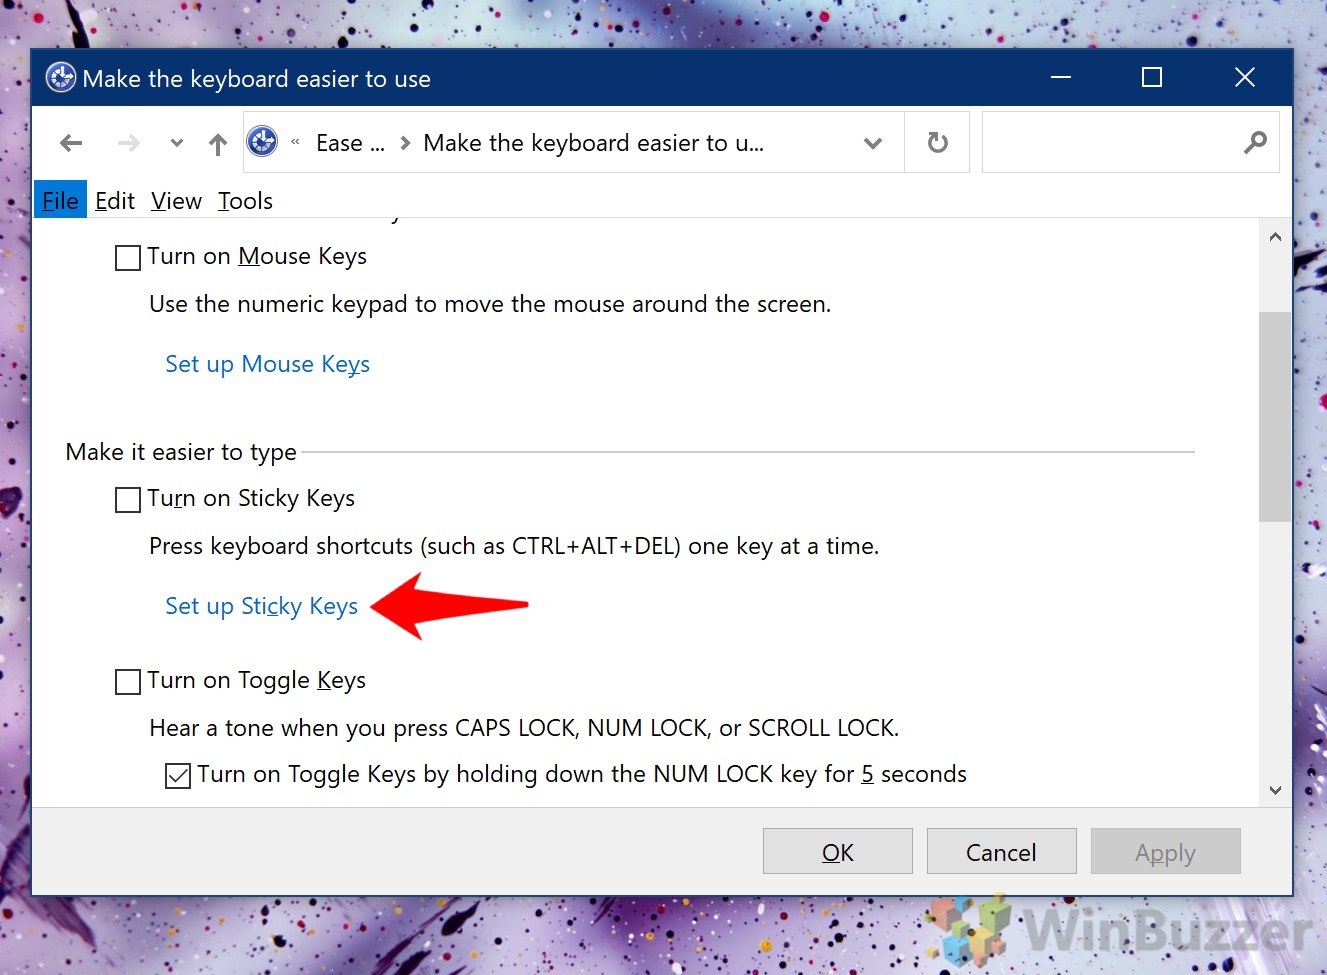
Scroll until you find the “Make it easier to type” section, then tick or untick “Turn on Sticky Keys” and press “OK”.
- Set up Sticky Keys
To change your Sticky Keys settings, click the “Set up Sticky Keys” button underneath the tick box.
- Adjust your Sticky Keys settings
Here you can change what enables or disables Sticky Keys, whether you’ll get a warning message, whether it makes a sound, and more. Click “OK” when you’re done.
That rounds off this Sticky Keys tutorial, but we have plenty of other guides to fix frustrating Windows 10 quirks. You can, for example, disable fast startup or turn off notifications.
Last Updated on February 14, 2022 7:46 pm CET by Markus Kasanmascheff


