

Across your computer’s lifetime, you will have installed a variety of different software that runs automatically, from screenshot applications to your anti-virus solution. At times, these can conflict with Windows services, drivers, and other applications you’ve installed, causing issues. To get your PC to a point where you can identify what’s causing the problem, you may need to perform a clean boot.
What is a clean boot in Windows 10?
A Windows 10 clean boot starts your operating system with a minimal amount of drivers and services. This helps you to troubleshoot without disruption and allows you to systematically enable services until you find the one that’s causing the issue.
In this tutorial we’re going to show you how to perform a clean boot in Windows 10 using msconfig. We’ll then quickly cover how you can identify your conflicting software to resolve the issue. Finally, we’ll show you how to get your system back to its normal state.
How to Clean Boot Windows 10
There’s no simple button inside of Windows 10 to perform a clean boot. You can access Safe Mode through your Advanced Startup options, but that’s not quite as useful as it disables Microsoft services as well. Instead, we’ll be manually disabling the third-party services and programs that run automatically with the System Configuration tool and Task Manager.
- Open System Configuration
Press Start and type “msconfig”. Click the top result, named “System Configuration”.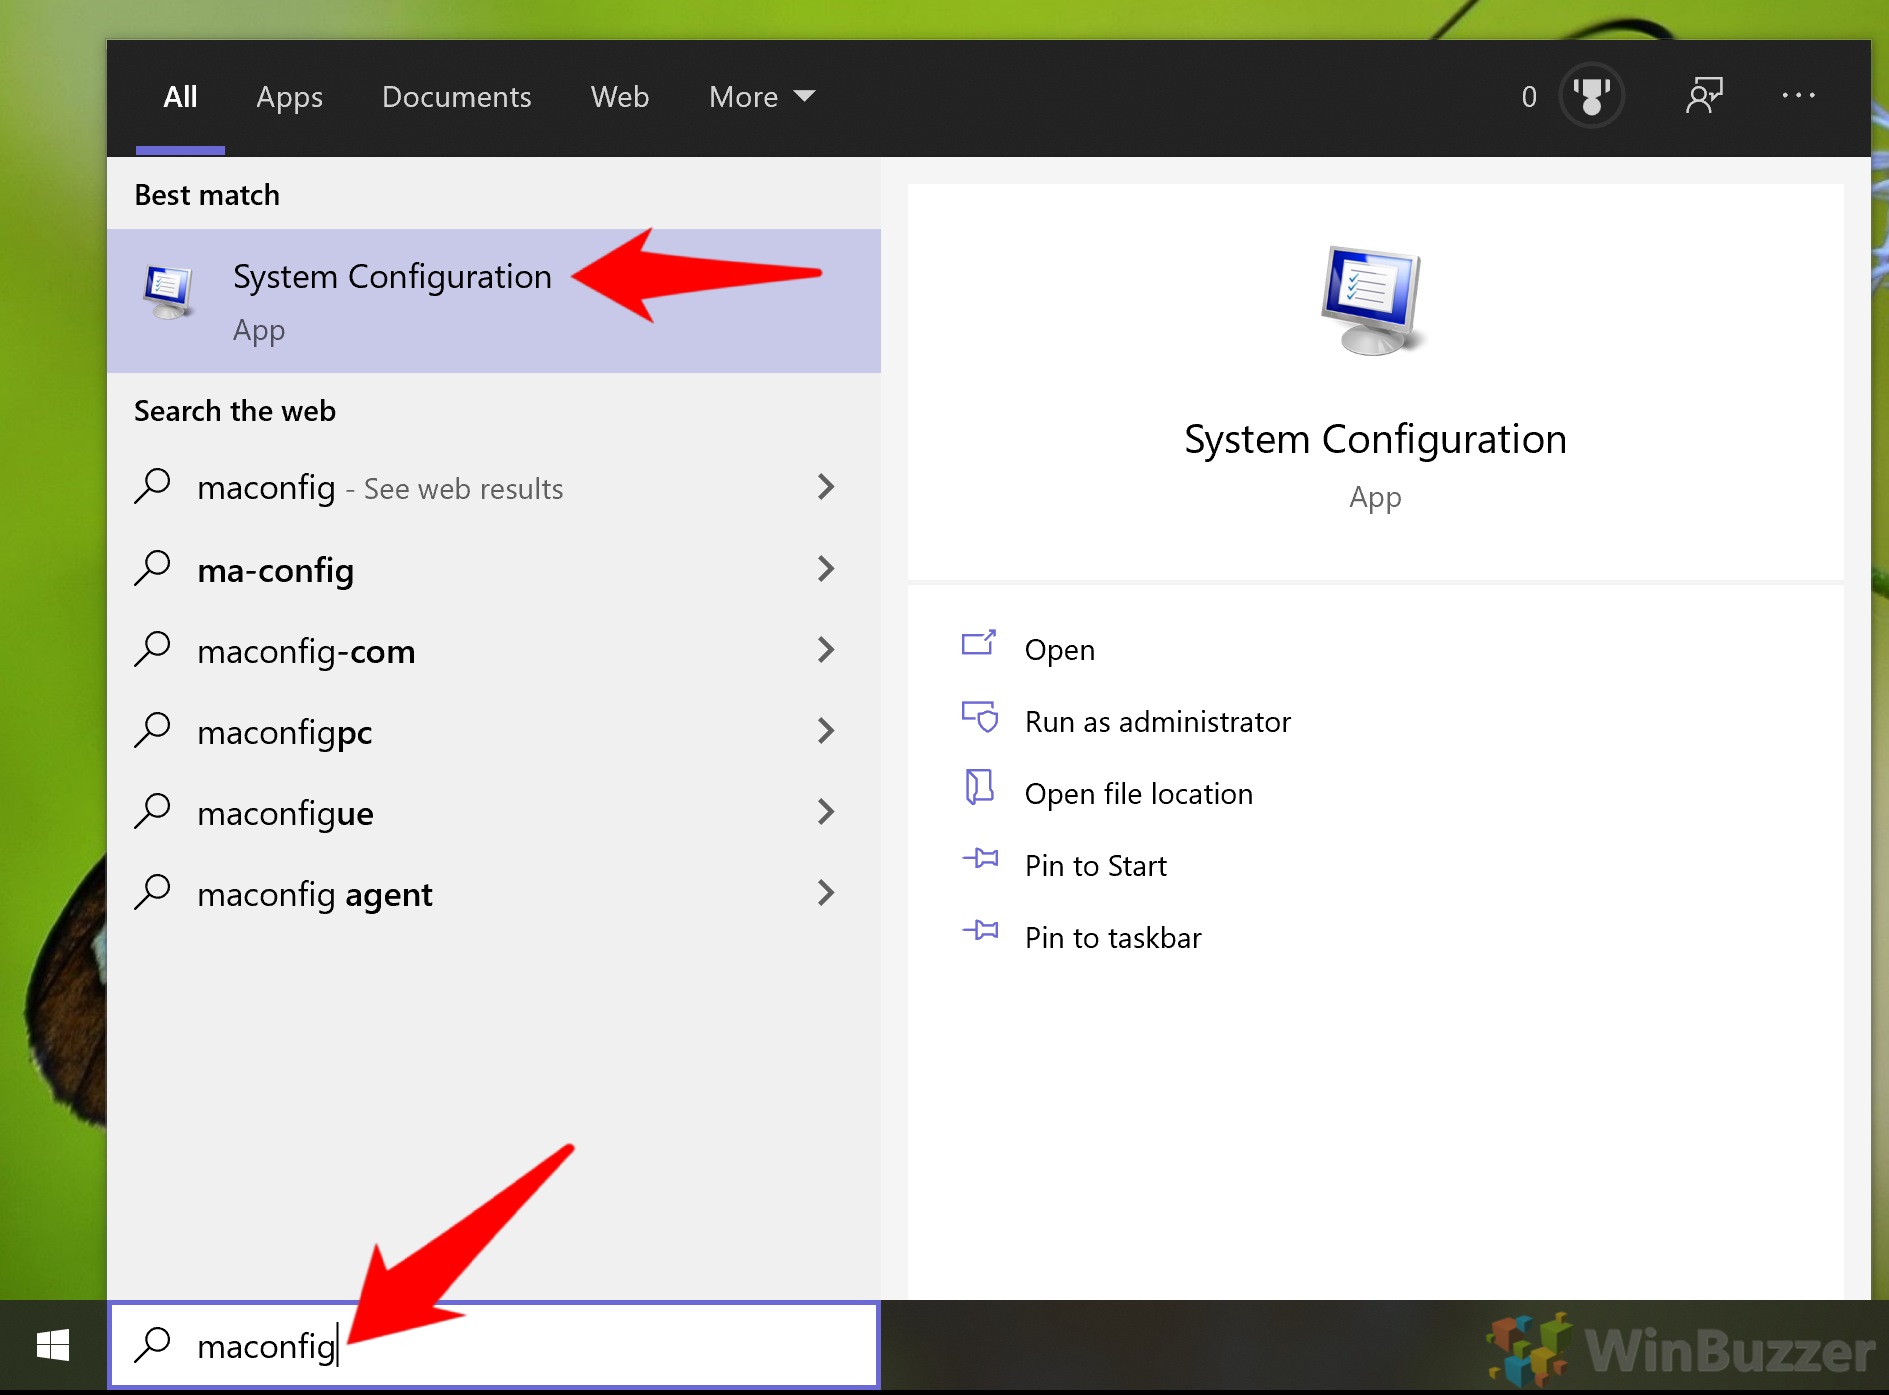
- Untick ‘Load startup items’
This is the first and crucial step for preparing your system for a clean startup. You’ll find the option at the button of the “General” tab. Tick “Selective startup” to make the box interactable.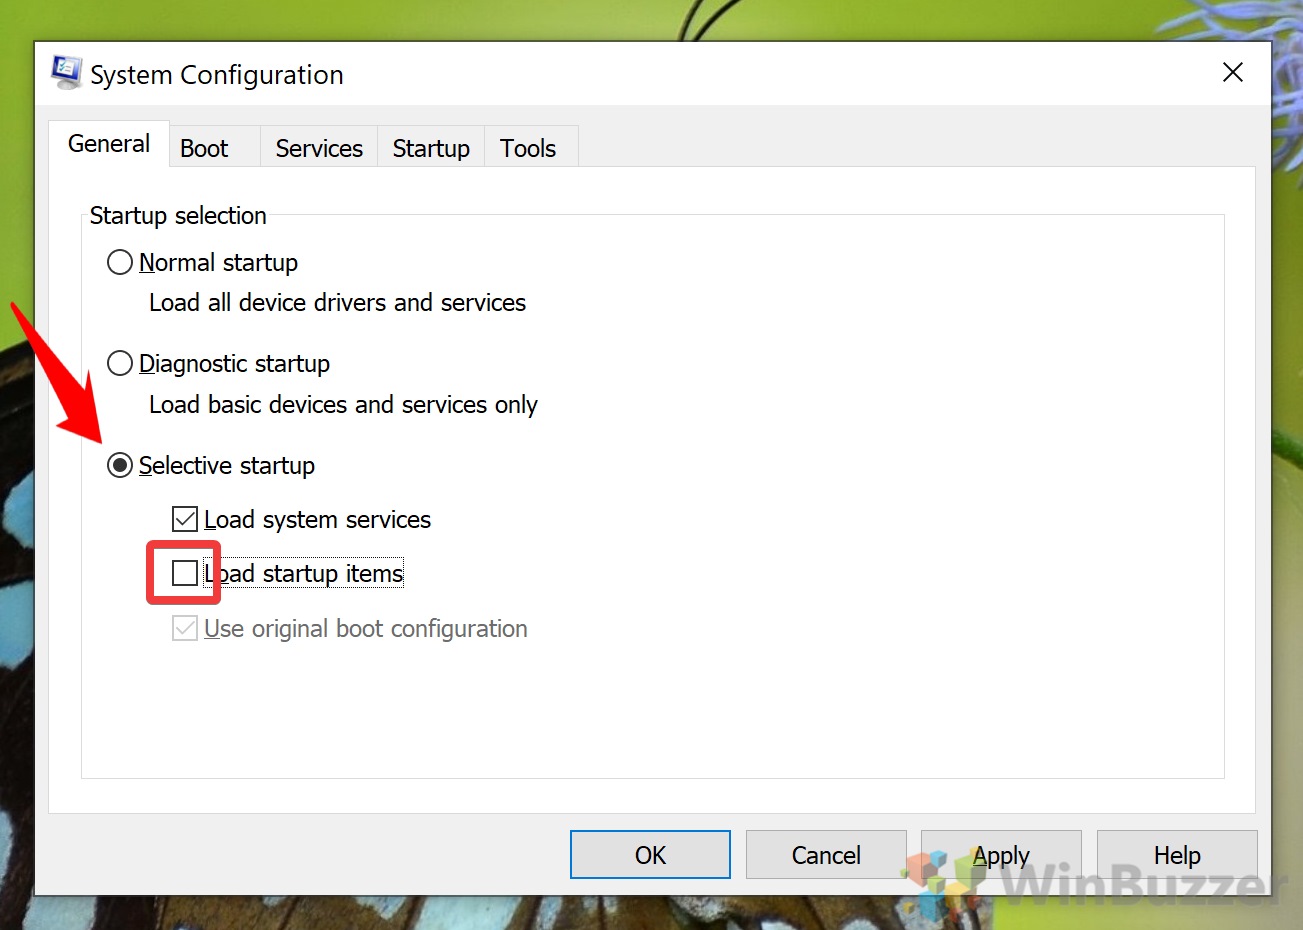
- Disable all non-Microsoft services
In the “Services” tab, tick “Hide all Microsoft services”, then press “Disable all”.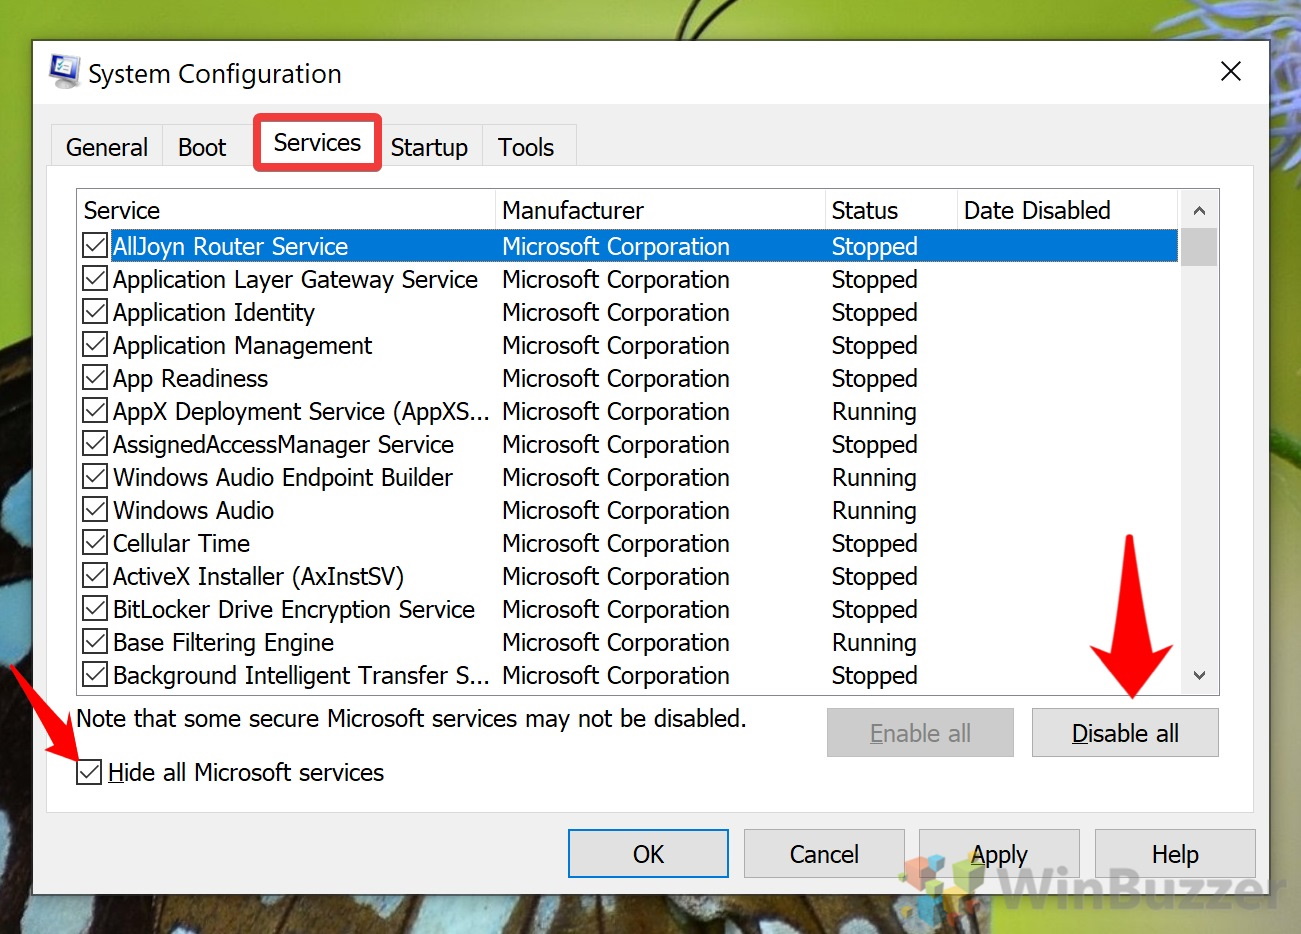
- Open Task Manager
To disable other startup items, we’ll need to use Task Manager. In the “Startup” tab of System Configuration, you’ll see a handy link to open it.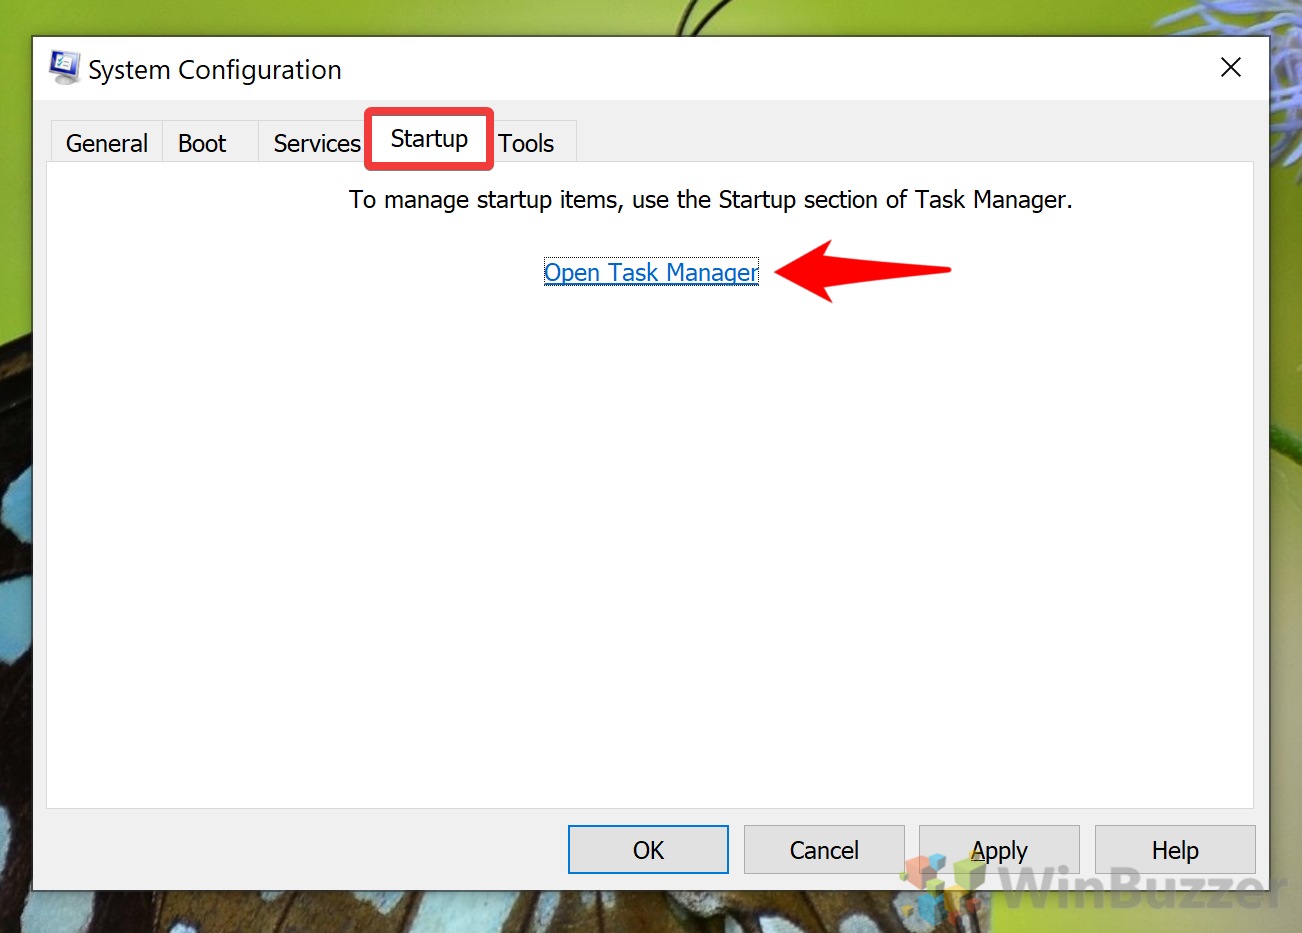
- Disable your startup programs
Click on each of your programs marked “Enabled” and press the “Disable” button in the bottom-right corner.
- Press ‘OK’ in System Configuration

- Restart your computer
System Configuration will surface a dialog telling you that you need to restart your PC to apply the changes. Save whatever you’re doing and press “Restart” once ready. Your next startup will be a Windows 10 clean boot.
How to Identify Software Conflicts in Clean Boot
After your computer has performed its clean startup, you can work towards resolving your issue. If the problem is an inability to install or uninstall a program, try to perform the action again now you’re in clean boot.
If you couldn’t start a program try running it again now. If it doesn’t work still, there’s a good chance it isn’t an application or service conflict. If it does work, move on to the steps below to find out which application or service it’s conflicting with:
- Open System Configuration
Press Start and type “msconfig”. Click the top result, named “System Configuration”.
- Open the ‘Services’ tab and enable the top half of your services
First, however, tick “Hide all Microsoft services”. You don’t need to turn on exactly half, but you do need to know which services you enabled. Once you’re done press “OK”.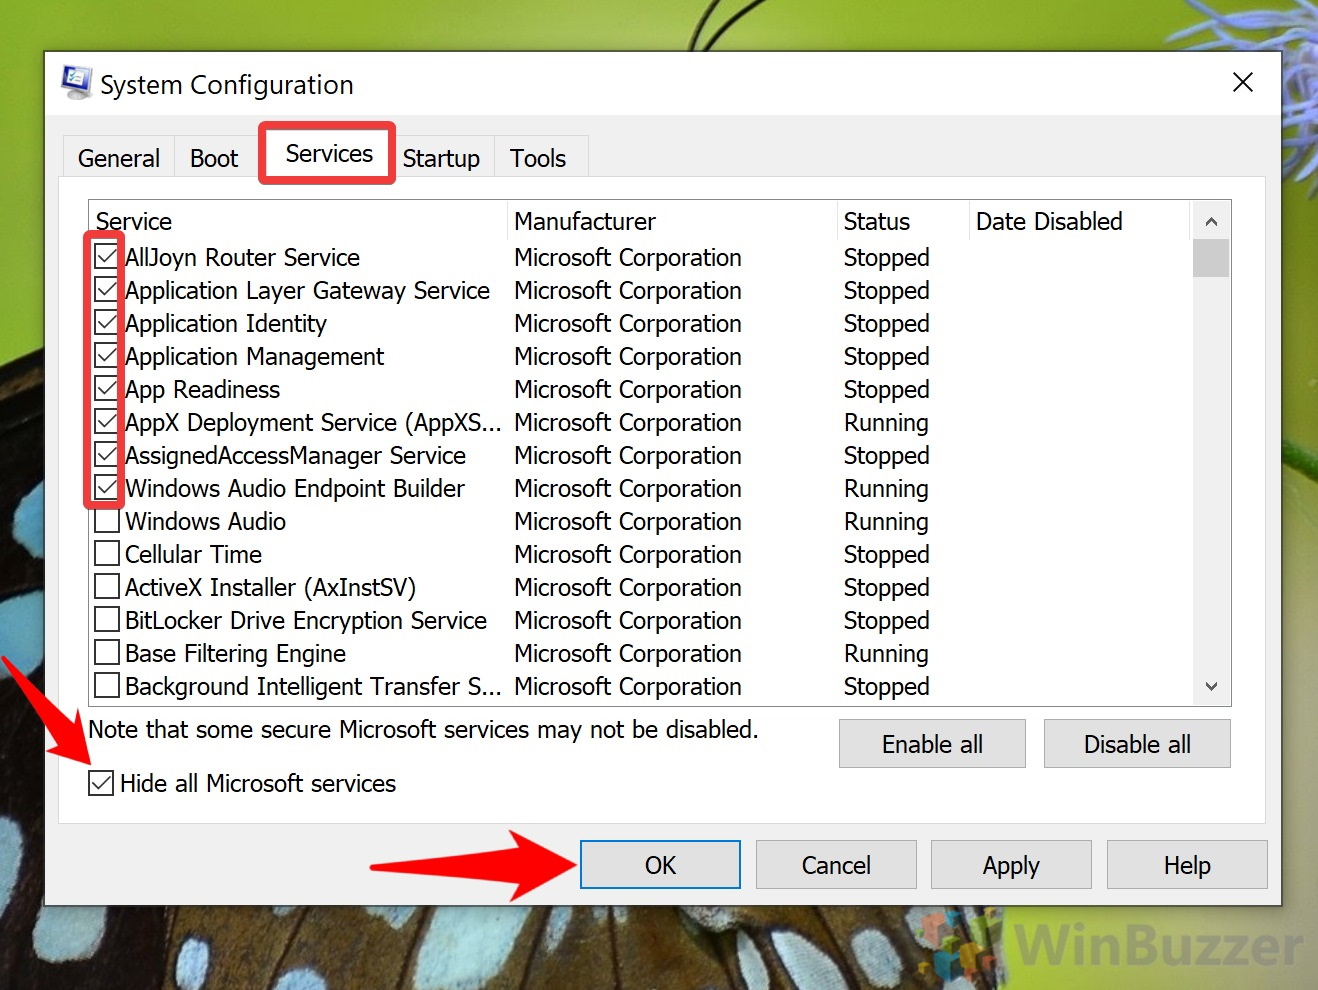
- Restart your PC and continue the troubleshooting process
If the issue doesn’t occur, go back to the previous step and repeat the process but for the bottom-half of your services.
Accept the prompt to restart your PC and see if you run into the issue again.
If it does occur, go back to the previous step but only tick half of the services from your original list. If this fixes the issue, instead try the bottom half of your original list. Repeat this process until the issue occurs with only one service still enabled. Uninstall or disable it and research the issue online.
If you’ve tested all of your services and the problem doesn’t occur, try it via the startup list in your Task Manager instead.
How to Return to Normal Functioning After a Clean Boot
Now that you have identified the problematic startup item, you’ll want to start up your system with your regular set of programs and services. Minus, of course, the problematic one you identified.
- Open System Configuration
Press Start and type “msconfig”. Click the top result, named “System Configuration”.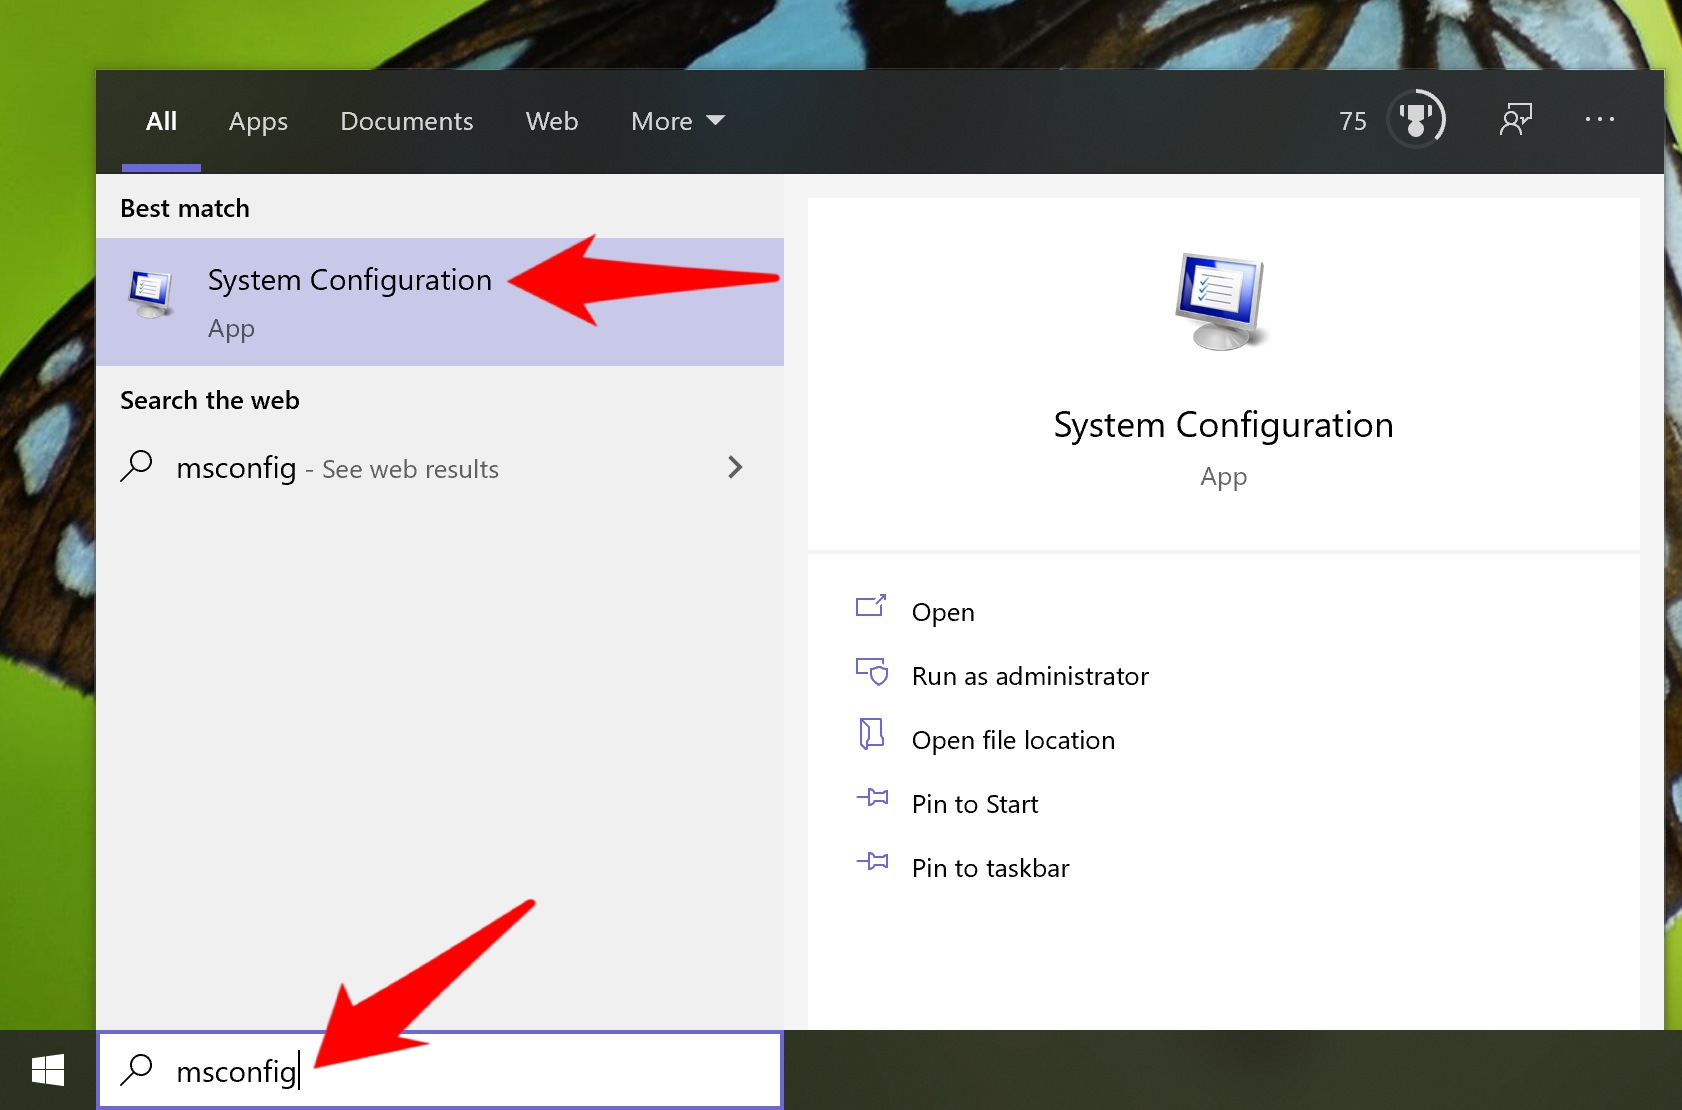
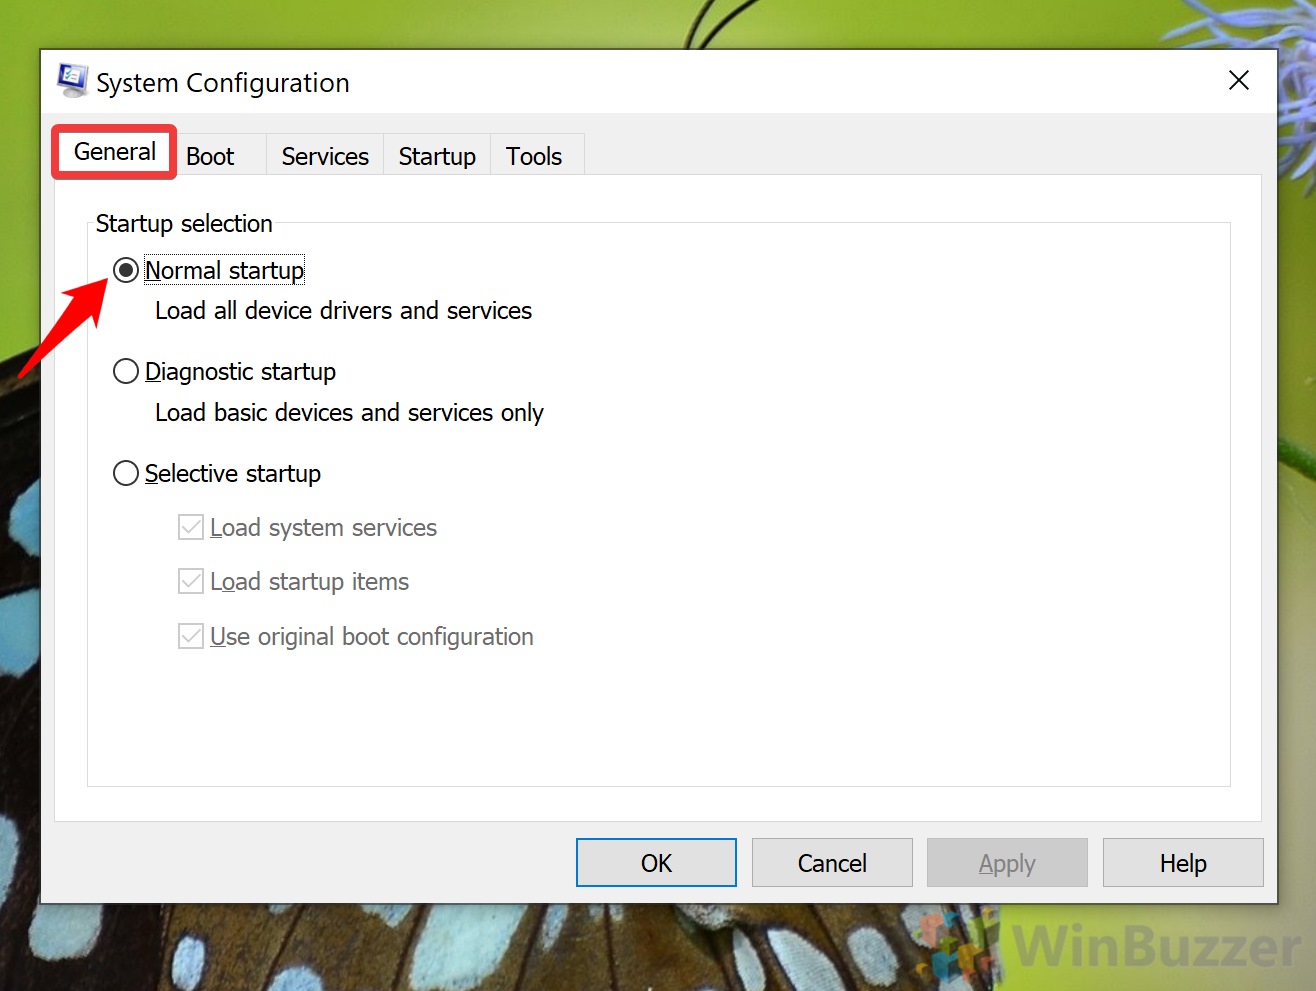
- Tick ‘Normal startup’ in the general tab
- Enable all of your services
In the “Services” tab, tick “Hide all Microsoft services” and then press “Enable all”. Make sure to untick your problematic service if you didn’t remove it in the previous step.
- Open Task Manager
Now switch to the “Startup” tab of System Configuration and press “Open Task Manager”.
- Re-enable your startup programs
In the “Startup” tab of Task Manager, click the programs you want to start with Windows and press “Enable”.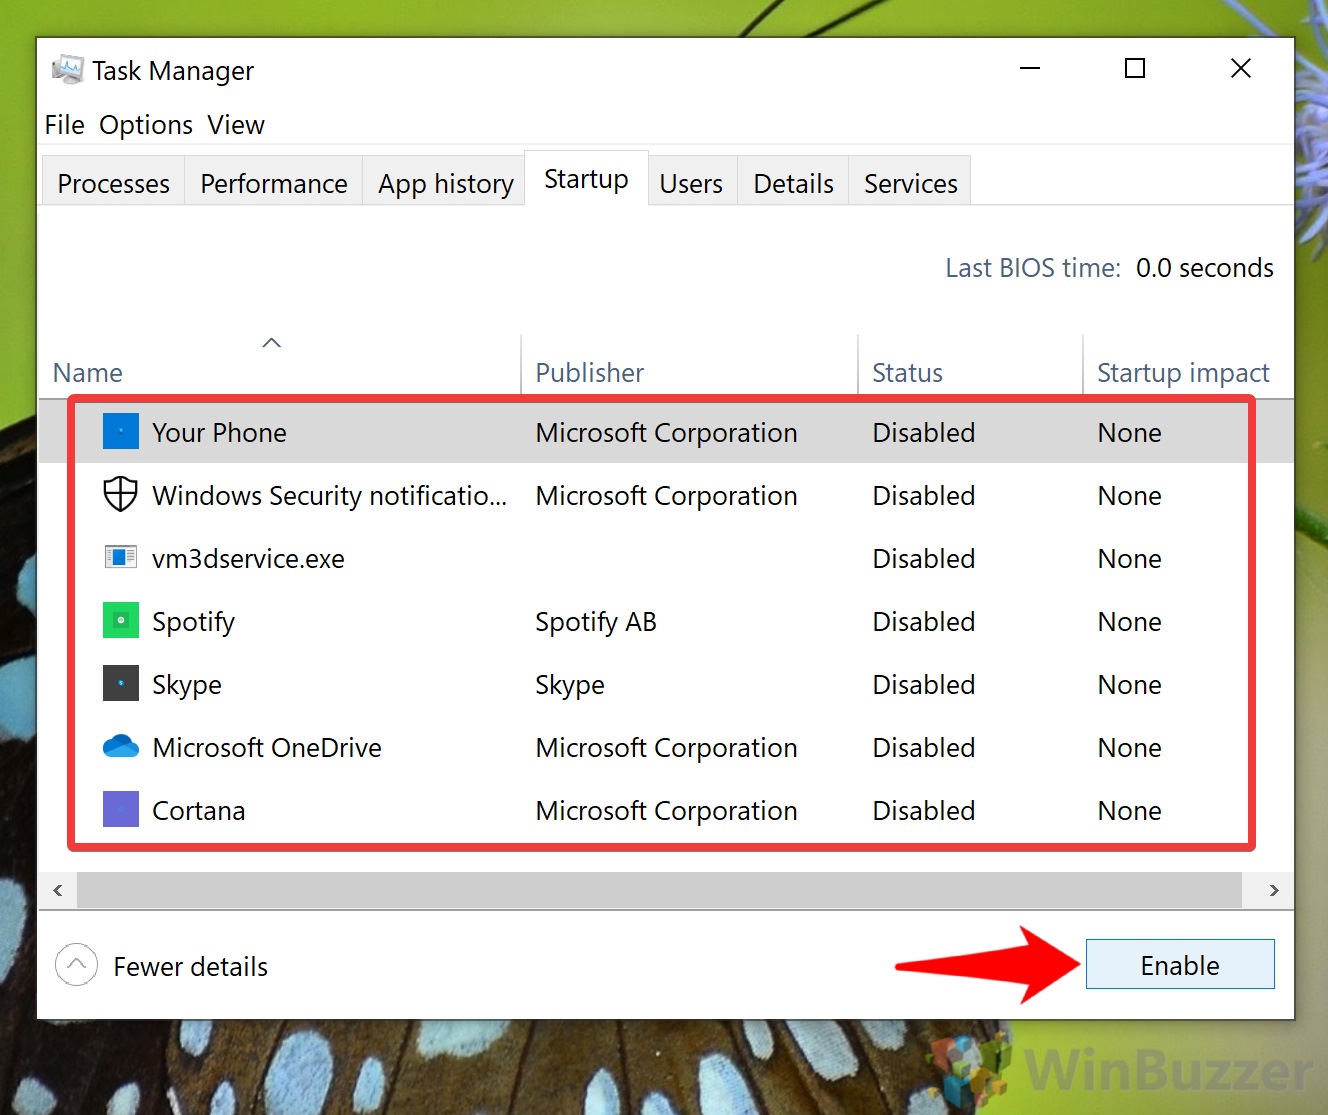
- Press ‘OK’ in System Configuration

- Agree to restart your PC
That said, if you can’t get into your main OS at all, consider using the Startup repair tool to fix it. You can also reset Windows 10 if you’re really stuck.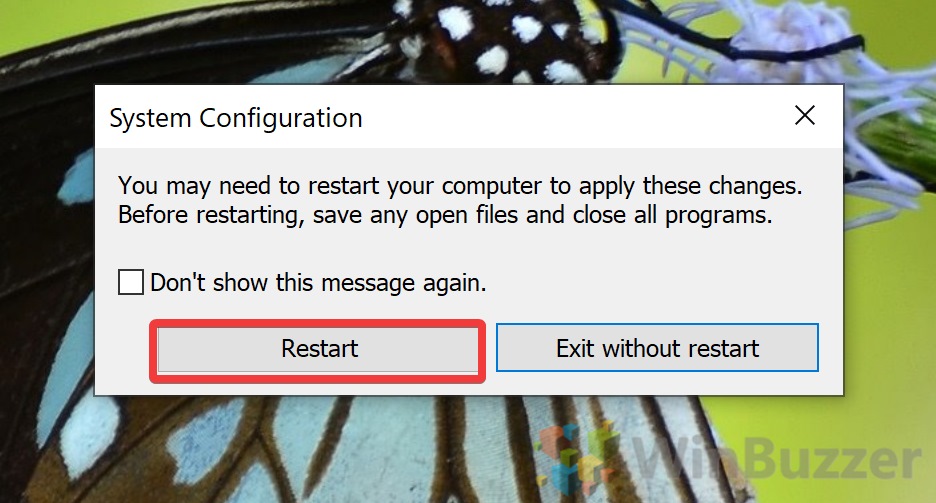
With your Windows 10 clean boot disabled, you should be able to use your system as you usually would. However, if you’re still having issues, leave a comment below and we’ll see if we can help you.


