

The Windows 10 cursor is more or less iconic at this point, but it’s not without its flaws. Quite often, it can be too small on high-resolution displays or fit poorly with your system theme. In such instances, you can change your cursor to a custom one or simply change your cursor size in Windows 10 settings.
This is important because while it often fades into the background, the cursor is a fundamental part of how we interact with most PCs. A cursor that’s too small will seriously hamper your productivity, and turning your resolution down isn’t a good solution either. While you can change the DPI scaling level of your entire PC, the ability to make your cursor bigger in Windows 10 is often all you need if you’re sitting in front of a monitor.
Today we’re going to start by showing you how to change your cursor size in Windows 10, then move onto the world of cursor customization so you can get it looking exactly as you wish. Let’s get started:
How to Change Cursor Size and Colour in Settings
Where possible, we like to start with the options in Microsoft’s modern settings app, and this is no different. The Windows 10 May 2019 Update (version 1903) added several new cursor customization options to Settings that allow you to quickly change cursor size and color.
- Open cursor settings
Press the Start button and type “Change mouse pointer color“. Click the first result,=.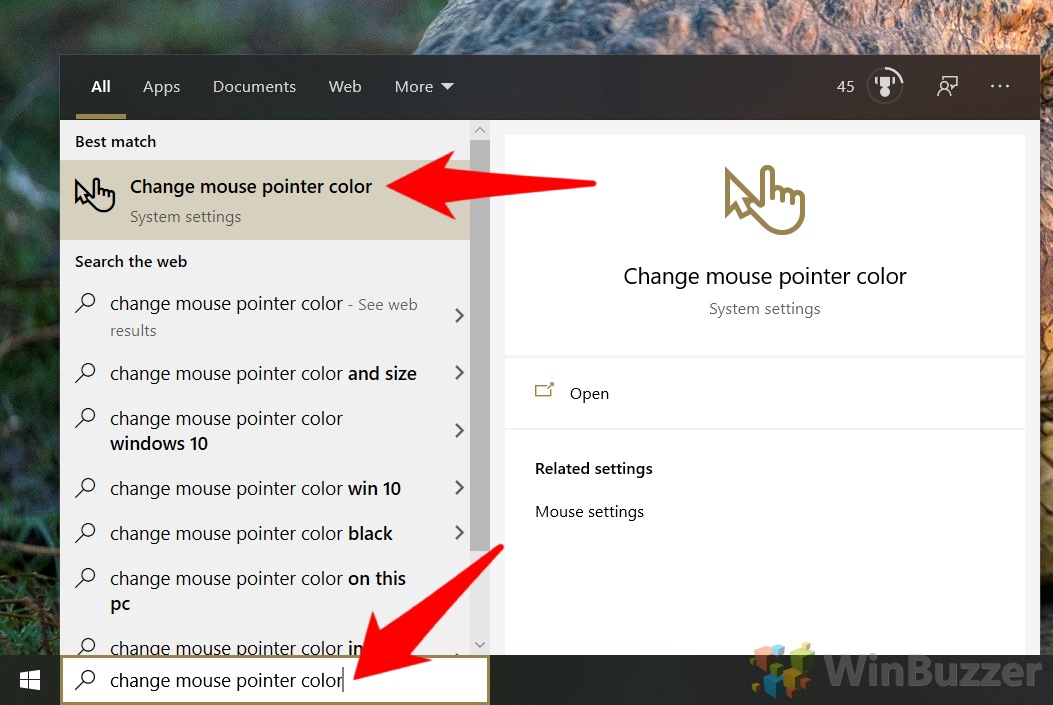
- Change your Windows 10 cursor settings
To change mouse pointer color, press the icon on the far-left under “Change pointer color” – the one with a color wheel. Then, select one of the suggested pointer colors or press the “+” icon next to “Pick a custom pointer color” to set your own.
Use the slider to make your cursor bigger via Windows 10 settings, or smaller if you’ve already increased it.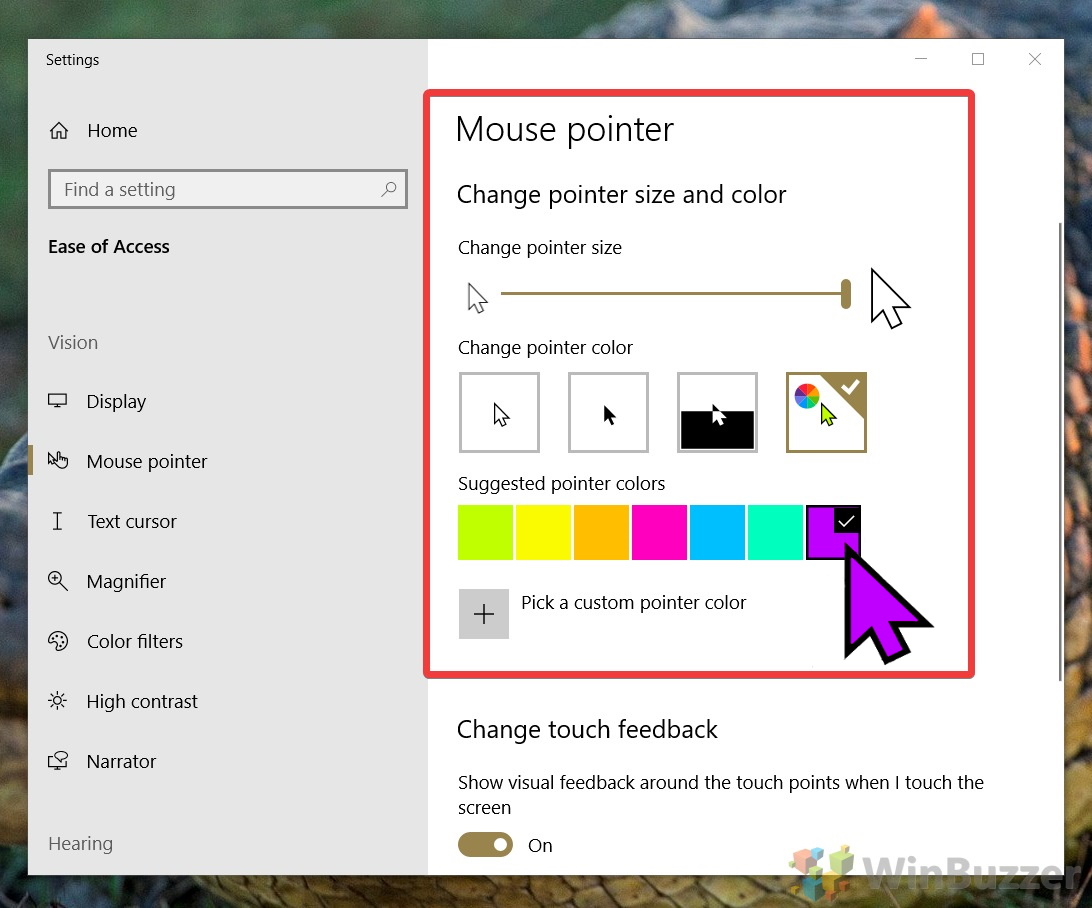
How to Change the Mouse Pointer Look in Control Panel
While the Windows Settings interface is intuitive, the Control Panel holds more in-depth options for your mouse pointer. With it, you can set a custom mouse cursor for different functions, such as when you’re selecting text or clicking a link.
- Open Control Panel
Press the Start or Search button and type “Control Panel”. Click the top result under “Best match”.
- Open mouse cursor settings
In your Control Panel, click the search bar in the top-right corner and search for “Mouse”. Under the Mouse heading in the main pane, click “Change how the mouse pointer looks“.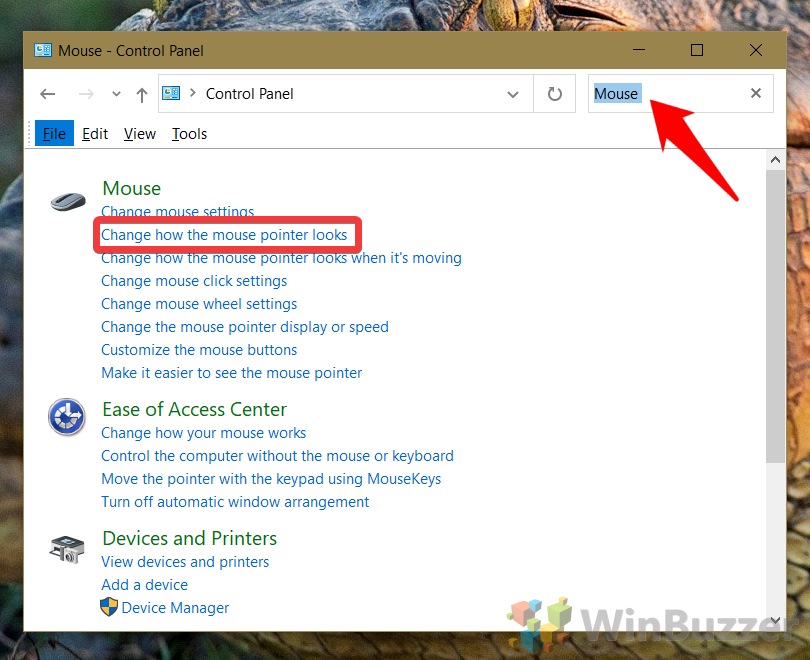
- Perform your cursor change
In the pane under “Customize”, click the mouse pointer icon you want to modify and use the cursor style changer under “Scheme” to change its theme. Once you’ve finished customizing, press “Apply” and “OK“.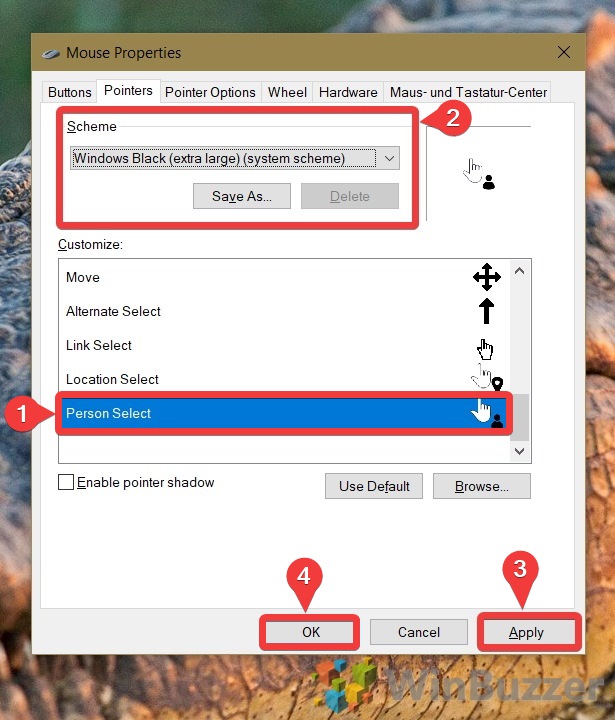
How to Get a Custom Cursor in Windows 10 via a Cursor Library
If you want to set an entirely custom cursor in Windows 10, your best bet is a cursor library. For the sake of this tutorial, we’ll be using a collection from rw-designer called the Open Cursor Library. We’ll then show you how to apply these cursor skins to your system. Each Windows 10 cursor download there is completely free of charge.
- Go to the Open Cursor Library
In your browser, visit the Open Cursor Library by clicking this link.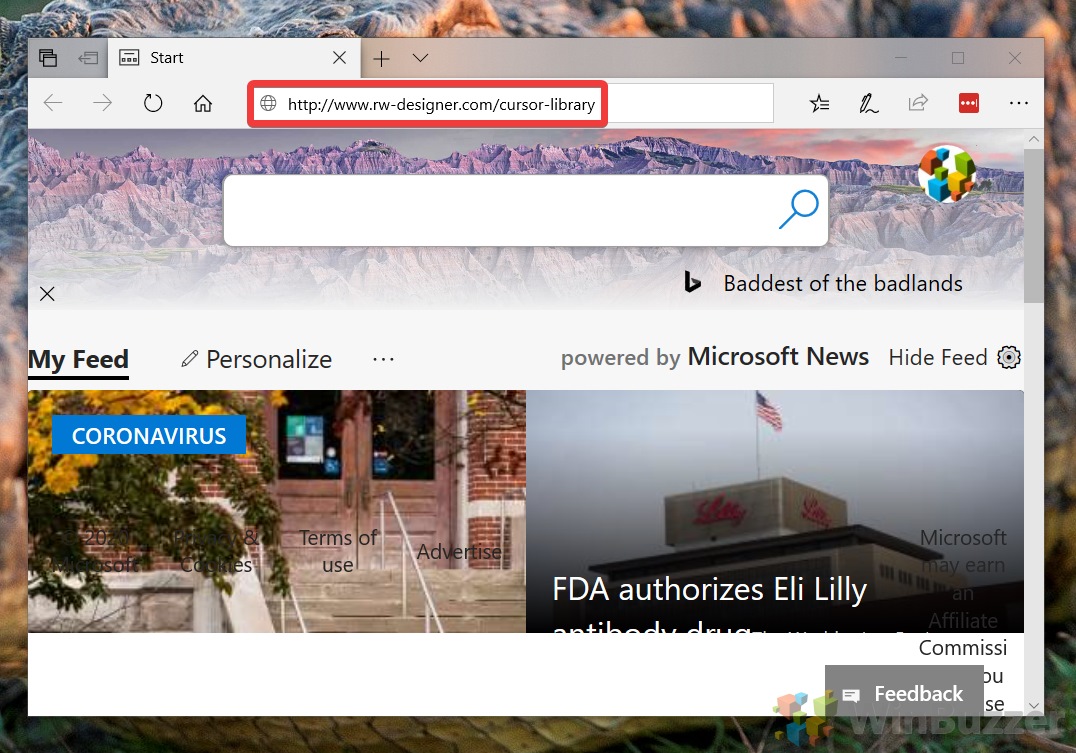
- Choose your desired cursor
Scroll through the collection of cursors for Windows 10 until you find one that suits you. We’re big fans of Pokémon here at Winbuzzer, so the Emerald cursors are a natural pick for us.
Click the cursor to open its download page.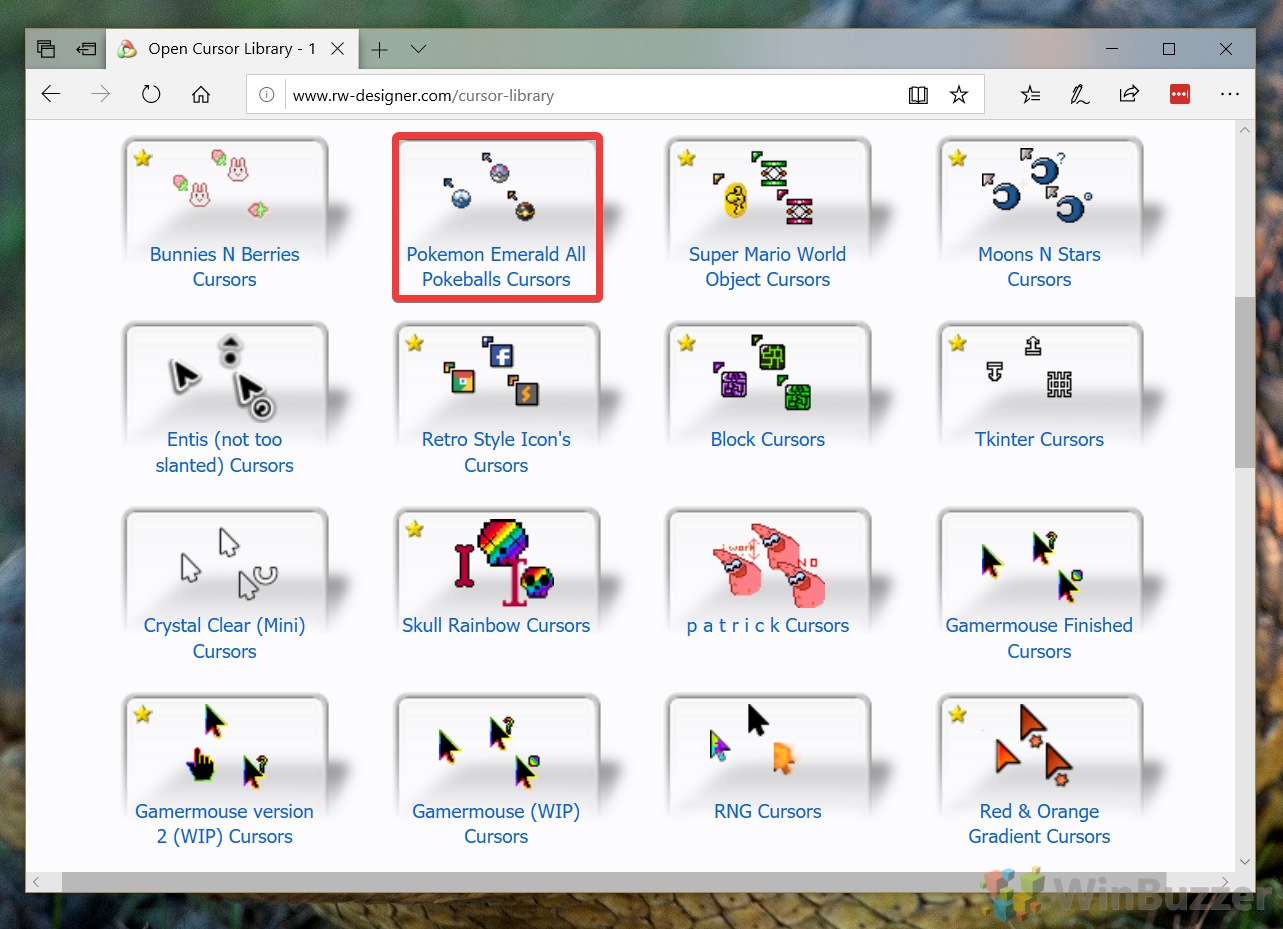
- Press the big blue ‘Download’ button
Save the resulting .zip file to your PC and extract it into its own folder for use in the next step.

- Press ‘Browse’ in your mouse properties window

- Navigate to your custom mouse cursor images
The cursors will likely be in your downloads folder, rather than the “cursor” folder that Windows will start you in.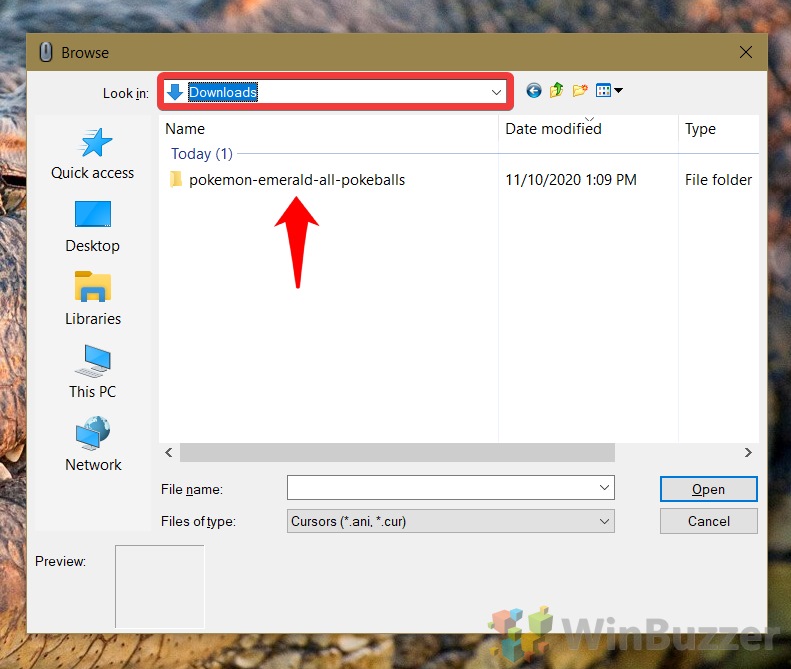
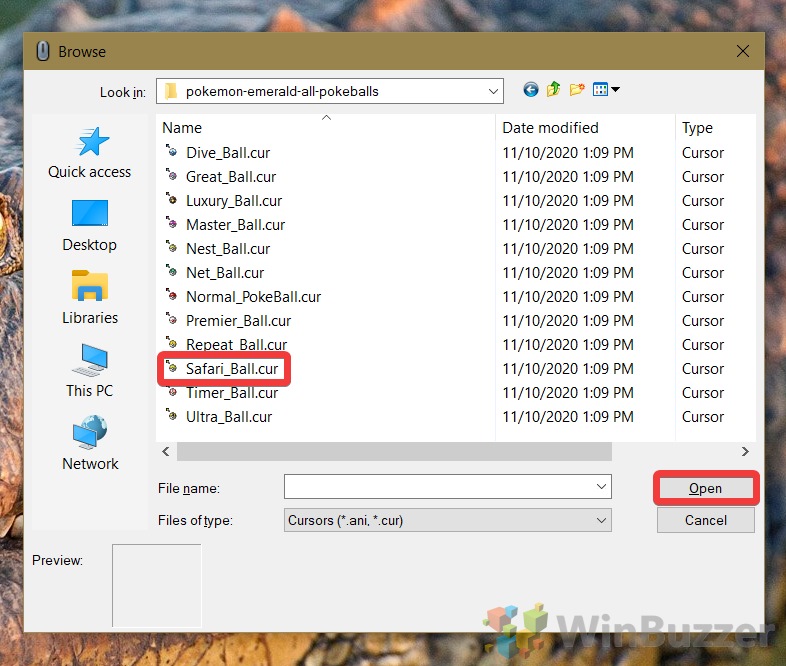
- Select the cursor style you like and press “Open”.
- Apply your custom mouse cursor change
Repeat the process for each cursor icon you’d like to change, then click “Apply”, followed by “OK”.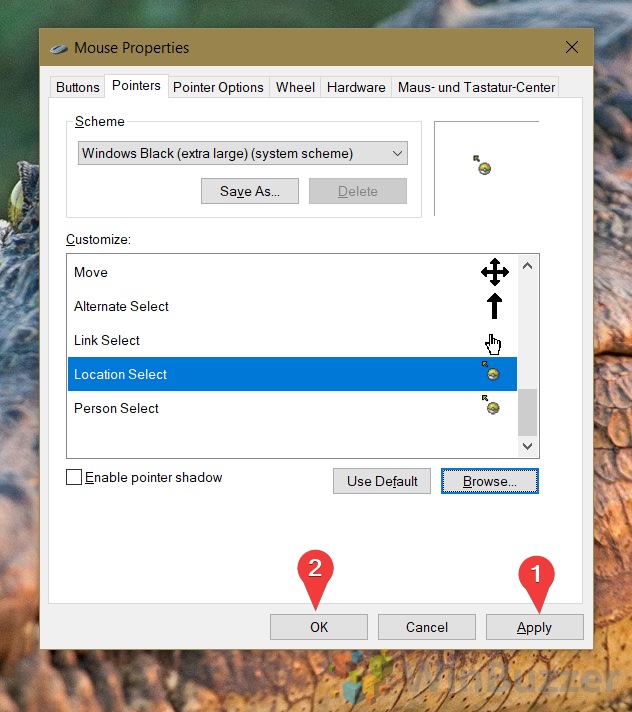
- How to change your cursor back
Select the icon you’d like to reset, then change the scheme back to one of your choice. Once you’re done, press “Apply“, followed by “OK”.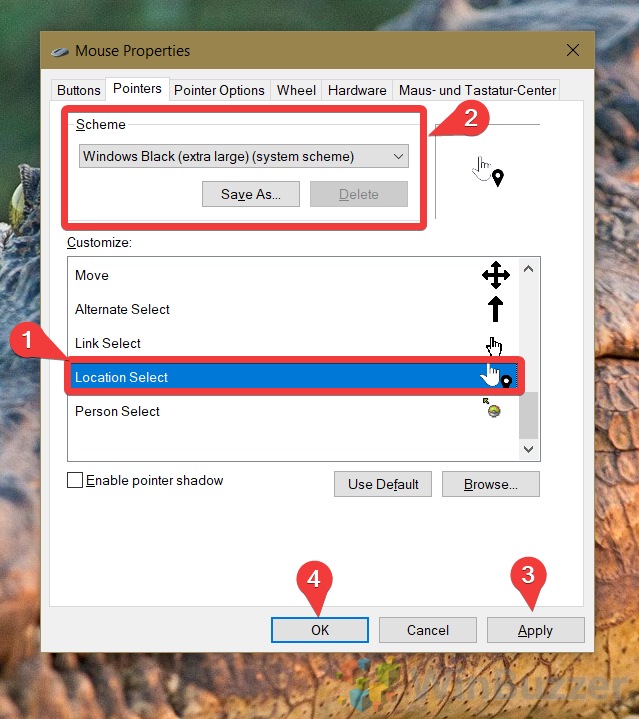
If you enjoyed this tutorial, you may want to look into other Windows 10 customizations, including how to set a screensaver or change the lock screen background.
Last Updated on February 26, 2021 10:00 am CET by Markus Kasanmascheff


