Starting with Windows 10 build 18298, Microsoft introduced a slightly controversial feature called reserved storage. Rather than trust the user to maintain enough space for Windows updates and other system tasks, it decided to automatically dedicate and close off space.
What is reserved storage and how does it work?
Windows 10 needs some space to be able to function correctly. Though it can do a lot with a small amount, being close to your storage limit is likely to impede performance and result in failed updates which could contain vital fixes or security mitigations. Reserved storage is a relatively new feature introduced to Windows to combat that scenario.
When reserves storage is enabled, Microsoft essentially lies to the user about the free space that’s available on the PC. Temporary and update files are stored in a hidden reserved storage section of the hard drive and don’t affect the available space you see in File Explorer.
As a result, those who want to free up space in Windows 10 or are looking for a more accurate picture may be wondering how to disable system reserved storage on Windows 10. Those who keep running into the “This computer does not have enough space for temporary files”, or “Your disk is almost full” errors may want to enable it. We’re going to show you how to do both today, as well as how to check your reserved storage size so you can make that decision.
How to Check Windows 10 Reserved Storage Size via Settings
Microsoft handily provides an overview of your reserved storage disk use through its storage settings menu.
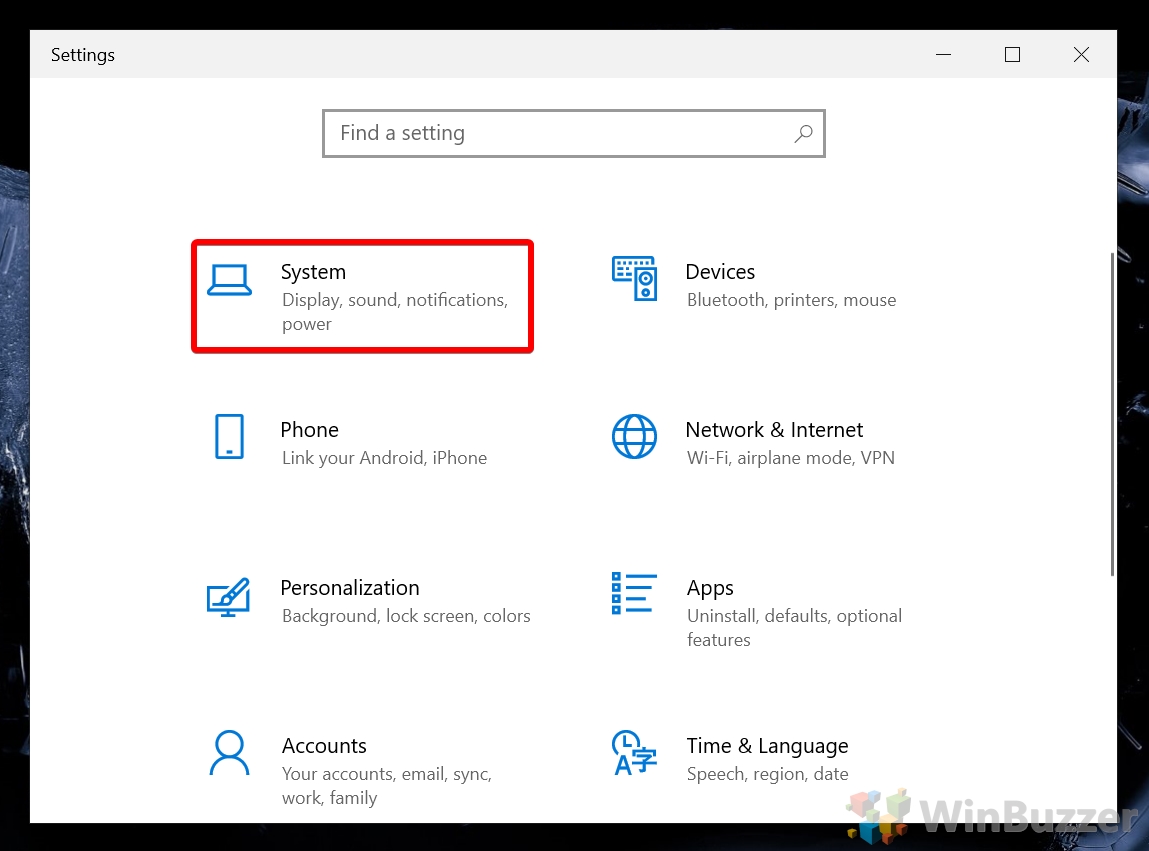
- Open system settings
Press “Windows + I” to open the settings menu, then click “System”.
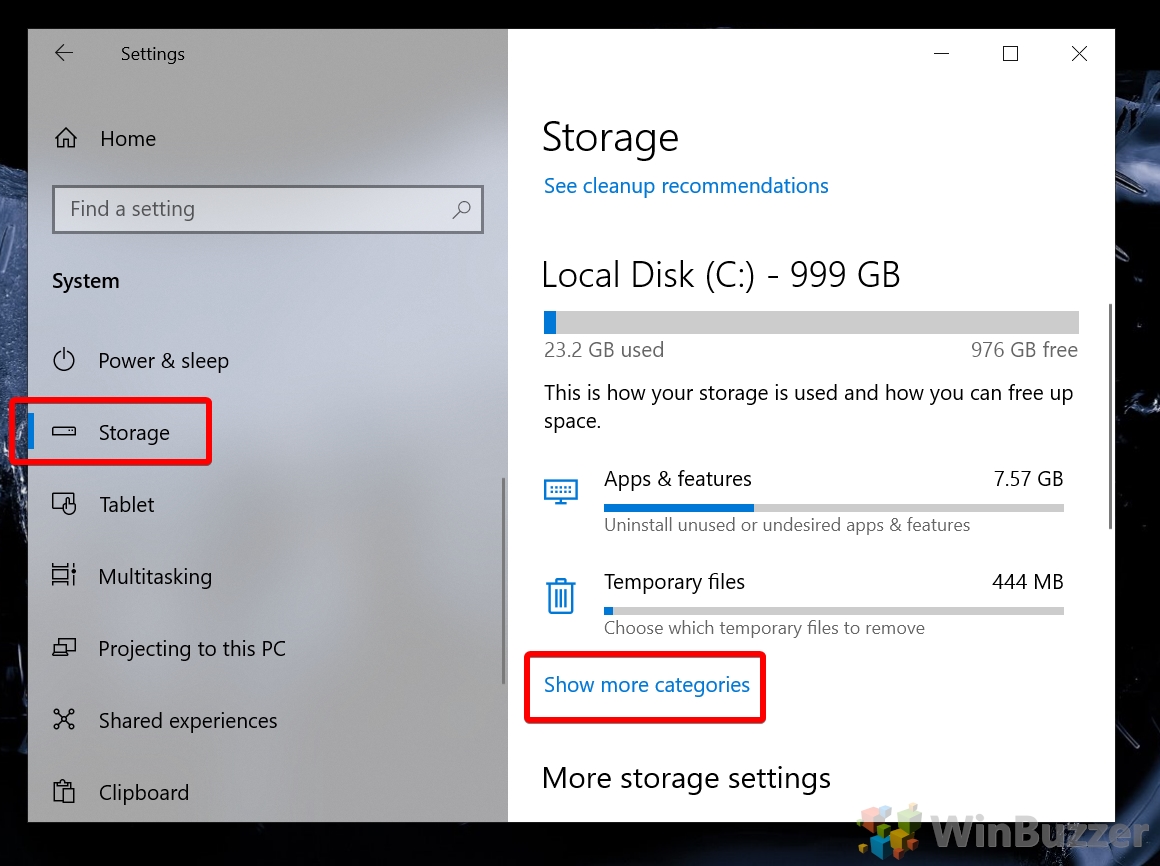
- Click “Storage”, then “Show more categories”
If your reserve Windows 10 information is not showing, you can continue to the next steps to check via command line.
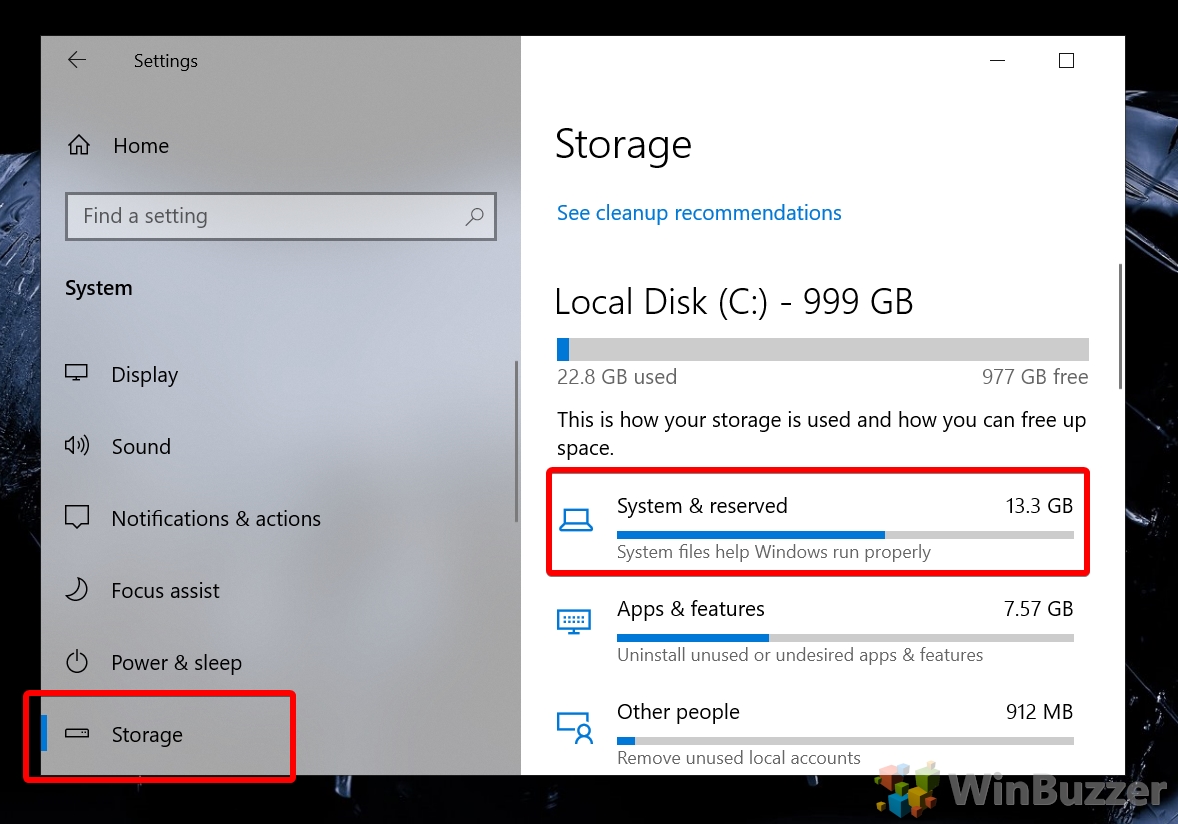
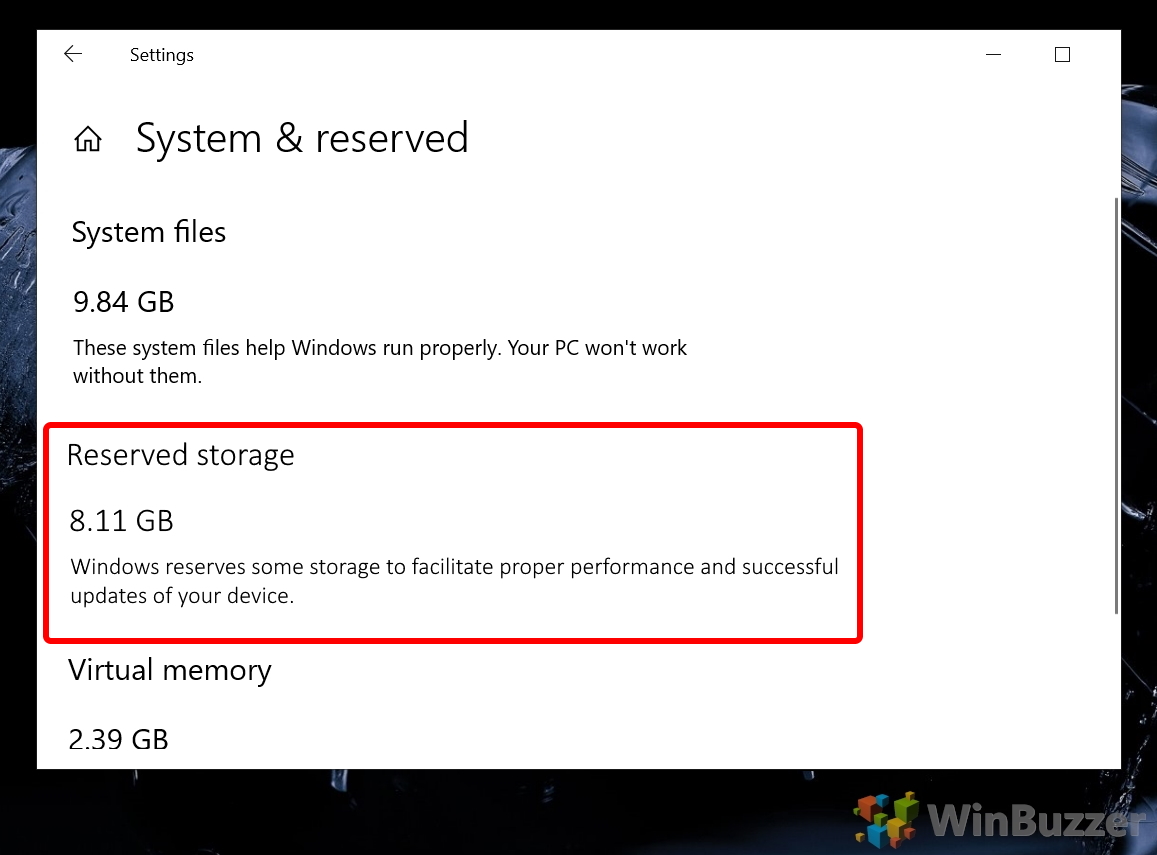
- Click “System & reserved”
Microsoft will show you how much space is reserved for your Windows 10 and reserved storage, but now how much is just used for reserved until you click the heading.
- Check system reserved storage space in Windows 10

How to Check Reserved Storage Size in Windows 10 via Command Prompt
For a quicker, yet less user-friendly route, you can check how much space system reserved storage is using via command prompt.
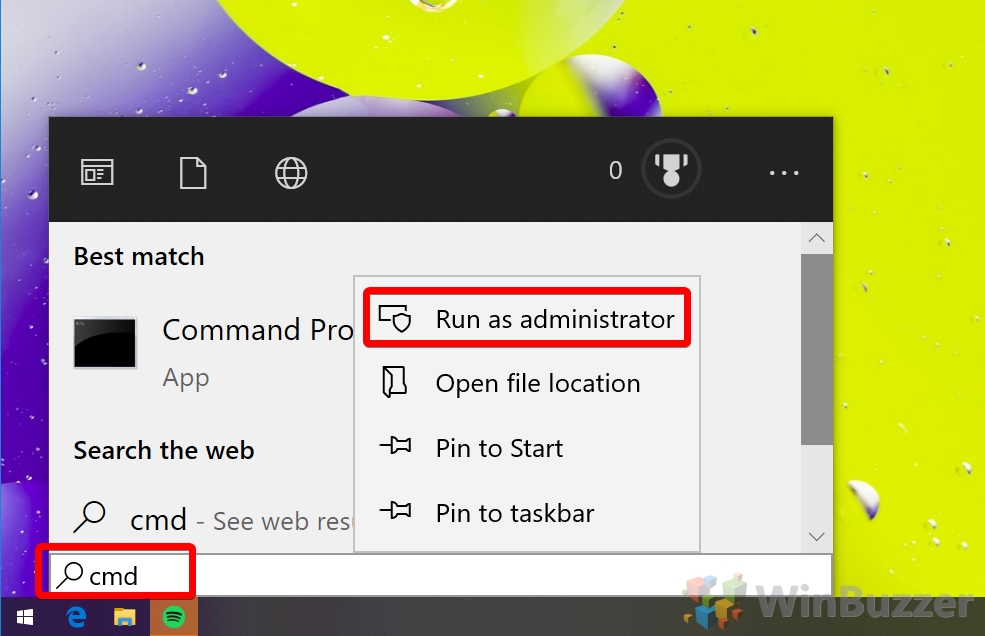
- Open an elevated Command Prompt
Press the “Windows” key and type “cmd”, then select “Run as administrator” in the side menu.
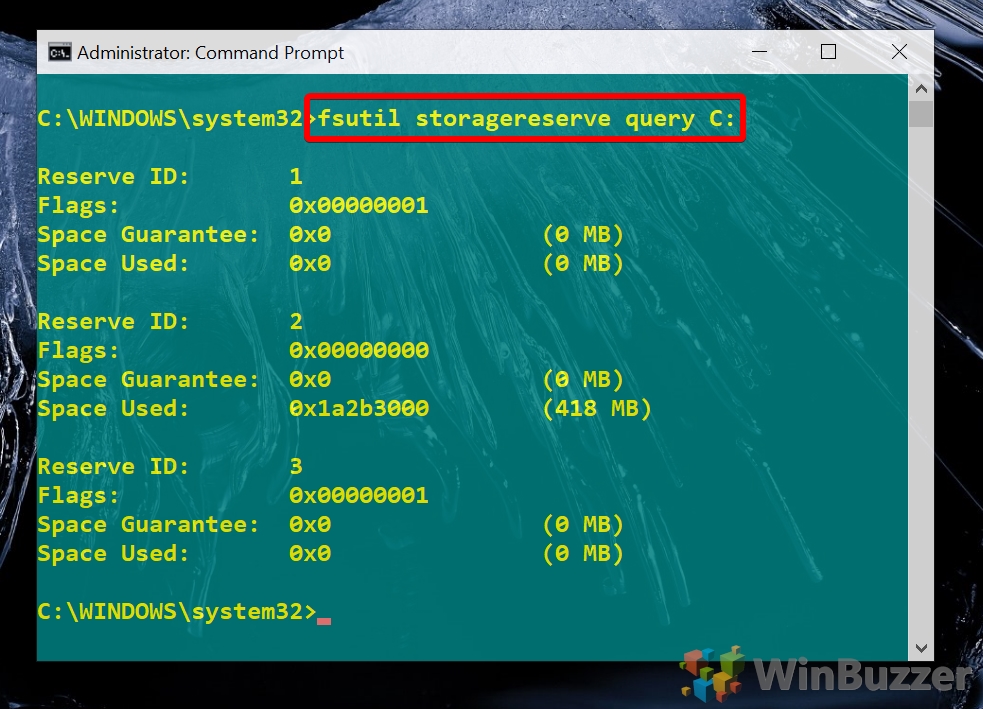
- Check your reversed storage size
In command prompt, type the following and press “Enter”:fsutil storagereserve query C:
Windows 10 should give you three outputs, which will show all of the reserved storage on your C: drive.
How to Check and Enable / Disable Windows 10 Reserved Storage via CMD
Alternatively, you can check, enable or disable reserved storage size via DISM in command prompt.
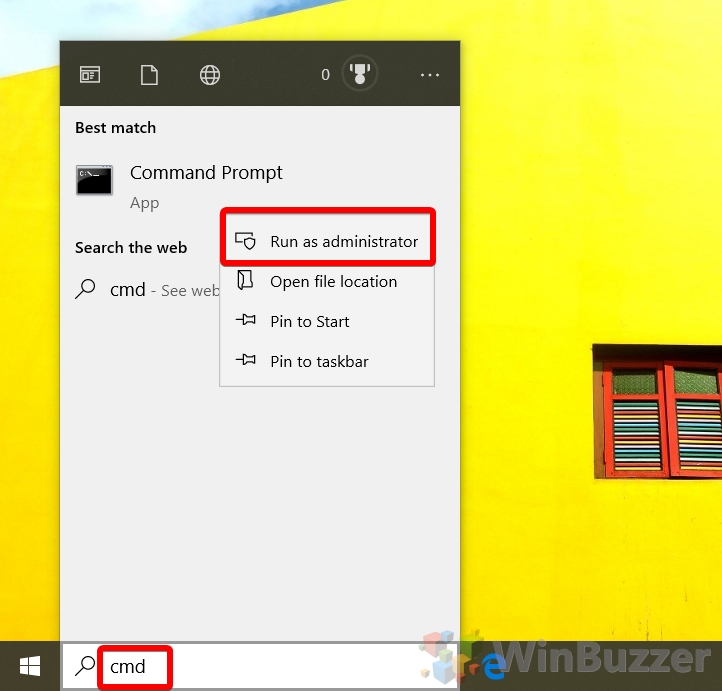
- Open Command Prompt as an Administrator
Press “Start” and type “cmd”, then right-click “Command Prompt” and select “Run as administrator”.
- Check is reserved storage is turned on
First, make sure reserved storage is enabled by typing the following command and pressing “Enter”:DISM /Online /Get-ReservedStorageState
- Enable or Disable Reserved Storage in Windows 10
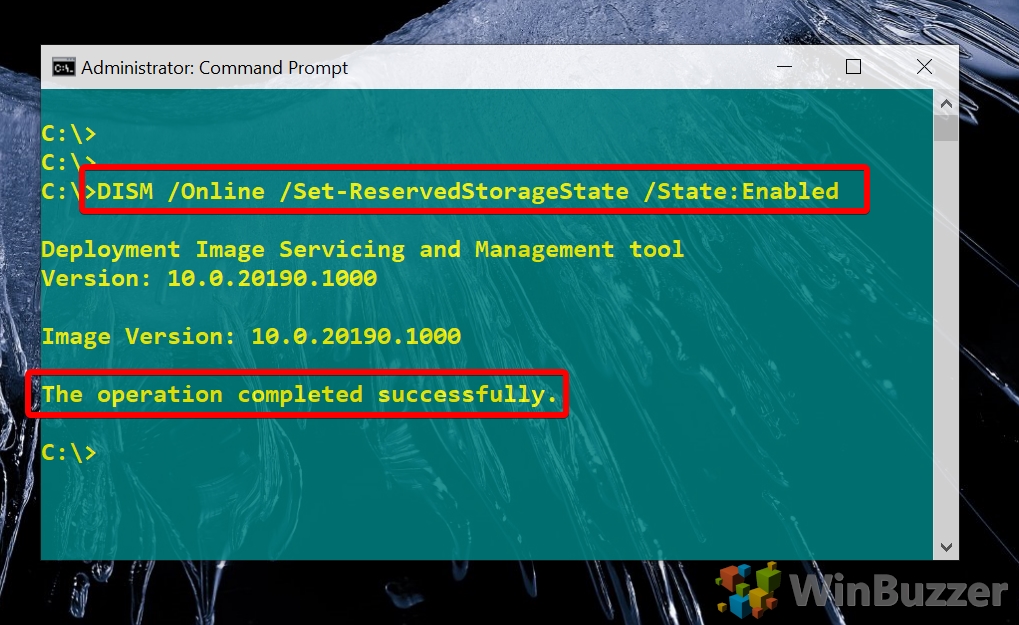
To enable reserved storage, type:DISM /Online /Set-ReservedStorageState /State:Enabled
Or, to disable it, enter:DISM /Online /Set-ReservedStorageState /State:Disabled
How to Check Windows 10 Reserved Storage State via PowerShell
If you prefer PowerShell over Command Prompt, you can also check the system reserved storage status there:
- Open PowerShell as admin
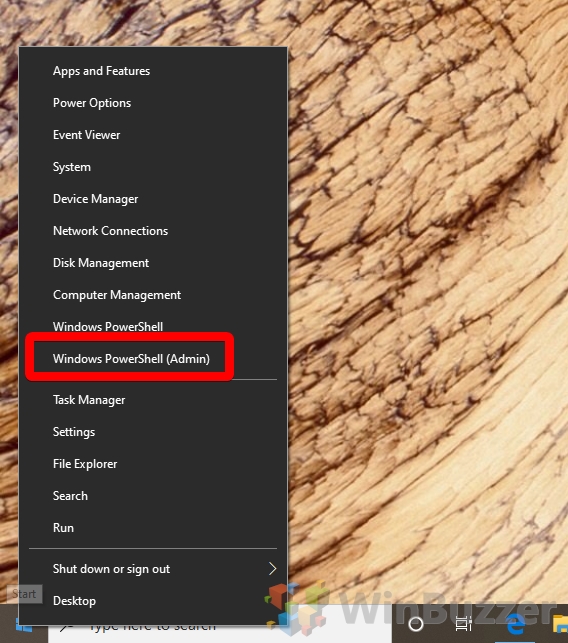
Press “Windows + X” to open the Start flyout menu and click “Windows PowerShell (Admin)”.
- Check your system reserved storage status
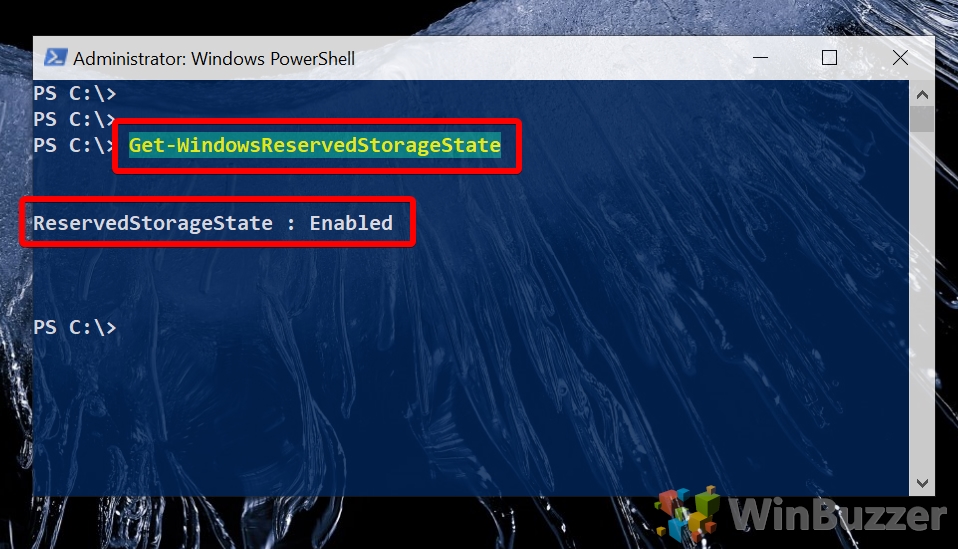
In PowerShell, enter the following command:Get-WindowsReservedStorageState
It will return “ReservedStorageState : Enabled” if it’s enabled for your device.
Enable or Disable Windows 10 Reserved Storage via Registry Hack
If you don’t want to run any commands, you can enable or disable Windows 10 reserved storage via a registry file, which you can download here.
- Download and Extract the files
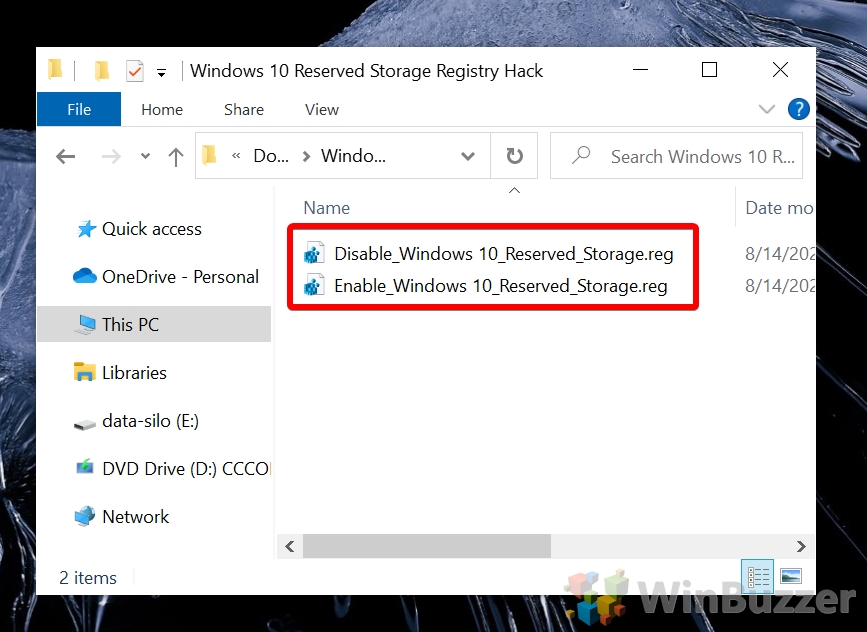
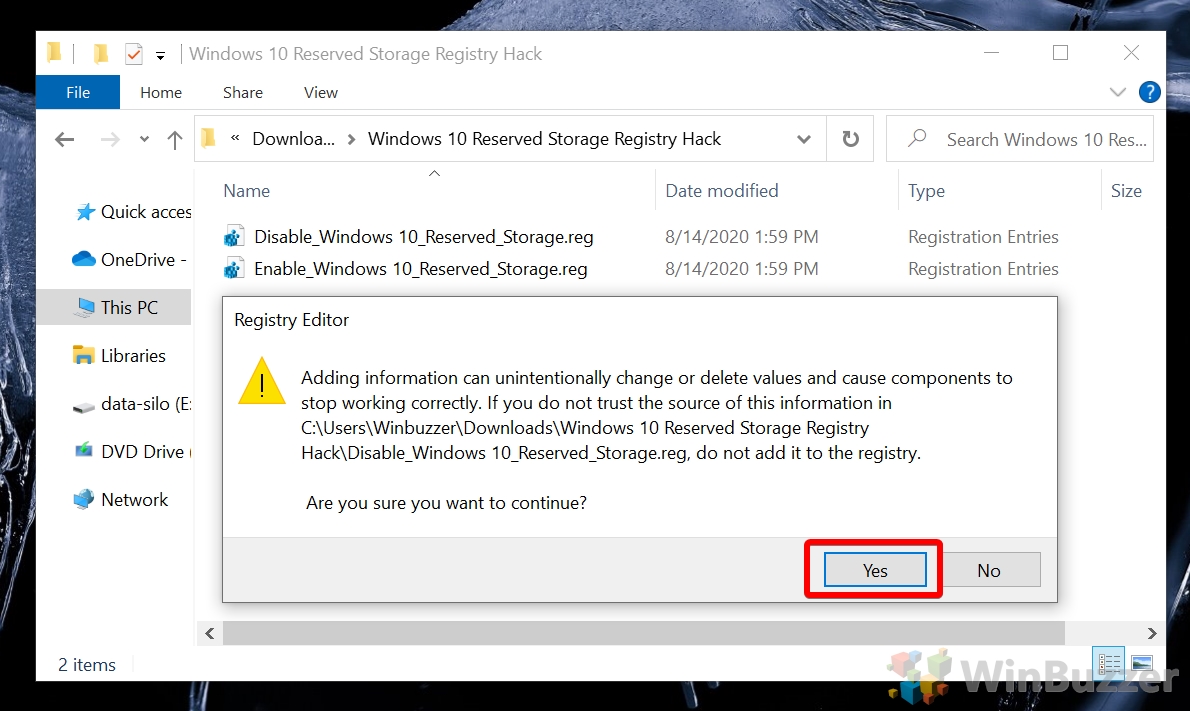
Once they’re extracted, you’ll see two .reg files, “Disable_Windows 10_Reserved_Storage.reg” and “Enable_Windows 10 Reserved_Storage.reg”. Click the one that’s relevant to you.
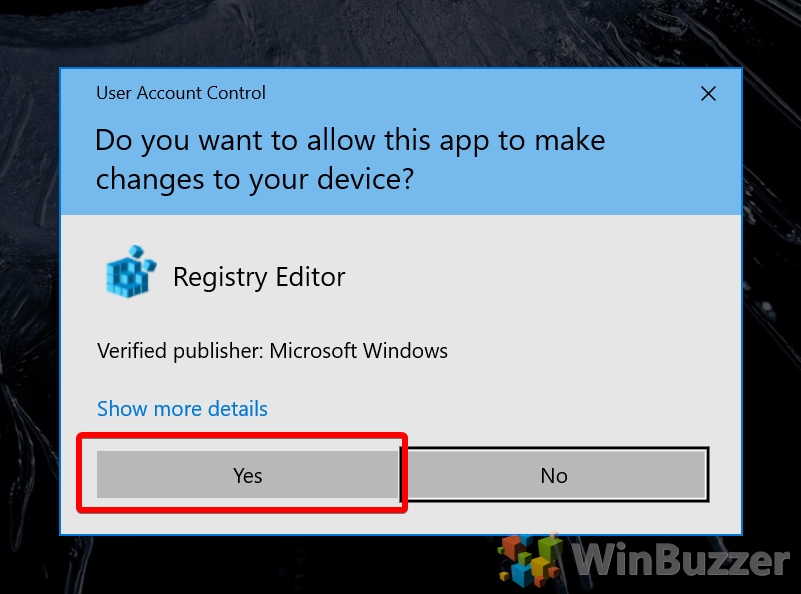
- Click “Yes” on the UAC prompt

- Click “Yes” to the security prompt

Check your status with PowerShell or CMD again to make sure the changes stuck. If you found this tutorial helpful, you may also want to check out our guide on using compactOS to free up space and cleaning up the WinSxS folder.
