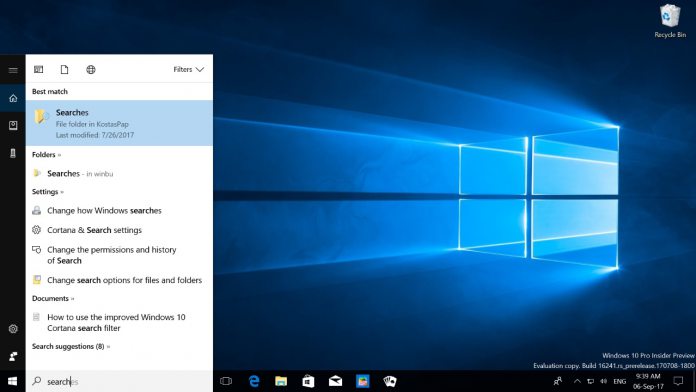
Windows search, also known as Cortana search, is an invaluable tool when looking for programs, documents, or even to carry out Bing queries. Unfortunately, it can also be quite buggy, with many users finding that Windows 10 Search is not working as it should.
Windows search is a complex beast and there are various reasons why it may stop working. It may also be that Cortana encountered a problem while trying to search. Others find that they simply can’t type in Windows search, and this can be because system files associated with the search service were corrupted. This can be combined with an error message that the Windows search service is not running in Windows 10.
A stranger issue is when Windows 10 search doesn’t find files or return results. In these cases, the problem is usually that the indexing services aren’t working correctly. The indexing process is what discovers all the files in your pc and puts their location in a database for the search to return when relevant.
Thankfully, while there are many reasons that the Windows search bar may stop working, there are also several easy ways to fix it. We’re going to run through those in just a moment, but first, it’s worth reminding you to restart your PC. Though it sounds like an obvious start, many want to avoid that lengthy boot process and so troubleshoot first. A simple restart is proven to fix various issues with Windows services, so it’s always worth trying with an issue like this.
How to Set Start Options and Restart Windows Search
Though it sounds silly, one reason users find the Windows 10 search bar is not working is that the OS “forgot” to make the service run at startup. This can persist across boots unless you go in a set it manually, the restart the Window search service. Here’s what you need to do:
- Press “Windows + R” and type “services.msc”
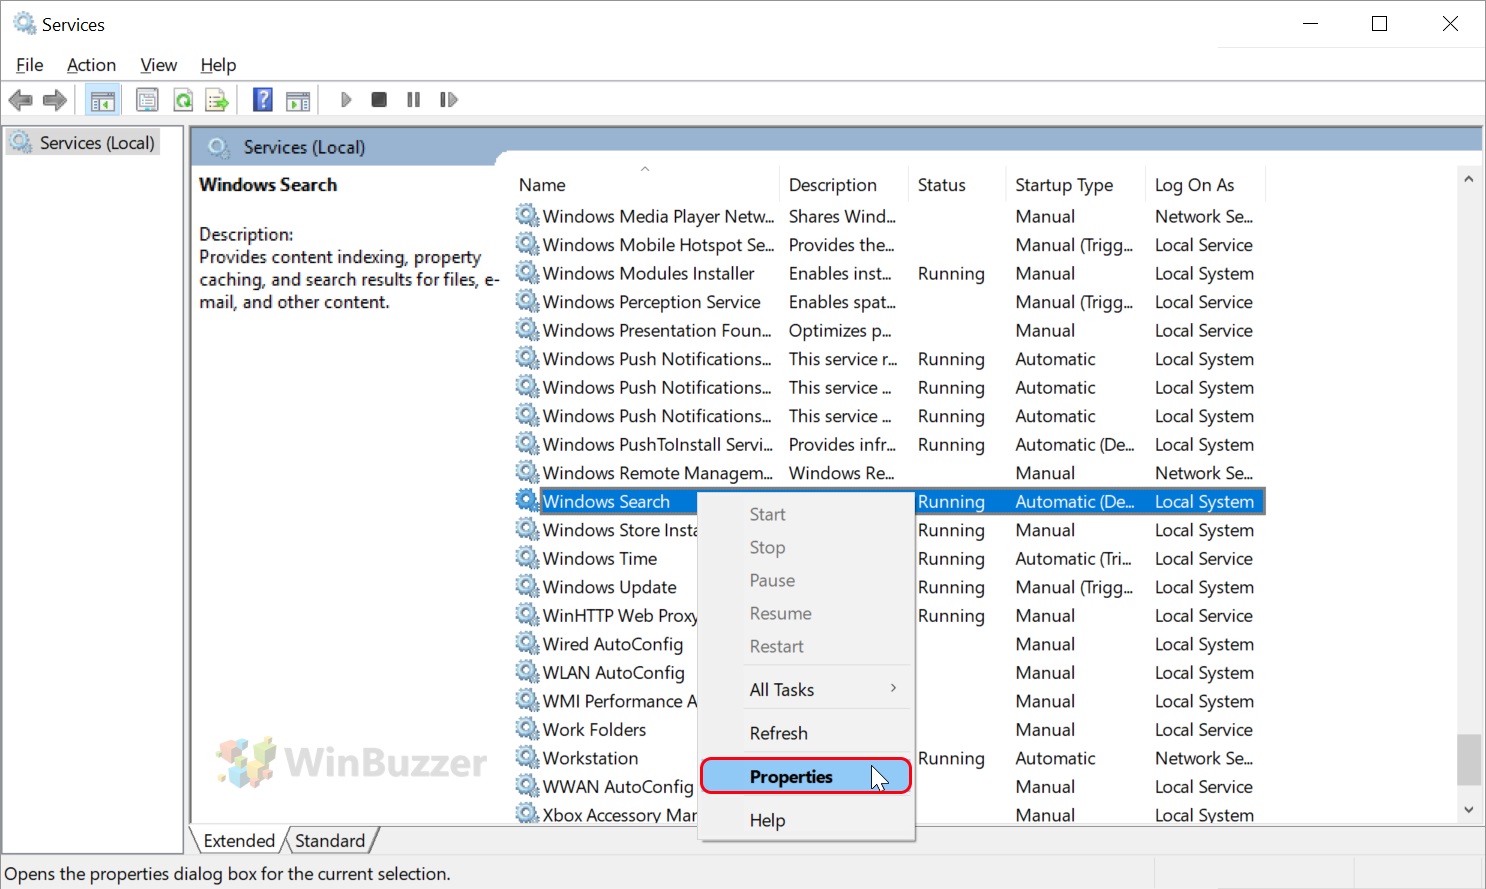
- Find the Windows search service
Under “Local services”, find the “Windows Search” entry, right-click it, and select “Properties”.
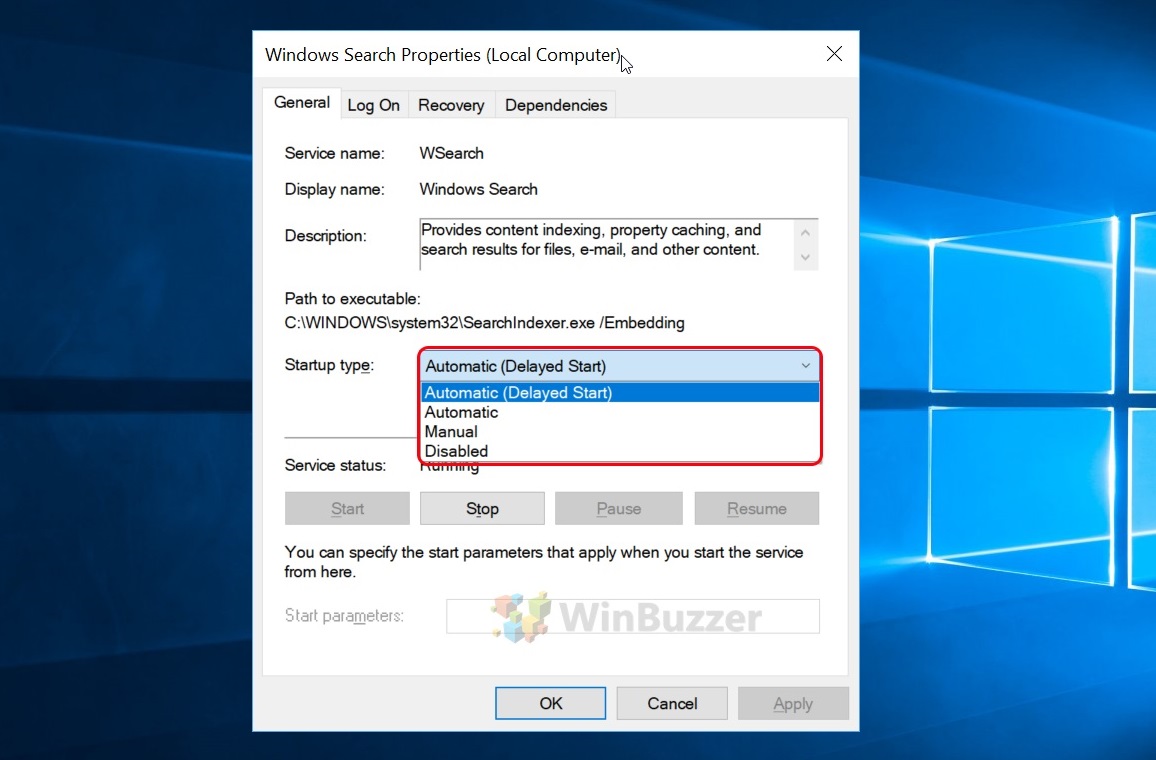
- Set the Windows search startup type to automatic
In the Windows search properties dialog, click the dropdown next to “Startup type:” and choose “Automatic”, or “Automatic (Delayed Start)”, whichever suits your preferences. Press “OK”.
- Restart the Windows search service
Once you’ve completed the steps, it can be beneficial to restart the service if Windows 10 search is not working still. To do so, right-click the service and choose “Restart”.

How to Restart the Cortana Process if Cortana Search is Not Working
Though Cortana isn’t as visible in newer versions of Windows 10, the digital assistant still powers some things behind the scenes, and as a result, Windows 10 search can fail is Cortana search is not working. This can sometimes be remedied by restarting the Cortana process.
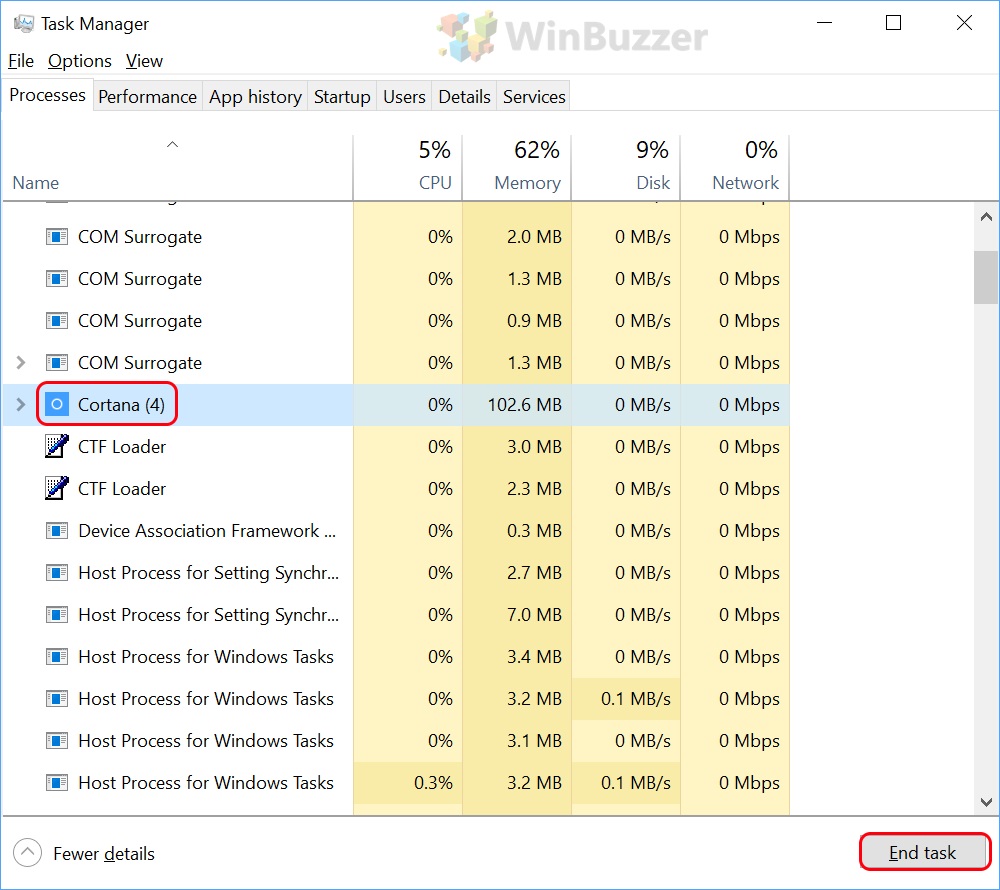
- Open Task Manager
Press “Ctrl + Shift + Esc” to open Task Manager. Scroll or press the “C” key until you find Cortana, then press “End task” in the bottom-right corner.
Cortana will restart, hopefully resolving any problems you have with the search service.
- Restart Windows Explorer
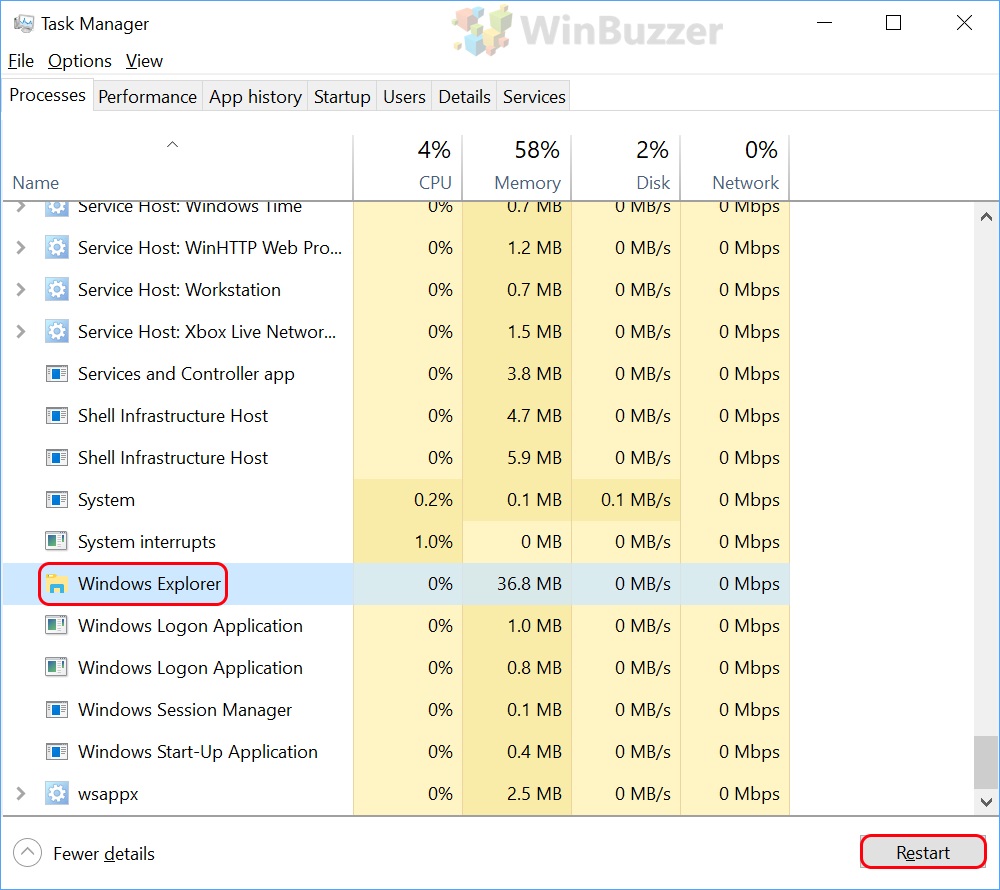
However, if Cortana search is not working still, it may be necessary to restart Windows Explorer. While in the Task Manager, scroll or press “W” until you find Windows Explorer, then click “Restart”.
How to Restore Indexing Services with the Troubleshooter
As mentioned earlier, if you can type in the search bar but it doesn’t return results, the problem is likely with Windows indexing. Thankfully, this is such a common issue that the Windows Troubleshooter has an option to automate the repair process.
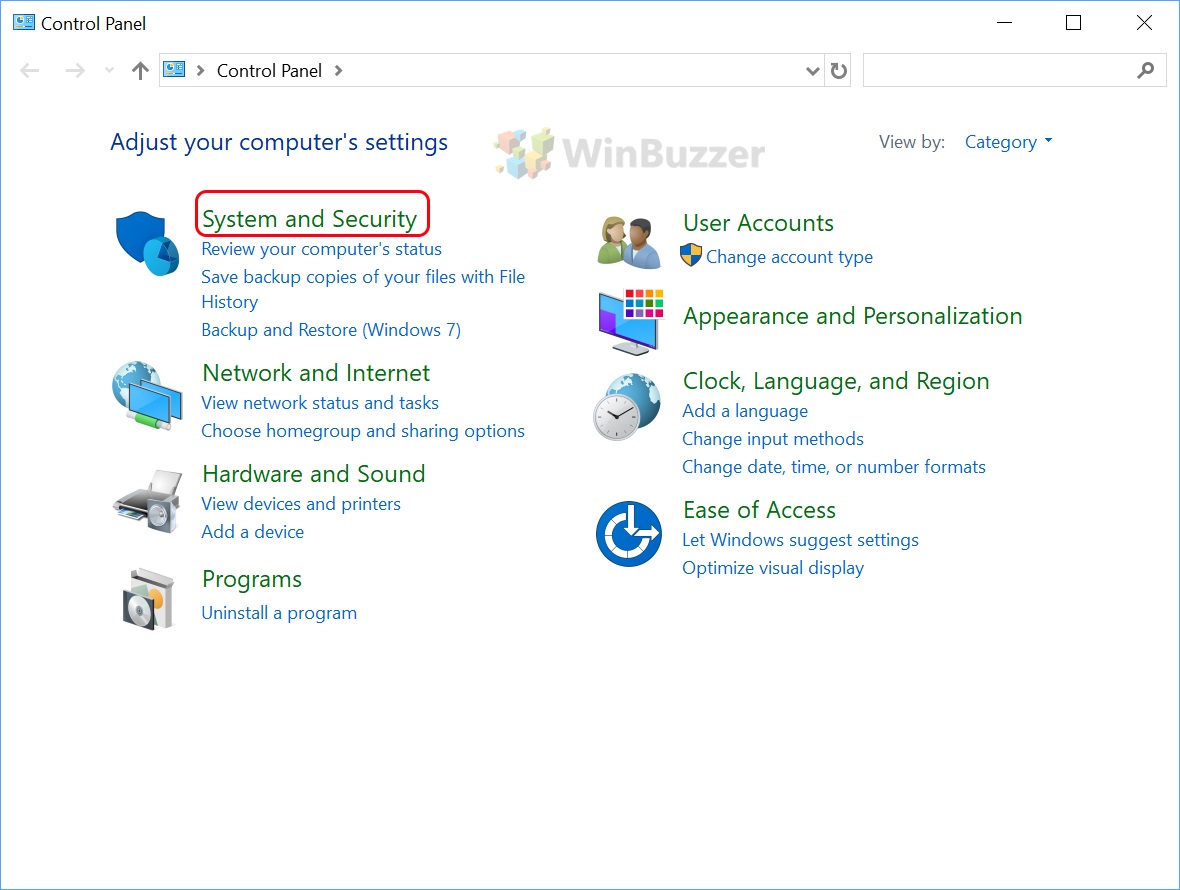
- Open Control Panel
Press “Windows + R”, then type “Control Panel” and press “Enter”.

- Select “System and Security”
- Choose “Troubleshoot common computer problems”
You’ll find his under the “Security and Maintenance” heading, on the right-hand side.

- Run the search and indexing troubleshooter
Scroll down the troubleshoot list until you find the “Search and indexing” heading, then click it and choose “Run the troubleshooter”.

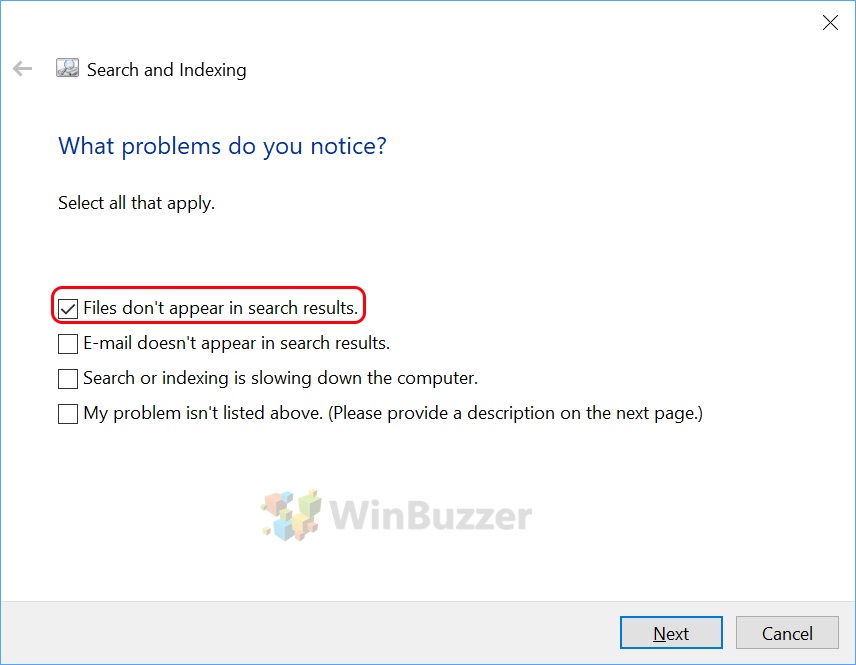
- Choose “Files don’t appear in search results” and click “Next”
If there are any non-complex issues with your search and indexing, the tool should be able to repair them automatically.
How to Change the Windows 10 Page File Size
This solution was offered by an anonymous reader and may give some relief if done of the above methods worked for you. Changing the size of your page file, even temporarily, may help when the Windows 10 Start Menu search isn’t working.
- Open sysdm.cpl
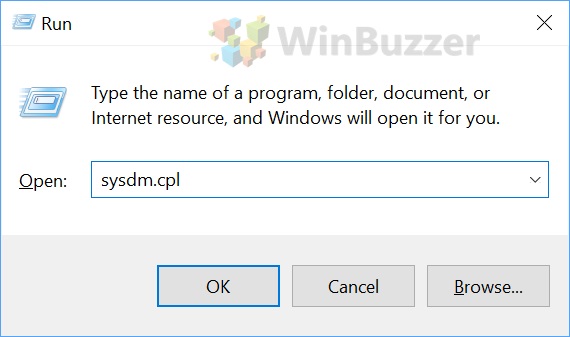
Press “Windows + R” to open the Run dialog, type “sysdm.cpl” and press “Enter”.
- Open advanced performance settings
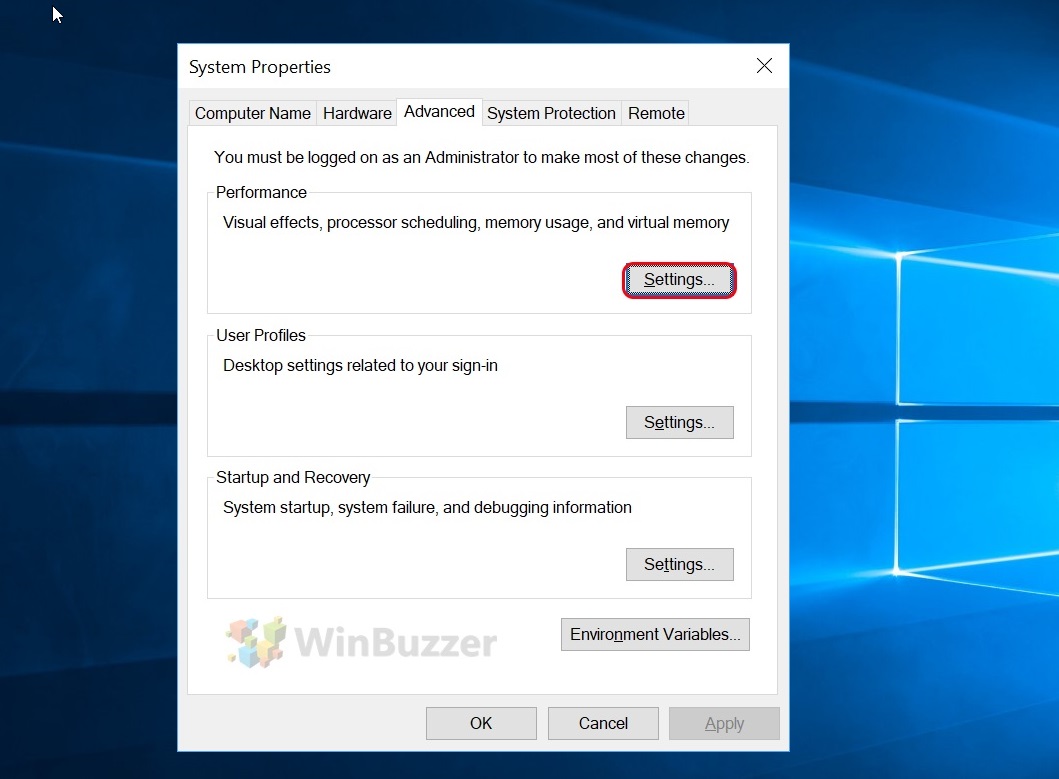
In the advanced tab, click “Settings” in the “Performance” section.
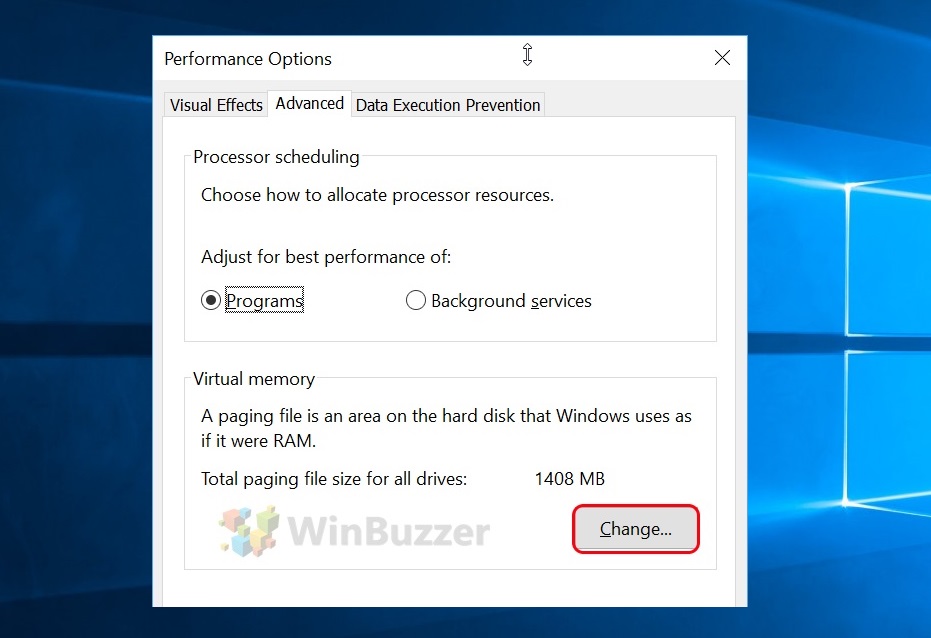
- Click “Advanced”, then “Change” under “Virtual memory”
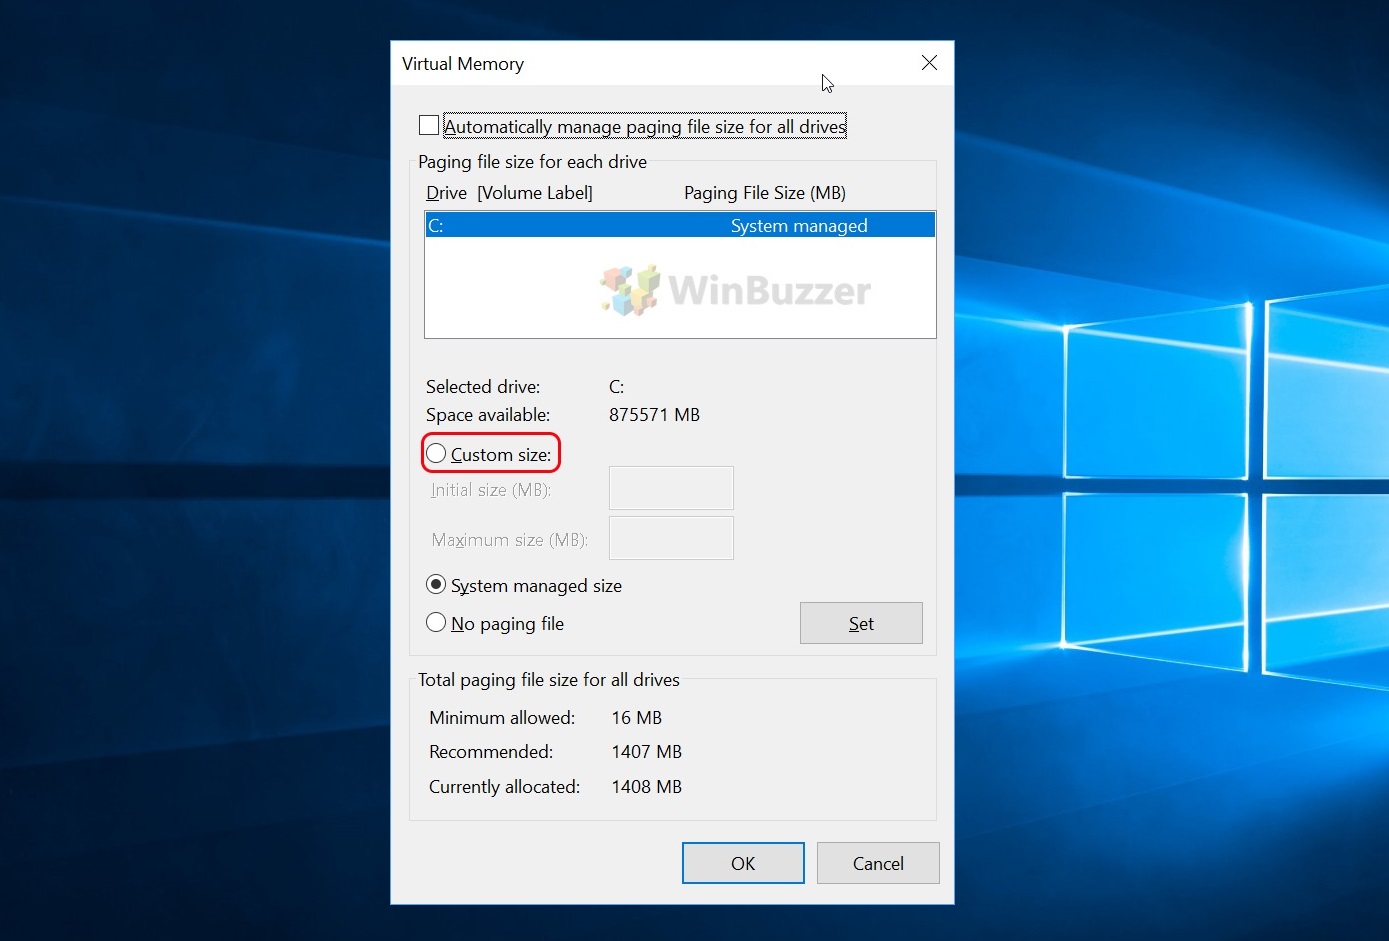
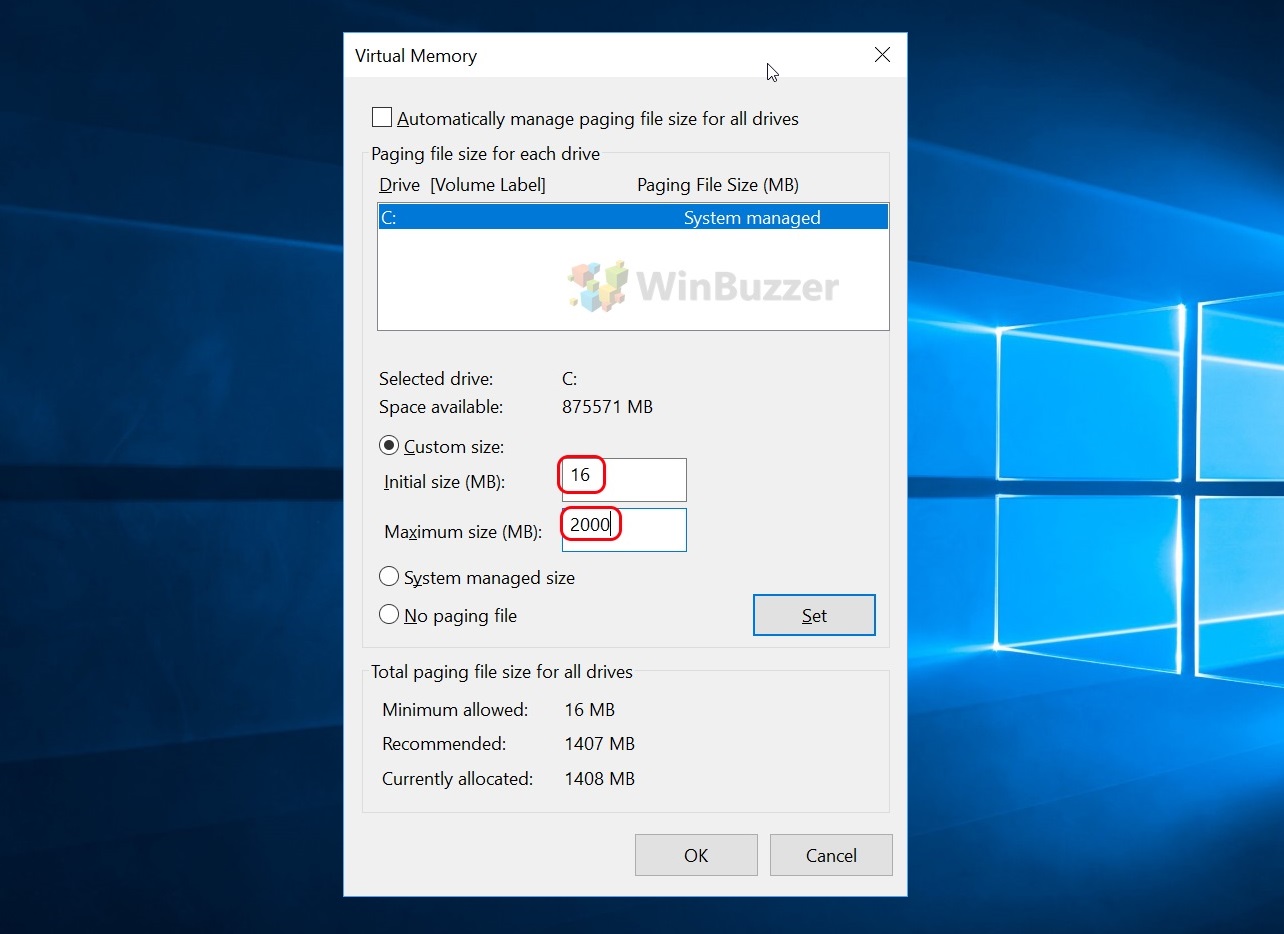
- Uncheck “Automatically manage paging file size for all drives”
- Set a custom paging size
Click “Custom size”, then set the “Inital size (MB)” to 16, and the “Maximum size (MB)” to at least 2,000. Press “Set” and “OK”.
If you experience performance issues after the pagefile change, go in and switch it back to “Automatically manage paging file size for all drives”.
If you’re still experiencing issues, you may want to make sure you don’t have the “Zemana AntiLogger Free” keystroke encryption option enabled, as this can cause issues where you can’t type in Windows search. If nothing has worked, you may want to try repairing your system image with DISM or reset/repair your PC via Advanced Startup Options.
Last Updated on February 26, 2021 10:16 am CET by Markus Kasanmascheff
