

Windows 10’s Virtual Hard Drive (VHD) support is a major boon for the OS, letting users boot and run an entire system from a single file. Primarily used for virtual machines, a VHD or VHDX accurately mimics a physical hard disk in structure. You can create a Virtual Drive for Windows 10 in just a few minutes, but first, a bit about how they work and why you may want one.
VHD vs VHDX: What is a VHD Disk File?
VHD and its successor, VHDX, are file formats that contain the information Windows expects to see in the structure it’s used to. They have partitions and a file system and don’t require much setup, especially when used in combination with a virtual machine.
One of the major advantages of a VHD is that it can be backed up easily. After its creation, you can copy its entire contents elsewhere with a single file, which is often faster and less troublesome. You’re also able to use a VHD to dual-boot your OS with another operating system, for example, Windows and Linux. Admins can also use them to quickly set up OS’ with a group of preset tools.
A VHD or VHDx can have a fixed file size or it can be dynamic – meaning it’ll only take up the exact amount of space on your system that it needs. VHDX is simply the successor to VHD, and fills in some of its cons. It has a capacity of 64TB rather than 2TB and supports modern features like disk resizing. With that said, let’s jump into how to create a virtual drive for Windows 10.
How to Create a Dynamic Virtual Drive for Windows 10
The popularity of this feature means we won’t have to dive into command prompt or registry to create a Windows 10 VHD – instead we can use the Disk Management tool.
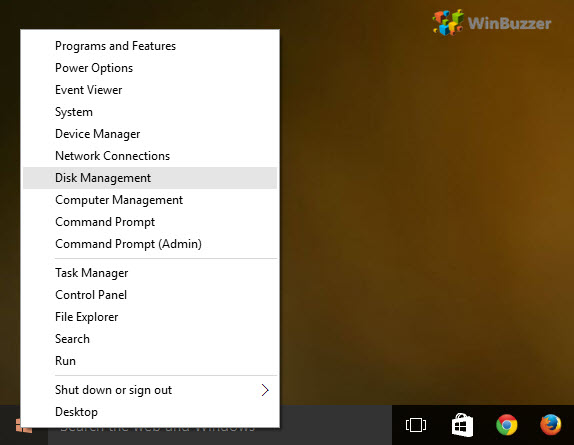
- Open Disk Management
Right-click the Start button or press “Windows + X” and click “Disk Management”.
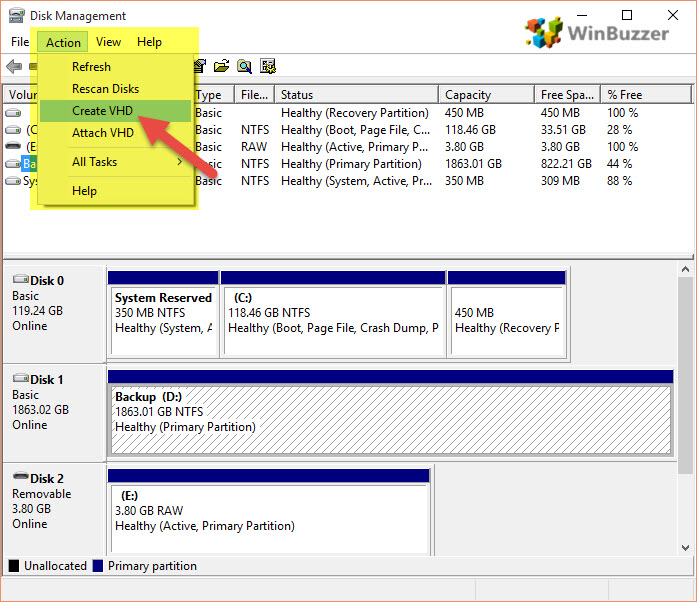
- Create a Virtual Drive for Windows 10
The Disk Management window will open to an overview of all your drives. Ignore all of those for now and instead head to the top menu and click “Action > Create VHD”.
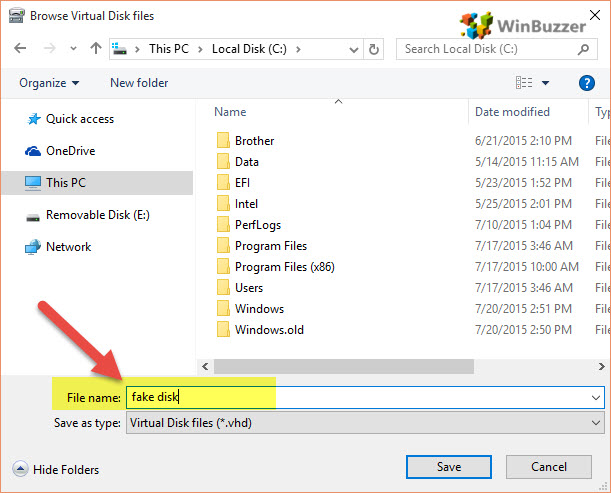
- Set a name and location for your VDHX File
Choose a drive with plenty of space to sore your VDHX/VHX file, name it, and click “Save”. For now, it doesn’t matter if you choose .vhd or .vhdx as the file type. We’ll get to that in the next step.
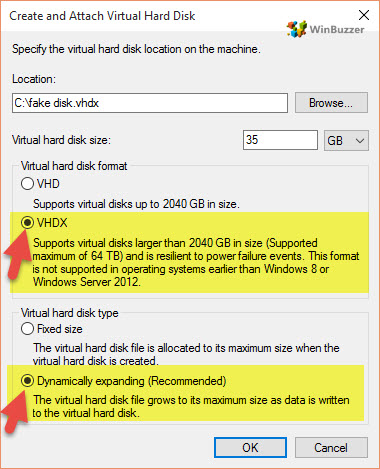
- Create a Dynamic VDHX for Windows 10
In the options screen, choose a starting “Virtual hard disk size”, set the “Virtual hard disk format” to “VHDX” for more room for expansion and power failure resilience, and set the “Virtual hard disk type” to “Dynamically expanding”. Once you’re done, click “OK”.
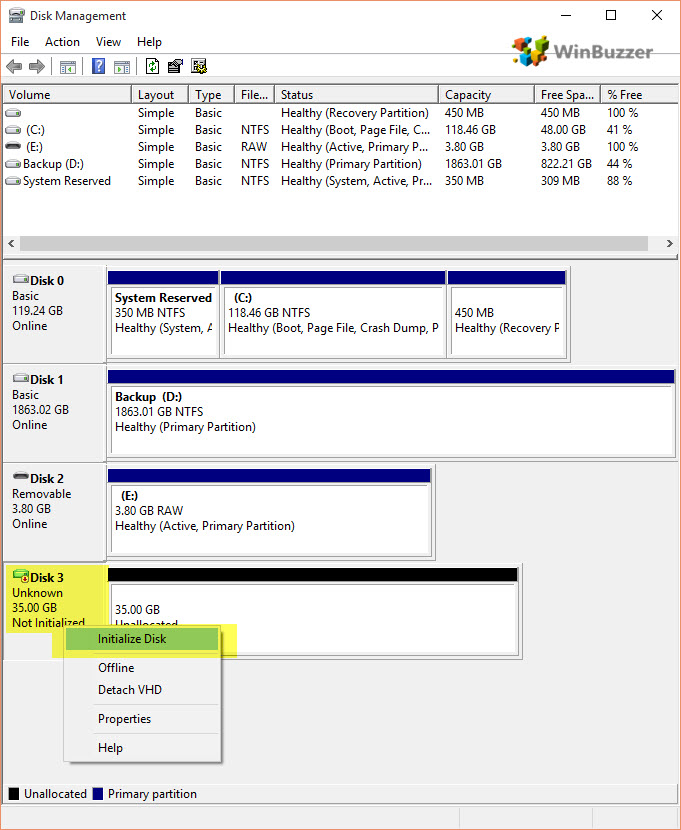
- Initialize the virtual hard disk
Back in the main Disk Management screen, you should now see your virtual hard drive for Windows 10 as unallocated space. Right-click the left description area where it says “Not initialized” and select “Initialize disk”.
- Select the GRP Partition Style
In the resulting Initialize Disk dialog, select “GPT (GUID Partition Table)”. This partition standard is newer and better than MBR in basically every way, and these days MBR is mostly used in old systems that don’t support GPT. Press “OK”.

- Assign a drive letter, format, and mount the VHD
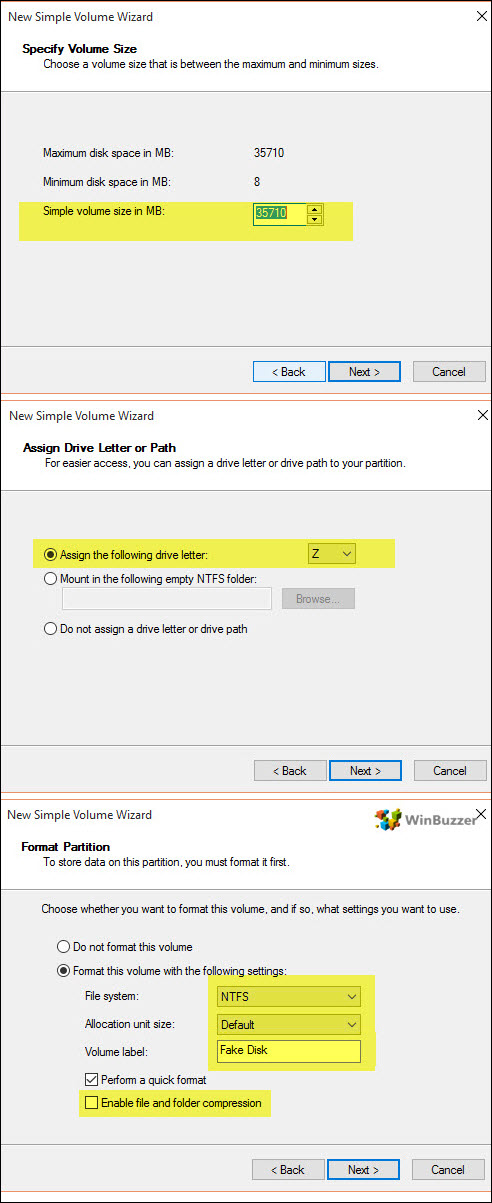
Initializing the disk will open the New Simple Volume Wizard where you’ll want to change a few settings.
• On the Specify Volume Size screen, type the maximum disk space in MB in “Simple volume size in MB”.
• Assign the following drive letter to any that’s still free.
• Format this volume with the following settings: NTFS, Default, Volume Name, Enable file and folder compression.
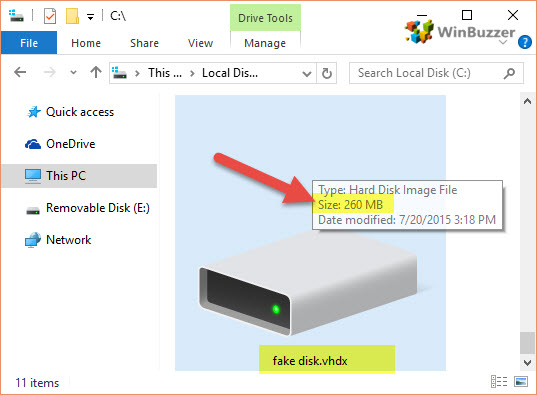
- Check Windows Explorer for your Dynamic Virtual Drive for Windows 10
Press “Windows + E” or the icon on your taskbar to open File Explorer and navigate to “This PC”. Your virtual hard drive will show up in Windows as a regular disk and you can use it as usual. You’ll note that the drive isn’t using the full amount you allocated – it’s only using what’s currently on the disk.
Last Updated on September 8, 2022 3:23 pm CEST by Markus Kasanmascheff


