Windows File Explorer is useful in many ways, but the lack of easy customization can make it a pain to use. By default, Microsoft’s document browser opens to the Quick Access overview, which is useful to some, but inconvenient to others. If you a folder you use more than everything else, such as your user or documents folder, it isn’t ideal. Thankfully, though, you can change File Explorer’s default startup folder in Windows 10 just by adjusting its taskbar shortcut.
If you tend to launch Explorer in Windows with its short, “Win + E”, this may not help you. However, many people have the File Explorer icon on the taskbar build into their muscle memory. If you’re one of those, you can open Windows 10 File Explorer to a specific folder of your choice.
We’re going to show you how to do this, and it’ll take just a few minutes out of your day. Even better, it’s as risk-free as it gets, requiring no registry edits or commands. Let’s get started:
How to Create a New File Explorer in Windows 10 Shortcut
Before we start, choose the folder you want available from the taskbar. If one doesn’t spring to mind immediately, you may just be better off leaving it as default for an overview of your recent and often accessed files. Navigate to the folder of your choice.
- Create a new shortcut and change File Explorer’s default folder view
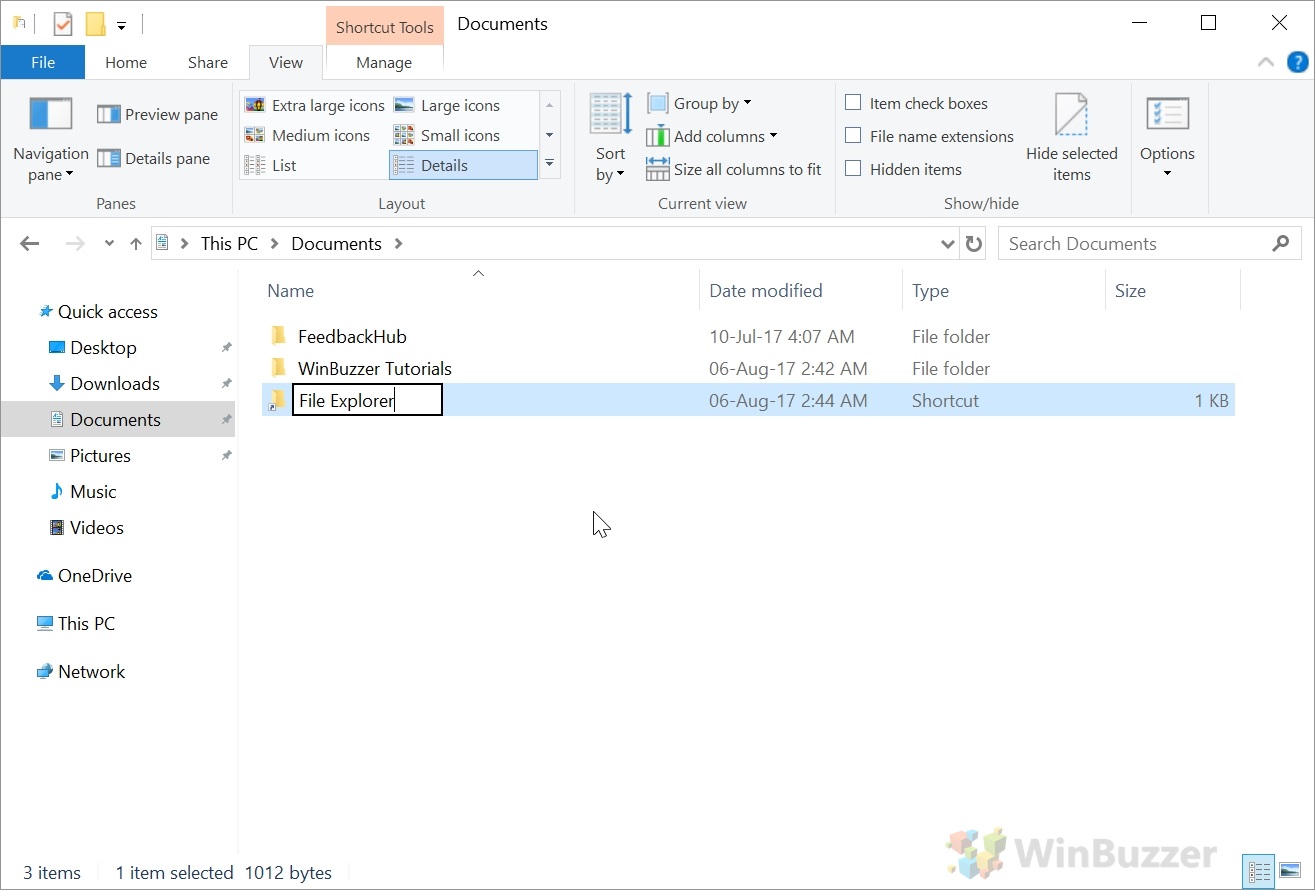
Right-click the empty space in your folder and choose “Create shortcut” or “New > Shortcut”. This will create a shortcut to the current folder, which we’ll be utilized later.
- Rename the File Explorer in Windows 10 Shortcut
Press F2 while clicked on the folder or right-click and choose “Rename” and change it to “File Explorer”.
- Open File Explorer shortcut properties
Without any changes, your custom File Explorer in Windows 10 icon won’t look like File Explorer at all, instead just having the folder icon. Right-click the new shortcut and select “Properties”.
- Change the shortcut to a File Explorer icon
In the properties window, ensure you’re in the “Shortcut” tab before clicking “Change icon…”.
In the new dialog box, click the “Browse…” button next to “Look for icons in this file:”. Type%windir%\explorer.exe, click the File Explorer icon, and then press “OK”.
How to Change the File Explorer Default Folder View in Windows 10
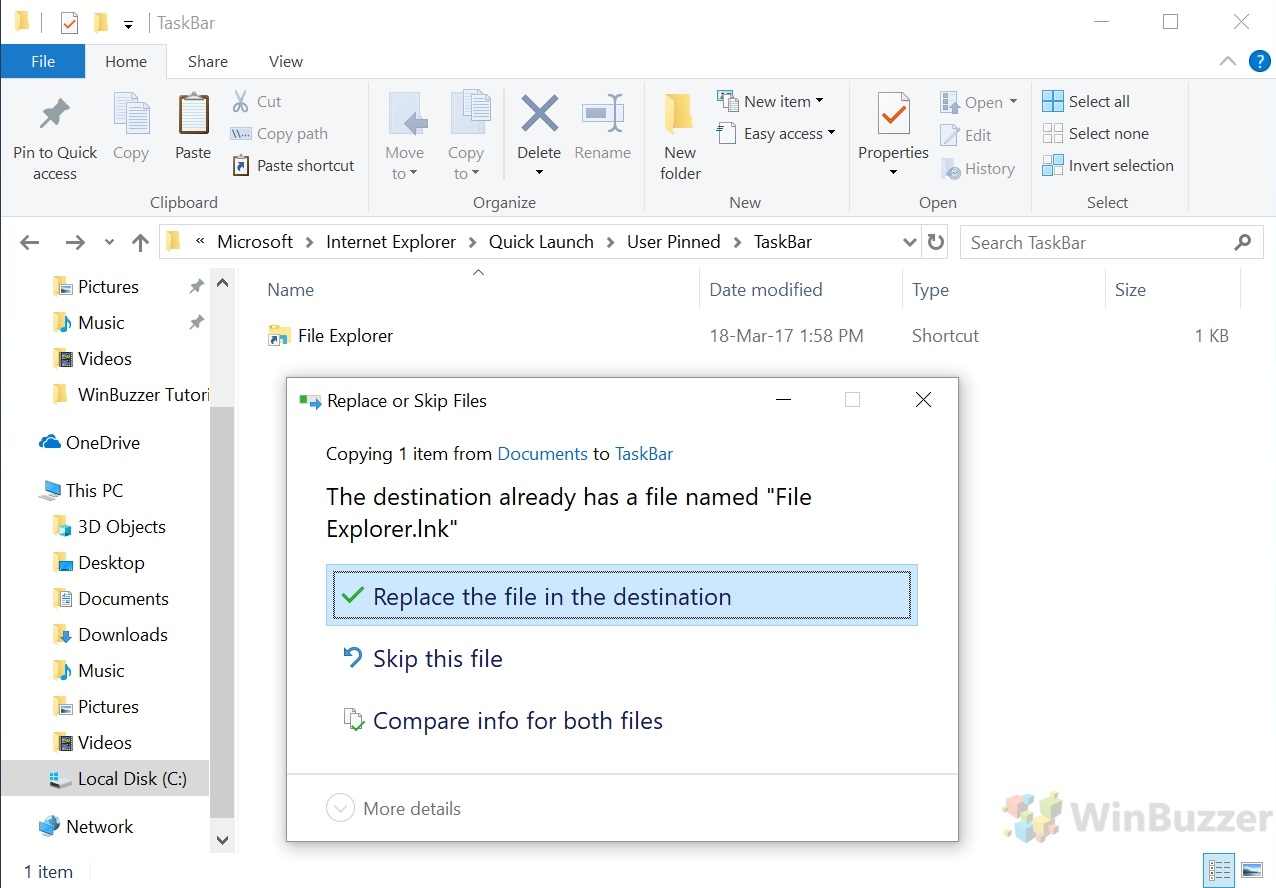
Now that our shortcut has been created, we can replace the current File Explorer icon on the taskbar with our changed default file explorer shortcut. First, navigate to %userprofile%\AppData\Roaming\Microsoft\Internet Explorer\Quick Launch\User Pinned\TaskBar.
- Show your system files
Make sure your system files are shown by navigating to “Control Panel > Appearance and Personalization > Folder Options > View tab > Advanced settings > Show hidden files, folders, and drives“. - Change the default Windows 10 File Explorer folder view
Copy your shortcut from the folder you saved it to the Taskbar folder, making sure you have a backup of the original somewhere in case something goes awry. When asked if you want to replace the current icon, click “Replace the file in the destination”. Your new taskbar icon will now link to the folder of your choice.
- Restore your default folder if you accidentally delete it
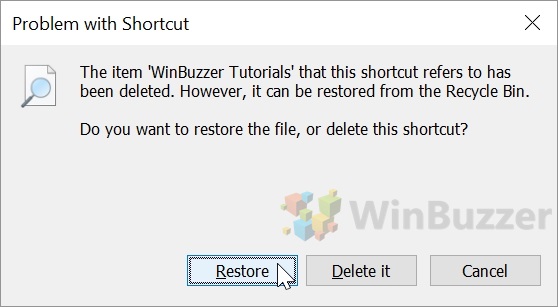
If you try to click your File Explorer icon after deleting the folder it links to, you’ll get an error on click, saying the item the shortcut links to has been deleted. If it’s still in the recycle bin, you can click “Restore” to bring it back. Otherwise, press “Windows + E” to open File Explorer, replace the icon with the default one, and start the process again.


