These days, basically every computer comes with a Windows 10 recovery partition that’s provided by the OEM. The useful addition means less reliance on third-parties if you need to roll back your PC to its factory state, but it also means you’re going back to an old version of Windows that’s quite often filled with unnecessary programs and trial software.
What is a recovery partition?
Due to the inclusion on their PC by default, many users assume the recovery partition isn’t something they should mess with. In reality, though, it’s completely safe and relatively easy to format the OEM recovery partition and create a recovery partition of your own.
The recovery partition is simply a save of the system’s state when the manufacturer first set up the PC. It usually takes the form of a .wim file that can be accessed through the usual recovery interface. You can create a recovery partition in Windows yourself to replace those files, but it’s usually not a good idea to simply delete the OEM partition without replacing it.
To create a recovery drive in Windows 10, you must first create a Windows recovery image, before preparing the partition and adding it to your boot menu for easy access. If you want to create a full Windows 10 System Image Backup, there is an easier way to do it which does not work to update the recovery partition.
How to Capture a Windows Recovery Image as a WIM file
There’s some preparation required before you create your windows recovery image, though this is reduced if you already keep your OS maintained and up-to-date. First, make sure your PC is fully updated, has the user accounts and software you want to be included, and has the themes/settings you’d prefer. Once complete, boot from Windows installation media by following this guide.
- Open Command Prompt via Windows Installation Media
Once your PC boots, ignore the setup screen and press “Shift + F10” to open the command-line interface.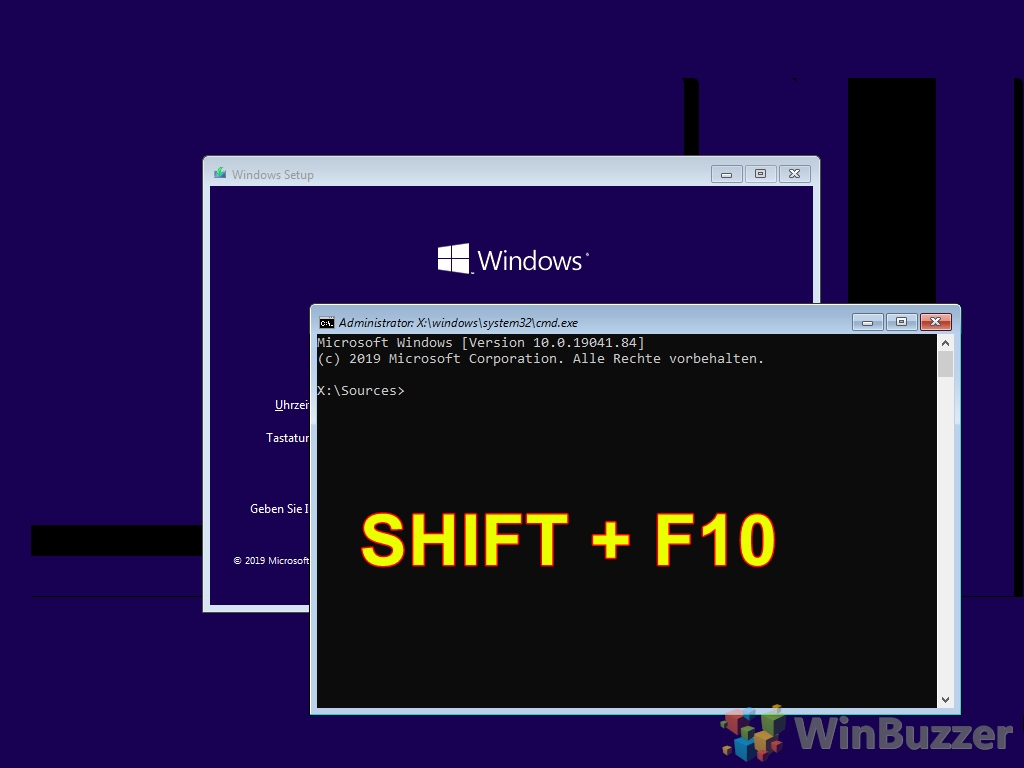
- (Optional) Initialize networking services
You only need to do this if you want to save your Windows 10 recovery image on a network drive. To do so, typewpeinitand press “Enter”.
- (Optional) Map a network drive for network drive storage
In Command Prompt, enter the following command, replacing ‘Z:’ with your mapped drive, ‘storageserver’ with the server name, and ‘images’ with the name of your shared folder:net use Z: \\storageserver\images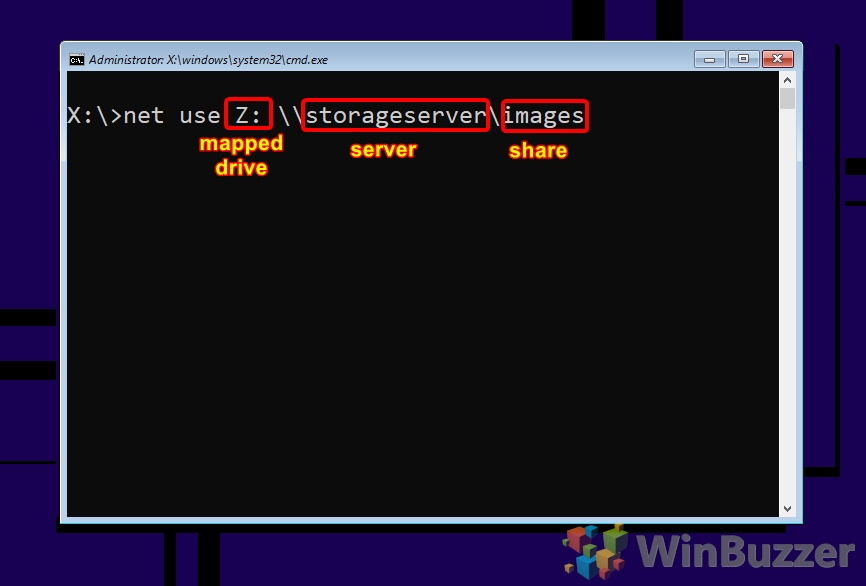
- Confirm your Windows 10 recovery drive with diskpart
Before you create your Windows recovery image, it’s worth double-checking that you know the correct letter for your Windows drive and to save your image to. In Command prompt, verify this by typingdiskpart, thenlist vol.
You’ll be faced with an output similar to below. In our case, we can look at the size and use our previous knowledge to determine that ‘C’ is our OS/source drive and ‘D’ is the destination we want to save our recovery image to. Be sure to type “exit” to leave diskpart before you continue.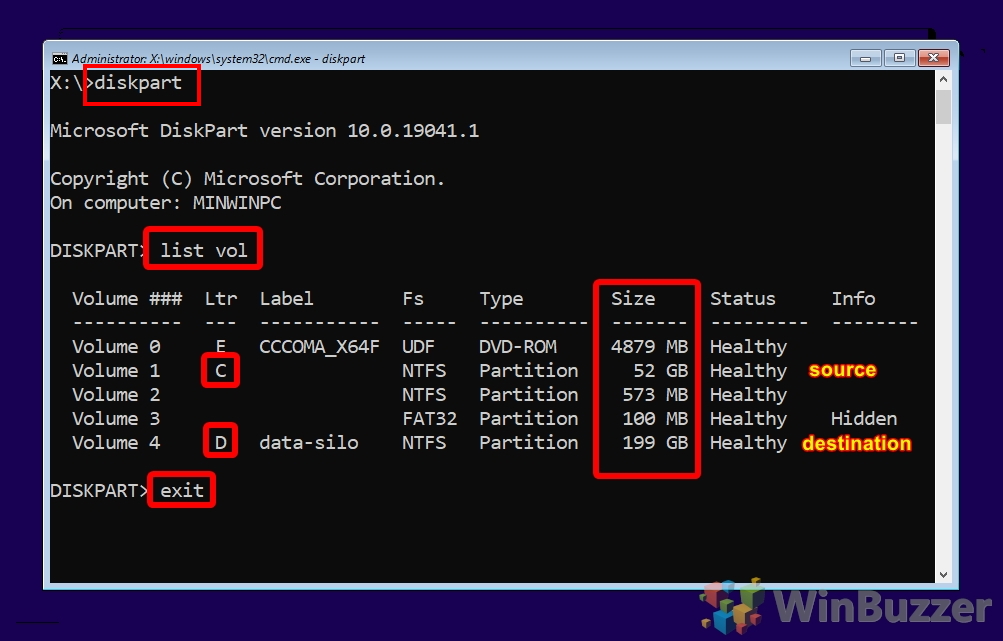
- Capture the Windows recovery image
We’re now ready to capture our OS image, which is possible via the following command, which you should customize to suit your needs:dism /capture-image /imagefile:D:\install.wim /capturedir:C:\ /name:"Recovery Partition" /description:"Custom Recovery Partition" /compress:none/imagefile:determines where to save the captured image and its name, install.wim./capturedirtells DISM the root folder of the disk to capture, which is C:\ for us./nameis quite self-explanatory – an identifier for our image, while/descriptiongives some further detail. The/compress:noneoption turns off compression, which makes the process faster, but you can also use/compress:maximumif you want the image to take up less space.
When complete, you can close out of Command Prompt and restart your PC.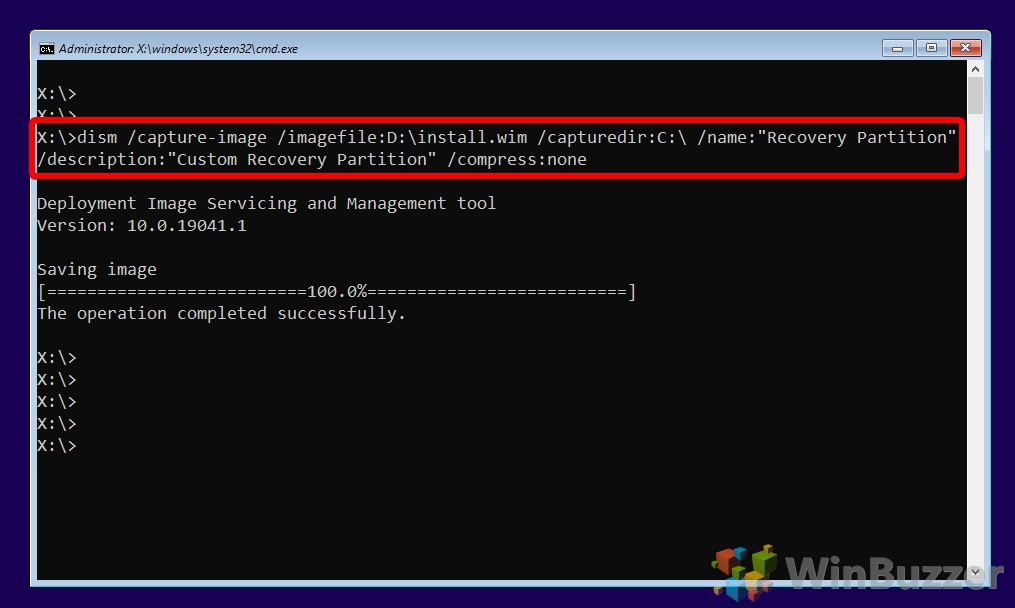
How to Create a Windows 10 Recovery Partition
Now we’ve captured our Windows recovery image, but there’s still a bit of work to do to ensure it remains accessible if our main OS runs into problems. First off, check that it actually saved:
- Check your folder for ‘install.wim’
In Windows Explorer, navigate to the place you saved your Windows recovery image (in our case I:/), and look for “install.wim” to verify the save was performed correctly. Also check the size of the file, as this will become important in a second when we open our recovery partition creator.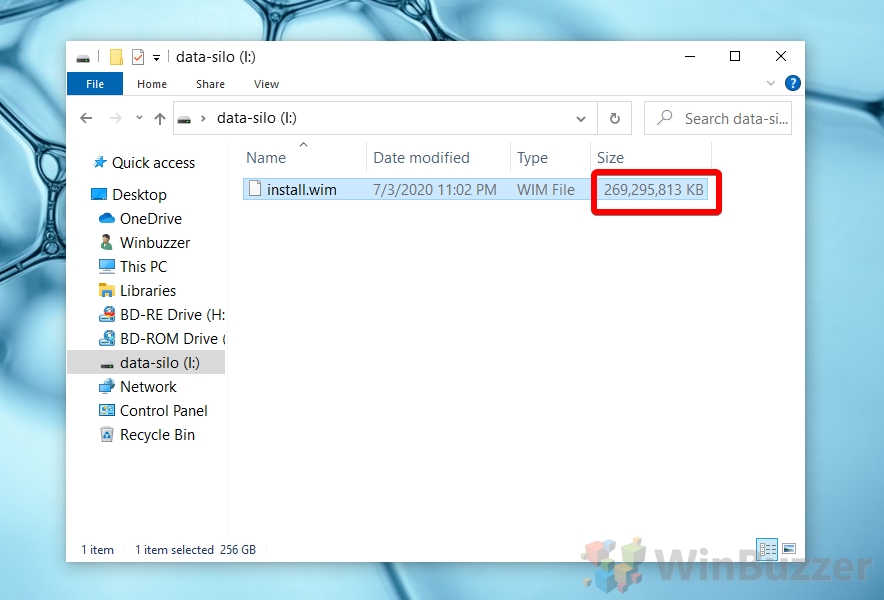
- Create your Windows 10 Recovery Partition
In a drive with enough spare space, create a recovery partition at least as large as the recovery image. We chose to make it 270 GB, rather than 269, just for some extra leeway. If you’re unsure how to create a partition, follow our in-depth guide here.
- Mount a Windows 10 ISO
Mount a Windows 10 ISO by double-clicking it, ensuring its the same version as your current OS. If you didn’t use an ISO to create your Windows Installation Media, you can obtain one by following this guide.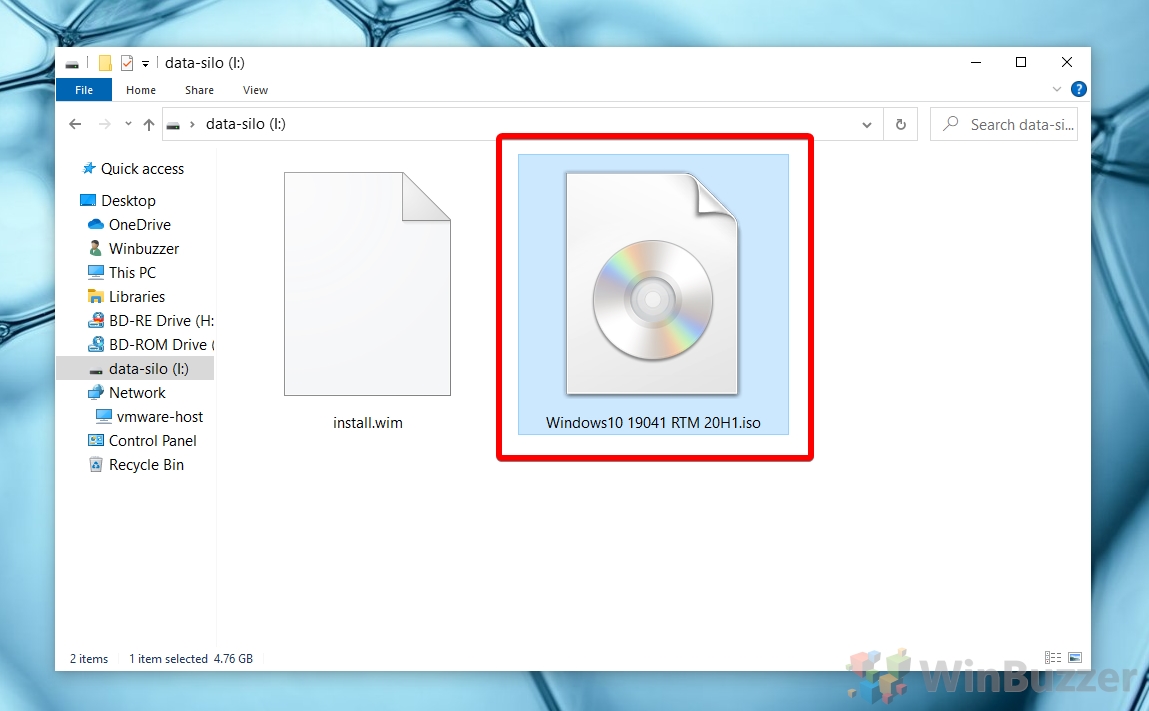
- Copy the Windows 10 Home or Windows 10 Pro setup files to your recovery partition
Windows will mount the ISO as a new disk drive with several folders, including ‘boot’, ‘efi’, etc. Copy all of the files to your newly created Windows 10 recovery drive.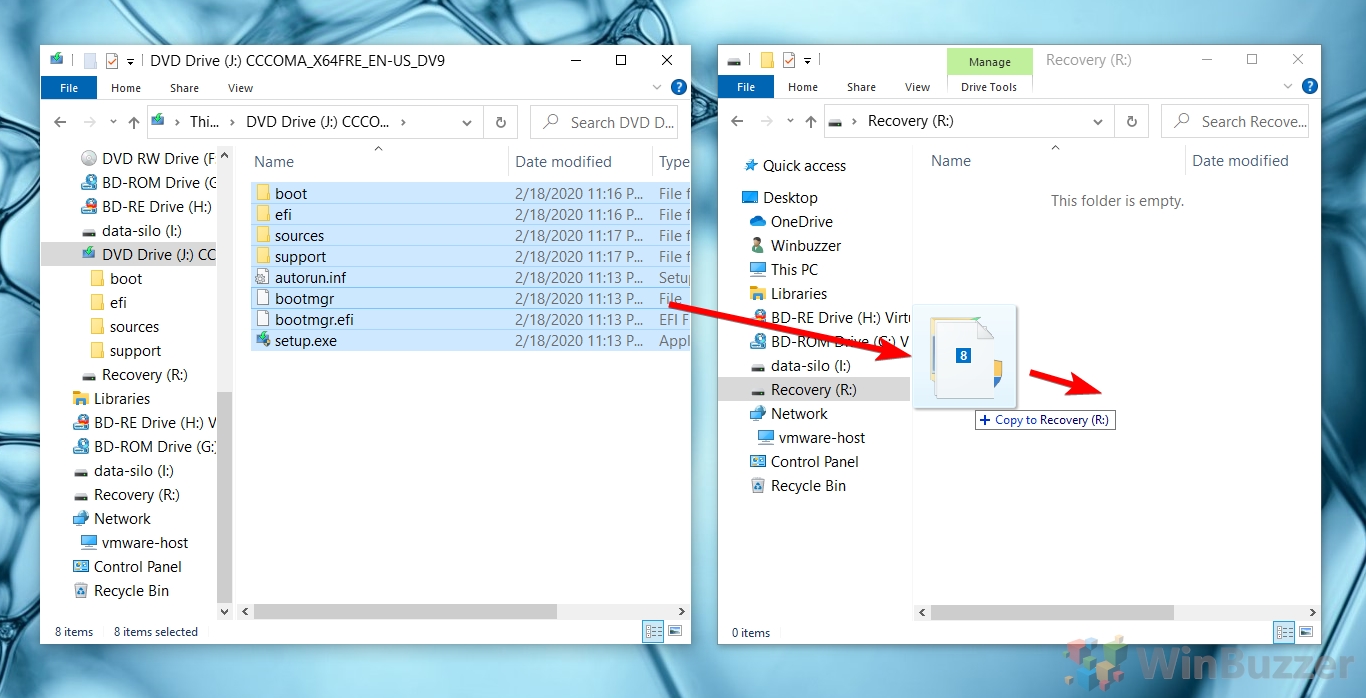
- Delete the install.wim in the setup files from your ISO
Your ISO will have come with a pre-made ‘install.wim’ file, the default OS. We need to delete this to make room for our custom one. Navigate to the “sources” folder and delete “install.wim”. It may be called “install.esd” if you made your ISO with the Media Creation Tool.
- Copy your custom Windows 10 recovery image to the sources folder
Keeping the sources folder open, drag the custom “install.wim” you created to the “sources” folder on the recovery drive. The transfer may take a little while.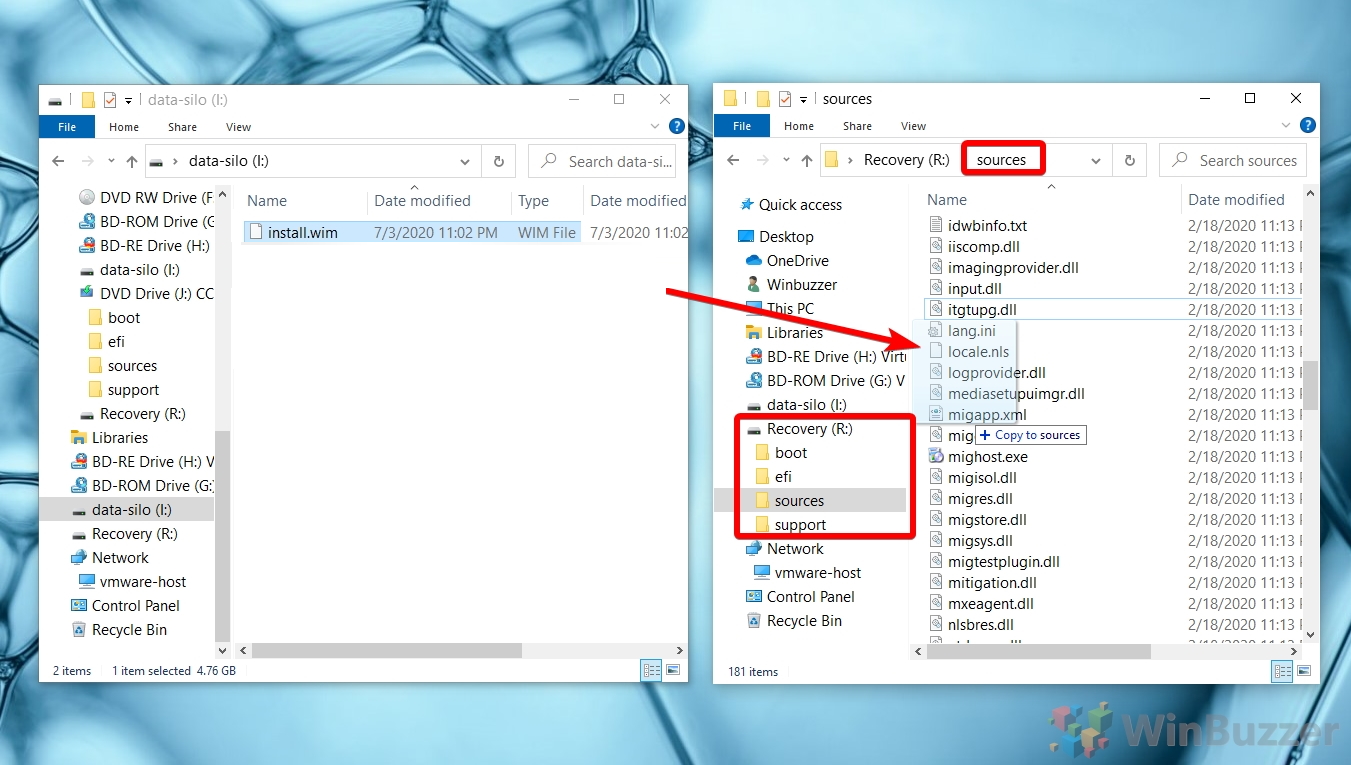
How to Add Your Custom Windows 10 Recovery Partition to the Boot Menu
Now we’re almost there; we just need to add the recovery partition to our boot menu. For this, we’ll be using a tool called EasyBCD, which you can download here. Despite the prompt, there’s no need to like the Facebook page. Install the software before you continue.
- Add a new EasyBCD entry
Open EasyBCD and look for “Add New Entry” button in the left-hand menu. Click it.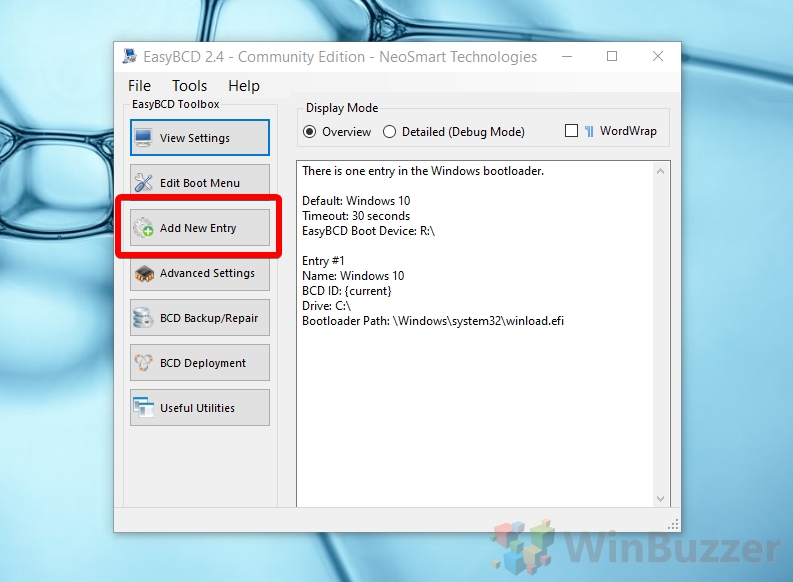
- Add your Windows recovery image as “WinPE”
Look under the “Portable/External Media” heading for the “WinPE” tab. Click it, applying the following settings:
– Type: WIM Image (Ramdisk)
– Name: Windows 10 Recovery
– Path: Your boot.wim file (in the sources folder of your Windows 10 recovery drive.)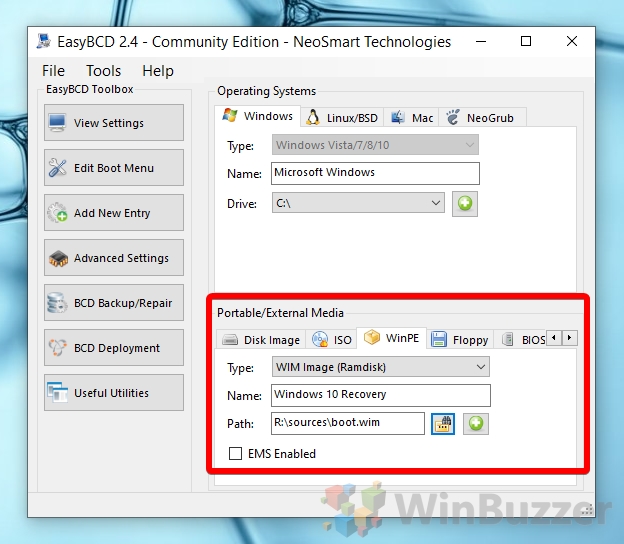
- Write the changes to the Boot Menu
Press the ‘+’ button to write these changes to your Windows 10 Boot Menu.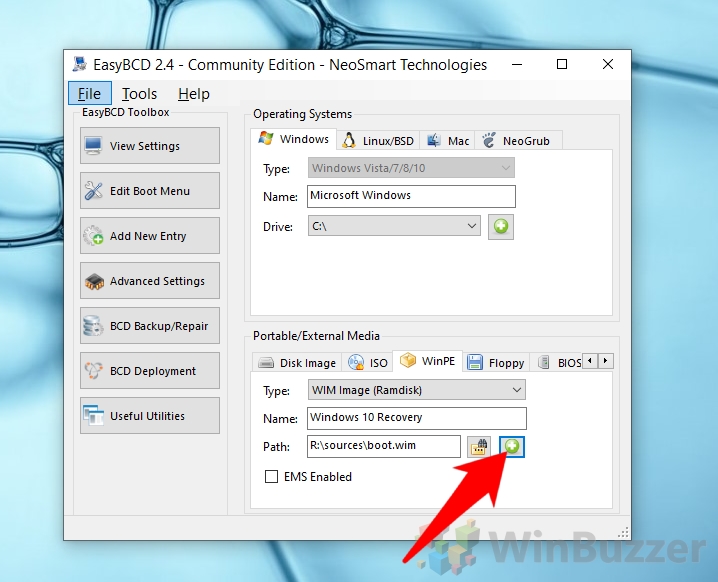
- Hide the Windows 10 recovery drive in Disk Management
We don’t need the recovery drive cluttering our UI anymore. In partition manager, hide the Drive letter by following this tutorial.
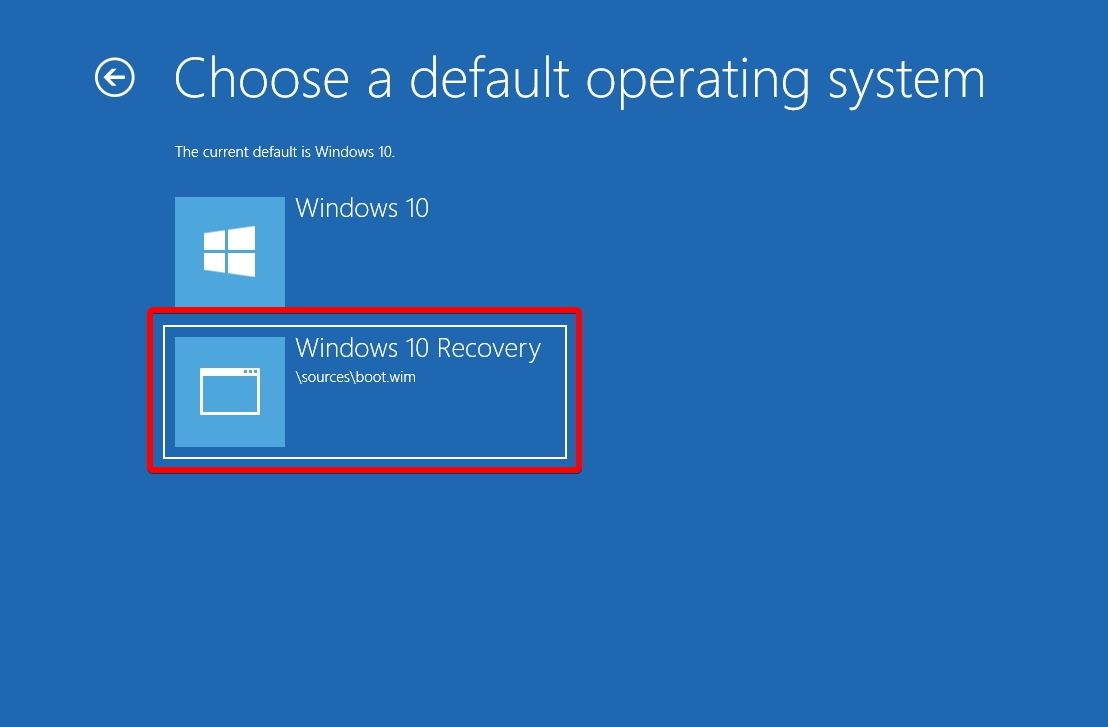
- Restart to Advanced Startup Options to select the recovery partition
To check our recovery partition, which must boot to Advanced Startup options. If you don’t know how to do this, you can follow our previous guide. Verify that /sources/boot.wim shows up under our available options and select it if you’d like to restore your OS.